
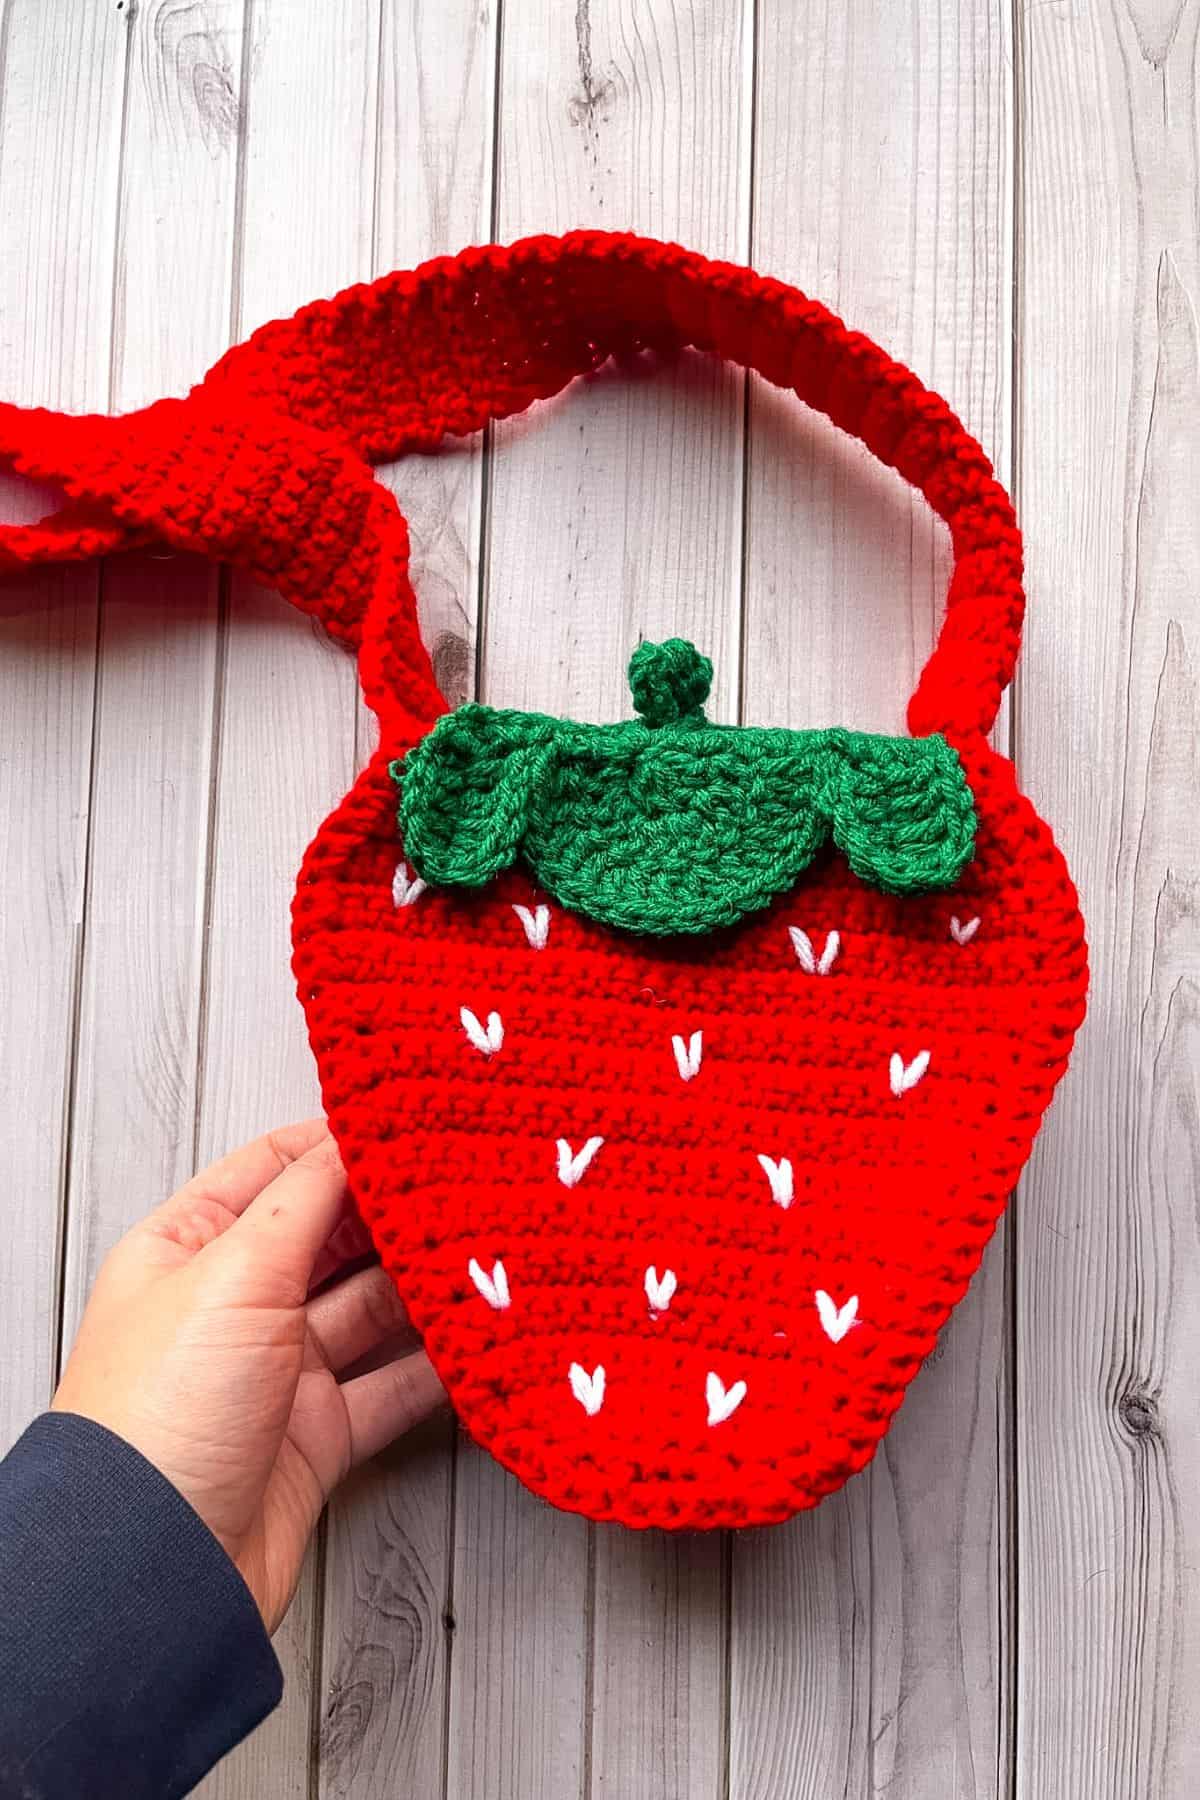
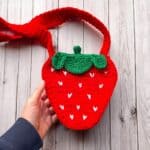
This Crochet Strawberry Bag Pattern is a quick project that’s a cute way to accessorize in spring or summer! Wear the crochet strawberry bag to the beach or farmer's market to make a statement.
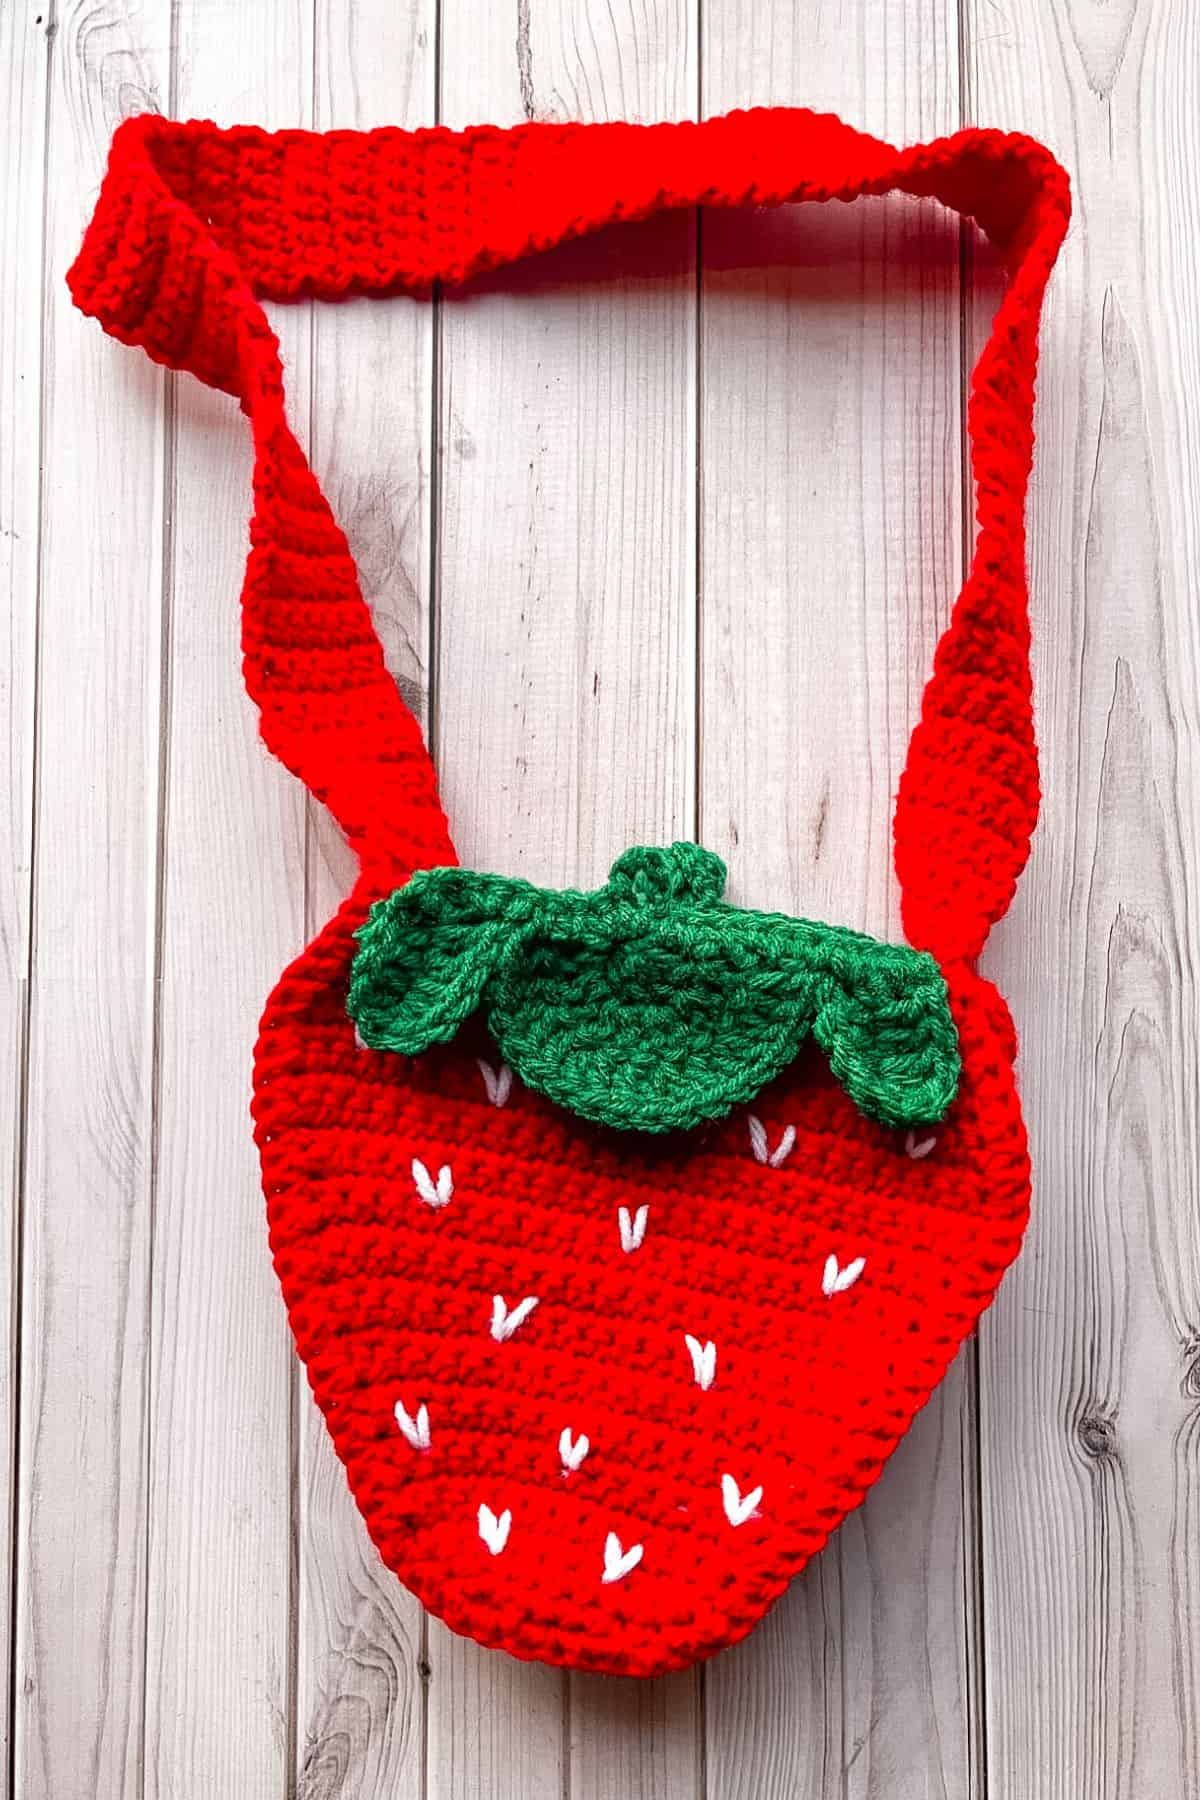
This mini crochet strawberry bag is just big enough to hold a phone and a few other small objects.
Strawberries are everywhere on social media and in stores, embracing the spring/summer aesthetic.
Many have even incorporated them into cottagecore and kawaii styles.
Personally, I love strawberries and wouldn’t mind having them on everything I own. In fact I made a crochet strawberry keychain to attach to my bags when I don't have my crochet strawberry purse around. Another great bag that fits the summer vibe is my Crochet Frog Bag Pattern, if you were needing a second crochet bag.
Now let's get started on learning how to crochet a strawberry bag!
Jump to:
✏️ Things To Note:
- Yarn Choice: I used acrylic yarn for this crochet strawberry bag pattern, but cotton or chunky yarn would also work well. I use acrylic for most of my crochet patterns like my crochet strawberry blanket, but I use cotton mostly for coasters like my crochet strawberry coaster pattern.
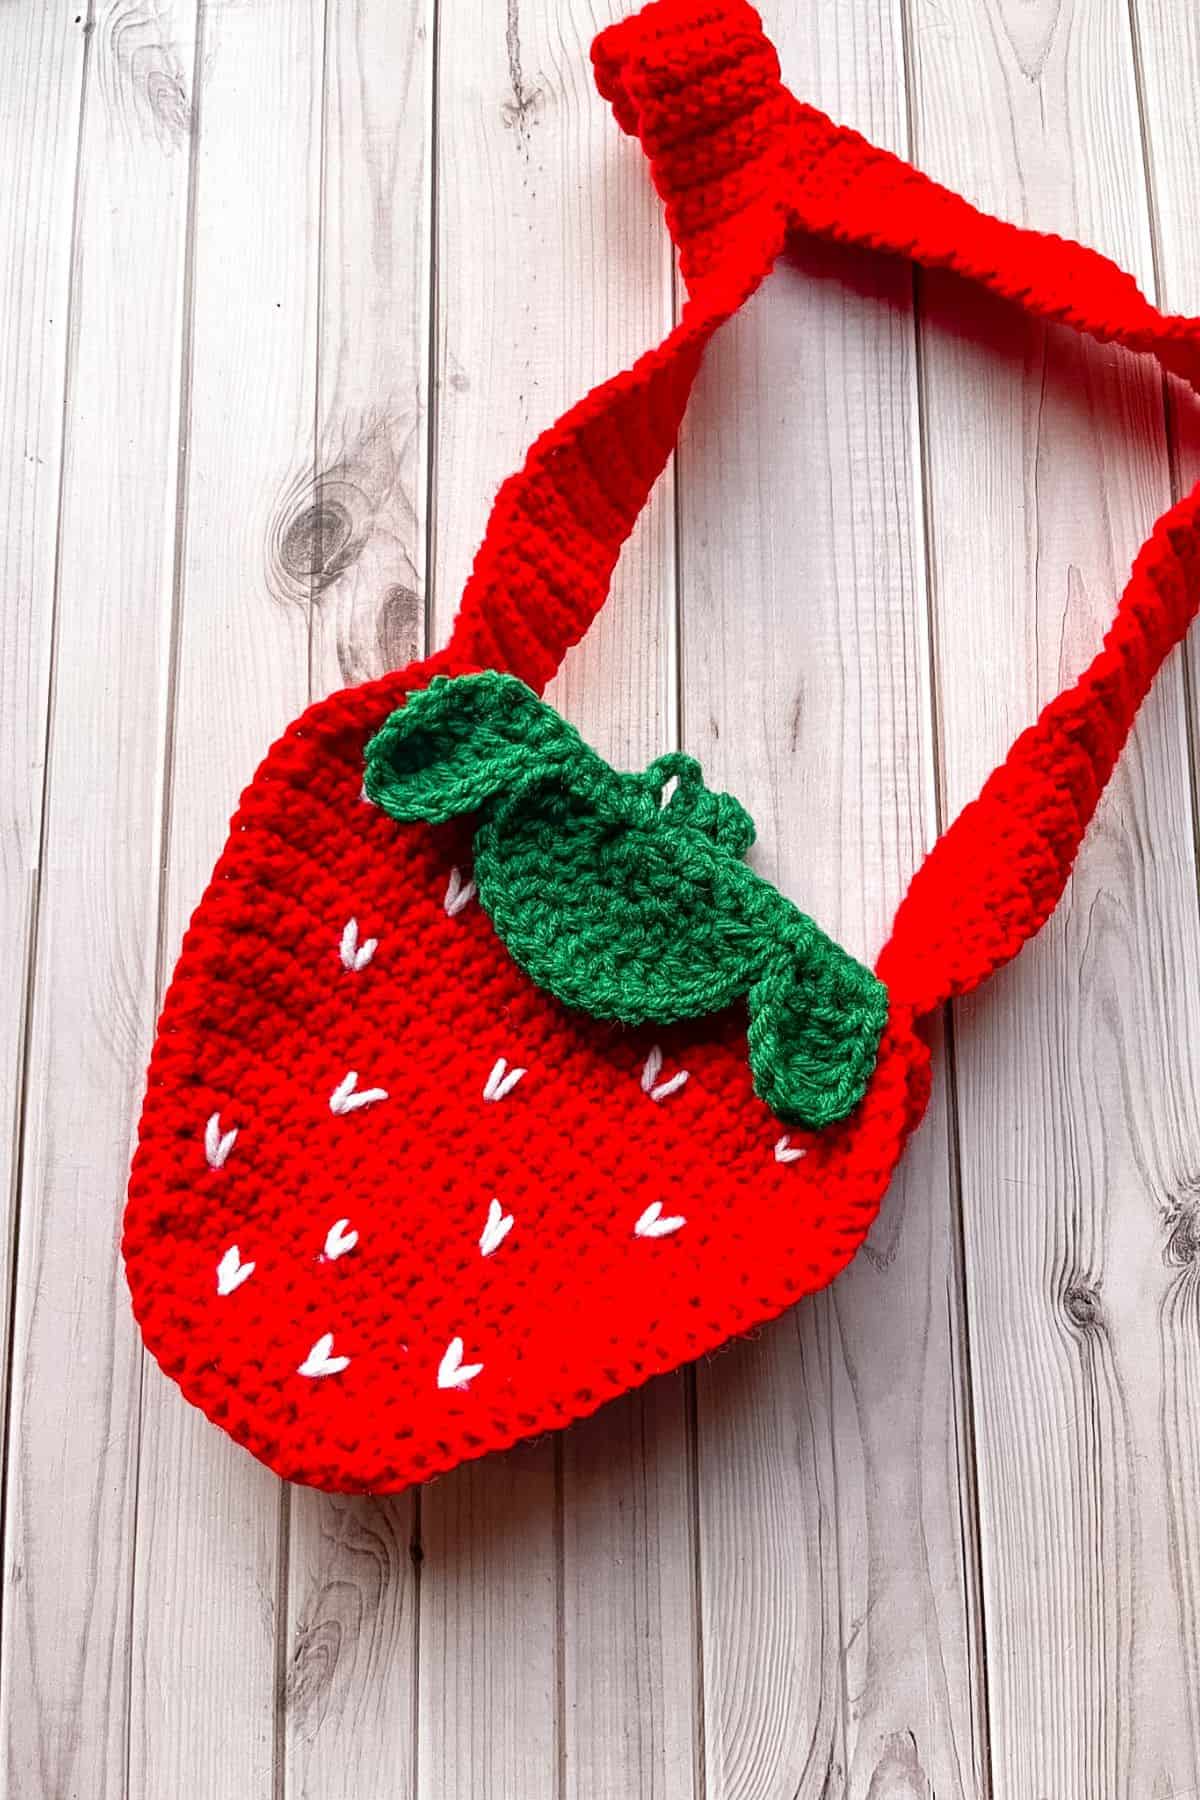
- Size Consideration: The crochet strawberry bag pattern is designed to hold a phone and a few small objects; it is not intended for large or heavy items—think of it as a small strawberry crochet purse.
- Adjustable Strap: You can adjust the strap length depending on where you want the bag to sit on your side or if it’s for a child. I prefer mine right above my hip.
💭 Abbreviations to Remember (US Terms)
- Chains (ch)
- Magic ring (mr)
- Single crochet (sc)
- Double crochet (dc)
- Increase (inc)
- Decrease (dec)
🧋 Variations
You can use chunky yarn if you would like a larger crochet strawberry bag!
🍵 Instructions for Crochet Strawberry Bag Pattern
The crochet strawberry bag pattern will be made in rows:
Crochet Strawberry x2:
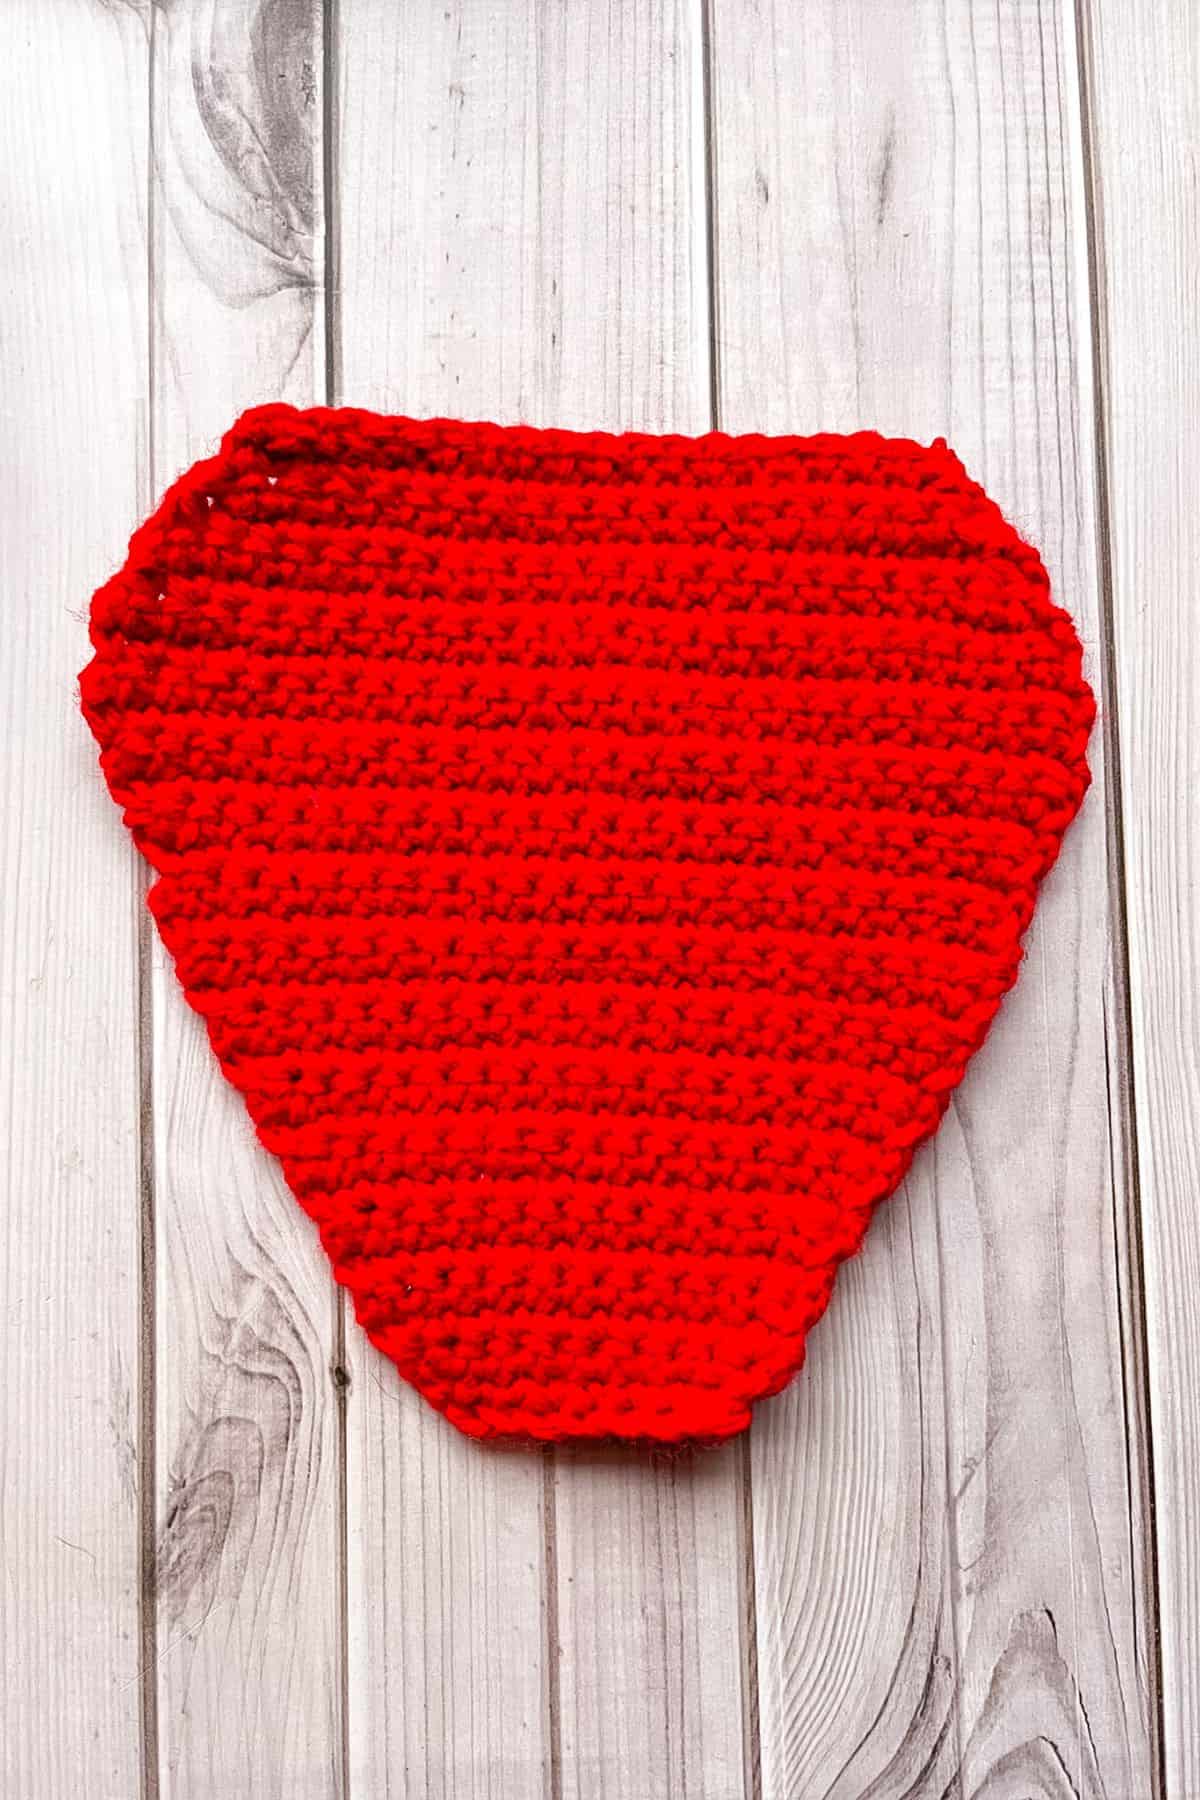
Ch x9 and turn.
Row 1: In the second ch from the hook, make a sc. Continue making sc for the entire row (8). Then ch x1 and turn.
Row 2: Inc, sc x6, inc (10). Then ch x1 and turn.
Row 3: Inc, sc x8, inc (12). Then ch x1 and turn.
Row 4-5: Sc x12 (12). Then ch x1 and turn.
Row 6: Inc, sc x10, inc (14). Then ch x1 and turn.
Row 7: Sc x14 (14). Then ch x1 and turn.
Row 8: Inc, sc x12, inc (16). Then ch x1 and turn.
Row 9: Sc x16 (16). Then ch x1 and turn.
Row 10: Inc, sc x14, inc (18). Then ch x1 and turn.
Row 11: Sc x18 (18). Then ch x1 and turn.
Row 12: Inc, sc x16, inc (20). Then ch x1 and turn.
Row 13: Sc x20 (20). Then ch x1 and turn.
Row 14: Inc, sc x18, inc (22). Then ch x1 and turn.
Row 15-17: Sc x22 (22). Then ch x1 and turn.
Row 18: Inc, sc x20, inc (24). Then ch x1 and turn.
Row 19: Sc x24 (24). Then ch x1 and turn.
Row 20: Inc, sc x22, inc (26). Then ch x1 and turn.
Row 21-24: Sc x26 (26). Then ch x1 and turn.
Row 25: Dec, sc x22, dec (24). Then ch x1 and turn.
Row 26: Sc x24 (24). Then ch x1 and turn.
Row 27: Dec, sc x20, dec (22). Then ch x1 and turn.
Row 28: Dec, sc x18, dec (20). Then ch x1 and turn.
Row 29: Sc x20 (20). Then ch x1 and turn.
Row 30: Dec, sc x16, dec (18). Then ch x1 and turn. Fasten off and weave in ends.
Crochet Strawberry Bag Strap:
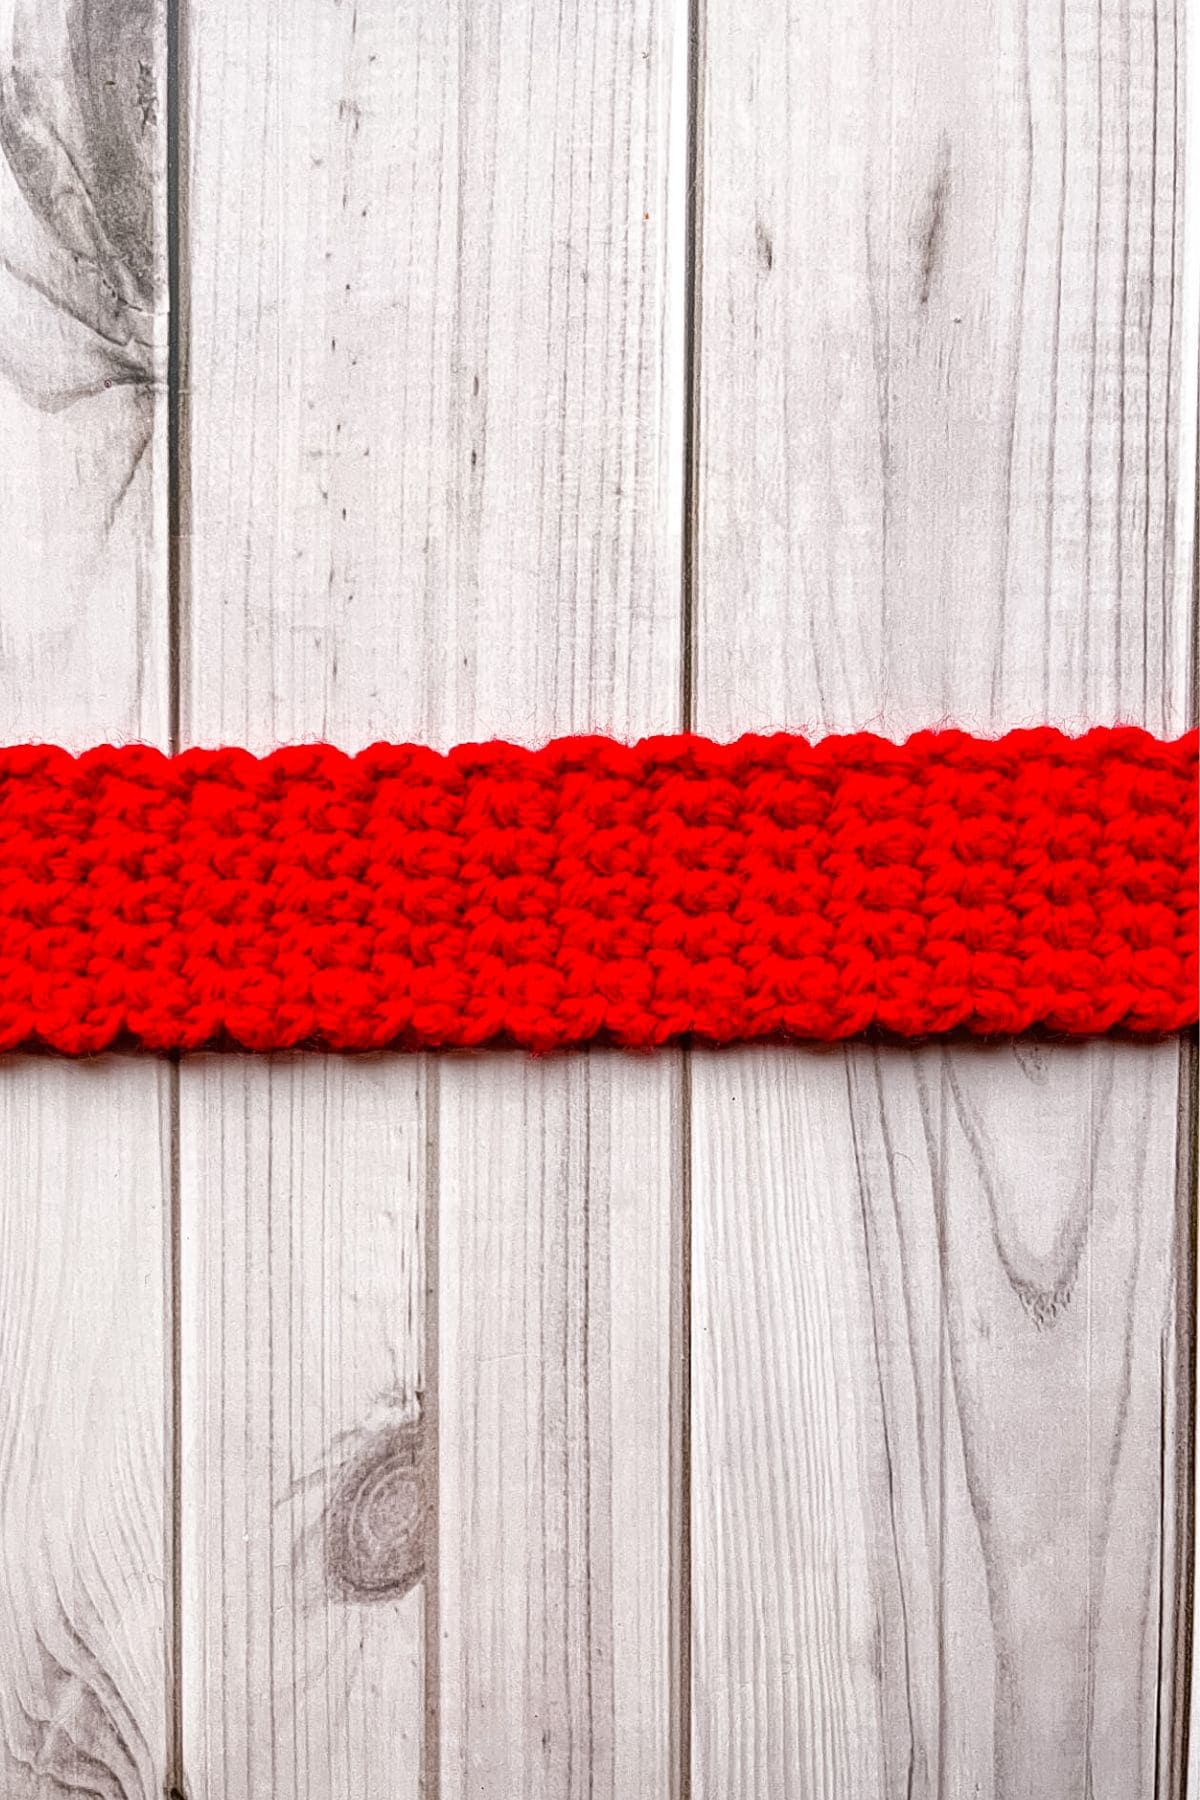
This is going to be the side of the strawberry as well as the strap of the bag.
Ch x7 (7) and turn.
Row 1: In the second ch from hook make a sc. Continue to make sc in each ch. (6)
Row 2-175: Sc x6 (6). Ch x1 and turn.
You may need to adjust rows depending on the size of the handle you would like, but also keep in mind that this is going to surround the 2 strawberry pieces you made earlier.
Fasten off but leave the weaving of the ends until the very end so you can adjust the length of the strap if need be.
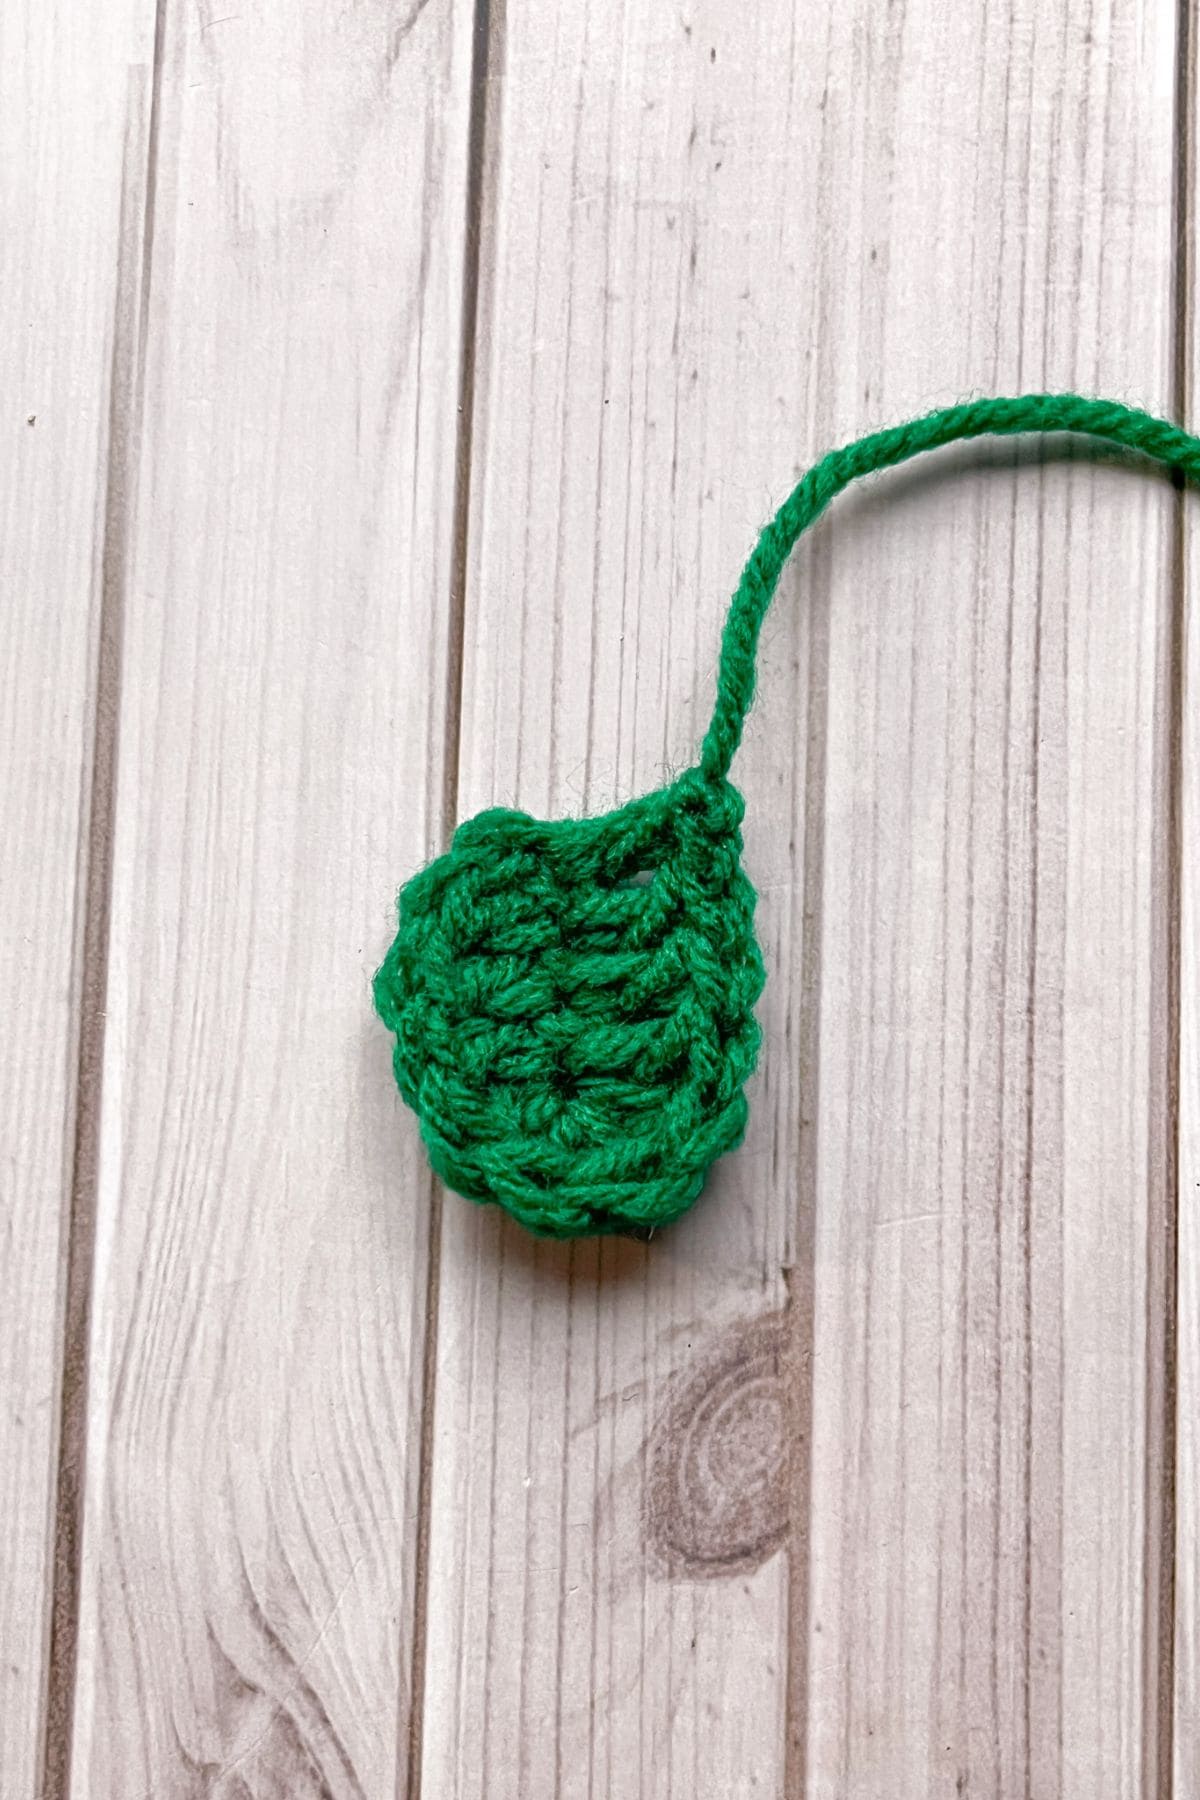
Crochet Strawberry Leaves:
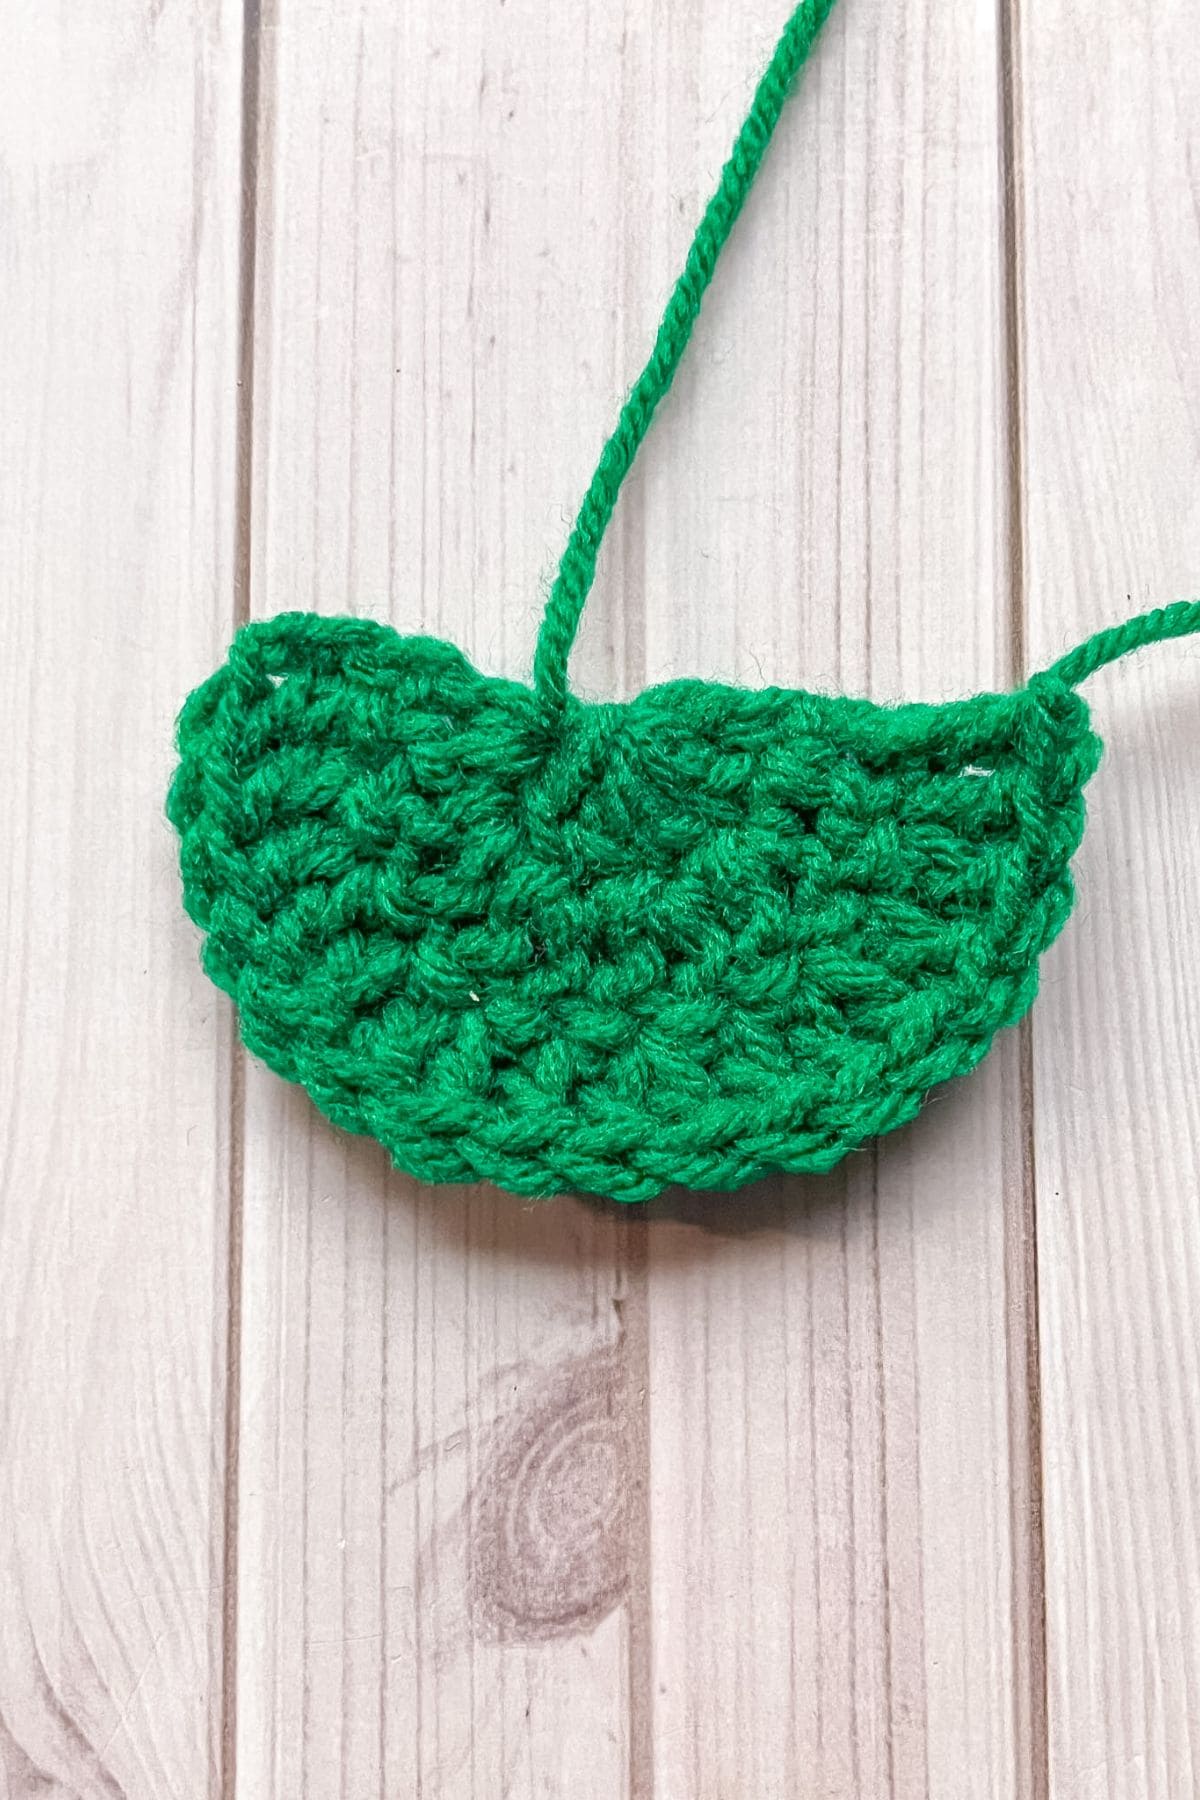
The middle leaves x2:
Row 1: Make a mr, ch x2 (counts as a dc) then dc x5 (6). Ch x2 (counts as a dc for the next row) and turn. DO NOT JOIN THE CIRCLE.
Row 2: Make a dc into the last stitch you made from the previous round, then inc in every stitch (12). Ch x2 and turn.
Row 3: Make a dc into the last stitch you made from the previous round, dc x1 in the next stitch, then *inc, dc. Repeat from * for the rest of the row (18). Fasten off and weave in the ends.
The outer leaves x4:
Ch x5 (5).
Row 1: In the third chain from the hook make a dc. Make another dc in the next stitch. Then dc x6 in the last chain. Dc x3 on the other side of the chains. Fasten off and weave in the ends.
Crochet the Leaves to the Bag:
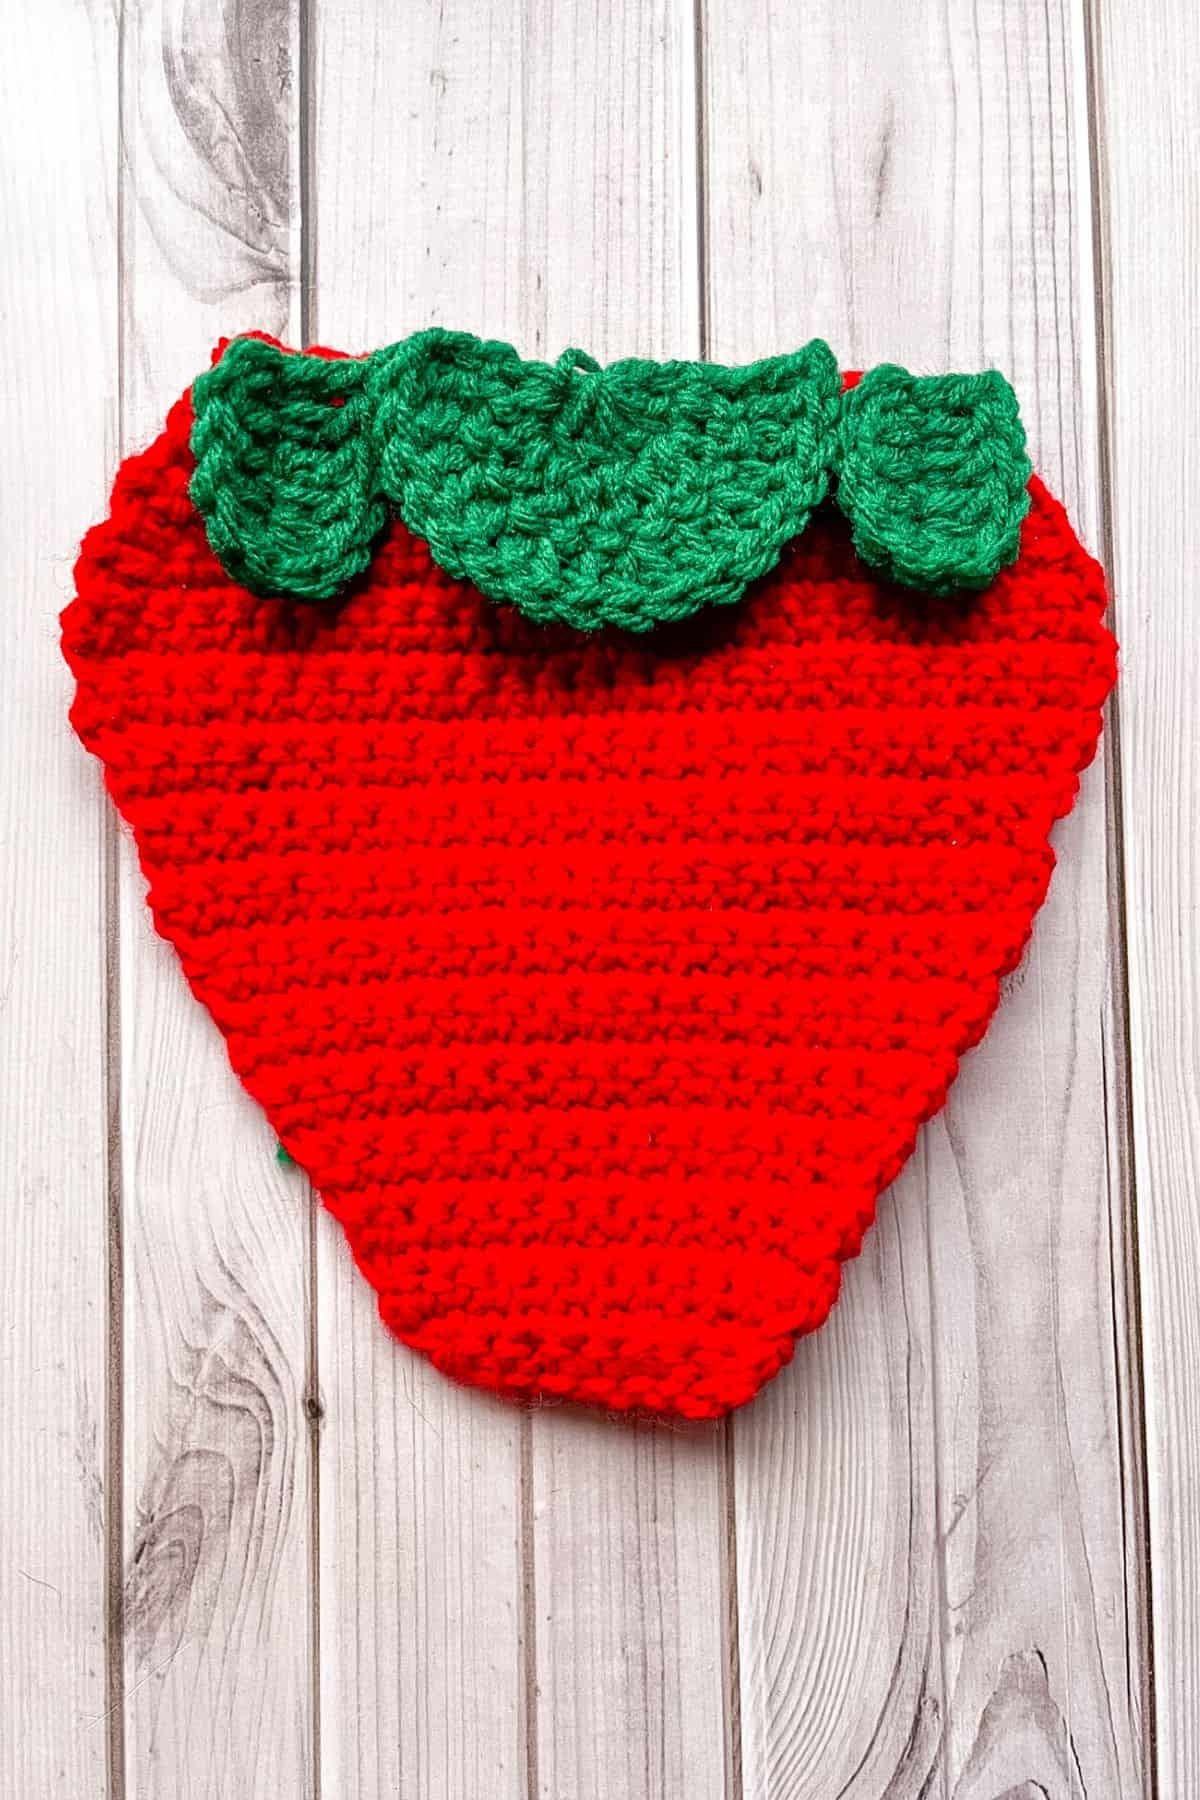
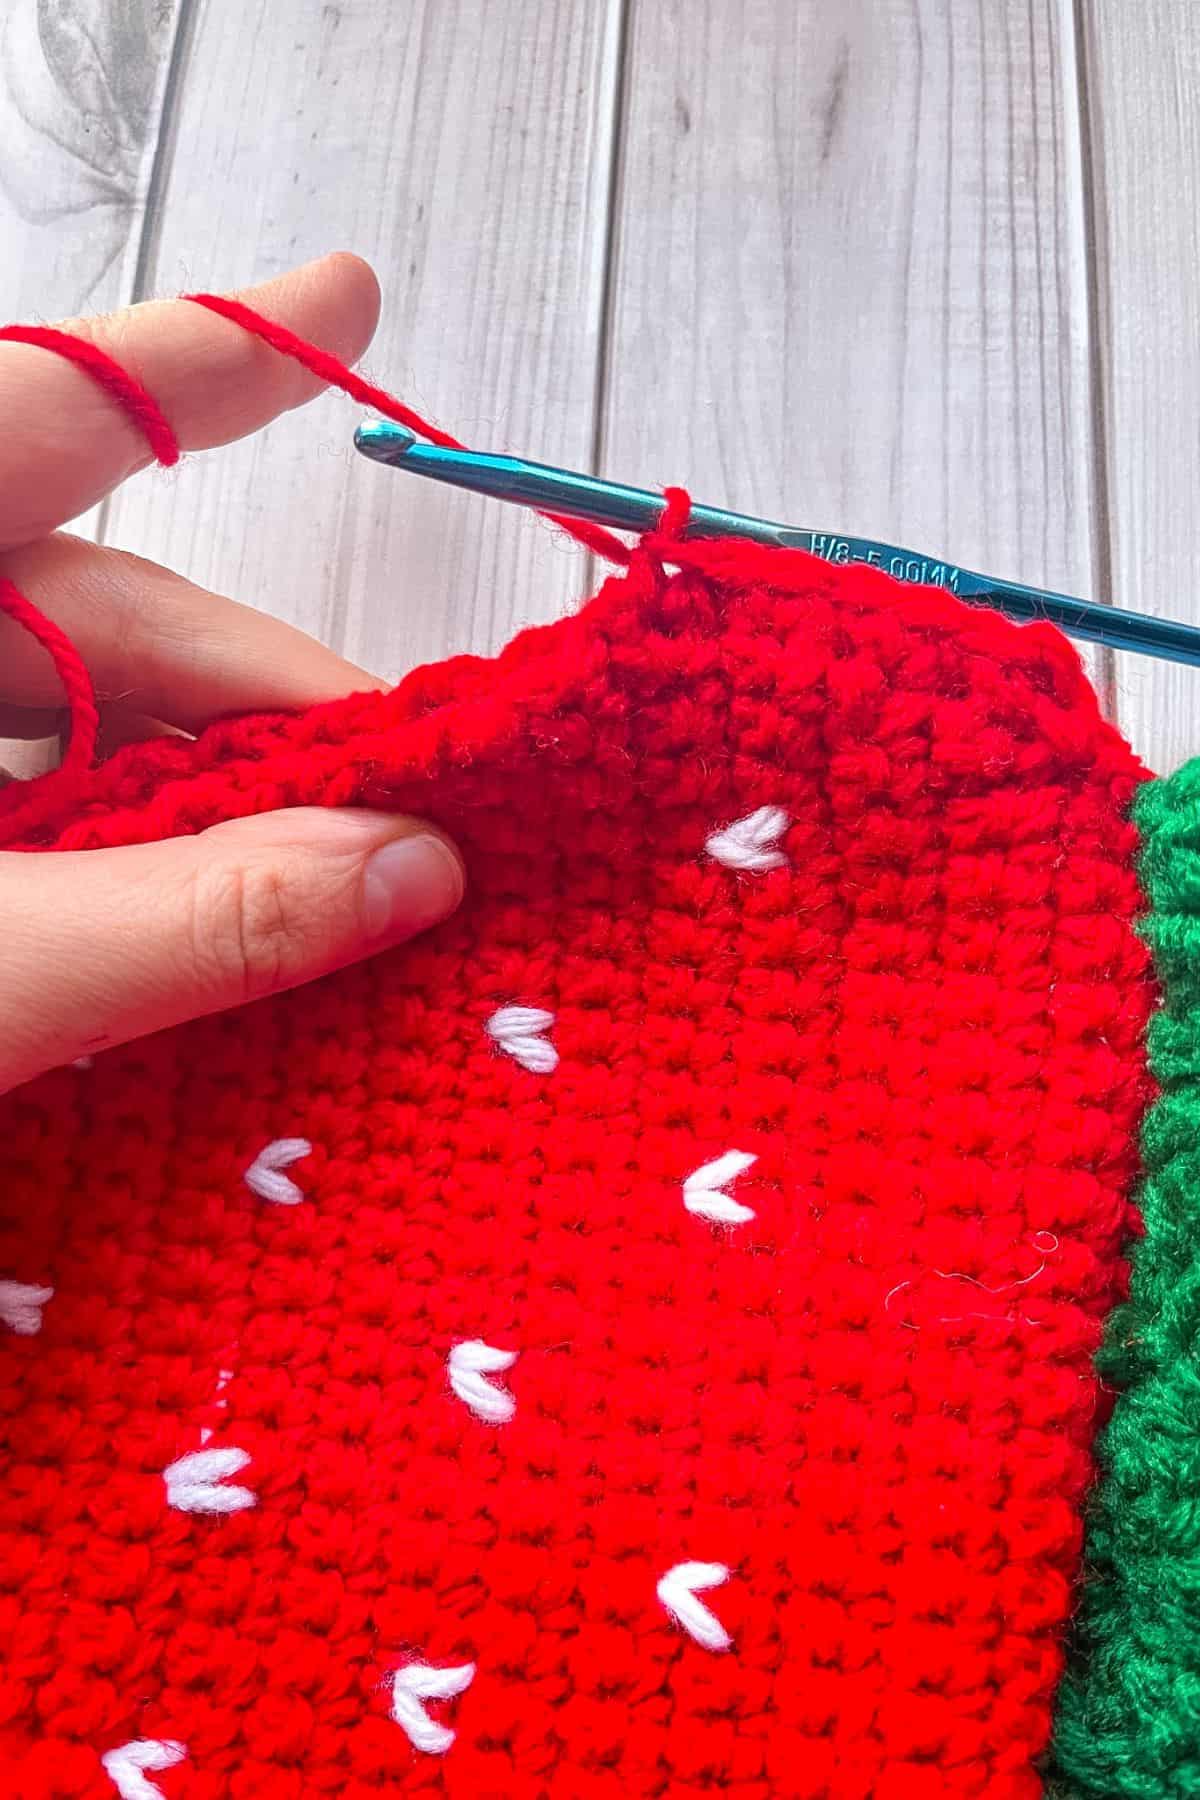
Pin in place a small leaf, the big leaf, and then another small leaf at the top. This should fit almost perfectly with the top edge. Then take the green yarn on the hook and go through both the strawberry and green leaf, yarn over and pull out and finish like you would a single crochet. Then sc the entire edge with the leaves by making sure to go through the sc at the top and then through a closest “hole” on the leafs edge (which is usually at the end of each row).
When you are half through, so about 8-9 single crochets in, on one strawberry side you will ch x7 then attach the chain back into the same stitch you started the chain in by making a single crochet. Then you will continue to finish attaching the leaves.
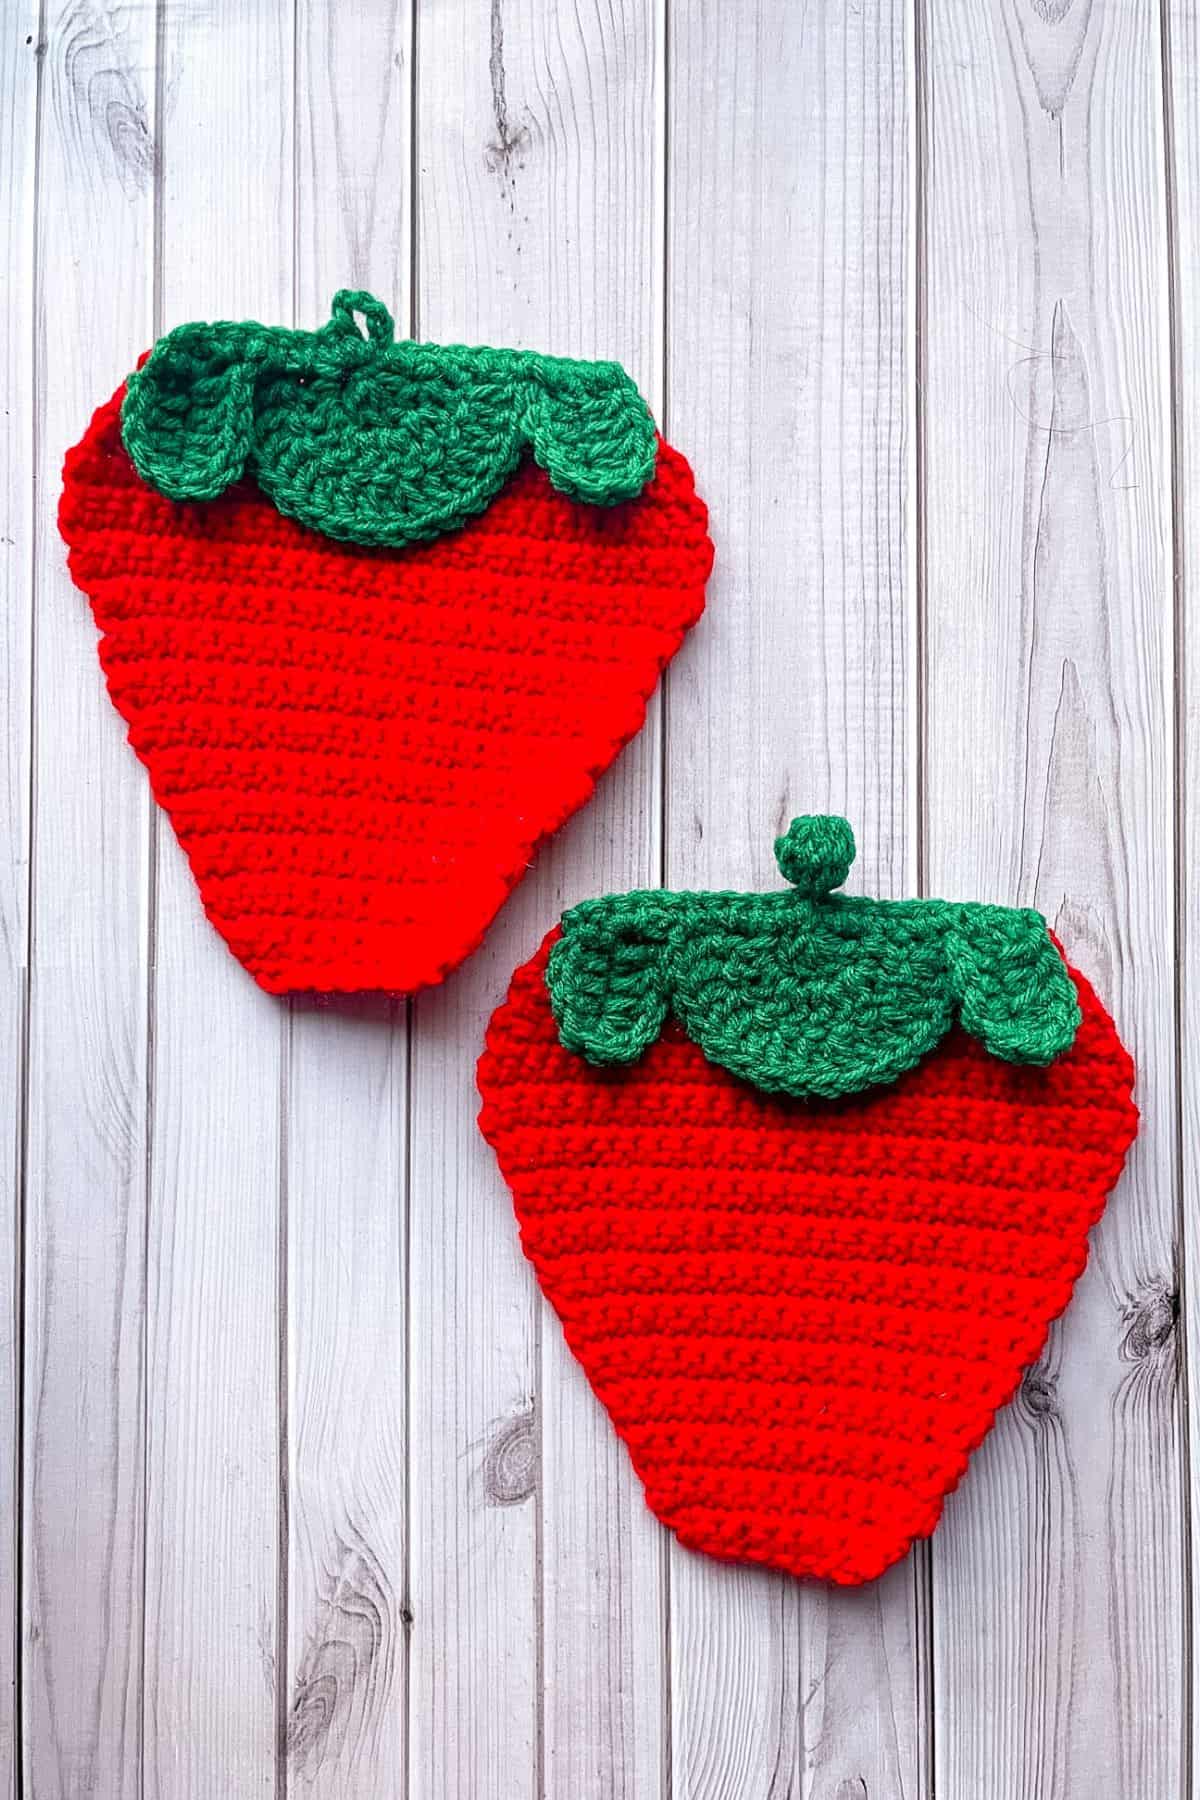
On the other strawberry you will again go halfway on the top edge and make a pom pom stitch (see paragraph below) and then continue to crochet the leaves to the strawberry.
* How to crochet a pom pom stitch:
Ch x3.
In the 3rd chain from the hook, dc 4 together. To do this make a normal dc but instead of going through the last 2 loops on your hook you start to make another dc, so each time you make a dc you are gaining an extra loop on your hook. At the end you should have 5 loops on your hook. Then yarn over and go through all 5 loops on your hook.
Then ch x3.
In the 3rd chain from your hook, dc 4 together again.
Fold the cluster of stitches over and sl st into the ch that you made your first group of dc’s in.*
Sc back into the original stitch you made before making the pom pom, then continue to single crochet the edge of the strawberry bag and leaves together.
Embroidery:
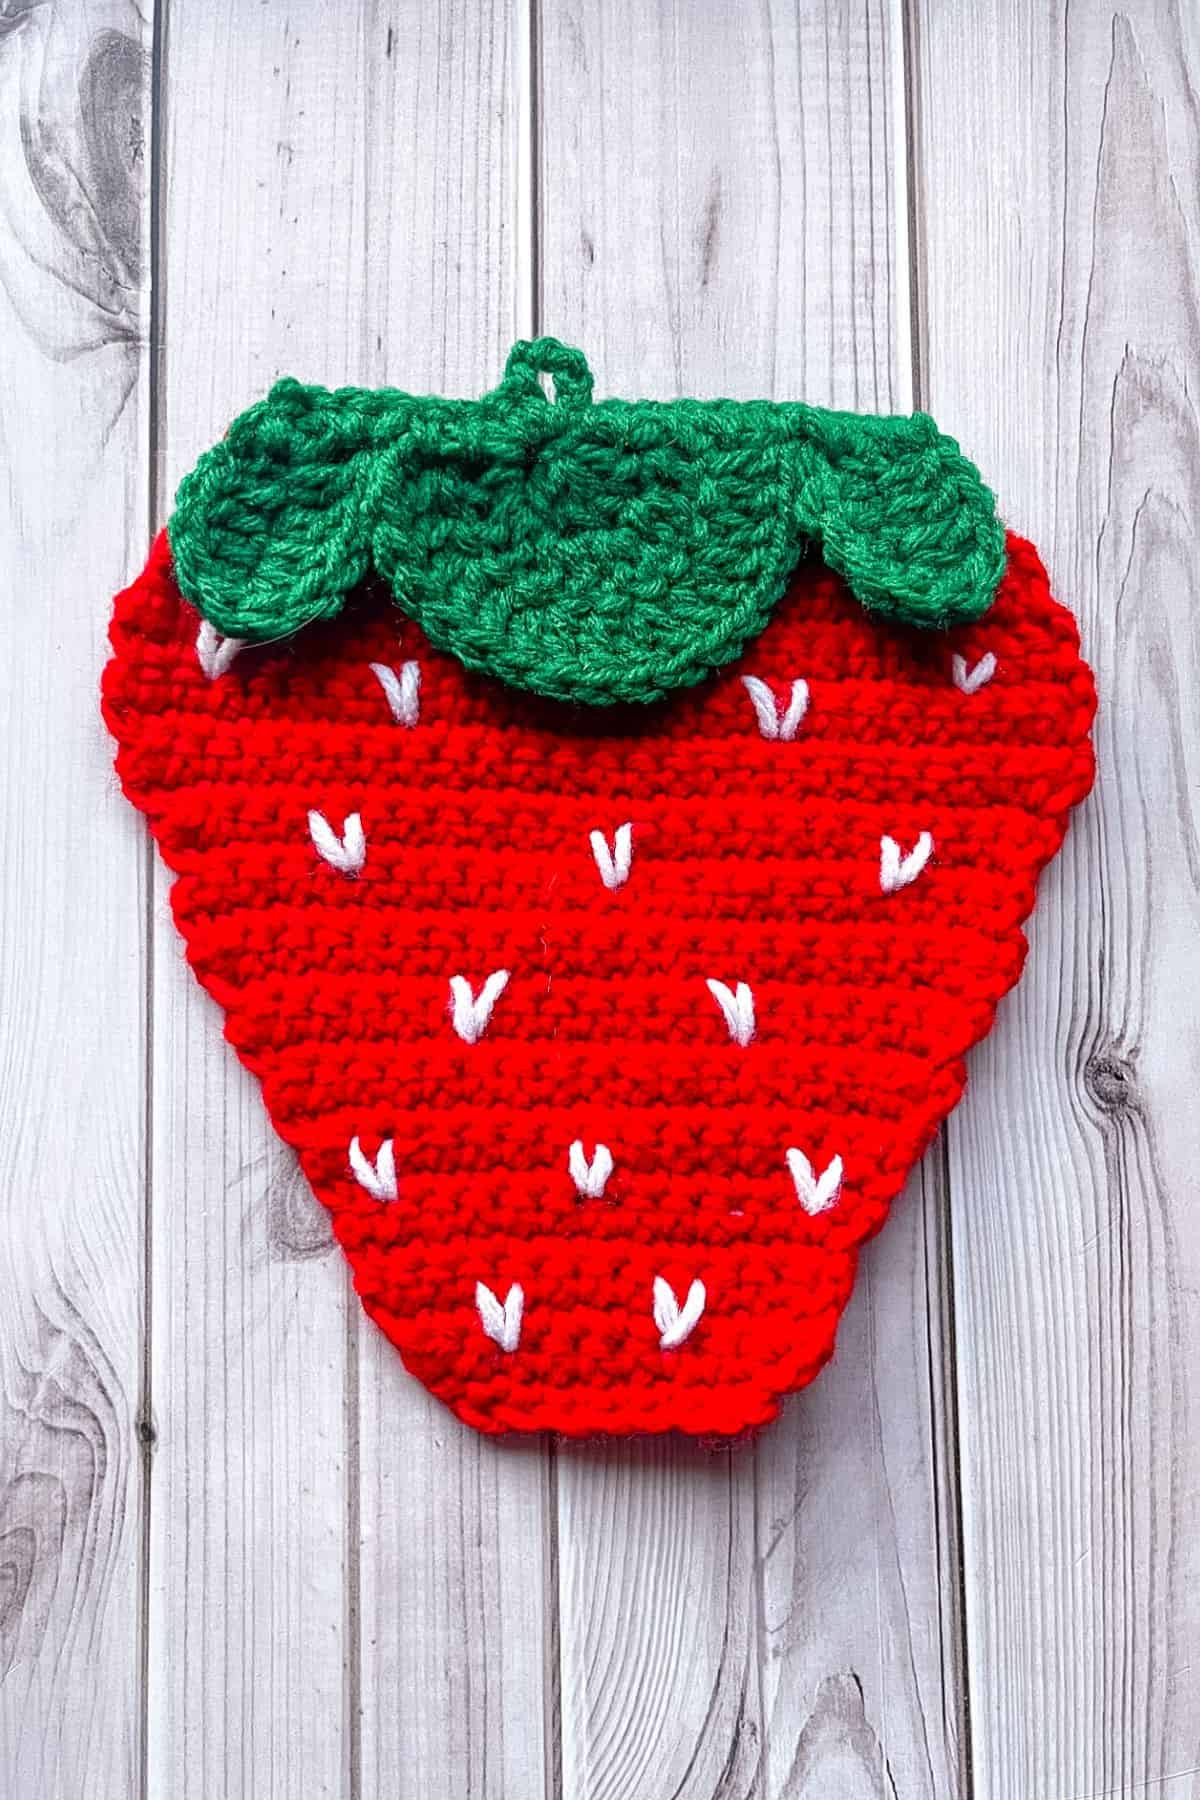
Sporadically embroider little white Vs on one side of each strawberry pieces.
Crocheting/Sewing the Bag Together:
Now that the crochet strawberry leaves are attached, you can use the same concept above for attaching the side piece to the front and back pieces.
With the embroidery and leaves facing outwards, line up the strawberry (right by the leaves) and the beginning of the strawberry strap.
Crochet the strap (this is also the middle of the bag) and strawberry together. Now crochet along the entire edge of the strawberry, making sure to grab both pieces.
Once you get to the other side of the bag fasten off and weave in the ends. Repeat the process above for the other side.
Now that the bag has been made you only have the strap to sew onto the side that it is still not attached to. This is where you can put it on your shoulder and adjust the length of the strap if you need to by either adding more rows or taking a few rows out.
Once you are happy with the length, take your tapestry needle and sew it to the inside of the crochet strawberry bag.
After all the sewing and weaving in the ends are done you are finished! You are now done with the crochet strawberry bag pattern!
If you are looking for another fun strawberry pattern to make, check out my crochet strawberry pillow pattern. If you have any leftover red yarn, try making my crochet ladybug pattern.
🐌Expert Tips
- Yarn Selection: Choose a yarn that fits your desired texture for the crochet strawberry bag pattern. Acrylic is durable, while cotton provides breathability. Don’t hesitate to mix different textures for a unique look.
- Adjustable Strap: If making the crochet strawberry bag pattern for a child, consider adjusting the strap length as you crochet. Use a measuring tape to ensure it fits comfortably.
- Secure Embellishments: When embroidering the white Vs on your strawberries, ensure that your stitches are tight for durability. This will prevent any loose threads from unraveling.
- Color Combinations: Feel free to experiment with different colors for your strawberries. Consider using shades of red, pink, or even variegated yarn for a unique twist.
- Storage Tips: When not in use, store your bag flat to maintain its shape. Avoid hanging it to prevent stretching.
🧵Pattern FAQs
Yes! While the crochet strawberry bag pattern calls for acrylic yarn, you can experiment with cotton or chunky yarn. Just keep in mind that using a thicker yarn will change the size of the bag.
You can make the bag larger by adding more rows to the main body or using a larger hook size. For a smaller bag, reduce the number of rows or use a smaller hook.
Yes, you can wash it! Hand wash with mild detergent and lay it flat to dry to maintain its shape.
🧶More Crochet Summer Patterns
If you tried this Crochet Strawberry Bag Pattern (or any other pattern on my website), please let me know how it went in the 📝 comments below. I'd love to hear from you!
Crochet Strawberry Bag Pattern
Materials
Abbreviations (US terms)
- Chains - ch
- Magic ring - mr
- Single crochet - sc
- Double crochet - dc
- Increase - inc
- Decrease - dec
Notes
- Yarn Choice: I used acrylic yarn for this crochet strawberry bag pattern, but cotton or chunky yarn would also work well. I use acrylic for most of my crochet patterns like my crochet strawberry blanket, but I use cotton mostly for coasters like my crochet strawberry coaster pattern.
- Size Consideration: The crochet strawberry bag pattern is designed to hold a phone and a few small objects; it is not intended for large or heavy items—think of it as a small strawberry crochet purse.
- Adjustable Strap: You can adjust the strap length depending on where you want the bag to sit on your side or if it’s for a child. I prefer mine right above my hip.
Instructions
- The crochet strawberry bag pattern will be made in rows:
Crochet Strawberry x2:
- Ch x9 and turn.
- Row 1: In the second ch from the hook, make a sc. Continue making sc for the entire row (8). Then ch x1 and turn.
- Row 2: Inc, sc x6, inc (10). Then ch x1 and turn.
- Row 3: Inc, sc x8, inc (12). Then ch x1 and turn.
- Row 4-5: Sc x12 (12). Then ch x1 and turn.
- Row 6: Inc, sc x10, inc (14). Then ch x1 and turn.
- Row 7: Sc x14 (14). Then ch x1 and turn.
- Row 8: Inc, sc x12, inc (16). Then ch x1 and turn.
- Row 9: Sc x16 (16). Then ch x1 and turn.
- Row 10: Inc, sc x14, inc (18). Then ch x1 and turn.
- Row 11: Sc x18 (18). Then ch x1 and turn.
- Row 12: Inc, sc x16, inc (20). Then ch x1 and turn.
- Row 13: Sc x20 (20). Then ch x1 and turn.
- Row 14: Inc, sc x18, inc (22). Then ch x1 and turn.
- Row 15-17: Sc x22 (22). Then ch x1 and turn.
- Row 18: Inc, sc x20, inc (24). Then ch x1 and turn.
- Row 19: Sc x24 (24). Then ch x1 and turn.
- Row 20: Inc, sc x22, inc (26). Then ch x1 and turn.
- Row 21-24: Sc x26 (26). Then ch x1 and turn.
- Row 25: Dec, sc x22, dec (24). Then ch x1 and turn.
- Row 26: Sc x24 (24). Then ch x1 and turn.
- Row 27: Dec, sc x20, dec (22). Then ch x1 and turn.
- Row 28: Dec, sc x18, dec (20). Then ch x1 and turn.
- Row 29: Sc x20 (20). Then ch x1 and turn.
- Row 30: Dec, sc x16, dec (18). Then ch x1 and turn. Fasten off and weave in ends.
Crochet Strawberry Bag Strap:
- This is going to be the side of the strawberry as well as the strap of the bag.
- Ch x7 (7) and turn.
- Row 1: In the second ch from hook make a sc. Continue to make sc in each ch. (6)
- Row 2-175: Sc x6 (6). Ch x1 and turn.
- You may need to adjust rows depending on the size of the handle you would like, but also keep in mind that this is going to surround the 2 strawberry pieces you made earlier.
- Fasten off but leave the weaving of the ends until the very end so you can adjust the length of the strap if need be.
Crochet Strawberry Leaves:
The middle leaves x2:
- Row 1: Make a mr, ch x2 (counts as a dc) then dc x5 (6). Ch x2 (counts as a dc for the next row) and turn. DO NOT JOIN THE CIRCLE.
- Row 2: Make a dc into the last stitch you made from the previous round, then inc in every stitch (12). Ch x2 and turn.
- Row 3: Make a dc into the last stitch you made from the previous round, dc x1 in the next stitch, then *inc, dc. Repeat from * for the rest of the row (18). Fasten off and weave in the ends.
The outer leaves x4:
- Ch x5 (5).
- Row 1: In the third chain from the hook make a dc. Make another dc in the next stitch. Then dc x6 in the last chain. Dc x3 on the other side of the chains. Fasten off and weave in the ends.
- Crochet the Leaves to the Bag:
- Pin in place a small leaf, the big leaf, and then another small leaf at the top. This should fit almost perfectly with the top edge. Then take the green yarn on the hook and go through both the strawberry and green leaf, yarn over and pull out and finish like you would a single crochet. Then sc the entire edge with the leaves by making sure to go through the sc at the top and then through a closest “hole” on the leafs edge (which is usually at the end of each row).
- When you are half through, so about 8-9 single crochets in, on one strawberry side you will ch x7 then attach the chain back into the same stitch you started the chain in by making a single crochet. Then you will continue to finish attaching the leaves.
- On the other strawberry you will again go halfway on the top edge and make a pom pom stitch (see paragraph below) and then continue to crochet the leaves to the strawberry.
* How to crochet a pom pom stitch:
- Ch x3.
- In the 3rd chain from the hook, dc 4 together. To do this make a normal dc but instead of going through the last 2 loops on your hook you start to make another dc, so each time you make a dc you are gaining an extra loop on your hook. At the end you should have 5 loops on your hook. Then yarn over and go through all 5 loops on your hook.
- Then ch x3.
- In the 3rd chain from your hook, dc 4 together again.
- Fold the cluster of stitches over and sl st into the ch that you made your first group of dc’s in.*
- Sc back into the original stitch you made before making the pom pom, then continue to single crochet the edge of the strawberry bag and leaves together.
Embroidery:
- Sporadically embroider little white Vs on one side of each strawberry pieces.
Crocheting/Sewing the Bag Together:
- Now that the crochet strawberry leaves are attached, you can use the same concept above for attaching the side piece to the front and back pieces.
- With the embroidery and leaves facing outwards, line up the strawberry (right by the leaves) and the beginning of the strawberry strap.
- Crochet the strap (this is also the middle of the bag) and strawberry together. Now crochet along the entire edge of the strawberry, making sure to grab both pieces.
- Once you get to the other side of the bag fasten off and weave in the ends. Repeat the process above for the other side.
- Now that the bag has been made you only have the strap to sew onto the side that it is still not attached to. This is where you can put it on your shoulder and adjust the length of the strap if you need to by either adding more rows or taking a few rows out.
- Once you are happy with the length, take your tapestry needle and sew it to the inside of the crochet strawberry bag.
- After all the sewing and weaving in the ends are done you are finished! You are now done with the crochet strawberry bag pattern!
.


Maura says
Hi, I am almost done with my purse but have some questions about where the strap goes. Does the strap go all the way around the purse? If so, where do I start so that the bottom will be closed but the strap will also hang from the top of the purse? I don't really understand how to start at the leaves and still be able to go all around the purse. I would love to be able to see a picture of the side of your purse to try to understand. I would appreciate any feedback and tips you can offer. 😊
Kimberly Arenas says
Hello!
The strap does go all around the purse, you attach it to the last row you worked for the front and back of the strawberry (row 28) and then down to row 1, across and back up. Once sewn to both sides the top should remain open, then just sew the two ends of the strap together to create a loop for the bag's handle. If the handle seems too short for you, you can always make it longer.
Zaina says
Hi! Love the pattern but confused about the strap. Will it line the whole outer edge of the strawberry or only start from by the leaves and then the strawberry faces are connected together for the rest of the way when closing the outer edge of the bag. I hope I’m making sense!
Kimberly Arenas says
It will line the whole outer edge of the strawberry to create a wider bag, then the rest of the rows will create the strap 🙂
Haricot Verte says
So close to done. This was the first thing I made without using a video tutorial to make it. Thanks so much for writing such detailed instructions and including pictures. This is such a beautiful little purse and I know the little girl I give it to will love it. Thanks so much. I’m excited to make some more of your patterns.
KimberlyArenas says
Im so glad you like and found it easy to follow! 🙂
Amber says
Thanks so much. It is such a cute pattern and worked up great. I li e it and so does my daughter.
KimberlyArenas says
I'm so glad you both like it!
Macy says
I made this for my daughter and added a face and a fabric liner. It turned out so cute! Thank you for this pattern🙂
KimberlyArenas says
You're Welcome! I'm glad you and your daughter liked it!
Chey says
Currently working on this one and absolutely love it so far! I think the next time I make it, I will try to make it a little bigger 🙂 Thank you for the pattern! Can't wait to try the other ones out.
KimberlyArenas says
I am glad you are liking it!
Franziska says
Hi Kim, I am crocheting for 20 years now but this was definitely one of the best instructions I've ever used. I made 4 bags and they are so beautiful. I am very happy. I also sew a fabric lining for the inside for a cleaner look and better durability. Thanks so much! 🙂
Kimberly Arenas says
Happy you liked the pattern!