
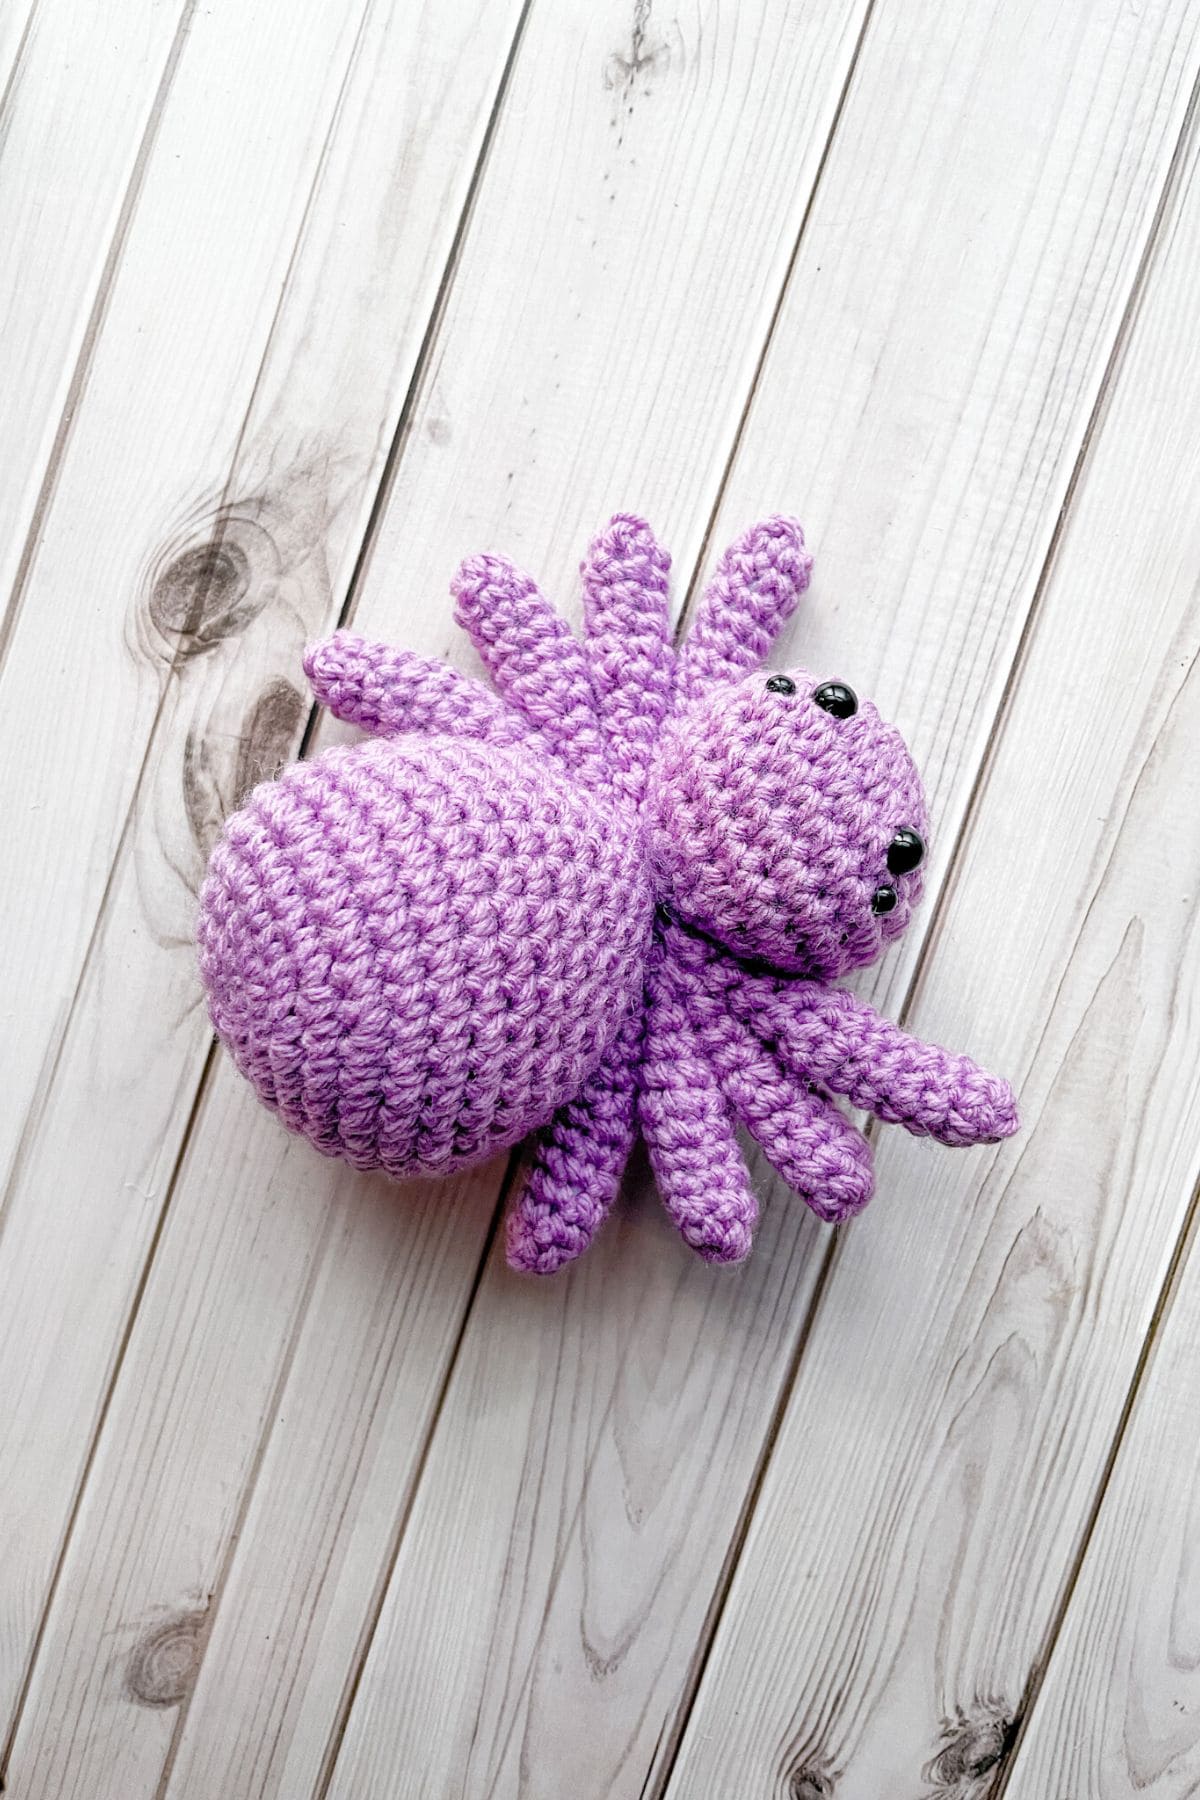
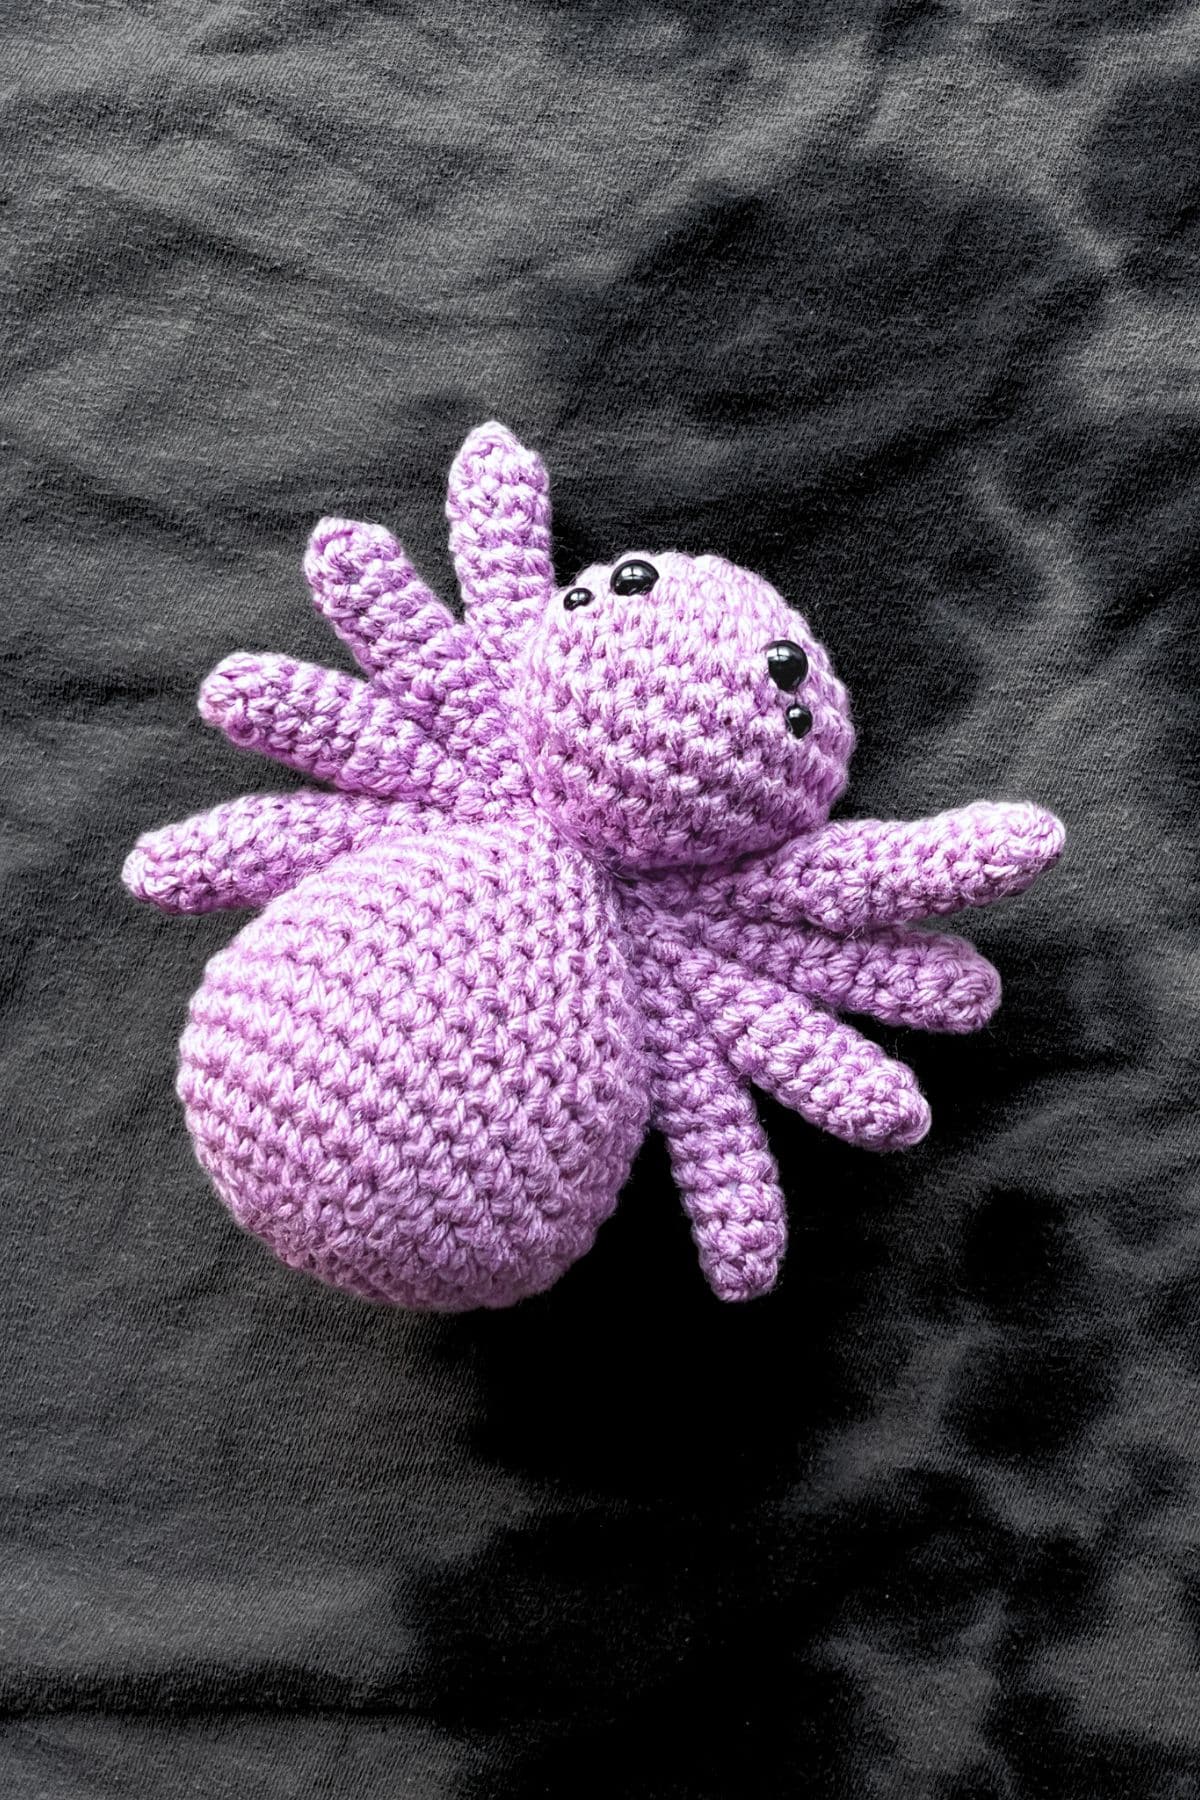
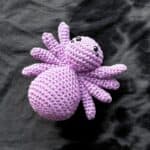
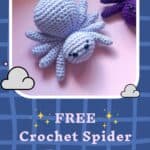
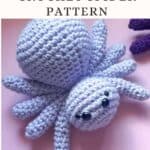
My Free Crochet Spider Pattern is easy to make and perfect for those spooky Halloween decorations! This crochet spider has 8 legs and looks like an actual spider without any of the creepy crawly!

This free crochet spider pattern is an excellent addition to your fall crochet collection. It is easy to make and highly versatile. I completed two crochet spiders within just a few hours, making them perfect for craft fairs and Halloween markets!
Speaking of Halloween, this is a great crochet pattern because you can easily make a crochet spider to decorate your home, or use chunky yarn to create giant statement pieces!
You can also get creative with colors and textures to make your crochet spider unique. Try using black yarn for a classic spooky look, or opt for bright, bold colors to make fun, kid-friendly versions.
Adding different embellishments, like tiny hats, bows, or even glow-in-the-dark yarn, can transform the crochet spider pattern into a charming decoration that fits any Halloween theme.
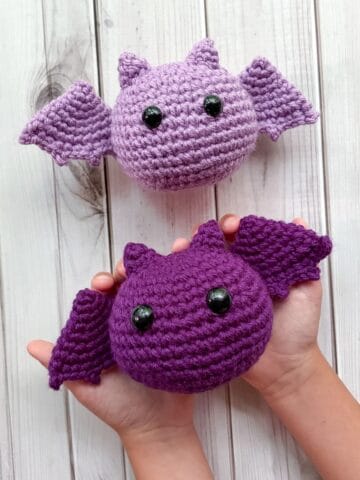
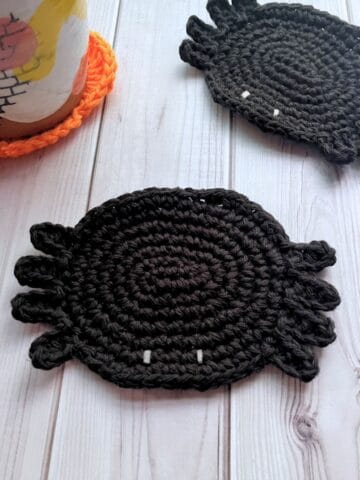
These versatile spiders also make adorable gifts or party favors, adding a handmade touch to any fall celebration. If you are looking for more cute spider patterns check out my crochet spider coaster pattern or my crochet Halloween garland pattern.
So lets get started on the free crochet spider pattern! I can't wait to show you how to crochet a spider!
Jump to:
✏️ Things To Note:
- Yarn Options: I used acrylic worsted weight yarn for this free crochet spider pattern, but you can use any type of yarn. Note that using chunky yarn will make a much larger crochet spider. Like how I made my crochet tempura shrimp with chunky yarn, if I used dk yarn it would be smaller.
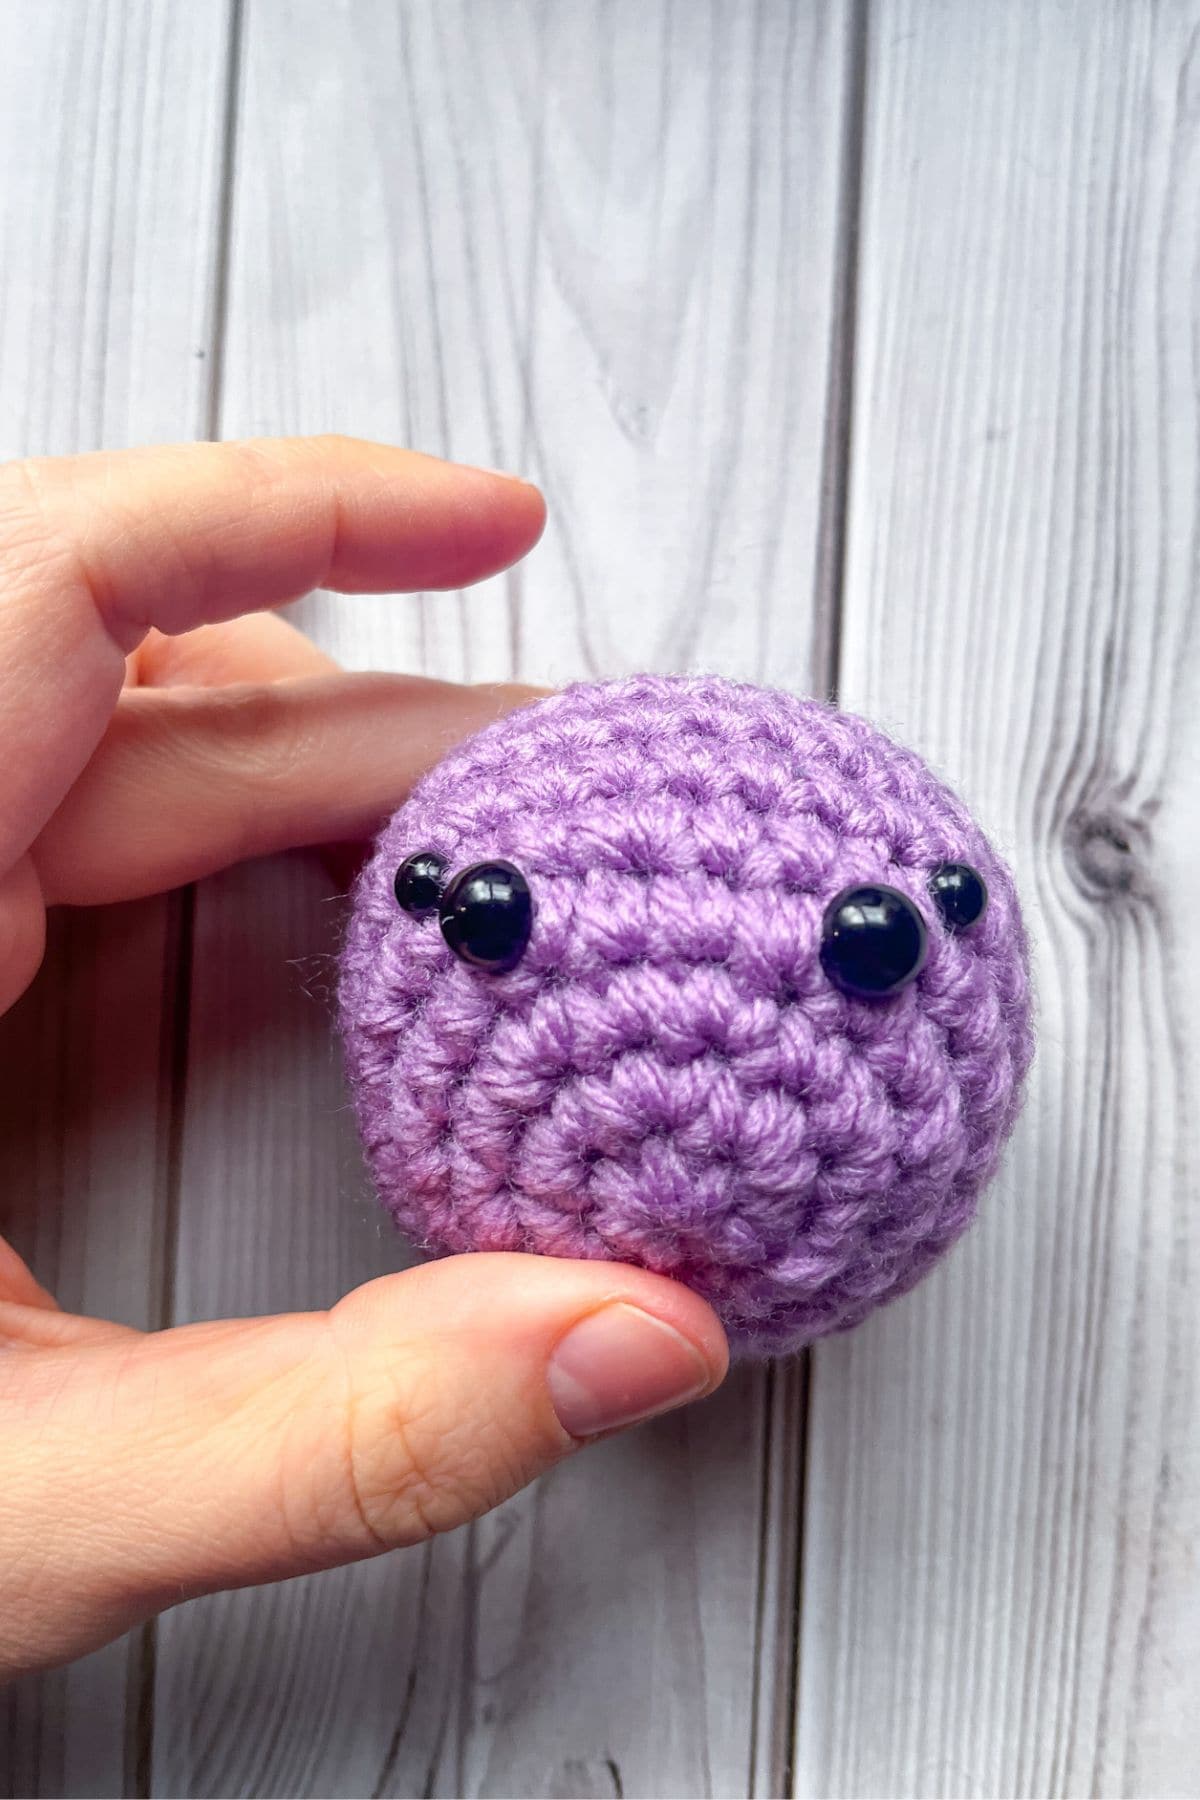
- Safety Eyes: I used two different pairs of safety eyes for the spider crochet pattern. The sizing doesn't matter as long as they are two different sizes.
- Finished Size: The finished spider plushie is roughly 6 inches long. Other Halloween crochet patterns roughly the same size are my crochet eyes pattern and crochet pumpkin pattern with leaves.
🪡 Materials Needed
💭 Abbreviations to Remember (US Terms)
- Magic ring - mr
- Single Crochet - sc
- Increase - inc (2 stitches in 1 stitch)
- Decrease - dec (1 stitch in 2 stitches)
🧋 Variations
Try chunky yarn for a larger spider! Experiment with different safety eye sizes for small beady eyes or large eyes. You can even add more eyes for a more spooktastic crochet spider.
🍵 Instructions for the Free Crochet Spider Pattern
For the free crochet spider pattern, we will be working in rounds.
Crochet Spider Head:
Round 1: Using light purple yarn, make a MR and make sc x6 in the circle. If you find it difficult making a magic ring you can chain 2 and then crochet sc x6 in the second chain from the hook (6).
Round 2: Inc in every sc (12).
Round 3: Inc, sc. Then repeat until end of round (18).
Round 4: Inc, sc x2. Then repeat until end of round (24).
Round 5: Inc, sc x3. Then and repeat until end of round (30).
Round 6-8: Sc in every stitch (30)
Round 9: Dec, sc x3 and repeat for the rest of the round (24). Make sure you add your safety eyes before decreasing: the larger eyes should be between rounds 4 and 5 with 3 stitches in between them, and the smaller eyes are between rounds 5 and 6 one stitch diagonal from the large eyes.
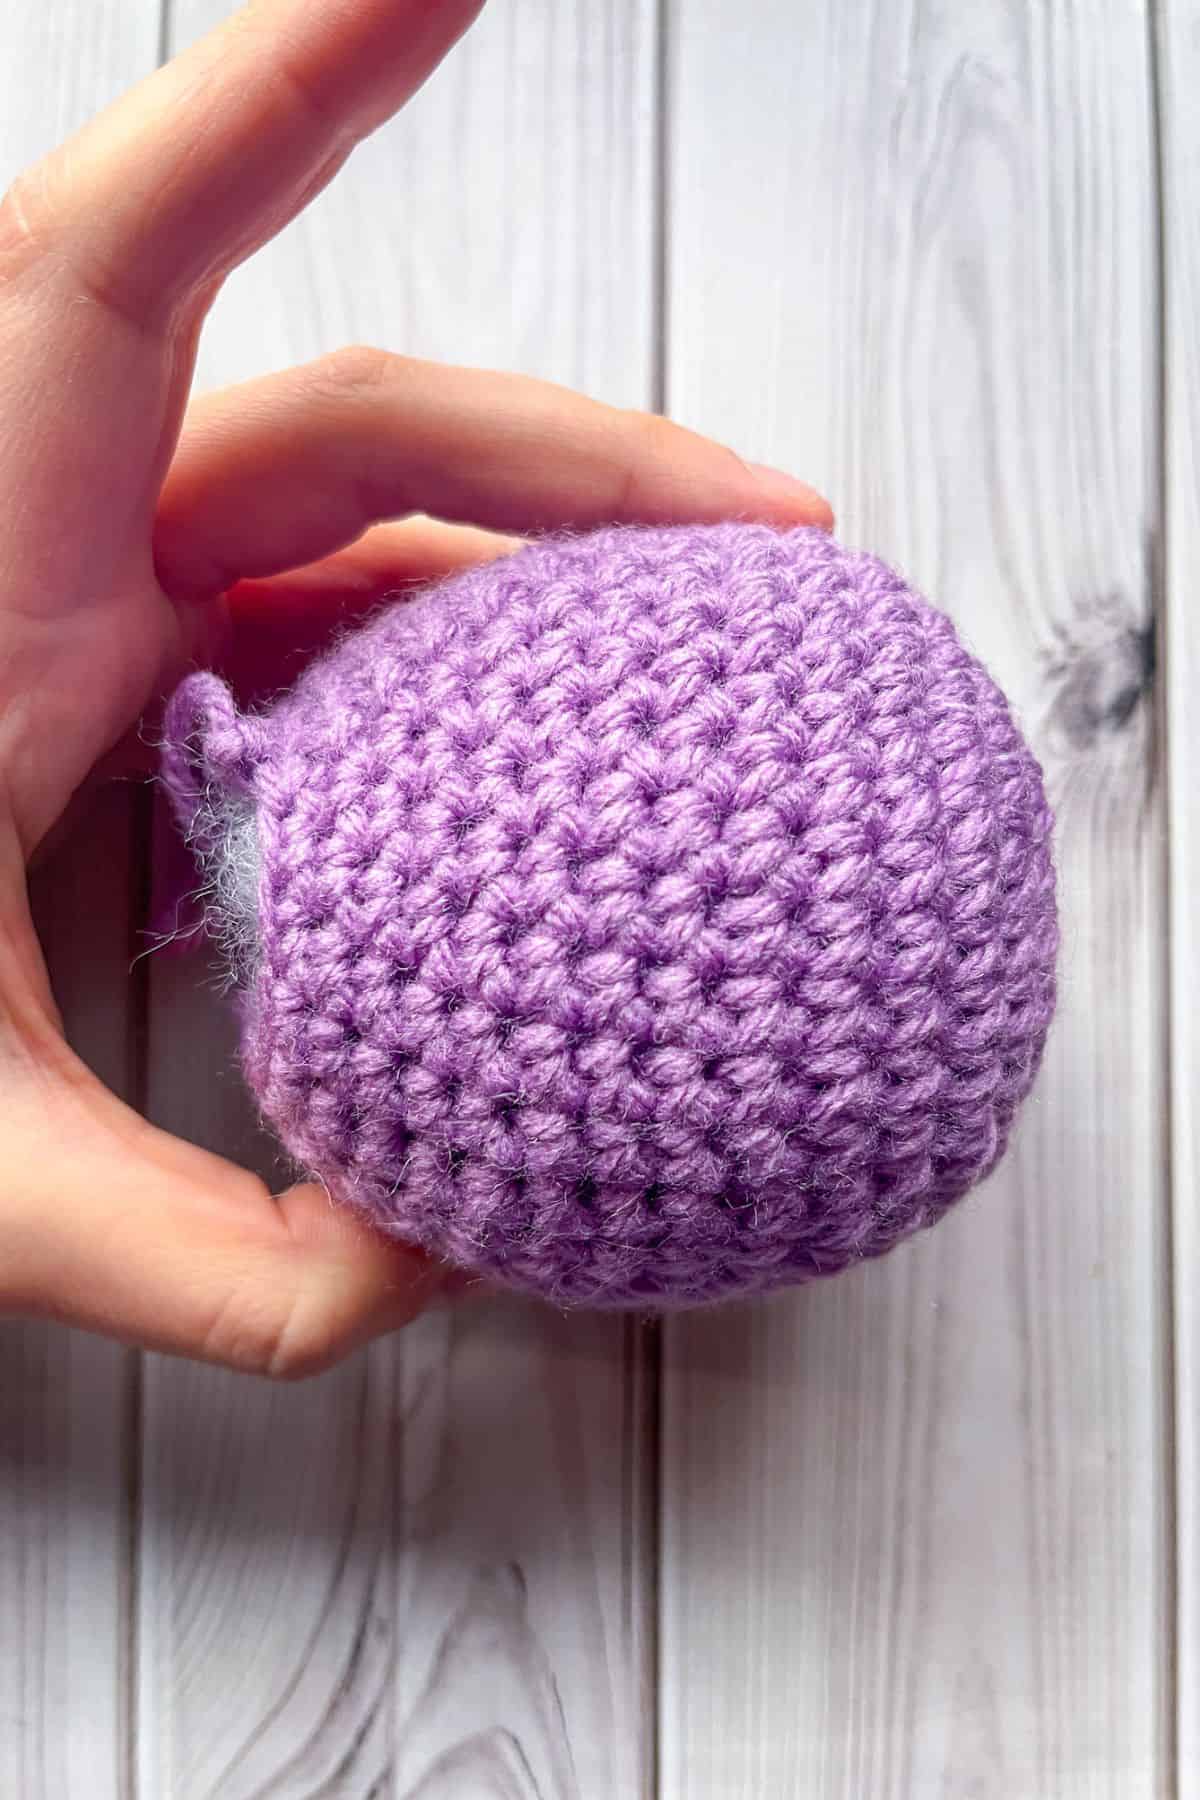
Round 10: Dec, sc x2. Then repeat for the rest of the round (18). Stuff the head.
Round 11: Dec, sc. Then repeat for the rest of the round (12).
Round 12: Dec and repeat for the rest of the round (6). Fasten off and weave in the tail.
Crochet Spider Body:
Round 1: Make a MR and make sc x6 in the circle (6).
Round 2: Inc in every sc (12).
Round 3: Inc, sc. Then repeat until end of round (18).
Round 4: Inc, sc x2. Then repeat until end of round (24).
Round 5: Inc, sc x3. Then repeat until end of round (30).
Round 6: Inc, sc x4. Then repeat until end of round (36).
Round 7: Inc, sc x5. Then repeat until end of round (42).
Round 8-9: Sc for the entire round (42).
Round 10: Dec, sc x12. Then repeat for the entire round (39).
Round 11: Dec, sc x11. Then repeat for the entire round (36).
Round 12: Dec, sc x10. Then repeat for the entire round (33).
Round 13: Dec, sc x9. Then repeat for the entire round (30).
Round 14: Dec, sc x8. Then repeat for the entire round (27).
Round 15: Dec, sc x7. Then repeat for the entire round (24). Begin stuffing the body.
Round 16: Dec, sc x6. Then repeat for the entire round (21).
Round 17: Dec, sc x5. Then repeat for the entire round (18).
Round 18: Dec, sc x4. Then repeat for the entire round (15). Fasten off and leave a tail for sewing.
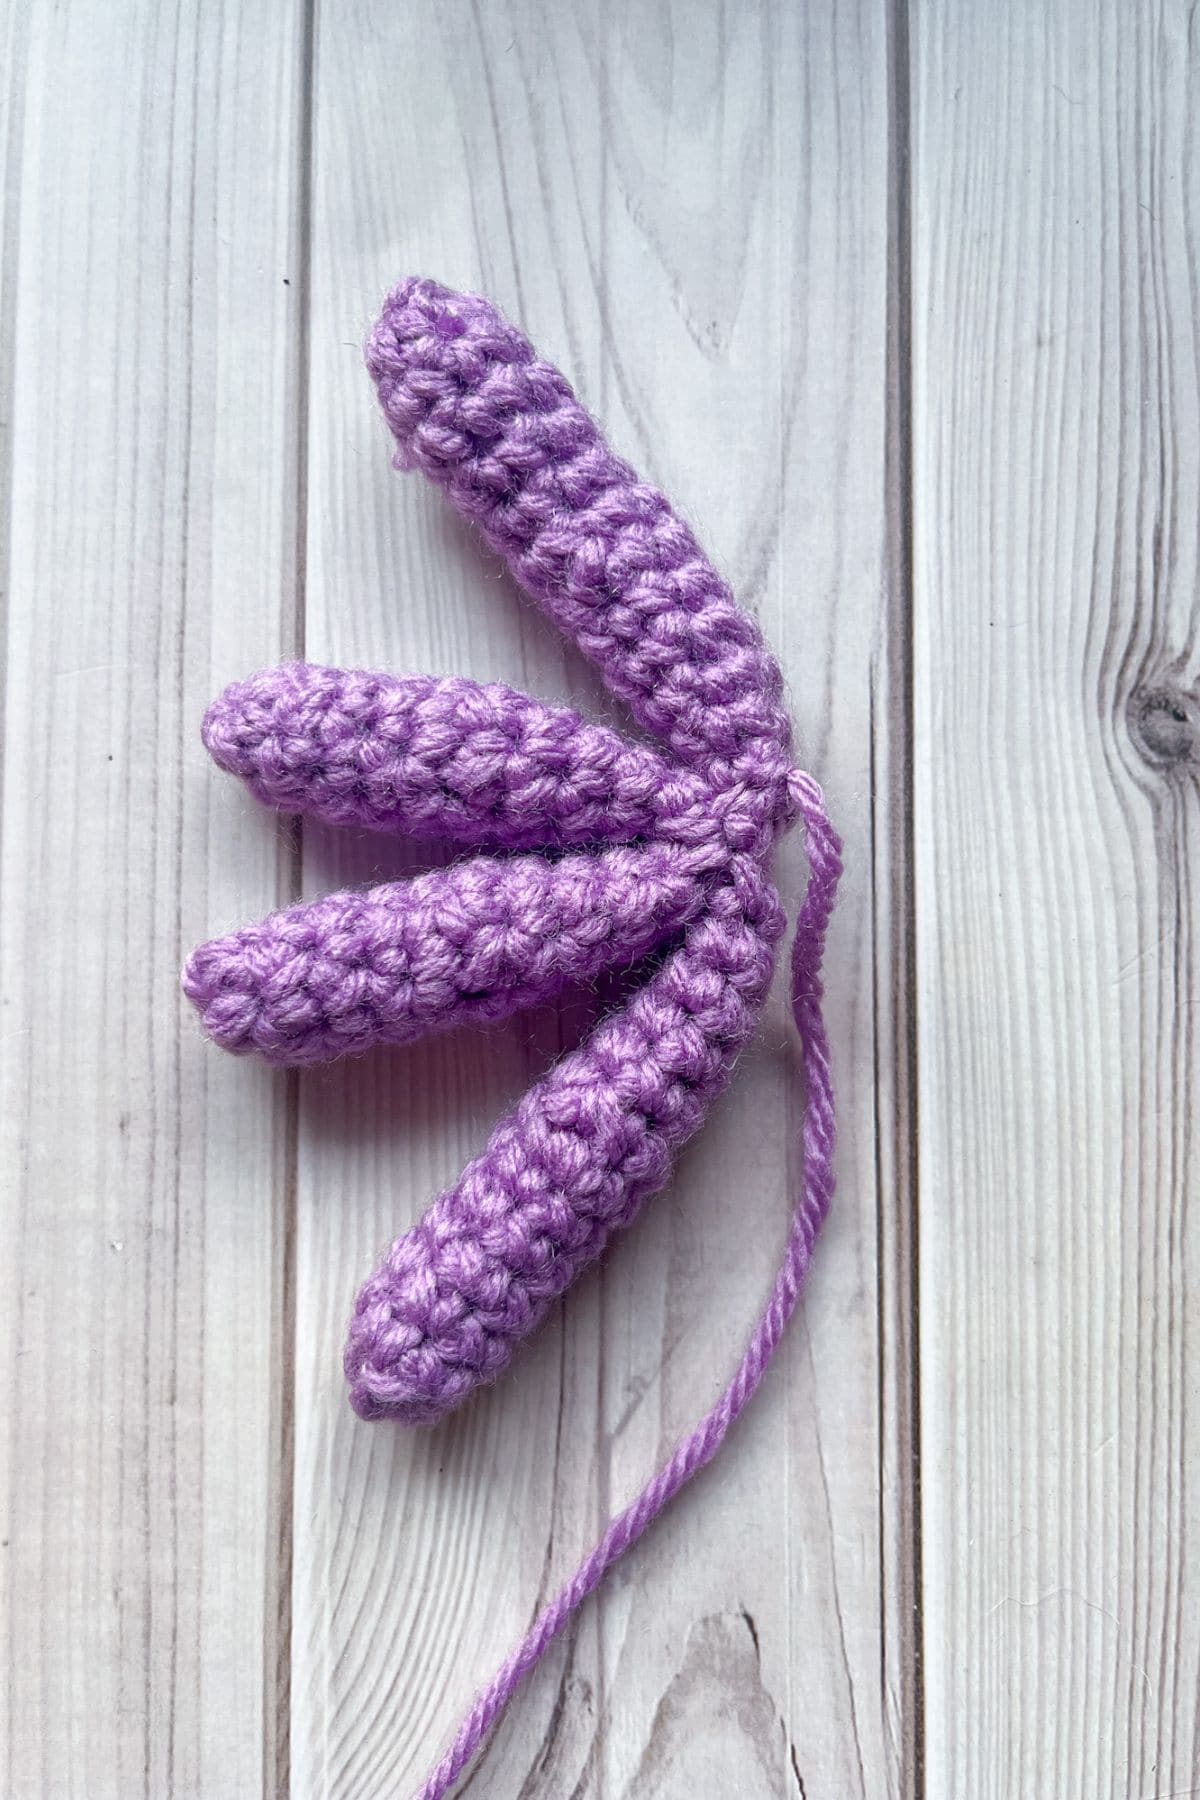
Crochet Spider Legs:
Shorter legs x4:
Round 1: Make a MR and make sc x6 in the circle (6).
Round 2-5: Sc in every stitch (6).
Round 6: Inc, sc x2. Then repeat for the rest of the round (8)
Round 7: Dec, sc x2. Then repeat for the rest of the round (6)
Round 8-11: Sc in every stitch (6). Fasten off and stuff. Make sure to only stuff the first half of the legs and not the top part where it will connect to the spider body.
Longer legs x4:
Round 1: Make a MR and make sc x6 in the circle (6).
Round 2-6: Sc in every stitch (6).
Round 7: Inc, sc x2. Then repeat for the rest of the round (8).
Round 8: Dec, sc x2. Then repeat for the rest of the round (6).
Round 9-13: Sc in every stitch (6). Fasten off (for 2 of these legs - leave long tails for sewing) and stuff. Make sure to only stuff the first half of the legs and not the top part where it will connect to the spider body.
Sewing:
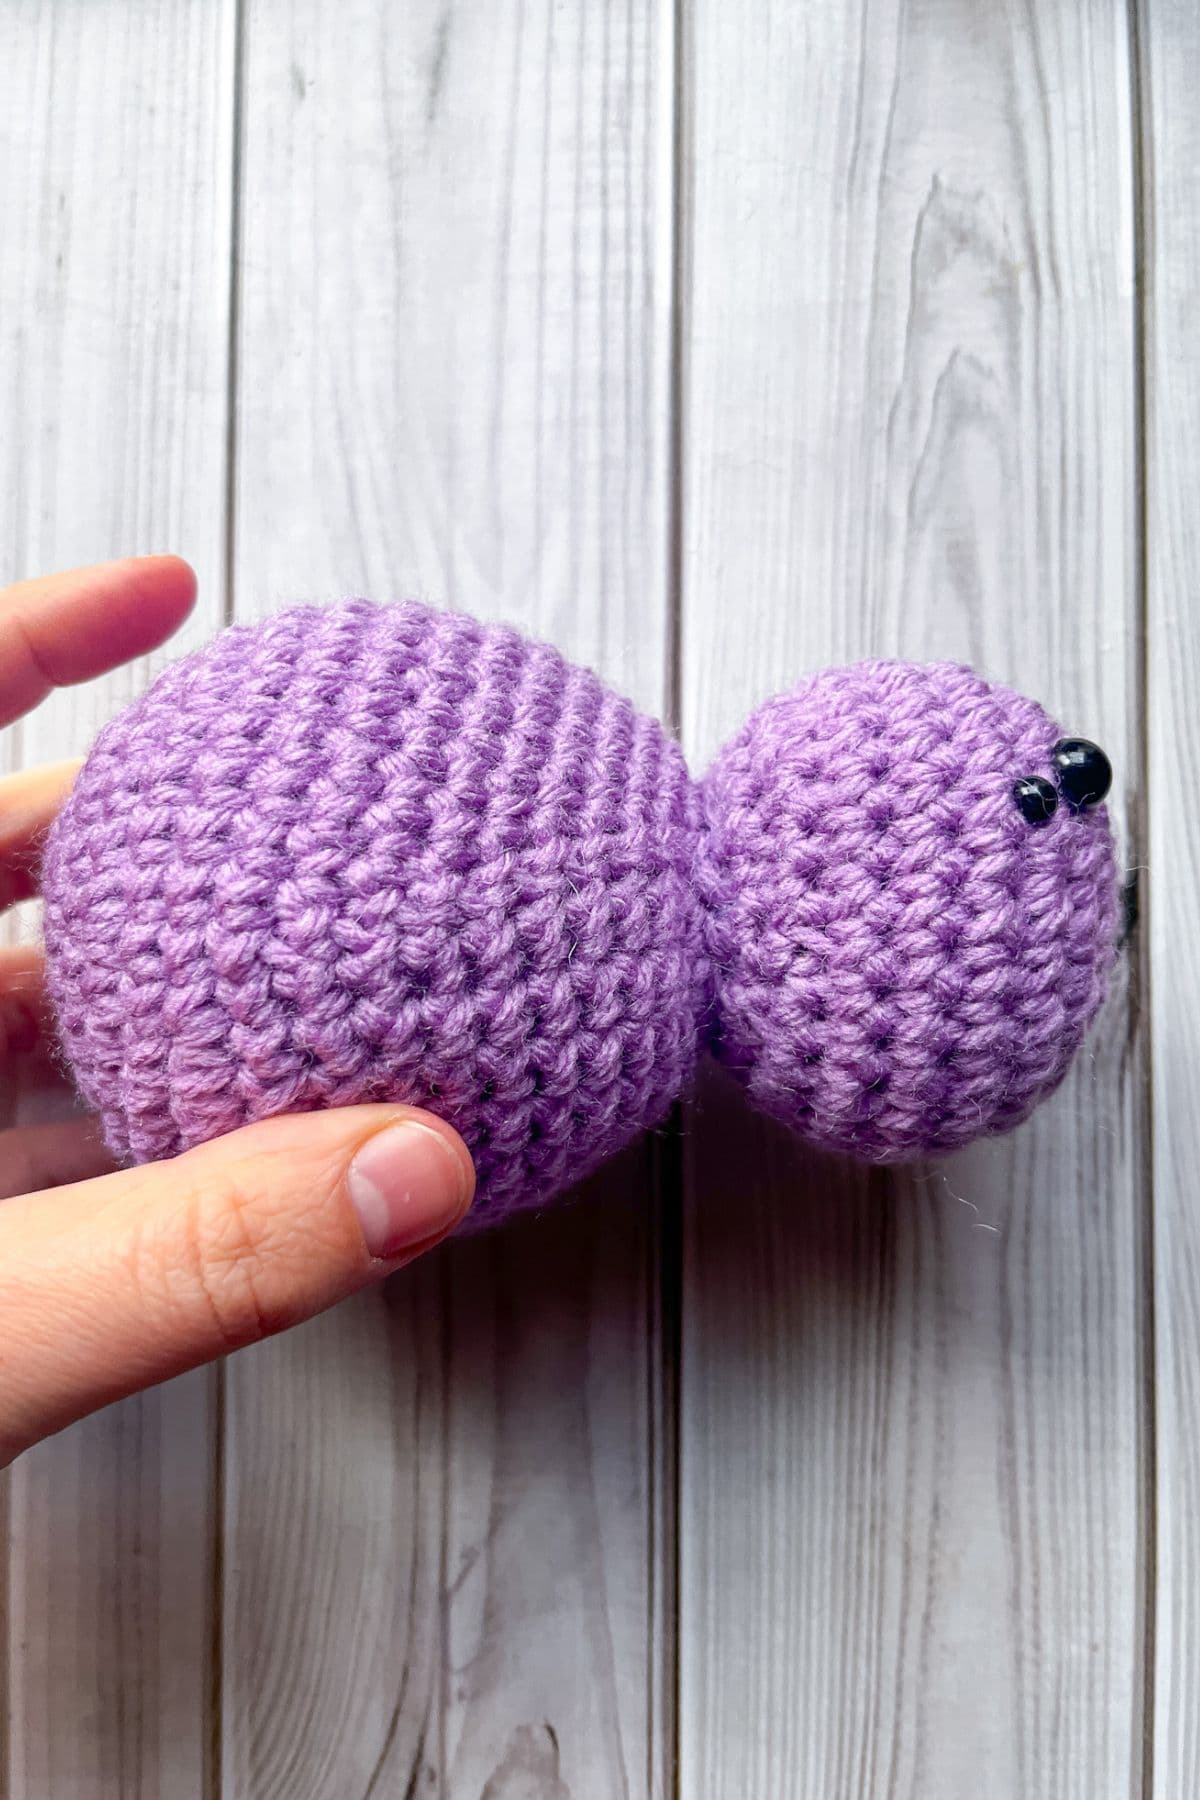
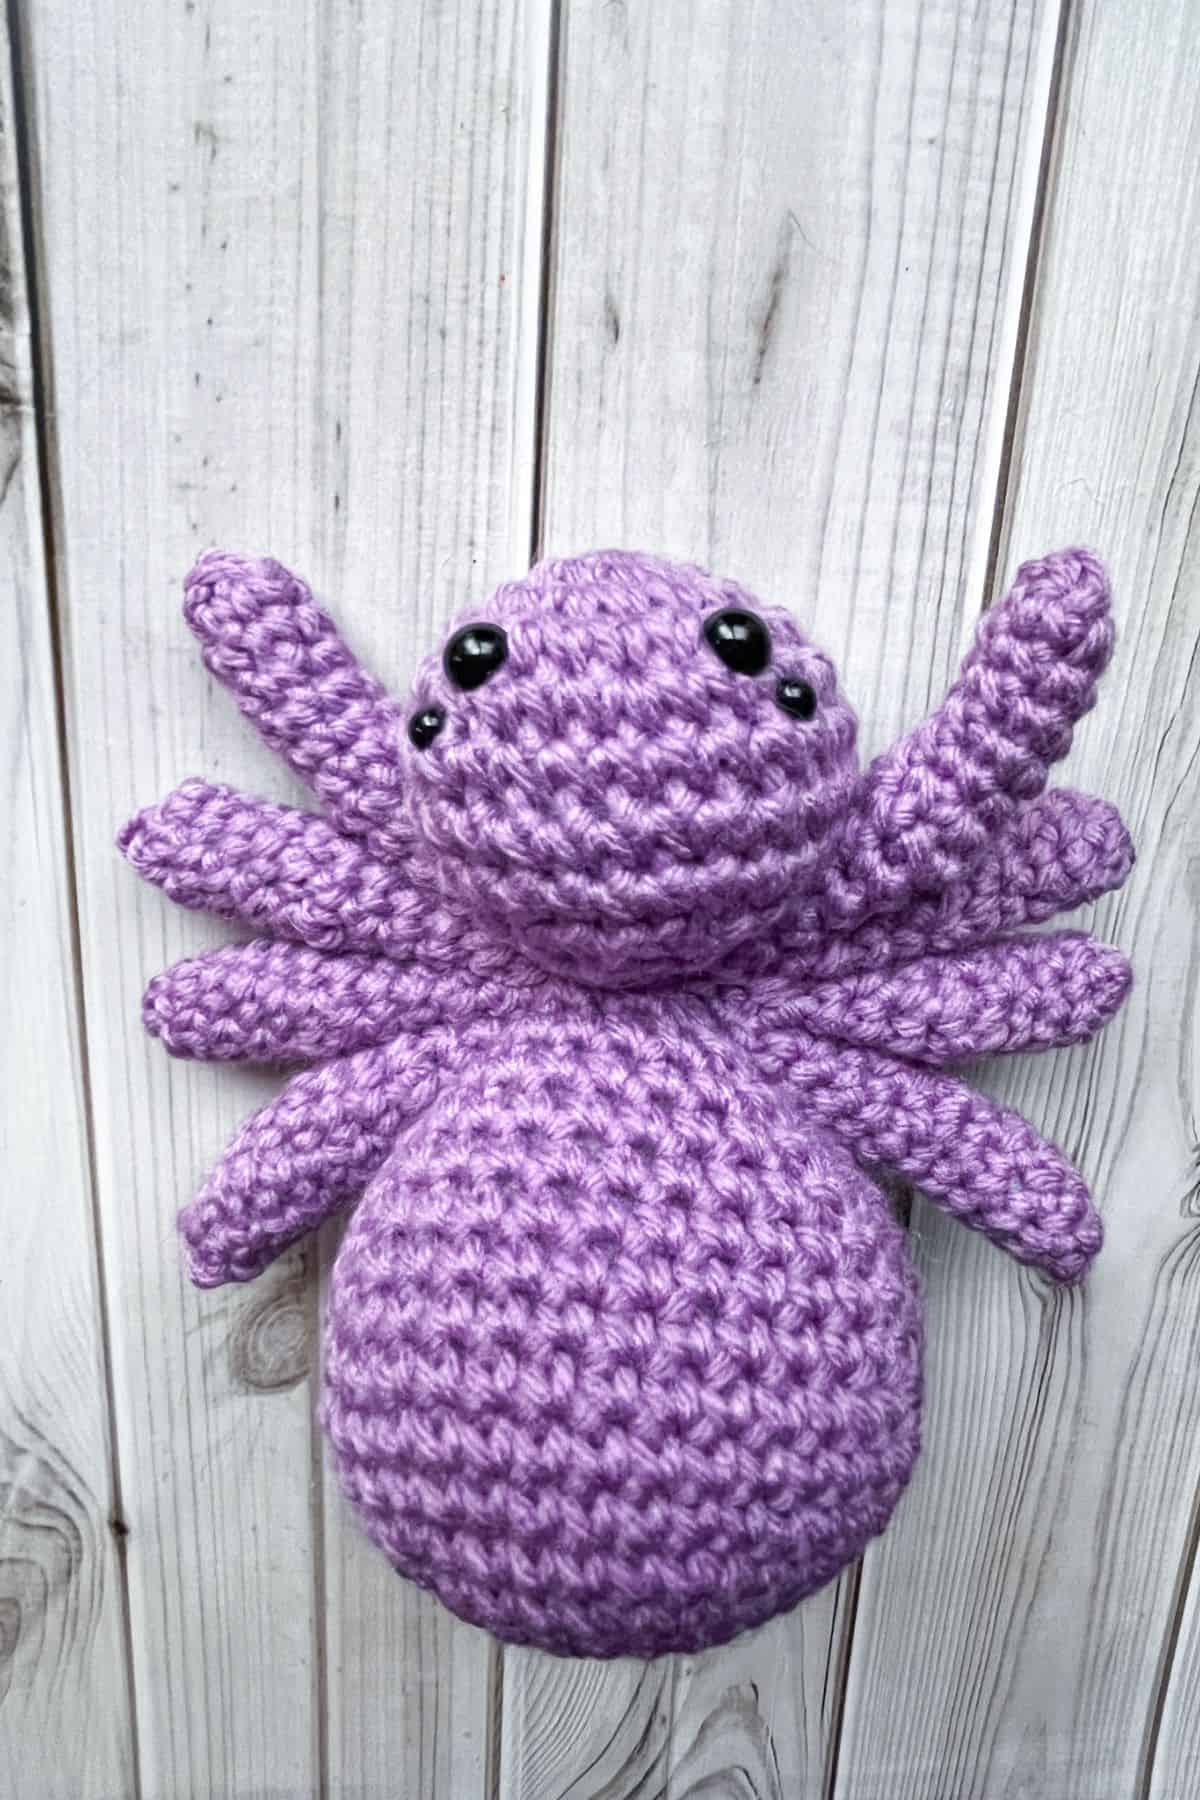
Sew the head to the body.
For the legs take 2 of the shorter legs and sandwich them between 2 of the longer legs. Then sew through all 4 legs at once until all 4 legs are sewn shut and together. Then sew to the point where the spider head and body connect. You can sew it to that spot by going through the neck and then go back through the neck to its original side. Do that a few times to make it secure. Fasten off and weave in the end.
Attach the other set of legs to the other side of the spider in the same way. Fasten off and weave in the end.
And now you have a crochet spider made from my free crochet spider pattern! I hope you loved learning how to crochet a spider!
If you want to make more crochet Halloween decor check out my crochet potion bottle pillow pattern or my crochet ghost coaster pattern!
🐌Expert Tips
- Choosing Yarn and Hook: Opt for softer acrylic or cotton yarn for the free crochet spider pattern, huggable finish. Larger hooks paired with chunky yarns can make a statement piece, while smaller hooks give you detailed, compact spiders.
- Safety Eyes: Experiment with safety eye placements to create various expressions. You can even use felt circles to add more character to the eyes before attaching them.
- Color Combinations: Mix different shades for a striped or multicolored spider to make the crochet spider pattern more playful or unique.
- Stuffing Technique: For more realistic leg positions with the free crochet spider pattern, only stuff the ends of the legs. This allows for a more natural bend and flexibility when posing your spider.
🧵 Pattern FAQs
The crochet spider pattern could be 3-5 times bigger, depending on the yarn and hook size.
Absolutely! You can change the colors, make it larger or smaller, or add embellishments like appliqués on its body.
If you prefer yarning under for amigurumi, go ahead! I find yarning over more natural.
🧶More Crochet Halloween Patterns


If you tried this Free Crochet Spider Pattern (or any other pattern on my website), please let me know how it went in the 📝 comments below. I'd love to hear from you!
Free Crochet Spider Pattern
Materials
- Caron One Pound - lilac
- H hook 5mm
- Tapestry needle
- Polyfill stuffing
- 2 sets of safety eyes I used 6mm and 9mm
Abbreviations (US terms)
- Magic ring - mr
- Single crochet - sc
- Increase (inc) - 2 stitches in 1 stitch
- Decrease (dec) - 1 stitch in 2 stitches
Notes
- Yarn Options: I used acrylic worsted weight yarn for this free crochet spider pattern, but you can use any type of yarn. Note that using chunky yarn will make a much larger crochet spider.
- Safety Eyes: I used two different pairs of safety eyes for the spider crochet pattern. The sizing doesn't matter as long as they are two different sizes.
- Finished Size: The finished spider plushie is roughly 6 inches long.
Instructions
- For the free crochet spider pattern, we will be working in rounds.
Crochet Spider Head:
- Round 1: Using light purple yarn, make a MR and make sc x6 in the circle. If you find it difficult making a magic ring you can chain 2 and then crochet sc x6 in the second chain from the hook (6).
- Round 2: Inc in every sc (12).
- Round 3: Inc, sc. Then repeat until end of round (18).
- Round 4: Inc, sc x2. Then repeat until end of round (24).
- Round 5: Inc, sc x3. Then and repeat until end of round (30).
- Round 6-8: Sc in every stitch (30)
- Round 9: Dec, sc x3 and repeat for the rest of the round (24). Make sure you add your safety eyes before decreasing: the larger eyes should be between rounds 4 and 5 with 3 stitches in between them, and the smaller eyes are between rounds 5 and 6 one stitch diagonal from the large eyes.
- Round 10: Dec, sc x2. Then repeat for the rest of the round (18). Stuff the head.
- Round 11: Dec, sc. Then repeat for the rest of the round (12).
- Round 12: Dec and repeat for the rest of the round (6). Fasten off and weave in the tail.
Crochet Spider Body:
- Round 1: Make a MR and make sc x6 in the circle (6).
- Round 2: Inc in every sc (12).
- Round 3: Inc, sc. Then repeat until end of round (18).
- Round 4: Inc, sc x2. Then repeat until end of round (24).
- Round 5: Inc, sc x3. Then repeat until end of round (30).
- Round 6: Inc, sc x4. Then repeat until end of round (36).
- Round 7: Inc, sc x5. Then repeat until end of round (42).
- Round 8-9: Sc for the entire round (42).
- Round 10: Dec, sc x12. Then repeat for the entire round (39).
- Round 11: Dec, sc x11. Then repeat for the entire round (36).
- Round 12: Dec, sc x10. Then repeat for the entire round (33).
- Round 13: Dec, sc x9. Then repeat for the entire round (30).
- Round 14: Dec, sc x8. Then repeat for the entire round (27).
- Round 15: Dec, sc x7. Then repeat for the entire round (24). Begin stuffing the body.
- Round 16: Dec, sc x6. Then repeat for the entire round (21).
- Round 17: Dec, sc x5. Then repeat for the entire round (18).
- Round 18: Dec, sc x4. Then repeat for the entire round (15). Fasten off and leave a tail for sewing.
Crochet Spider Legs:
Shorter legs x4:
- Round 1: Make a MR and make sc x6 in the circle (6).
- Round 2-5: Sc in every stitch (6).
- Round 6: Inc, sc x2. Then repeat for the rest of the round (8)
- Round 7: Dec, sc x2. Then repeat for the rest of the round (6)
- Round 8-11: Sc in every stitch (6). Fasten off and stuff. Make sure to only stuff the first half of the legs and not the top part where it will connect to the spider body.
Longer legs x4:
- Round 1: Make a MR and make sc x6 in the circle (6).
- Round 2-6: Sc in every stitch (6).
- Round 7: Inc, sc x2. Then repeat for the rest of the round (8).
- Round 8: Dec, sc x2. Then repeat for the rest of the round (6).
- Round 9-13: Sc in every stitch (6). Fasten off (for 2 of these legs - leave long tails for sewing) and stuff. Make sure to only stuff the first half of the legs and not the top part where it will connect to the spider body.
Sewing:
- Sew the head to the body.
- For the legs take 2 of the shorter legs and sandwich them between 2 of the longer legs. Then sew through all 4 legs at once until all 4 legs are sewn shut and together. Then sew to the point where the spider head and body connect. You can sew it to that spot by going through the neck and then go back through the neck to its original side. Do that a few times to make it secure. Fasten off and weave in the end.
- Attach the other set of legs to the other side of the spider in the same way. Fasten off and weave in the end.
- And now you have a crochet spider made from my free crochet spider pattern!
- If you want to make more crochet Halloween decor check out my crochet potion bottle pillow pattern or my crochet ghost coaster pattern!


Janina says
The pattern is perfect.
In the end I was afraid of sewing the 8 (!!) legs to the body. But then the pattern said to connect the legs first, genius! I was really relieved ^^
Kimberly Arenas says
The less sewing the better! 🙂
Gretchen M Crawford says
Very cute and works up so fast! Perfect addition for Halloween decor!
Tiffany Geier says
The long leg rows are numbered wrong.
Kimberly Arenas says
Thanks for catching my mistake! I have updated the pattern to show the correct number for the rounds 🙂
Tamarinde Lampshire says
Spider turns out great… thanks for the pattern! It was easy to follow and went quickly… my kids loved them!
Kimberly Arenas says
Im glad you liked the pattern!
Jen C says
Made Spider with Bernat blanket yarn. Joined the head and body without finishing the two parts; basically sewed them together stitch for stitch. Came out super cute. Thank you very much for pattern.
Kimberly Arenas says
I'm glad you liked the pattern!
Judy Richardson says
Love, love the Spider, easy to do to the end thank you so much for the pattern…
Thelma says
I am sorry but I am not sure what a crochet pattern or stitch "MR" is??
I am anxious to get started-alsois there any way you could email the pattern for the spider/snail... glad you are here...
Kimberly Arenas says
Hi there, MR stands for magic ring, also known as MC magic circle. I unfortunately cannot email the pattern, however there is a pattern card at the bottom of the post similar to a "recipe" card. This card can be printed or saved on most devices. I hope you enjoy the pattern!
Laurent Tyrone says
I've done the body, but as I was performing the decreases each round, it began to take on a triangular shape. Pretty sure I'm doing the sc dec correctly, so not sure what's up. Please help!
Kimberly Arenas says
Since you are decreasing each round in only 3 places evenly spaced out it can appear triangular or tapered, whereas a normal decrease of 6 appears more circular. This is normal and shouldn't affect the overall outcome when stuffed.
Kelly says
Idk what I'm doing wrong.
On round 10 of the body when I do it I end up with 30 stitches instead of 39.
Kimberly Arenas says
Hi there, before starting round 10, make sure you have 42 stitches from the previous round. Round 10 is a decrease then single crochet in the next 12 stitches. This sequence of stitches requires 14 stitches to work in from the previous round, which will turn into 13 stitches this round because of the decrease. This sequence will be repeated a total of 3 times for Round 10. So you will lose 3 stitches in total for the round making the 42 stitches go down to 39.
Alex says
i just saw this on The Faded Wildflower Crochet : youtube https://youtu.be/caF3y7E1j7o?si=--mV6bRMrL3nMeLB
it looks great so i had to check out the website
Kimberly Arenas says
Yay! I'm glad you found me and hope you enjoy my patterns!
Helen Valdes says
Hi what kind of yarn do I use to make rhe spider?
Kimberly Arenas says
I used Caron One Pound Lilac for the light purple spider and Red Heart Dark Orchid for the darker purple spider.
Jessica says
I made this with chunky yarn and it came out soo cute!! Great pattern 😃
Kimberly Arenas says
I bet it is so soft! I hope you enjoy your new spider friend!
Amber says
This was so easy to follow and fun to make! I did a sparkly teal color and my son is obsessed with it.
So cute!
Lori says
Easy to read and follow!! Turned out really cute!
KimberlyArenas says
Thank you! I'm glad you enjoy the pattern 🙂