
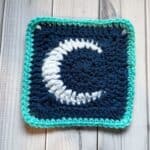
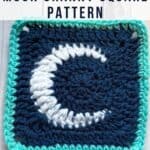
Bring a sense of celestial and mystery to your next project with my Crochet Moon Granny Square Pattern. Fun, cute, and a little spooky, but most importantly - easy to make.
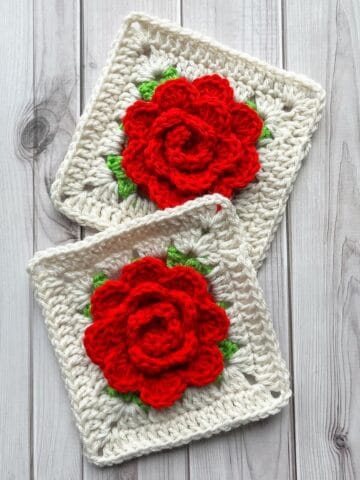
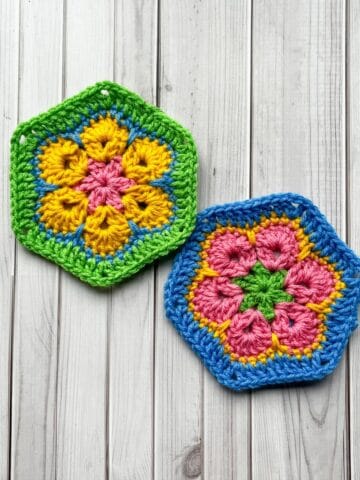
I love creating unique granny squares, such as my Crochet Heart Granny Square Pattern, Bat Granny Square Pattern and Lemon Granny Square Crochet Pattern.
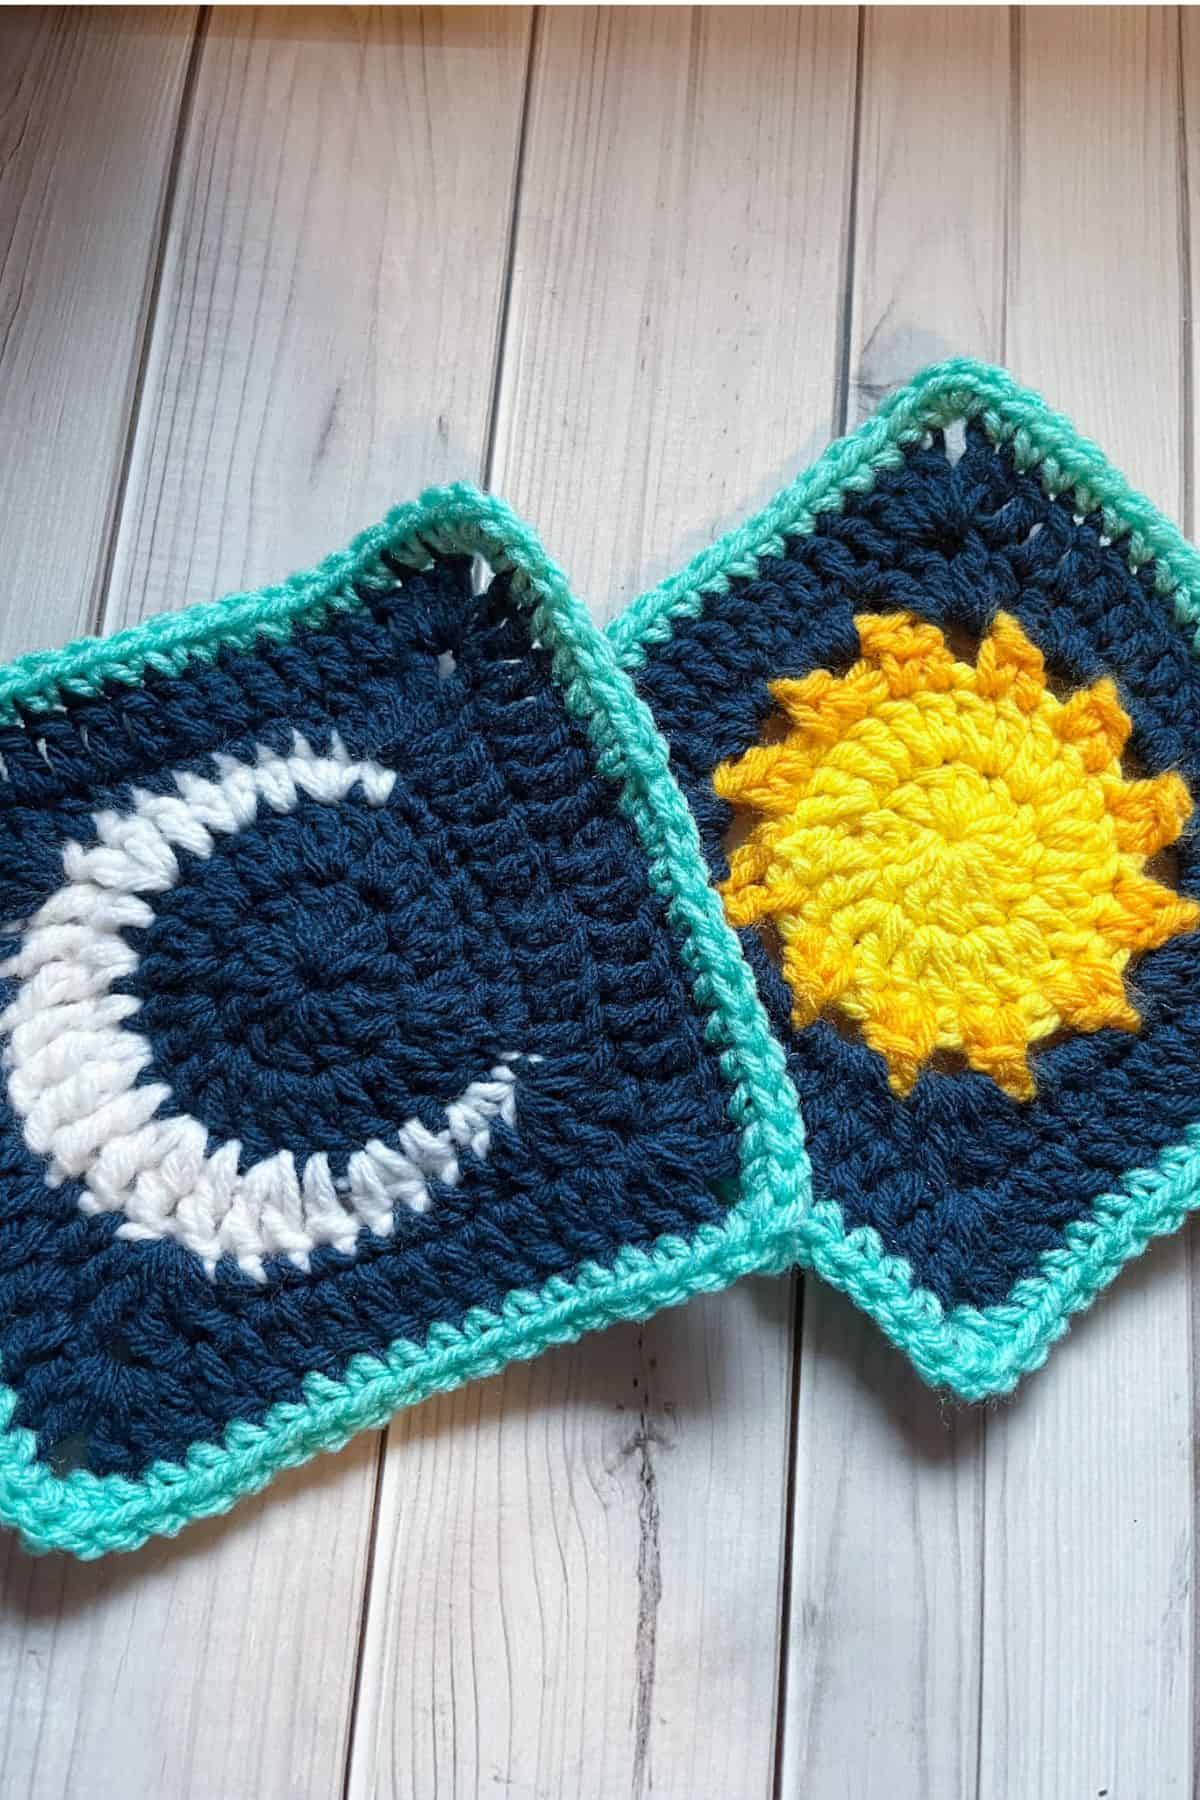
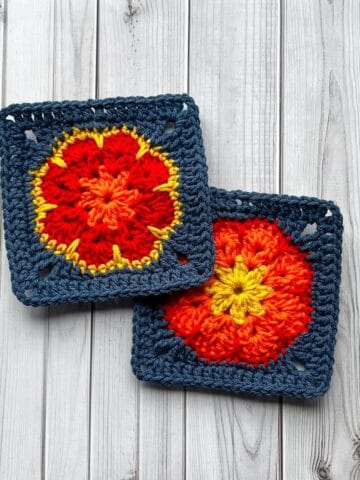
The moon granny square pattern came about when I was inspired to design a hexi cardi for my celestial loving friend. I wanted to make her some unique pockets, and a crochet moon granny square pocket seemed perfect. After a few tries, I think I finally got it right! Now she has both moon and Sun Granny Square pockets.
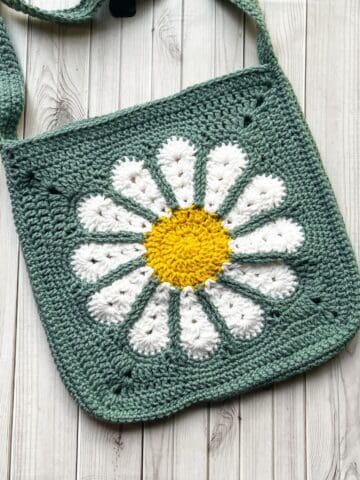
This crochet moon granny square is easy to follow and versatile. You can use it to create bags, blankets, coasters, cardigans, and more.
So, let's begin!
Jump to:
✏️ Things To Note:
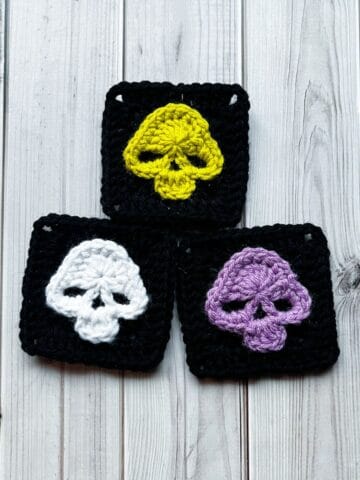
- Yarn Options: I made my crochet moon granny squares with new skeins, but you can also use scrap yarn if you're only making a few. They don’t use up much yarn at all.
- Beginner-Friendly: The crochet moon granny square pattern is fairly simple and beginner-friendly.
- Size Adjustments: The finished crescent moon granny square pattern measures roughly 6 inches. To make a smaller version, simply omit the last round or the single crochet round when squaring off the moon.
🪡 Materials Needed
💭Abbreviations to Remember (US terms)
- Magic ring - mr
- Chain - ch
- Single crochet - sc
- Double crochet - dc
- Half double crochet - hdc
- Triple crochet - tr
- Extended triple crochet - extended tr
- Slip stitch - sl st
- Increase - inc
🍵Instructions for Moon Granny Square Pattern
The moon granny square pattern is made in the round.
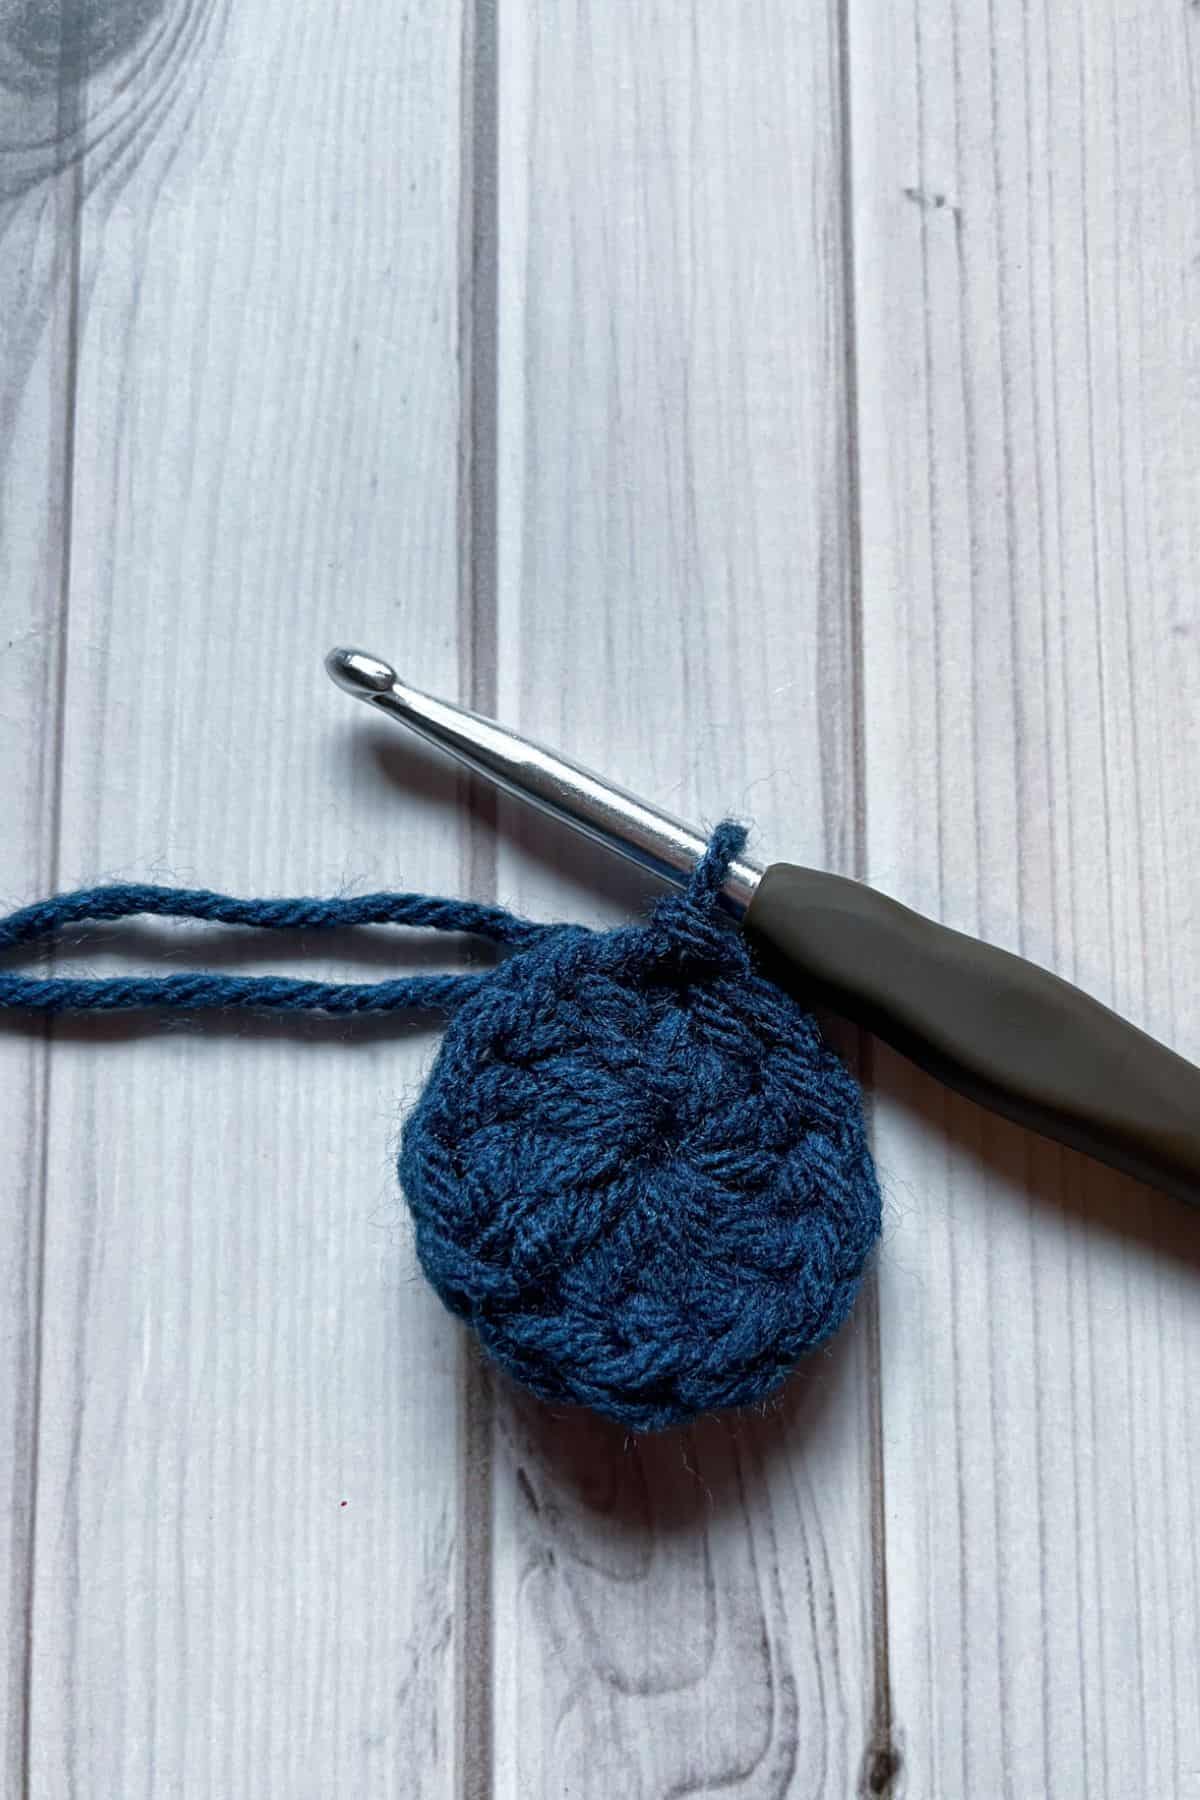
Round 1: With the blue yarn, make a mr, next ch x2 (DOES NOT COUNT AS A STITCH) and then dc x12 into the mr, sl st to first dc (12). If you find it difficult making a magic ring you can chain 4, slip stitch it together, and then in the newly formed circle, ch x2 and dc x12 in the hole, then sl st to first dc. (12)
Round 2: Ch x2, dc inc in every dc, sl st to first dc. (24)
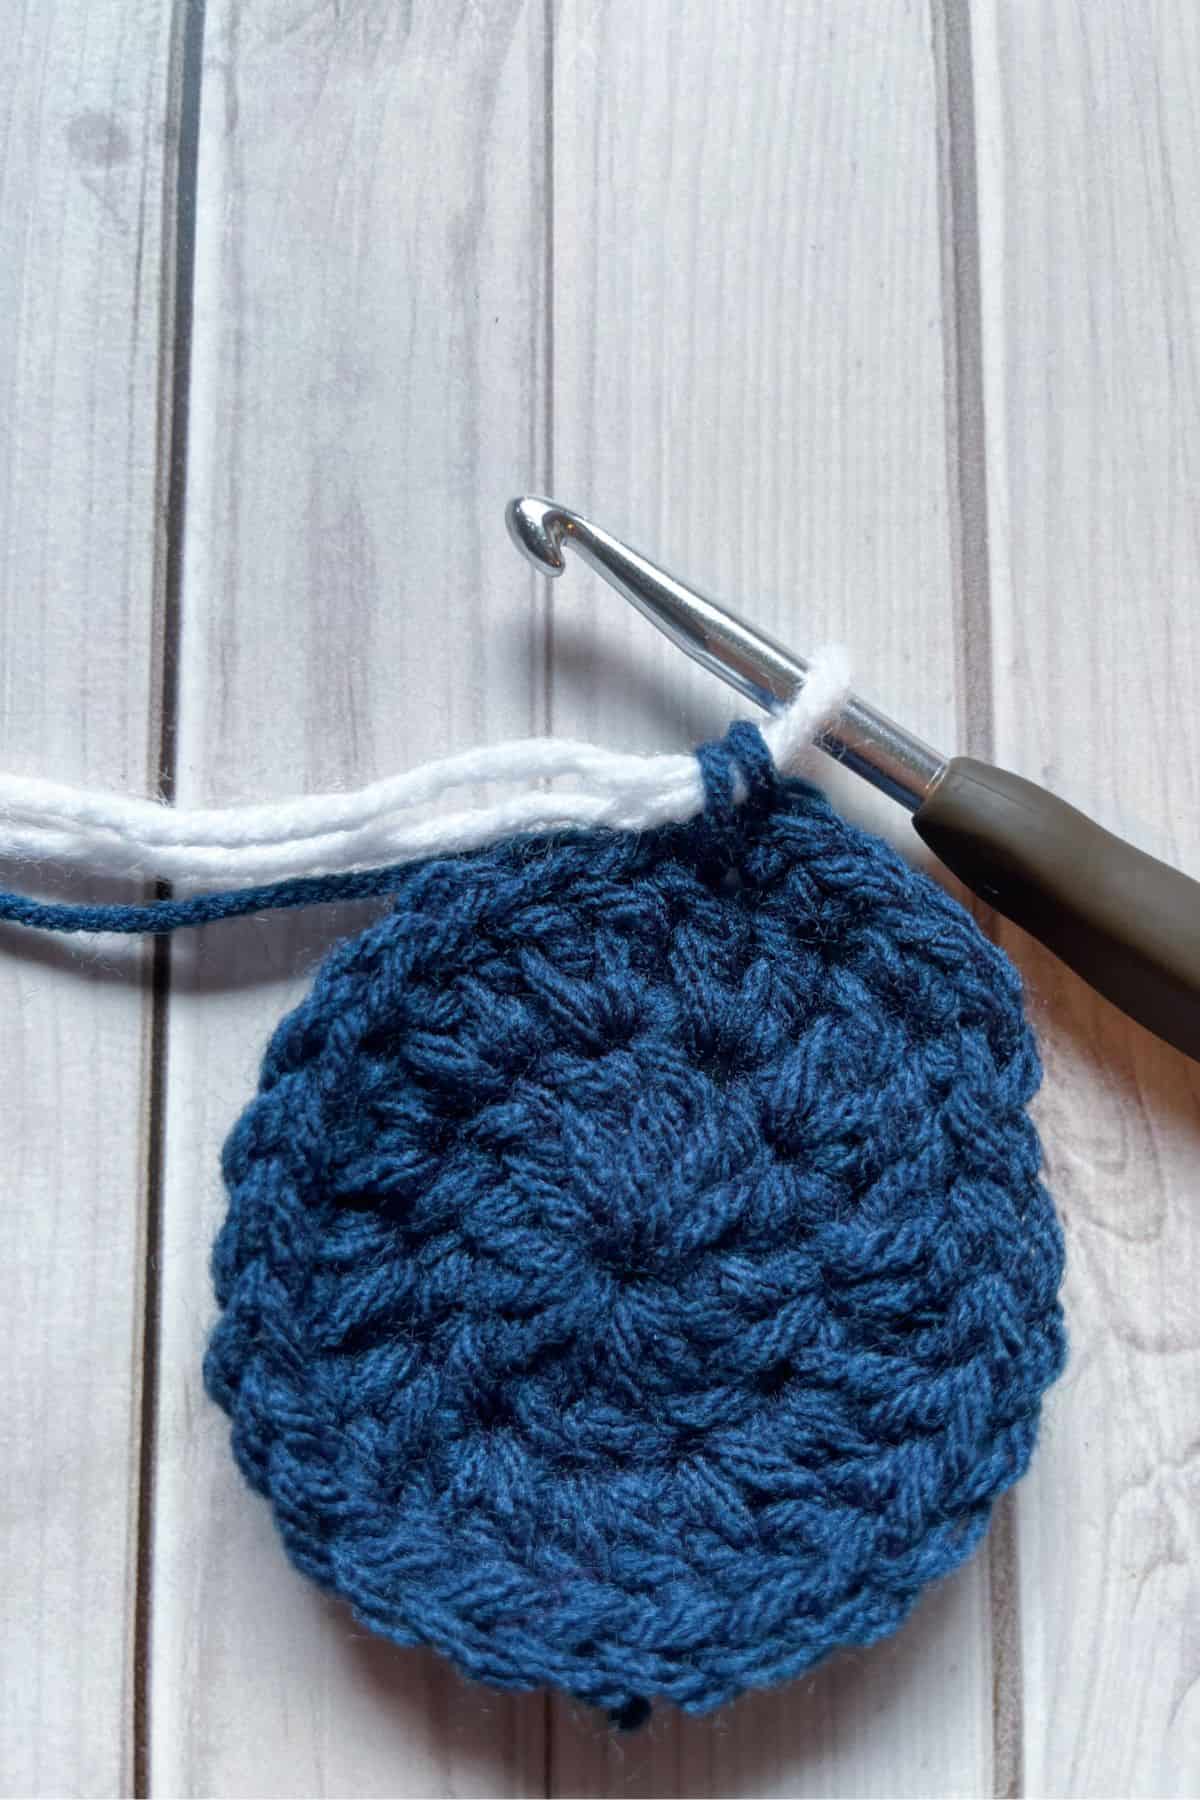
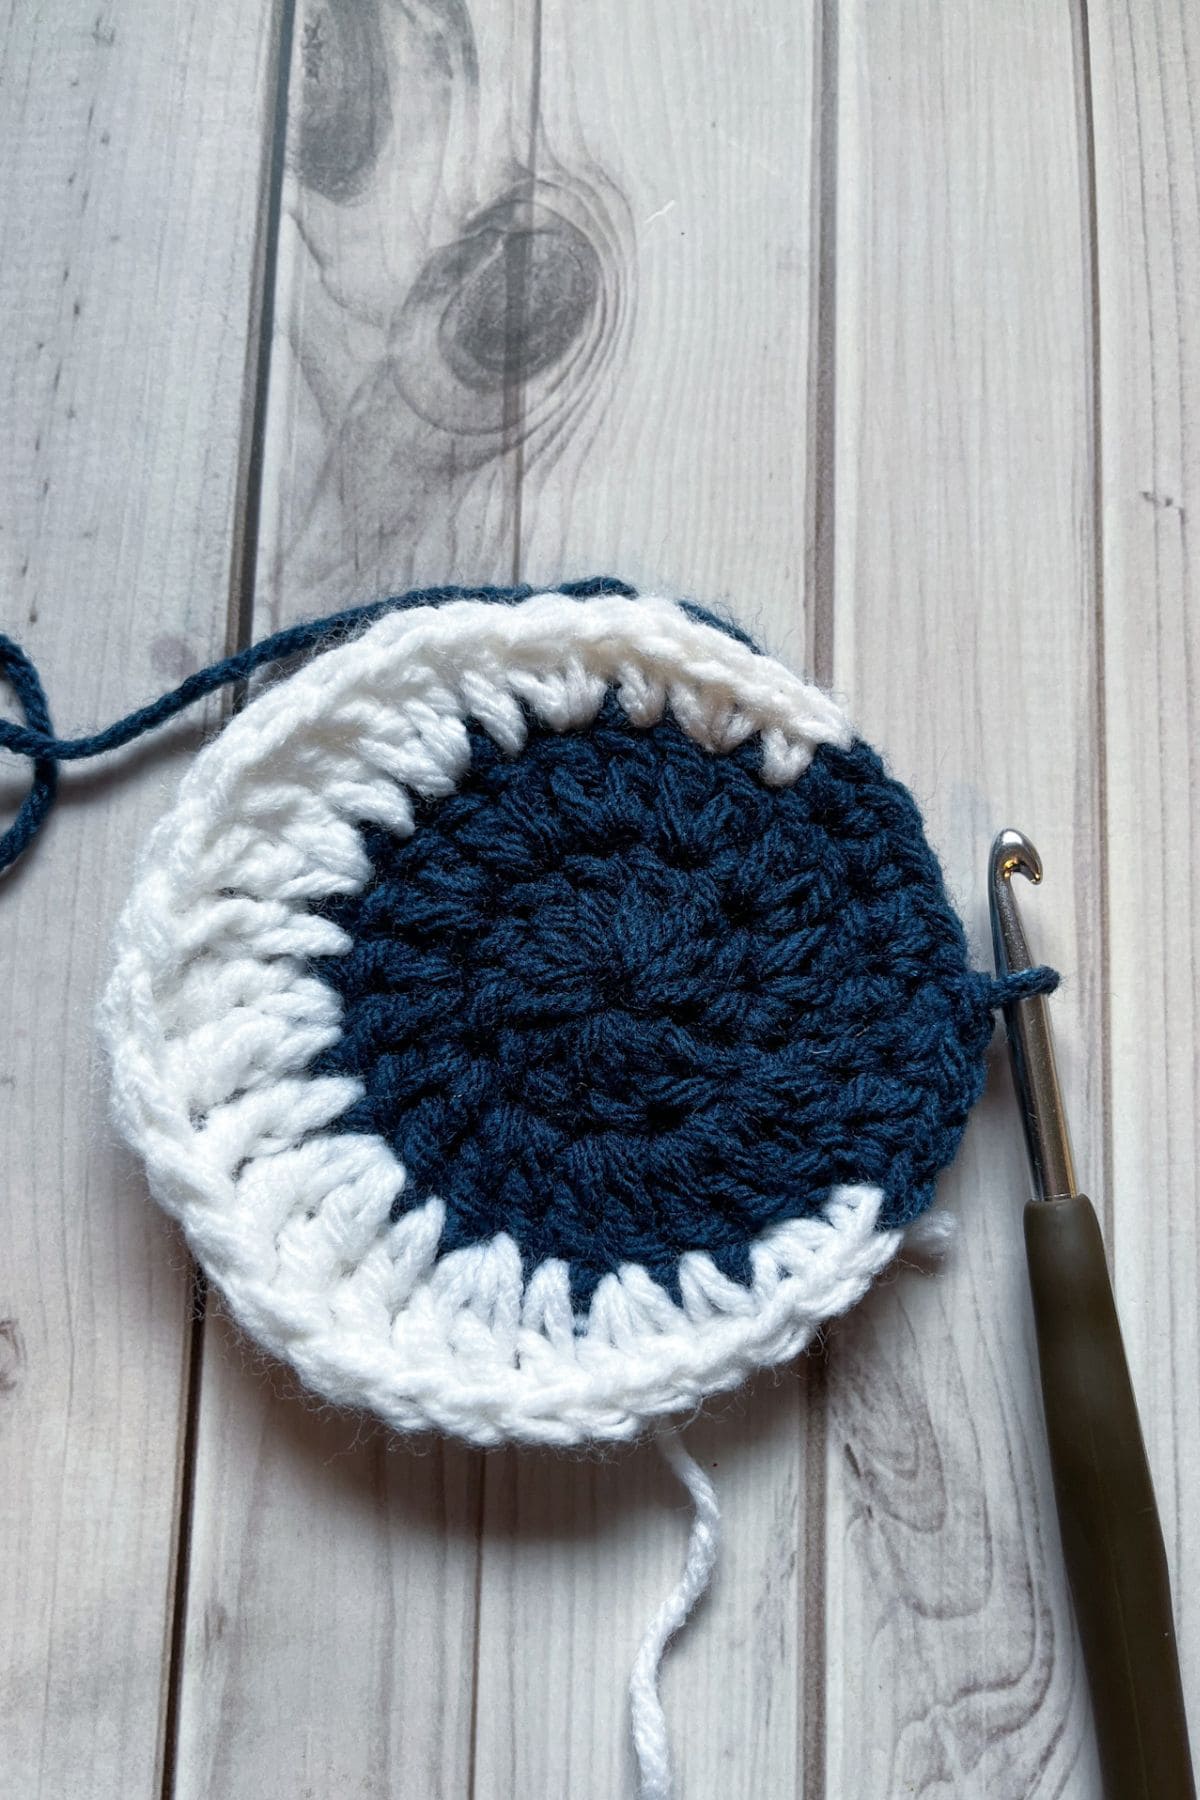
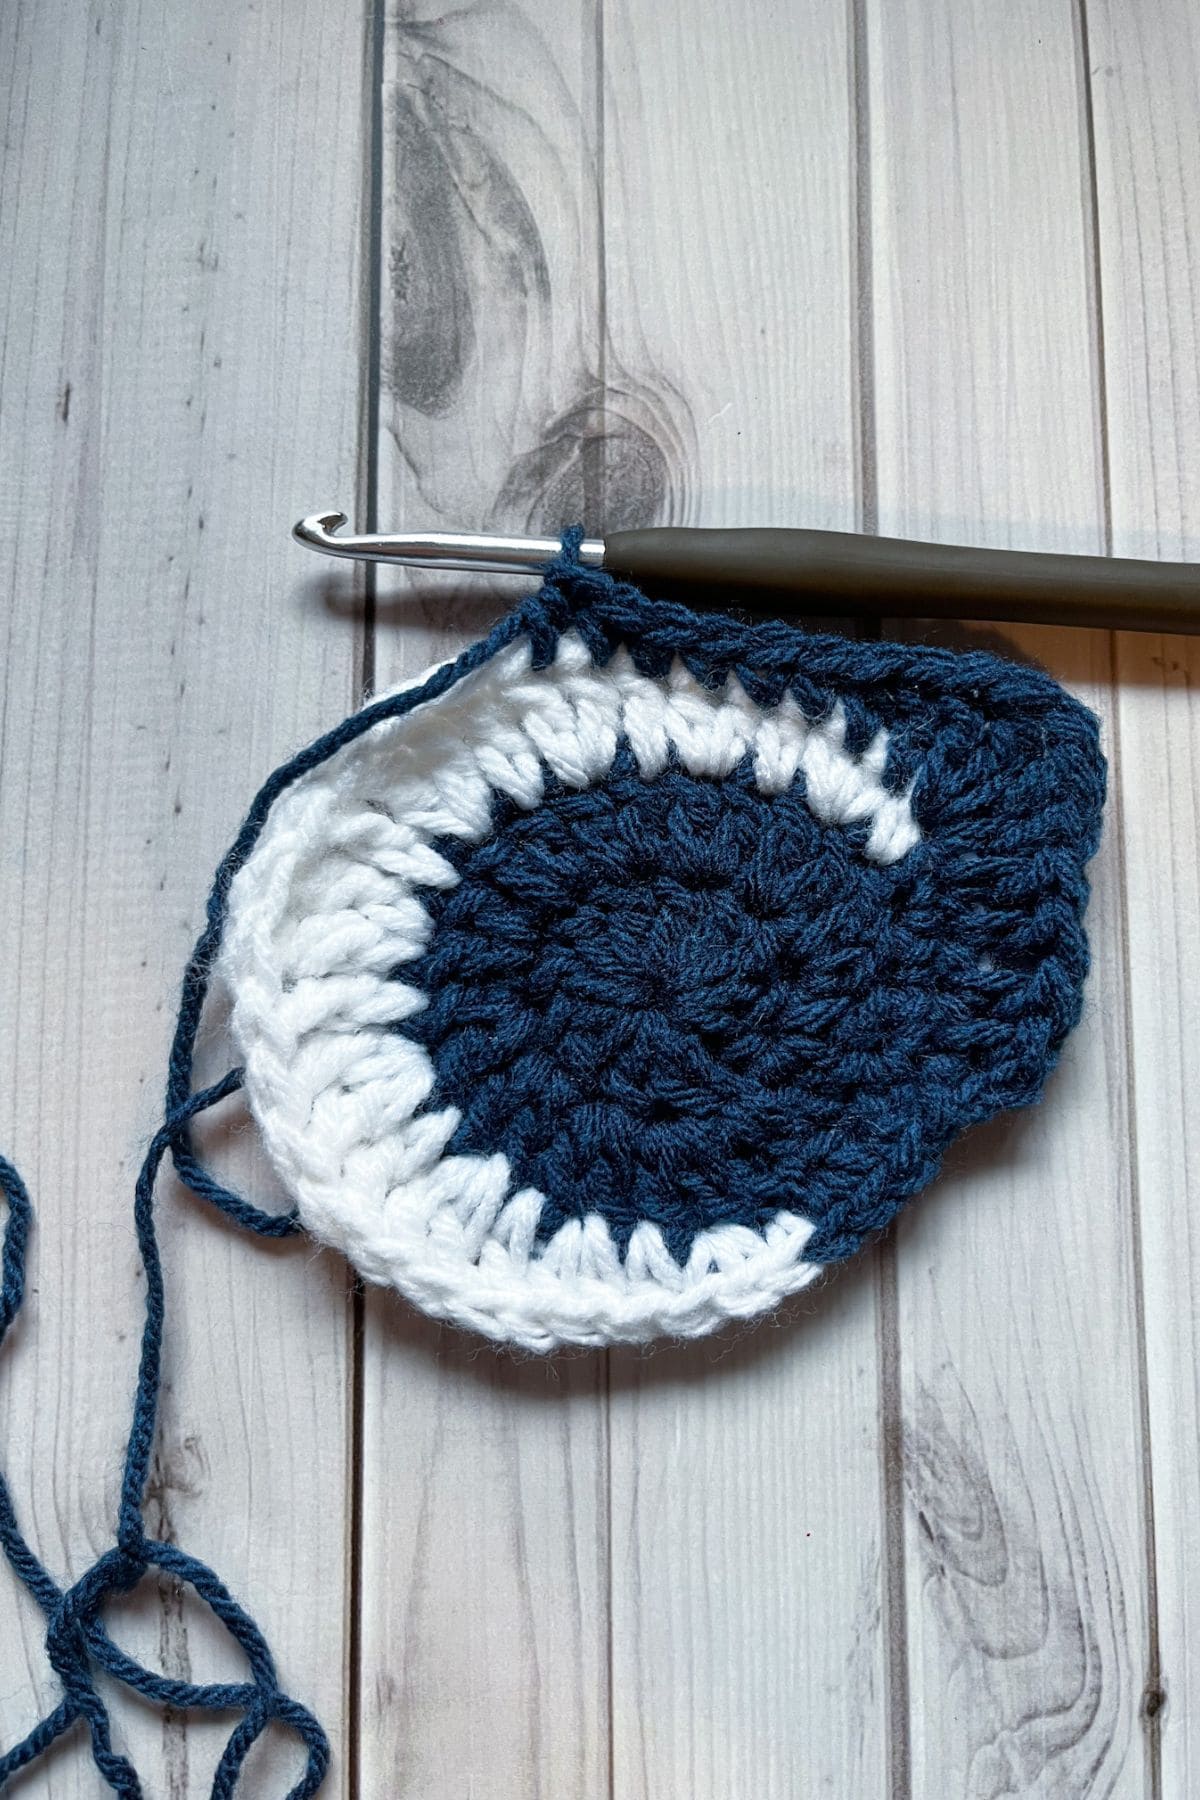
Round 3: Ch x1 and then sc inc, sc, sc inc in blue.
Then change the color to white, don't fasten off the blue yarn just carry it underneath the white stitches.
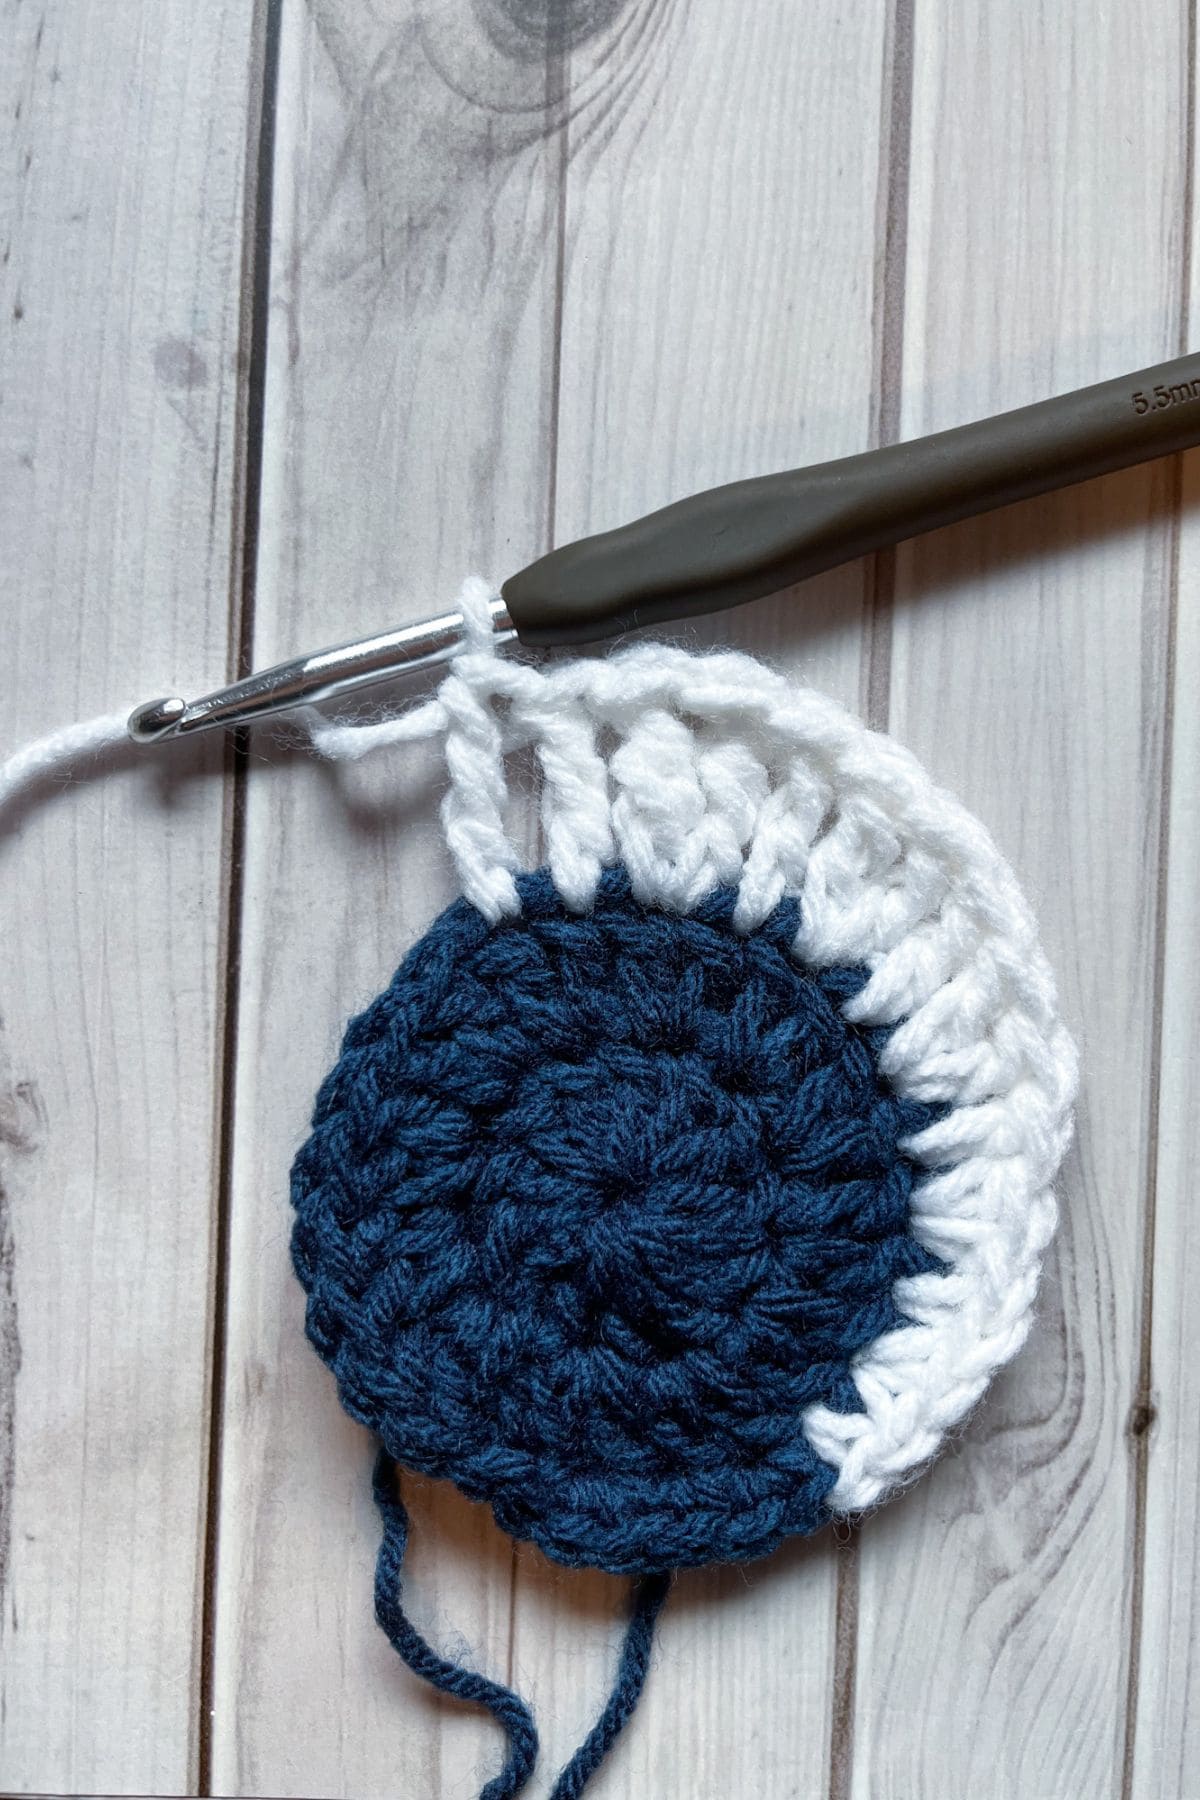
With the white yarn, make the following sequence of stitches for the moon:
Sc, sc inc, hdc, hdc inc, dc, dc inc, tr, tr inc, tr, extended tr inc, tr, tr inc, tr, dc inc, dc, hdc inc, hdc, sc inc, sc.
Fasten off the white and switch the color back to navy.
With the blue yarn:
Sc inc, sc and then sl st to the first sc in the round (skip the chain).
You should have 8 blue stitches (5 at the beginning of the round and 3 at the end of the round) and 28 white stitches for this round (36).
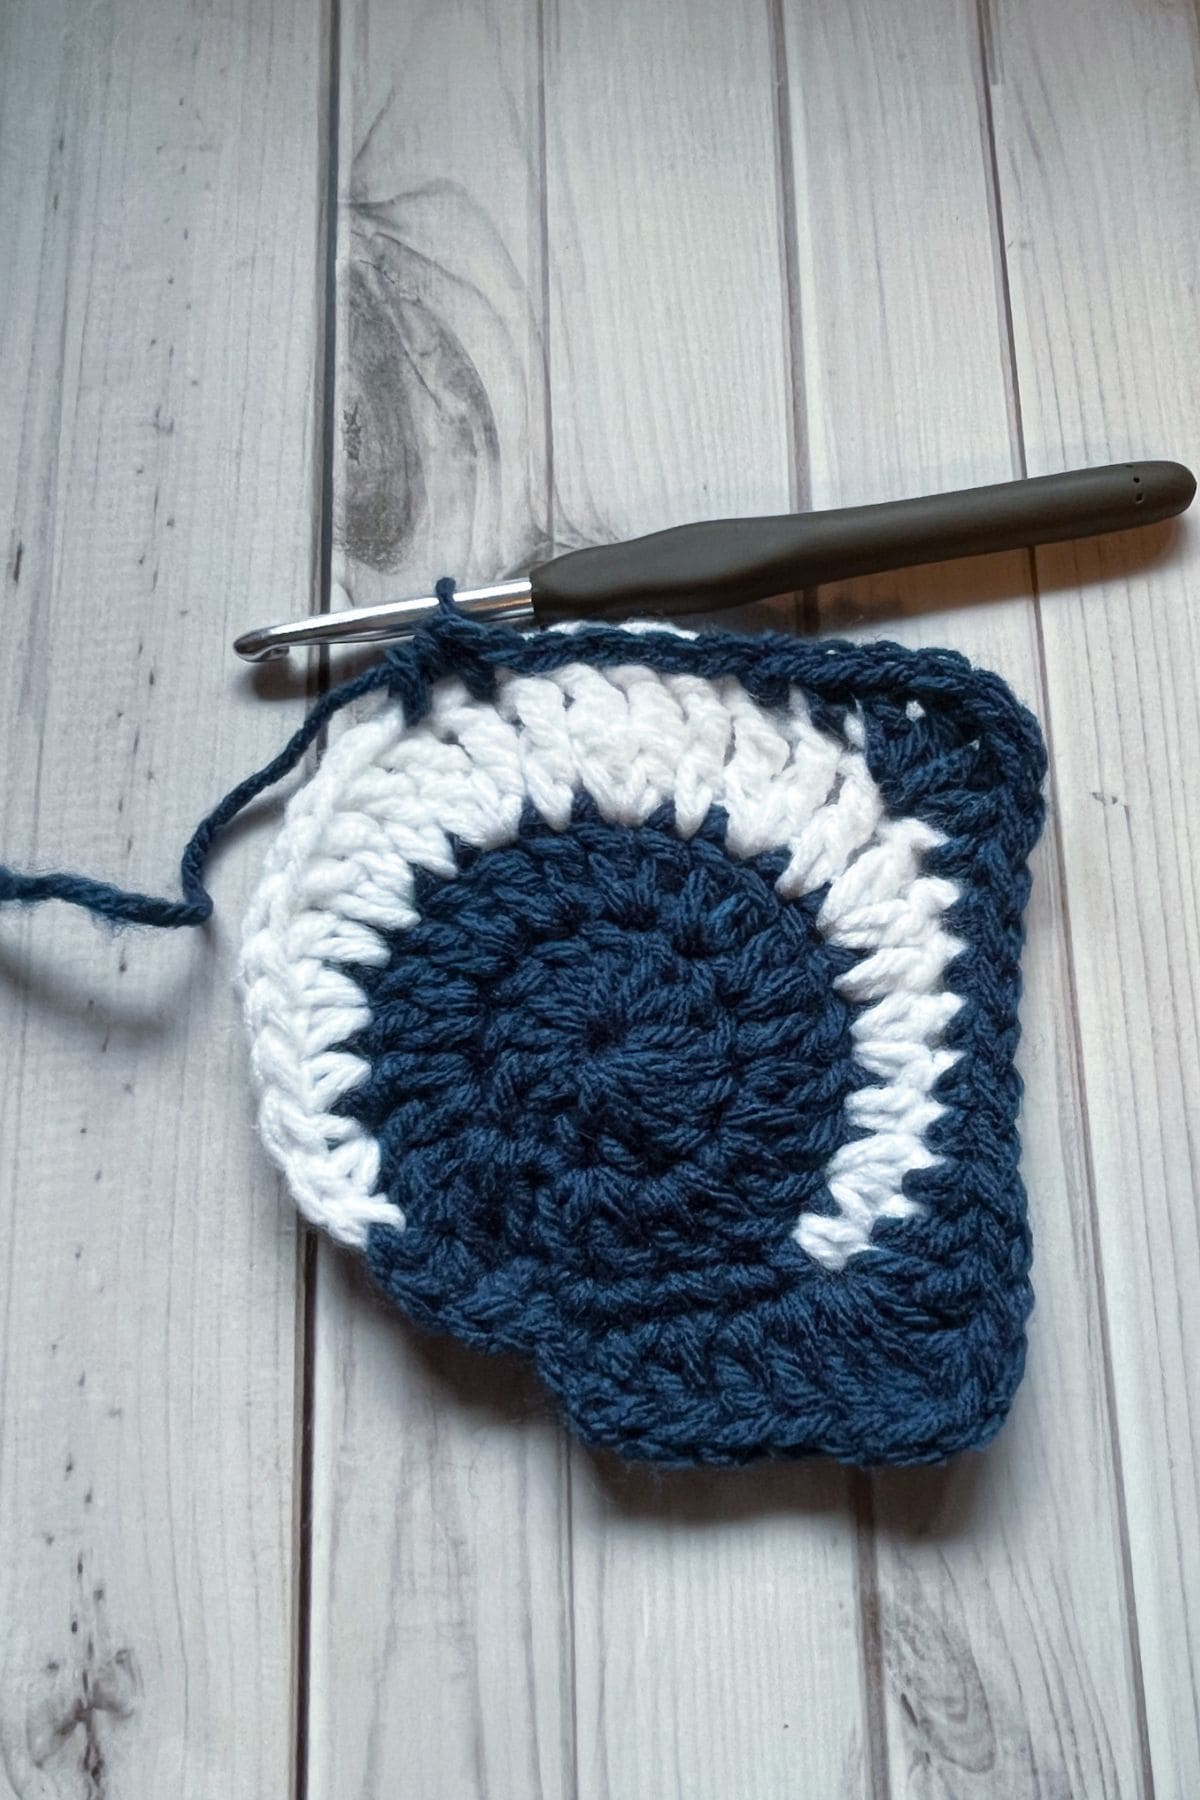
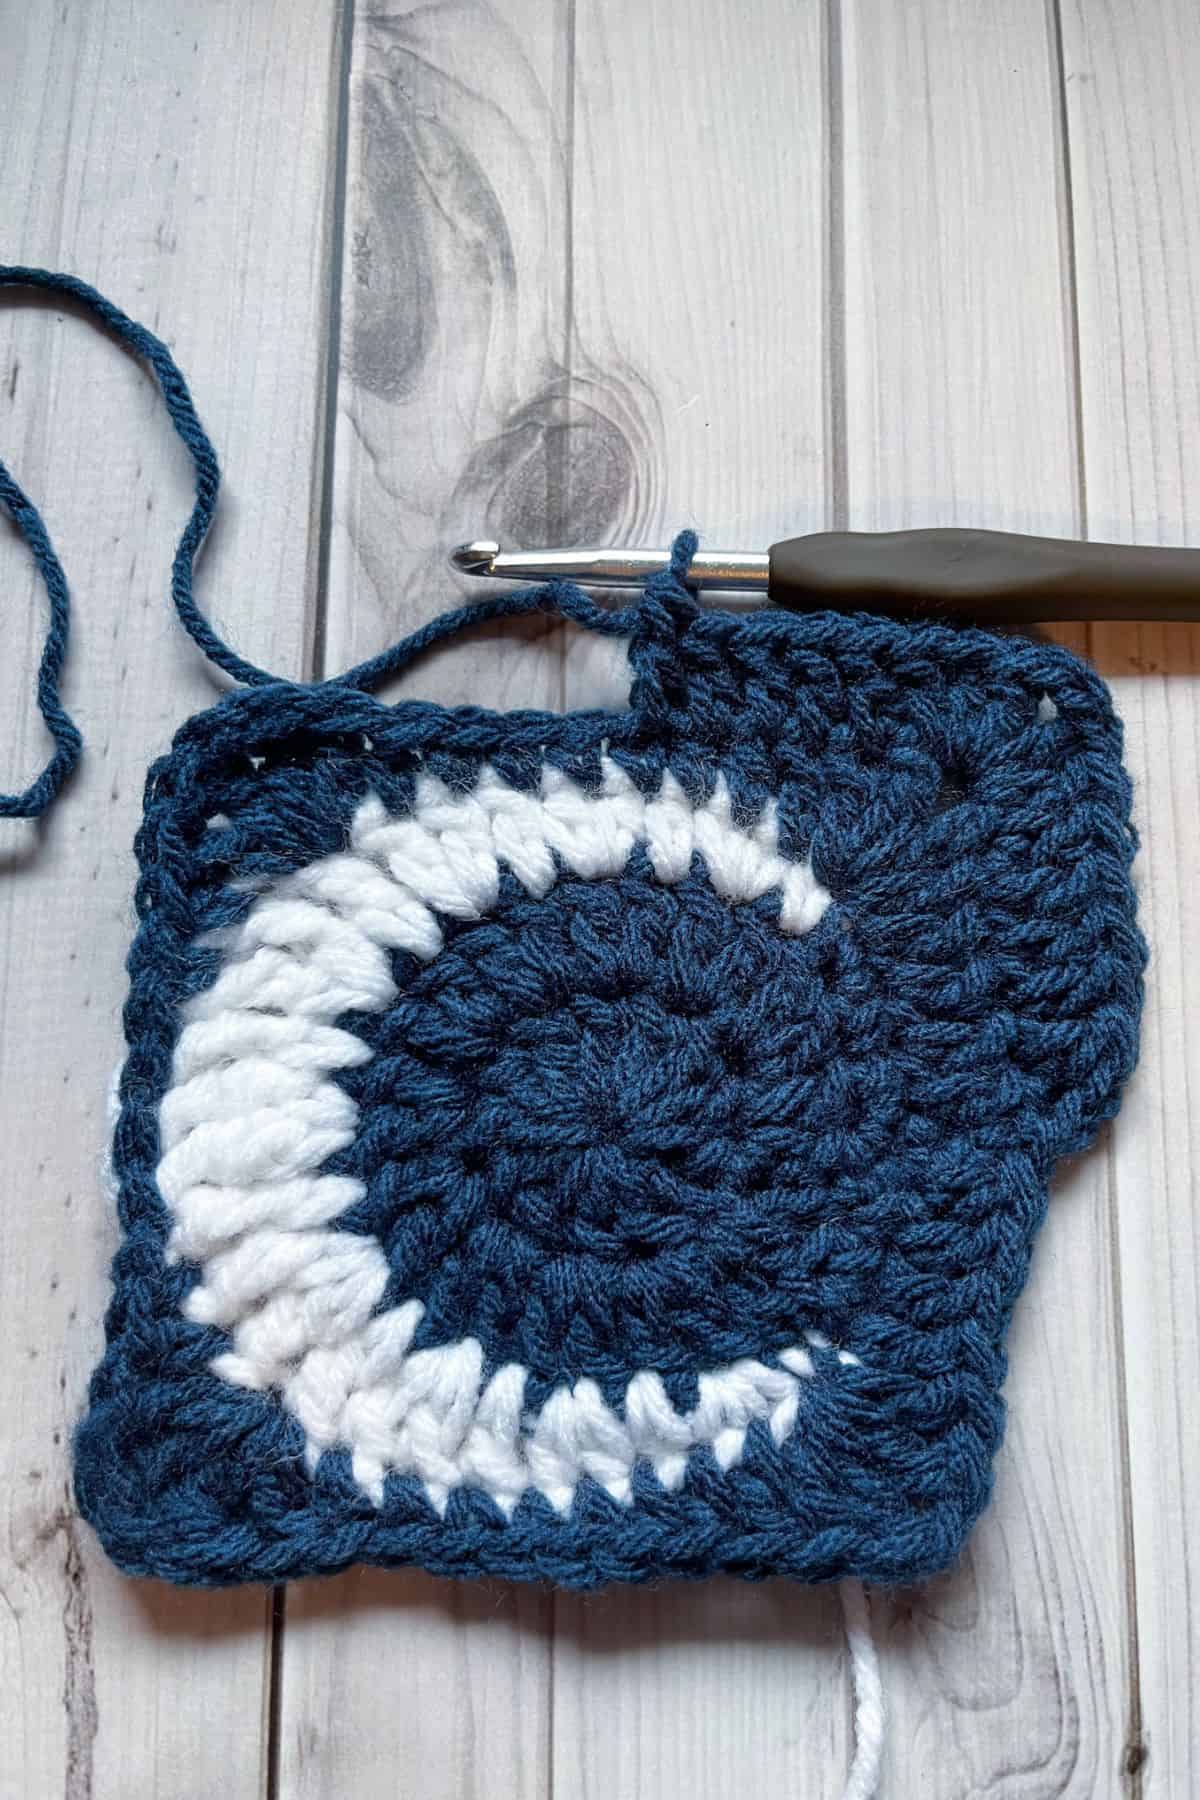
Round 4: Ch x2, hdc in the next 3 stitches, then a dc in the last blue stitch. Then make a (dc + tr + ch + tr + dc) in the next stitch. This is the first corner and is made in the first white stitch of the last round.
In the next 8 stitches make: dc, hdc x2, sc x4, hdc
Make the second corner: (dc + tr + ch + tr + dc) in the next stitch.
In the next 8 stitches make: hdc, sc, sl st x4, sc, hdc
Make the third corner: (dc + tr + ch + tr + dc) in the next stitch.
In the next 8 stitches make: hdc, sc x4, hdc x2, dc
Make the fourth corner: (dc + tr + ch + tr + dc) in the next stitch.
Dc, then hdc in each of the next 3 stitches. Sl st to 1st hdc top in the round.
Each side should have 8 stitches plus the corners (2 + 1 ch +2). Total stitches - 48 + 4 chains.
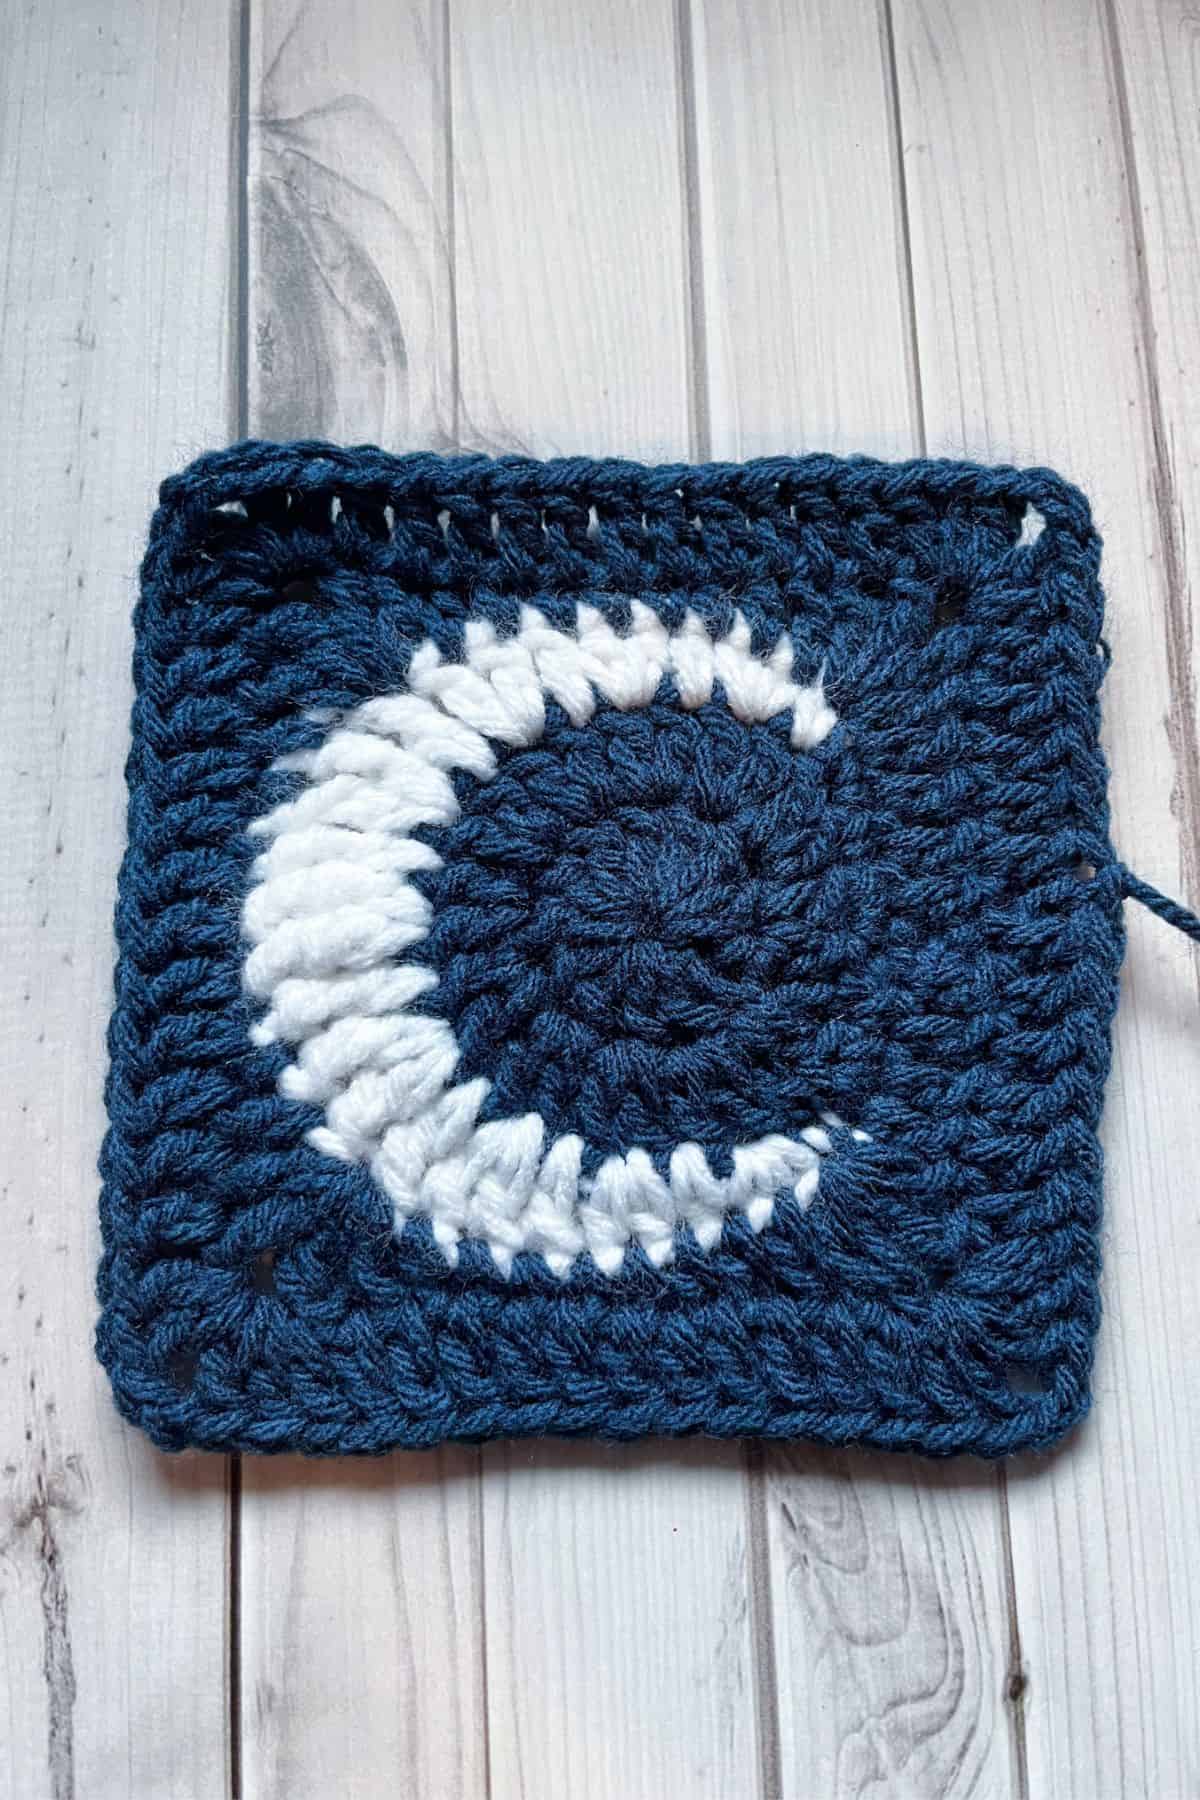
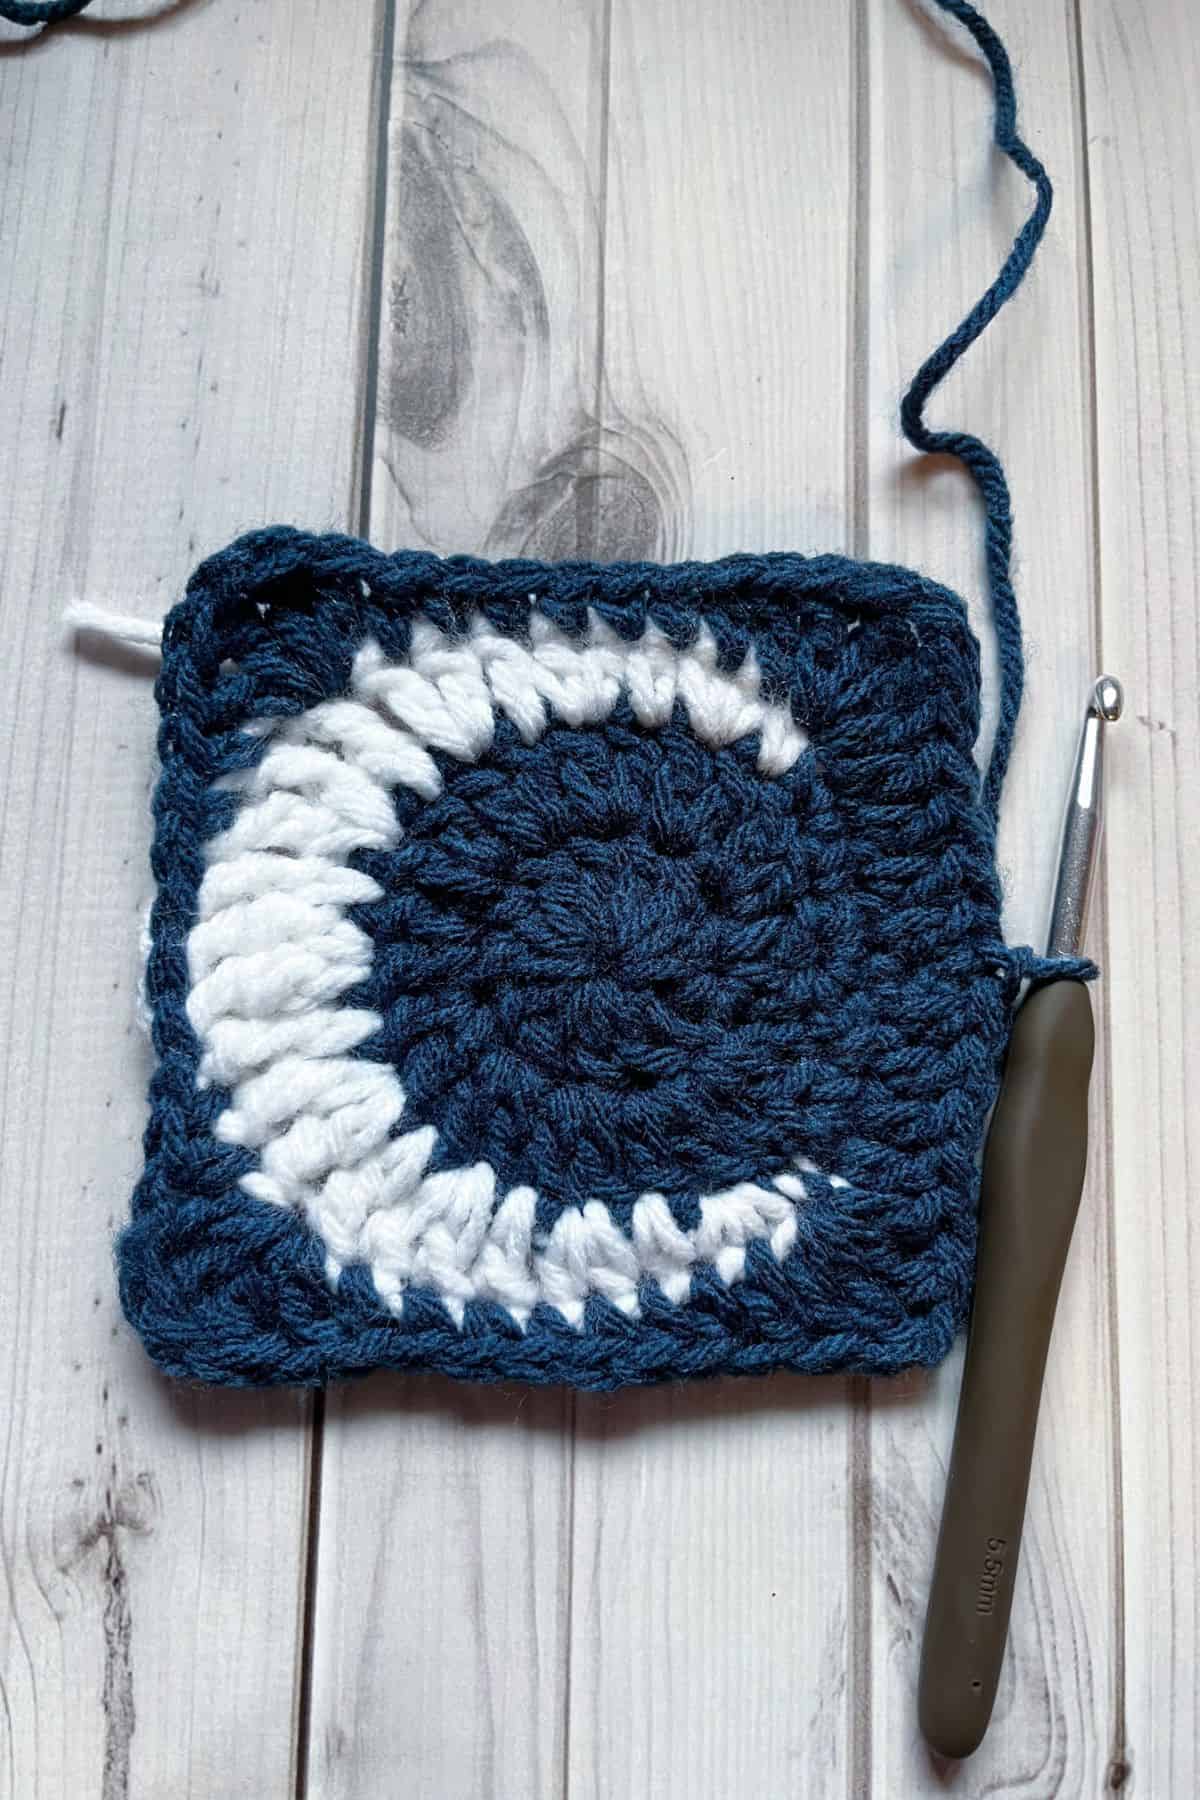
Round 5: Ch x2, then dc in the next couple of stitches. When you get to the chain space in the corner make a dc inc + ch x2 + dc inc. Then dc the side of the square (12 per side without the corners). Repeat 3 more times for the rest of the round.
Once you make the last dc in the round, sl st to the first dc.
You should have a total of 64 dc stitches and 8 chains.
Then fasten off the yarn and switch the color to turqua.
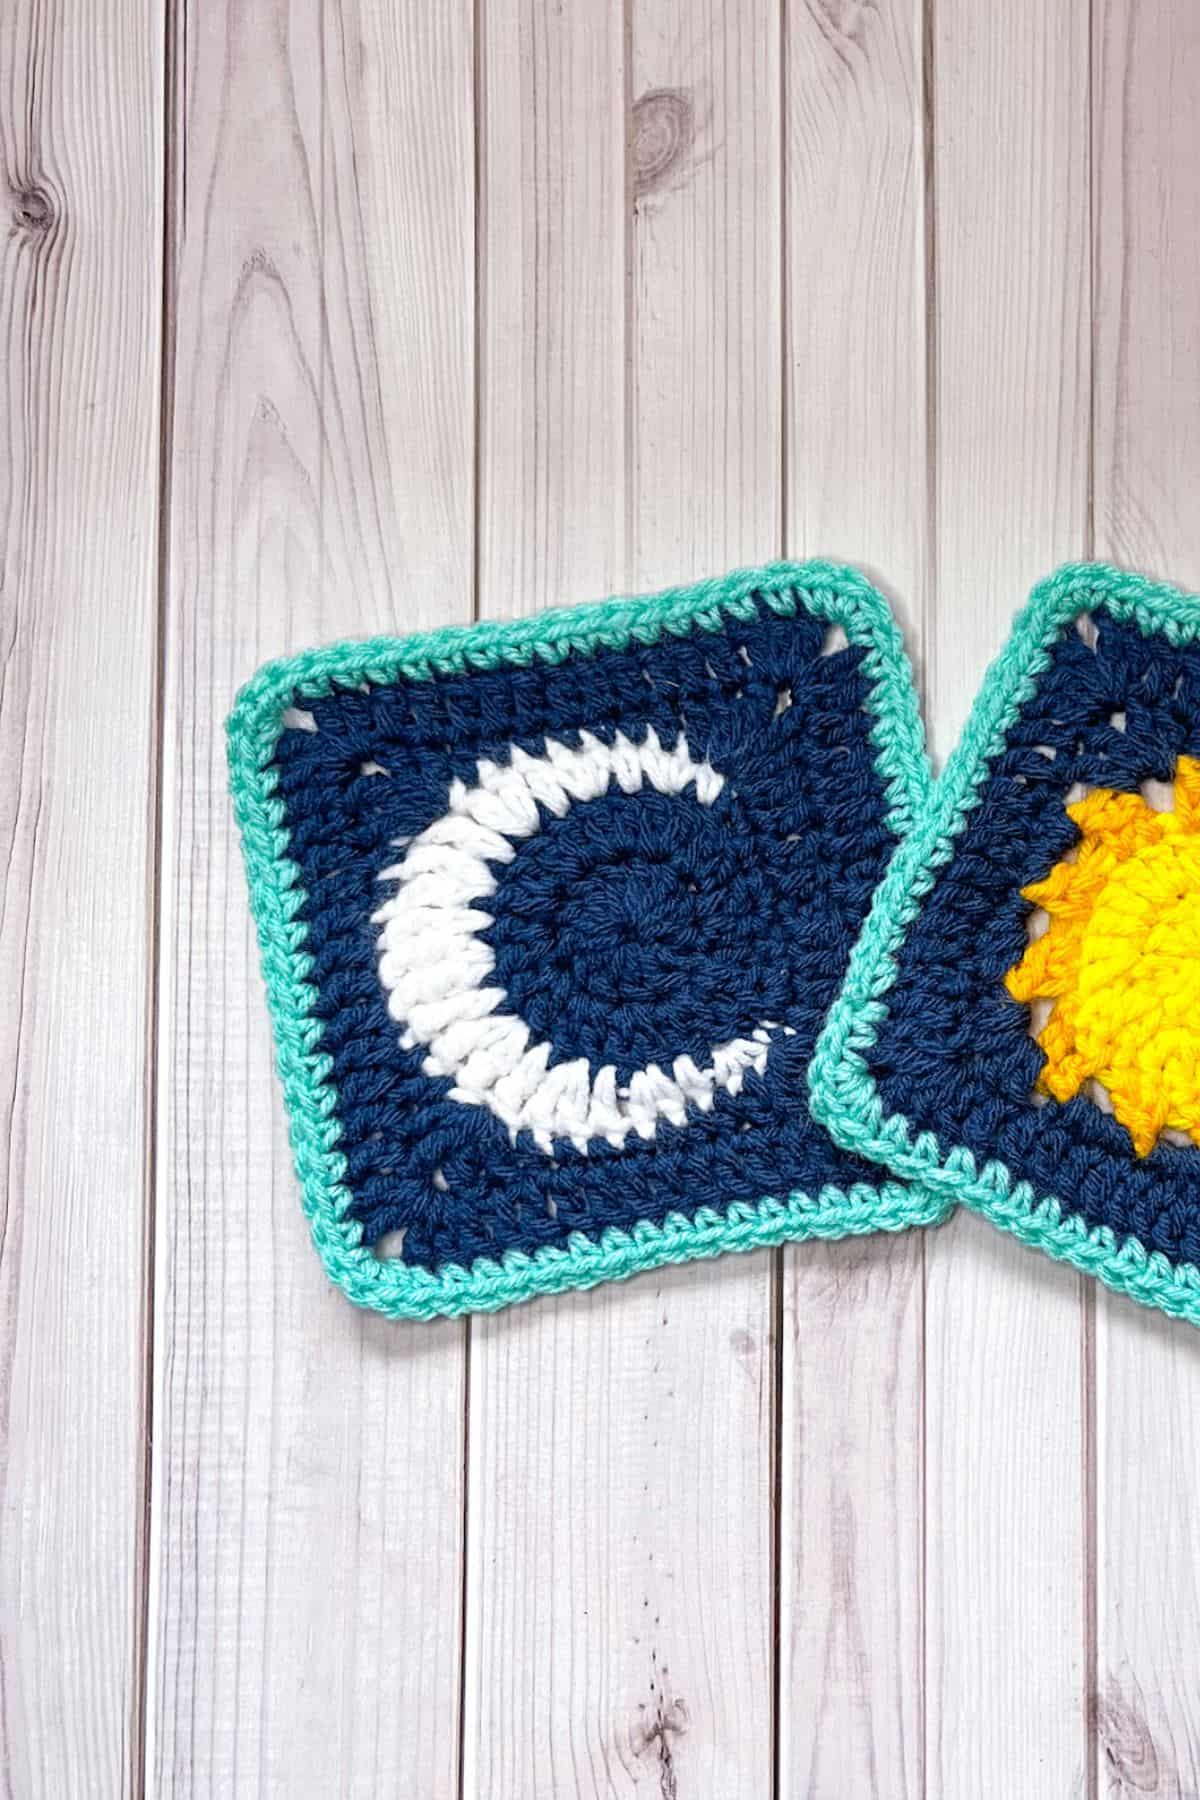
Round 6 (optional): Ch x1, then sc then entire round and make 3 sc in each corner. Sl st to the first sc in the round when you get to the end.
There should be 76 sc stitches for this optional round.
Weave in any ends.
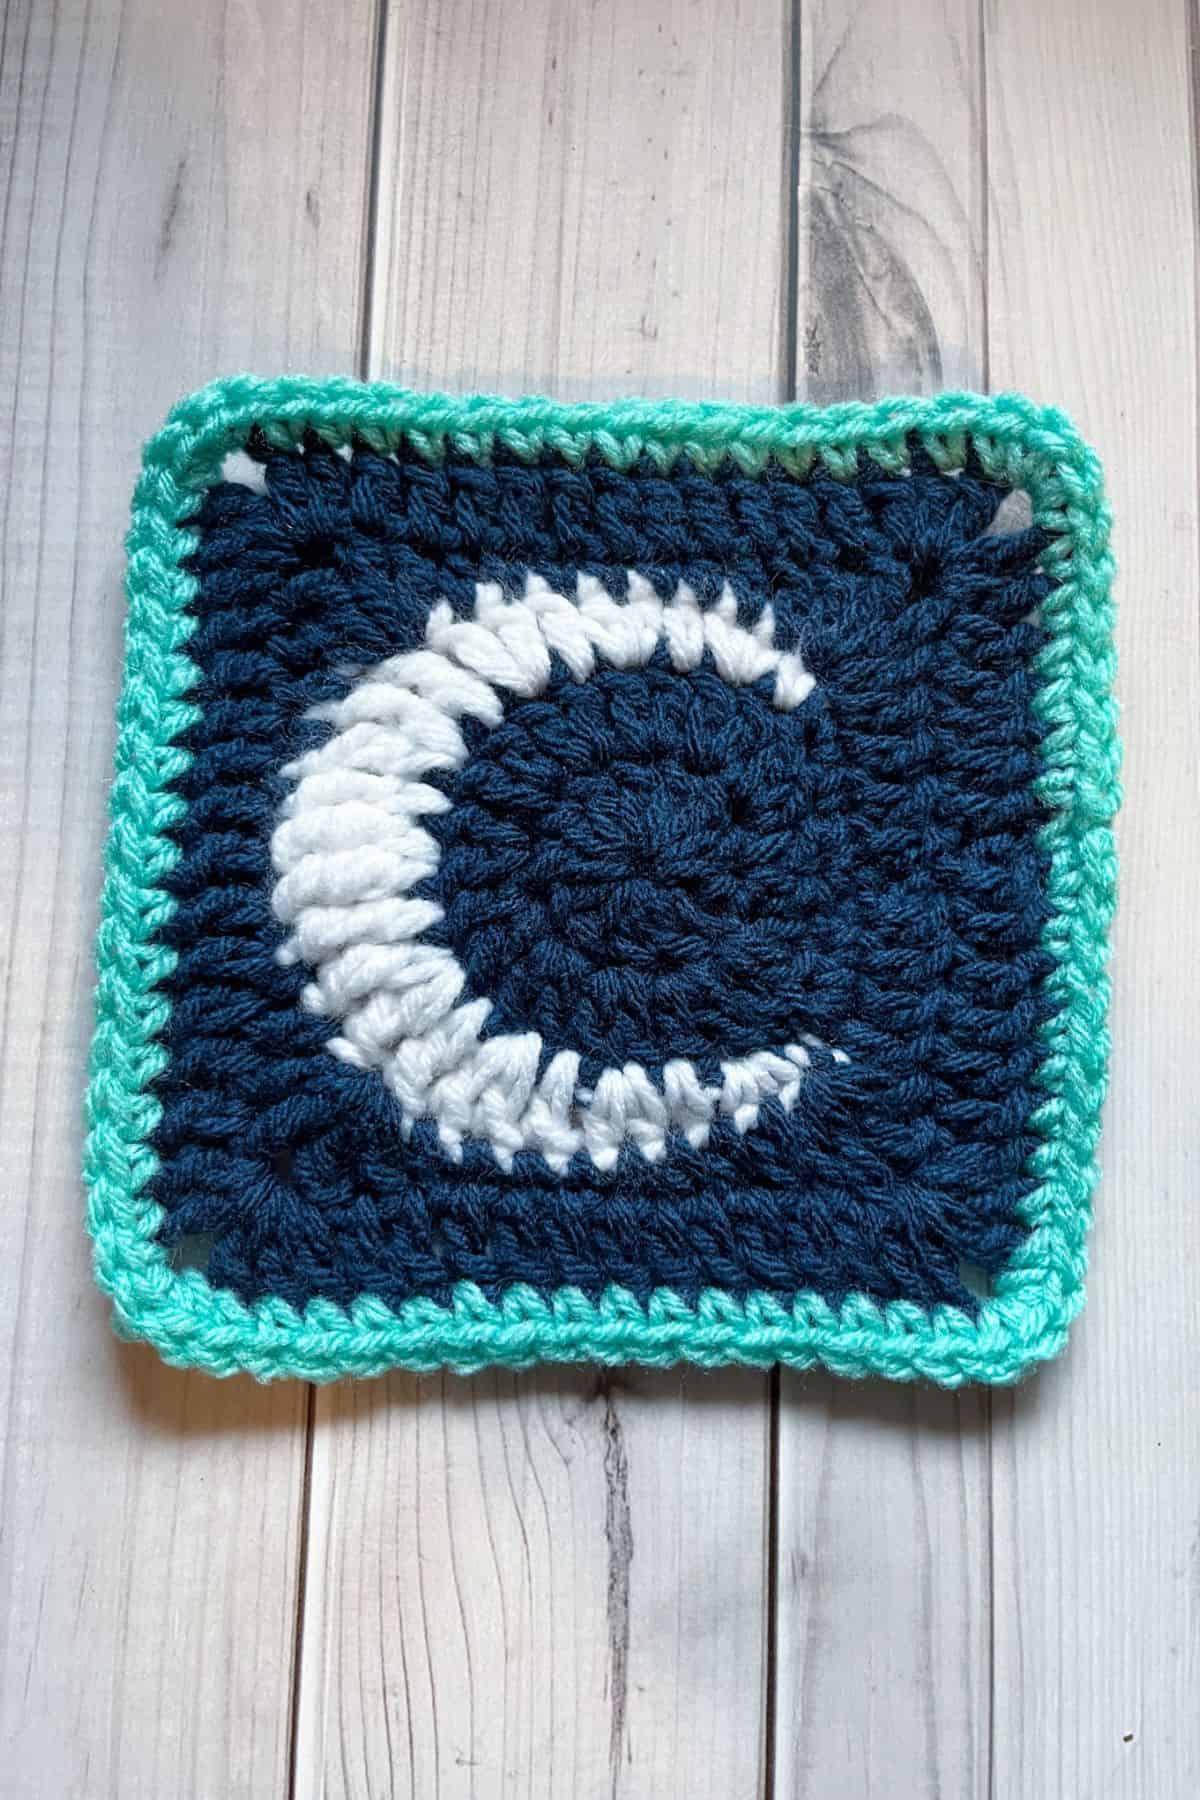
Now you have a finished moon granny square pattern, perfect for any celestial crochet project!
If you are looking to add more out of this world patterns to your repertoire, check out my crochet moon pillow pattern and crochet star garland pattern. Both can use up any extra yellow yarn you might have laying around.
If you have any extra yarn, try making my Crochet Whale Shark Bag Pattern.
🐌Expert Tips
- Experiment with Color: Try using different shades of blue and yellow for a unique night sky effect.
- Combine Patterns: Mix and match with other granny squares for a creative blanket or bag.
- Edge with Contrast: Consider adding a contrasting color around the edge for a pop of color.
- Add Embellishments: Try adding beads or embroidery for extra flair.
🧵Pattern FAQs
Absolutely! In fact, if you use super chunky blanket yarn you can probably make a pillow from just 1 square for each side.
You can make blankets, cardigans, hats, pillowcases, purses, and bags - you name it!
You can use dk sized yarn or a smaller hook for a smaller crochet crescent moon granny square.
🧶More Granny Square Patterns


If you tried this Moon Granny Square Pattern (or any other pattern on my website), please let me know how it went in the 📝 comments below. I'd love to hear from you!
Moon Granny Square Pattern
Abbreviations (US terms)
- Magic ring - mr
- Chain - ch
- Single crochet - sc
- Double crochet - dc
- Half double crochet - hdc
- Triple crochet - tr
- Extended triple crochet - extended tr
- Slip stitch - sl st
- Increase - inc
Notes
- I made crochet moon granny squares with new skeins, but scrap yarn works if you're only making a few—they don't use much yarn.
- The pattern is simple and beginner-friendly.
- The finished squares are about 6 inches; for a smaller size, omit the last round or the single crochet round for squaring off the moon.
Instructions
- The moon granny square pattern is made in the round.
- Round 1: With the blue yarn, make a mr, next ch x2 (DOES NOT COUNT AS A STITCH) and then dc x12 into the mr, sl st to first dc (12). If you find it difficult making a magic ring you can chain 4, slip stitch it together, and then in the newly formed circle, ch x2 and dc x12 in the hole, then sl st to first dc. (12)
- Round 2: Ch x2, dc inc in every dc, sl st to first dc. (24)
- Round 3: Ch x1 and then sc inc, sc, sc inc in blue.
- Then change the color to white, don't fasten off the blue yarn just carry it underneath the white stitches.
- With the white yarn, make the following sequence of stitches for the moon:
- Sc, sc inc, hdc, hdc inc, dc, dc inc, tr, tr inc, tr, extended tr inc, tr, tr inc, tr, dc inc, dc, hdc inc, hdc, sc inc, sc.
- Fasten off the white and switch the color back to navy.
- With the blue yarn:
- Sc inc, sc and then sl st to the first sc in the round (skip the chain).You should have 8 blue stitches (5 at the beginning of the round and 3 at the end of the round) and 28 white stitches for this round (36).
- Round 4: Ch x2, hdc in the next 3 stitches, then a dc in the last blue stitch. Then make a (dc + tr + ch + tr + dc) in the next stitch. This is the first corner and is made in the first white stitch of the last round.
- In the next 8 stitches make: dc, hdc x2, sc x4, hdc
- Make the second corner: (dc + tr + ch + tr + dc) in the next stitch.
- In the next 8 stitches make: hdc, sc, sl st x4, sc, hdc
- Make the third corner: (dc + tr + ch + tr + dc) in the next stitch.
- In the next 8 stitches make: hdc, sc x4, hdc x2, dc
- Make the fourth corner: (dc + tr + ch + tr + dc) in the next stitch.
- Dc, then hdc in each of the next 3 stitches. Sl st to 1st hdc top in the round.
- Each side should have 8 stitches plus the corners (2 + 1 ch +2). Total stitches - 48 + 4 chains.
- Round 5: Ch x2, then dc in the next couple of stitches. When you get to the chain space in the corner make a dc inc + ch x2 + dc inc. Then dc the side of the square (12 per side without the corners). Repeat 3 more times for the rest of the round.
- Once you make the last dc in the round, sl st to the first dc. You should have a total of 64 dc stitches and 8 chains.Then fasten off the yarn and switch the color to turqua.
- Round 6 (optional): Ch x1, then sc then entire round and make 3 sc in each corner. Sl st to the first sc in the round when you get to the end.There should be 76 sc stitches for this optional round.
- Weave in any ends.
- Now you have a finished moon granny square pattern, perfect for any celestial crochet project!
Louise A Jensen says
Hello!
Nice pattern! Do you perhaps have a pattern for a plain square with no motive?
Best Regards Louise
Kimberly Arenas says
Not yet, but I will be adding other granny square patterns to my website soon!
vj says
Hello again,
Silly question here -
On the back side of this pattern where there are the 4 crescent white slip stitches - are they suppose to be covered up when you do round 4. I don't know if i can leave a photo to show what I've done, but somehow I've done it both ways. One way you can definitely see the 4 white slip stitches and the other way they are covered up. Which way is correct? ( did i explain this well?) - [ BTW - I really like this pattern. I do have rounds 1, 2, 3, 5 & 6 memorized - it makes sense after you've done a few. I still have to look at notes for round 4, lol ]
Kimberly Arenas says
I don't think it matters too much 🙂 As long as they look good to you. I personally just go through the top 2 loops on the front like a normal stitch versus going around the entire thing.
vj says
Hello again,
Now I'm serious about making an afghan in this pattern as requested by a grandchild. I made a sample earlier following the video. Now I'm following the written instructions. Round 2 says to change to white. Then in round 3 it also says change to white. I think the video is correct on these rounds.
Kimberly Arenas says
Thanks for catching my mistake!
brenda Scott says
greetings: i just completed my first quarter moon and I'm delighted. your instructions are easy to follow and i love that you offer the total number of stitches at the end of each row. thank you
vj says
Love this! I am confused between the video and the written instructions. In round 3, in the written instructions you only have the extended triple once. In the video you do it more. Should I follow video or written instructions. I'm at a stand still. I guess I could try a sample with video instructions and a sample with written instructions
Kimberly Arenas says
Hi, I might have misspoke in the video since it was one of my first videos and nervous. But the moon shape in white should be :
Sc, sc inc, hdc, hdc inc, dc, dc inc, tr, tr inc, tr, extended tr inc
(this is the only stitch with extended triple crochets, I make it an increase so I use 2 in 1 stitch)
, tr, tr inc, tr, dc inc, dc, hdc inc, hdc, sc inc, sc.
The written pattern is the correct pattern and uses an extended triple increase 🙂
vj says
Thank you
And thank you for quick reply❤️
vj says
My apologies. I believe your video is also correct. But your video does cut off before the last corner. Instructions do help. Thank you
Rosa says
Hello! Please can you add the stitch counts to the end of each row please? I've made a few of these that don't seem to add up at various places (particularly row 3, where i only have 2 stitches left to do 3 blue stitches) 💙
Kimberly Arenas says
I updated the pattern with the stitch counts. The last 2 stitch spaces for round 3 is supposed to be for 3 stitches. - a sc inc and then a sc (3). Then sl st to the 1st sc in the round.
Duck says
Hi!
Wondering if there is a mistake in round 4? In round three you make 5 blue stitches before the first white one, then in the beginning of round 4 only crochet 4 stitches before starting the first corner, but say the corner starts in the first white stitch
Kimberly Arenas says
In round 3 you slip stitch to the single crochet, and in round 4 you chain 2 and start making double crochet stitches into the following stitch so it should be 4 dc since the chains are made in the first top of the single crochet. I generally don't consider chains as dc stitches and skip over them to make a slip stitch to the first actual stitch in some of my patterns (I know other pattern makers who do this and some who don't it's all up to preference). Although I wrote it this way, as long as the corner is made in the first white stitch and you end that side with 8 stitches between the corners like the other sides - then the pattern will still come out nicely 🙂
annie says
hi! what do you mean by "Dc x4 in the next stitches" at the end of round 4? also, how many stitches is it supposed to be if you count all the way around at the end of round 4? I'm pretty close to understanding the pattern, but my round 4 keeps being wonky and my moon ends up centered in the corner, not on the side like yours. thanks!
Kimberly Arenas says
hi I will edit the pattern for clarity, but the dc x4 in the next stitches means to dc x1 in the next 4 stitches like the last round. It should be 48 stitches in the total round or 48 + 4 chains for a total of 52.
Lysa Katarzyna says
Hello, I'm afraid that I am confused at the beginning of the fourth row. It is said to DC in the next 4 stitches and then do the corner in the first white but it was mentioned before that there are five row of blue to crochet in so something doesn't add up. By doing 4dc the next part I have to crochet in has to be blue and not white then ? Or should I have skipped a blue row ?
Kimberly Arenas says
The 4dc start in the next stitch following the sl st. I am currently making an updated video for this tutorial to help explain it 🙂
Amber Shuker-Bright says
Hey. I'm a beginner in granny squares. Started making this gorgeous moon one but I'm totally stuck. I don't understand some steps. At the end of round 2 you say change colour to white, then at the start of round 3 you say do the stitches in blue. I'm so confused. Could you offer any help? Sorry I'm probably reading it wrong but any help would be so useful. Thank you x
Kimberly Arenas says
hi, no worries! At the end of round 2 when I say switch the color to white, you are supposed to join the white yarn to the circle. The easiest way to do this is during the last stitch of round 2 (sl st) pull up the white yarn instead of the blue yarn to complete the stitch. Then instead of fastening off the blue, carry it under your stitches while you work with white. When it's time to do blue stitches, drop the white yarn and use blue like how you did before.
Amber Shuker-Bright says
Thank you 😊