
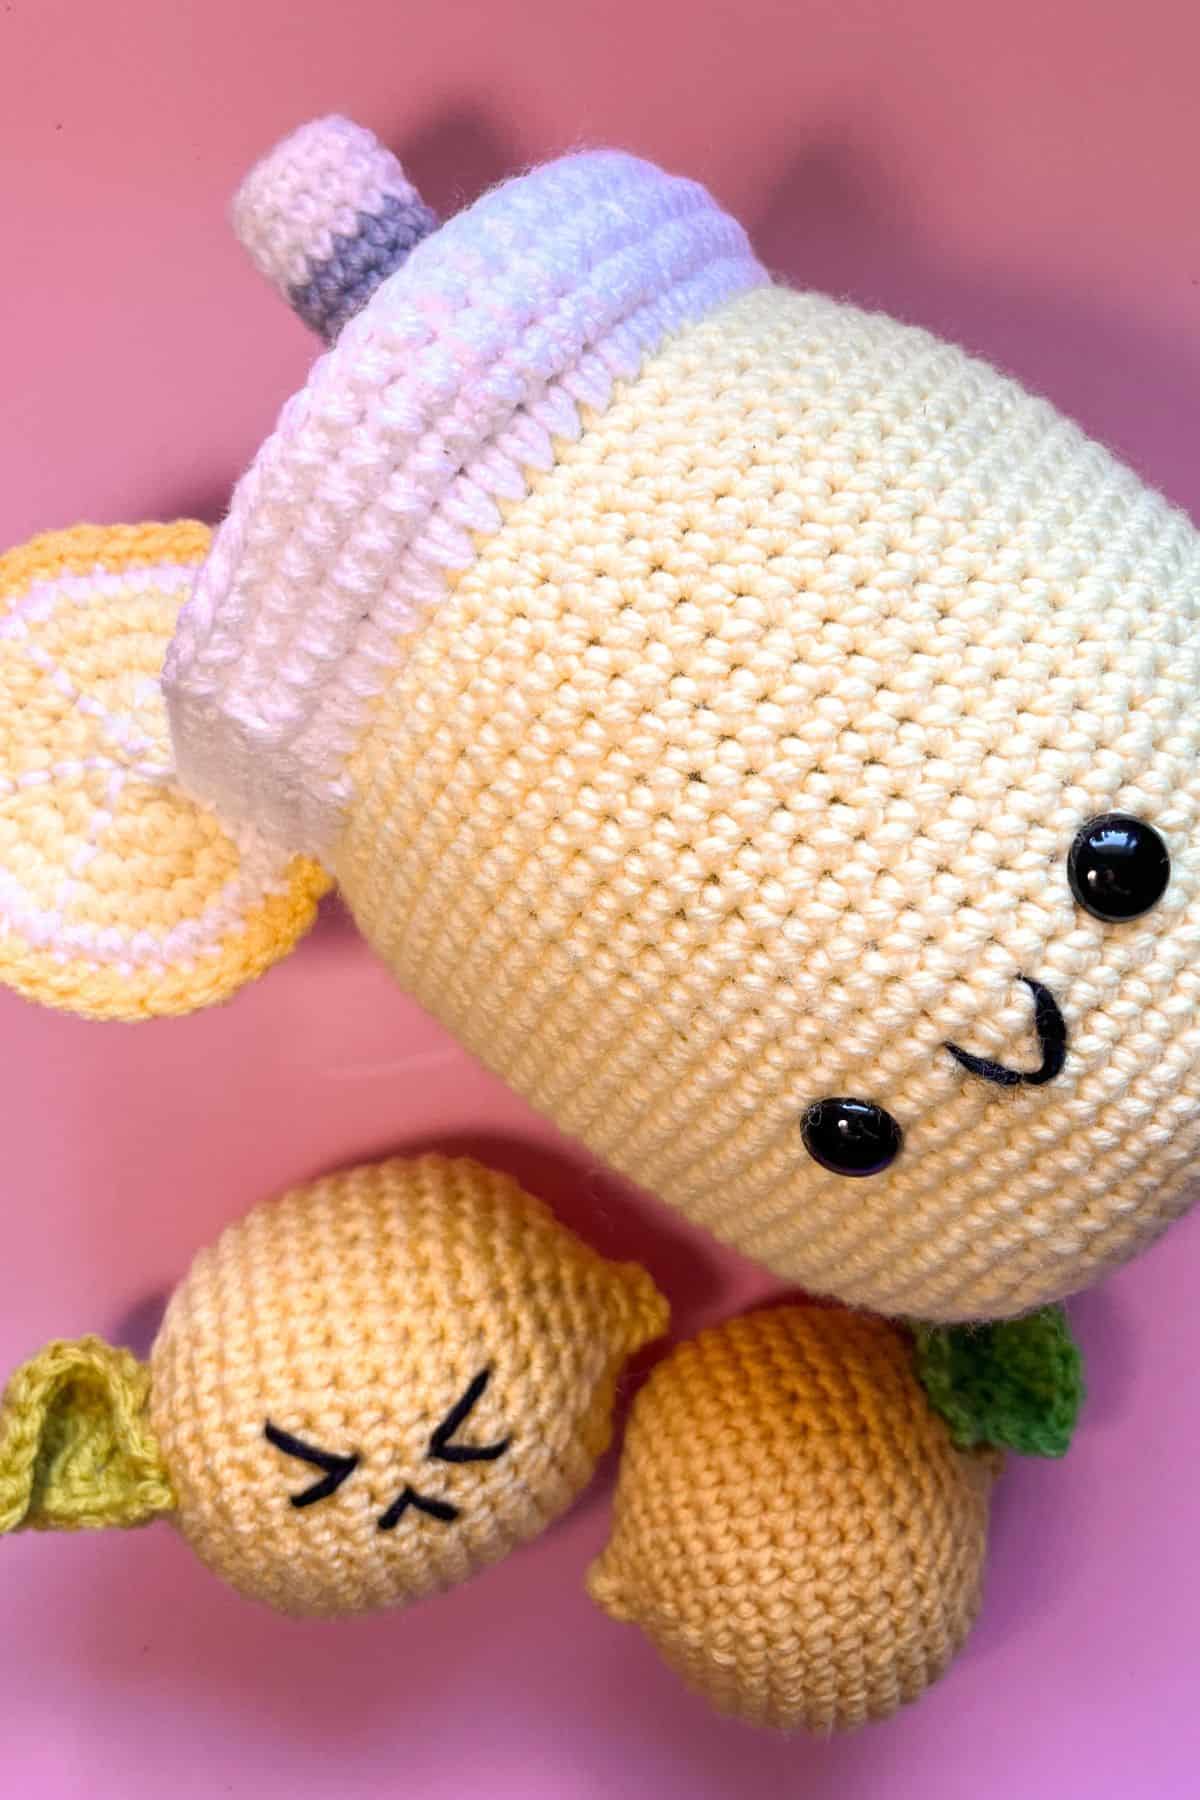
When life gives you crochet lemons, what do you make? Crochet lemonade! This Crochet Lemonade Pattern is perfect for summer and fun to create—a squishable friend to enjoy the sunshine with.

Crochet lemons are cute and fun, but have you ever tried making a crochet lemonade? I recently saw a lemonade plushie and thought, "Wow, that would be a cool pattern to create for crocheting, especially for summer!"
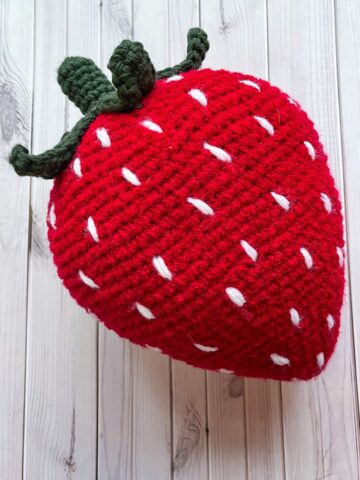
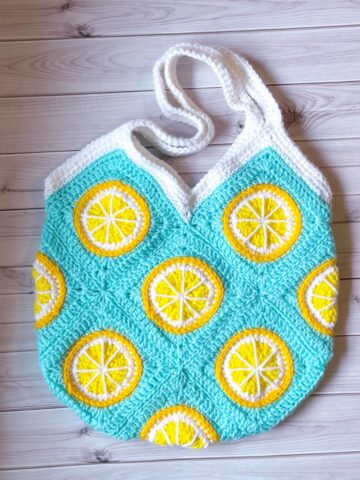
Summer crochet projects usually include beach cover-ups, watermelon coasters, or crochet strawberry bags, so I wanted to give the unsung hero of summer—lemonade—a proper crochet pattern!
Lemonade as a crochet pattern may sound difficult to capture, but it's easy peasy lemon squeezy! I'll show you how with my free crochet lemonade pattern below.
Jump to:
✏️ Things to Note
- Yarn Choice: I made this crochet lemonade pattern using a skein of light yellow yarn from Red Heart to emulate light-colored lemonade, but you can choose any shade of yellow based on your preference. I recommend using white for the top of the glass. I also used a little bit of light blue and white for the straw, but feel free to choose any color that complements your lemonade.
- Material Types: I made the crochet lemonade pattern with acrylic yarn, as it’s what I had on hand, but this project can be completed with any type of yarn. Cotton, acrylic, and chunky yarn are highly suggested.
- Finished Size: The finished size of the crochet lemonade pattern is about 10 inches high when using a 5mm hook. Different hook sizes will result in a different lemonade size.
🪡 Materials Needed
- 1 skein of lemon yarn from Red Heart
- 1 skein of white yarn from Red Heart
- Small amounts of blue, and yellow yarns.
- H hook (5mm)
- Tapestry needle for weaving in the ends and sewing pieces together
- Polyfill
- Safety Eyes
💭 Abbreviations to Remember (US Terms)
- Magic ring (mr)
- Single crochet (sc)
- Increase (inc) - 2 stitches in the same stitch
- Chains (ch). That's it. No fancy stitches here!
- Back loop only (blo)
🍵 Instructions for Crochet Lemonade Pattern
For this pattern, we will be working in rounds.
Round 1: Using light yellow, make a MR and work sc x8 in the circle. If you find it difficult making a magic ring you can chain 2 and then crochet sc x8 in the second chain from the hook. (8)
Round 2: Inc in every sc. (16)
Round 3: Inc, sc, inc, and then sc. Then repeat for the rest of the round. (24)
Round 4: Inc, sc x2, inc, and then sc x2. Then repeat for the rest of the round. (32)
Round 5: Inc, sc x3, inc, and then sc x3. Then repeat for the rest of the round. (40)
Round 6: Inc, sc x4, inc, and then sc x4. Then repeat for the rest of the round. (48)
Round 7: Inc, sc x5, inc, and then sc x5. Then repeat for the rest of the round. (56)
Round 8: Inc, sc x6, inc, and then sc x6. Then repeat for the rest of the round. (64)

Round 9: Sc in blo for the entire round (64). By crocheting in the back loop only on the single crochet stitches it means instead of going into the stitch and going under 2 loops, you will only go through the loop in the back not the front so you will only be going under 1 loop and then finishing the stitch like normal.
Round 10: Sc x15, inc. . Then repeat for the rest of the round. (68)
Round 11: Sc x68. (68)
Round 12: Sc x16, inc. Then repeat for the rest of the round. (72)
Round 13-36: Sc x72. (72)
Crocheted Lemonade Top:
Round 1: Using light yellow, make a MR and work sc x8 in the circle. If you find it difficult making a magic ring you can chain 2 and then crochet sc x8 in the second chain from the hook. (8)
Round 2: Inc in every sc. (16)
Round 3: Inc, sc, inc, sc. Then repeat for the rest of the round. (24)
Round 4: Inc, sc x2, inc, and then sc x2. Then repeat for the rest of the round. (32)
Round 5: Inc, sc x3, inc, and then sc x3. Then repeat for the rest of the round. (40)
Round 6: Inc, sc x4, inc, and then sc x4. Then repeat for the rest of the round. (48)
Round 7: Inc, sc x5, inc, and then sc x5. Then repeat for the rest of the round. (56)
Round 8: Inc, sc x6, inc, and then sc x6. Then repeat for the rest of the round.(64)
Round 9: Inc, sc x7, inc, and then sc x7. Then repeat for the rest of the round. (72)
[secure eyes to where you would like on the yellow base before the next step]
Attach top and base:
Round 10: This round we will be attaching the top of the lemonade to its base. USE 2 STRANDS OF WHITE.

To do this you will go through the 2 sc at once. One from the light yellow top and the other from the light yellow base. Both have 72sc so there should be no extra sc.
Start by going under the 2 loops like you are about to make a regular sc with the white yarn, then before yarning over, go through a sc from the base so you will end up with 4 loops on your hook not 2. Yarn over and go under all 4 loops.
You should now have 2 loops left on your hook, go through both like a normal sc. Sc the rest of the 2 pieces together, no increases (72) [BEFORE CLOSING THE TOP, STUFF THE LEMONADE.]

Round 37- 41: Using 2 strands of white yarn (this is for stability reasons for the lemon slice) sc the entire round. (72)
Crochet Straw:

Round 1: Using light blue (or another color yarn), ch x12, slip stitch together.
Round 2: Sc in the next ch and repeat for the entire round. (12)
Round 3- 4: Repeat round 2. At the end of round 4 color change like we did for the lemonade yellow to white, but from light blue to white.
Round 5- 7: Sc in every stitch (12) At the end of round 7 color change to light blue.
Round 8-10: Sc in every stitch (12). At the end of round 10 color change to white.
Round 11- 13: Sc in every stitch (12). Fasten off but leave tail for sewing.
Crochet Lemon Slice:
Row 1: With a light yellow, make a mr, OR ch 2 if you can’t make one, and make 8sc in either the mr or the second ch from hook. DO NOT CONNECT. Ch 1, turn. (8)
Row 2: [Inc] repeat what's in the brackets for the rest of the round. Ch 1, turn. (16)
Row 3: [Inc] repeat what's in the brackets for the rest of the round. Ch 1, turn. (32)
Row 4: [Inc, sc] repeat what’s in the brackets for the rest of the round. Ch 1, turn. (48)
Row 5: [Inc, sc x2] repeat what's in the brackets for the rest of the round. Ch 1, turn. (64)
Row 6: [Inc, sc x3] repeat what's in the brackets for the rest of the round. Ch 1 turn (80) It will look very funny and wavy at this point, that is okay!

Fold the lemon in half and crochet a white edge around it using single crochet. (40)

Then add another row around it in a darker yellow to act as the peel part of the lemon. (40)
When both rows of edging are done take your tapestry needle and embroider the lemon segments on the slice on both sides. You can add as many segments as you want by making radiating lines from the center.
Sewing:
The straw can be placed anywhere on the top that you think might look good, I have mine off center.
The lemon slice has a slit in it because we did not connect the lemon into a complete circle. This slit is for placing it on the lemonade lid ( it's the reason why we doubled our yarn for the white edge of the drink - for stability and structure).
Sew the lemon slice to the top anywhere you would like (having it to the side of the face is probably one of the better places for placement) and there you have it! A cuddly lemonade plushie.
If you have any extra yarn leftover, you can make some crochet lemon granny squares for a bag or pillow!
🐌Expert Tips
- Choose Your Yarn Wisely: Opt for cotton yarn for a lightweight, breathable project, especially for a summer-friendly feel. Select yarn that is colorfast if you plan to wash your lemonade plushie frequently.
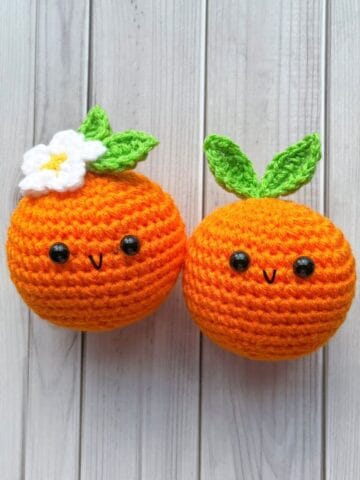
- Add Fun Variations: Experiment with colors to create different flavors, such as pink for pink lemonade or orange for orangeade! Enhance your creation with tiny crochet fruits or mini umbrellas for extra charm.
- Stuffing Tips: Ensure the lemonade is adequately stuffed for a plush look without overpacking, which could distort the shape. Consider using sustainable stuffing alternatives, like cotton or recycled materials, for an eco-friendly project.
- Safety Considerations: If using safety eyes, ensure they are securely fastened, especially if giving this toy to young children.
🧵 Pattern FAQs
Yes! If you are wanting to make something different than say a lemonade you absolutely can! My suggestions are pink for pink lemonade or orange for orange juice.
Yes! I have used strips of old clothes and scarp yarn as fillers for toys before. I'm sure you can use other things as well but try not to use hard materials or things that are too small that can seep through the crochet holes.
The 2 strands of yarn around the lid are for stability of holding up the lemon slice since it is heavy and is bonded to the lemonade only on the rim. If you were going to do this pattern without the lemon slice you can forgo the double strand and just use 1 strand like normal.
🧶More Crochet Summer Patterns

If you tried this Crochet Lemonade Pattern (or any other pattern on my website), please let me know how it went in the 📝 comments below. I'd love to hear from you!

Crochet Lemonade Pattern
Materials
Yarn colors:
- 1 skein lemon yarn
- 1 skein white yarn
- 1 ball of light blue
- 1 ball of a darker shade of yellow
- Tapestry needle
- 5mm crochet hook
- Polyfill
Abbreviations (US terms)
- sc = Single crochet
- mr = Magic ring
- inc = Increase (2 stitches in the same stitch)
- ch = Chain
- blo = Back Loop Only
Notes
Instructions
- For this pattern we will be working in rounds.
- Round 1: Using light yellow, make a MR and work sc x8 in the circle. If you find it difficult making a magic ring you can chain 2 and then crochet sc x8 in the second chain from the hook. (8)
- Round 2: Inc in every sc. (16)
- Round 3: Inc, sc, inc, sc and repeat until end of round (24)
- Round 4: Inc, sc x2, inc, sc x2 and repeat until end of round (32)
- Round 5: Inc, sc x3, inc, sc x3 and repeat until end of round (40)
- Round 6: Inc, sc x4, inc, sc x4 and repeat until end of round (48)
- Round 7: Inc, sc x5, inc, sc x5 and repeat until end of round (56)
- Round 8: Inc, sc x6, inc, sc x6 and repeat until end of round (64)
- Round 9: Sc in blo for the entire round (64). By crocheting in the back loop only on the single crochet stitches it means instead of going into the stitch and going under 2 loops, you will only go through the loop in the back not the front so you will only be going under 1 loop and then finishing the stitch like normal.
- Round 10: Sc x15, inc, for the entire row (68)
- Round 11: Sc x68 (68)
- Round 12: Sc x16, inc, for the entire row (72)
- Round 13-36: Sc x72 (72)
Crocheted Lemonade top:
- Round 1: Using light yellow, make a MR and work sc x8 in the circle. If you find it difficult making a magic ring you can chain 2 and then crochet sc x8 in the second chain from the hook. (8)
- Round 2: Inc in every sc. (16)
- Round 3: Inc, sc, inc, sc and repeat until end of round (24)
- Round 4: Inc, sc x2, inc, sc x2 and repeat until end of round (32)
- Round 5: Inc, sc x3, inc, sc x3 and repeat until end of round (40)
- Round 6: Inc, sc x4, inc, sc x4 and repeat until end of round (48)
- Round 7: Inc, sc x5, inc, sc x5 and repeat until end of round (56)
- Round 8: Inc, sc x6, inc, sc x6 and repeat until end of round (64)
- Round 9: Inc, sc x7, inc, sc x7 and repeat until end of round (72)
- [secure eyes to where you would like on the yellow base before the next step]
- Round 10: This round we will be attaching the top of the lemonade to its base. To do this you will go through the 2 sc at once. One from the light yellow top and the other from the light yellow base. Both have 72sc so there should be no extra sc. To do this: start by going under the 2 loops like you are about to make a regular sc with the light yellow yarn, then before yarning over, go through a sc from the base so you will end up with 4 loops on your hook not 2. Yarn over and go under all 4 loops. You should now have 2 loops left on your hook, go through both like a normal sc. Sc the rest of the 2 pieces together, no increases (72) [BEFORE CLOSING THE TOP, STUFF THE LEMONADE.]
- Make a color change at the end of the row by going through the motions of making a sc stitch. Go under the loops, but before yarning over with light yellow, take white yarn [WITH 2 STRANDS OF WHITE YARN] and yarn over with that. Pull through the yellow loops and you should have white on your hook now. Weave in the yellow and white yarn ends.
- Round 37- 41: Using 2 strands of white yarn (this is for stability reasons for the lemon slice) sc the entire round (72)
Straw:
- Round 1: Using light blue (or another color yarn), ch x12, slip stitch together.
- Round 2: Sc in the next ch and repeat for the entire round (12)
- Round 3- 4: Repeat round 2. At the end of round 4 color change like we did for the lemonade yellow to white, but from light blue to white.
- Round 5- 7: Sc in every stitch (12) At the end of round 7 color change to light blue.
- Round 8-10: Sc in every stitch (12). At the end of round 10 color change to white.
- Round 11- 13: Sc in every stitch (12). Fasten off but leave tail for sewing.
Lemon Slice:
- Row 1: With a light yellow, make a mr, OR ch 2 if you can’t make one, and make 8sc in either the mr or the second ch from hook. DO NOT CONNECT. Ch 1, turn. (8)
- Row 2: [Inc] repeat what's in the brackets for the rest of the round. Ch 1, turn (16)
- Row 3: [Inc] repeat what's in the brackets for the rest of the round. Ch 1, turn. (32)
- Row 4: [Inc, sc] repeat what’s in the brackets for the rest of the round. Ch 1, turn (48)
- Row 5: [Inc, sc x2] repeat what's in the brackets for the rest of the round. Ch 1, turn (64)
- Row 6: [Inc, sc x3] repeat what's in the brackets for the rest of the round. Ch 1 turn (80)
- Fold the lemon in half and crochet a white edge around it using single crochet.(40) Then add another row around it in a darker yellow to act as the peel part of the lemon. (40) When both rows of edging are done take your tapestry needle and embroider the lemon segments on the slice on both sides. You can add as many segments as you want by making radiating lines from the center.
Sewing:
- The straw can be placed anywhere on the top that you think might look good, I have mine off center.
- The lemon slice has a slit in it because we did not connect the lemon into a complete circle. This slit is for placing it on the lemonade lid ( it's the reason why we doubled our yarn for the white edge of the drink - for stability and structure). Sew the lemon slice to the top anywhere you would like (having it on the side is probably one of the better places for placement) and there you have it! A cuddly lemonade plushie


Nicole D says
This pattern is truly adorable! Perfect for fun summer vibes!