
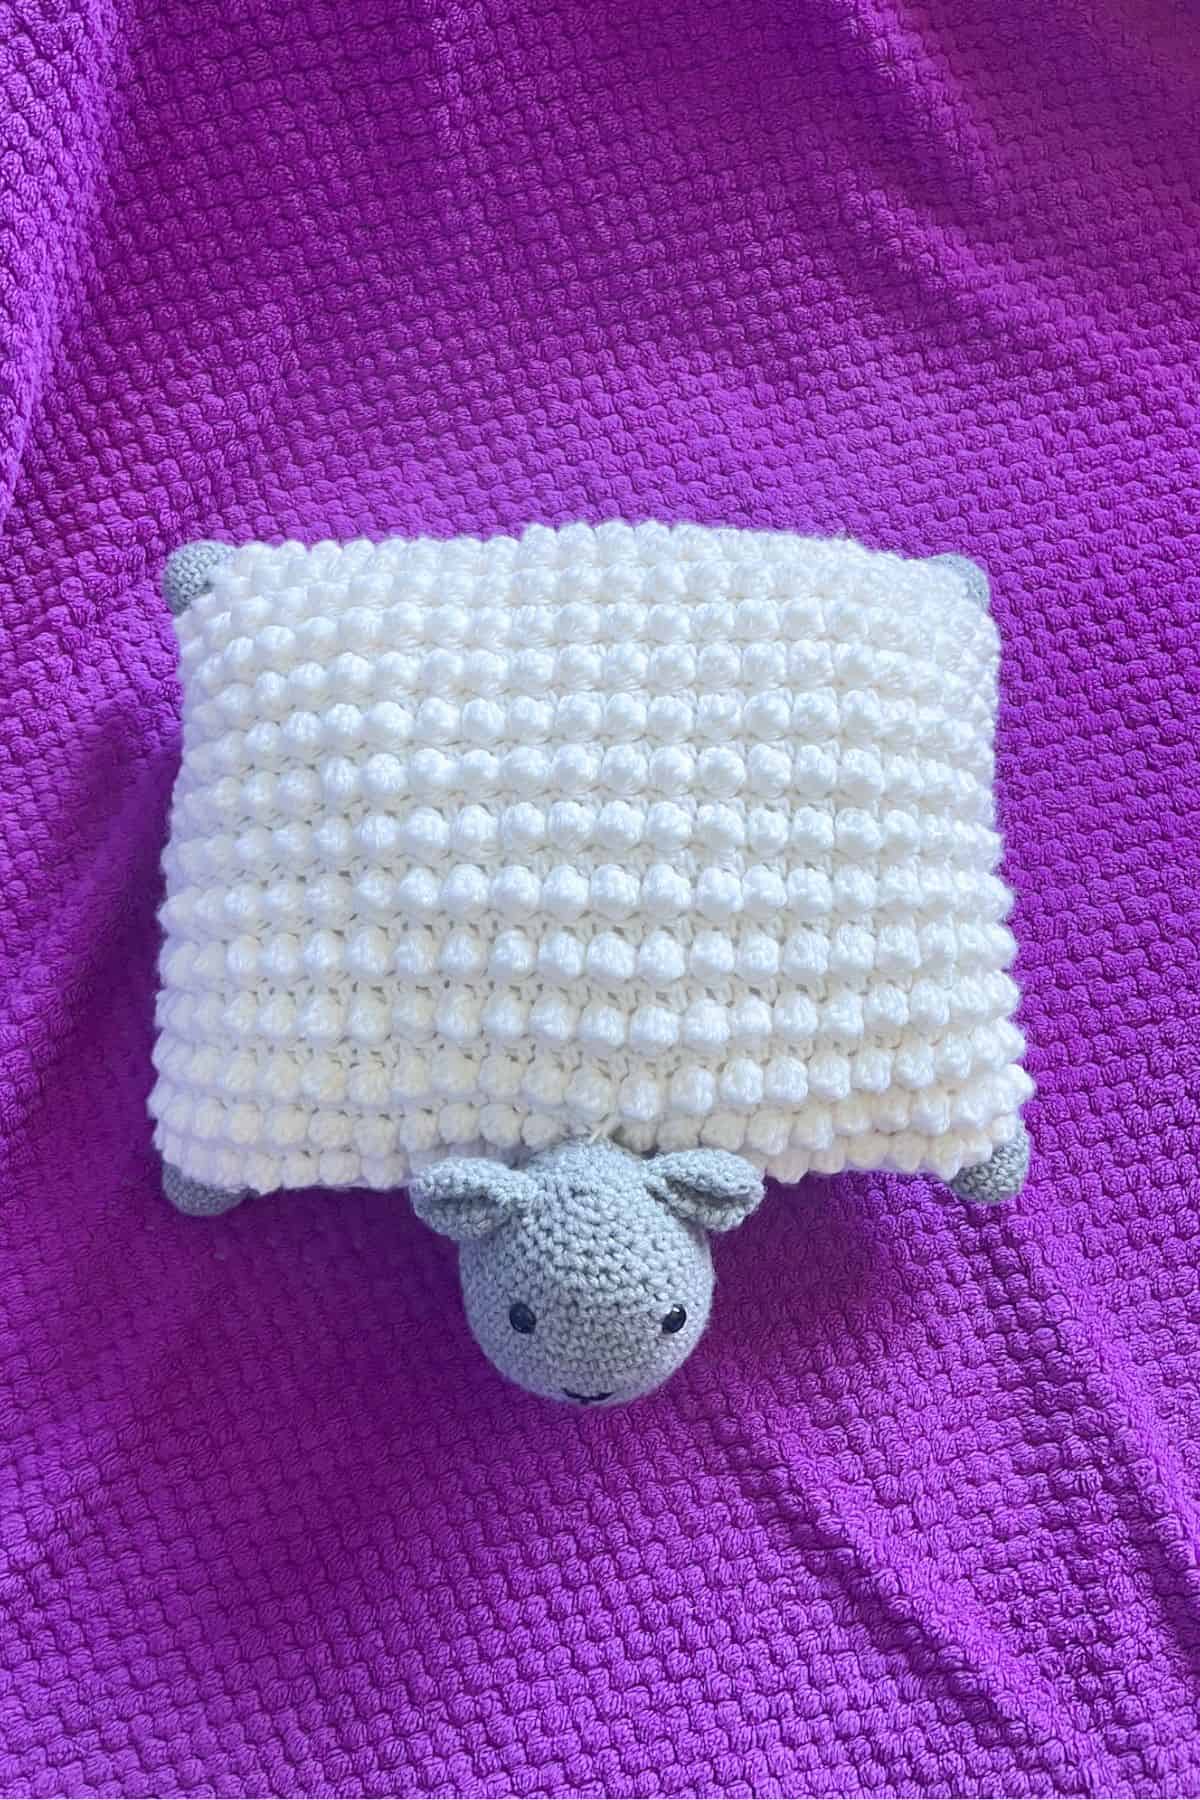
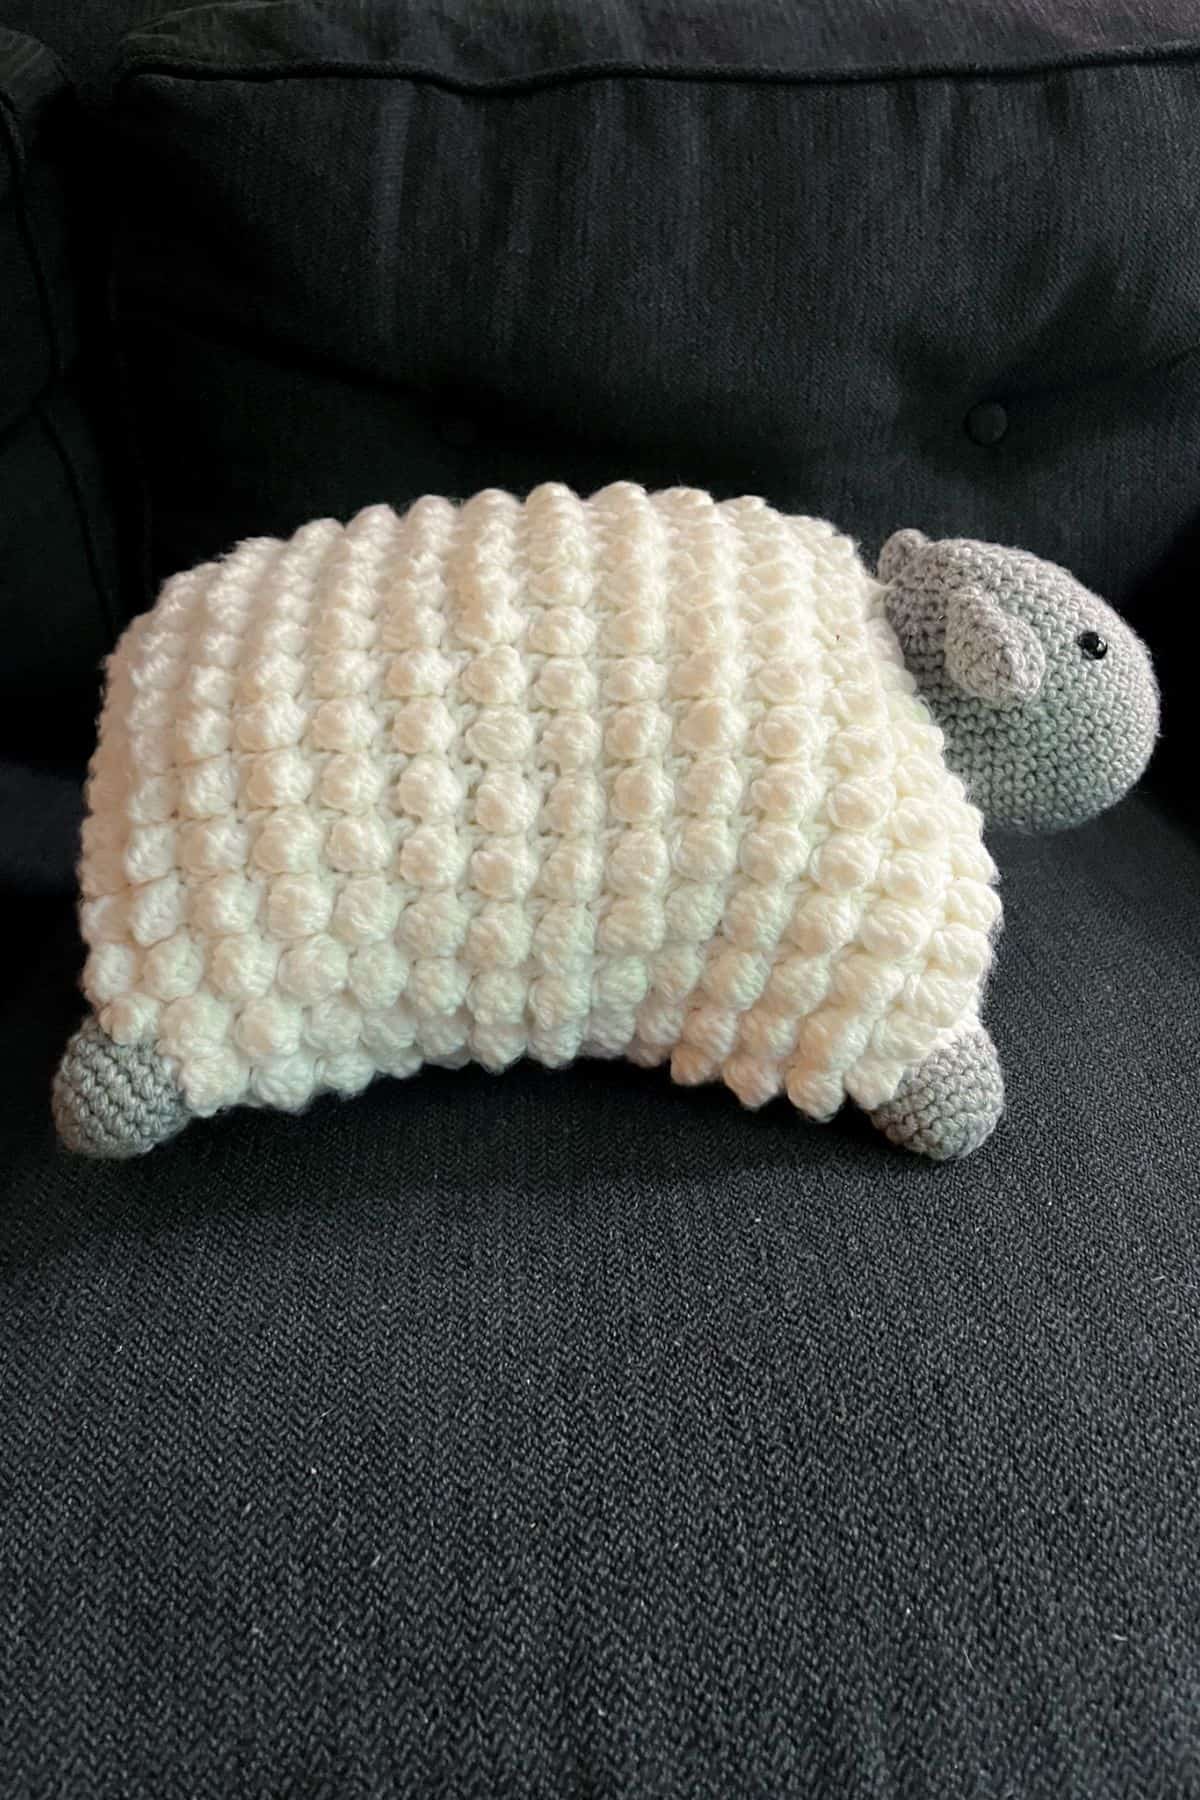
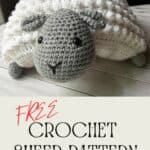
Add a sprinkle of nostalgia to your crochet projects with this delightful Crochet Sheep Pattern! Ideal for creating your very own sheep pillow pet, this charming design effortlessly transforms into a cozy pillow or a cuddly companion with the help of buttons.
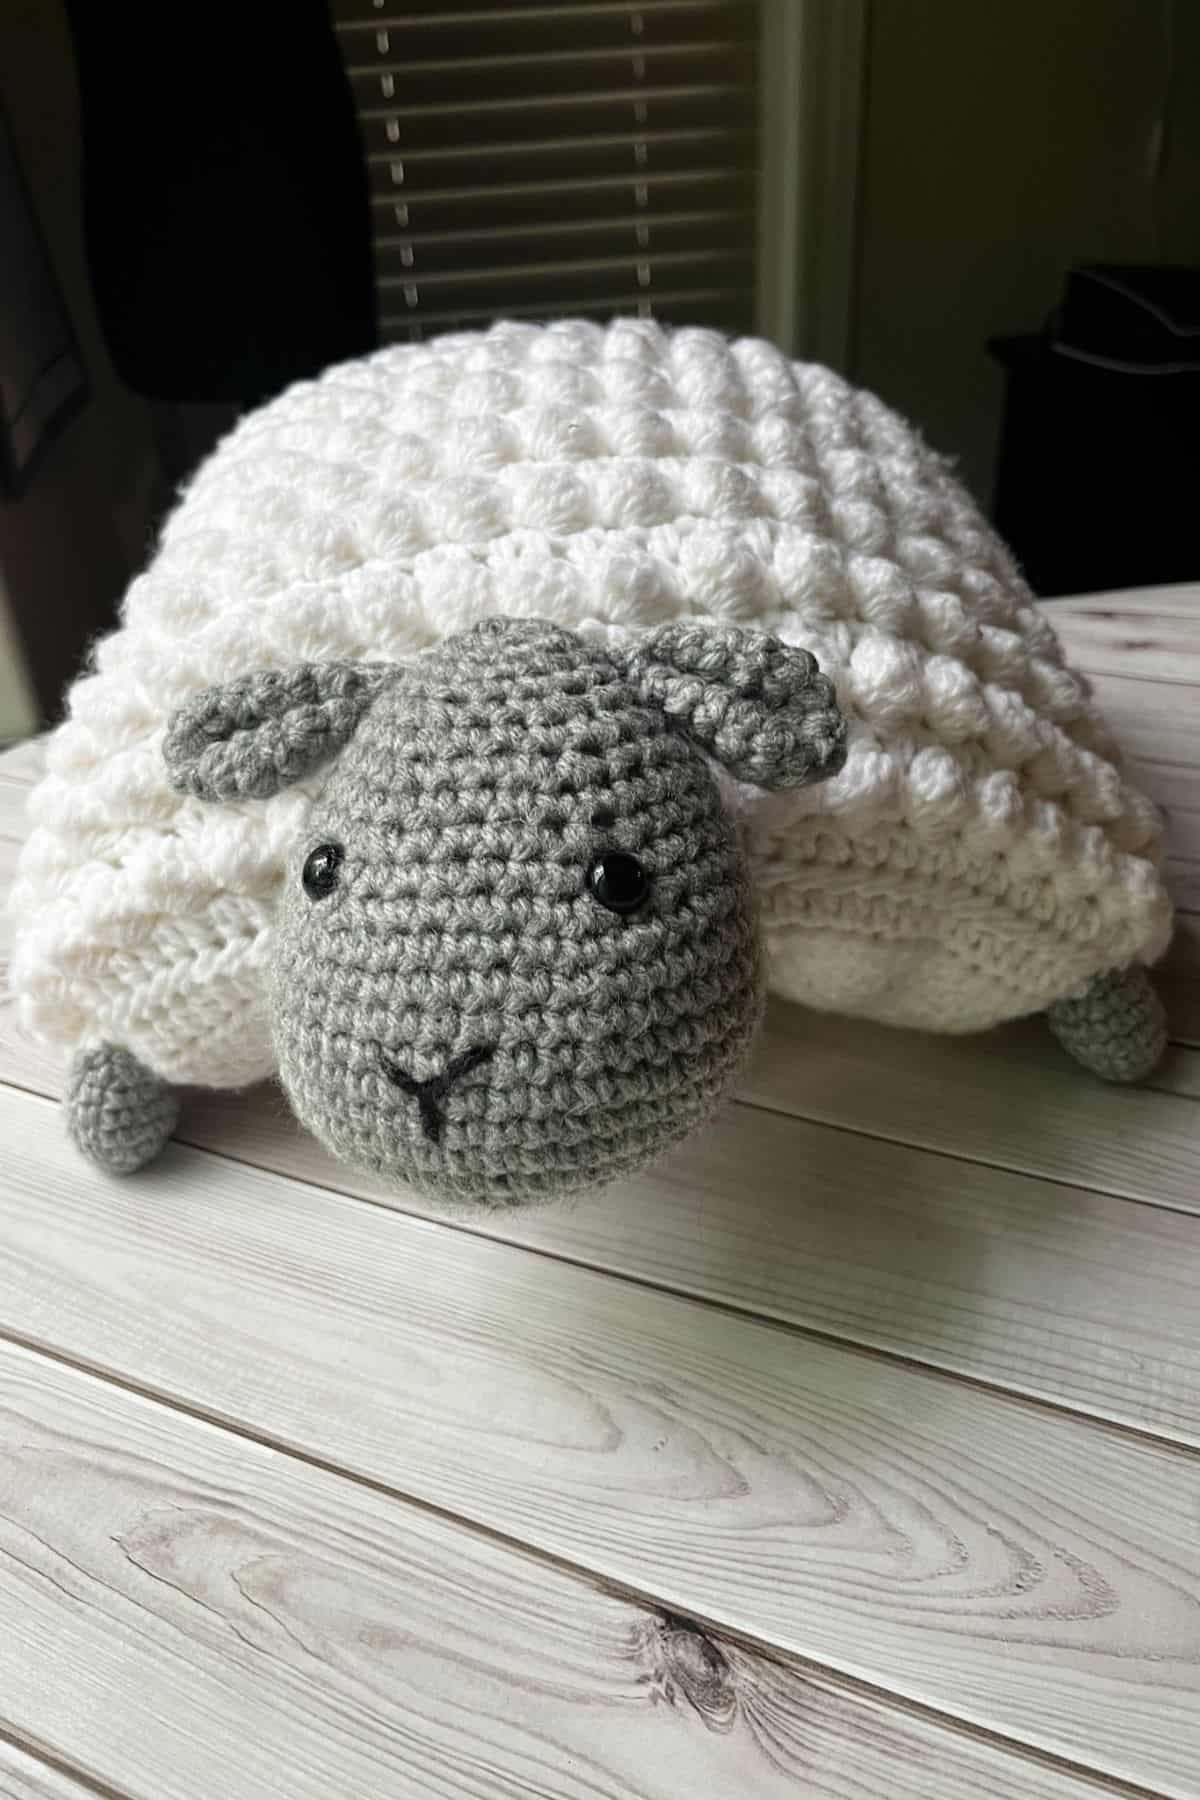
I've always wanted to craft a crochet sheep pattern, and I chose to make it a bobble sheep because bobbles—though they can be yarn eaters—are one of my favorite stitches. The rich texture they create adds a playful dimension to any project. See my crochet bobble stitch tutorial for more.
Recently, I’ve discovered new ways to incorporate bobble stitches into my work, like using them as borders for my crochet candy cane stripe blanket or as fluffy clouds on my crochet rainbow keychain. I’m excited to integrate them into more patterns, so keep an eye out for those!
I made this adorable crochet sheep plush for my preschooler as an Easter gift, along with other fun creations like crochet crème egg covers, crochet Easter eggs, and crochet mini Easter baskets. He’s been having a blast with them, pretending it’s Easter already!
This crochet pillow pet is perfect for Easter, birthdays, or any celebration, making it a wonderful gift for little ones.
Jump to:
✏️ Things To Note:
- Yarn Weight: I used acrylic worsted weight yarn for the crochet sheep pattern, but you can use any yarn you prefer; just adjust the chain size if you change the yarn weight.
- Stuffing: I used polyfill as the stuffing for the crochet sheep pattern, but you can also make the crochet pillow pet pattern to fit an existing pillow.
- Finished Size: The finished size of the crochet sheep pattern is roughly 22 inches wide and 20 inches tall (including the head).
🪡 Materials Needed
- Caron One Pound White Yarn
- Caron One Pound Gray Yarn
- 12mm Safety Eyes
- Tapestry Needle
- 5mm Hook
- Polyfill
- Buttons or closures for the strap on the bottom of the pillow
- A little bit of black yarn for the nose
💭Abbreviations to Remember (US terms)
- Magic ring - mr
- Single crochet - sc
- Increase - inc
- Decrease - dec
- Half double crochet - hdc
- Bobble - bobble (no abbreviation)
- Chain - ch
🧋Variations
Try making different color sheep, like a solid black one or a Valais sheep that is black with white fluff.
🍵Instructions for Crochet Sheep Pattern
Crochet Sheep Head:
The crochet sheep pattern is made in the round.
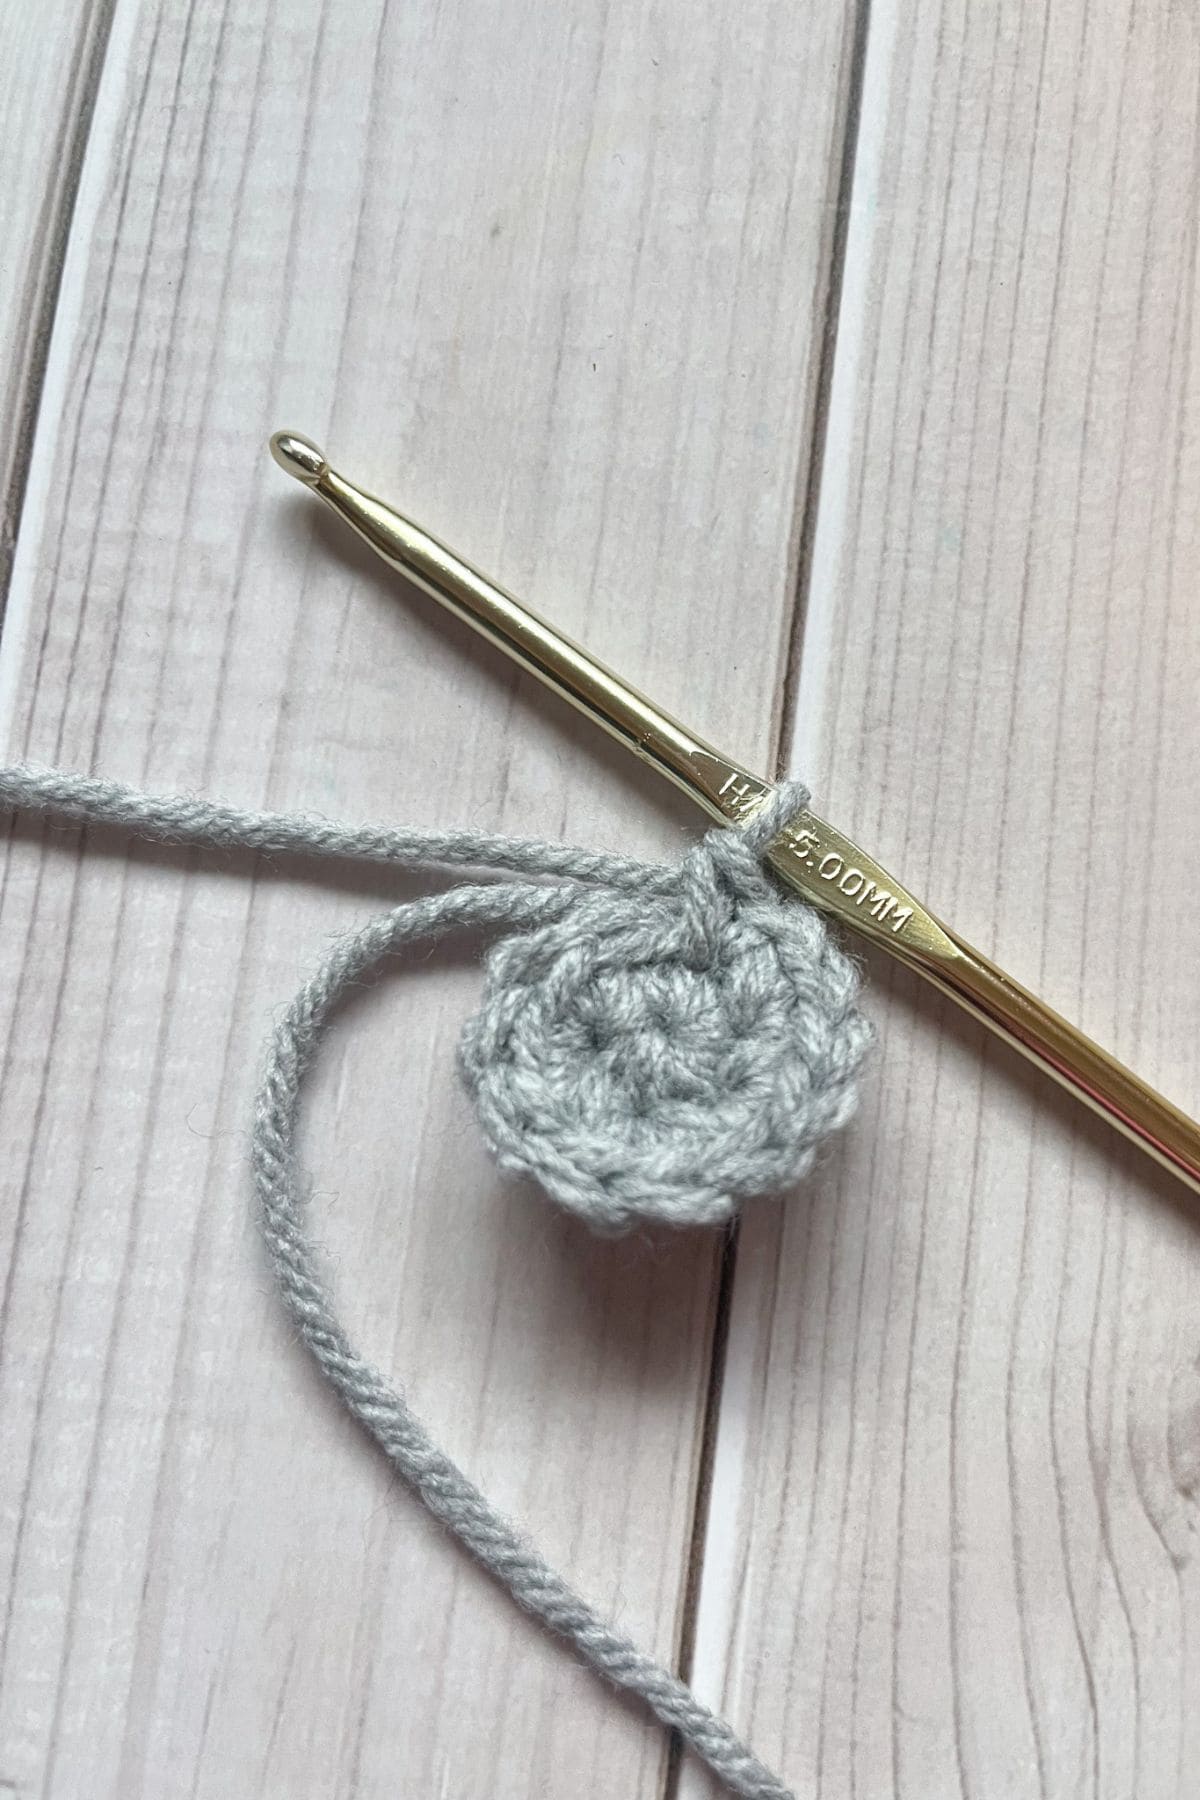
Round 1: Using the gray yarn, make a mr and then sc x6 into the mr. (6)
Round 2: Inc in every sc. (12)
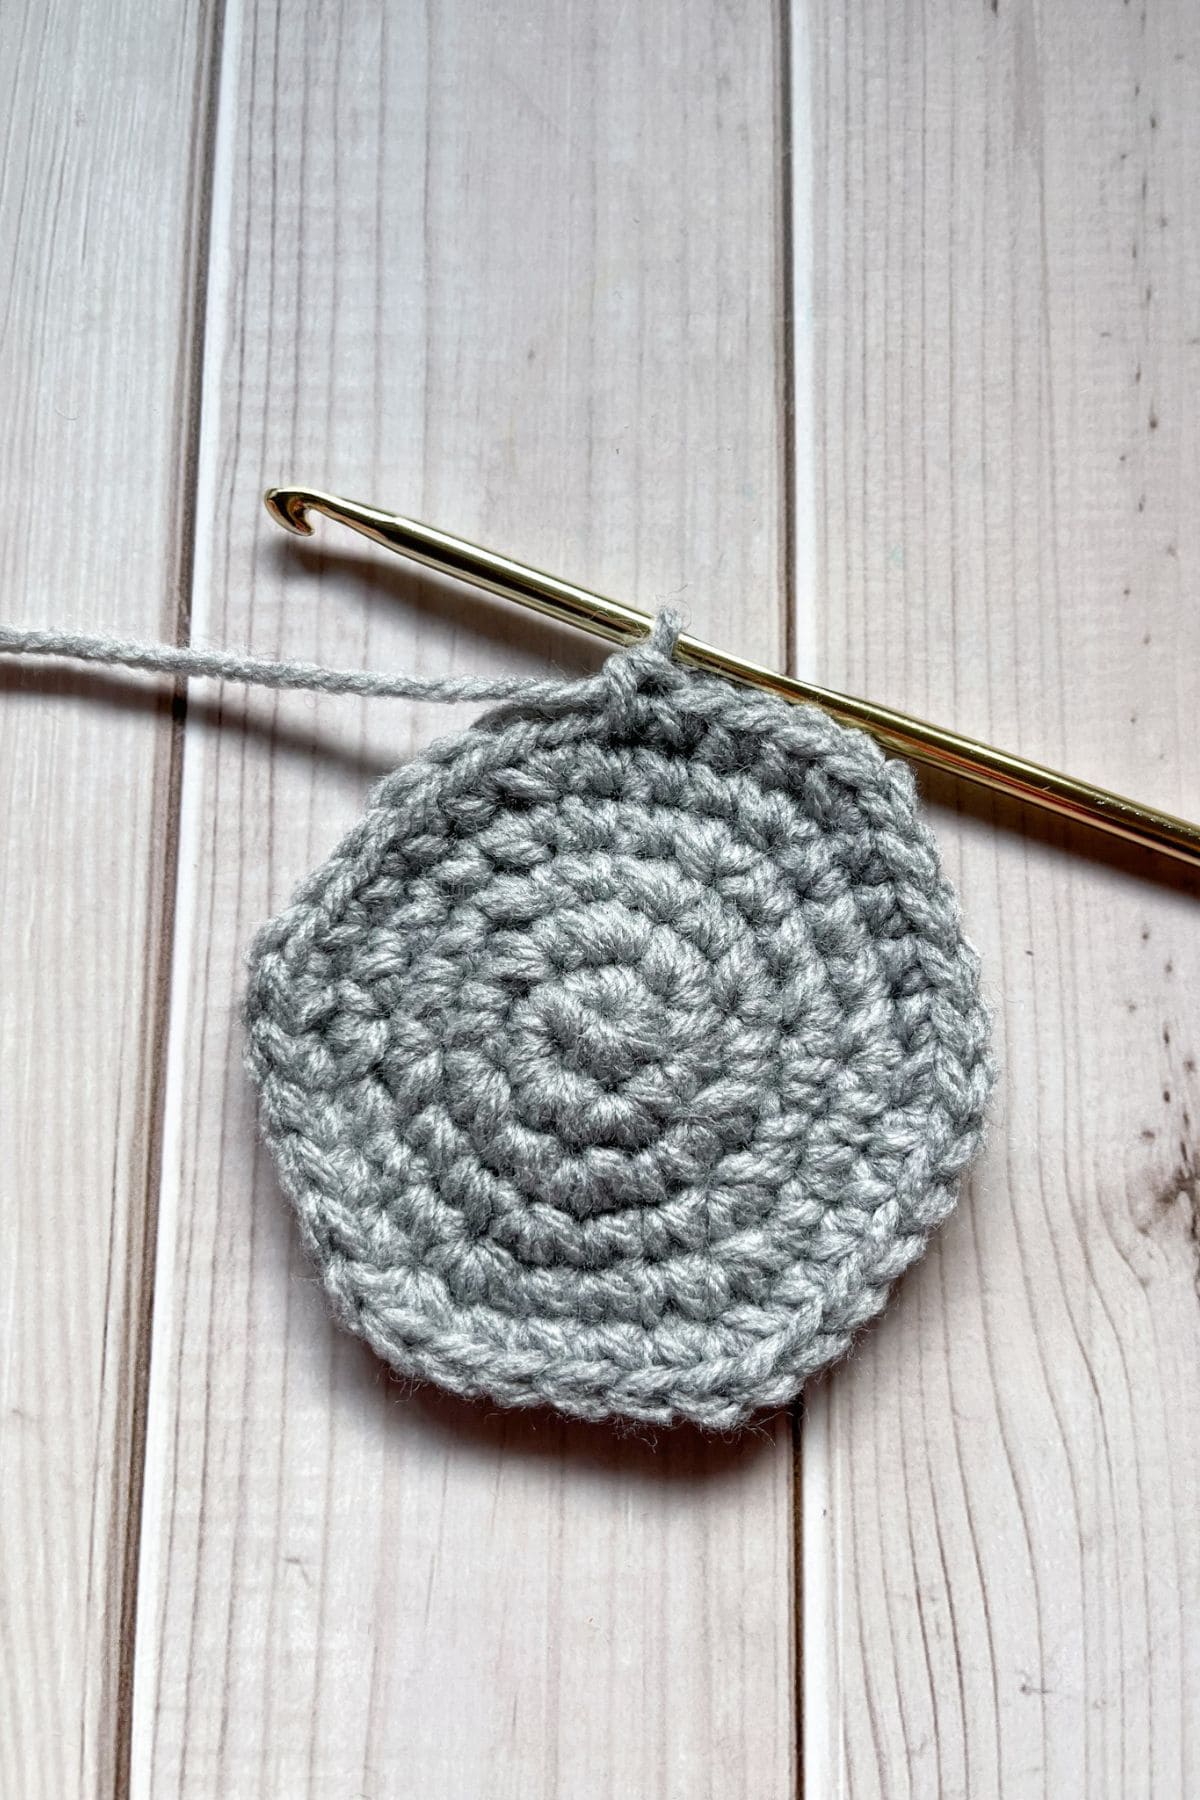
Round 3: Inc, sc. Then repeat until end of round (18)
Round 4: Inc, sc x2. Then repeat until end of round (24)
Round 5: Inc, sc x3. Then repeat until end of round (30)
Round 6: Inc, sc x4. Then repeat until end of round (36)
Round 7: Inc, sc x5. Then repeat until end of round (42)
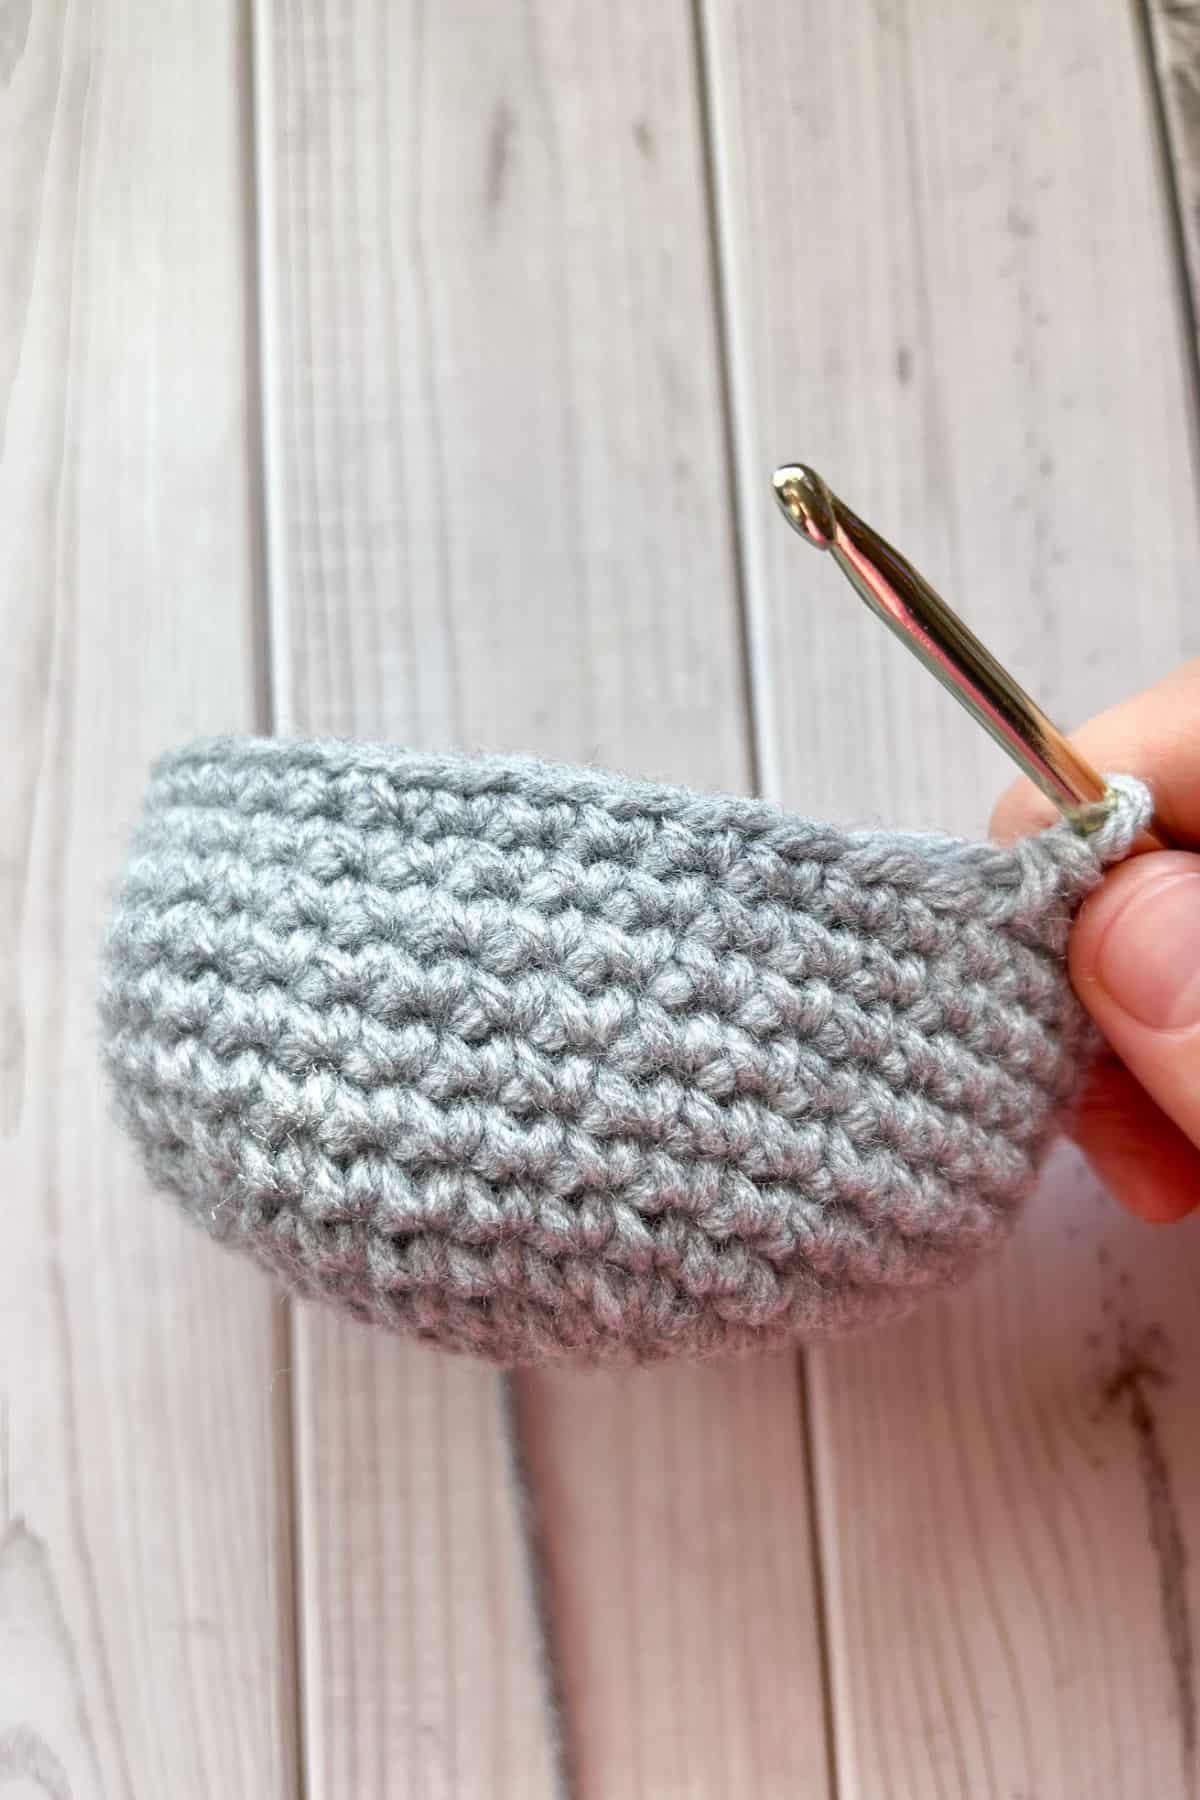
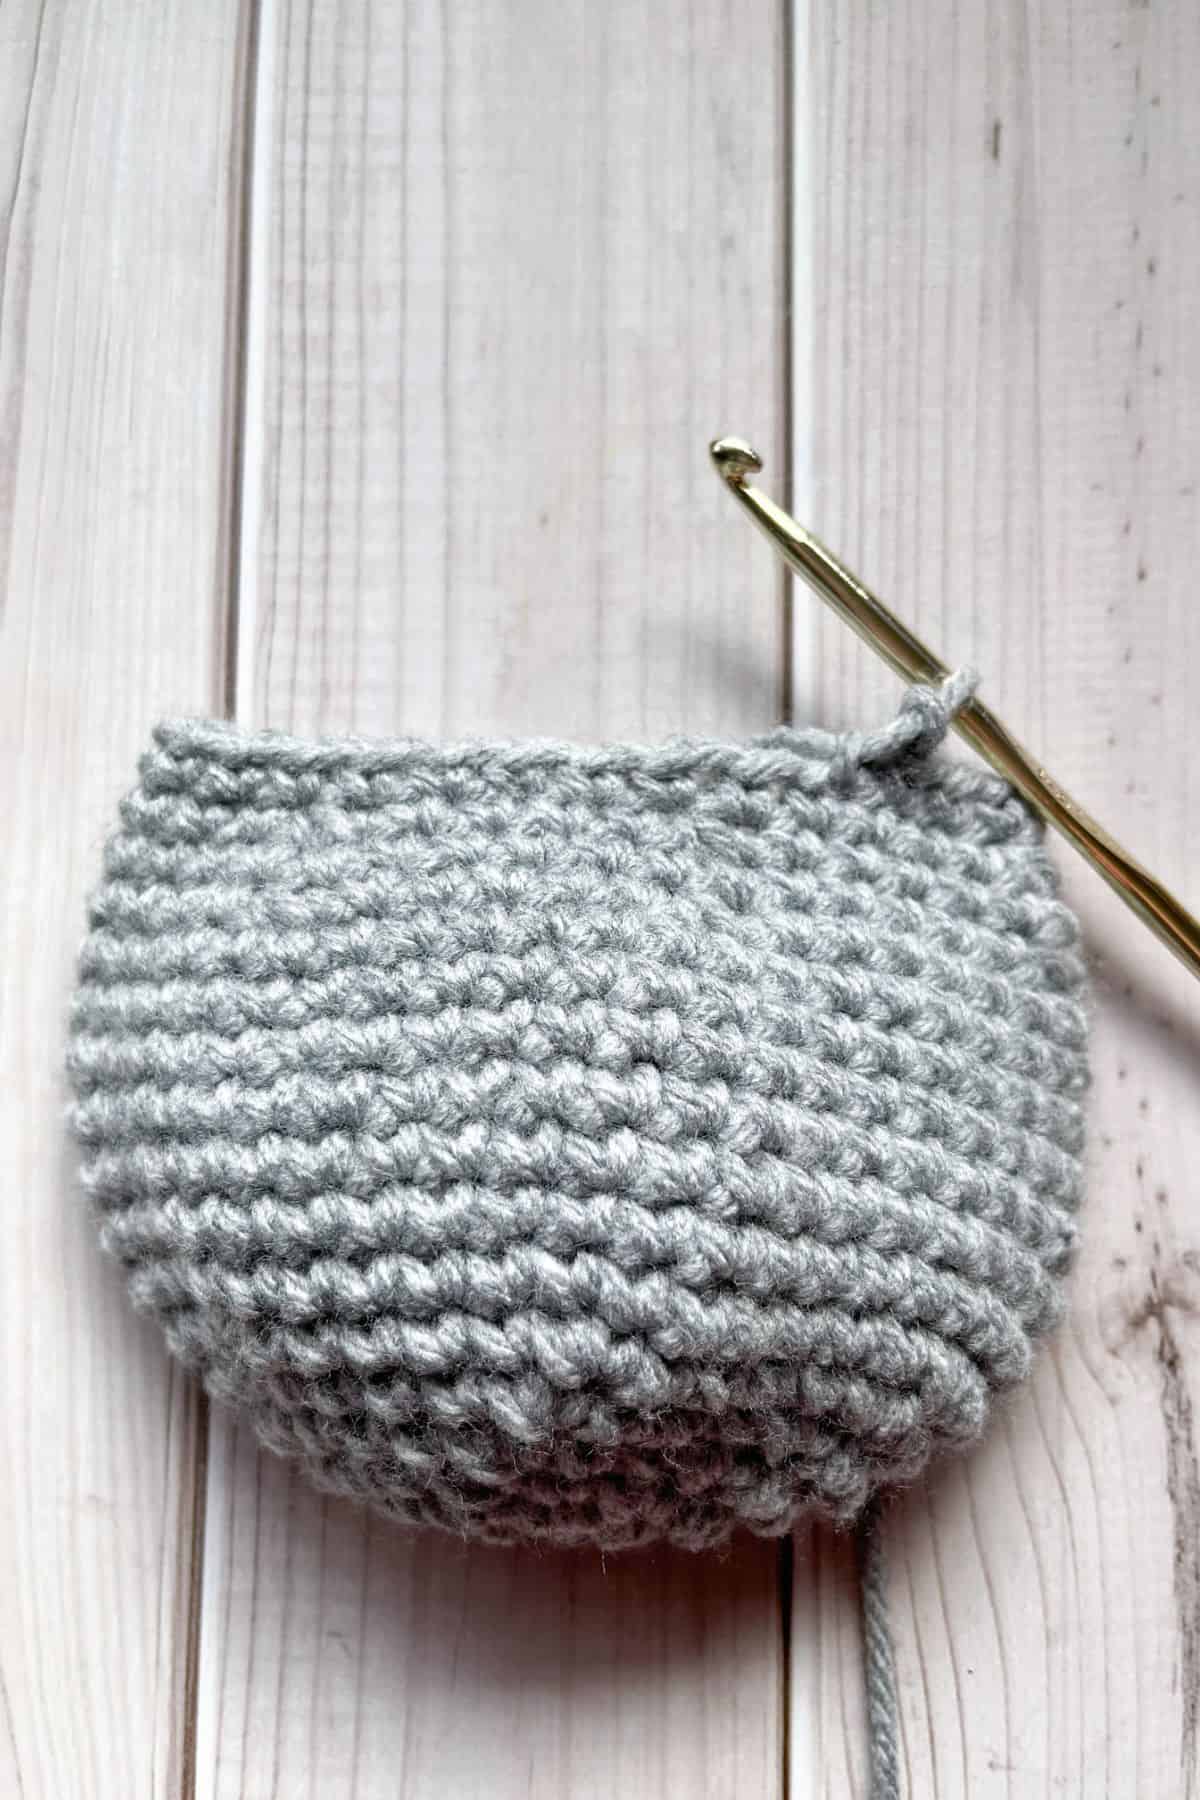
Round 8-14: Sc in every stitch (42)
Round 15: Dec, sc x5. Then repeat until end of round (36)
Round 16: Sc in every stitch (36)
Round 17: Dec, sc x4. Then repeat until end of round (30)
Round 18: Sc in every stitch (30)
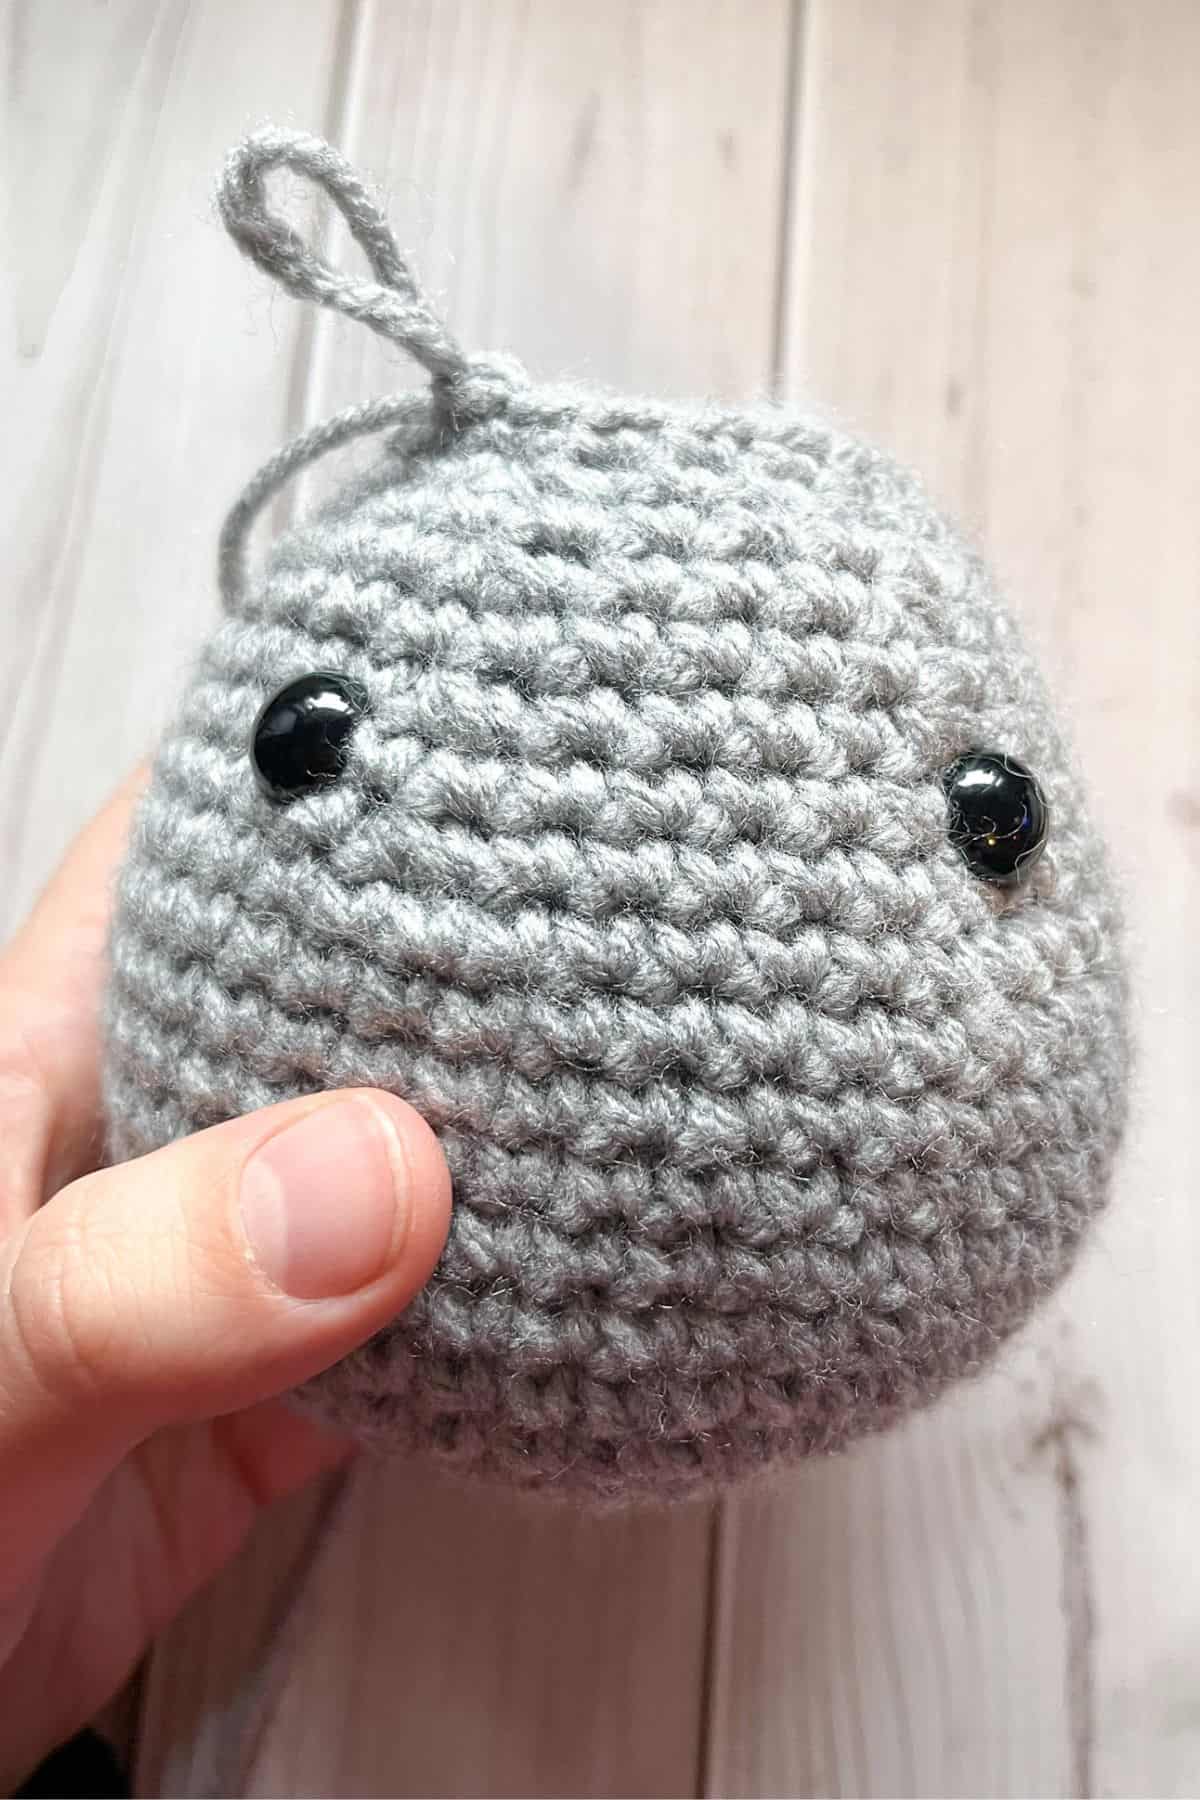
Round 19: Dec, sc x3. Then repeat until the end of round (24) (Should probably insert eyes and start to stuff the head if you haven't already.)
Round 20: Sc in every stitch (24)
Round 21: Dec, sc x2. Then repeat until end of round (18)
Round 22: Sc in every stitch (18)
Round 23: Dec, sc. Then repeat until end of round (12)
Round 24: Sc in every stitch (12)
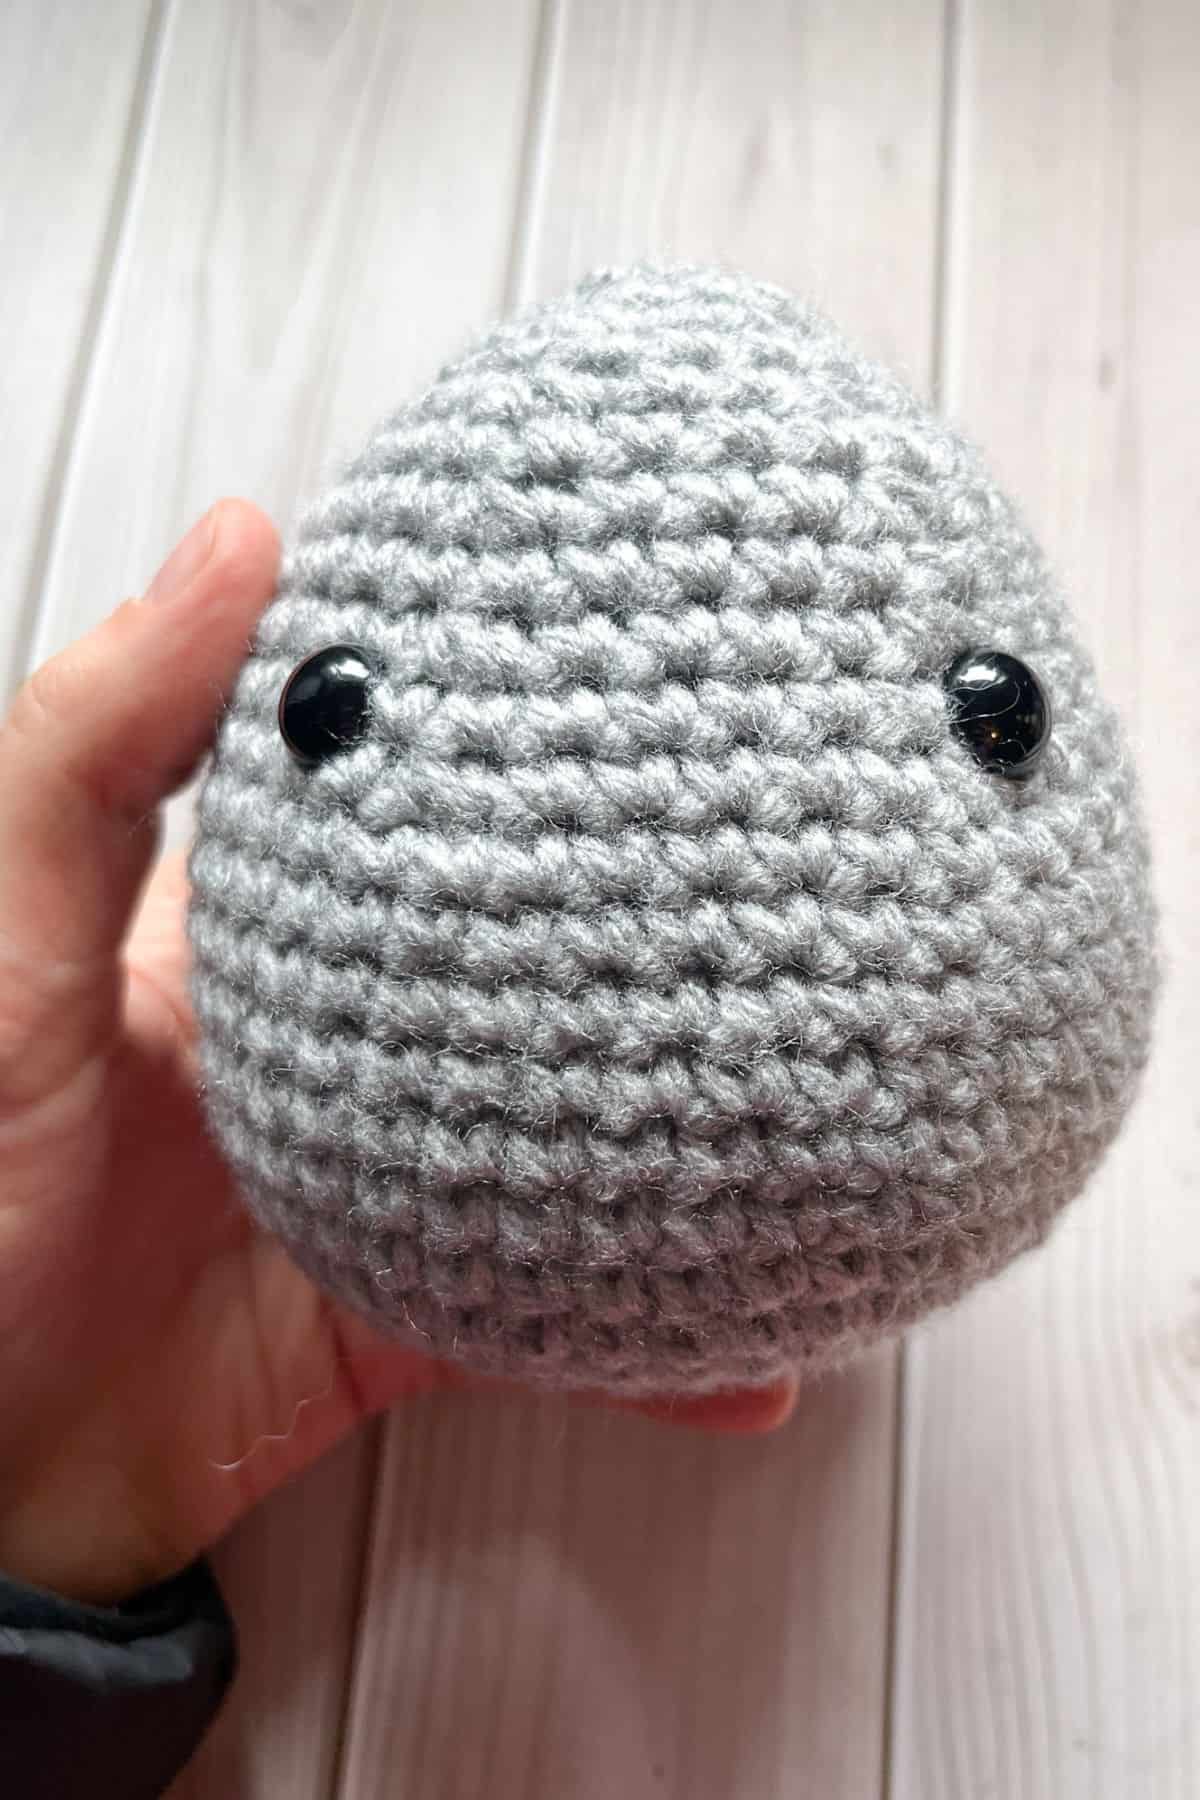
Round 25: Dec, and repeat until end of round (6). Fasten off and weave in any ends.
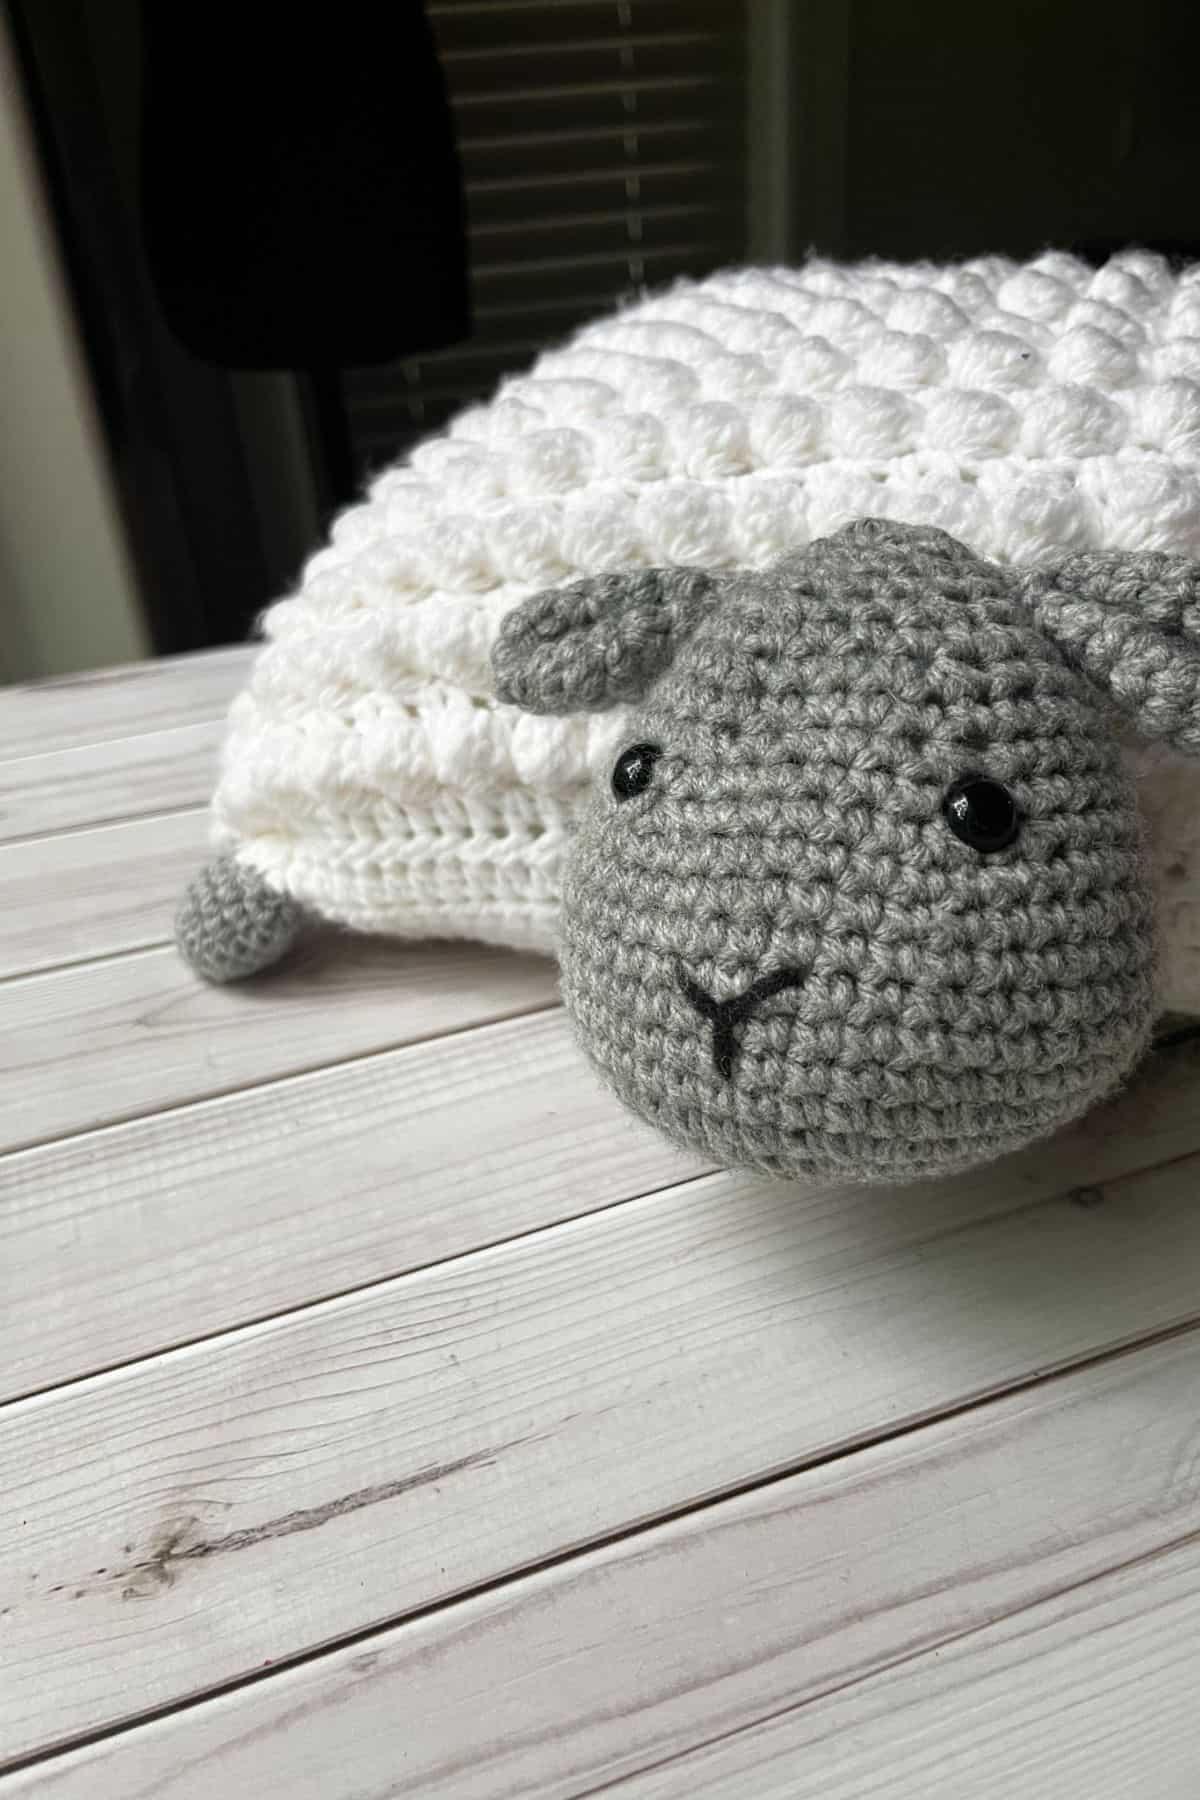
With the black yarn make a wide T on the nose of the sheep, near the bottom of its head. If you make the horizontal part of the nose first, you can pull it down when you make the vertical stitch by starting at the bottom of the vertical line looping over the top line and pulling it down.
Crochet Sheep Ears:
This pattern is made in the round. Make 2.
Round 1: Using the gray yarn, make a mr and then sc x6 into the mr. (6)
Round 2: Inc in every sc. (12).
Round 3: Inc, sc. Then repeat until end of round (18).
Round 4: Sc in every stitch. (18)
Round 5: Dec, sc. Then repeat until end of round (12).
Round 6: Sc in every stitch. (12).
Round 7: Dec, and repeat until end of round (6).
Round 8: Sc in every stitch (6). Fasten off the yarn but leave a tail for sewing. Do not stuff the ears.
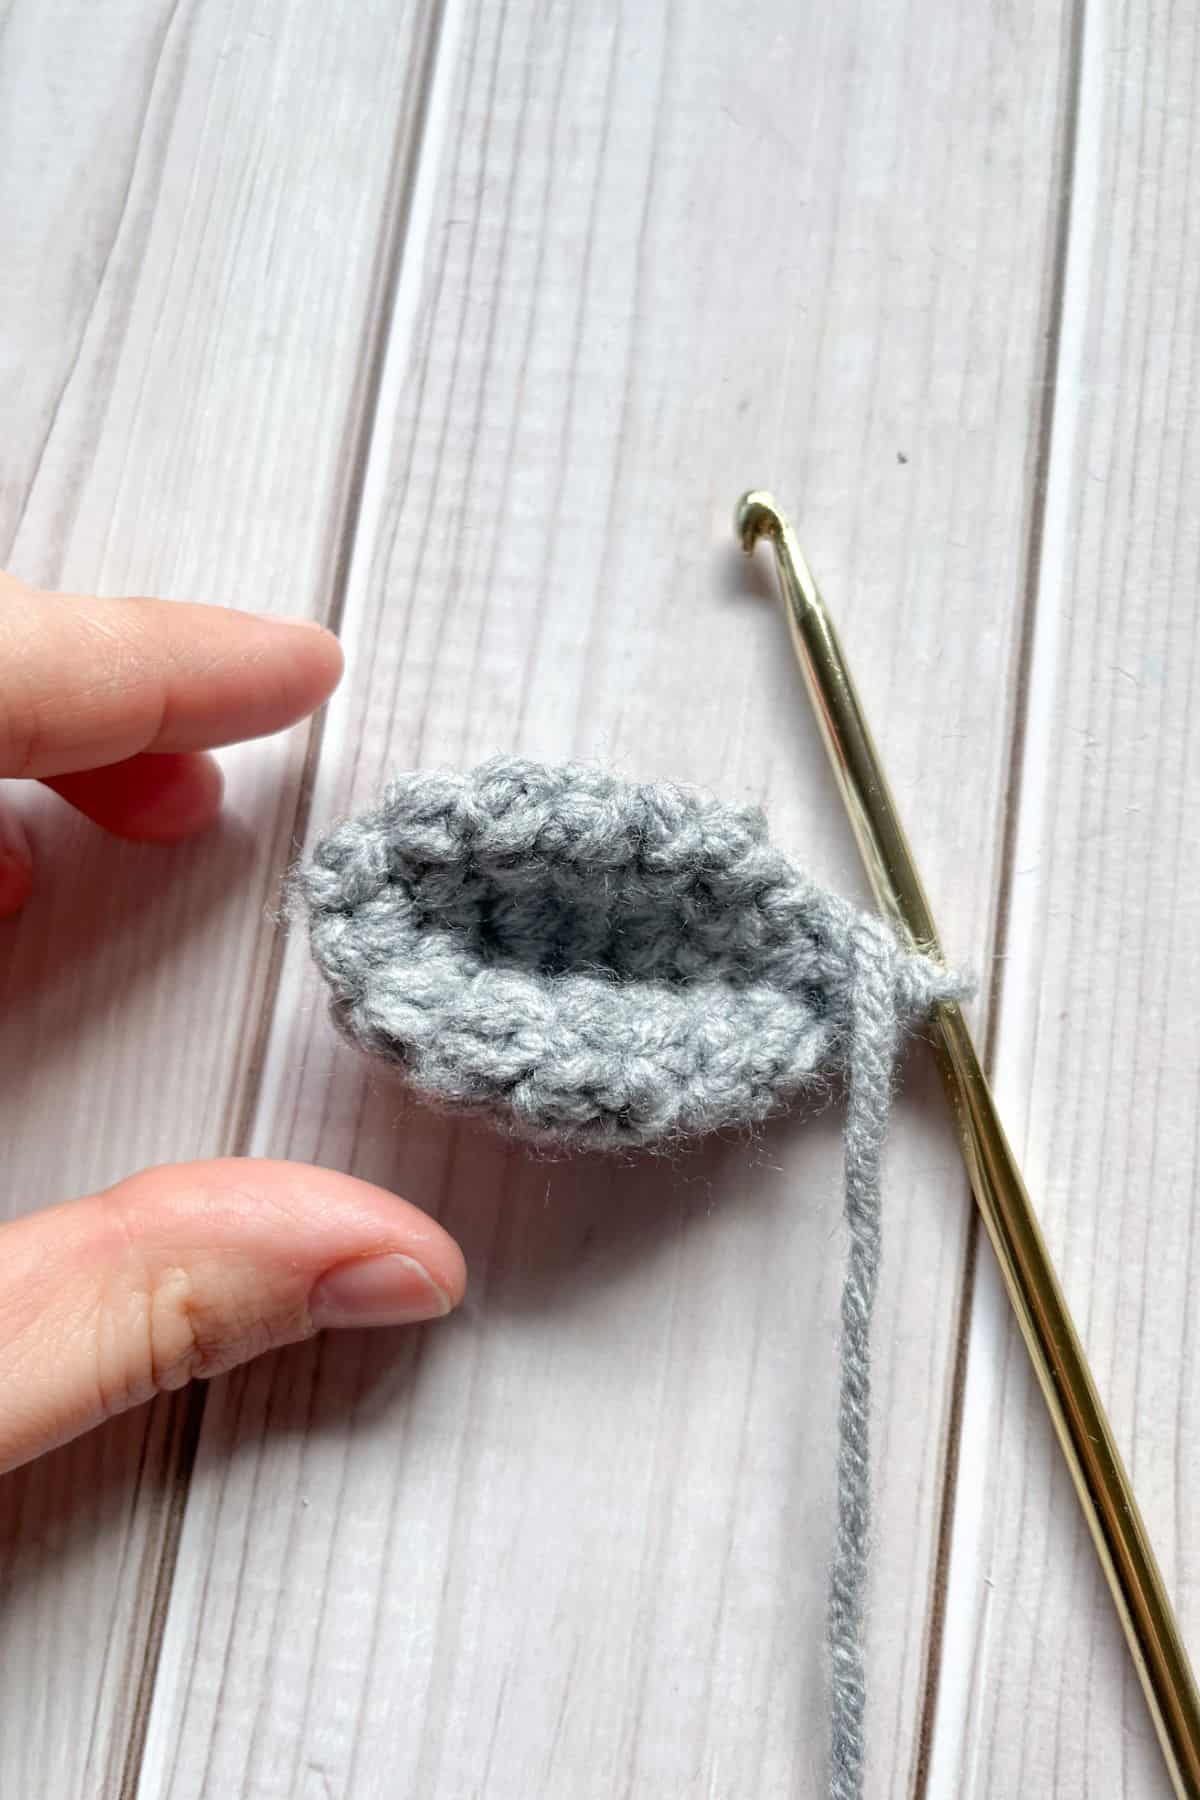
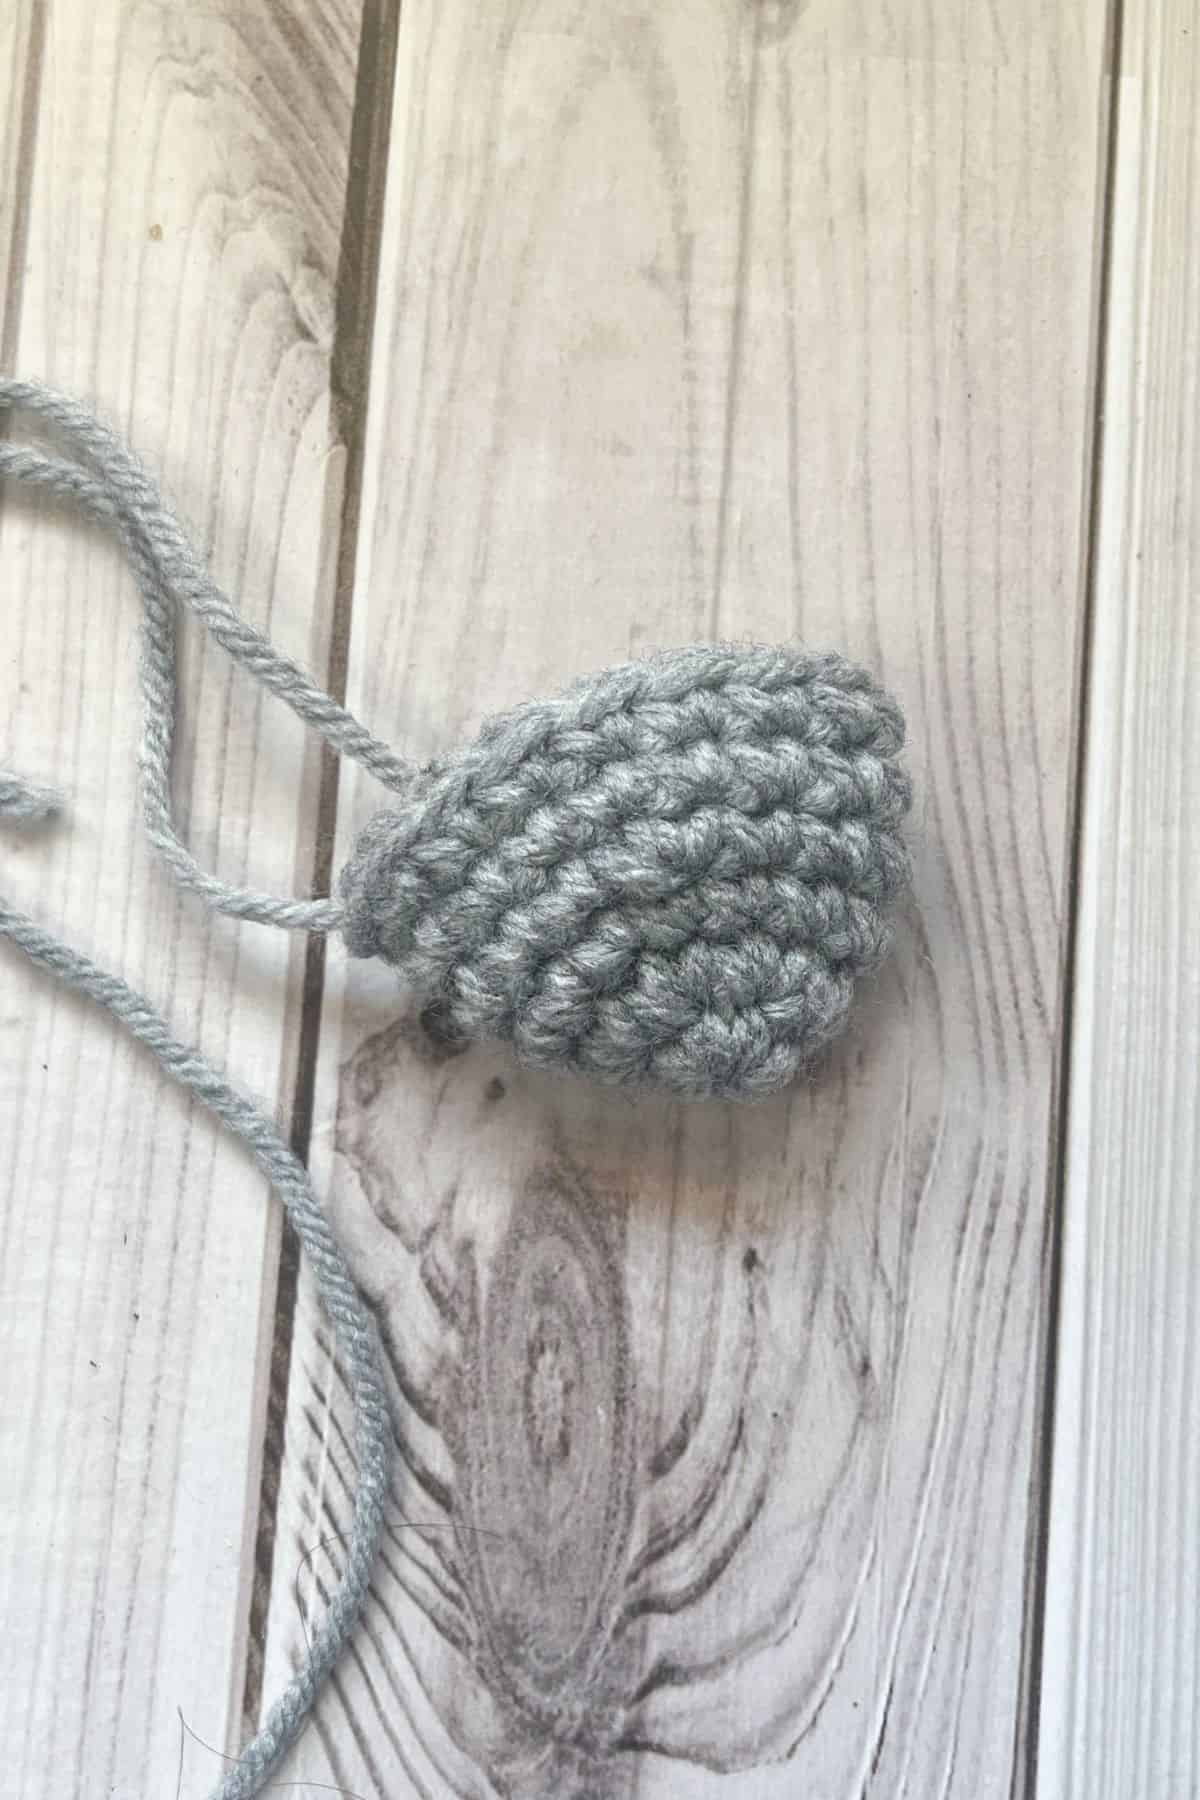
Crochet Sheep Feet:
This pattern is made in the round. Make 4.
Round 1: Using the gray yarn, make a mr and then sc x6 into the mr. (6)
Round 2: Inc in every sc. (12).
Round 3: Sc in every stitch. (12).
Round 4: Inc, sc x3. Then repeat for the rest of the round. (15).
Round 5-6: Sc in every stitch. (15). Fasten off and leave tails for sewing.
Pillow Part of the Pattern:
Top part:
This pattern is made in rows.
Row 1: Ch x50 and then turn.
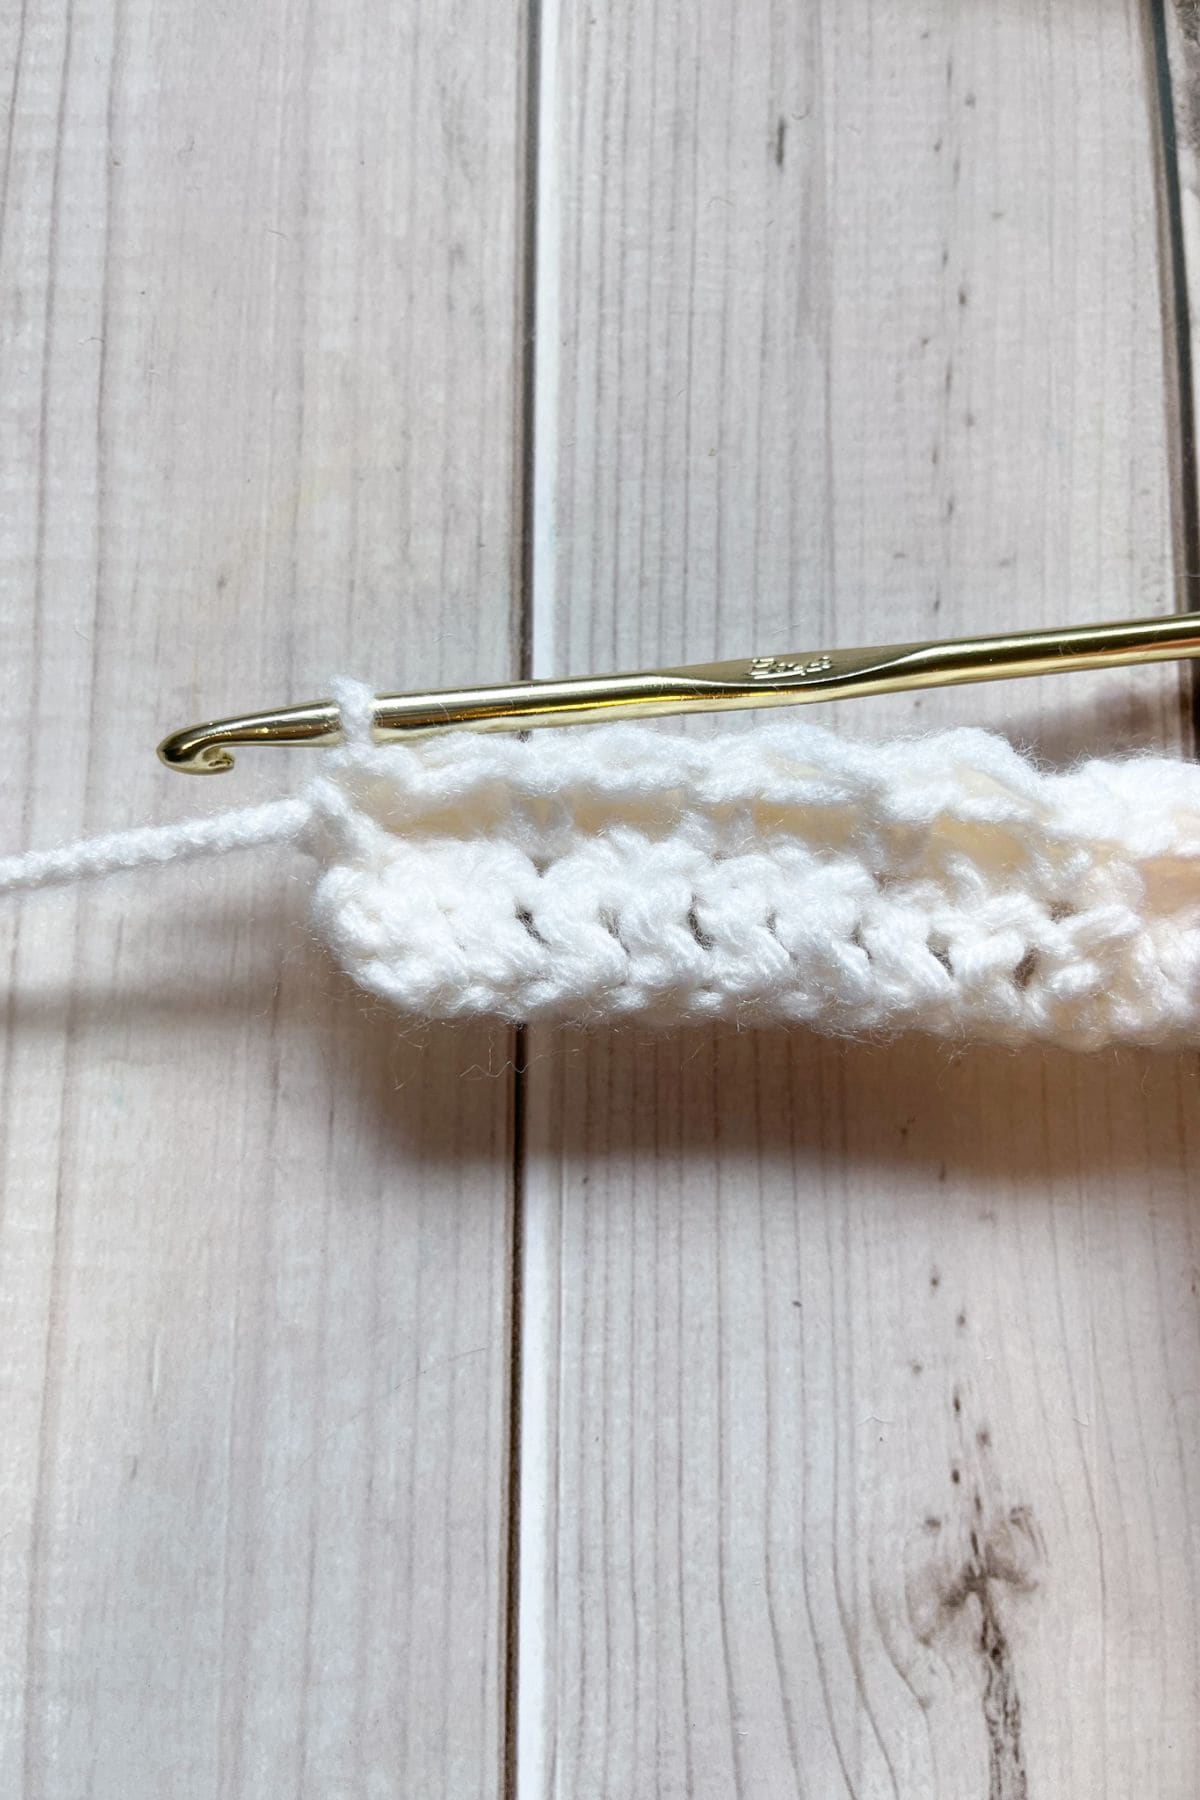
Row 2: In the second ch from the hook make a hdc. Continue making hdc for the rest of the row (49). Then ch x1 and turn.
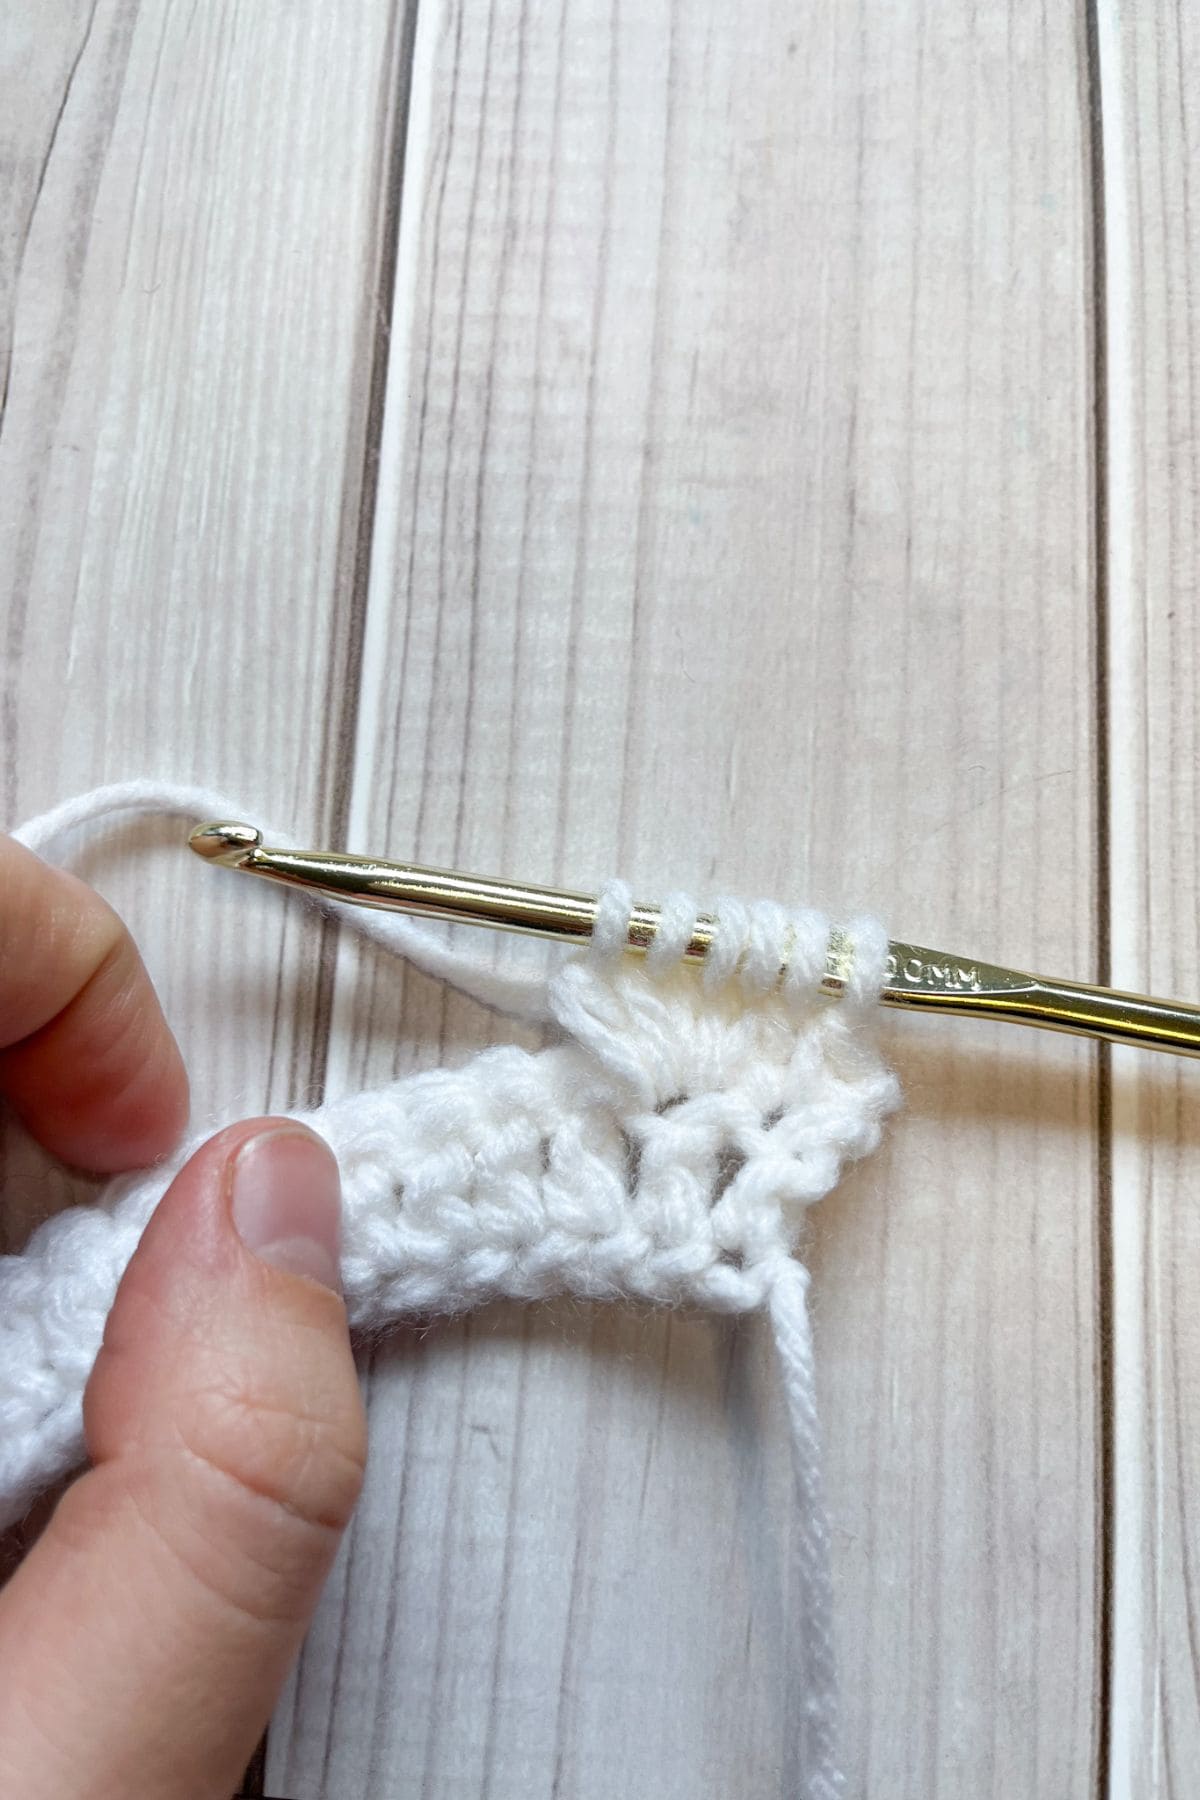
Row 3: In the first stitch (not the chain), make a sc. Then ch x2 and move onto making a bobble stitch in the next stitch.
*Bobble Stitch: A bobble stitch is made by yarning over, inserting the hook into the stitch, yarn over, draw loop back through stitch, yarn over pull through 2 loops then STOP. You will have a half completed dc hanging from your hook. Repeat the steps 4 more times until you have 5 half completed dc stitches hanging from your hook and 6 loops ON your hook. Then yarn over and pull through all 6 loops.*
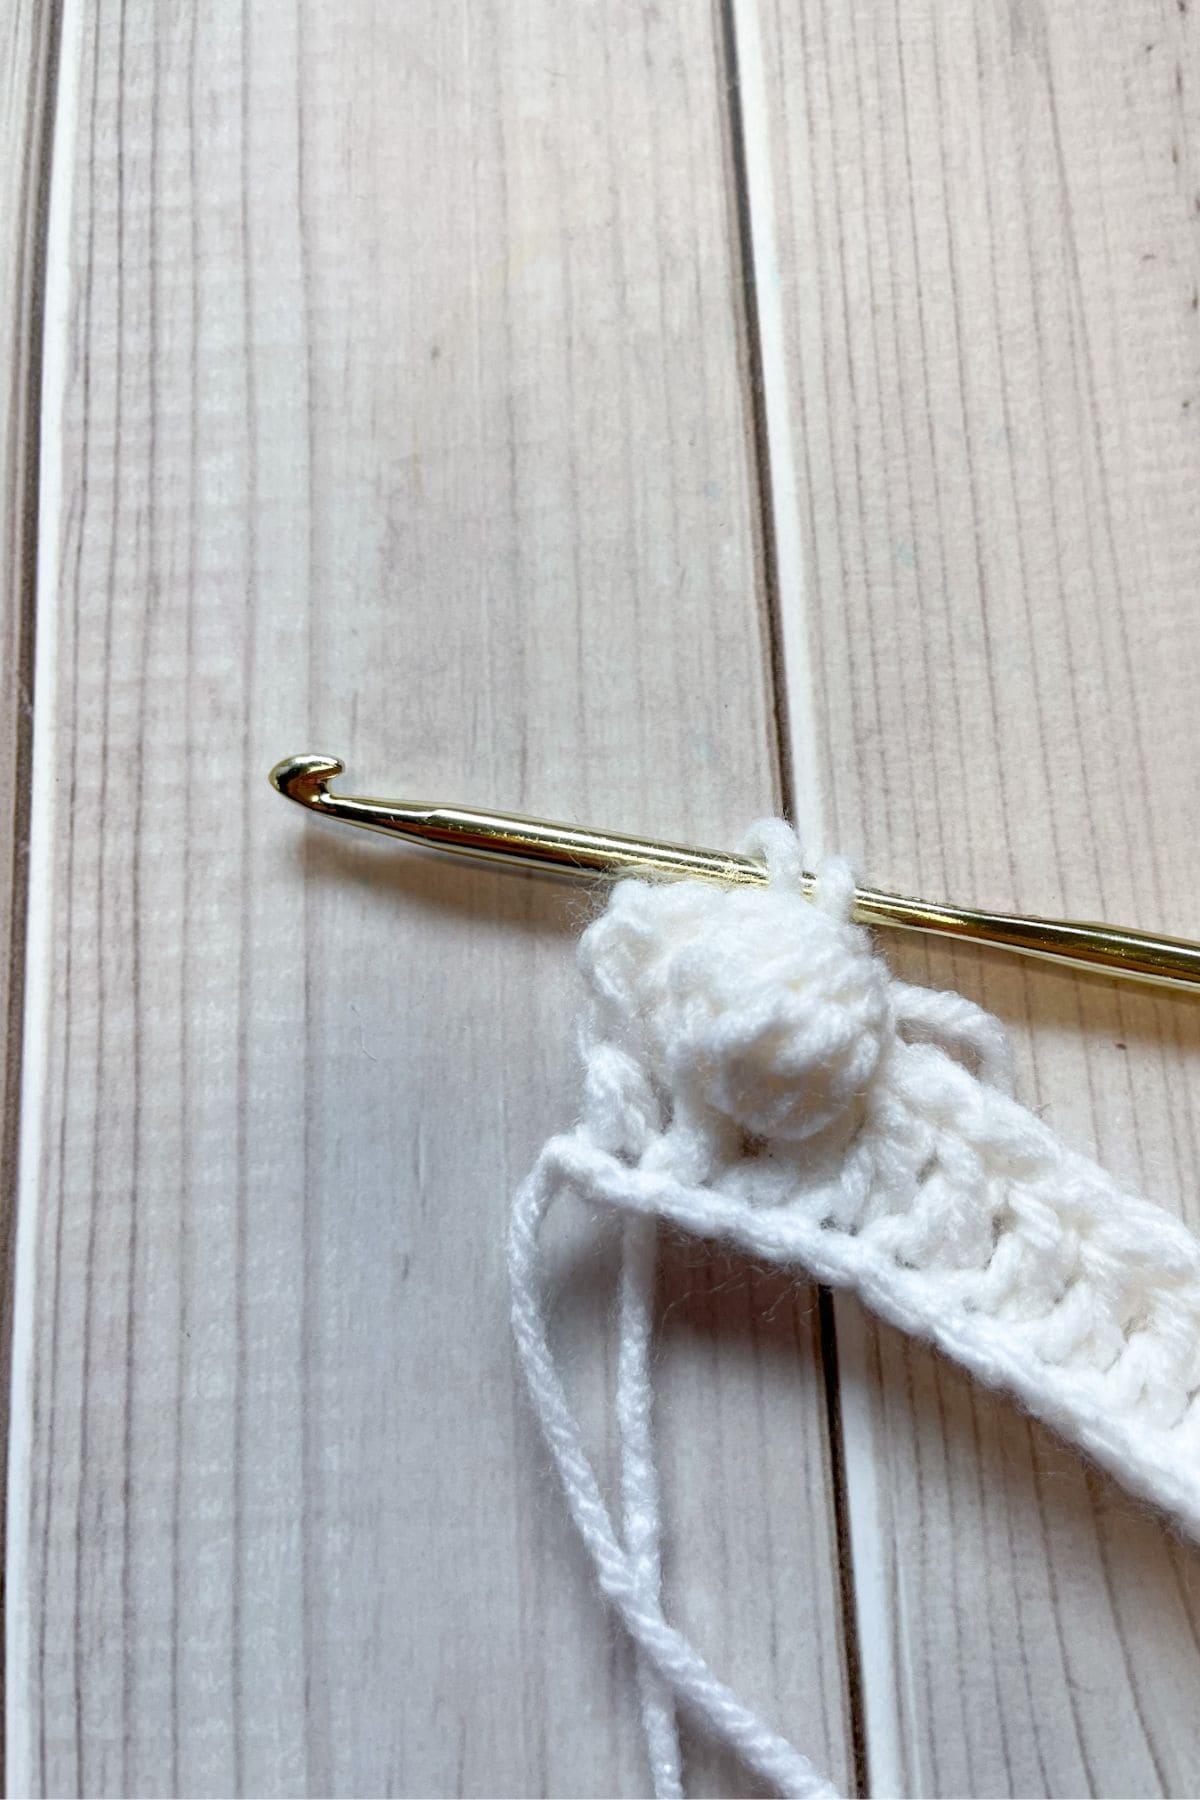
This is the front side of the bobble stitch.
Make a sc in the next stitch next to the bobble stitch. Then repeat alternating ch x2 + bobble stitch, sc for the rest of the round. The last stitch in the round should be a sc.
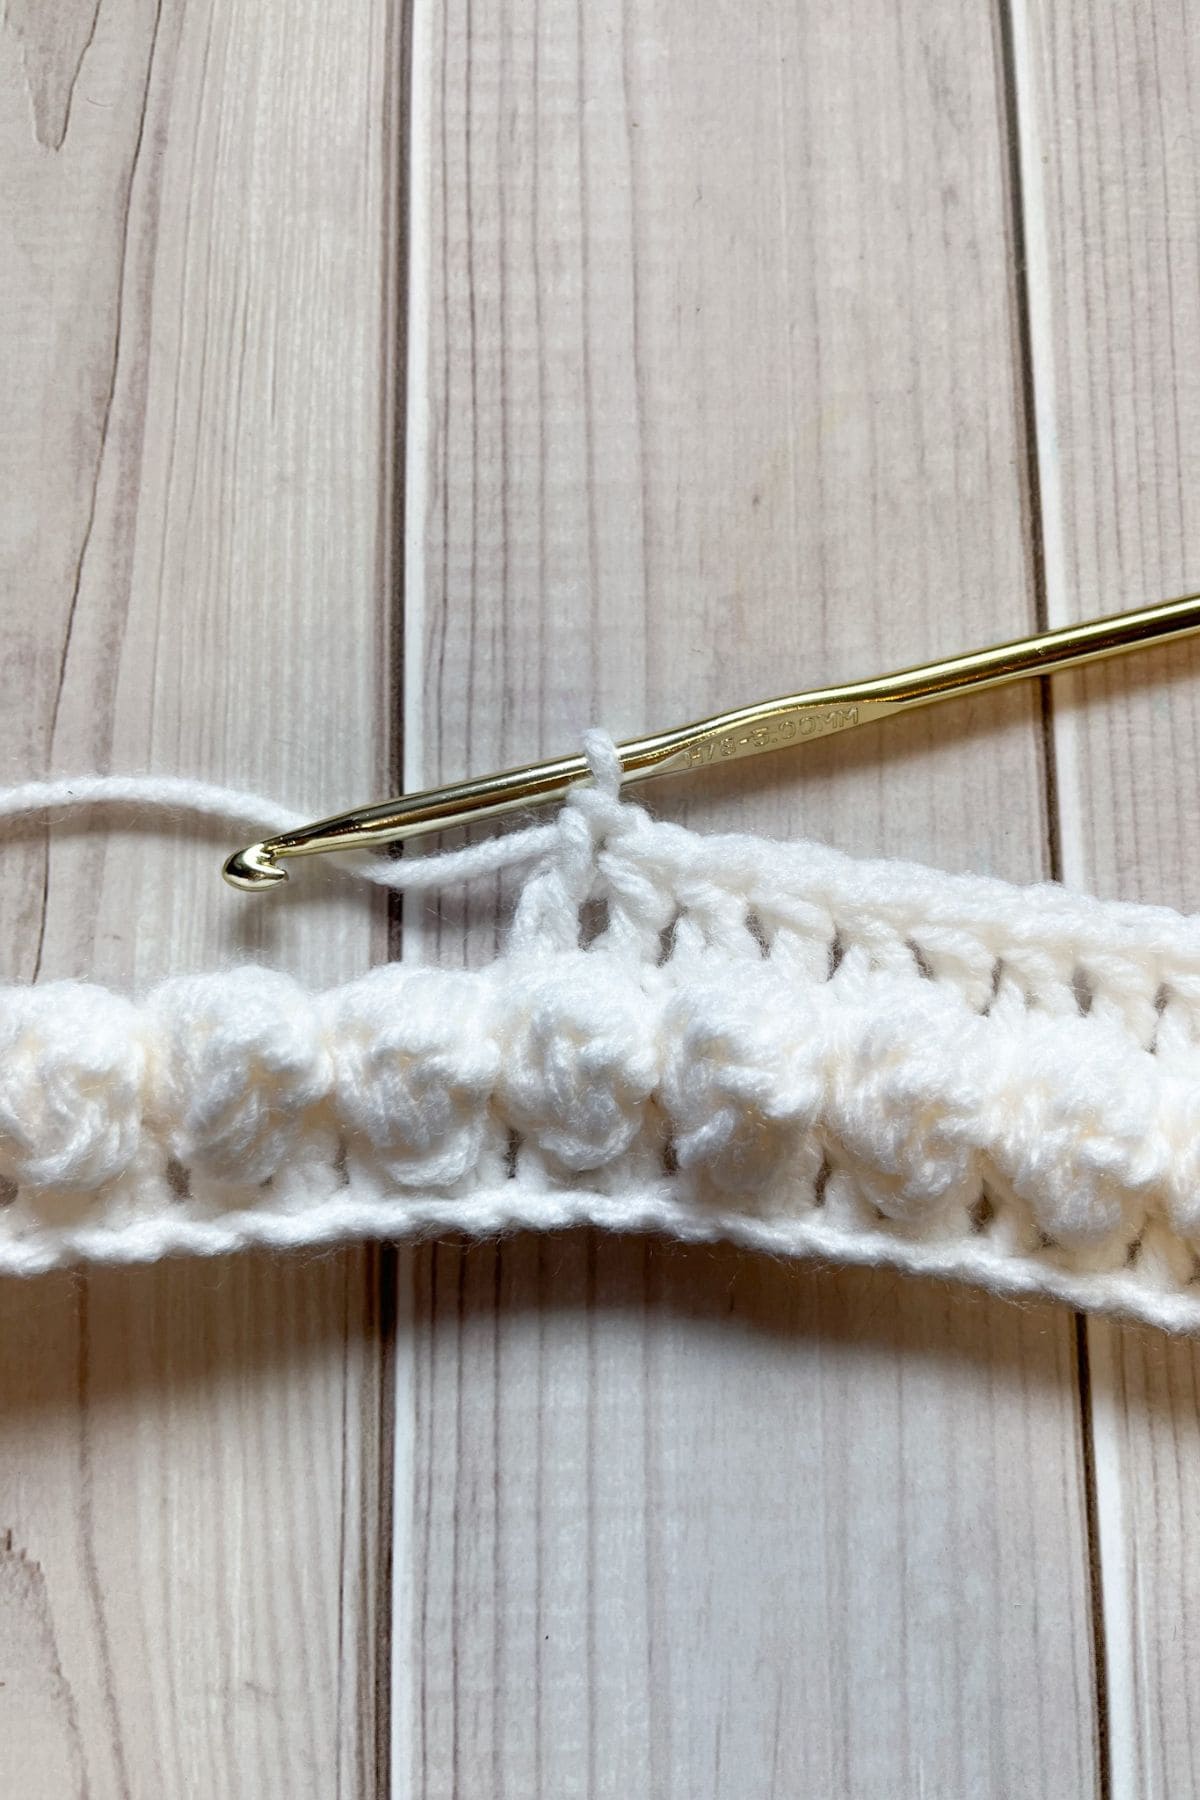
You will find that one side of the project has the bobbles and the other side is flat. The flat side is the “wrong” side and will be the inside side, while the bobbles is the “right” side and will be on the outside of your pillow.
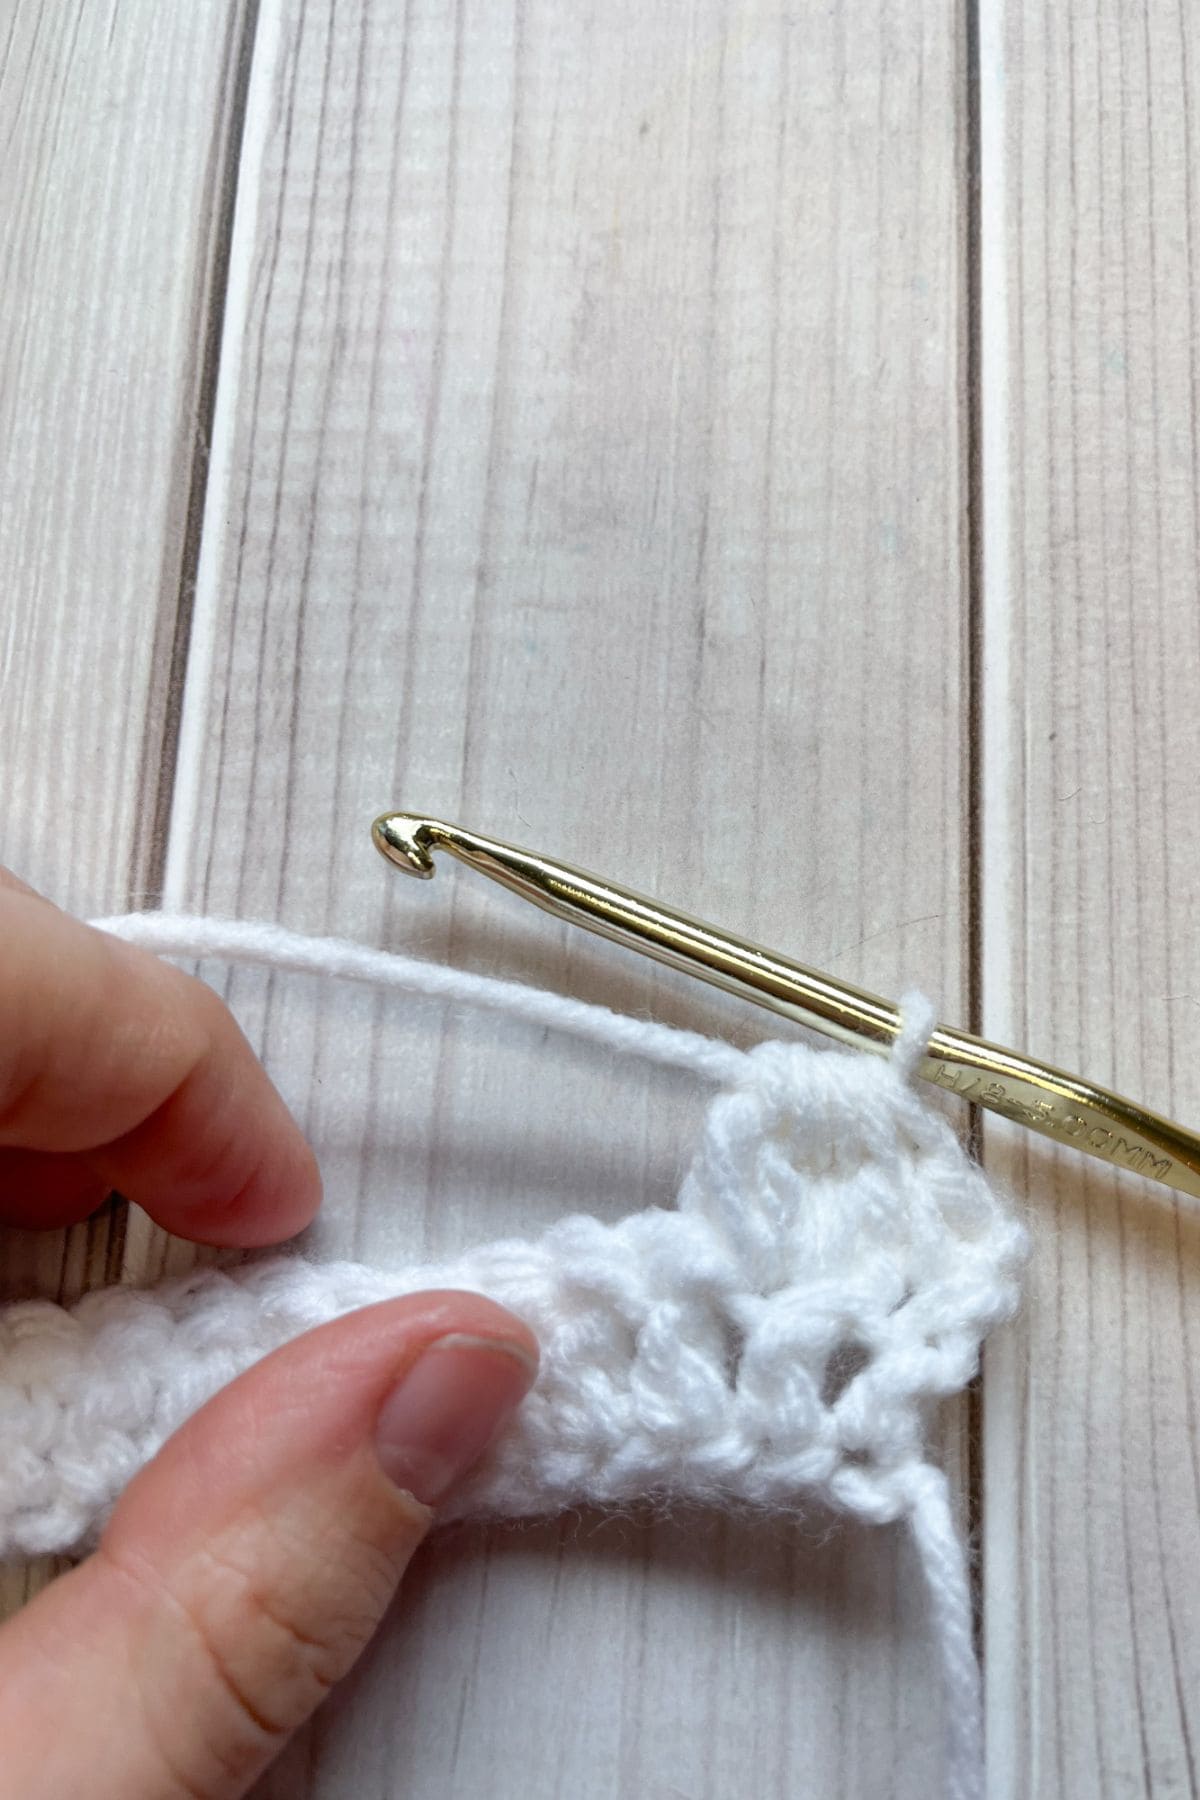
Ch x1 and turn.
Row 4: Make a hdc in the first stitch available and work hdc into every stitch in this row (49). Then ch x1 and turn.
Row 5-30: Repeat rows 3 and 4 for the rest of the rectangle (49). Then fasten off and weave in the ends.
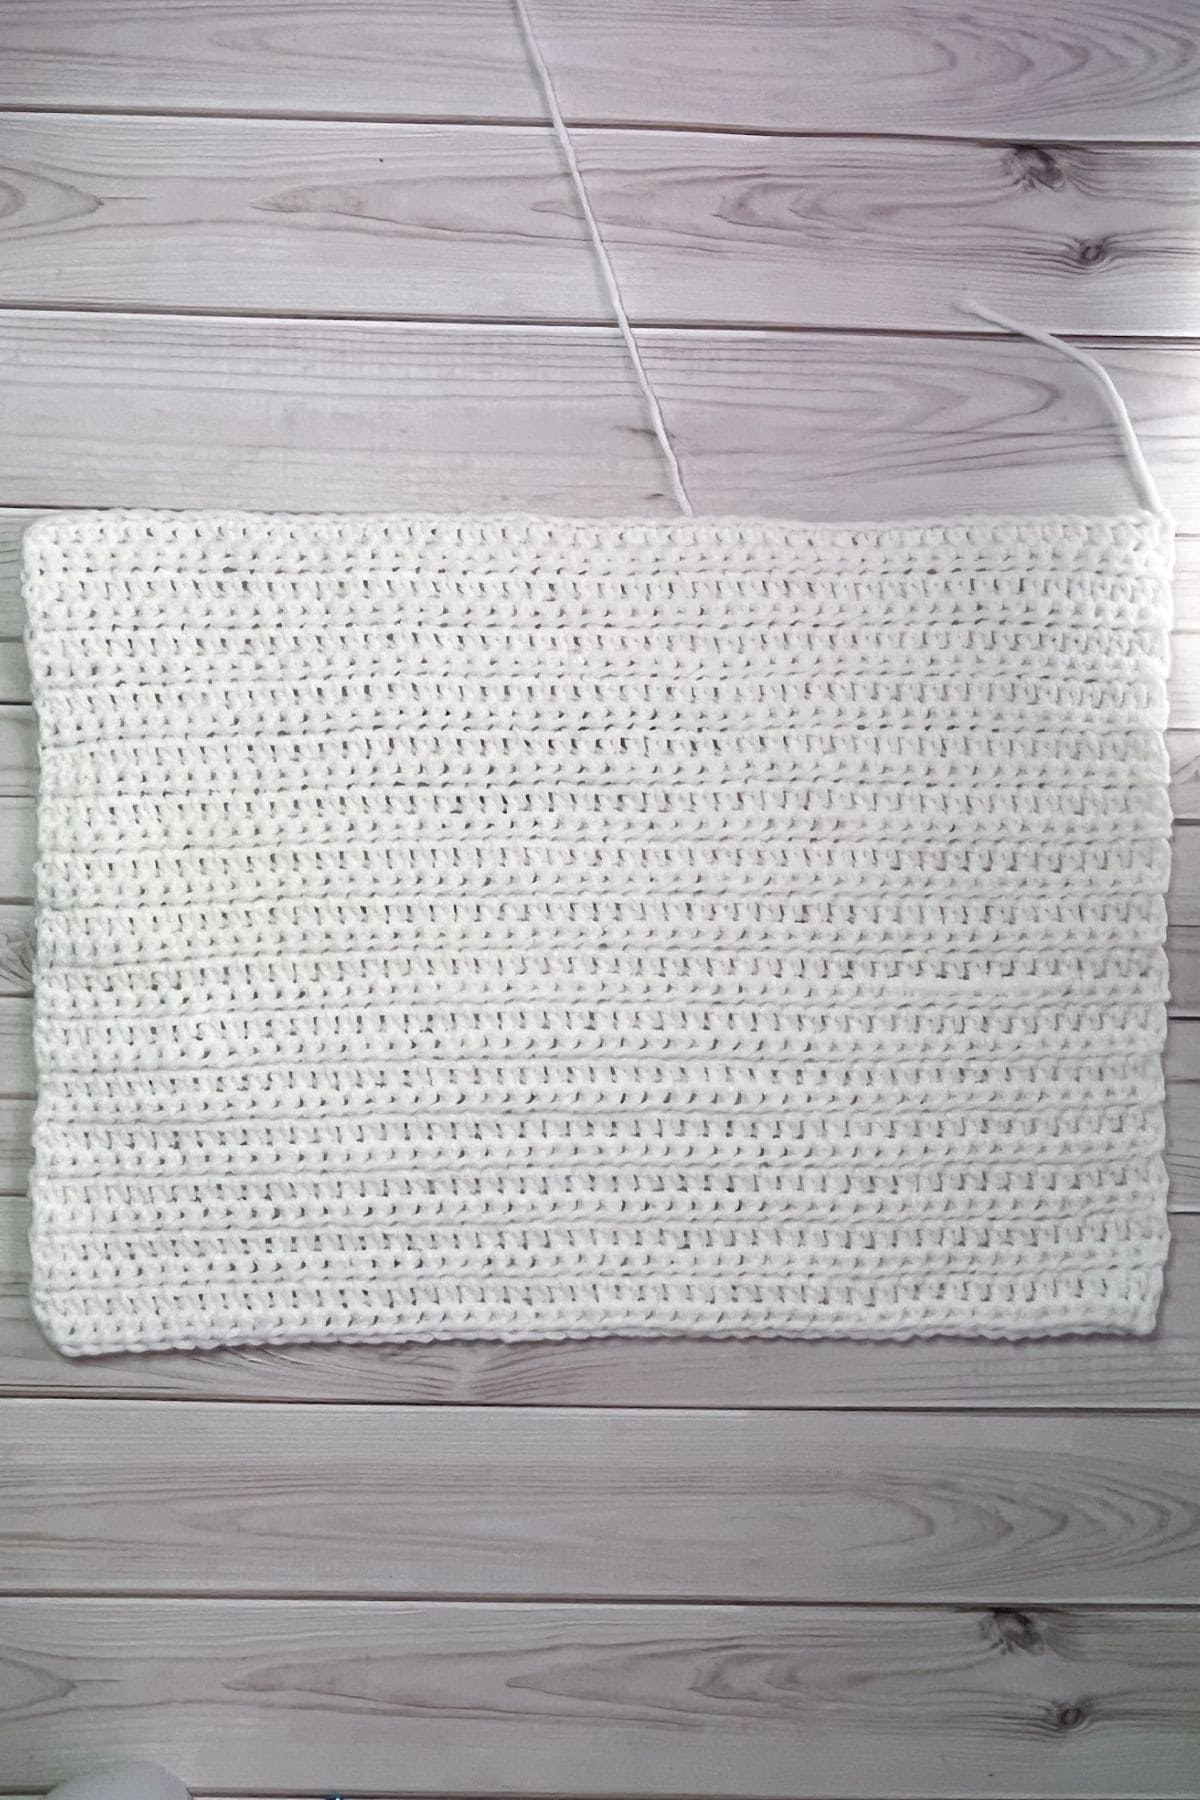
Bottom Part:
This part of the pattern is worked in rows.
Row 1: Ch x50 and then turn.
Row 2: In the second ch from the hook make a hdc. Continue making hdc for the rest of the row (49). Then ch x1 and turn.
You want to make sure the size of the hdc and bobble square are similar in size, you may need to either add chains in the beginning to achieve the right size, or move up a hook size. I was fine making the bottom rectangle with the same number of stitches as the bobble top.
Row 3-30: Repeat row 2. Then fasten off the yarn and leave a long tail for sewing.
Crochet Strap:
This part of the pattern is made in rows:
Row 1: Ch x13 and then turn.
Row 2: In the second ch from the hook make a sc and make sc for the rest of the row (12). Then ch x1 and turn.
Row 3: Sc in every stitch for this row (12). Then ch x1 and turn.
Row 4-16: Repeat row 3 (12). Then ch x1 and turn.
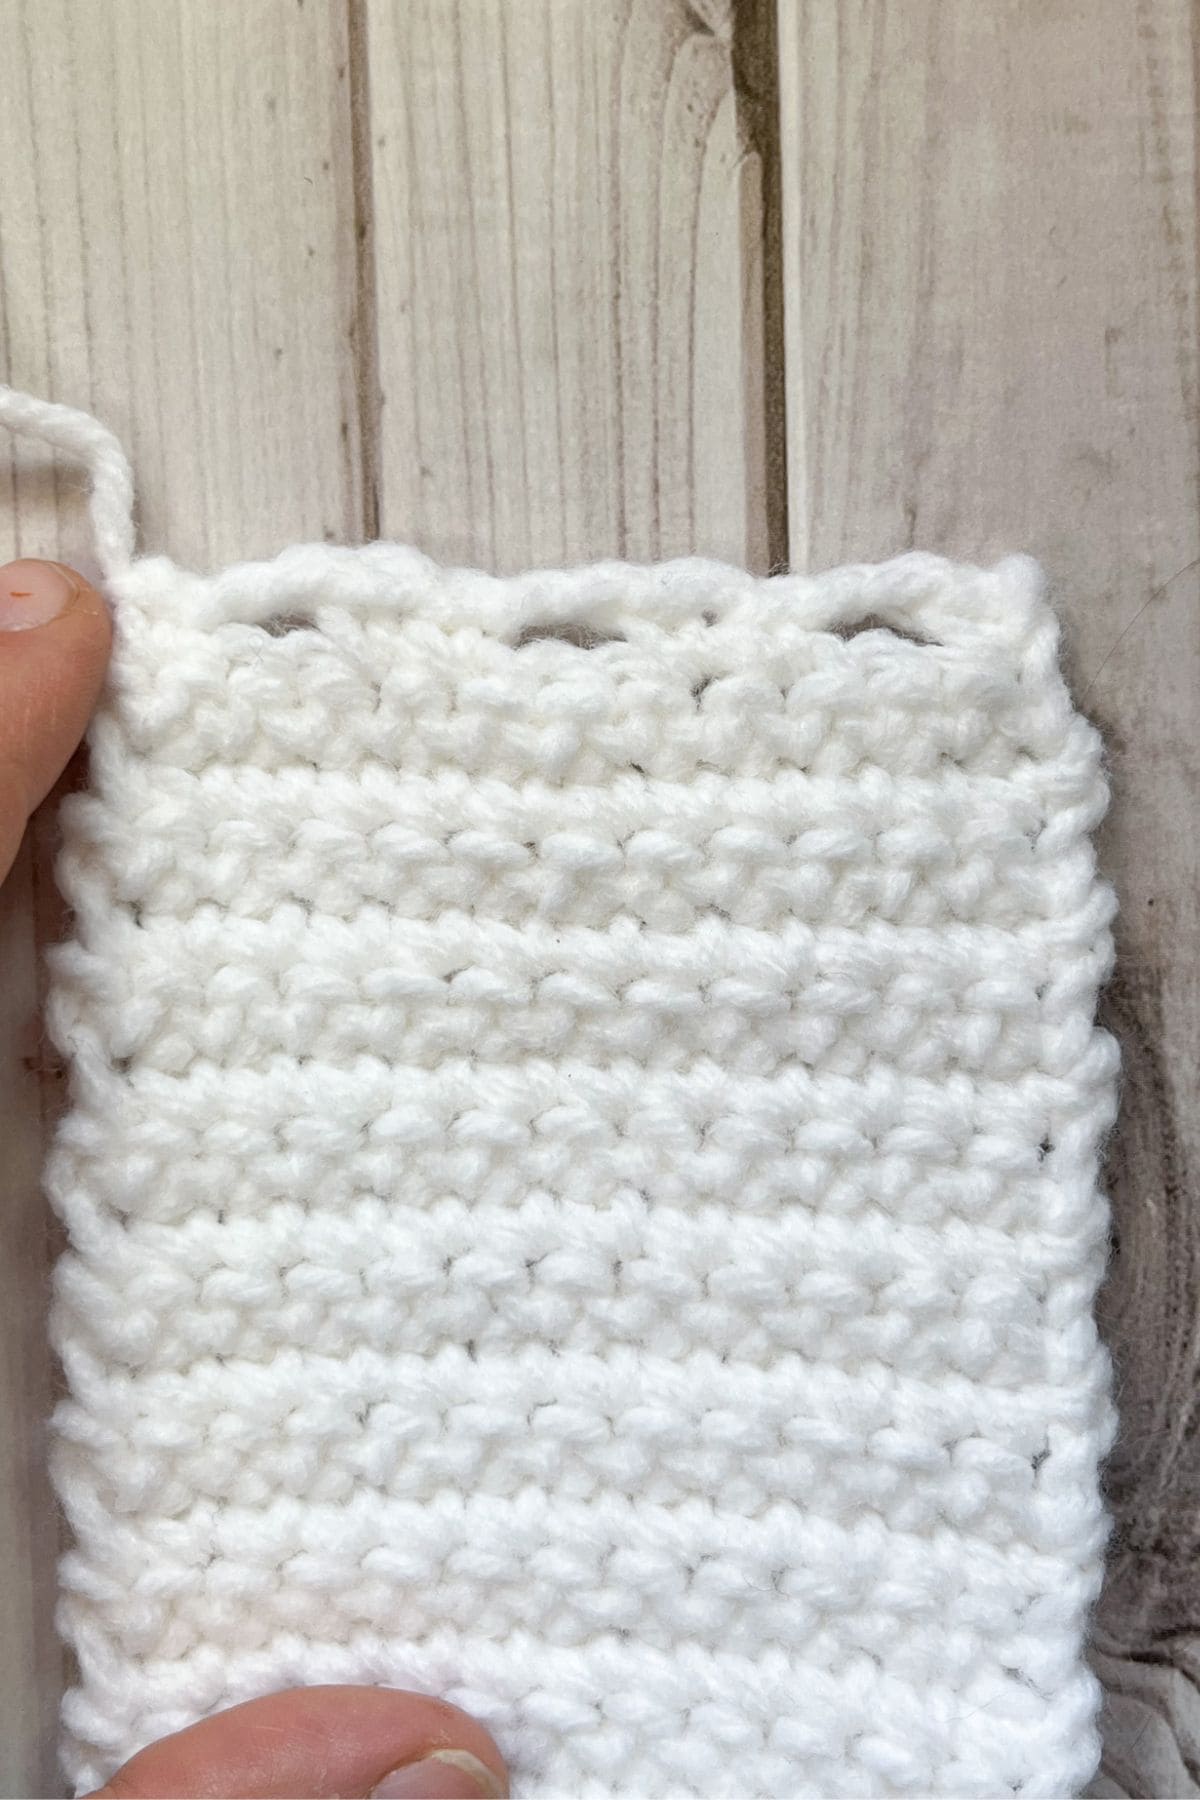
Row 17: Sc x2, ch x2 and skip the following 2 stitches below, sc x1, (ch x2 and skip the 2 stitches below) x2, then sc x2 (12).
This row is for making holes for the 1” buttons. If you have other sized buttons, please adjust this row to fit your buttons.
Finishing:
Sew the ears to the sheep's head.
Next sew the pillow top and bottom together, stuff and sew shut.
Then sew the head to the top-middle-edge of the pillow.
Sew the little feet onto the corners of the pillow, you can stuff them a little if you would like.
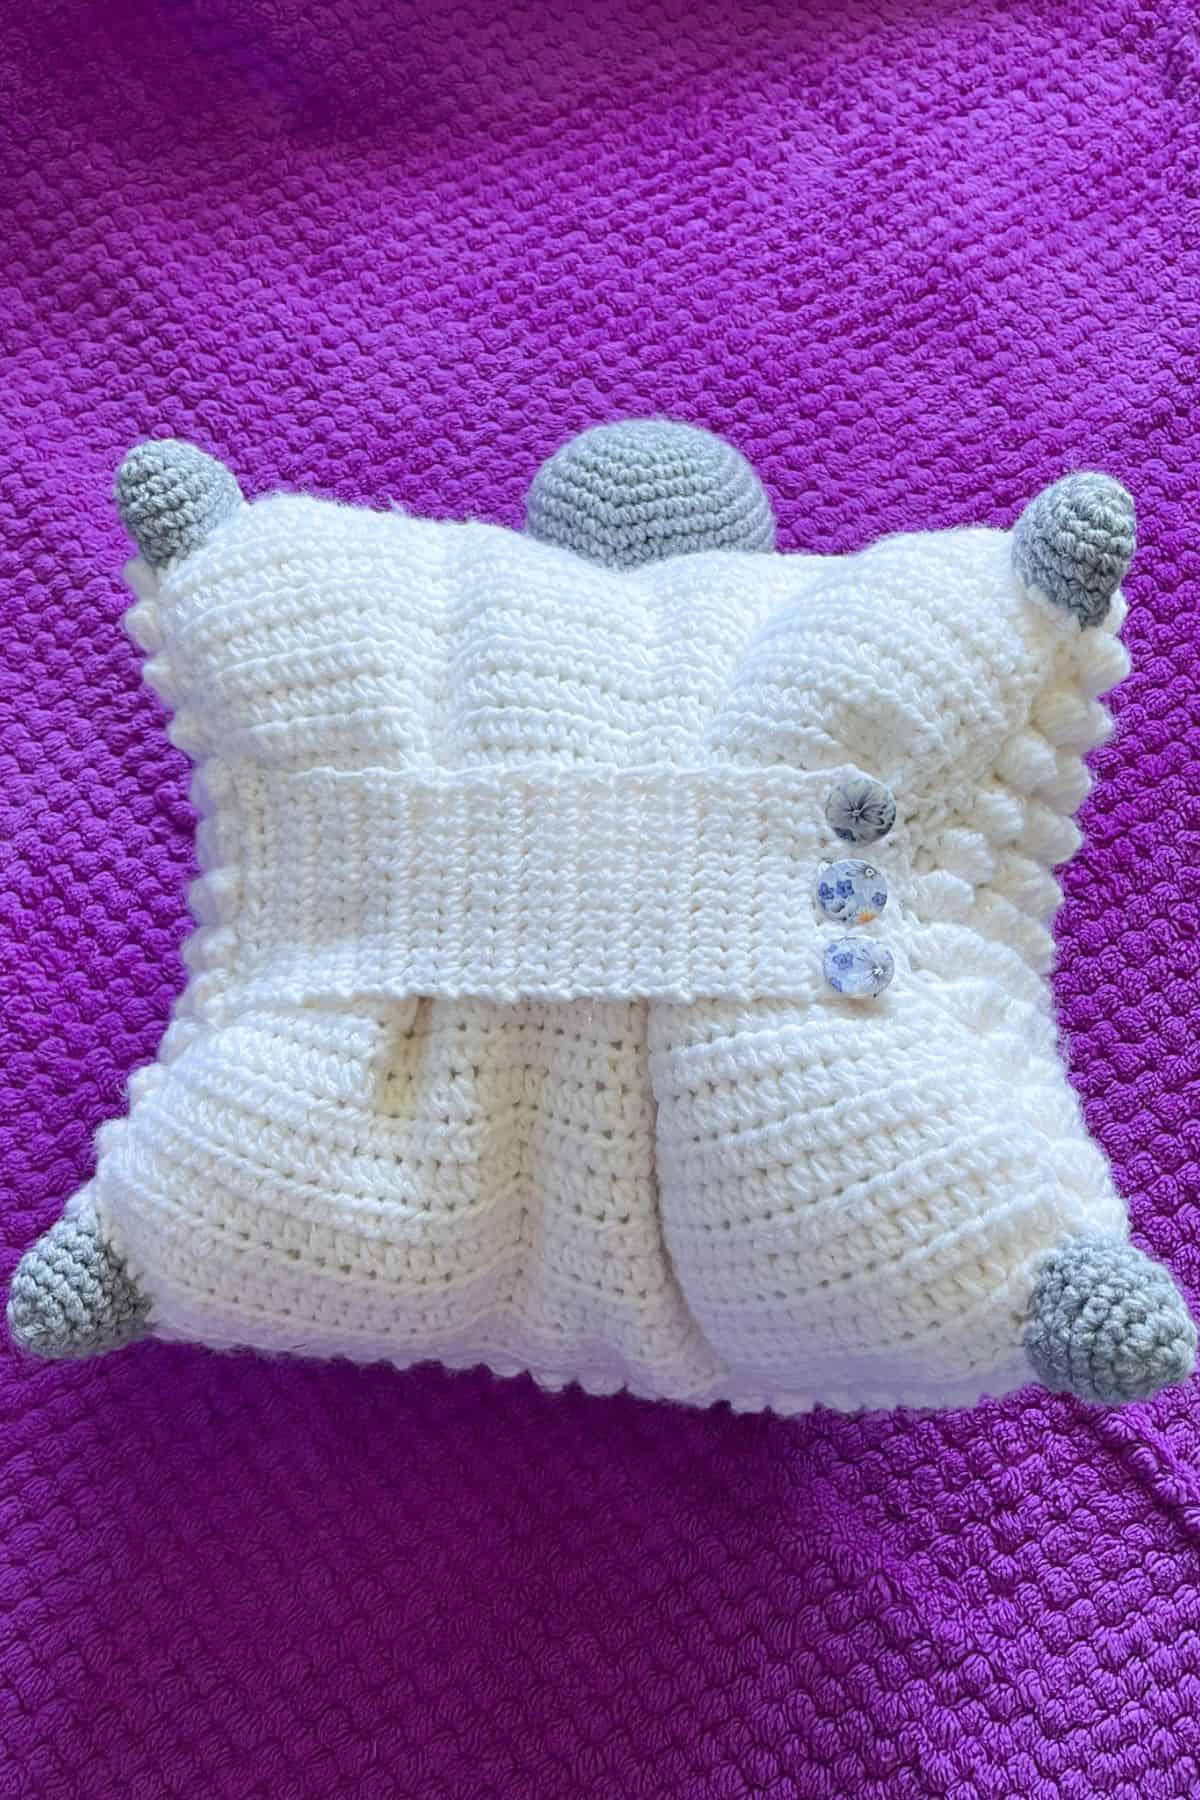
Finally sew the strap and buttons onto the bottom side of the pillow. You want them to be along the middle edges of the pillow.
And now you have a completed crochet sheep pattern! Perfect for a diy pillow pet that you can snuggle for years to come.
If you like the texture that the bobble stitches give, try making my crochet sunflower pillow pattern for other seasonal textured pillows!
🐌Expert Tips
- Secure Your Pieces: If you are struggling to sew pieces onto your pillow without them sliding, use safety pins to hold the pieces in place while you stitch them down. This can help ensure everything stays aligned and secure during the assembly process.
- Embroider for Safety: If making the crochet sheep pattern for a toddler, opt for embroidered eyes instead of safety eyes to prevent choking hazards. Embroidered features can also add a unique charm to your creation.
- Finishing Touches: After assembling the crochet sheep pattern, consider using fabric glue to secure small parts like buttons or features. This adds extra durability, especially if the pillow pet will be heavily used.
- Practice Bobble Stitches: If you're new to bobble stitches, practice on a separate swatch before starting the project. This will help you become comfortable with the technique and achieve a more uniform look before starting the crochet sheep pattern.
🧵Pattern FAQs
Absolutely, if you take away the textured top you can switch out the pattern to fit many other animals like a horse or unicorn.
I would remove the safety eyes and just do embroidered eyes, then extend the top bobble stitch a few stitches both in width and then the rows.
Of course! It will just turn out really huge so be aware of that!
🧶More Crochet Easter Patterns


If you tried this Crochet Sheep Pattern (or any other pattern on my website), please let me know how it went in the 📝 comments below. I'd love to hear from you!

Crochet Sheep Pattern
Materials
- Caron One Pound White Yarn
- Caron One Pound Gray Yarn
- 12 mm Safety Eyes
- Tapestry Needle
- 5 mm Hook
- Polyfill
- Buttons or closures for the strap on the bottom of the pillow
- A little bit of black yarn for the nose
Abbreviations (US terms)
- Magic ring - mr
- Single crochet - sc
- Increase - inc
- Decrease - dec
- Half double crochet - hdc
- Bobble - bobble (no abbreviation)
- Chain - ch
Notes
- I used acrylic worsted weight yarn for the crochet sheep pattern, but you can use any yarn; just adjust the chain size for different weights.
- I used polyfill for stuffing for the crochet sheep pattern, but you can adapt the pattern to fit an existing pillow.
- The finished crochet sheep pattern measures about 22 inches wide and 20 inches tall (including the head).
Instructions
Crochet Sheep Head:
- The crochet sheep pattern is made in the round.
- Round 1: Using the gray yarn, make a mr and then sc x6 into the mr. (6)
- Round 2: Inc in every sc. (12)
- Round 3: Inc, sc. Then repeat until end of round (18)
- Round 4: Inc, sc x2. Then repeat until end of round (24)
- Round 5: Inc, sc x3. Then repeat until end of round (30)
- Round 6: Inc, sc x4. Then repeat until end of round (36)
- Round 7: Inc, sc x5. Then repeat until end of round (42)
- Round 8-14: Sc in every stitch (42)
- Round 15: Dec, sc x5. Then repeat until end of round (36)
- Round 16: Sc in every stitch (36)
- Round 17: Dec, sc x4. Then repeat until end of round (30)
- Round 18: Sc in every stitch (30)
- Round 19: Dec, sc x3. Then repeat until the end of round (24) (Should probably insert eyes and start to stuff the head if you haven't already.)
- Round 20: Sc in every stitch (24)
- Round 21: Dec, sc x2. Then repeat until end of round (18)
- Round 22: Sc in every stitch (18)
- Round 23: Dec, sc. Then repeat until end of round (12)
- Round 24: Sc in every stitch (12)
- Round 25: Dec, and repeat until end of round (6). Fasten off and weave in any ends.
- With the black yarn make a wide T on the nose of the sheep, near the bottom of its head. If you make the horizontal part of the nose first, you can pull it down when you make the vertical stitch by starting at the bottom of the vertical line looping over the top line and pulling it down.
Sheep Ears:
- This pattern is made in the round. Make 2.
- Round 1: Using the gray yarn, make a mr and then sc x6 into the mr. (6)
- Round 2: Inc in every sc. (12)
- Round 3: Inc, sc. Then repeat until end of round (18)
- Round 4: Sc in every stitch. (18)
- Round 5: Dec, sc. Then repeat until end of round (12)
- Round 6: Sc in every stitch (12)
- Round 7: Dec, and repeat until end of round (6).
- Round 8: Sc in every stitch (6), Fasten off the yarn but leave a tail for sewing. Do not stuff the ears.
Sheep Feet:
- This pattern is made in the round. Make 4.
- Round 1: Using the gray yarn, make a mr and then sc x6 into the mr. (6)
- Round 2: Inc in every sc. (12)
- Round 3: Sc in every stitch. (12).
- Round 4: Inc, sc x3. Then repeat for the rest of the round. (15).
- Round 5-6: Sc in every stitch. (15). Fasten off and leave tails for sewing.
Pillow Part of the Pattern:
Top part:
- This pattern is made in rows.
- Row 1: Ch x50 and then turn.
- Row 2: In the second ch from the hook make a hdc. Continue making hdc for the rest of the row (49). Then ch x1 and turn.
- Row 3: In the first stitch (not the chain), make a sc. Then ch x2 and move onto making a bobble stitch in the next stitch.
- *Bobble Stitch: A bobble stitch is made by yarning over, inserting the hook into the stitch, yarn over, draw loop back through stitch, yarn over pull through 2 loops then STOP. You will have a half completed dc hanging from your hook. Repeat the steps 4 more times until you have 5 half completed dc stitches hanging from your hook and 6 loops ON your hook. Then yarn over and pull through all 6 loops.*
- Make a sc in the next stitch next to the bobble stitch. Then repeat alternating ch x2 + bobble stitch, sc for the rest of the round. The last stitch in the round should be a sc.
- You will find that one side of the project has the bobbles and the other side is flat. The flat side is the “wrong” side and will be the inside side, while the bobbles is the “right” side and will be on the outside of your pillow.
- Ch x1 and turn.
- Row 4: Make a hdc in the first stitch available and work hdc into every stitch in this row (49). Then ch x1 and turn.
- Row 5-30: Repeat rows 3 and 4 for the rest of the rectangle (49). Then fasten off and weave in the ends.
Bottom Part:
- This part of the pattern is worked in rows.
- Row 1: Ch x50 and then turn.
- Row 2: In the second ch from the hook make a hdc. Continue making hdc for the rest of the row (49). Then ch x1 and turn.
- You want to make sure the size of the hdc and bobble square are similar in size, you may need to either add chains in the beginning to achieve the right size, or move up a hook size. I was fine making the bottom rectangle with the same number of stitches as the bobble top.
- Row 3-30: Repeat row 2. Then fasten off the yarn and leave a long tail for sewing.
Strap:
- This part of the pattern is made in rows:
- Row 1: Ch x13 and then turn.
- Row 2: In the second ch from the hook make a sc and make sc for the rest of the row (12). Then ch x1 and turn.
- Row 3: Sc in every stitch for this row (12). Then ch x1 and turn.
- Row 4-16: Repeat row 3 (12). Then ch x1 and turn.
- Row 17: Sc x2, ch x2 and skip the following 2 stitches below, sc x1, (ch x2 and skip the 2 stitches below) x2, then sc x2 (12).
- This row is for making holes for the 1” buttons. If you have other sized buttons, please adjust this row to fit your buttons.
Finishing:
- Sew the ears to the sheep's head.
- Next sew the pillow top and bottom together, stuff and sew shut.
- Then sew the head to the top-middle-edge of the pillow.
- Sew the little feet onto the corners of the pillow, you can stuff them a little if you would like.
- Finally sew the strap and buttons onto the bottom side of the pillow. You want them to be along the middle edges of the pillow.
- And now you have a completed crochet sheep pillow pet pattern!

Leave a Reply