
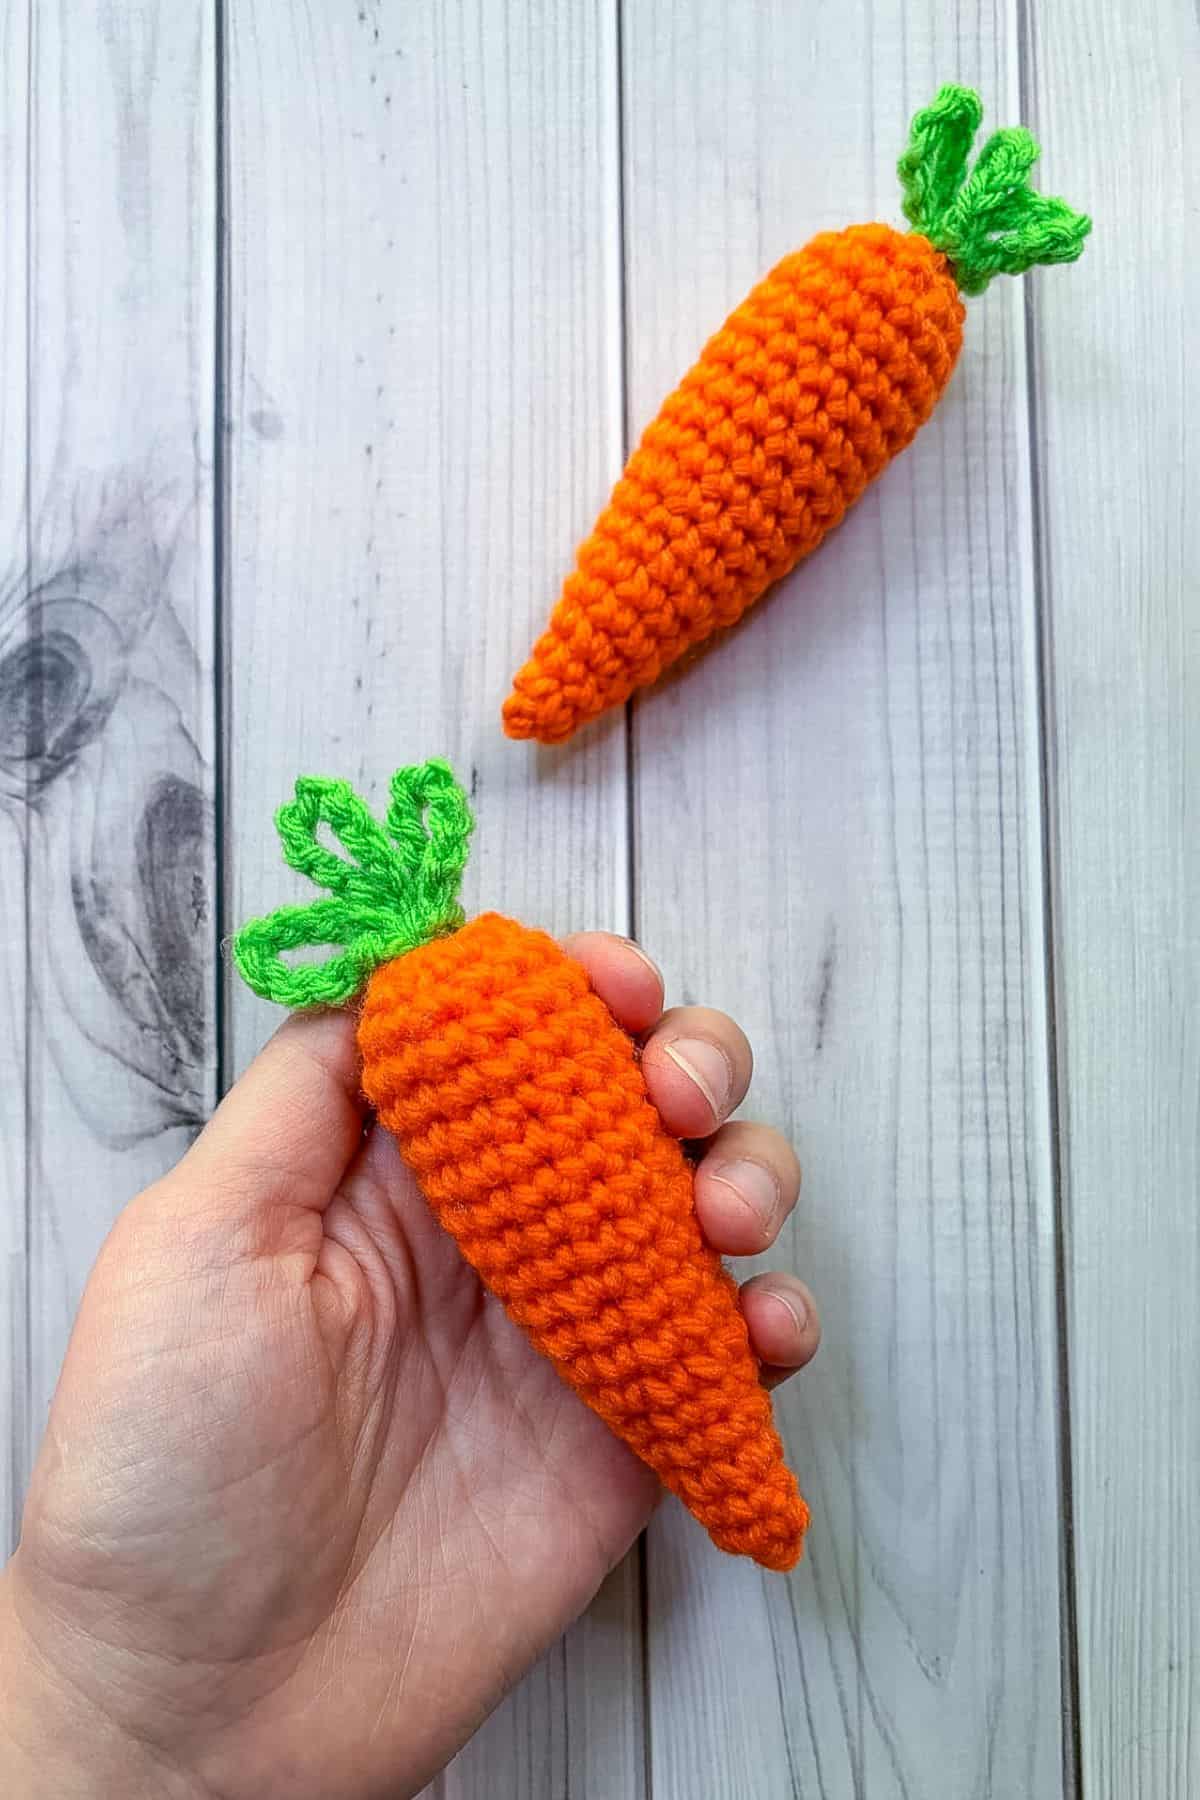
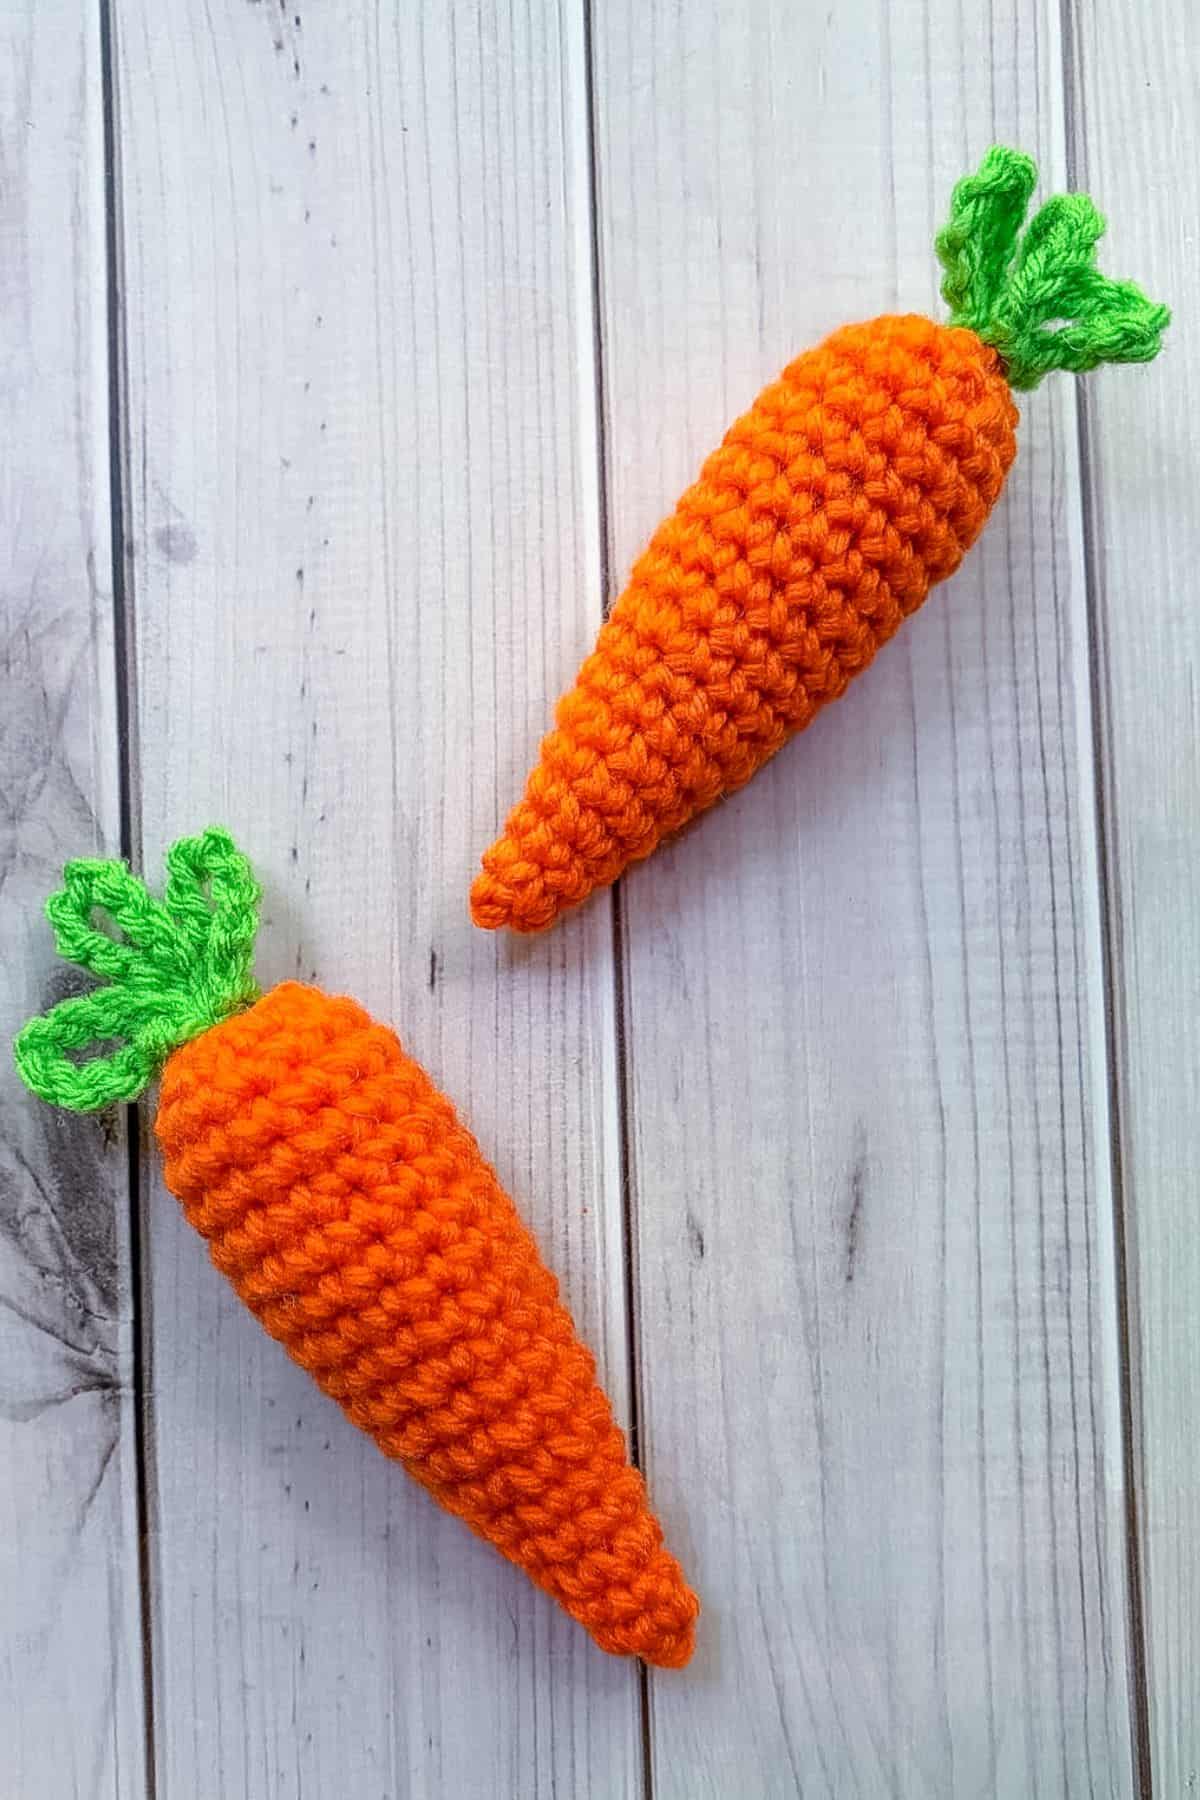
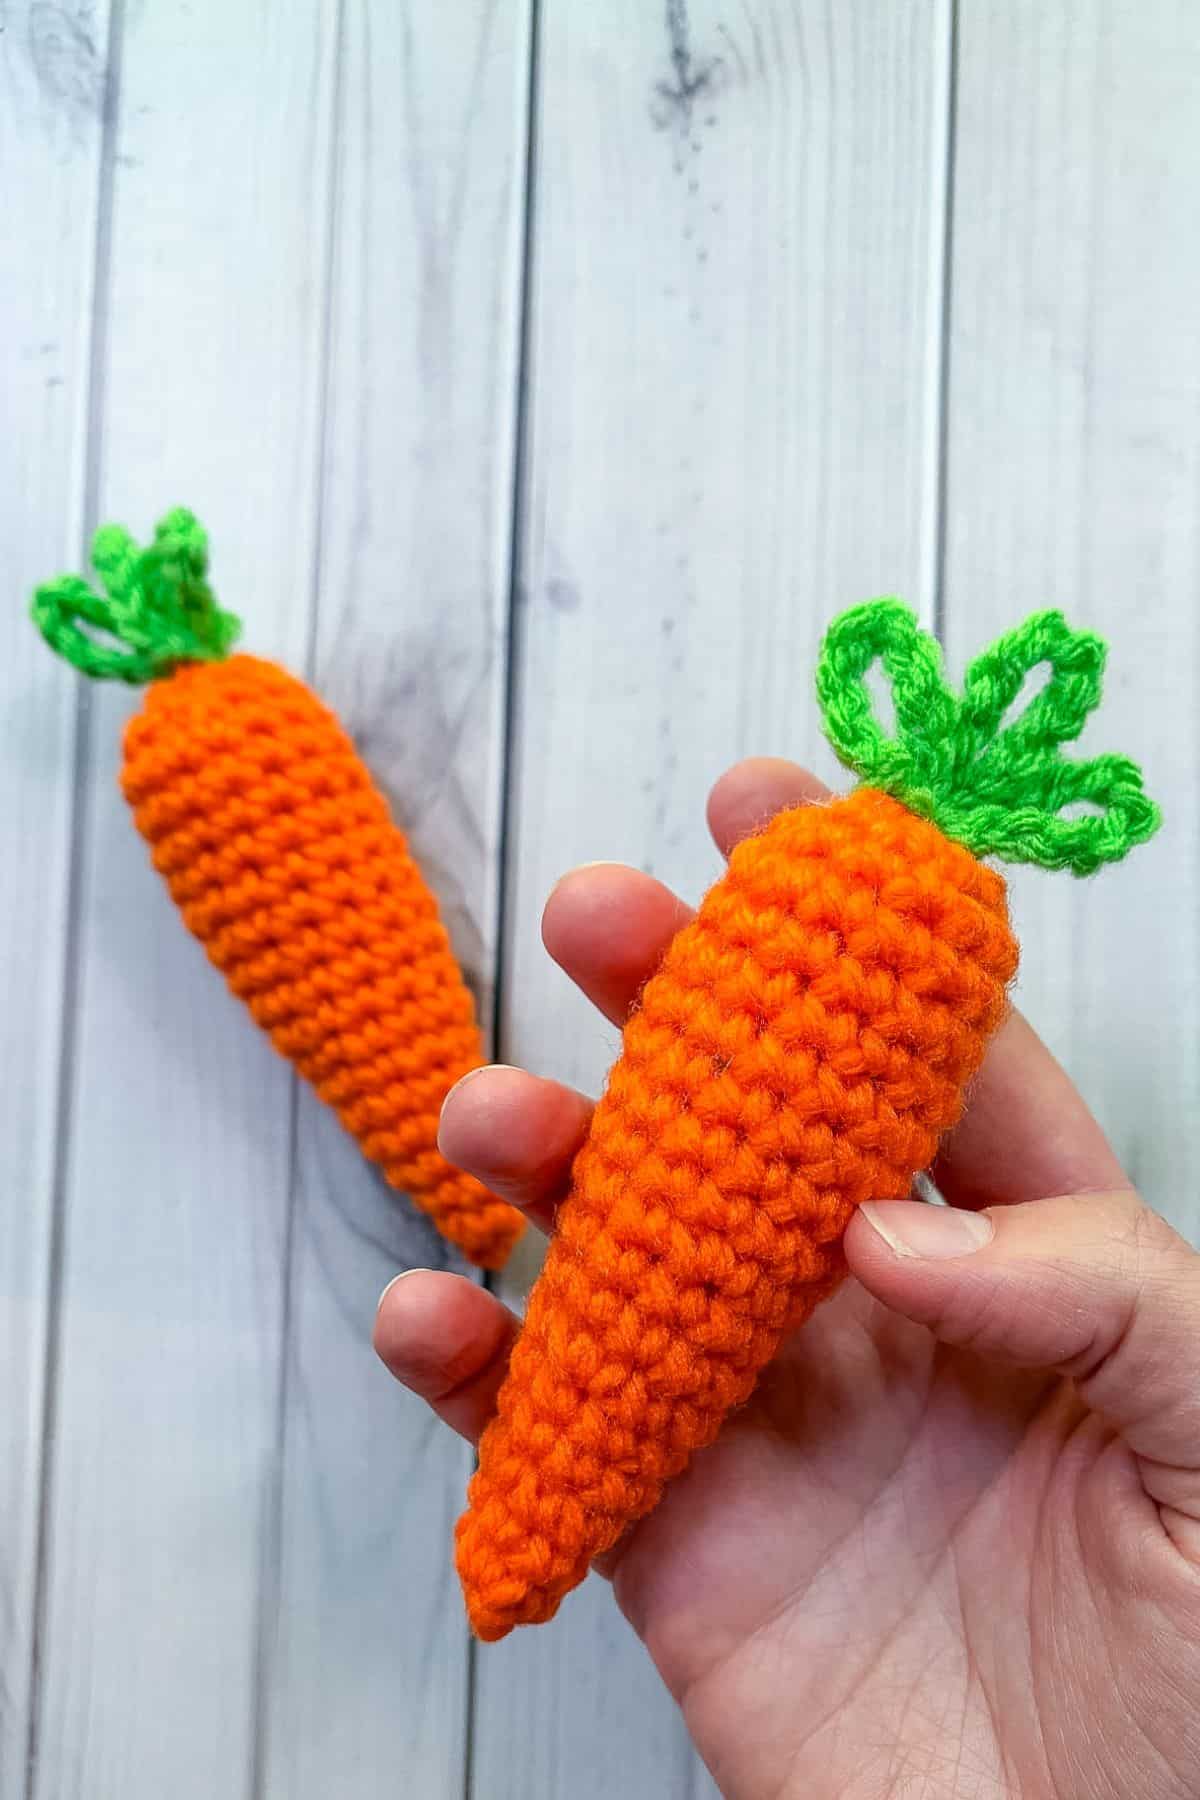
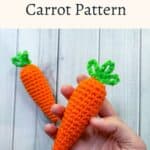
My Crochet Carrot Pattern is easy to make and perfect for many crochet projects! Create a cute plushie or use it for Easter decorations—the possibilities are endless!
Crochet carrots are versatile. You can make them alongside other crochet produce and add them to your child's play kitchen or garden.
Pair the carrots with a bunny or use them as standalone toys in Easter baskets.
You can even substitute the polyfill for catnip to create a crochet cat toy. Another cute pattern to use for catnip can be my small crochet poptart pattern!
Whatever your project, my crochet carrot pattern is quick and simple to work up!
Jump to:
✏️ Things to Note:
- Yarn Choice: I used acrylic yarn for this crochet vegetable. However, you can also use cotton or chunky yarn if you want to make a larger carrot. Avoid wool unless you are okay with it shrinking when washed.
- Stitch Techniques: The carrot crochet pattern primarily uses single crochet (sc). If you can single crochet, you can make this carrot!
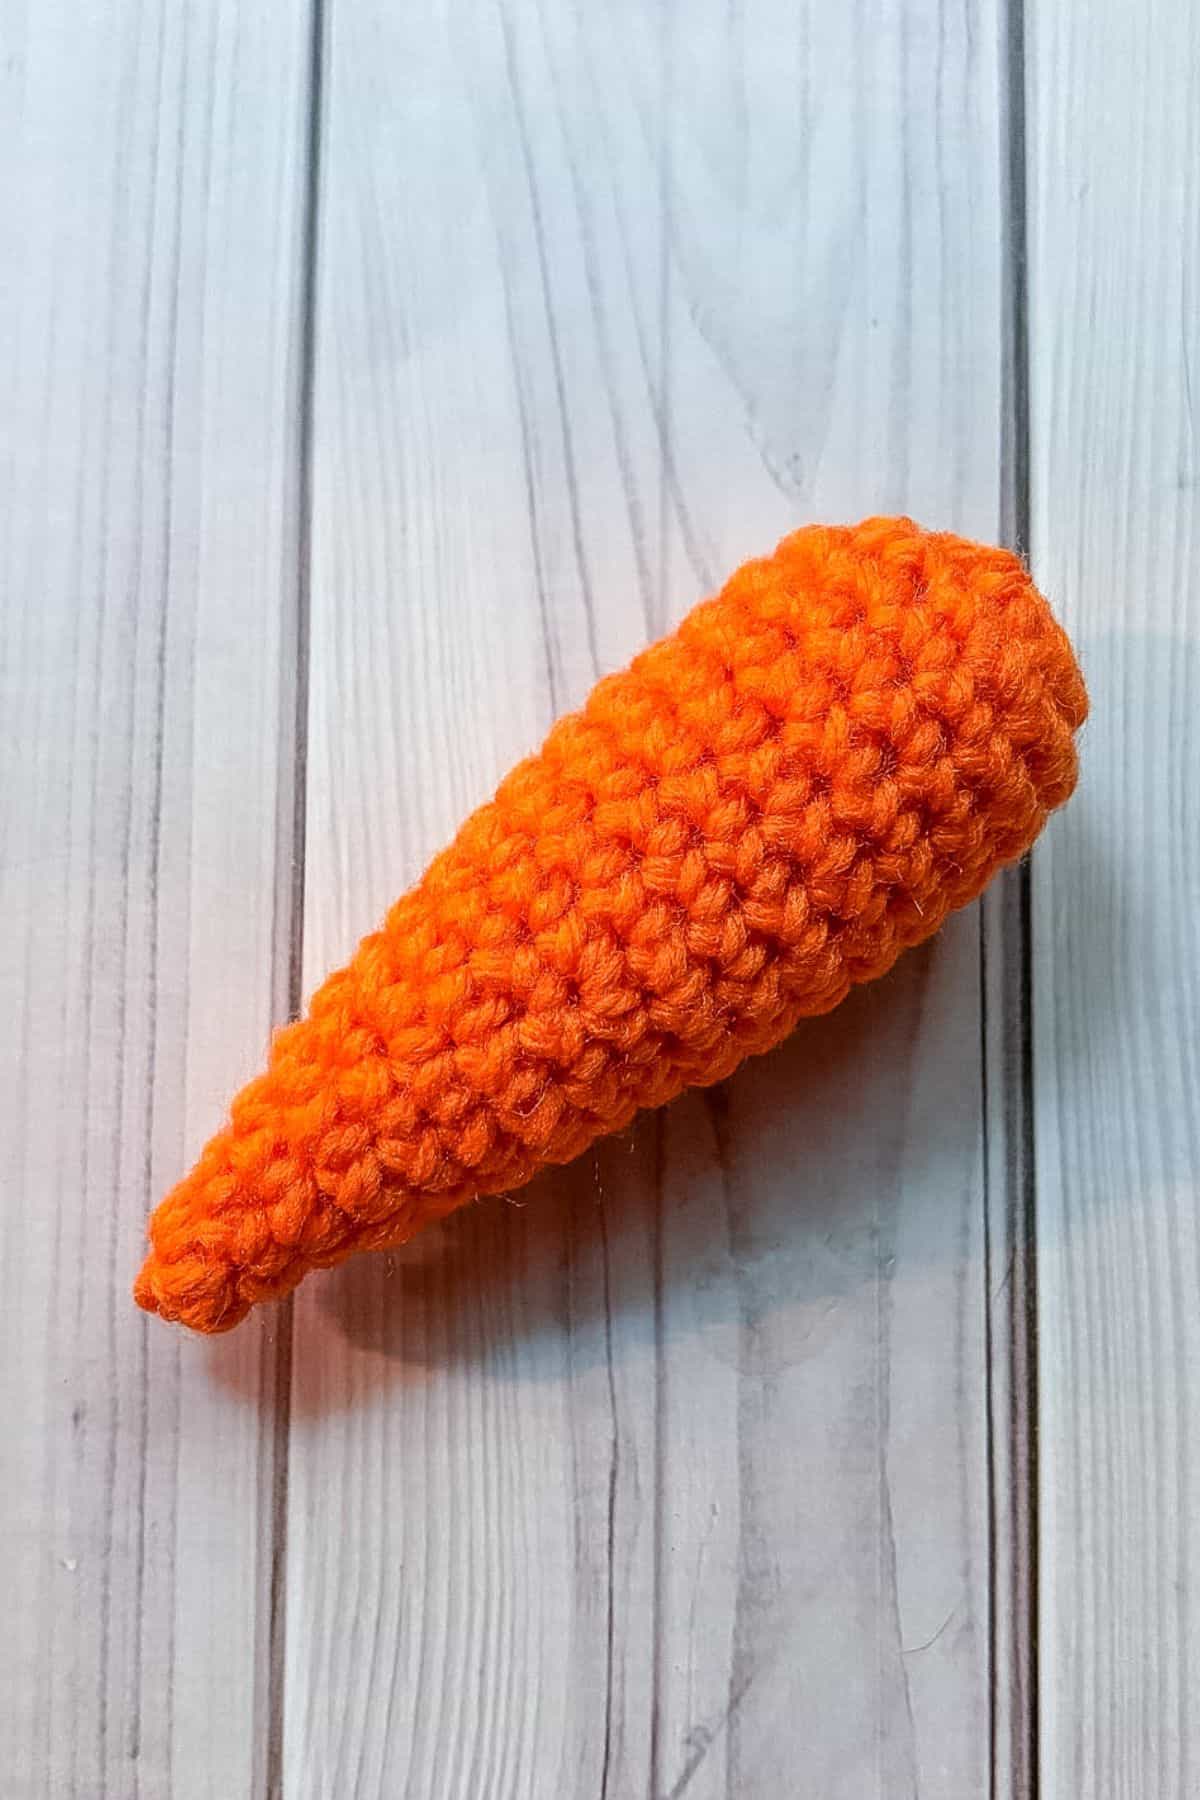
- Size: The crochet carrot amigurumi is roughly 4 inches long when completed.
🪡 Materials Needed
💭 Abbreviations to Remember (US Terms)
- Chains (ch)
- Magic ring (mr)
- Single crochet (sc)
- Increase (inc) - 2 stitches in the same stitch
- Decrease (dec) - 1 stitch combining 2 stitches
🧋 Variations
Try using chunky yarn for a larger carrot plushie! You can also use different colors to create rainbow carrots.
🍵 Instructions for Crochet Carrot Pattern
Crochet Carrot Base:
For this pattern, we will be working in rounds.
Round 1: Make a mr, then sc x3 into the circle (3).
Round 2: Inc in every stitch (6).
Round 3: Sc in every stitch (6).
Round 4: Inc, sc. Then repeat for the rest of the round (9).
Round 5-6: Sc in every stitch (9).
Round 7: Inc, sc x2. Then repeat for the rest of the round (12).
Round 8-9: Sc in every stitch (12).
Round 10: Inc, sc x3. Then repeat for the rest of the round (15).
Round 11-18: Sc in every stitch (15).
Round 19: Dec, sc. Then repeat for the rest of the round (10). Fasten off the yarn and close the top of the carrot by going through the front loop of every sc in the last round and pulling tight. Secure the yarn and weave in the ends.
Crochet Carrot Top:
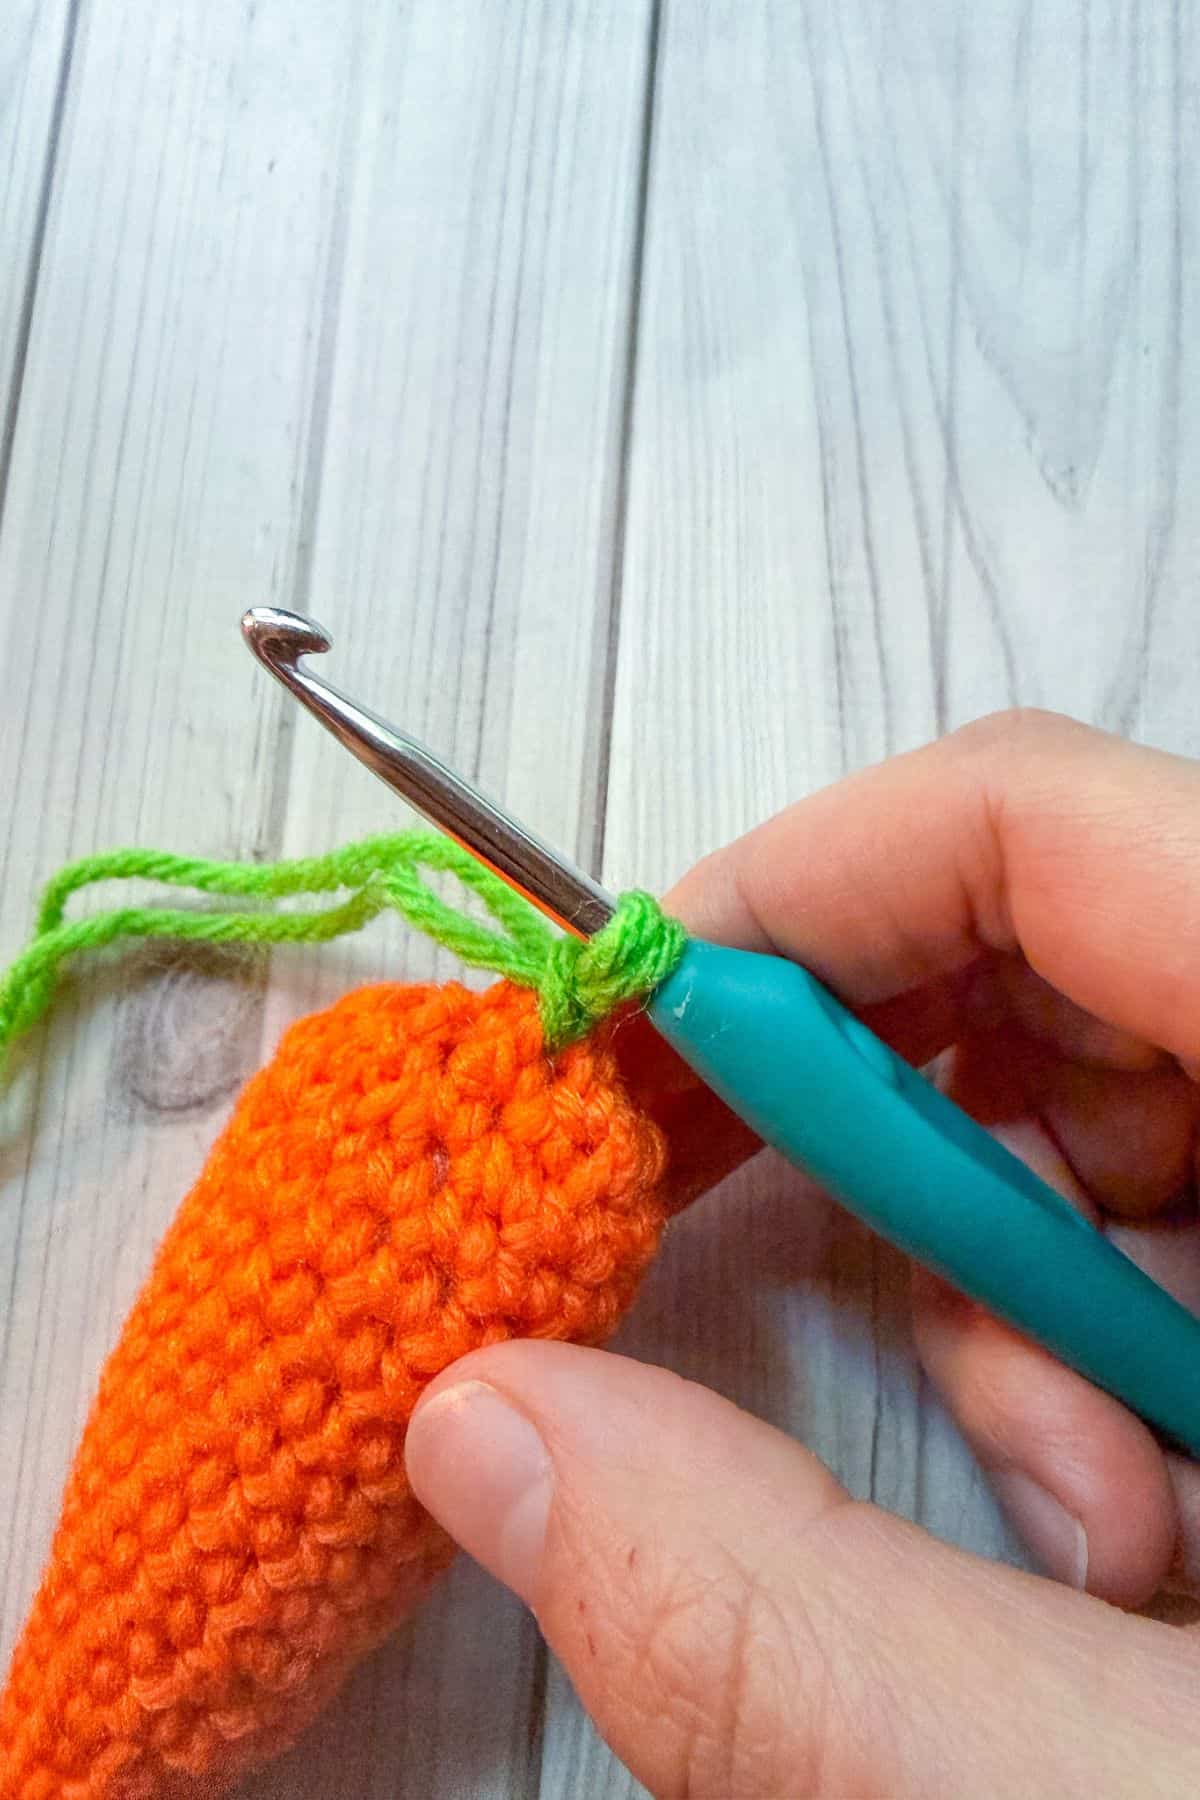
Join the green yarn to the top of the carrot.
Then *ch x10 and make a sl st at the center of the carrot. Repeat from * 2 more times.
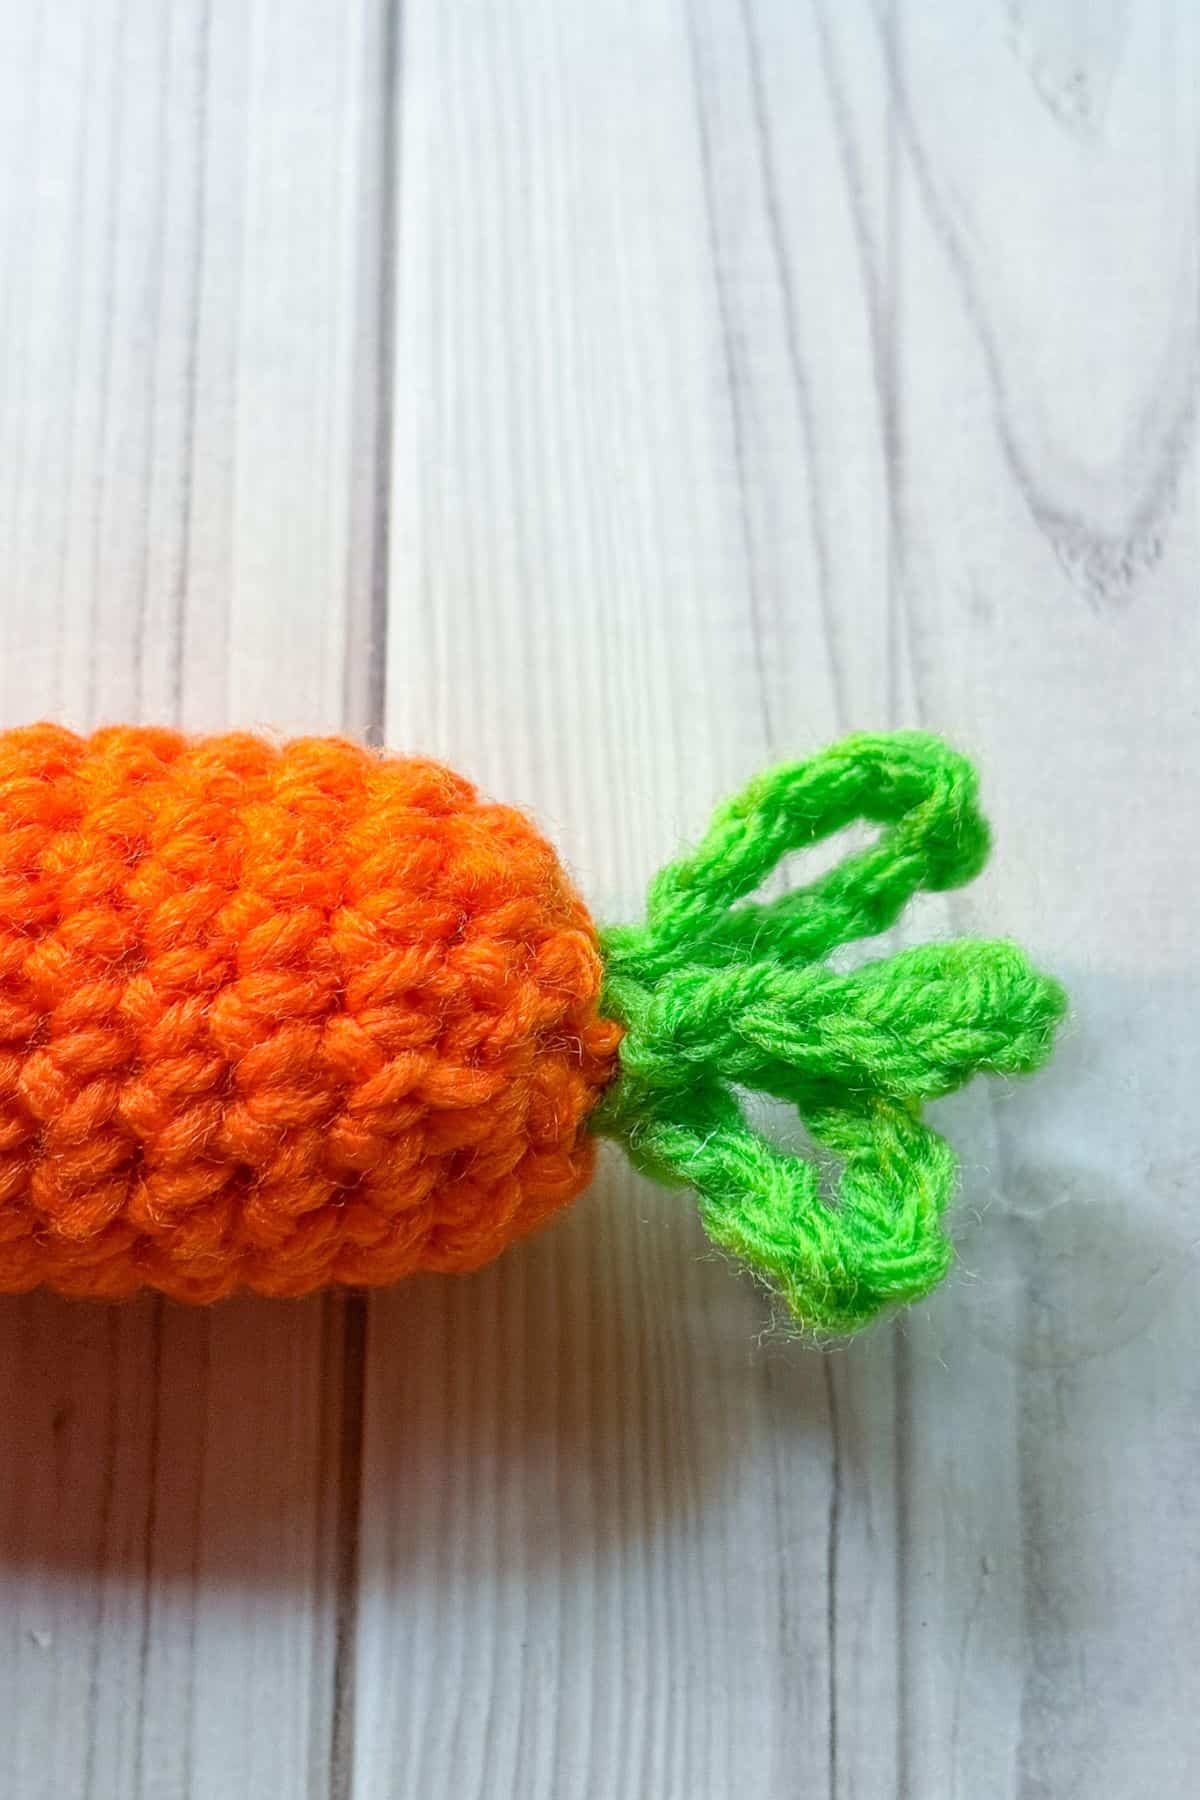
And now the crochet carrot pattern is done! I hope you enjoyed this crochet food pattern! If you want to explore more free crochet food patterns, check out my crochet dumpling and crochet bao patterns.
If you have extra orange yarn you can make my crochet pumpkin coffee sleeve pattern or my easy crochet pumpkin pattern.
If you have any extra green yarn, check out my crochet frog pattern.
🐌Expert Tips
- Tension Tips: If you have trouble keeping your stitches tight, try yarning under instead of yarning over during sc. This technique naturally creates a tighter stitch, although it may take some time to get used to. Many amigurumi crafters recommend yarning under for better results.
- Stitch Markers: Use stitch markers to keep track of your rounds, especially in the initial rounds of the carrot and carrot top.
- Safety Considerations: If using safety eyes, ensure they are secured firmly. For younger children, consider embroidering the eyes with yarn for added safety.
- Adjusting Patterns: Feel free to adjust the number of rounds or the thickness of the carrot top based on your preference for a customized look!
🧵 Pattern FAQs
It takes me less than 20 minutes to make a carrot! Depending on your speed it might take you longer, or even less time to make one.
No. Never give your dog toys made from yarn, it is bad for their intestinal tract and can cause a lot of internal issues.
Absolutely! For a softer feeling on baby skin I would suggest using cotton or bamboo yarns.
🧶More Crochet Food Patterns

If you tried this Crochet Carrot Pattern (or any other pattern on my website), please let me know how it went in the 📝 comments below. I'd love to hear from you!

Crochet Carrot Pattern
Abbreviations (US terms)
- Chains - ch
- Magic ring - mr
- Single crochet - sc
- Increase (inc) - 2 stitches in the same stitch
- Decrease (dec) - 1 stitch combining 2 stitches
Notes
- Yarn: I used acrylic yarn for this crochet vegetable. However, you can also use cotton or chunky yarn if you want to make a larger carrot. Avoid wool unless you are okay with it shrinking when washed.
- Stitch Techniques: The carrot crochet pattern primarily uses single crochet (sc). If you can single crochet, you can make this carrot!
- Size: The crochet carrot amigurumi is roughly 4 inches long when completed.
Instructions
Crochet Carrot Base:
- For this pattern, we will be working in rounds.
- Round 1: Make a mr, then sc x3 into the circle (3).
- Round 2: Inc in every stitch (6).
- Round 3: Sc in every stitch (6).
- Round 4: Inc, sc. Then repeat for the rest of the round (9).
- Round 5-6: Sc in every stitch (9).
- Round 7: Inc, sc x2. Then repeat for the rest of the round (12).
- Round 8-9: Sc in every stitch (12).
- Round 10: Inc, sc x3. Then repeat for the rest of the round (15).
- Round 11-18: Sc in every stitch (15).
- Round 19: Dec, sc. Then repeat for the rest of the round (10). Fasten off the yarn and close the top of the carrot by going through the front loop of every sc in the last round and pulling tight. Secure the yarn and weave in the ends.
Crochet Carrot Top:
- Join the green yarn to the top of the carrot.
- Then *ch x10 and make a sl st at the center of the carrot. Repeat from * 2 more times.
- And now the crochet carrot pattern is done! I hope you enjoyed this crochet food pattern!


Leave a Reply