
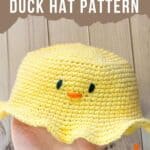
Embrace spring with this really cute and simple Crochet Duck Hat Pattern. The best part of the hat pattern is that it can be easily adjusted for all head sizes!

Spring is pretty great, the flowers are in bloom, there is a fresh breeze in the air, and cute baby animals. I love animals so much that I love crocheting them, as seen with my crochet giraffe, and even turning food into animals like my crochet concha bunnies.
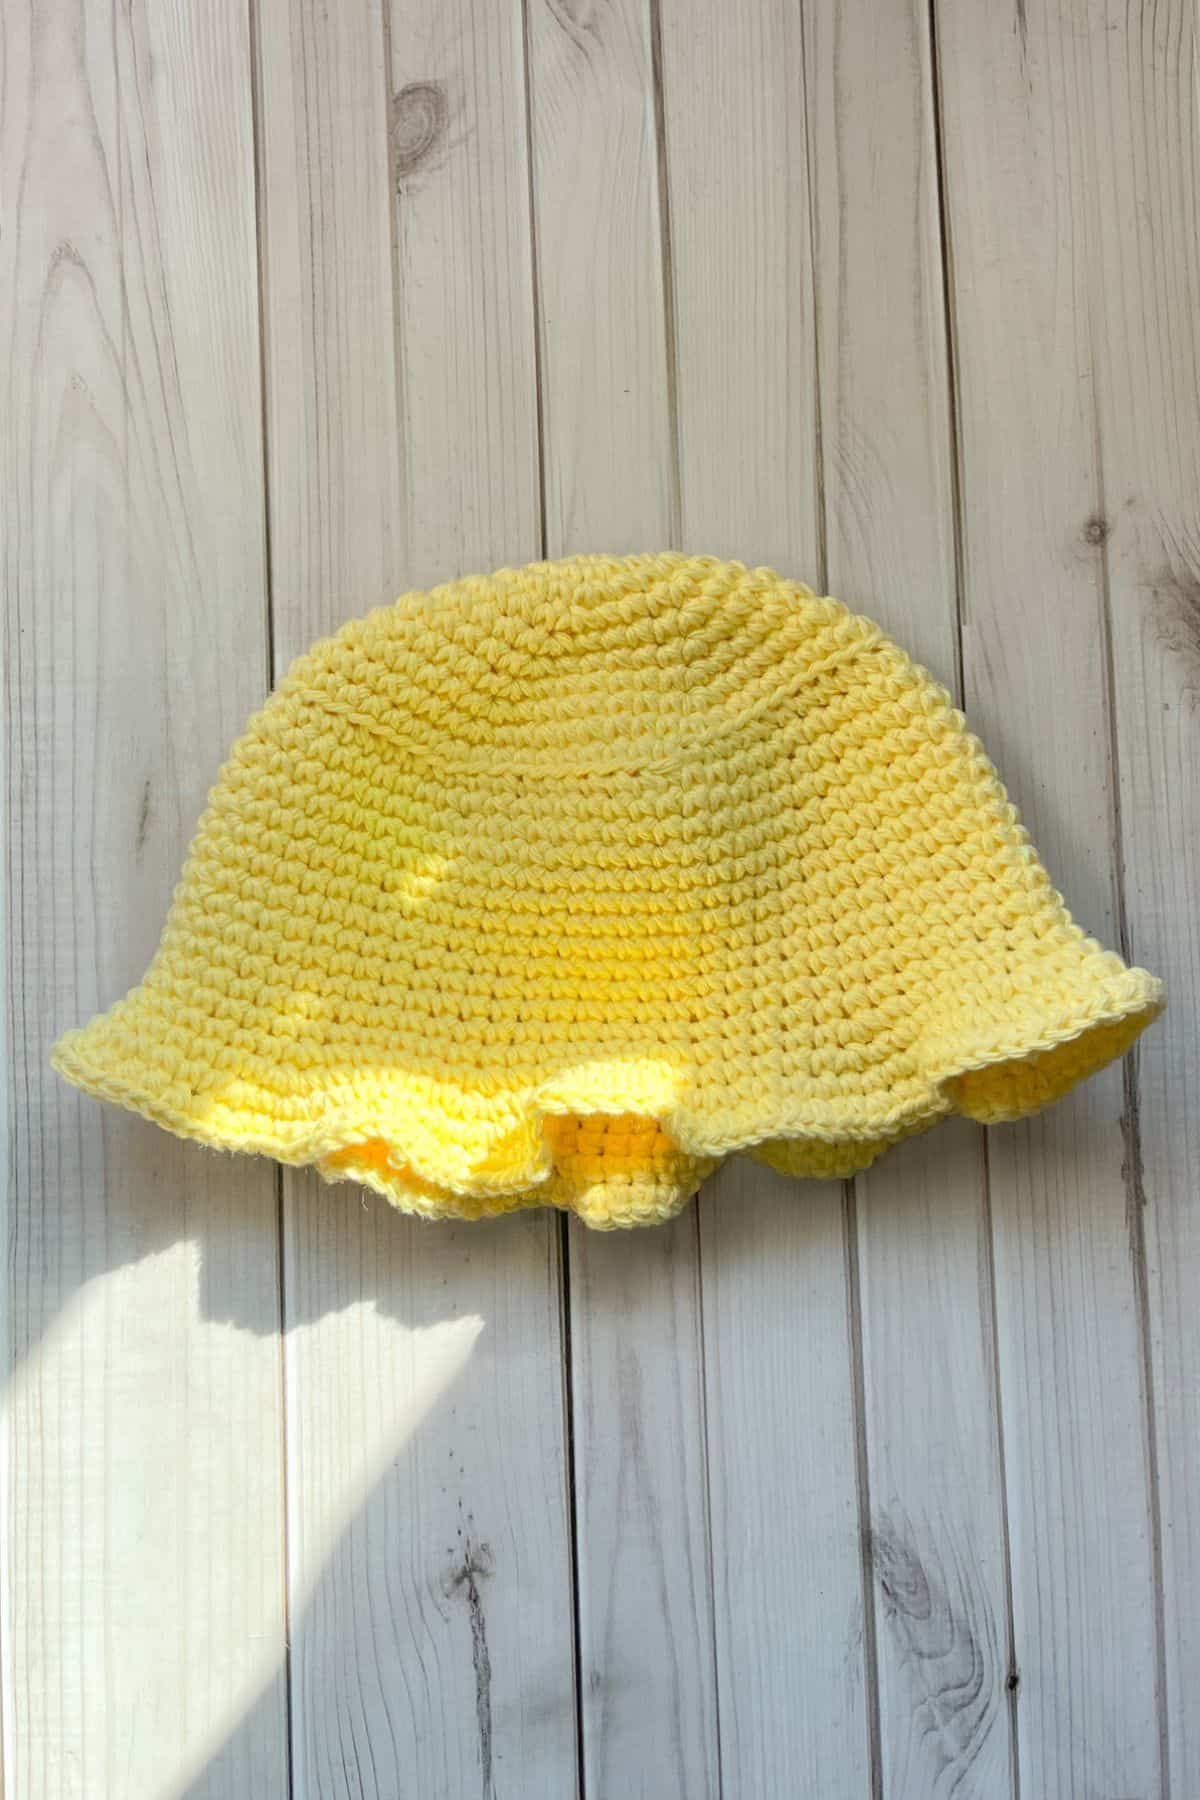
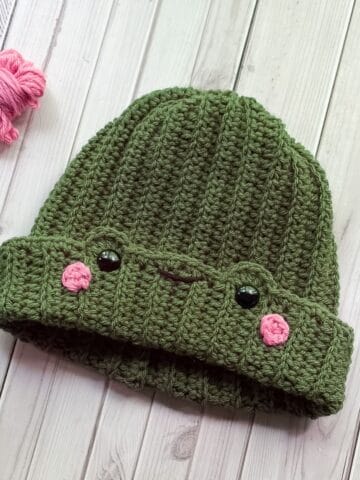
My newest creation? A crochet duck hat, specifically a crochet duck bucket hat. I typically make crochet beanie patterns like my crochet polar bear hat and crochet frog hat patterns, but with the weather warming up, I thought it would be fun to create a bucket hat for my 5-year-old.
The crochet duck hat pattern is fairly simple to construct, primarily using regular single crochet stitches. I chose single crochets because they hold their shape better than double crochets, ensuring the hat retains its classic bucket hat form.
I enjoy making hat patterns that are open-ended, allowing you to easily adjust the size based on your measurements. Since all head sizes differ and so does each crocheter's tension, this approach ensures a good fit.
Jump to:
✏️ Things To Note:
- Sizing Information. The crochet duck hat pattern outlined below is designed for a hat that can fit most 5-year-olds. If you need it wider or longer, please adjust accordingly. I have a few sizing suggestions at the end of the pattern, but consider them as guidelines only.
- Yarn Choice. I used cotton yarn for the crochet duck bucket hat pattern. If you use acrylic, note that those bucket hats will be better suited for fall or winter, as acrylic retains heat. Cotton and cotton blends don't retain heat and breathe better, making them ideal for summer and spring hats.
- Hook Size. I used a 4.5mm hook to keep the stitches tighter, which helps the hat retain its iconic bucket shape. Feel free to adjust the hook size based on your tension or if you prefer the hat to be stiffer or looser.
🪡 Materials Needed
- Lily sugar n cream yellow cotton yarn
- A little bit of black yarn for eyes
- A little bit of orange yarn for the mouth
- 4.5mm hook
- Tapestry needle
- Soft tape measure
💭Abbreviations to Remember (US terms)
- Magic ring - mr
- Single crochet - sc
- Increase - inc
- Back loop only - blo
🧋Variations
You can easily change the sizing of the hat to fit your needs, as well as change the color and character entirely. This is a basic bucket hat and can be used as a basis for many designs.
🍵Instructions for Crochet Duck Hat Pattern
How to crochet a bucket hat:
This is for a hat that can fit a 5 year old (about 20.5 inches in circumference), adjust the size if you need it bigger or smaller. I tend to crochet pretty tightly.
Of course, things like hair can affect the size needed so keep that in mind as well as you make them.
If making your own hat:
My suggestion is to measure your head's circumference, write down those measurements, then build your hat based on those measurements before you start the back loop only round. This will make it the most accurate with little frustration and ripping stitches out.
If making a hat for an adult that is not yourself or someone you can measure their head:
Make your last round before the back loop only row 22-23 inches in circumference. Depending on your tension and yarn thickness, this would be near 90 stitches in the round (more or less).
Now that we got that out of the way, onto the duck bucket hat crochet pattern!

Round 1: Using the yellow cotton yarn, make a mr and then sc x6 into the mr. (6)
Round 2: Inc in every sc. (12)
Round 3: Inc, sc. Then repeat until end of round (18)
Round 4: Inc, sc x2. Then repeat until end of round (24)
Round 5: Inc, sc x3. Then repeat until end of round (30)
Round 6: Inc, sc x4. Then repeat until end of round (36)

Round 7: Inc, sc x5. Then repeat until end of round (42)
Round 8: Inc, sc x6. Then repeat until end of round (48)
Round 9: Inc, sc x7. Then repeat until end of round (54)
Round 10: Inc, sc x8. Then repeat until end of round (60)
Round 11: Inc, sc x9. Then repeat until end of round (66)
Round 12: Inc, sc x10. Then repeat until end of round (72)

Round 13: Blo sc in every sc. (72).

Round 14-28: Sc in every stitch (72). (For adult hats add 2-3 more rounds)
Round 29: Now we are starting on the rim. Inc, sc x5. Then repeat for the rest of the round (84).
If you changed the hat size, that's fine, it just requires a bit of math.
You are to make 12 increases total in this round so divide the number of stitches you currently have by 12. Like so 72 / 6 = 12.
I made an increase with one of the stitches and then normally sc for the other 5 stitches. Yours might be inc, sc x6 or 7 - that's totally okay and if you have extra stitches just fudge it a little. This is a very forgiving hat.
Round 30: Sc in every stitch (84).
Round 31: Inc, then sc x6. Then repeat until the end of the round. (96). We increased by 12 so if you have a different hat size use the same method above for this round.
Round 32: The next couple of rounds is where the hat rim gets frilly, if you prefer to have zero frills - just continue to repeat an increase row of 12 with a sc row with no increases after it.
Inc, sc x2. Then repeat until the end of the round. (128).
We increased by 32 on this round. You increase more or less depending on frill preferences. Having more increases will create a more frilly edge, less but more than 12 increases will create a wavy edge.
Round 33: Inc, sc x2. Then repeat for the rest of the round. (170). Add more rows if you want a larger wavier rim, otherwise fasten off and weave in the tails.
Embroidery:
With the tapestry needle, embroider a small lined mouth in the middle of the hat roughly an inch to two inches long with orange yarn. I made 3 passes for my hat's mouth.
Then when that is done make eyes with the black yarn north of the sides of the mouth. I made those about ¾ of an inch long.
Once that's done your crochet duck bucket hat is all done!

🐌Expert Tips
- Measure Your Hat: Since crochet tension varies from person to person, measure the circumference of the hat before continuing with the straight sides of the pattern. This will help ensure a proper fit.
- Use Safety Pins: If you find it challenging to sew pieces onto your hat without them sliding, use safety pins to hold the pieces in place while you sew.
- Consider Yarn Weight: If you're unsure which yarn to use, remember that cotton is best for warmer weather, while acrylic is better suited for cooler months.
- Adjust Hook Size: If you want a tighter or looser fit, consider adjusting your hook size accordingly.
- Be Creative: Don’t hesitate to customize the hat's design! Change colors, add embellishments, or adjust the size to make it truly unique.
🧵Pattern FAQs
You can use acrylic if you plan to wear the bucket hat on cooler days in fall or spring, but I advise against it for summer hats as acrylic traps heat and can lead to discomfort.
While I love using safety eyes on hats, I advise against them for parts of hats that sit directly on the head, as they can become uncomfortable.
You can, but the overall structural integrity of the hat may change.
🧶More Crochet Hat Patterns

If you tried this Crochet Duck Hat Pattern (or any other pattern on my website), please let me know how it went in the 📝 comments below. I'd love to hear from you!

Crochet Duck Hat Pattern
Materials
- Lily sugar n cream yellow cotton yarn
- A little bit of black yarn for eyes
- A little bit of orange yarn for the mouth
- 4.5 mm hook
- Tapestry needle
- Soft tape measure
Abbreviations (US terms)
- Magic ring - mr
- Single crochet - sc
- Increase - inc
- Back loop only - blo
Notes
- This crochet duck hat pattern fits a 5-year-old (about 20.5 inches in circumference); adjust the size as needed.
- Hair can affect the size, so consider that while making the hat.
- To make your own hat, measure the crown's circumference, note the measurement, and build your hat before the back loop only round for accuracy.
- For an adult hat, aim for a last round circumference of 22-23 inches (about 90 stitches, depending on tension and yarn thickness).
- I used cotton for the crochet duck bucket hat; acrylic is better for fall or winter.
- Cotton and blends breathe better, making them ideal for summer and spring hats.
- I used a 4.5mm hook for tighter stitches to maintain the bucket hat shape; adjust the hook size based on your tension for a stiffer or looser fit.
Instructions
- Round 1: Using the yellow cotton yarn, make a mr and then sc x6 into the mr. (6)
- Round 2: Inc in every sc. (12)
- Round 3: Inc, sc. Then repeat until end of round (18)
- Round 4: Inc, sc x2. Then repeat until end of round (24)
- Round 5: Inc, sc x3. Then repeat until end of round (30)
- Round 6: Inc, sc x4. Then repeat until end of round (36)
- Round 7: Inc, sc x5. Then repeat until end of round (42)
- Round 8: Inc, sc x6. Then repeat until end of round (48)
- Round 9: Inc, sc x7. Then repeat until end of round (54)
- Round 10: Inc, sc x8. Then repeat until end of round (60)
- Round 11: Inc, sc x9. Then repeat until end of round (66)
- Round 12: Inc, sc x10. Then repeat until end of round (72)
- Round 13: Blo sc in every sc. (72).
- Round 14-28: Sc in every stitch. (72). (for adult hats add 2-3 more rounds)
- Round 29: Now we are starting on the rim. Inc, sc x5. Then repeat for the rest of the round (84).
- If you changed the hat size, that's fine, it just requires a bit of math. You are to make 12 increases total in this round so divide the number of stitches you currently have by 12. Like so 72 / 6 = 12.I made an increase with one of the stitches and then normally sc for the other 5 stitches. Yours might be inc, sc x6 or 7 - that's totally okay and if you have extra stitches just fudge it a little. This is a very forgiving hat.
- Round 30: Sc in every stitch (84).
- Round 31: Inc, then sc x6. Then repeat until the end of the round. (96). We increased by 12 so if you have a different hat size use the same method above for this round.
- Round 32: The next couple of rounds is where the hat rim gets frilly, if you prefer to have zero frills - just continue to repeat an increase row of 12 with a sc row with no increases after it.
- Inc, sc x2. Then repeat until the end of the round. (128).
- We increased by 32 on this round. You increase more or less depending on frill preferences. Having more increases will create a more frilly edge, less but more than 12 increases will create a wavy edge.
- Round 33: Inc, sc x2. Then repeat for the rest of the round. (170). Add more rows if you want a larger wavier rim, otherwise fasten off and weave in the tails.
Embroidery:
- With the tapestry needle, embroider a small lined mouth in the middle of the hat roughly an inch to two inches long with orange yarn. I made 3 passes for my hat's mouth.
- Then when that is done make eyes with the black yarn north of the sides of the mouth. I made those about ¾ of an inch long.
- Once that's done your crochet duck bucket hat is all done!


Leave a Reply