
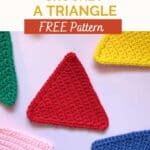
Today, I will show you how to crochet a triangle, a quintessential foundation crochet shape to know. Once you master this skill, you can create diamonds and other shapes that use triangles as their basic form.

You might be wondering: how do you crochet a triangle? Crocheting basic shapes can be tricky if you don’t know where to begin. I will say that 2D crochet shapes are often easier for beginner crocheters than 3D shapes because they don't take as long to complete and don't get distorted by stuffing.
Learning to make different 2D shapes, like the flat triangle, is essential because even if you struggle with 3D shapes, you can dissect the 3D pattern into basic 2D shapes and combine them into a 3D version of the shape you want to create, such as a crochet pyramid or a d20 dice. Alternatively, you could crochet several triangles and make a crochet triangle blanket, similar to a crochet granny square blanket.
Once you have the basic shape down, you can alter it to fit other patterns you want to create. This pattern demonstrates the basics of triangles, with every other row featuring an increase. You can modify the pattern for a wider triangle by increasing every row, or you can slow down the increases by adding more rows in between, as seen in my crochet carrot pattern.
If you make enough crochet triangles, you can also create a crochet triangle motif garland or a crochet triangle blanket. I make use of triangles in my crochet Halloween garland pattern.
Jump to:
✏️ Things to Note:
- Understanding Triangle Construction: Knowing how to crochet a triangle will help you make other shapes. You can also learn how to crochet a diamond by either joining two triangles together or decreasing the pattern in reverse.
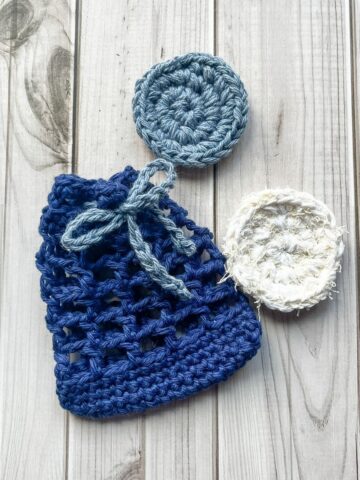
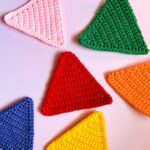
- Practice Makes Perfect: I suggest making a few practice triangles before starting any project. You can always frog the project to reuse the yarn later, or incorporate them into your next project! I made my triangles in different colors to create a cute rainbow flag crochet bunting for my room—why not have fun with it?
- Customization Options: You can use any yarn and any hook for this pattern; it's entirely up to you how you want to make the triangles. For reference, I used a 5mm (H) hook.
🪡 Materials Needed
- A crochet hook (size based on type of yarn your using), for reference I was using a 5mm or H hook.
- A tapestry needle for weaving in the ends
- Yarn of any kind. If you are a beginner, I suggest staying away from fuzzy yarns as those yarns make it harder to see the stitches
💭 Abbreviations to Remember (US Terms)
- Chains (ch)
- Single crochet (sc)
- Increase (inc) - 2 stitches in one space.
🧋 Variations
- Try using different colors to create a crochet rainbow bunting!
- Experiment with various types of triangles by adding more single crochet rows without increasing, or by removing single crochet rows for a more obtuse triangle.
🍵 Instructions for How to Crochet a Triangle
For the crochet triangle pattern, we will be working in rows.
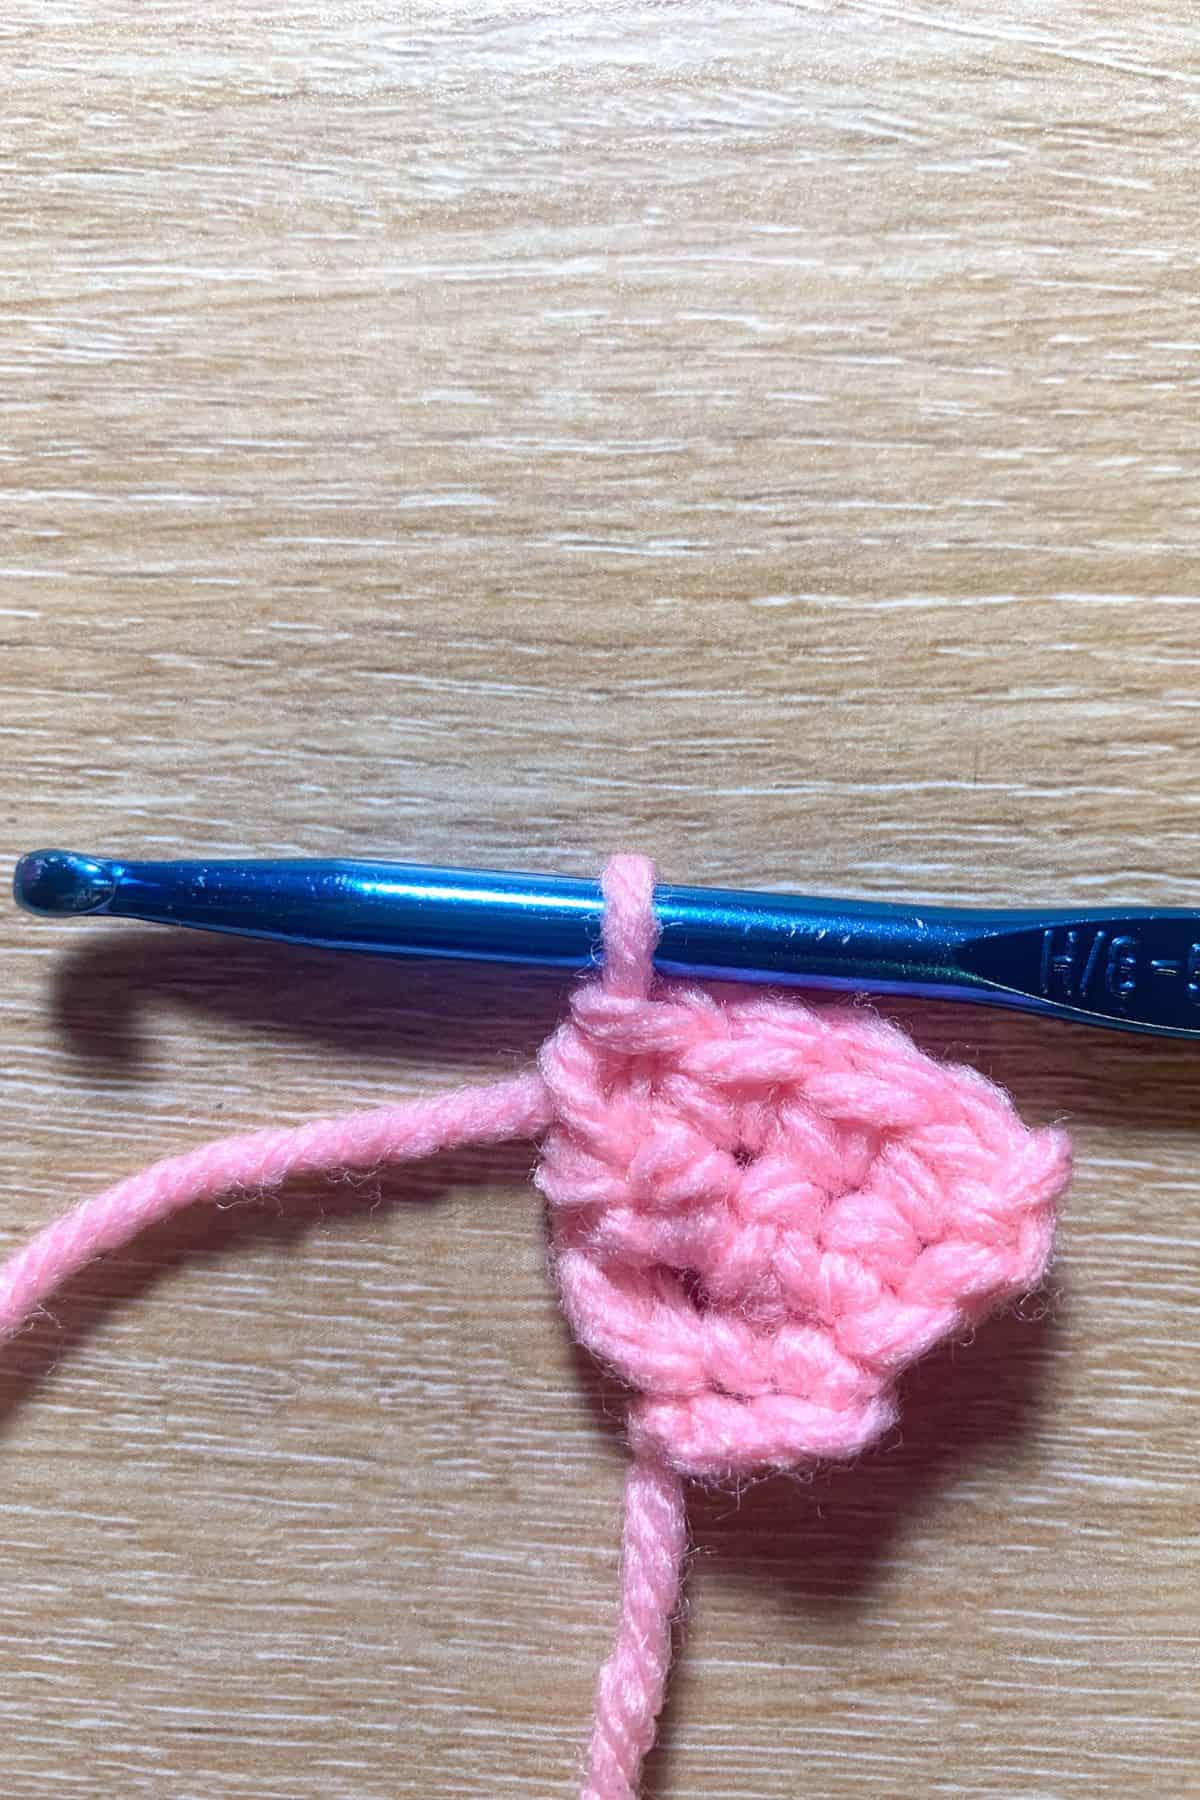
Row 1: Ch x2 and turn.
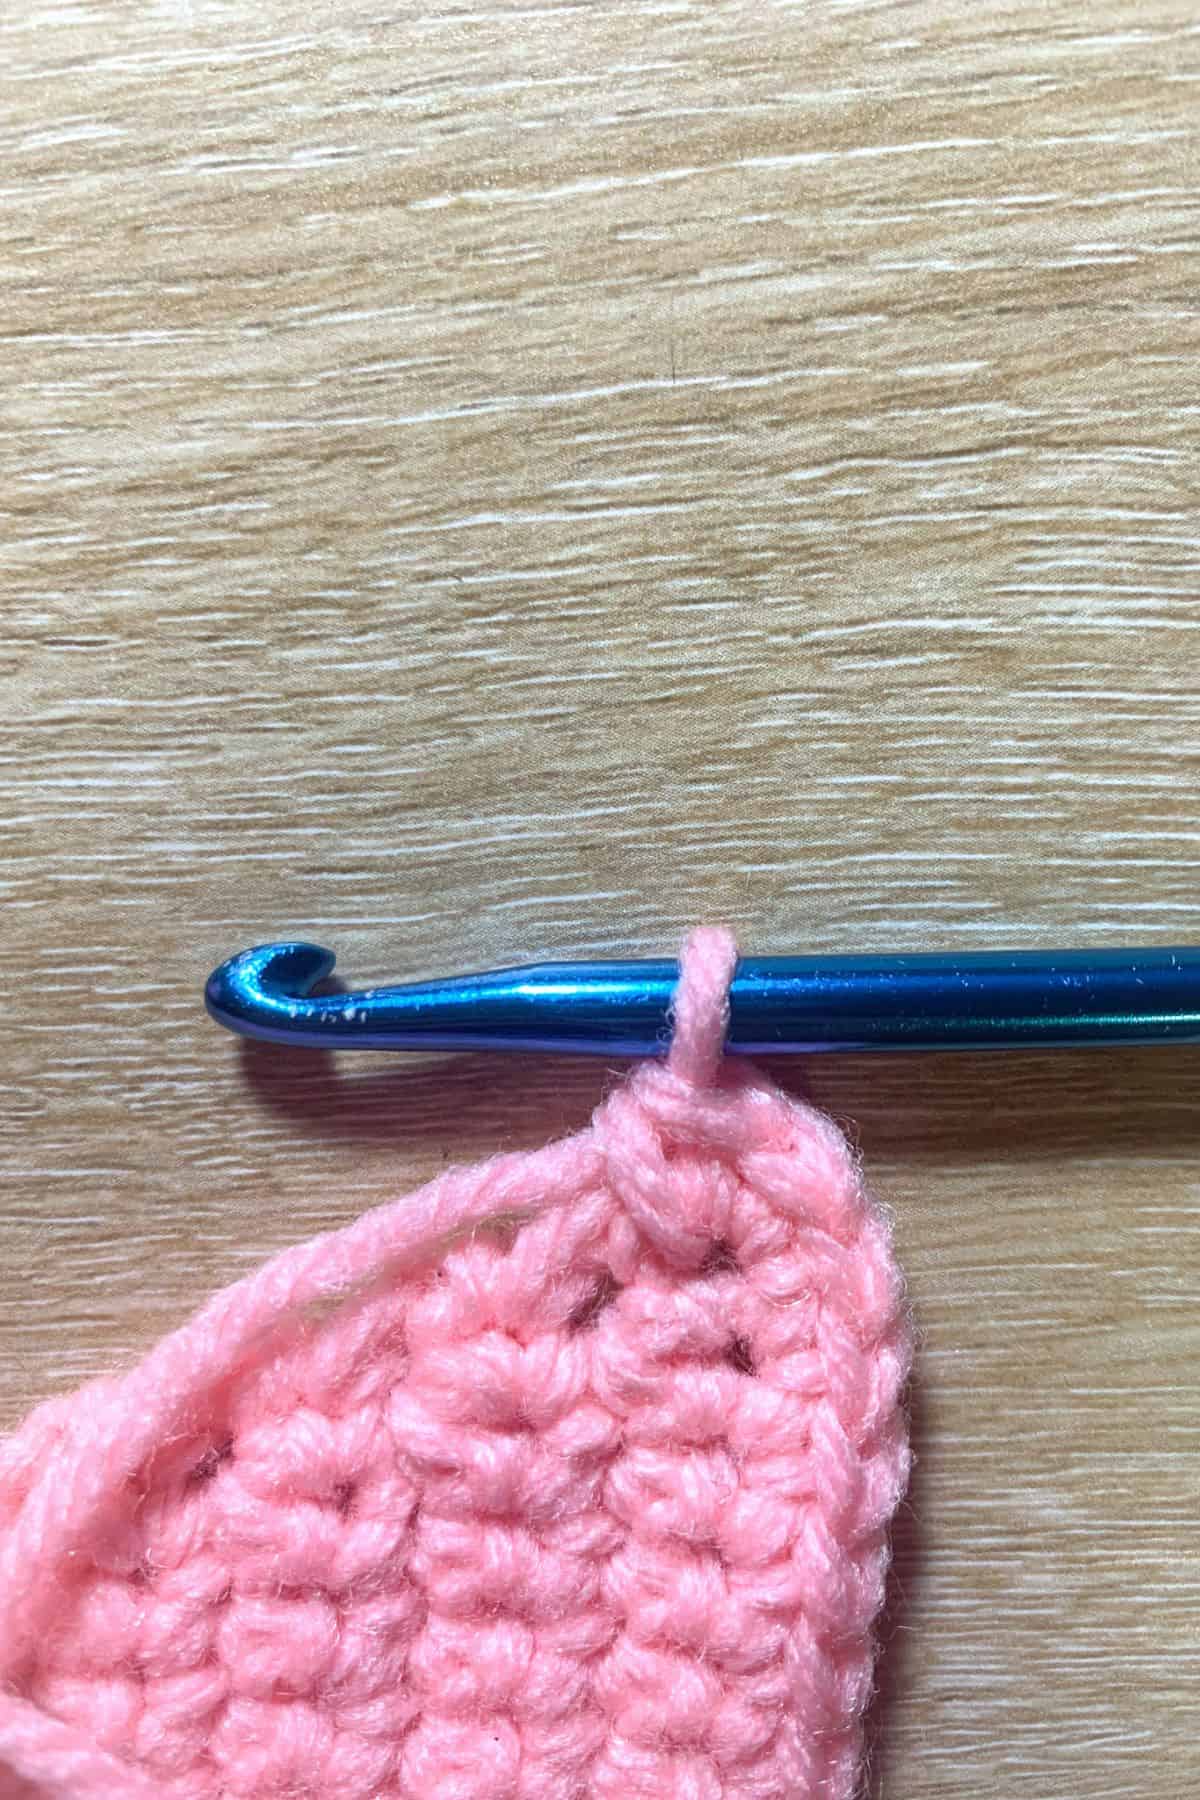
Row 2: In the second chain from the hook make an increase. (2) Ch 1 and turn. Do not work in the turning chains. Always skip those.
Row 3: Sc x2 (2). Then Ch 1 and turn
Row 4: Inc x2 (4). Then Ch 1 and turn
Row 5: Sc x4 (4). Then Ch 1 and turn
Row 6: Inc, sc x2, inc (6). Then Ch 1 and turn
Row 7: Sc x6 (6). Then Ch 1 and turn
Row 8: Inc, sc x4, inc (8). Then Ch 1 and turn
Row 9: Sc x8 (8). Then Ch 1 and turn
Row 10: Inc, sc x6, inc (10). Then Ch 1 and turn
Row 11: Sc x10 (10). Then Ch 1 and turn
Row 12: Inc, sc x8, inc (12). Then Ch 1 and turn.
Row 13: Sc x12 (12). Then Ch 1 and turn.
Row 14: Inc, sc x10, inc (14). Then Ch 1 and turn.
Row 15: Sc x14 (14). Then Ch 1 and turn.
Row 16: Inc, sc x12, inc (16). Then Ch 1 and turn.
Row 17: Sc x16 (16). Then Ch 1 and turn.
Row 18: Inc, sc x14, inc (18). Then Ch 1 and turn.
Row 19: Sc x18 (18). Then Ch 1 and turn.
Row 20: Inc, sc x16, inc (20). Then Ch 1 and turn.
Row 21: Sc x20 (20). Then Ch 1 and turn.
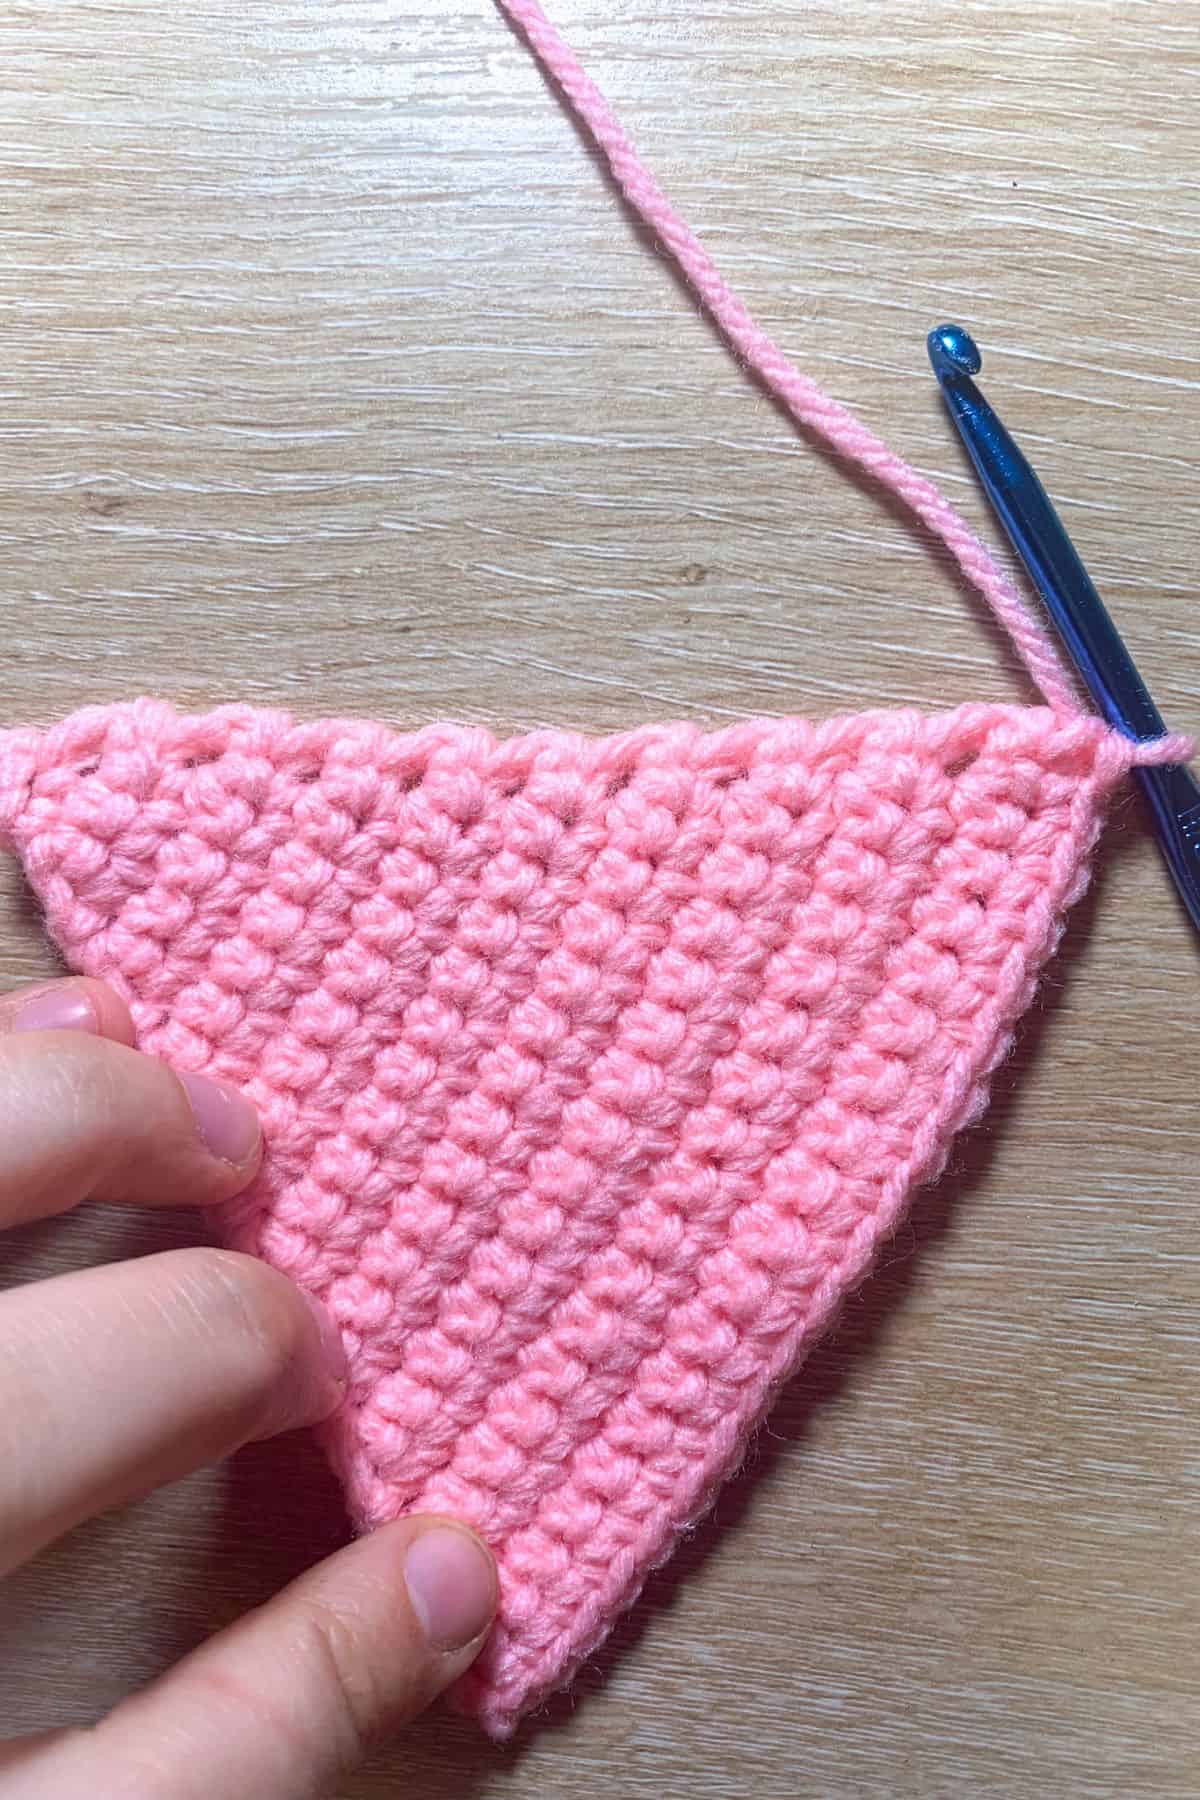
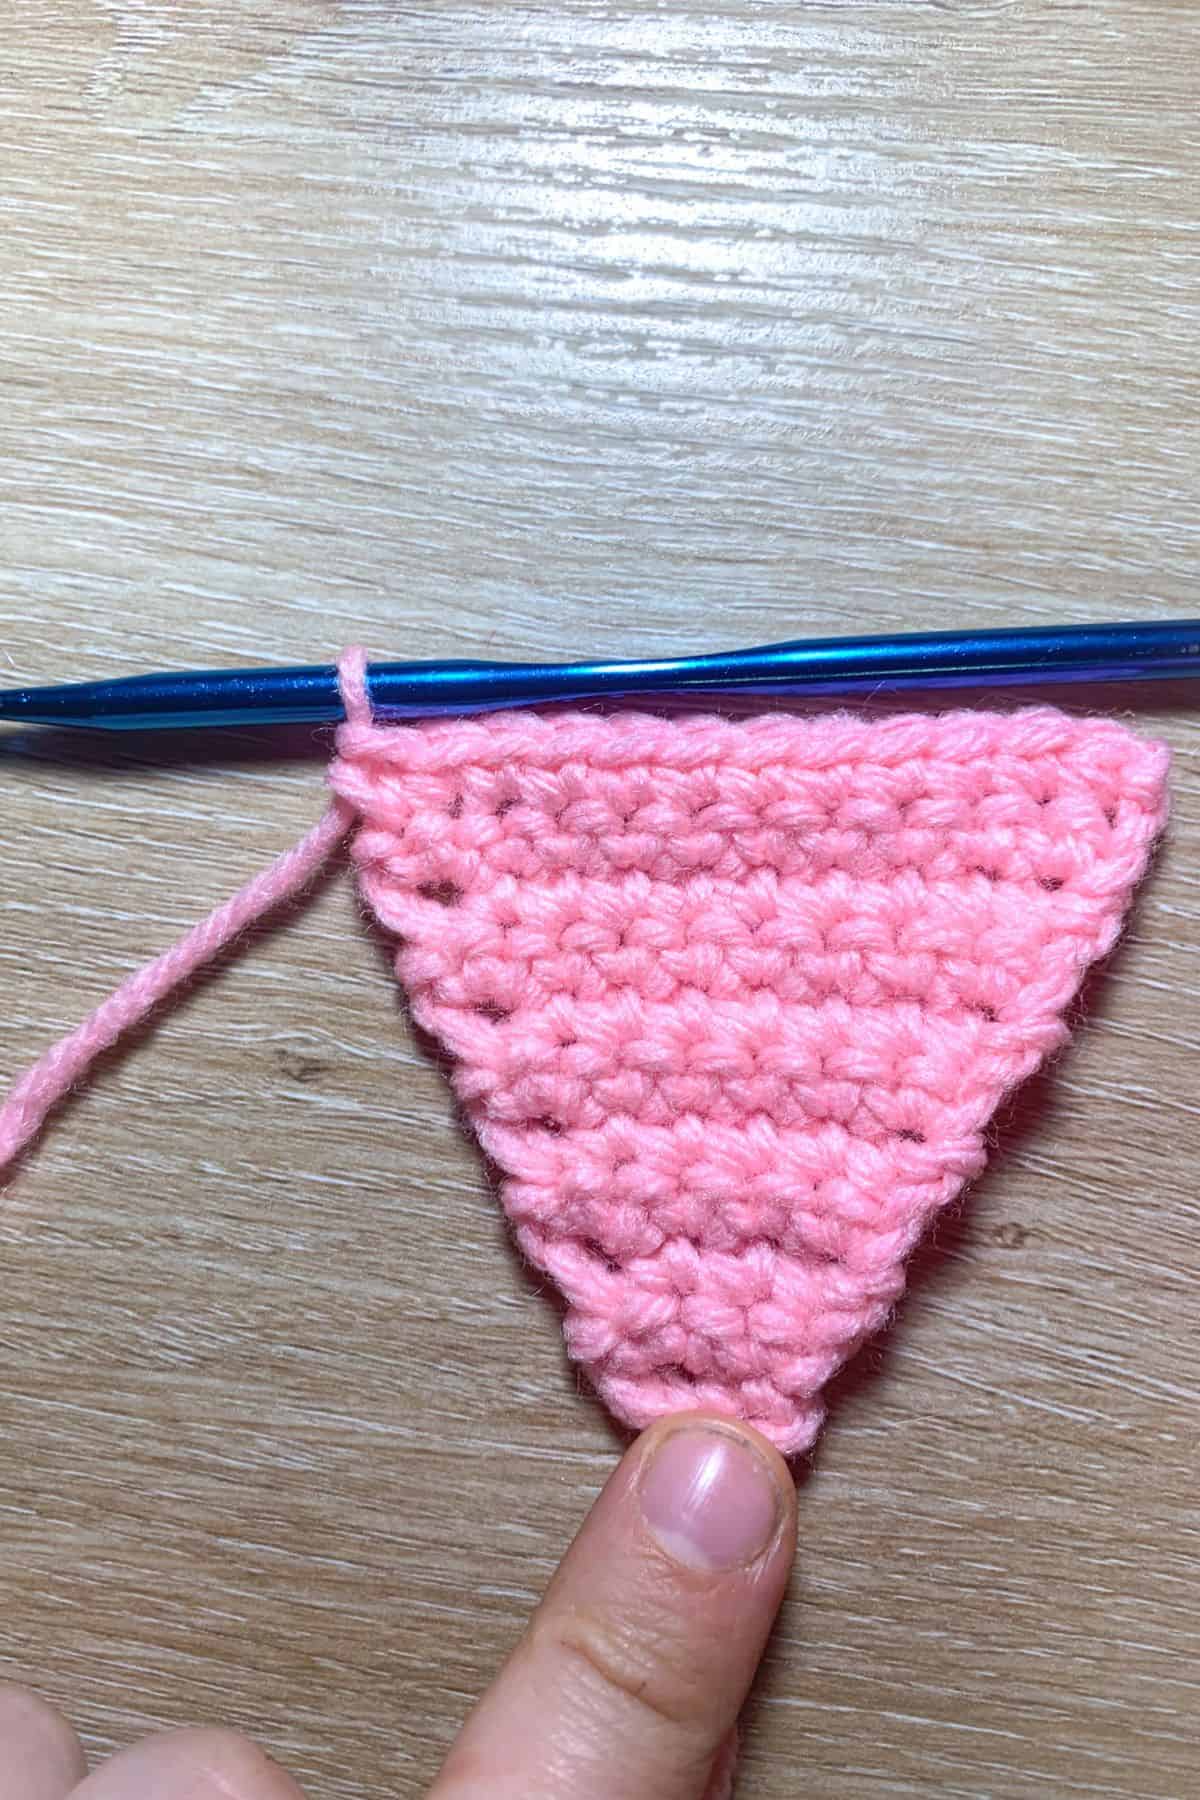
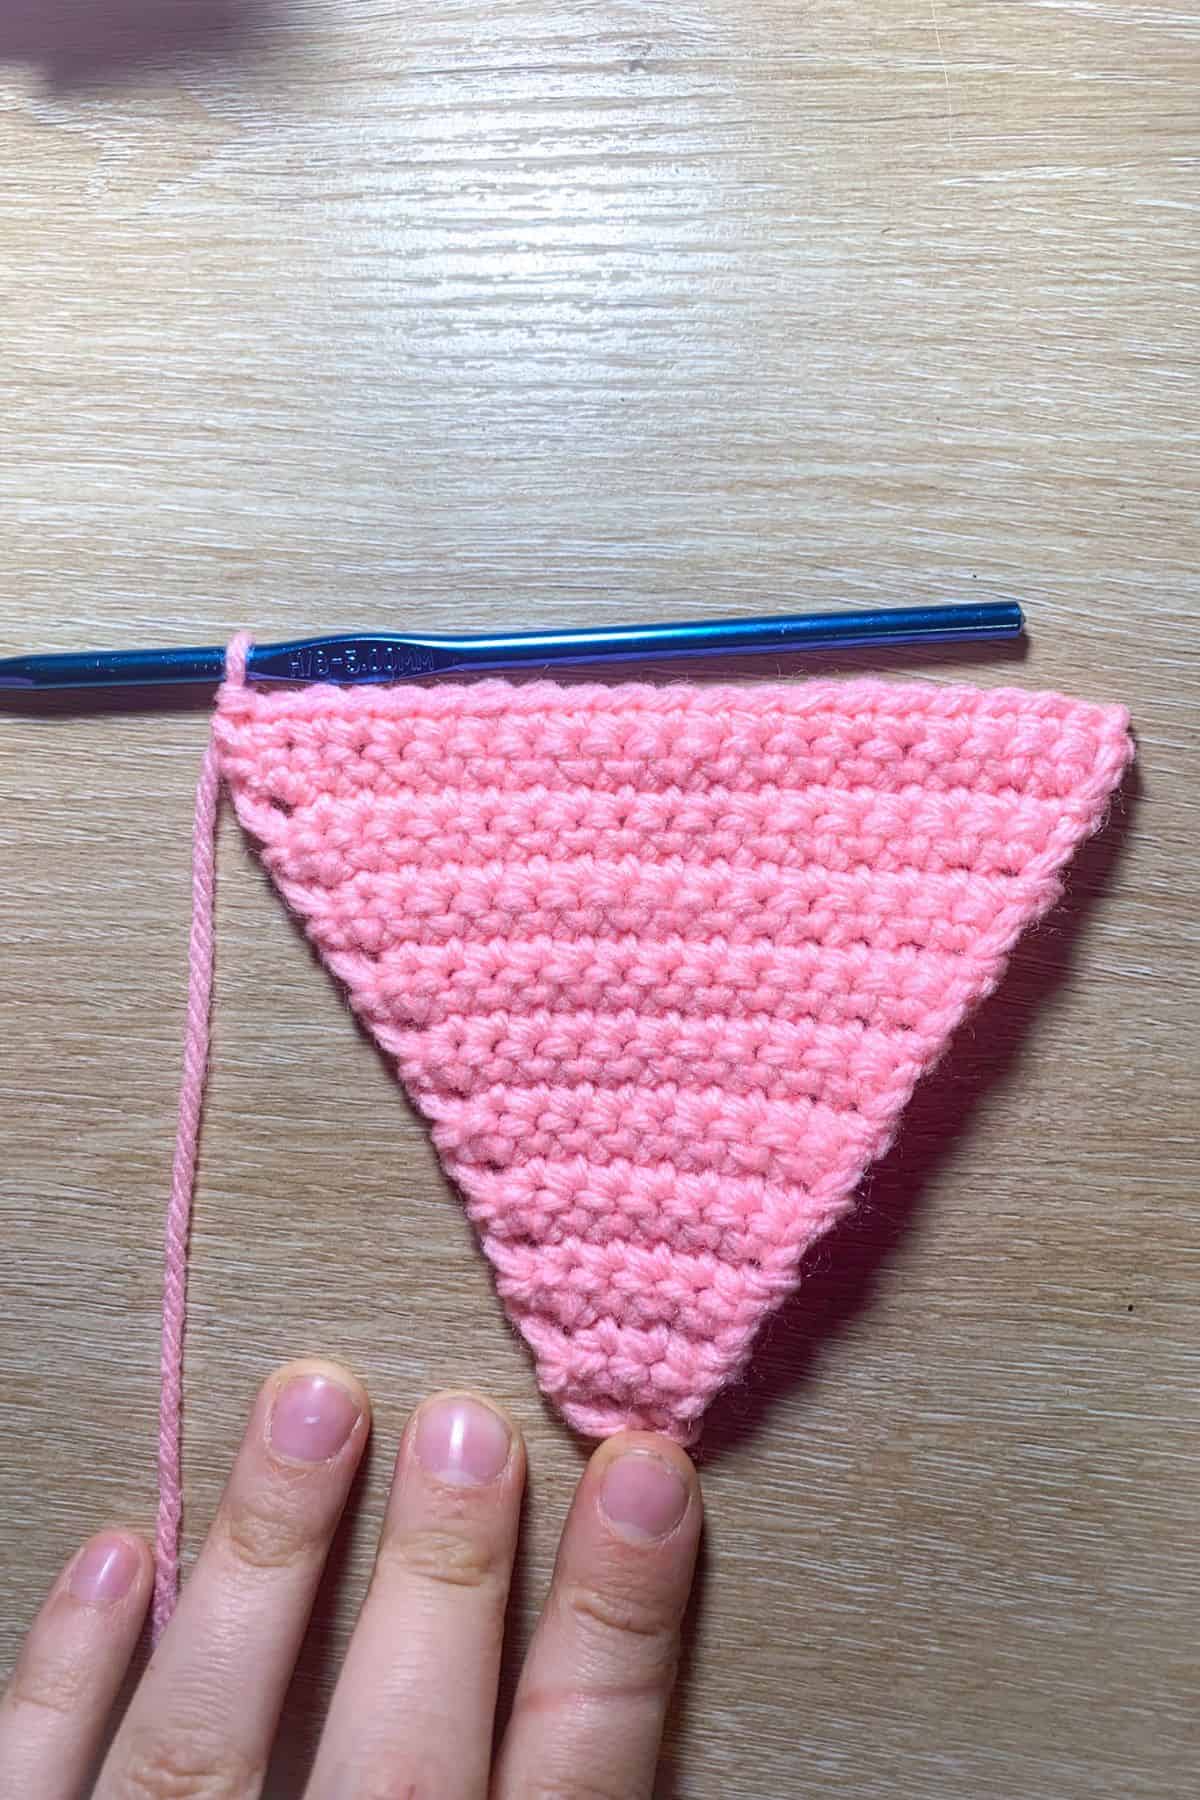
Now you can single crochet around the edge of the triangle if you would like to create a cleaner finish. To do that make single crochets all around the triangle, for the edges that don’t have single crochet holes already, just make 1 single crochet for each row you made in the triangle.
For the corners do 3 single crochets to help round the corner so you can work the otherside without the edges curling up on you.
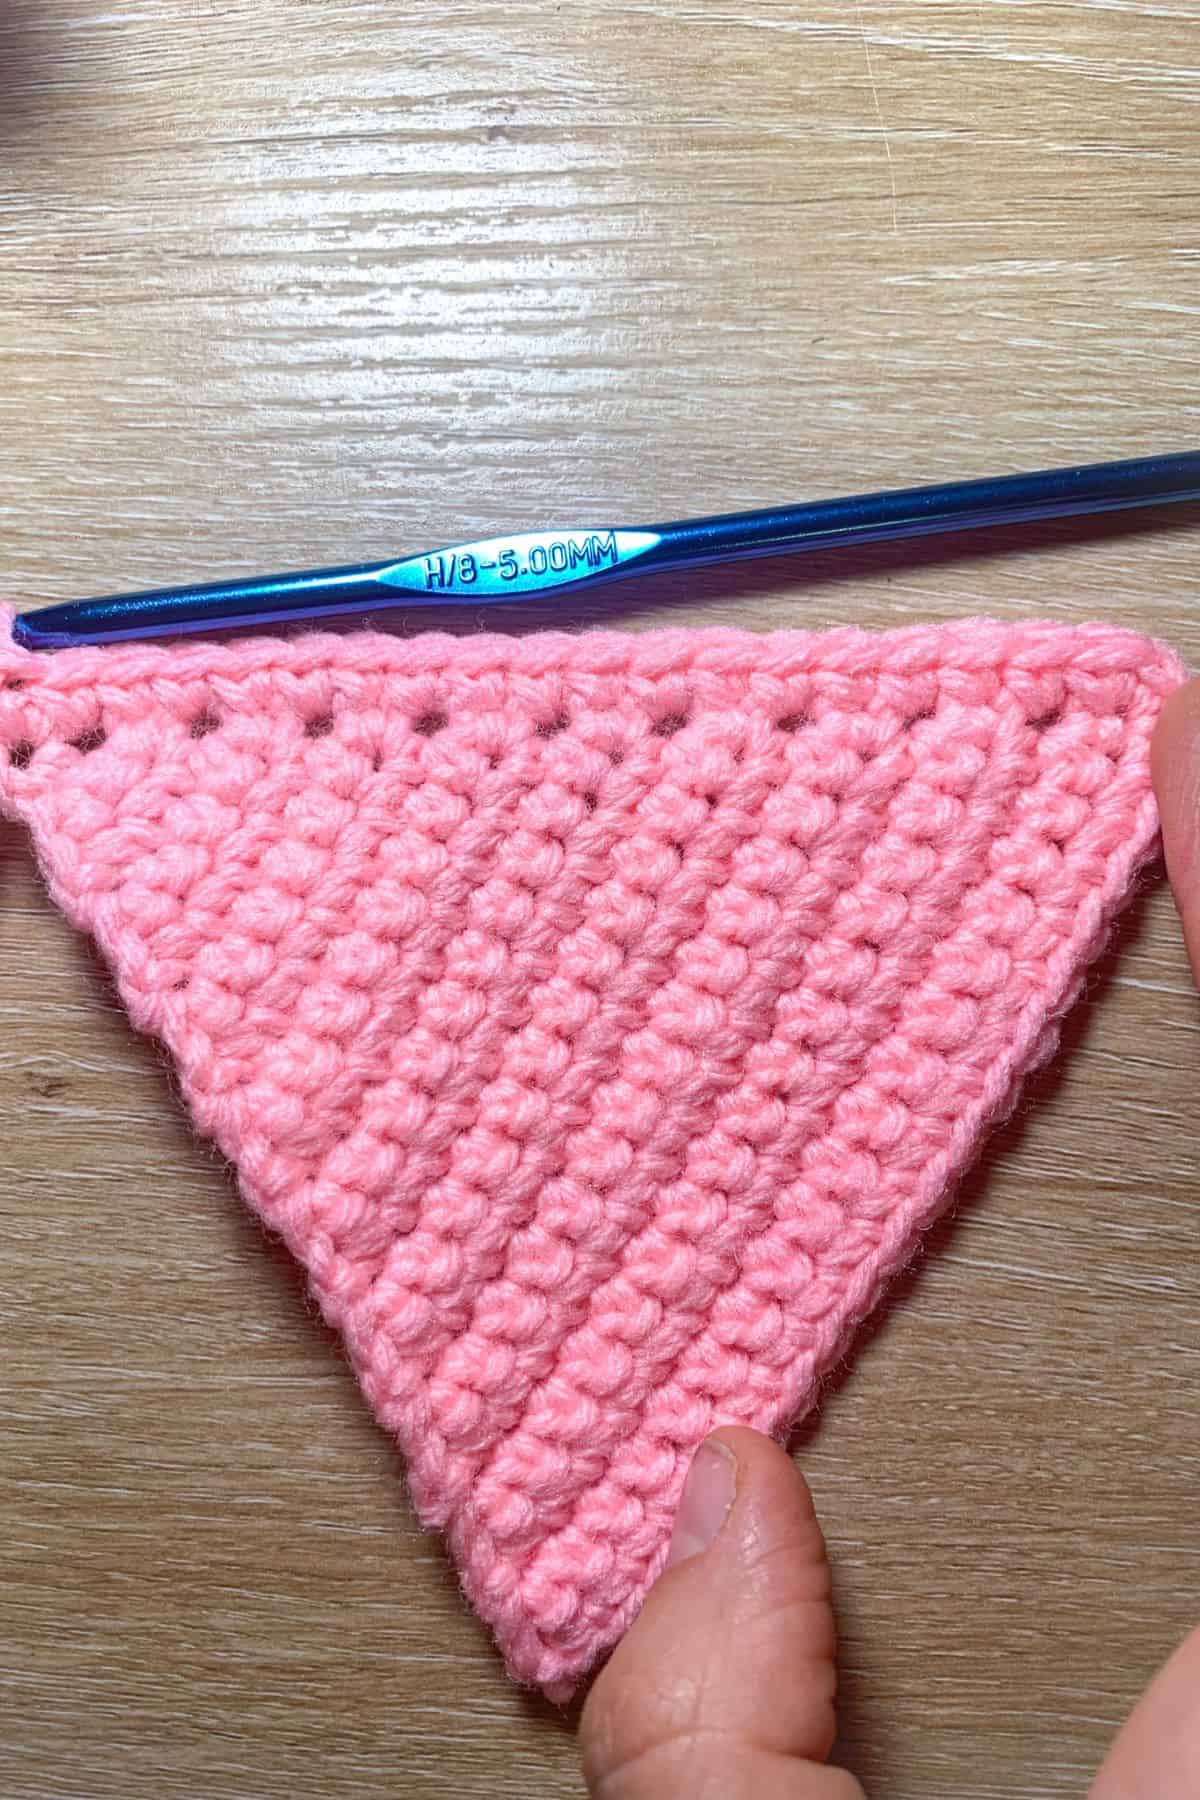
There should be the same number of single crochets on the edge as there are rows (21). If it is wavy at all, you need to use less stitches, if its curling more than just a little, make looser stitches on the edge.
And now you know how to crochet a triangle! If you make enough, you can make a cool crochet flag bunting, perfect for bedroom or nursery decor! If you are making a bunting, adding some crochet applique patterns like the bee in my crochet honeycomb blanket would look cute for a crochet nursery garland.
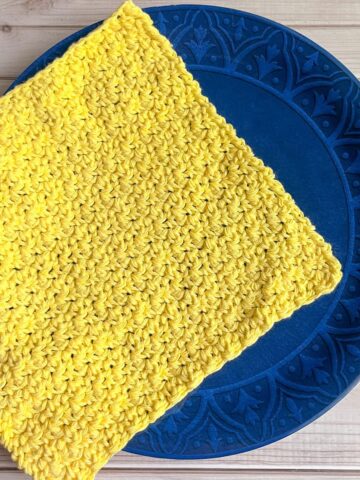
You can also make a blanket. You can put them together like a granny square blanket, you can learn how to assemble them together using my crochet strawberry granny square blanket pattern.
If you were using scraps of yarn for this project, and have some other yarn scraps left over, look into making some of my other crochet scrap yarn projects like my crochet planet and solar system playset.
But, if you were making a rainbow triangle bunting and have leftover yarn, you can make a crochet rainbow keychain or crochet fidget toy with the leftover yarn.
🐌Expert Tips
- Experiment with Tension: Your tension can significantly affect the shape and size of your triangles. Make sure to maintain consistent tension throughout your work for the best results.
- Use Stitch Markers: If you find it challenging to keep track of your increases and decreases, consider using stitch markers to help you remember where to change your stitch count.
- Practice Blocking: Blocking your finished triangles can help them hold their shape better. It can also enhance the crispness of the edges, especially if you plan to use them for decorative projects.
🧵 Pattern FAQs
You can make crochet pizza slices, cheese, cake slices, flags, candy corn, witch hats, diamonds, carrots, Christmas trees, and more. The list goes on!
No, there will always be some roundness to the edges, as that is the nature of the material. Yarn tends to create a rounded finish, but blocking the pieces will provide a crisper finish, making the edges appear sharper.
Blocking is the process of stretching crochet pieces so the yarn fibers have a better form memory after lots of use and washing. It's commonly used for flat crochet textiles that need a cleaner finish, particularly in blankets and clothing.
🧶More Crochet Beginner Patterns

If you tried this How to Crochet a Triangle (or any other pattern on my website), please let me know how it went in the 📝 comments below. I'd love to hear from you!
How to Crochet a Triangle
Materials
- 1 Yarn of any color
- 5mm crochet hook or any hook for yarn size
- Tapestry needle
Abbreviations (US terms)
- ch = Chain
- sc = Single crochet
- inc = Increase (2 stitches in one place)
Notes
- Learning to crochet a triangle is a versatile skill.
- Create a diamond by joining two triangles or following the triangular pattern backward, decreasing toward the middle.
- Practice with a few triangles; you can reuse the yarn or incorporate them later.
- Use any yarn and hook size; I used an H hook (5mm).
- Experiment with colors for a unique crochet rainbow bunting.
- Adjust the number of single crochet rows for different triangle shapes.
Instructions
- For the crochet triangle pattern, we will be working in rows not the round.
- Row 1: Ch x2 and turn.
- Row 2: In the second chain from the hook make an increase. (2) Ch 1 and turn. Do not work in the turning chains. Always skip those.
- Row 3: Sc x2 (2). Then Ch 1 and turn.
- Row 4: Inc x2 (4). Then Ch 1 and turn.
- Row 5: Sc x4 (4). Then Ch 1 and turn.
- Row 6: Inc, sc x2, inc (6). Then Ch 1 and turn.
- Row 7: Sc x6 (6). Then Ch 1 and turn.
- Row 8: Inc, sc x4, inc (8). Then Ch 1 and turn.
- Row 9: Sc x8 (8). Then Ch 1 and turn.
- Row 10: Inc, sc x6, inc (10). Then Ch 1 and turn.
- Row 11: Sc x10 (10). Then Ch 1 and turn.
- Row 12: Inc, sc x8, inc (12). Then Ch 1 and turn.
- Row 13: Sc x12 (12). Then Ch 1 and turn.
- Row 14: Inc, sc x10, inc (14). Then Ch 1 and turn.
- Row 15: Sc x14 (14). Then Ch 1 and turn.
- Row 16: Inc, sc x12, inc (16). Then Ch 1 and turn.
- Row 17: Sc x16 (16). Then Ch 1 and turn.
- Row 18: Inc, sc x14, inc (18). Then Ch 1 and turn.
- Row 19: Sc x18 (18). Then Ch 1 and turn.
- Row 20: Inc, sc x16, inc (20). Then Ch 1 and turn.
- Row 21: Sc x20 (20). Then Ch 1 and turn.
- Now you can single crochet around the edge of the triangle if you would like to create a cleaner finish. To do that make single crochets all around the triangle, for the edges that don’t have single crochet holes already, just make 1 single crochet for each row you made in the triangle.
- For the corners do 3 single crochets to help round the corner so you can work the other side without the edges curling up on you. Once done, fasten off and weave in the ends.
- You can then steam and block the triangles for an even cleaner finish and string them up with yarn and have it be a cool crochet wall decor piece.

Leave a Reply