
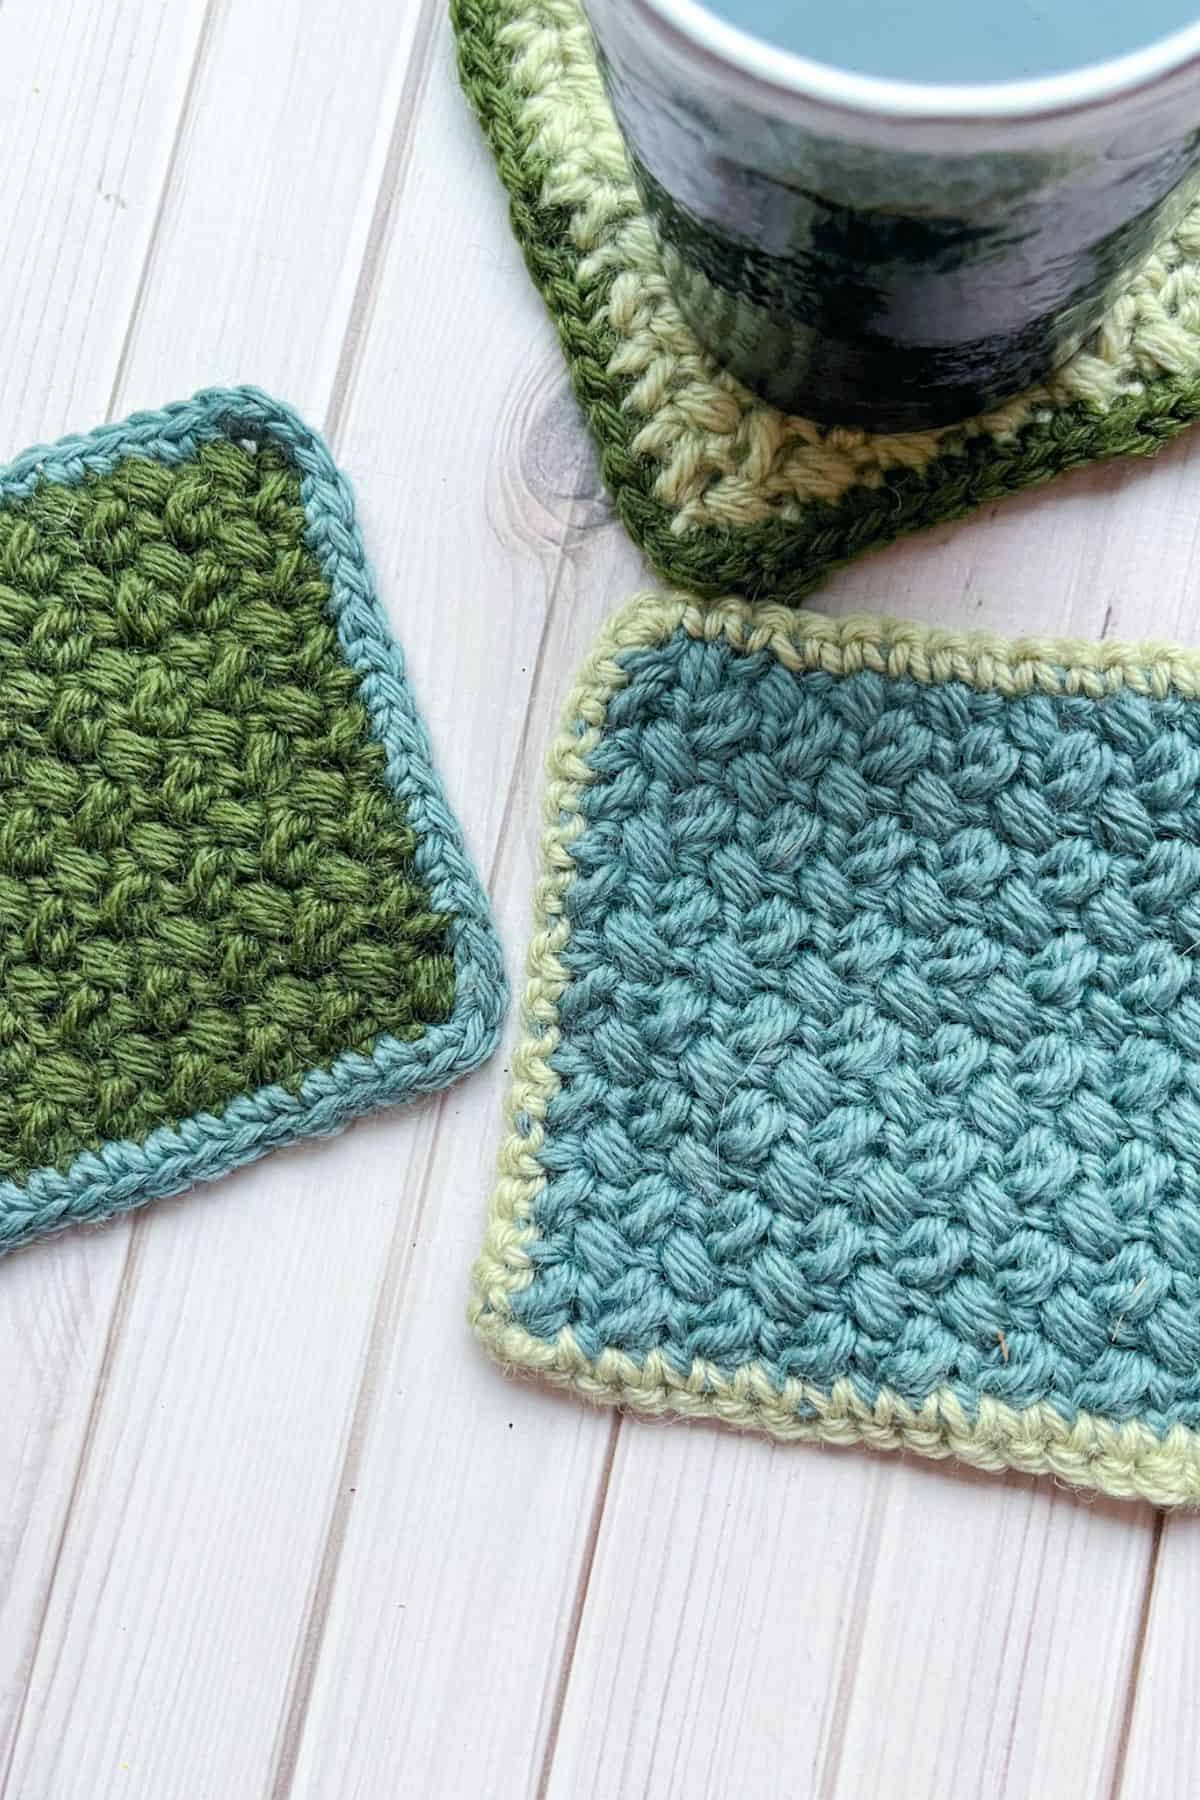
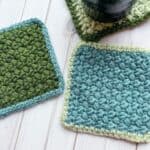
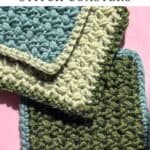
My Elizabeth Crochet Stitch Coasters are perfectly square crochet coasters with a unique texture. The Elizabeth crochet stitch, also known as the mini bean crochet stitch, is an easy stitch to learn if you can manage multiple loops on your hook at once.

The Elizabeth crochet stitch is made as if you were doing a single crochet (without finishing the stitch by going under the loops on the hook) and then transitioning directly into a half double crochet by yarning over, going under the same stitch you previously worked into, yarning over again, and then pulling back through.
This process leaves you with four loops on the hook. You then finish the stitch by going through all four loops and immediately making a chain to secure the stitch. After that, skip the next stitch and repeat the process!
As mentioned, the Elizabeth stitch is also known as the mini bean stitch. I don’t know exactly why it’s called the Elizabeth stitch (maybe because it’s a very beautiful stitch), but it’s named the mini bean stitch because the tiny puff it creates resembles a bean. Personally, I think it looks more like a coffee bean than a pinto bean, but I digress.
Regardless of the name you prefer, the Elizabeth crochet stitch is perfect for both washcloths and dishcloths. You can even extend the number of chains to create a blanket! Here, I’ll be making my Elizabeth crochet stitch into a square crochet coaster pattern. My crochet Santa coaster is also a square coaster and you can turn my crochet dragonfly stitch swatch into a square coaster too!
Square crochet coasters are easy to make and make great last-minute gifts. You can create a few of them and pair them with coffee cups, tea, and coffee beans for nice gifts for friends during the holidays.
Jump to:
✏️ Things To Note:
- Yarn Type: I used small amounts of cotton to make the Elizabeth crochet stitch square crochet coaster pattern. Cotton yarn is the yarn I recommend for coasters, as it transfers heat well and can absorb liquid if condensation forms on the glass. I do not recommend acrylic yarn, as it is less absorbent and made from plastic, which can melt if it gets too hot.
- Coaster Size: The finished Elizabeth crochet stitch coaster size is roughly 4 inches by 4 inches.
- Yarn Amount: Depending on your tension and the size of your stitches, you may need more or less yarn than specified. Always have a little extra on hand, just in case!
🪡 Materials Needed
- Lily Sugar n Cream cotton yarn
- 4.5mm hook
- Tapestry needle for weaving in the ends
💭 Abbreviations to Remember (US Terms)
- Single crochet (sc)
- Chains (ch)
- Mini Bean Stitch
🧋 Variations
Color Combinations: Experiment with different colors to create a variety of coasters!
🍵 Instructions for Elizabeth Crochet Stitch Coasters
For the main part of the square crochet coaster, we will be working in rows
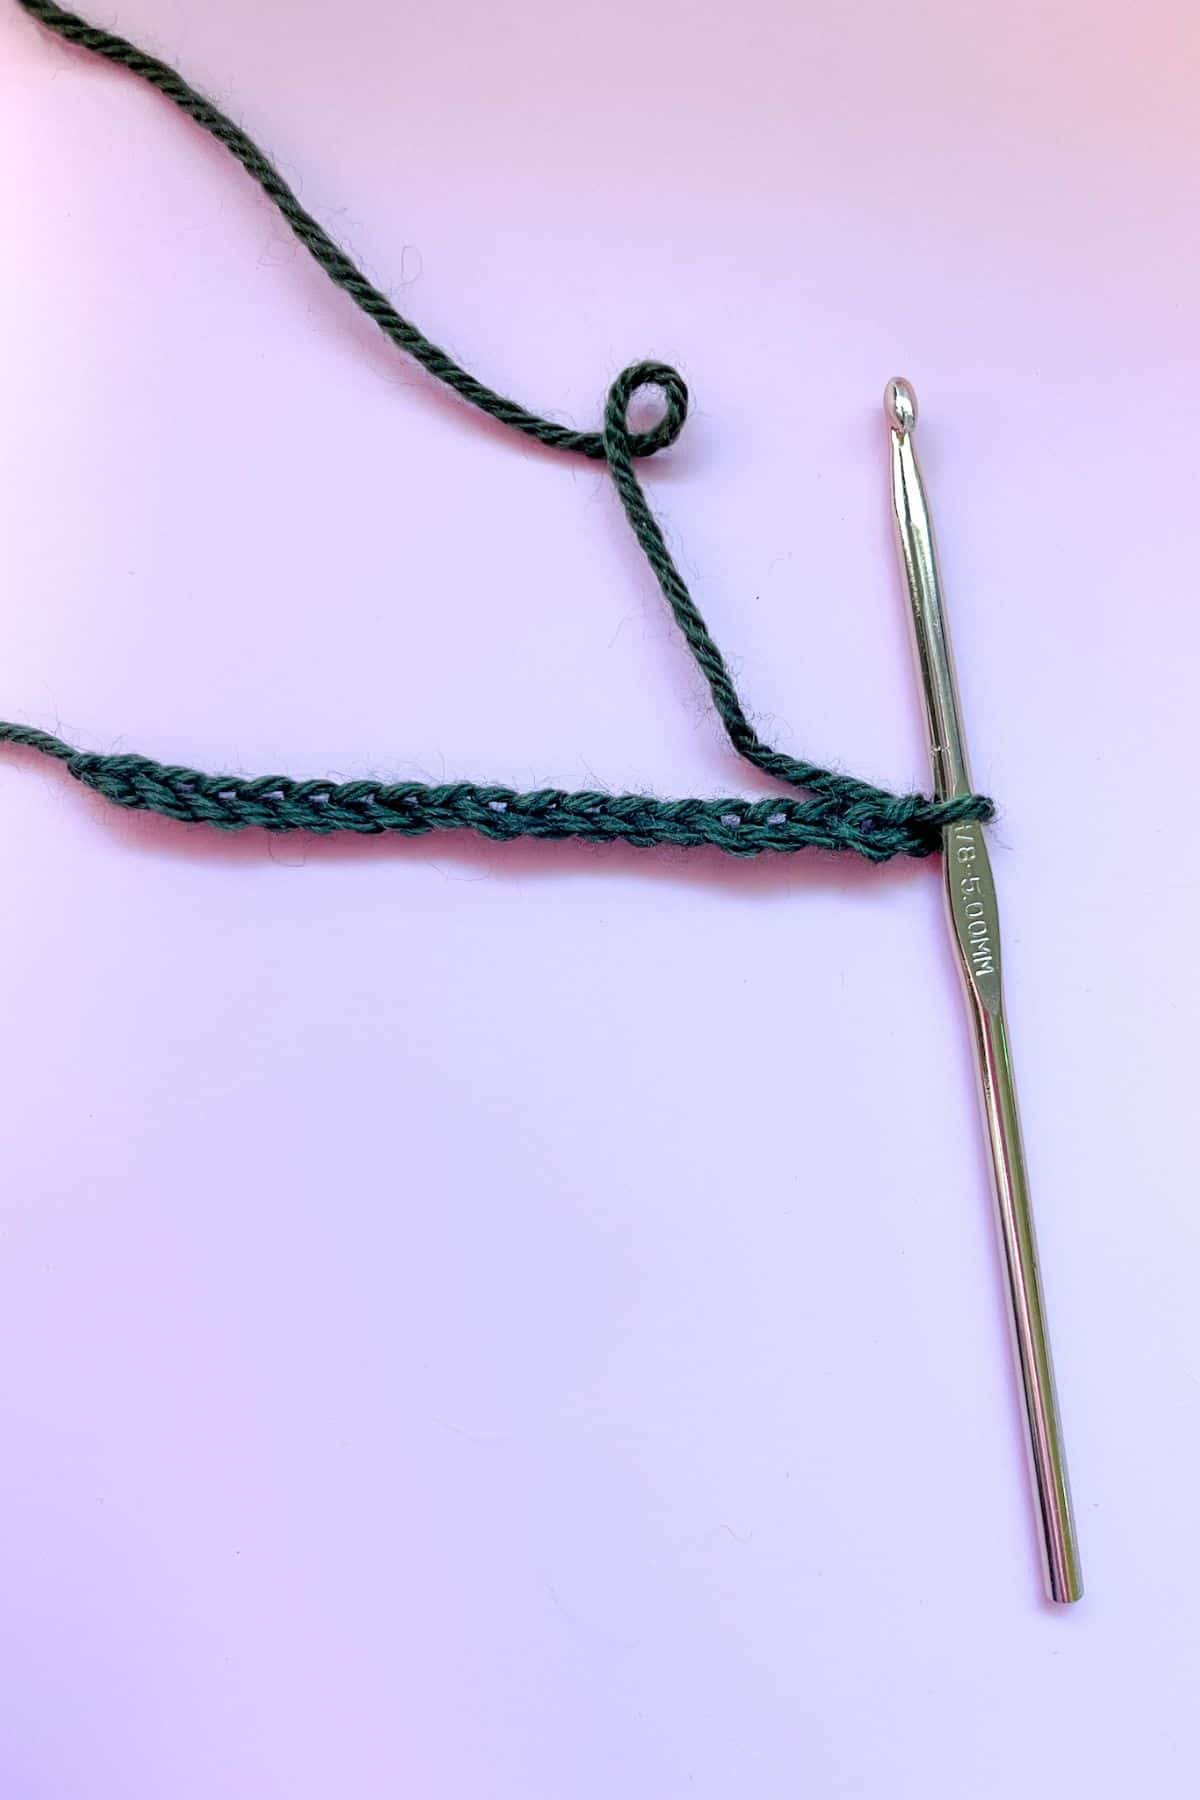
Row 1: Using any color cotton yarn, ch x15 +2 for the turning ch. (15 +2)
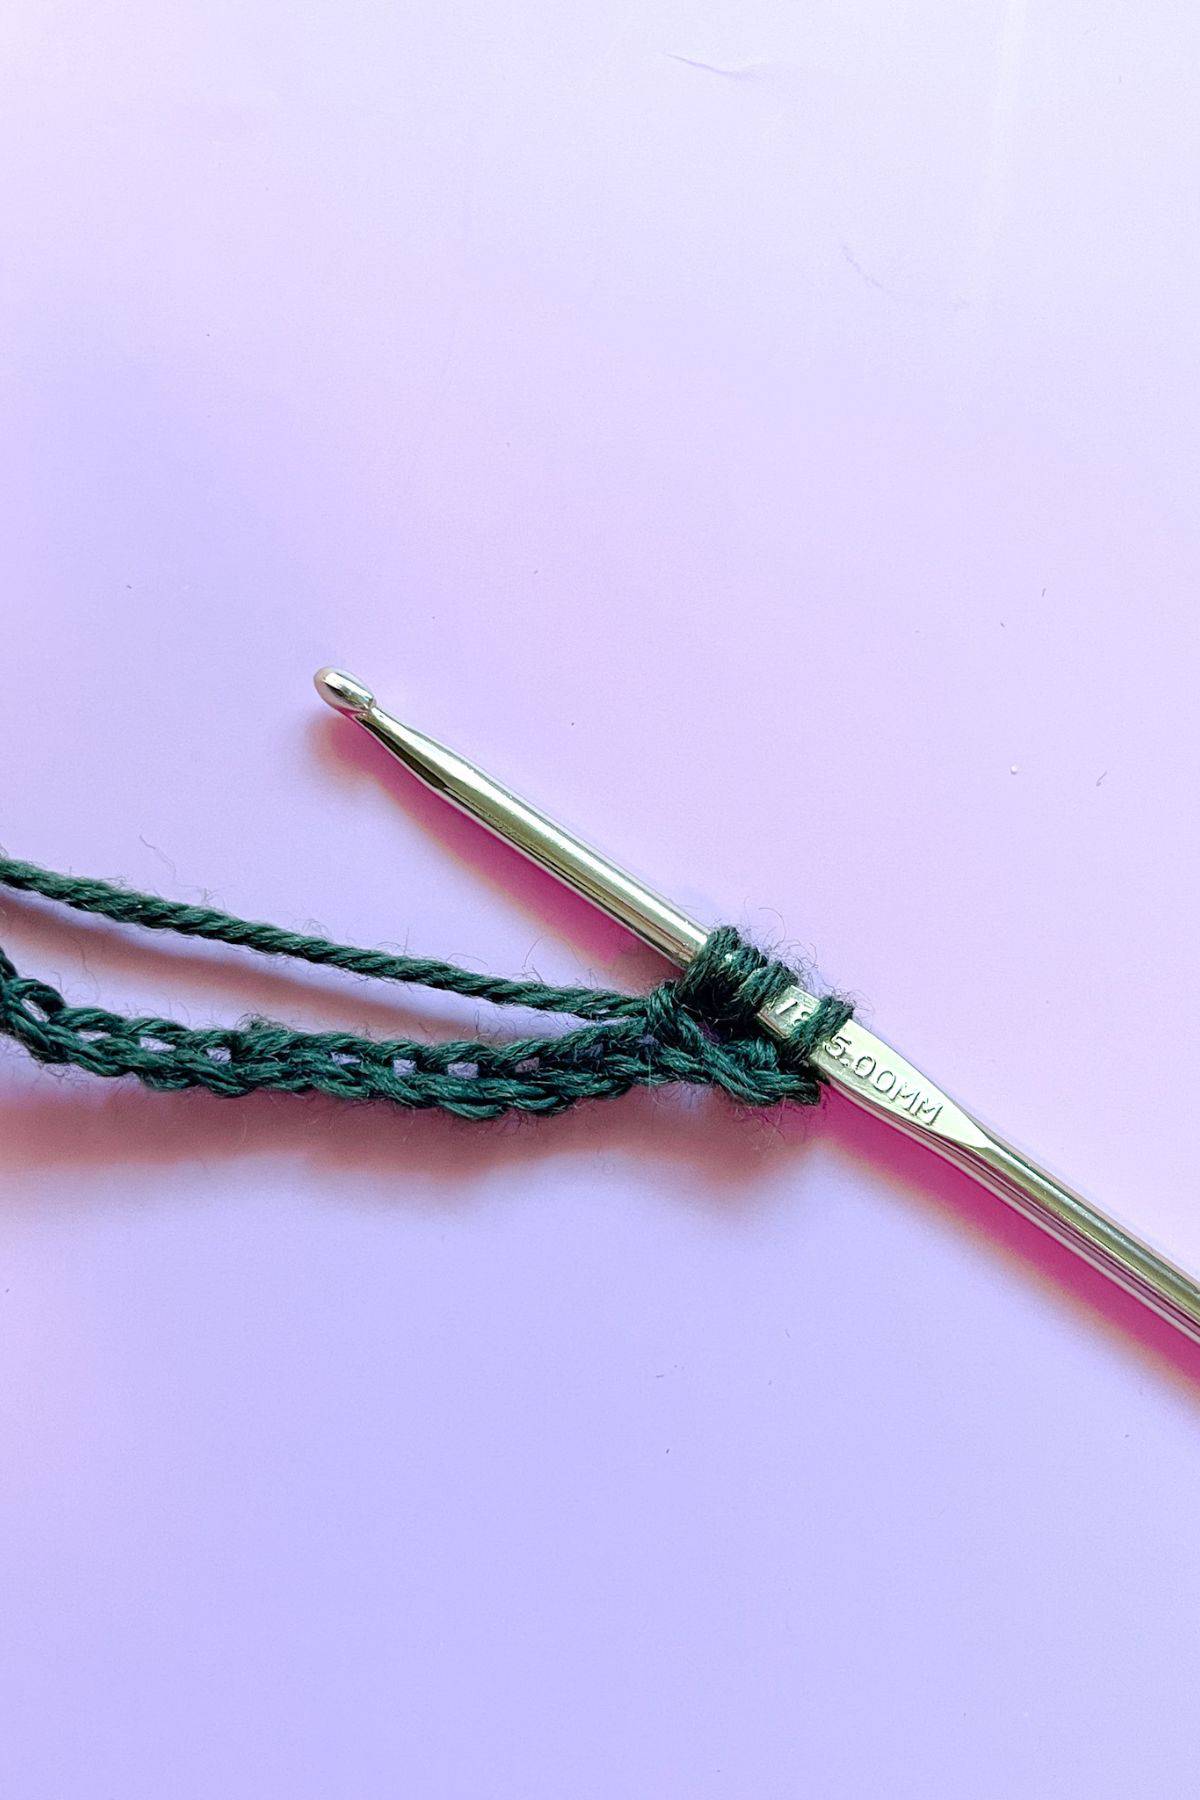
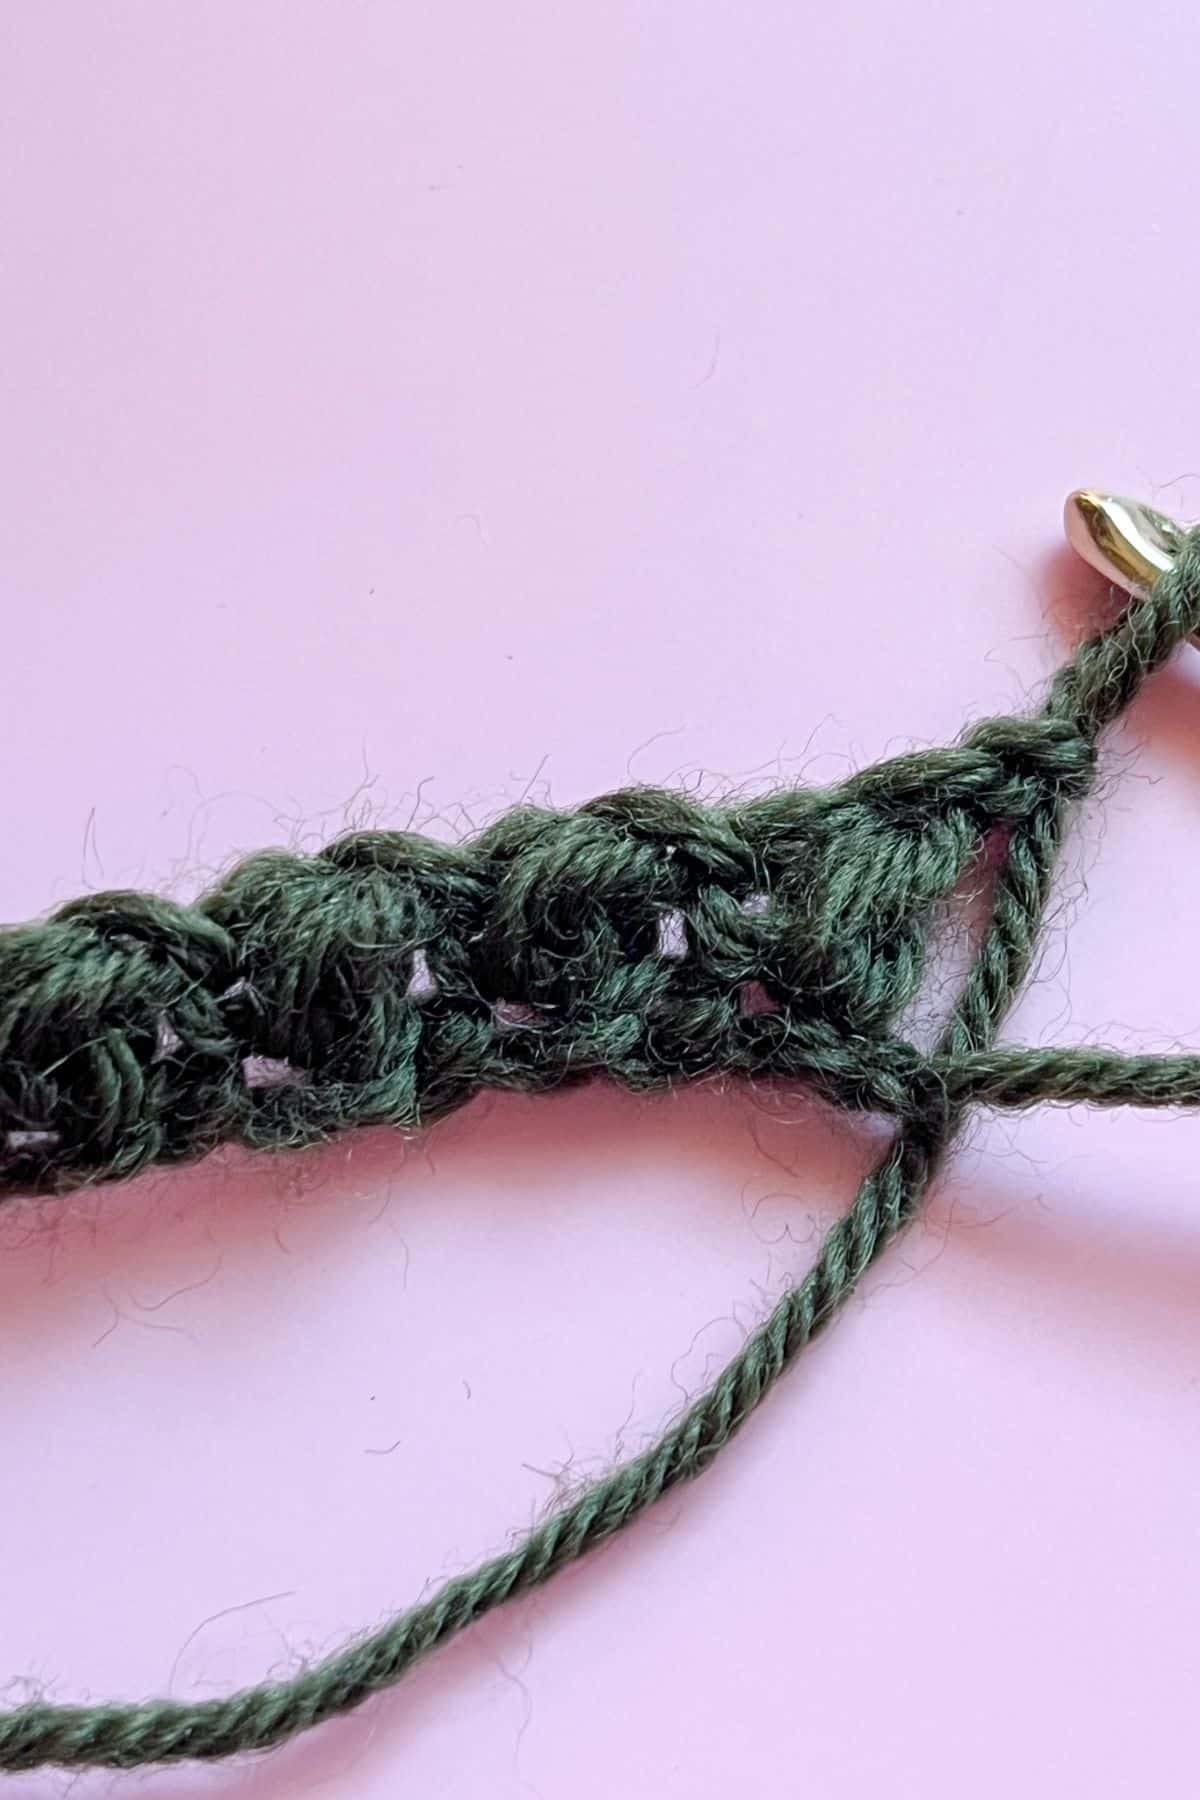
Row 2: Insert your hook into the 3rd chain from the hook, yarn over, pull up a loop, yarn over, insert hook into the same chain, yarn over and pull up another loop. You should have 4 loops on the hook.
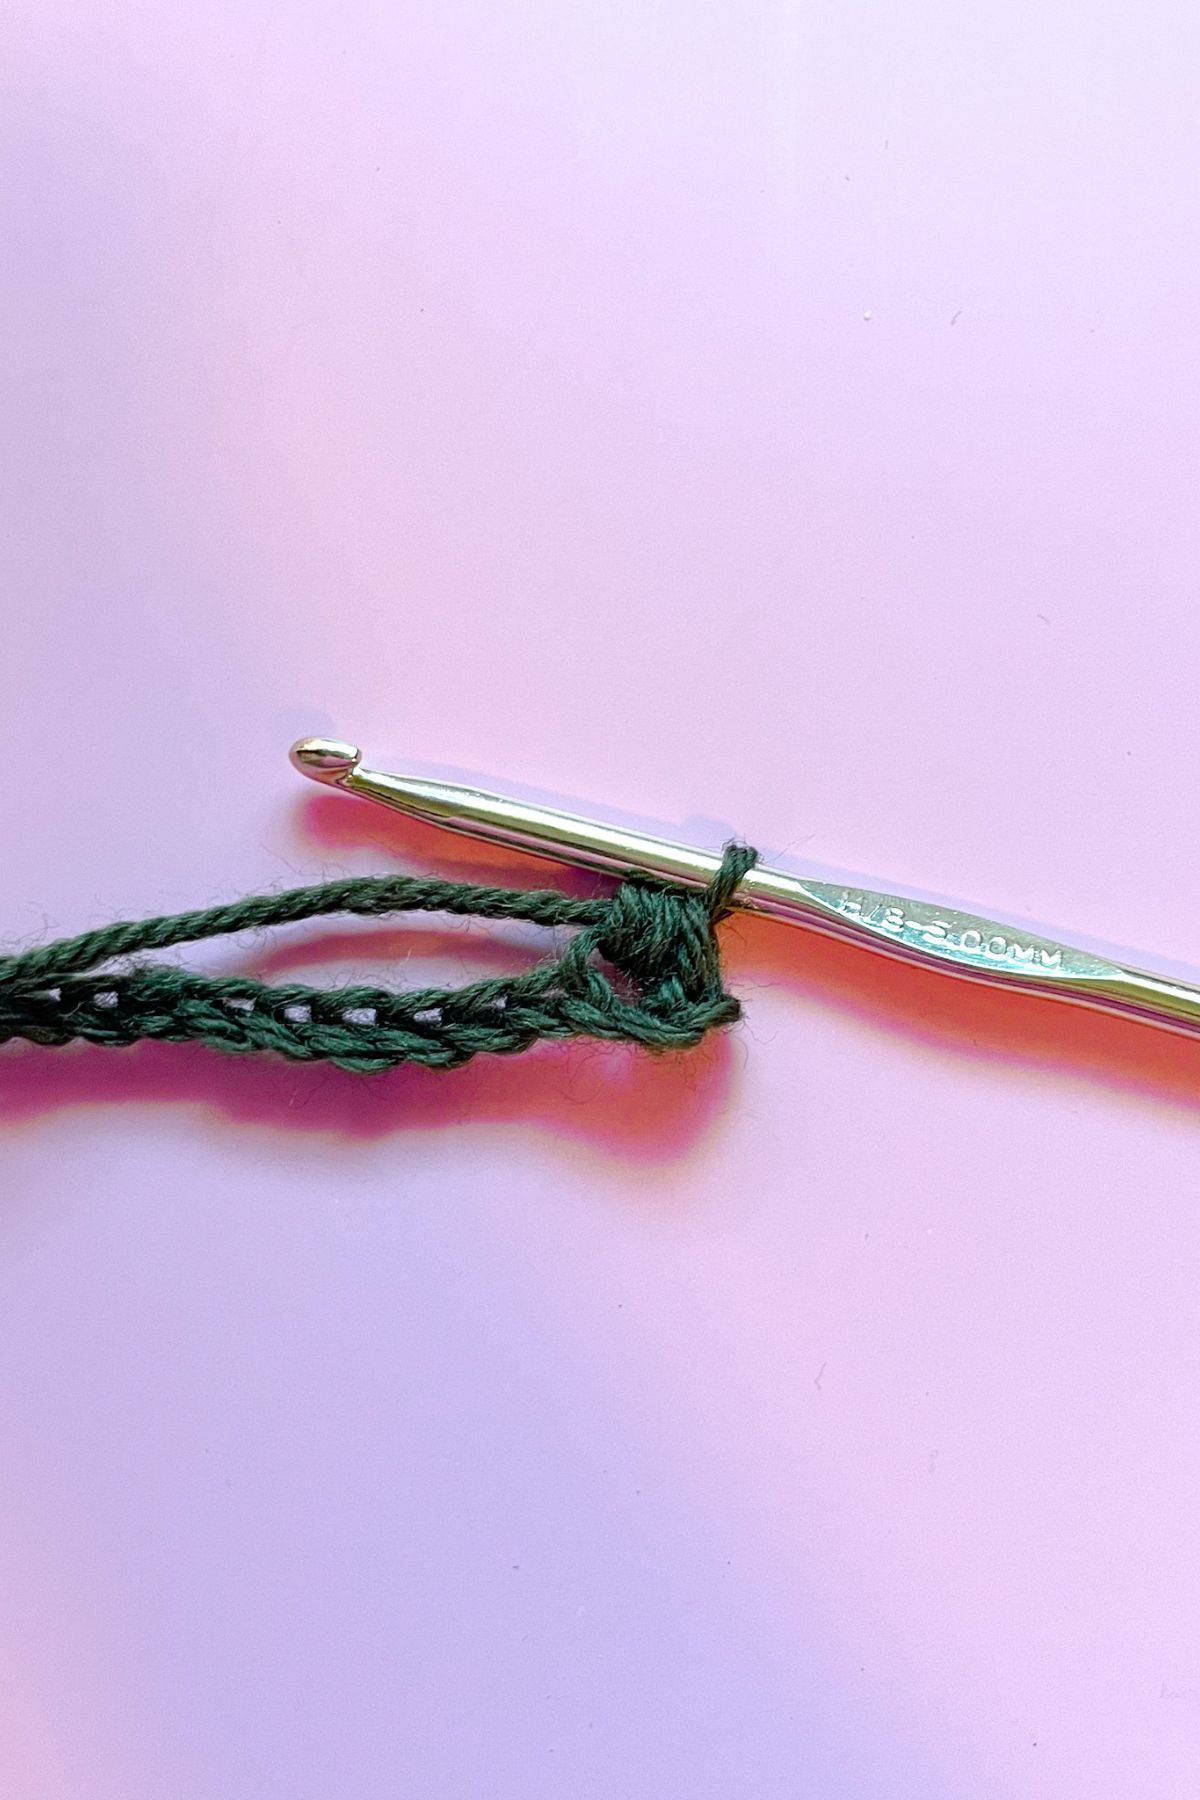
Yarn over and go through all 4 loops on the hook.
Then chain 1 to close the stitch.
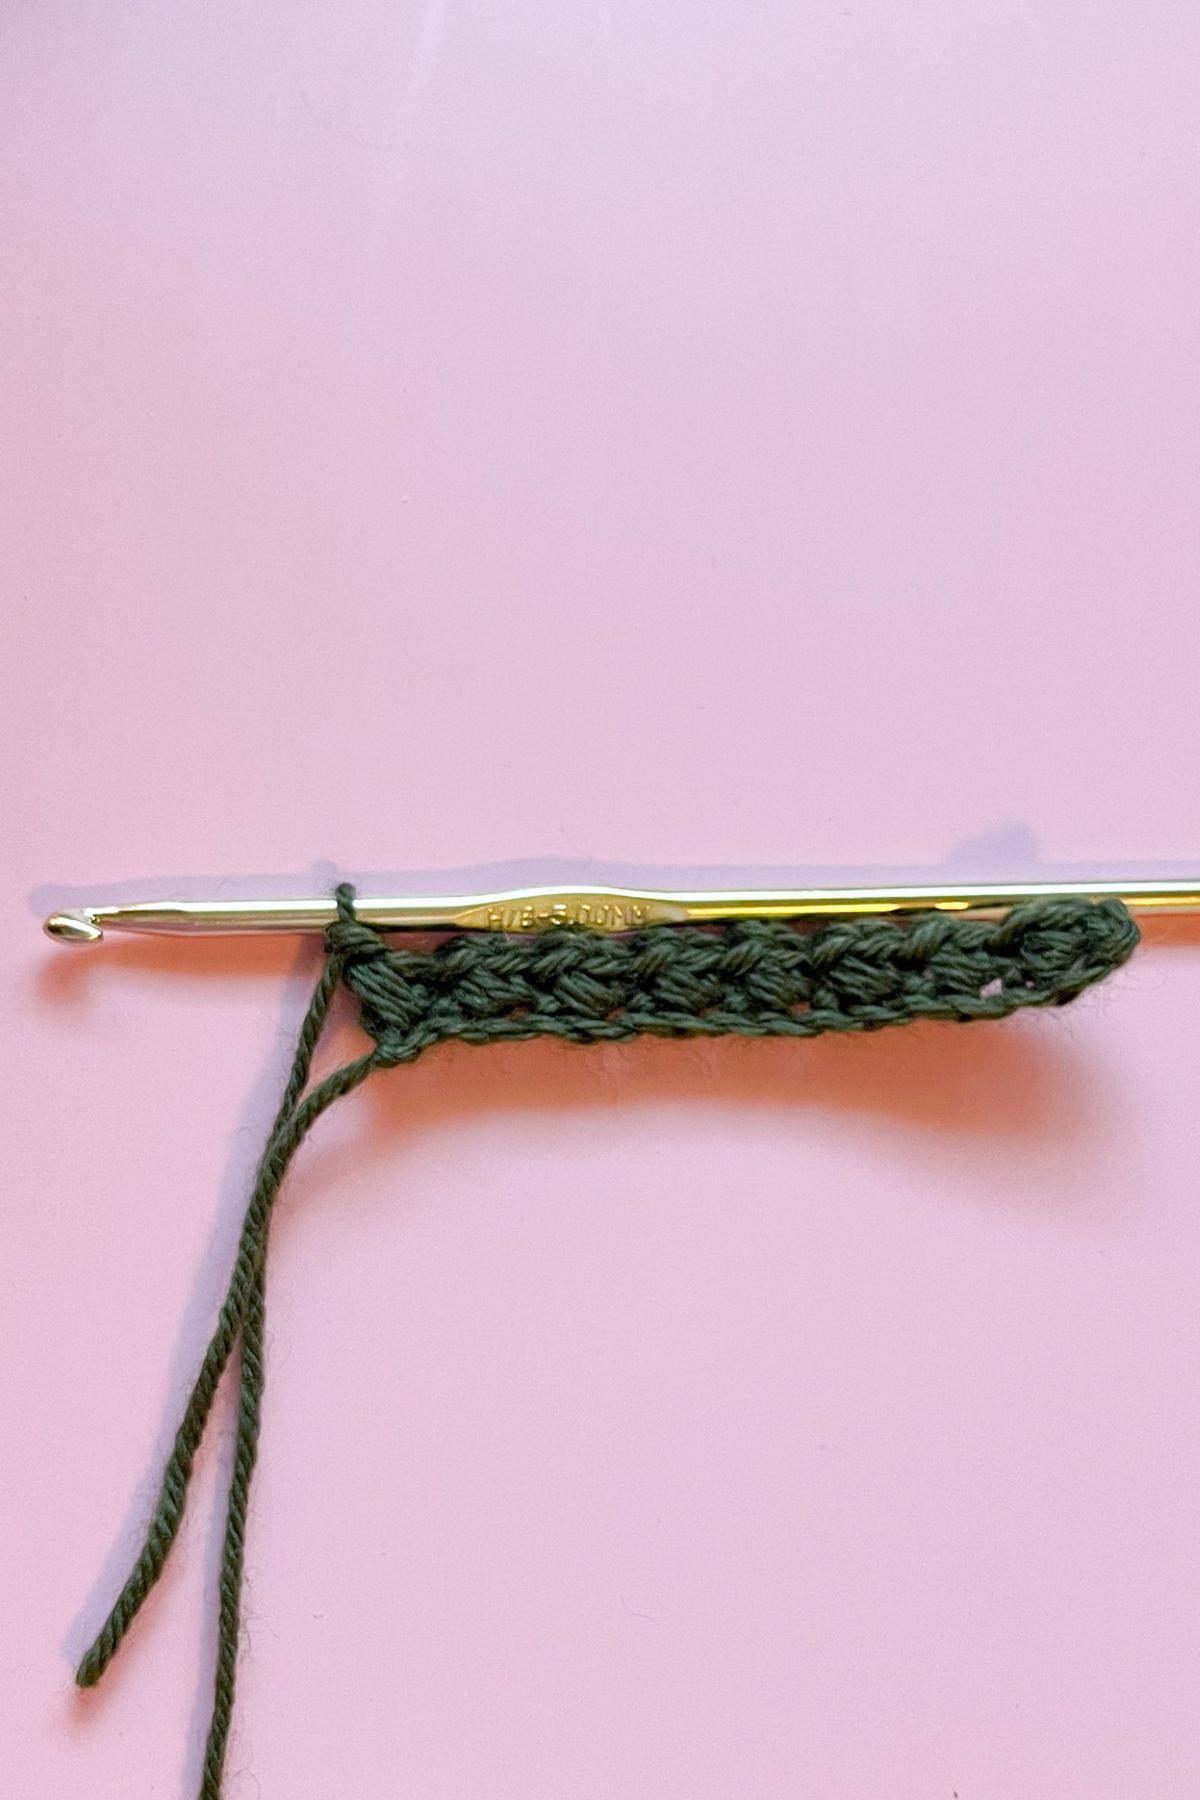
Skip the next chain, and in the following chain make another mini bean stitch:
*Insert hook into the chain, yarn over, pull up a loop, yarn over, insert hook into the same chain, yarn over and pull up another loop.
Ch x1 and skip the next sttich.
Repeat from * for the rest of the row
After making the chain for the last mini bean stitch, ch x1 and turn.
Row 3: When you turn your work you will find the next chain space and instead of chaining directly into it you will make your next mini bean stitch beside it. This can be explained better if you hold your project in both your hands and stretch the last elizabeth stitch made in the previous row slightly. You will see most of the loops going diagonally from bottom left to top right. Except 1 loop. That loop will be going top left to bottom right. So the stitch will form almost a V in its shape.
You will make your next elizabeth stitch in that void by going under the 1 loop and proceeding to do the stitch. Remember to chain 1 after going through the 4 loops! Continue to do this for the rest of the row, skipping every other stitch like you did before.
You should have 8 elizabeth stitches in each row completed.
Row 4-13: Repeat row 3 until the crochet square coaster is done. Fasten off.

Row 4-15: Repeat row 3 until the crochet square coaster is done. Fasten off.
Single Crochet Border:
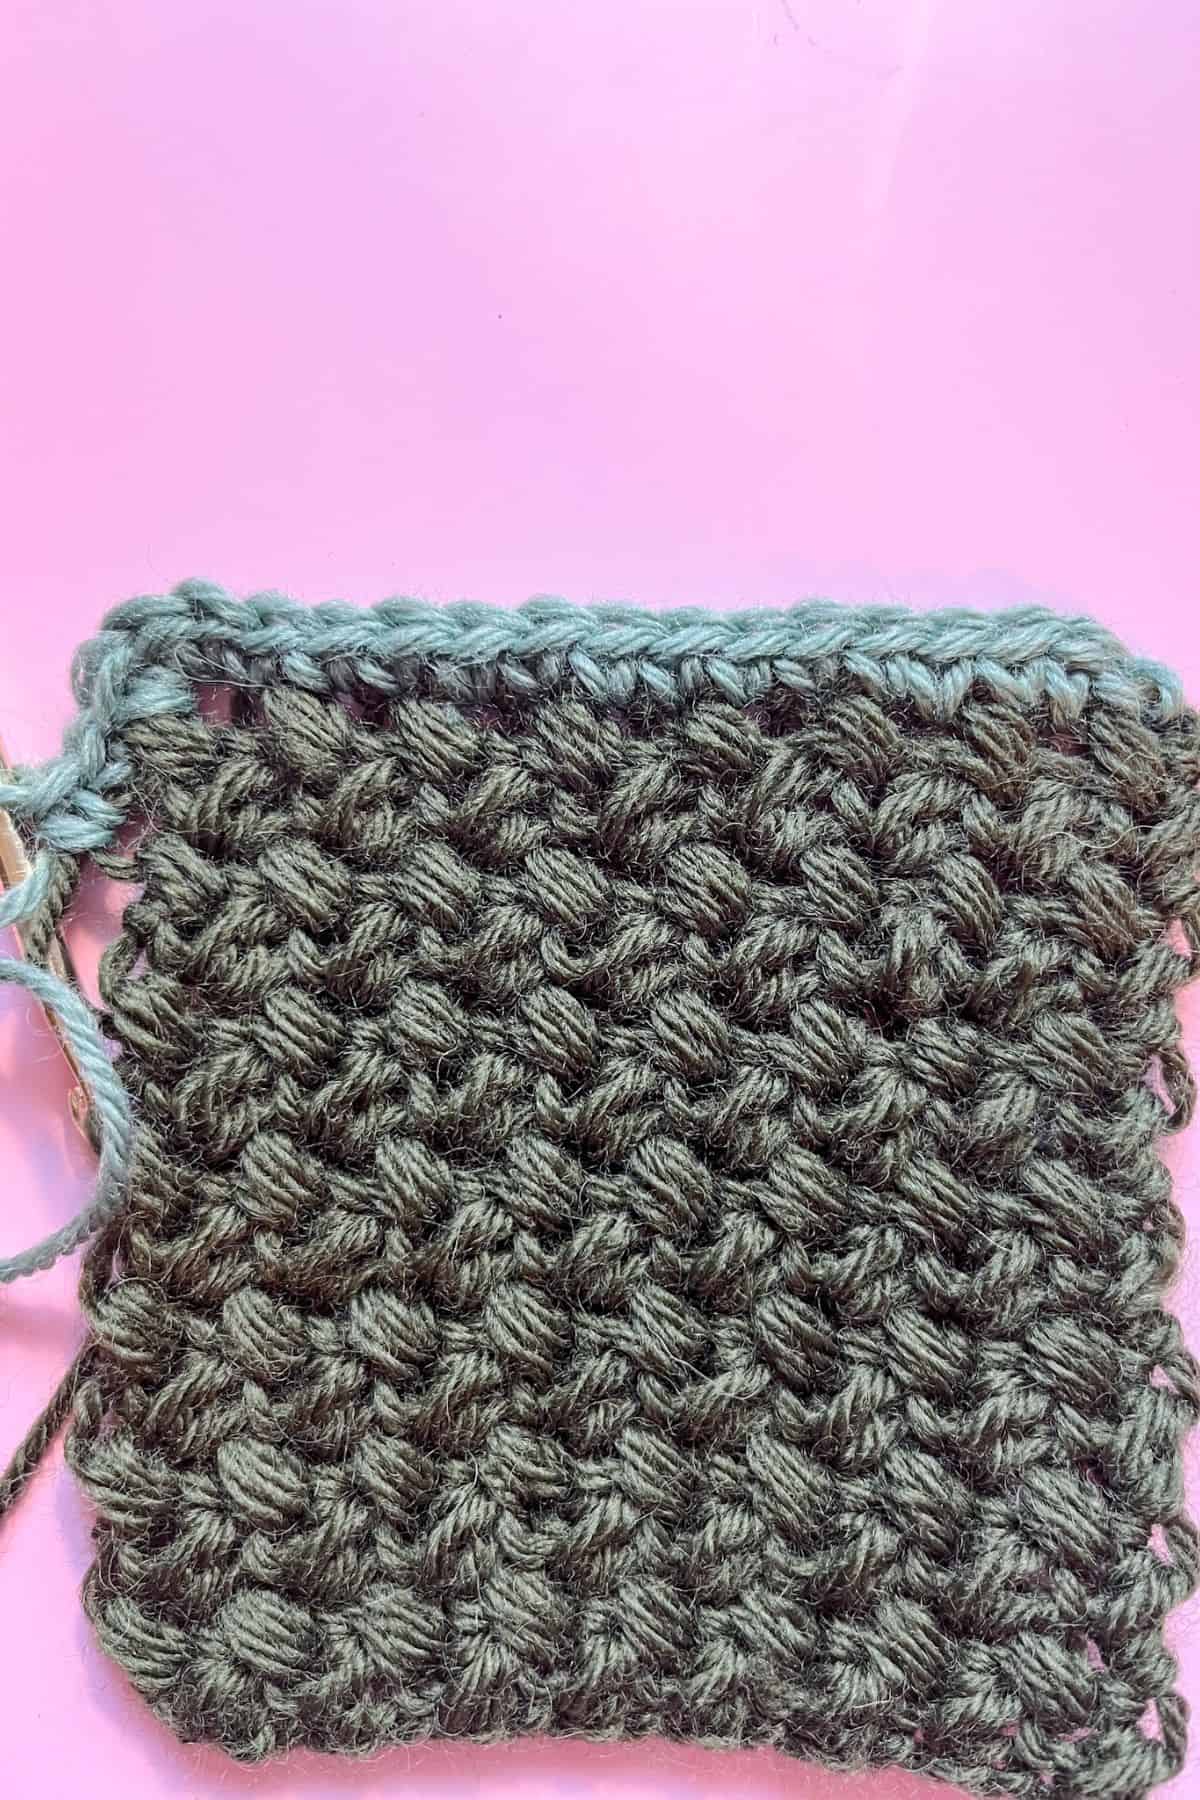
To create a cleaner finish I single crocheted around the entire edge. Insert the hook into the side of the last mini bean stitch you made, then make a sc. Sc the rest of the raaw edge, then when you get to the corner -> sc, ch, sc into the corner. Then sc the bottom, and repeat for the rest of the round.
Crochet 13 single crochets along each raw edge and 15 around the top and bottom. You can adjust this number based on tension, as that will be a contributing factor if the coaster curls up or is bent out of shape.
Blocking:

If you want your piece to have sharper edges you can try blocking it!
Once it's done stretching, you can now use the square crochet coaster as much as you want! Try making more in different colors!
If you want a little more texture, try the full bean stitch that I use in my crochet bean stitch infinity scarf.
If you have some blue yarn leftover, feel free to try your hand at making my crochet cat coaster pattern.
If you are interested in making more random and fun crochet coasters, check out my crochet strawberry coaster pattern , crochet axolotl coaster pattern and my crochet cherry blossom coaster pattern.
🐌Expert Tips
- Choosing the Right Yarn: Wool provides warmth and durability, while cotton is highly absorbent and great for kitchen use. Choose based on your project’s needs.
- Practice the Stitch: If you're new to the Elizabeth stitch, practice with a larger swatch to become comfortable managing the loops before starting your coasters.
- Experiment with Designs: Don’t hesitate to mix the Elizabeth stitch with other crochet techniques to create unique patterns and textures for your projects.
🧵 Pattern FAQs
Wash either by hand and air dry or wash and dry on the delicate setting in the clothes washer and dryer.
While you can use different yarns for practice, I recommend sticking to cotton for coasters to ensure absorbency and durability.
To maintain consistency, pay attention to your tension while crocheting and use a measuring tape to check the dimensions as you go.

🧶More Beginner Crochet Patterns

If you tried this Elizabeth Crochet Stitch Coasters (or any other pattern on my website), please let me know how it went in the 📝 comments below. I'd love to hear from you!
Elizabeth Crochet Stitch Coasters
Materials
- Lily Sugar n Cream cotton yarn
- 4.5mm crochet hook
- Tapestry needle
Abbreviations (US terms)
- sc = Single crochet
- ch = Chain
- Mini Bean Stitch (no abbreviation)
Notes
- Yarn Type: I used small amounts of cotton to make the Elizabeth crochet stitch square crochet coaster pattern. Cotton yarn is the yarn I recommend for coasters, as it transfers heat well and can absorb liquid if condensation forms on the glass. I do not recommend acrylic yarn, as it is less absorbent and made from plastic, which can melt if it gets too hot.
- Coaster Size: The finished Elizabeth crochet stitch coaster size is roughly 4 inches by 4 inches.
- Yarn Amount: Depending on your tension and the size of your stitches, you may need more or less yarn than specified. Always have a little extra on hand, just in case!
Instructions
- For the main part of the square crochet coaster we will be working in rows
- Row 1: Using any color cotton yarn, ch x15 +2 for the turning ch. (15 +2)
- Row 2: Insert your hook into the 3rd chain from the hook, yarn over, pull up a loop, yarn over, insert hook into the same chain, yarn over and pull up another loop. You should have 4 loops on the hook.
- Yarn over and go through all 4 loops on the hook.
- Then chain 1 to close the stitch.
- Skip the next chain, and in the following chain make another mini bean stitch:*Insert hook into the chain, yarn over, pull up a loop, yarn over, insert hook into the same chain, yarn over and pull up another loop. Ch x1 and skip the next sttich.Repeat from * for the rest of the rowAfter making the chain for the last mini bean stitch, ch x1 and turn.
- Row 3: When you turn your work you will find the next chain space and instead of chaining directly into it you will make your next mini bean stitch beside it. This can be explained better if you hold your project in both your hands and stretch the last elizabeth stitch made in the previous row slightly. You will see most of the loops going diagonally from bottom left to top right. Except 1 loop. That loop will be going top left to bottom right. So the stitch will form almost a V in its shape. You will make your next elizabeth stitch in that void by going under the 1 loop and proceeding to do the stitch. Remember to chain 1 after going through the 4 loops! Continue to do this for the rest of the row, skipping every other stitch like you did before.You should have 8 elizabeth stitches in each row completed.
- Row 4-13: Repeat row 3 until the crochet square coaster is done. Fasten off.
Single Crochet Border:
- To create a cleaner finish I single crocheted around the entire edge. Insert the hook into the side of the last mini bean stitch you made, then make a sc. Sc the rest of the raaw edge, then when you get to the corner -> sc, ch, sc into the corner. Then sc the bottom, and repeat for the rest of the round.Crochet 13 single crochets along each raw edge and 15 around the top and bottom. You can adjust this number based on tension, as that will be a contributing factor if the coaster curls up or is bent out of shape.
Blocking:
- If you want your piece to have sharper edges you can try blocking it!
- Once it's done stretching, you can now use the square crochet coaster as much as you want! Try making more in different colors!
.


Leave a Reply