
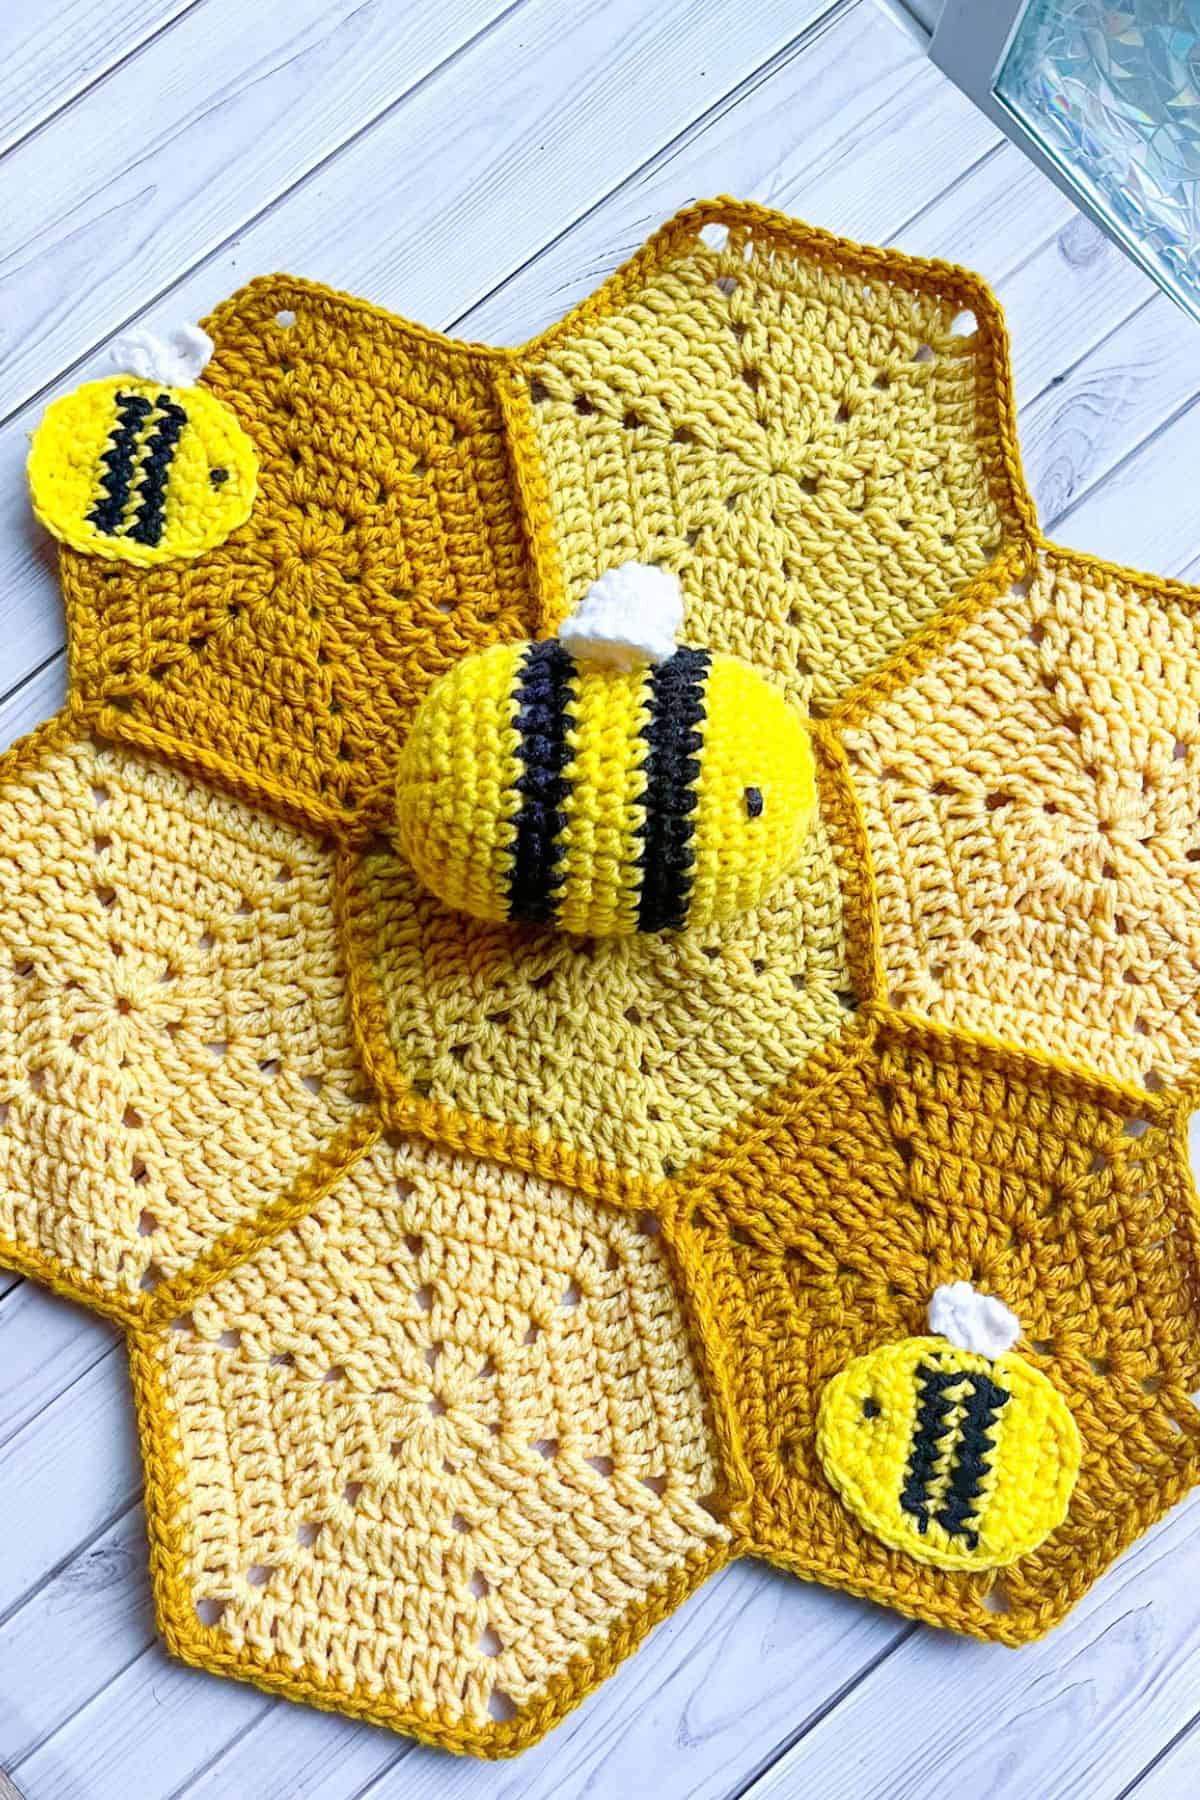
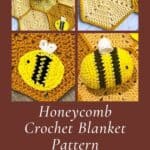
My Honeycomb Crochet Blanket Pattern is a BEE-autiful and easy pattern to make for that special newborn in your life. You can make this as a crochet lovey or increase the number of crochet hexagons to make any size blanket.
The honeycomb crochet blanket pattern is crafted using hexagon-shaped granny squares. I love making crochet hexagons—working on this pattern felt like being a busy bee building a hive!
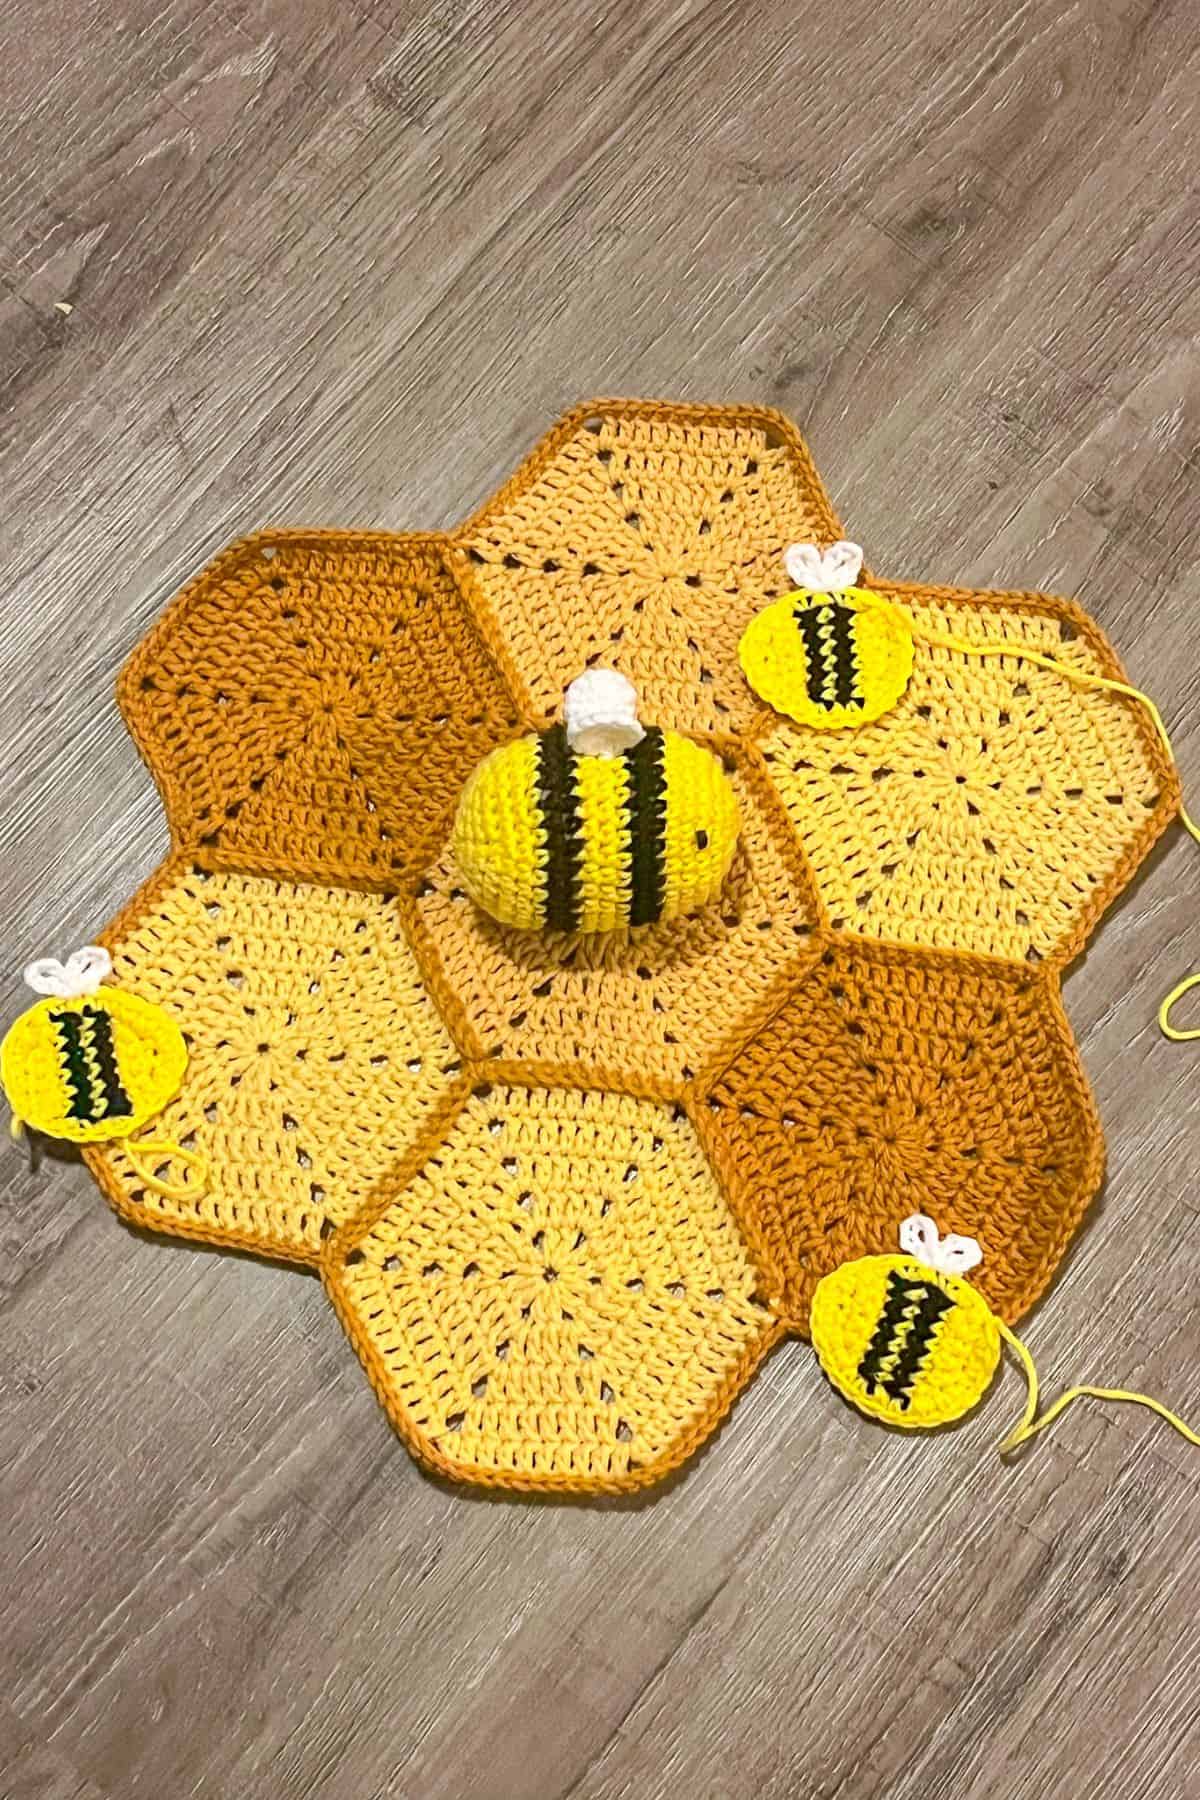
In an attempt to make more baby inspired patterns, I made the crochet honeycomb baby blanket into a crochet bee lovey. It isn't large like a crochet baby blanket would be, but you can keep making and adding crochet hexagons until you get to the desired size you want for the crochet honeycomb pattern.
If you love the crochet bee lovey pattern and are wanting to make more baby inspired crochet items, I do have a Giraffe Crochet Pattern that also uses yellow yarn, or a Crochet Sheep Pattern which would make for a great pillow/toy combination.
In addition to the crochet hexagon granny squares that are used in this blanket, my honeycomb crochet blanket pattern also uses bee appliques and a stuffed bee. I love using crochet appliques for projects because I can add them anywhere I want!
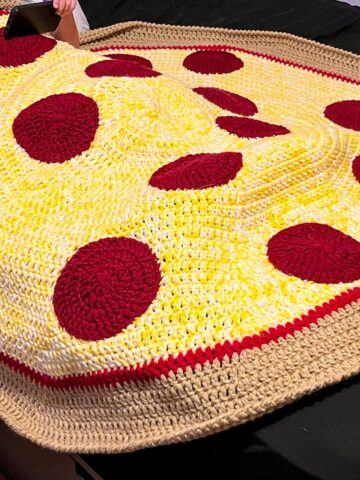
If you want to make a cute crochet baby blanket that is low sew, I suggest making a giant crochet granny square blanket, no sewing required. And then you can add simple appliques to the top of it like in my Crochet Sunflower Blanket Pattern or avoid all the sewing altogether by crocheting an intricate border for more pizazz like in the Crochet Rainbow Baby Blanket Pattern.
Jump to:
✏️ Things To Note:
- Yarn Choices. I used both Caron and Red Heart yarns for the Honeycomb Crochet Blanket Pattern. I don’t mind mixing brands, but if you prefer sticking to just one, that works too. You can limit the honeycombs to two colors or mix in a third for more variety.
- Joining Hexagons. I joined the hexagon granny squares using the single crochet method, but feel free to use whatever join you’re comfortable with, like slip stitch or mattress stitch. I personally use the mattress stitch for my Crochet Lemon Bag Pattern.
- Finished Size. The finished honeycomb crochet blanket pattern measures roughly 14 x 14 inches. This is slightly large for a lovey, but you can use a smaller hook if you prefer a smaller size. A few extra inches won’t hurt!
🪡 Materials Needed
- 5mm crochet hook
- Tapestry needle
- Red Heart Yarn - cornmeal
- Red Heart Yarn - gold
- Caron One Pound - dijon (you may need to find a yarn substitute as it looks discontinued). (optional)
- Red Heart Yarn - bright yellow
- Red Heart Yarn - black
- Red Heart Yarn - white
💭Abbreviations to Remember (US terms)
- Magic ring - mr
- Chain - ch
- Single crochet - sc
- Double crochet - dc
- Slip stitch - sl st
- Increase- inc
- Decrease - dec
🧋Variations
Adjust the honeycomb crochet blanket pattern size by adding more hexagons until you reach your desired length. You can also add more bee appliques to make your crochet hive blanket buzz even more!
🍵Instructions for Honeycomb Crochet Blanket Pattern
Crochet Hexagon Granny Square Pattern:
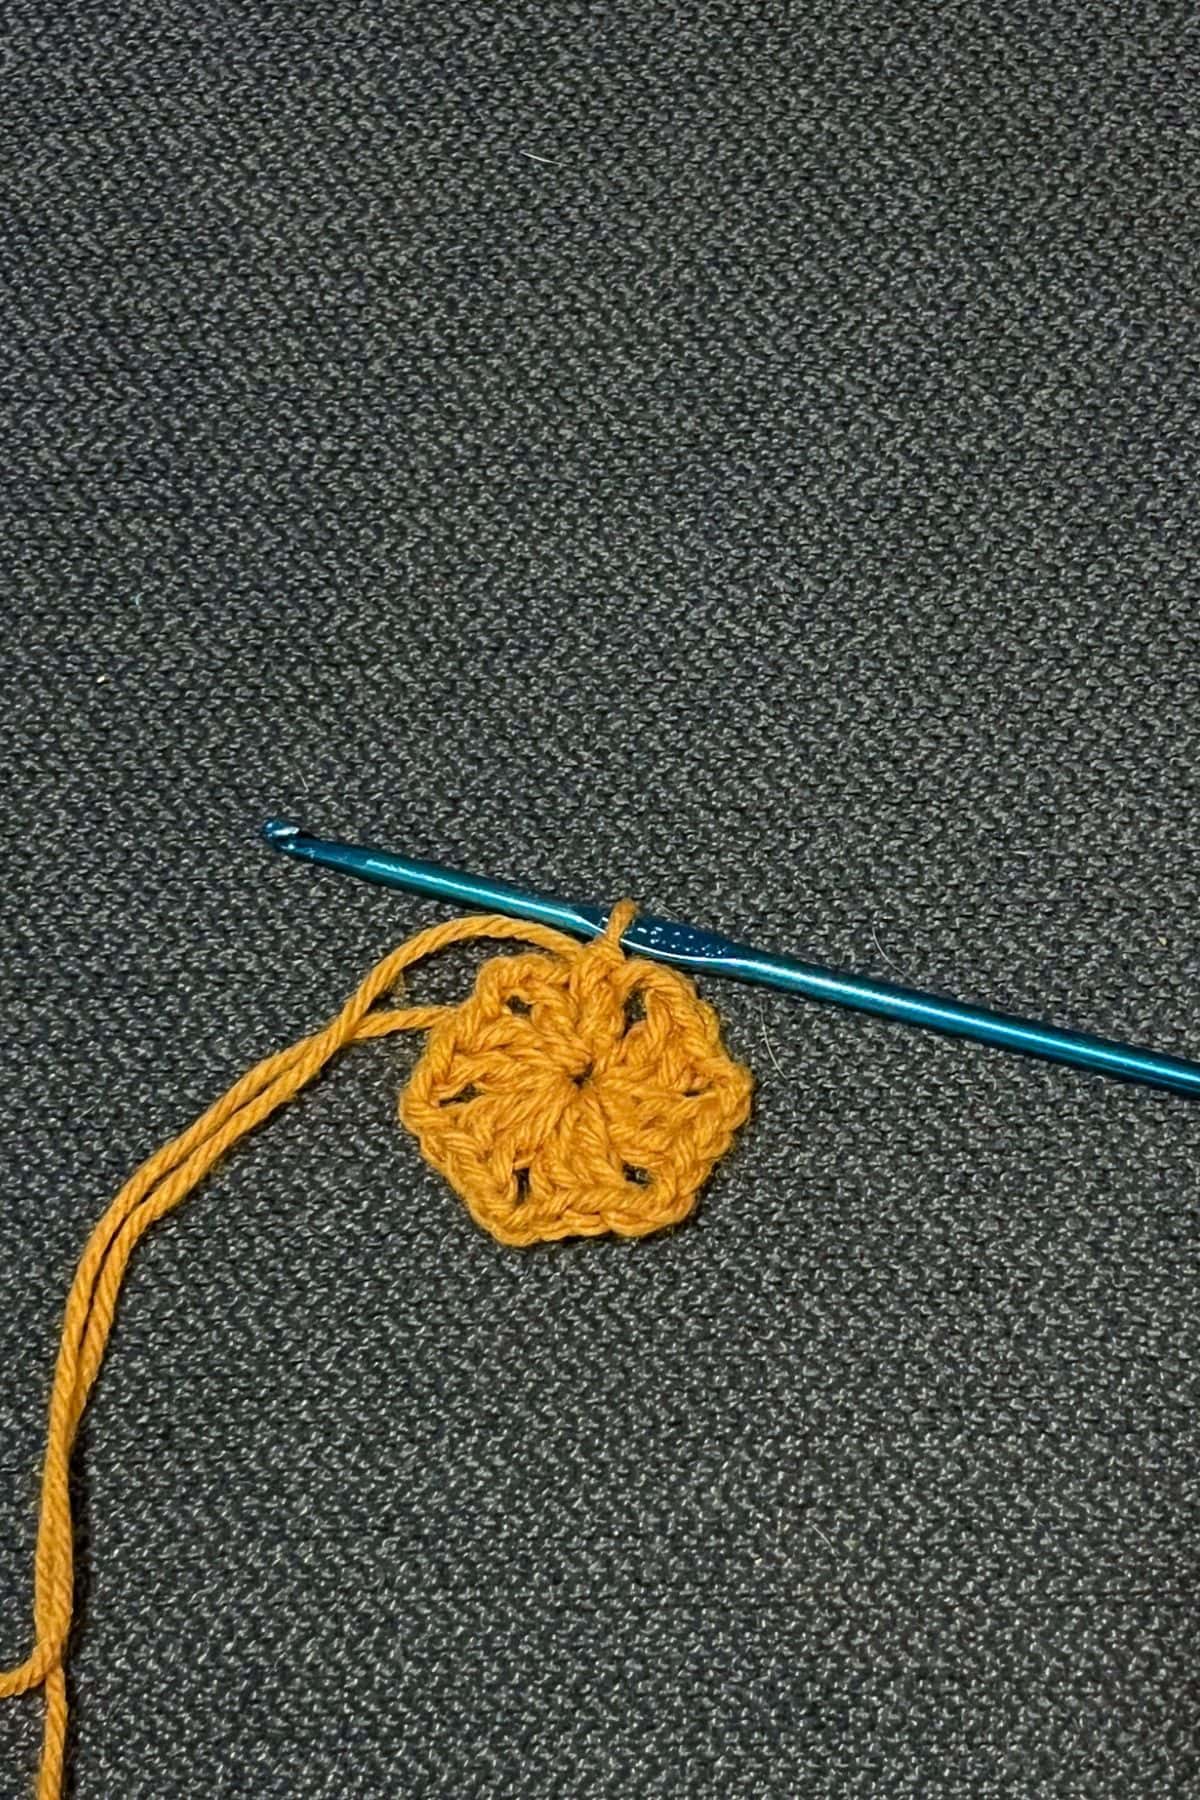
Round 1: Make a magic ring, then ch x3 (counts as a dc). Immediately after, make a dc into the mr. Then (Ch x2 + dc x2) and repeat another 4 times. At this point you should have 6 clusters. Ch x2 and then sl st to the top of the ch x3. Pull the magic ring tight, now you should have a clear 6 points caused by the chain spaces for your hexagon.
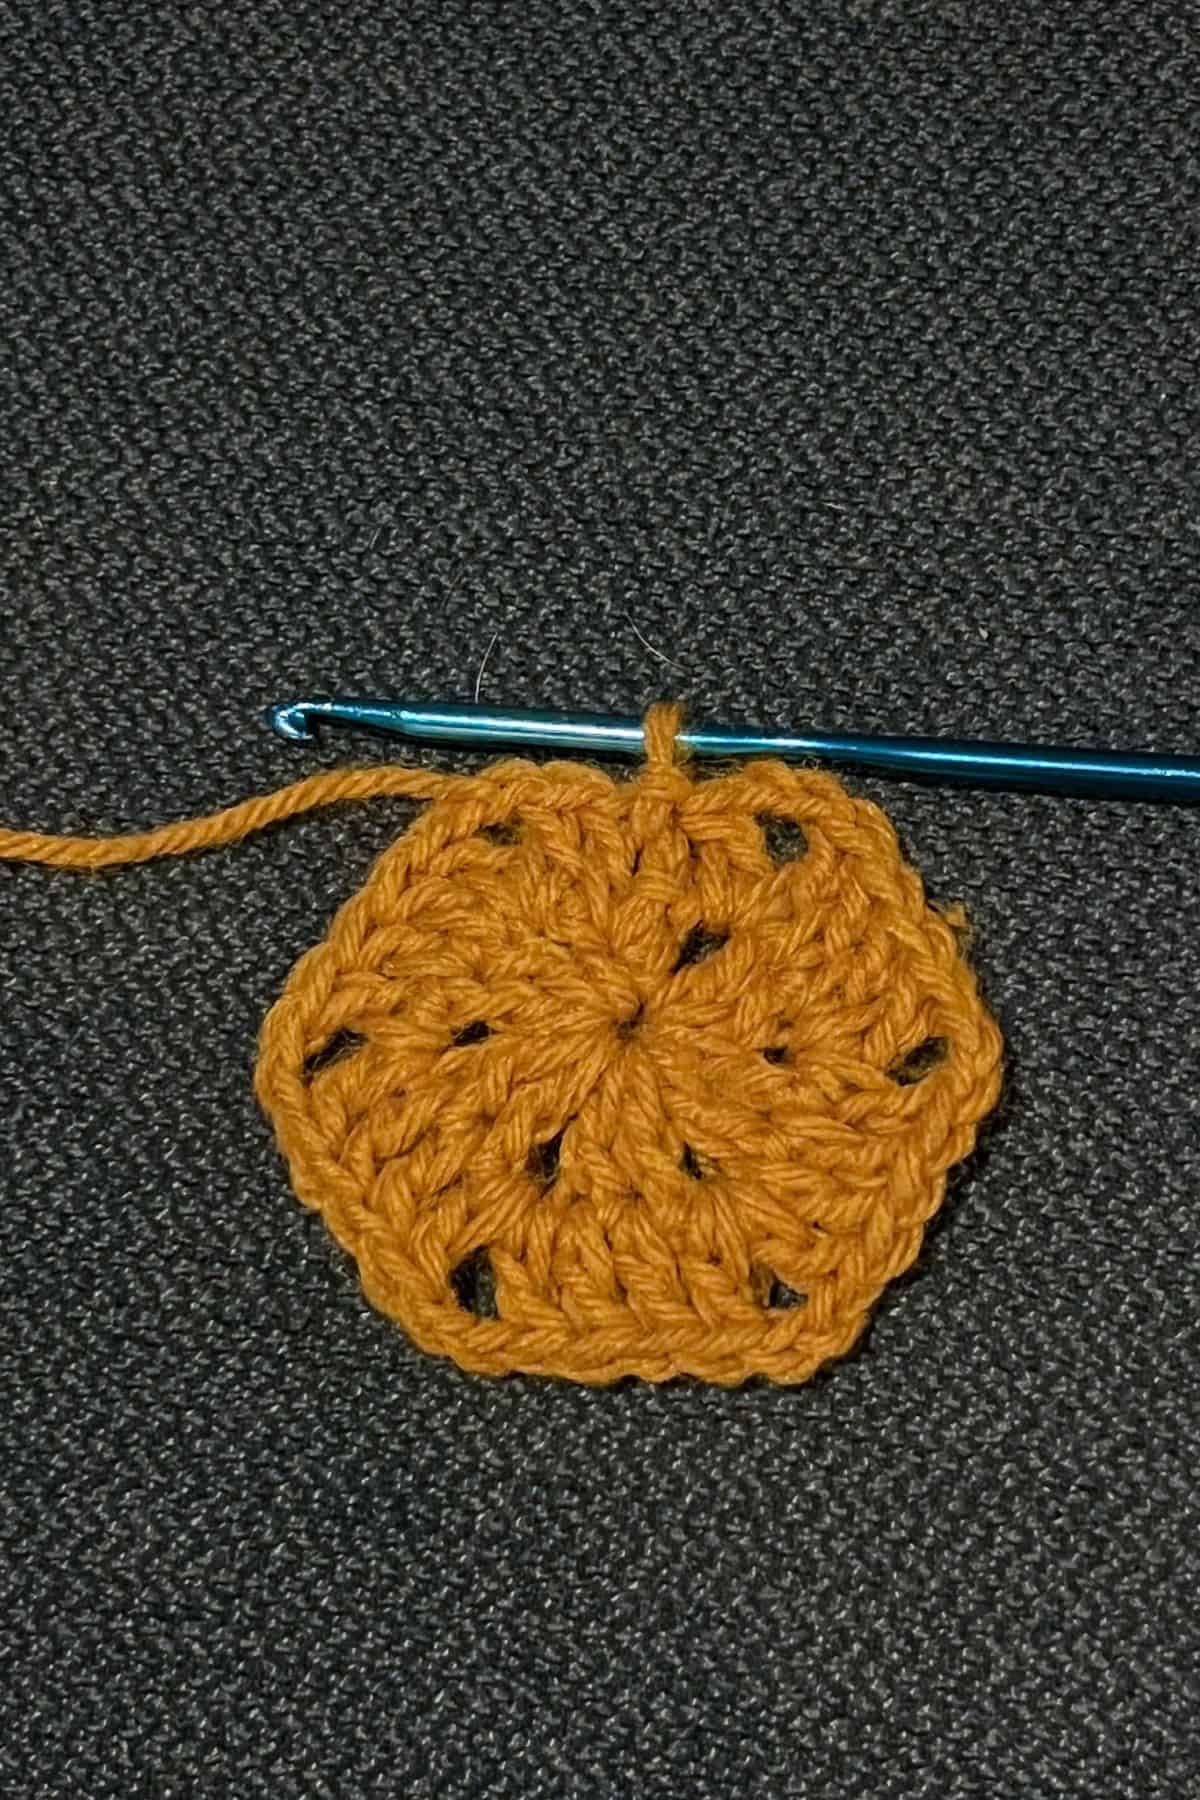
Round 2: Ch x3 and dc in each of the dc stitches from the round below, when you get to the corners make a dc + ch x2 + dc in each corner. When you are done with the round, sl st to the top of the ch x3 you made at the beginning of the round.
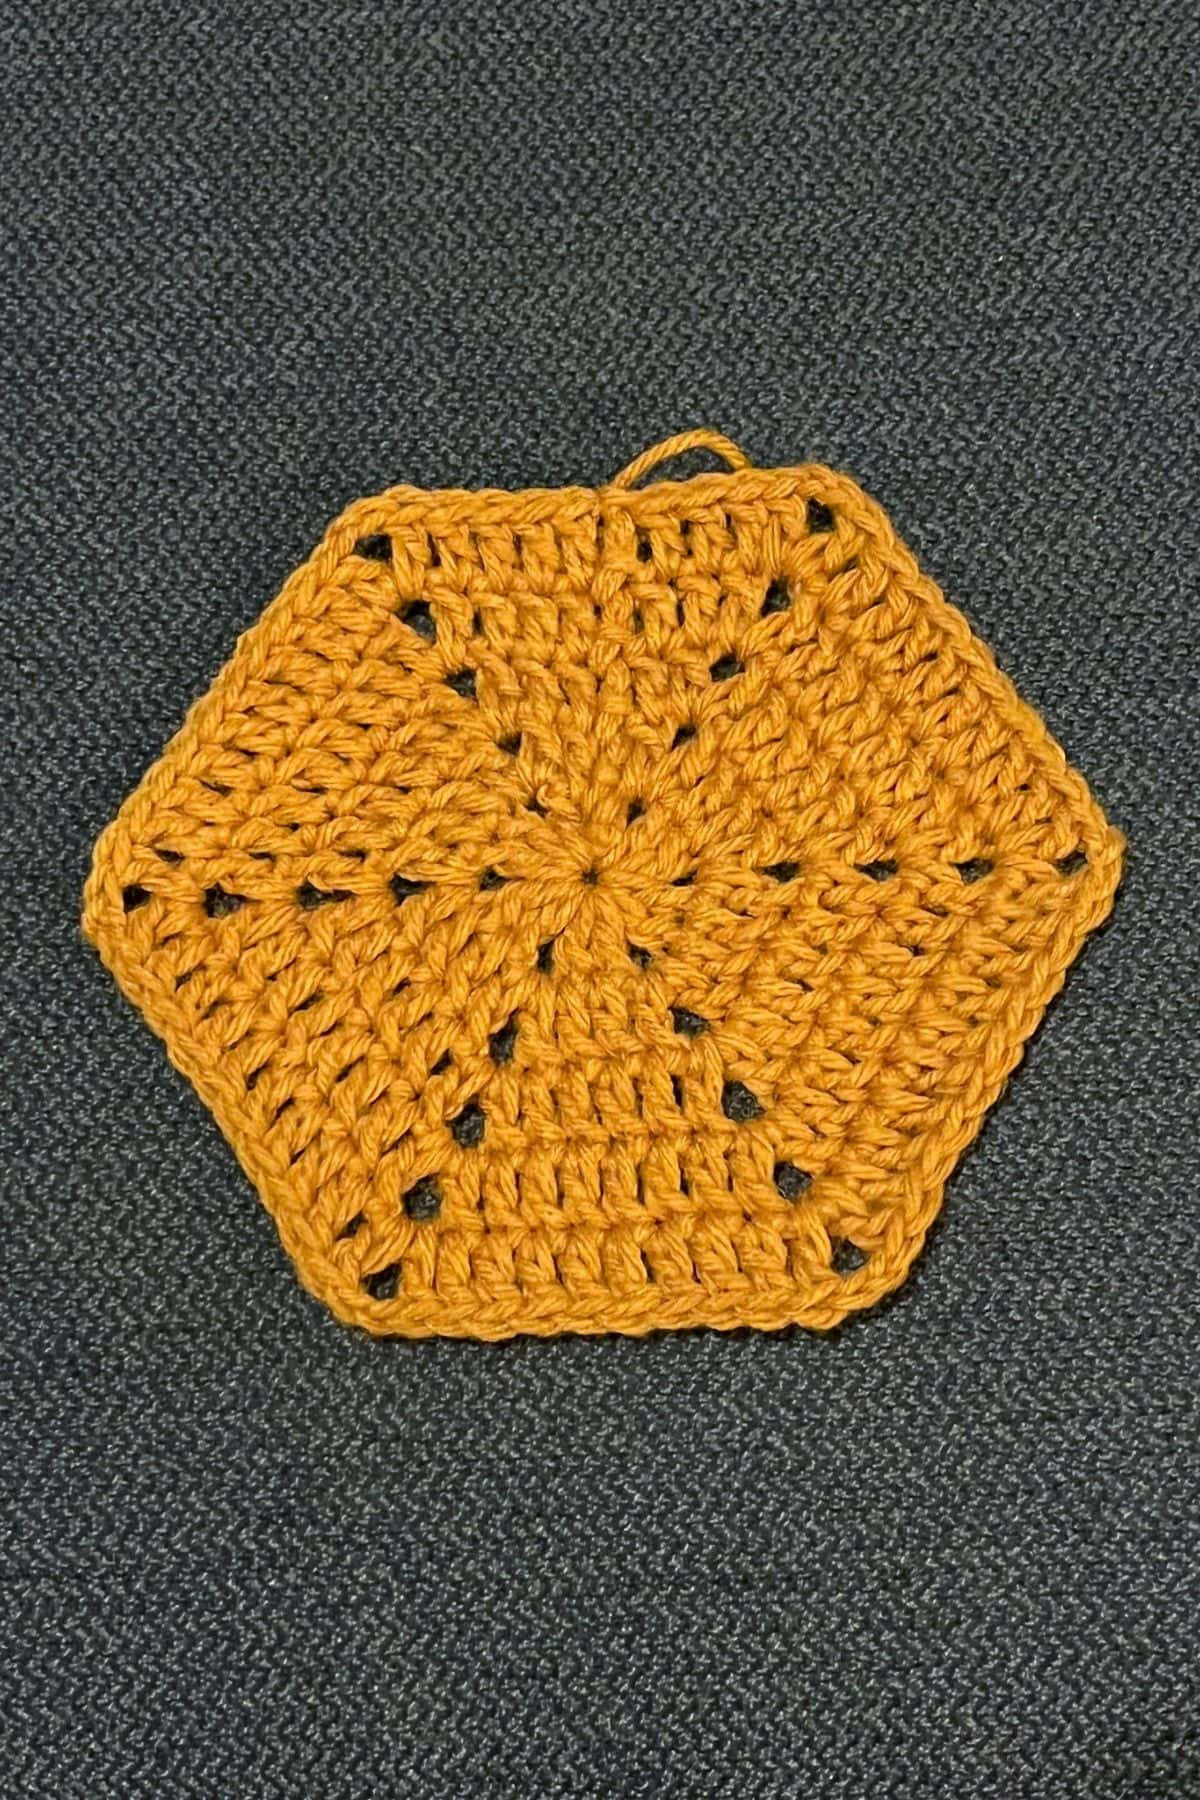
Round 3-5: Repeat round 2.
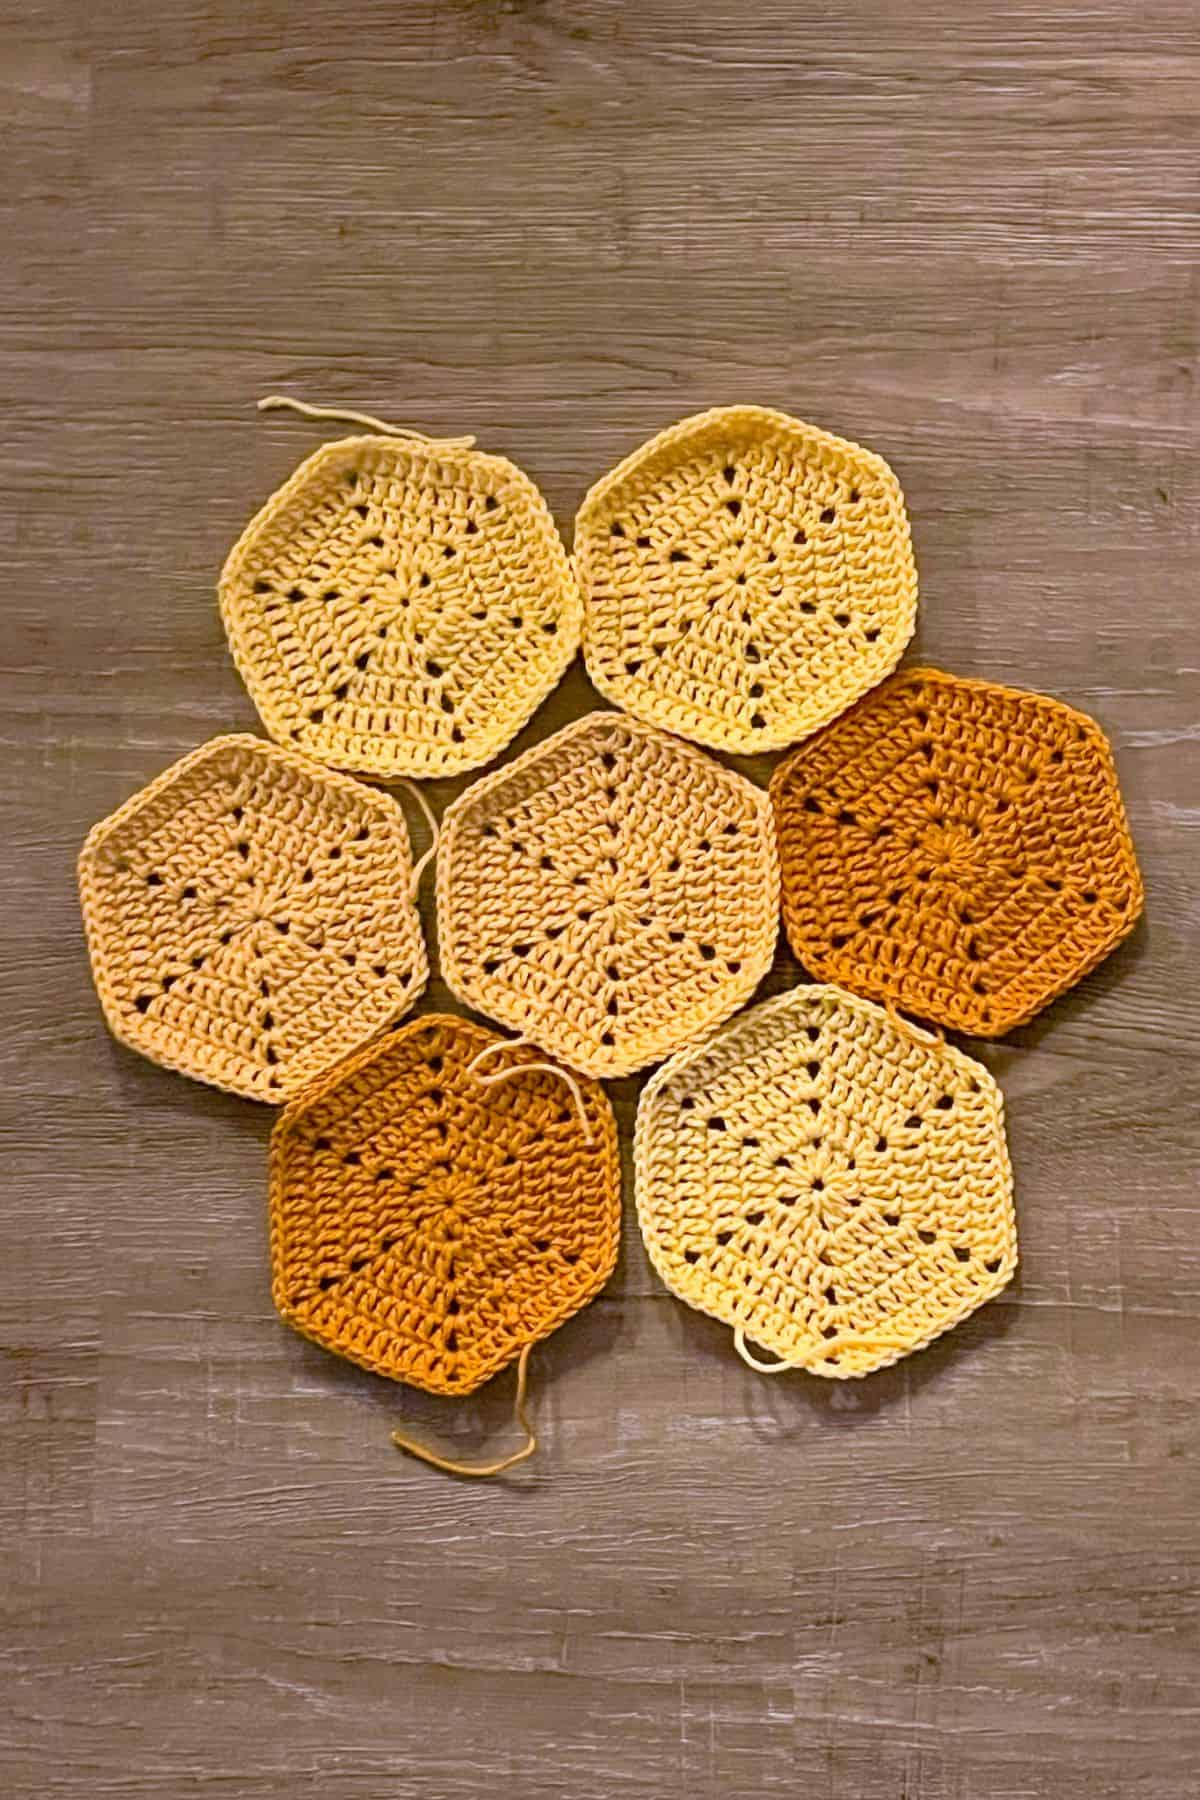
After the 5th round, fasten off the yarn and weave in any ends. Make as many honeycomb hexagons as you need, I used 7 hexagons. 3 cornmeal, 2 gold, and 2 dijon (but you can always use 2 colors verses 3 in any amount you like since the colors are so similar).
Crochet Bee Applique Pattern:
Row 1: Using the yellow yarn, ch x4
Row 2: In the second ch from the hook make a sc. Sc in the rest of the chains in the row. (3) Then ch x1 and turn.
Row 3: Skip the ch you just made and make an inc in the last stitch you worked in. Then sc in the next stitch and inc in the last stitch. (5) Then ch x1 and turn.
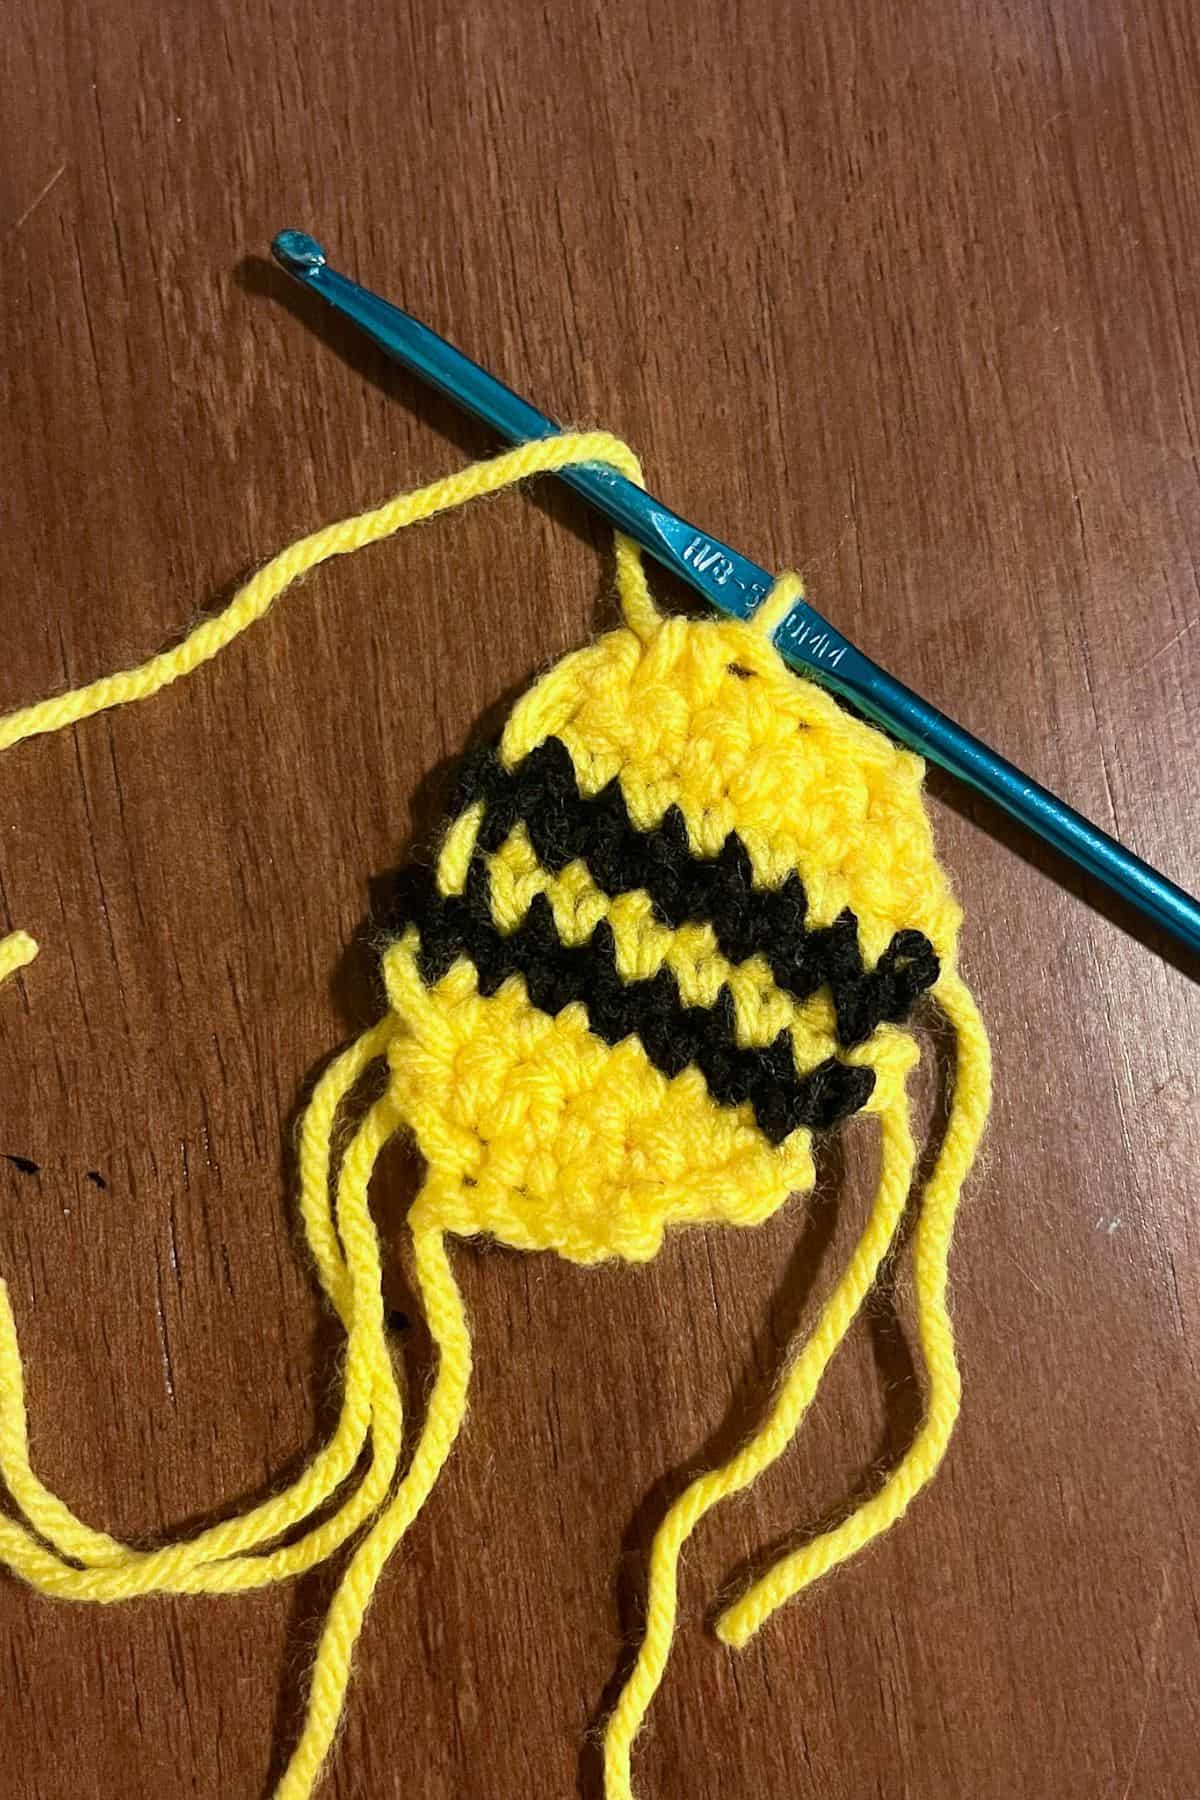
Row 4: Inc, sc x3, inc in this row. (7). At the end of this row, fasten off the yellow yarn and join the black yarn. Then ch x1 and turn.
Row 5: Sc in every stitch (7). Then ch x1 and turn. Fasten off the black yarn and switch to yellow.
Row 6: Sc in every stitch (7). Then ch x1 and turn. Fasten off the yellow yarn and switch to black.
Row 7: Sc in every stitch (7). Then ch x1 and turn. Fasten off the black yarn and switch to yellow.
Row 8: Sc in every stitch (7). Then ch x1 and turn.
Row 9: Dec, sc x3, dec in this row. (5). Then ch x1 and turn.
Row 10: Dec, sc, dec in this row. (3). Then ch x1 and turn.
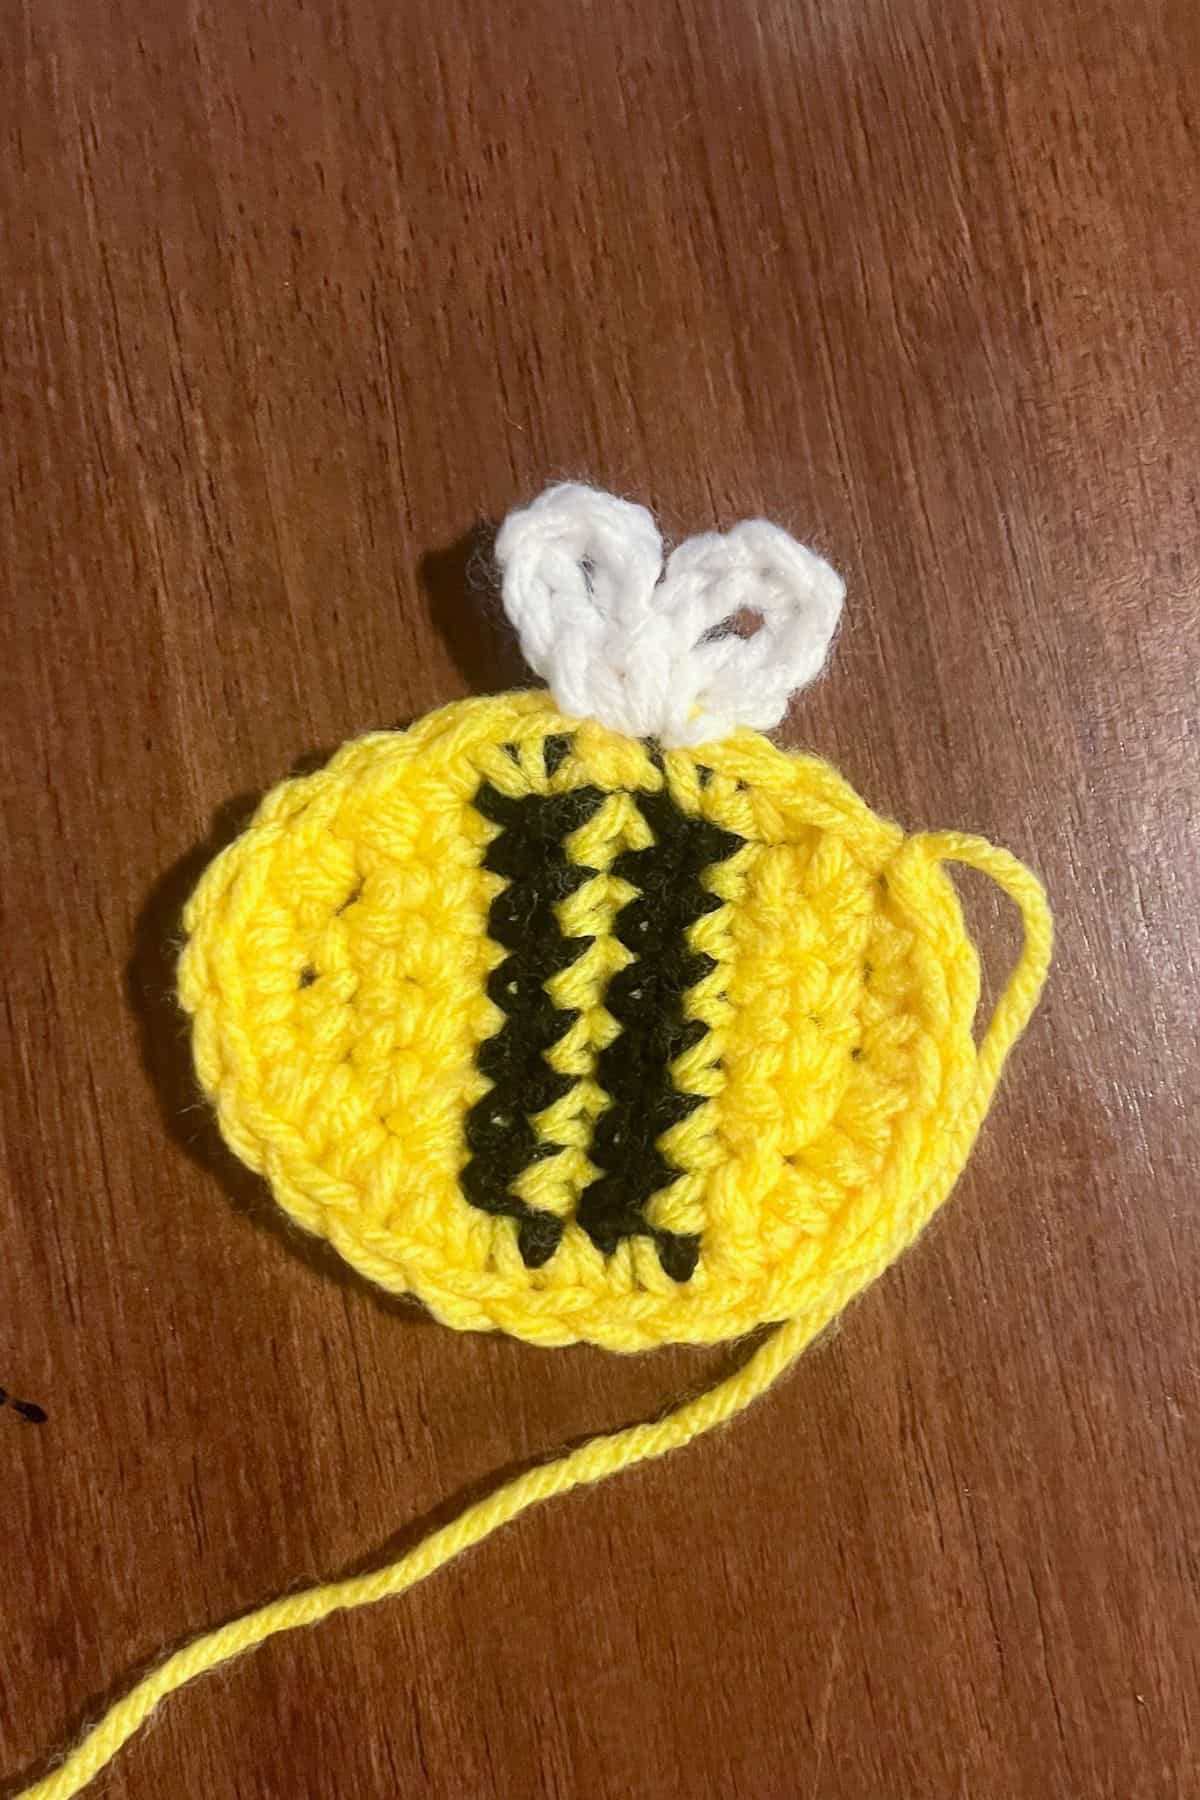
Now that the rows for the crochet bee applique are done, you can tidy up the applique by crocheting around its entire outer edge with the yellow. You want to make 1 crochet per stitch/ row that you created, then sl st to the beginning when you are done and fasten off the yarn. Leave a long tail for sewing.
Now all that is left are the wings. Join the white yarn to the yellow row between the 2 black stripes. Then ch x6. Sl st to the same stitch you joined the yarn at and ch x6. Then sl st back to the same stitch. You should have 2 loops on your bee - those are the wings. Now fasten off the yarn and weave in the ends.
You can make as many crochet bee appliques as you would like for your blanket. I made 3 for my crochet honeycomb lovey.
Crochet Bee Plushie Pattern:
This part of the pattern is optional since it could be used as the middle for a baby lovey but is impractical for a toddler blanket.
Round 1: Using the yellow yarn, make a mr and make sc x6 in the circle. If you find it difficult making a magic ring you can chain 2 and then crochet sc x6 in the second chain from the hook. (6)
Round 2: Inc in every sc. (12)
Round 3: Inc, sc, then repeat until end of round (18)
Round 4: Inc, sc x2. Then repeat until end of round (24)
Round 5: Inc, sc x3. Then repeat until end of round (30)
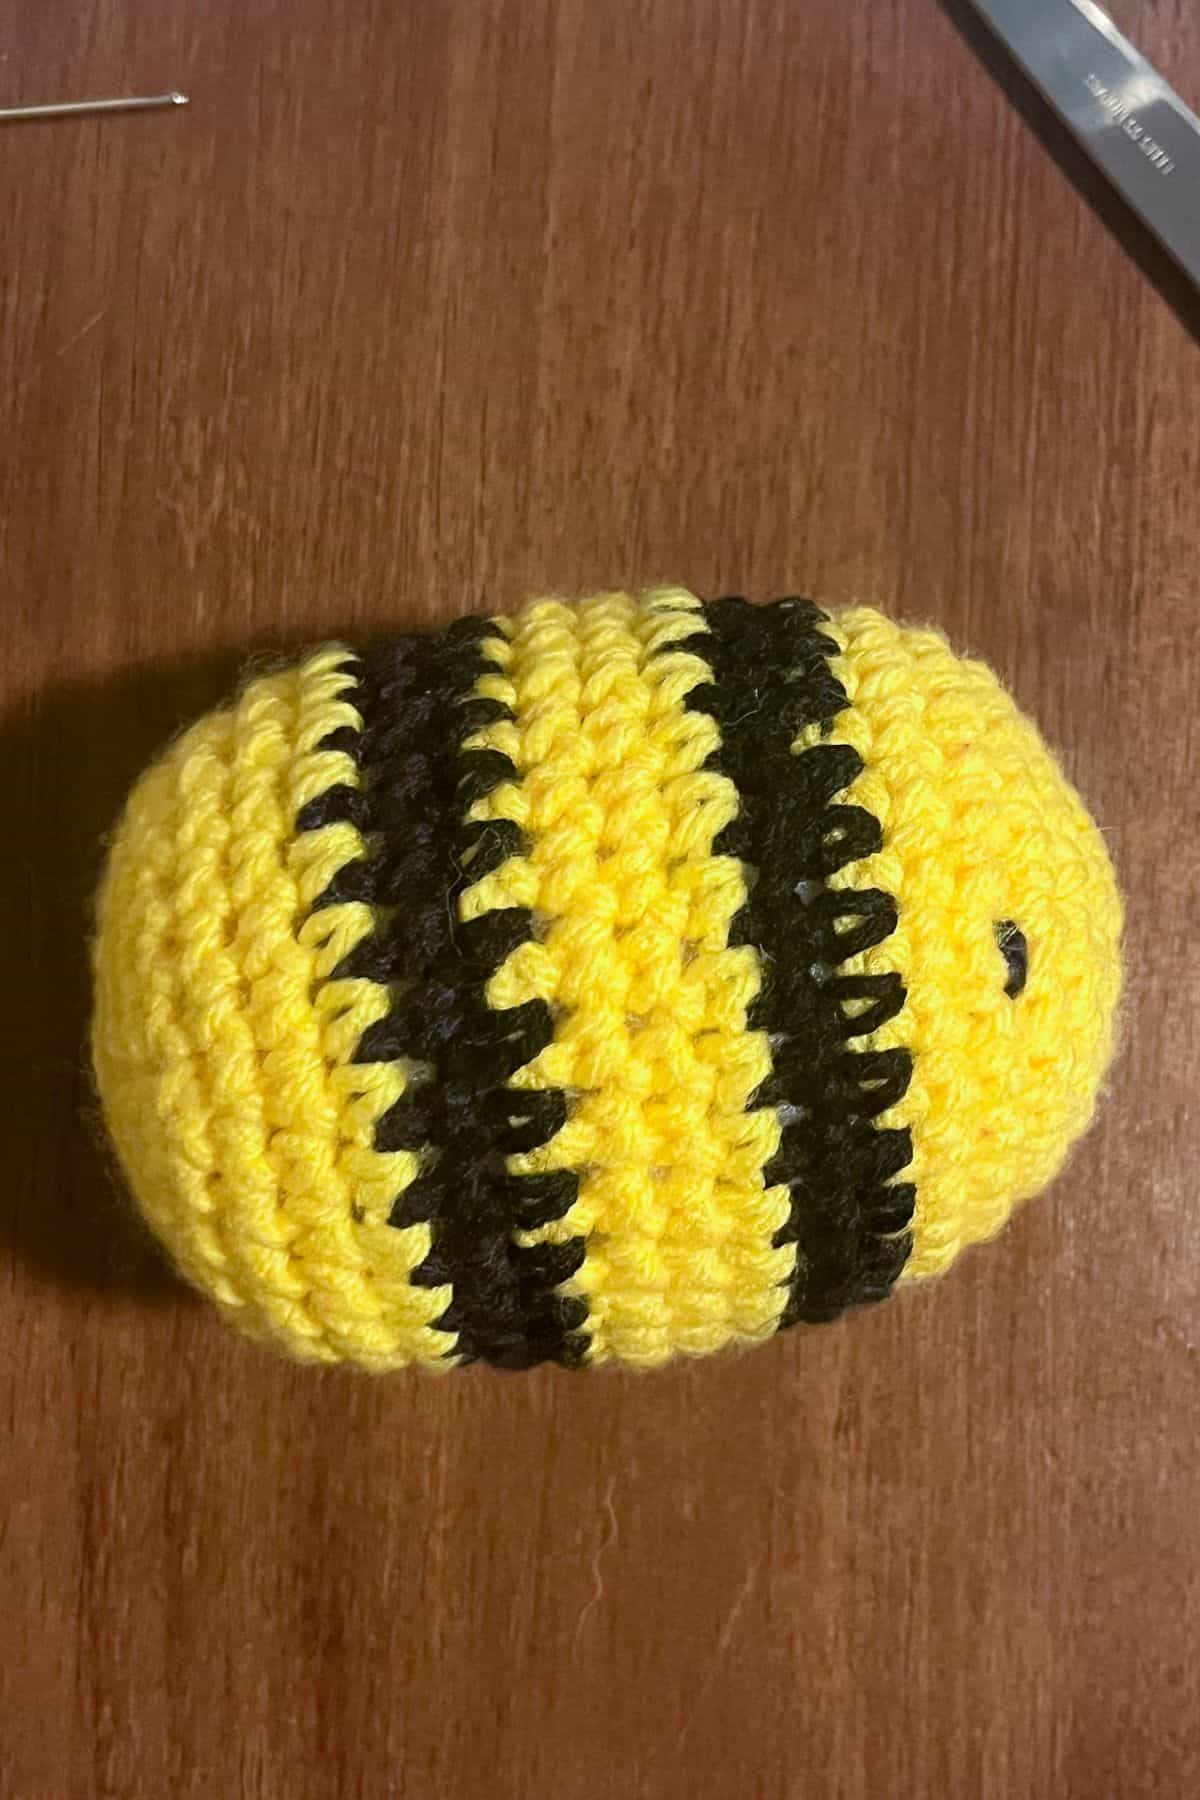
Round 6-7: Sc in every stitch (30). Then fasten off the yellow yarn and switch it to black.
Round 8-9: Sc in every stitch (30). Then fasten off the black yarn and switch it to yellow.
Round 10-12: Sc in every stitch (30). Then fasten off the yellow yarn and switch it to black.
Round 13-14: Sc in every stitch (30). Then fasten off the black yarn and switch it to yellow.
Round 15-17: Sc in every stitch (30).
Round 18: Dec, sc x3. Then repeat for the rest of the round (24).
Round 19: Dec, sc x2. Then repeat for the rest of the round (18).
Round 20: Dec, sc. Then repeat for the rest of the round (12).
Round 21: Dec. Then repeat for the rest of the round (6). Fasten off and weave in the ends.
Crochet Bee Wings:
Make 2.
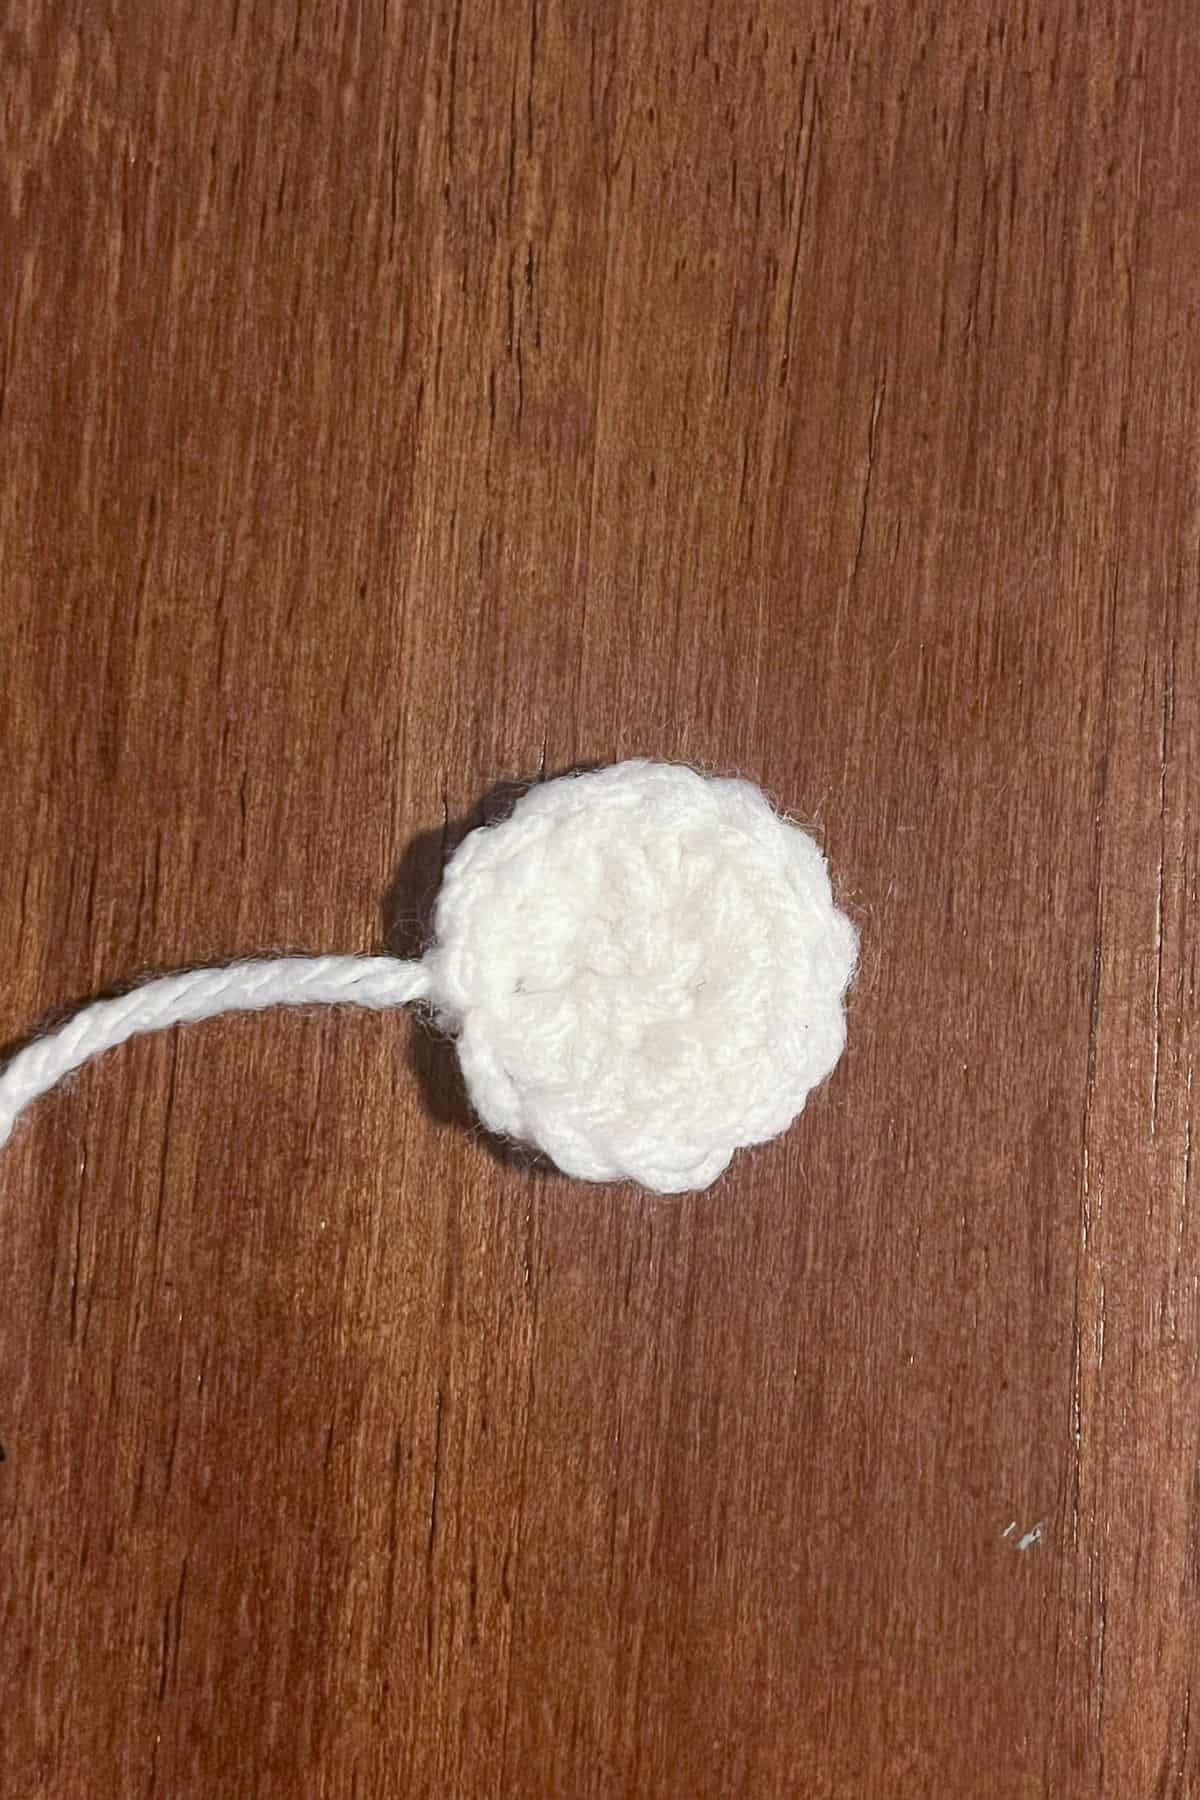
Round 1: Using the white yarn, make a mr and make sc x6 in the circle (6).
Round 2: Inc in every sc. (12) Then fasten off the yarn and leave a tail for sewing.
Sew the 2 wings to the top of the bee.
Now that you have granny squares, bee appliques and a bee plush it is time to put everything together!
Crochet the hexagon granny squares in any color combination you would like using one of the many joining methods. I chose to do the single crochet joining method where you single crochet the edges of the hexagons together. This creates ridges and a 3D honeycomb effect. I then single crochet the edges of the blanket so it looks more uniform. I did 3 sc in each pointed corner and a decrease where the hexagons meet.
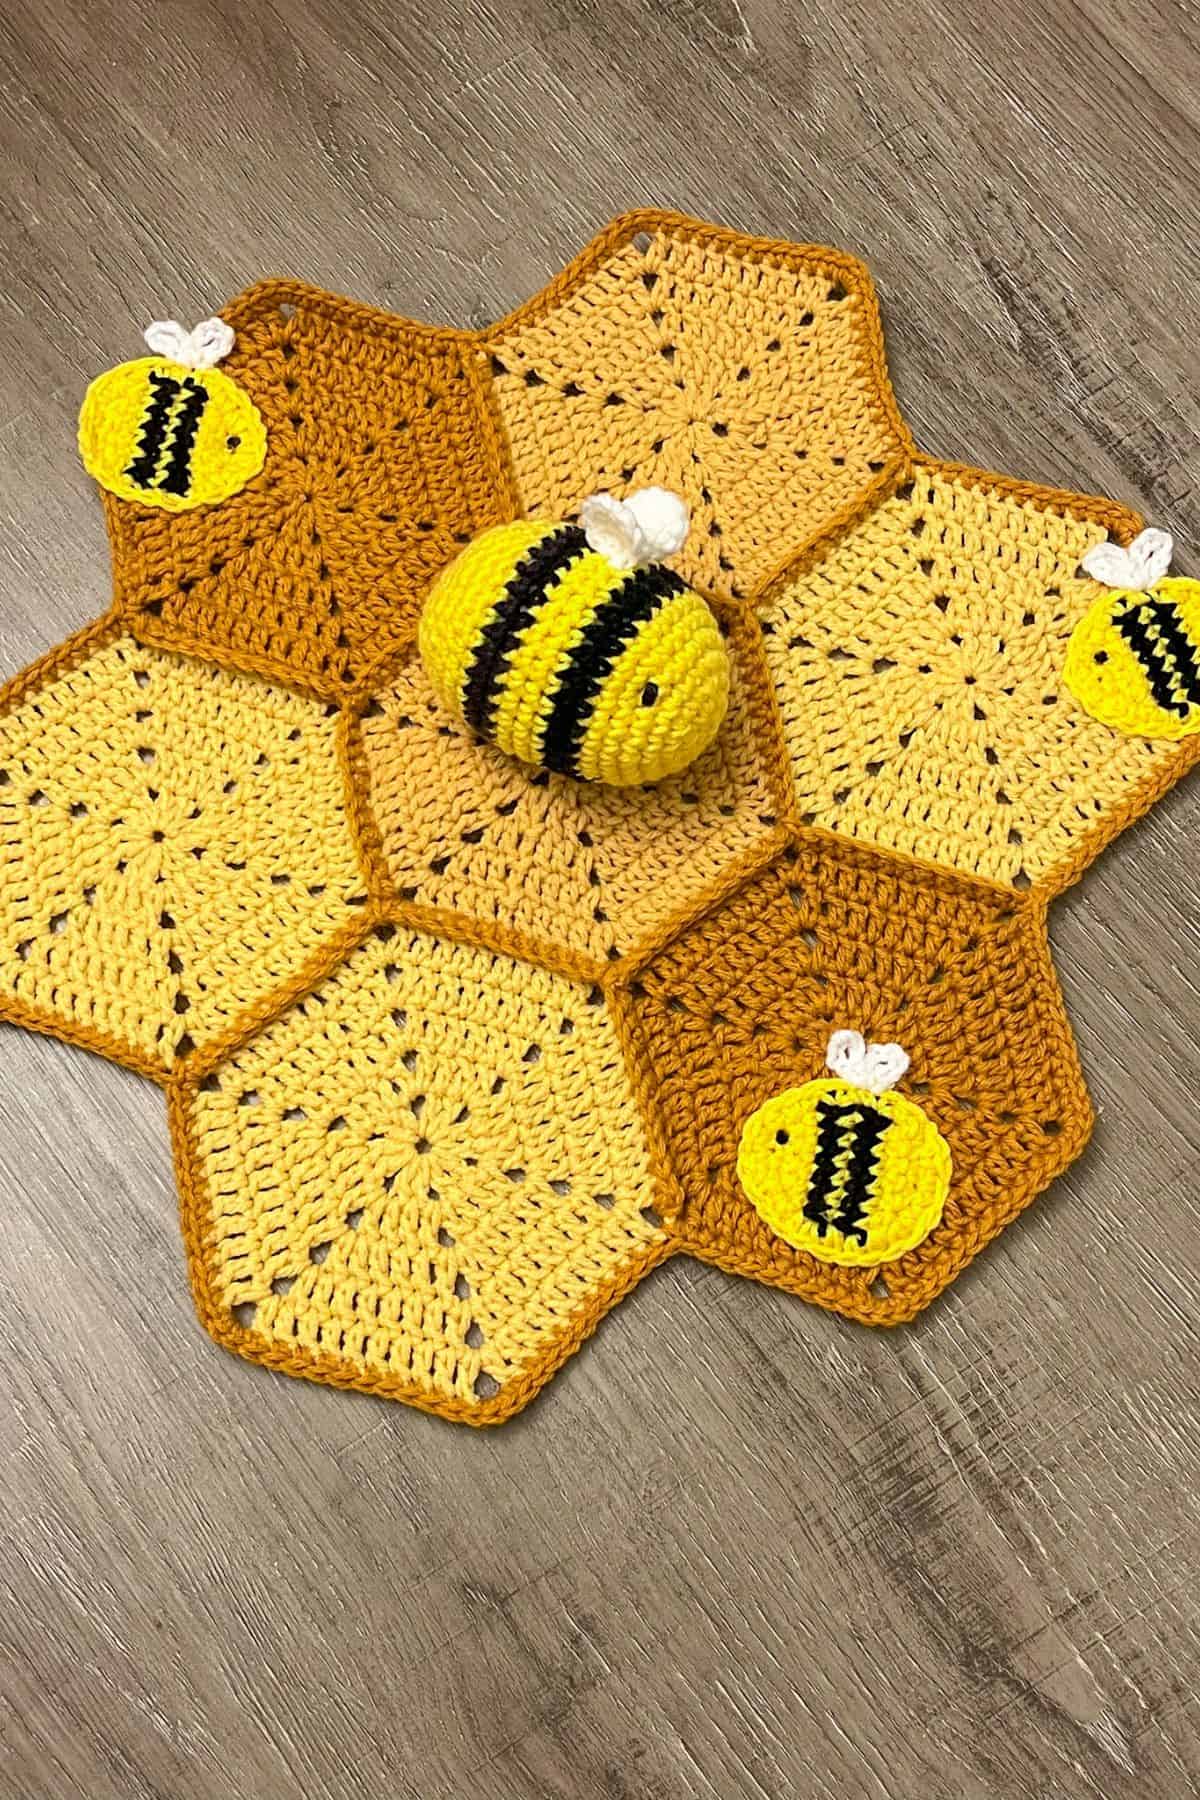
After the honeycomb crochet blanket pattern is put together, sew the crochet bee plushie to the center (if you are making it a lovey). Then sew the crochet bee appliques to where you would like them to appear on the blanket and you are all set!
Your honeycomb crochet blanket or the crochet bee lovey made from my honeycomb crochet blanket pattern is finished! I hope you had a fun time creating this BEE-utiful blanket!
If you are looking for another bee pattern check out my Crochet Bee Plushie Pattern and if you want another hexagon pattern check out my Crochet Hexagon Blanket Pattern
🐌Expert Tips
- Weaving Ends: Weave in yarn ends as you go. This will save you from the confusion of sorting out which ends to cut and which to sew later on.
- Consistent Color Changes: When switching yarn colors, always pull the new color through the last step of the previous stitch. This keeps your color changes neat and prevents fraying.
- Blocking: Blocking your hexagons before joining can help them keep their shape and align better. Simply dampen them and lay them flat to dry.
- Mixing Yarns: If you’re mixing yarn brands for the honeycomb crochet blanket pattern, try to keep to the same weight to ensure consistency in texture and stitch definition.
🧵Pattern FAQs
Absolutely! That is also a good way to increase the size of the blanket if you didn't want to change the design at all, like to make a stroller blanket.
Probably closer to 100. Which would take a lot more yarn.
The colors you should be looking for aren’t bright. Think more dull yellows. You want a soft lighter yellow, a medium yellow that has more hints of brown than the first yarn, and then a darker yellow yarn that almost looks like the color of gold or honey.
🧶More Crochet Blanket Patterns

If you tried this Honeycomb Crochet Blanket Pattern (or any other pattern on my website), please let me know how it went in the 📝 comments below. I'd love to hear from you!

Honeycomb Crochet Blanket Pattern
Materials
Abbreviations (US terms)
- Magic ring - mr
- Chain - ch
- Single crochet - sc
- Double crochet - dc
- Slip stitch - sl st
- Increase - inc
- Decrease - dec
Notes
- I used Caron and Red Heart yarn for the honeycomb blanket; feel free to mix brands or stick to one.
- You can use 2 colors for the honeycombs or add a different yellow for variety.
- I joined the hexagon granny squares with single crochet, but any joining method is fine.
- The finished bee lovey is about 14 x 14 inches; use a smaller hook for a smaller size if desired.
Instructions
Hexagon Granny Square Pattern:
- Round 1: Make a magic ring, then ch x3 (counts as a dc). Immediately after, make a dc into the mr. Then (Ch x2 + dc x2) and repeat another 4 times. At this point you should have 6 clusters. Ch x2 and then sl st to the top of the ch x3. Pull the magic ring tight, now you should have a clear 6 points caused by the chain spaces for your hexagon.
- Round 2: Ch x3 and dc in each of the dc stitches from the round below, when you get to the corners make a dc + ch x2 + dc in each corner. When you are done with the round, sl st to the top of the ch x3 you made at the beginning of the round.
- Round 3-5: Repeat round 2.
- After the 5th round, fasten off the yarn and weave in any ends. Make as many honeycomb hexagons as you need, I used 7 hexagons. 3 cornmeal, 2 gold, and 2 dijon (but you can always use 2 colors verses 3 in any amount you like since the colors are so similar).
Bee Applique Pattern:
- Row 1: Using the yellow yarn, ch x4
- Row 2: In the second ch from the hook make a sc. sc in the rest of the chains in the row. (3) Then ch x1 and turn.
- Row 3: Skip the ch you just made and make an inc in the last stitch you worked in. Then sc in the next stitch and inc in the last stitch. (5) Then ch x1 and turn.
- Row 4: Inc, sc x3, inc in this row. (7). At the end of this row, fasten off the yellow yarn and join the black yarn. Then ch x1 and turn.
- Row 5: Sc in every stitch (7). Then ch x1 and turn. Fasten off the black yarn and switch to yellow.
- Row 6: Sc in every stitch (7). Then ch x1 and turn. Fasten off the yellow yarn and switch to black.
- Row 7: Sc in every stitch (7). Then ch x1 and turn. Fasten off the black yarn and switch to yellow.
- Row 8: Sc in every stitch (7). Then ch x1 and turn.
- Row 9: Dec, sc x3, dec in this row. (5). Then ch x1 and turn.
- Row 10: Dec, sc, dec in this row. (3). Then ch x1 and turn.
- Now that the rows for the crochet bee applique are done, you can tidy up the applique by crocheting around its entire outer edge with the yellow. You want to make 1 crochet per stitch/ row that you created, then sl st to the beginning when you are done and fasten off the yarn. Leave a long tail for sewing.
- Now all that is left are the wings. Join the white yarn to the yellow row between the 2 black stripes. Then ch x6. Sl st to the same stitch you joined the yarn at and ch x6. Then sl st back to the same stitch. You should have 2 loops on your bee - those are the wings. Now fasten off the yarn and weave in the ends.
- You can make as many crochet bee appliques as you would like for your blanket. I made 3 for my crochet honeycomb lovey.
Bee Plush Pattern:
- This part of the pattern is optional since it could be used as the middle for a baby lovey but is impractical for a toddler blanket.
- Round 1: Using the yellow yarn, make a mr and make sc x6 in the circle. If you find it difficult making a magic ring you can chain 2 and then crochet sc x6 in the second chain from the hook. (6)
- Round 2: Inc in every sc. (12)
- Round 3: Inc, sc, then repeat until end of round (18)
- Round 4: Inc, sc x2. Then repeat until end of round (24)
- Round 5: Inc, sc x3. Then repeat until end of round (30)
- Round 6-7: Sc in every stitch (30). Then fasten off the yellow yarn and switch it to black.
- Round 8-9: Sc in every stitch (30). Then fasten off the black yarn and switch it to yellow.
- Round 10-12: Sc in every stitch (30). Then fasten off the yellow yarn and switch it to black.
- Round 13-14: Sc in every stitch (30). Then fasten off the black yarn and switch it to yellow.
- Round 15-17: Sc in every stitch (30).
- Round 18: Dec, sc x3. Then repeat for the rest of the round (24).
- Round 19: Dec, sc x2. Then repeat for the rest of the round (18).
- Round 20: Dec, sc. Then repeat for the rest of the round (12).
- Round 21: Dec. Then repeat for the rest of the round (6). Fasten off and weave in the ends.
Bee Wings: Make x2
- Round 1: Using the white yarn, make a mr and make sc x6 in the circle (6).
- Round 2: Inc in every sc. (12) Then fasten off the yarn and leave a tail for sewing.
- Sew the 2 wings to the top of the bee.
- Assemble: Now that you have granny squares, bee appliques and a bee plush it is time to put everything together!
- Crochet the hexagon granny squares in any color combination you would like using one of the many joining methods. I chose to do the single crochet joining method where you single crochet the edges of the hexagons together. This creates ridges and a 3D honeycomb effect. I then single crochet the edges of the blanket so it looks more uniform. I did 3 sc in each pointed corner and a decrease where the hexagons meet.
- After the crochet hexagon blanket is put together, sew the crochet bee plushie to the center (if you are making it a lovey). Then sew the crochet bee appliques to where you would like them to appear on the blanket and you are all set!
- Your honeycomb blanket is finished! I hope you had a fun time creating this BEE-utiful blanket!


Leave a Reply