

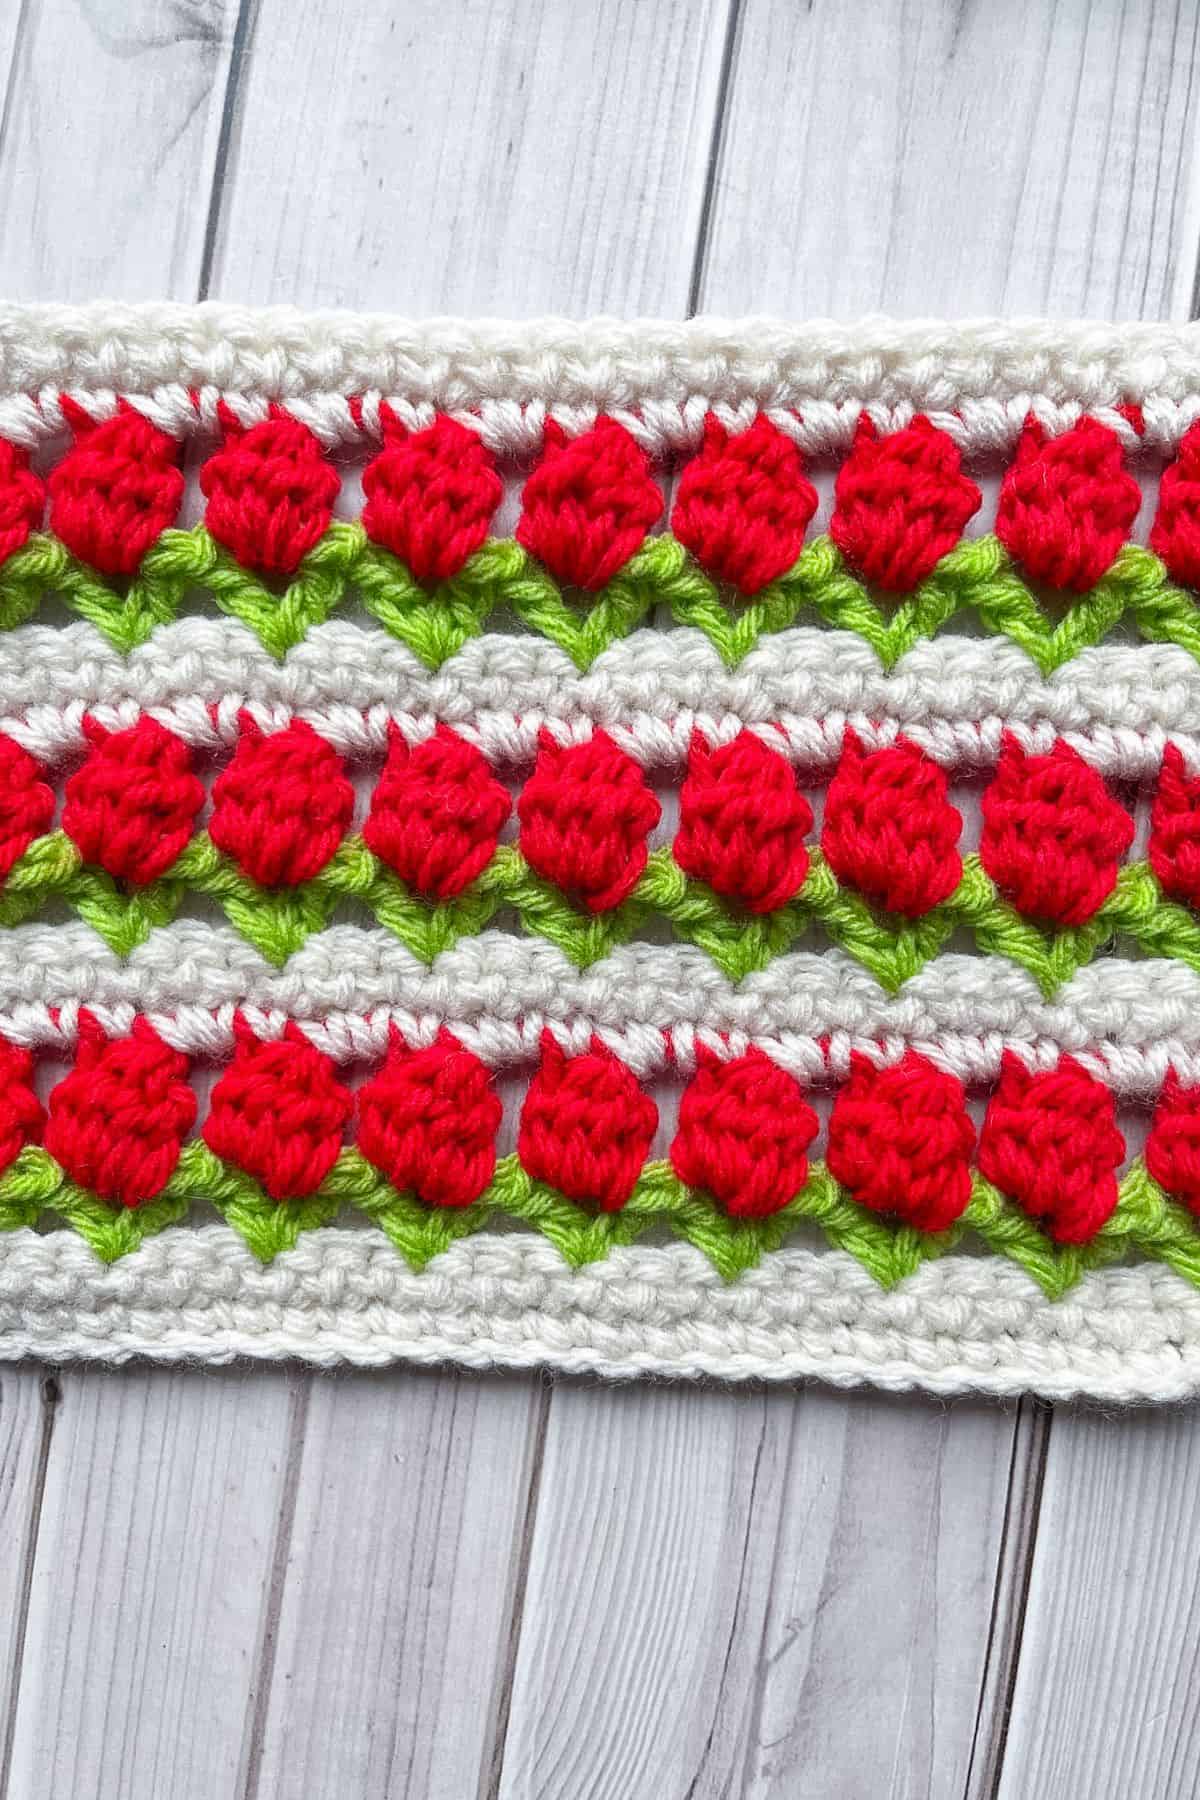
Say hello to spring by learning the Crochet Tulip Stitch Pattern! This beautiful crochet stitch is like having a field of flowers on your blanket.
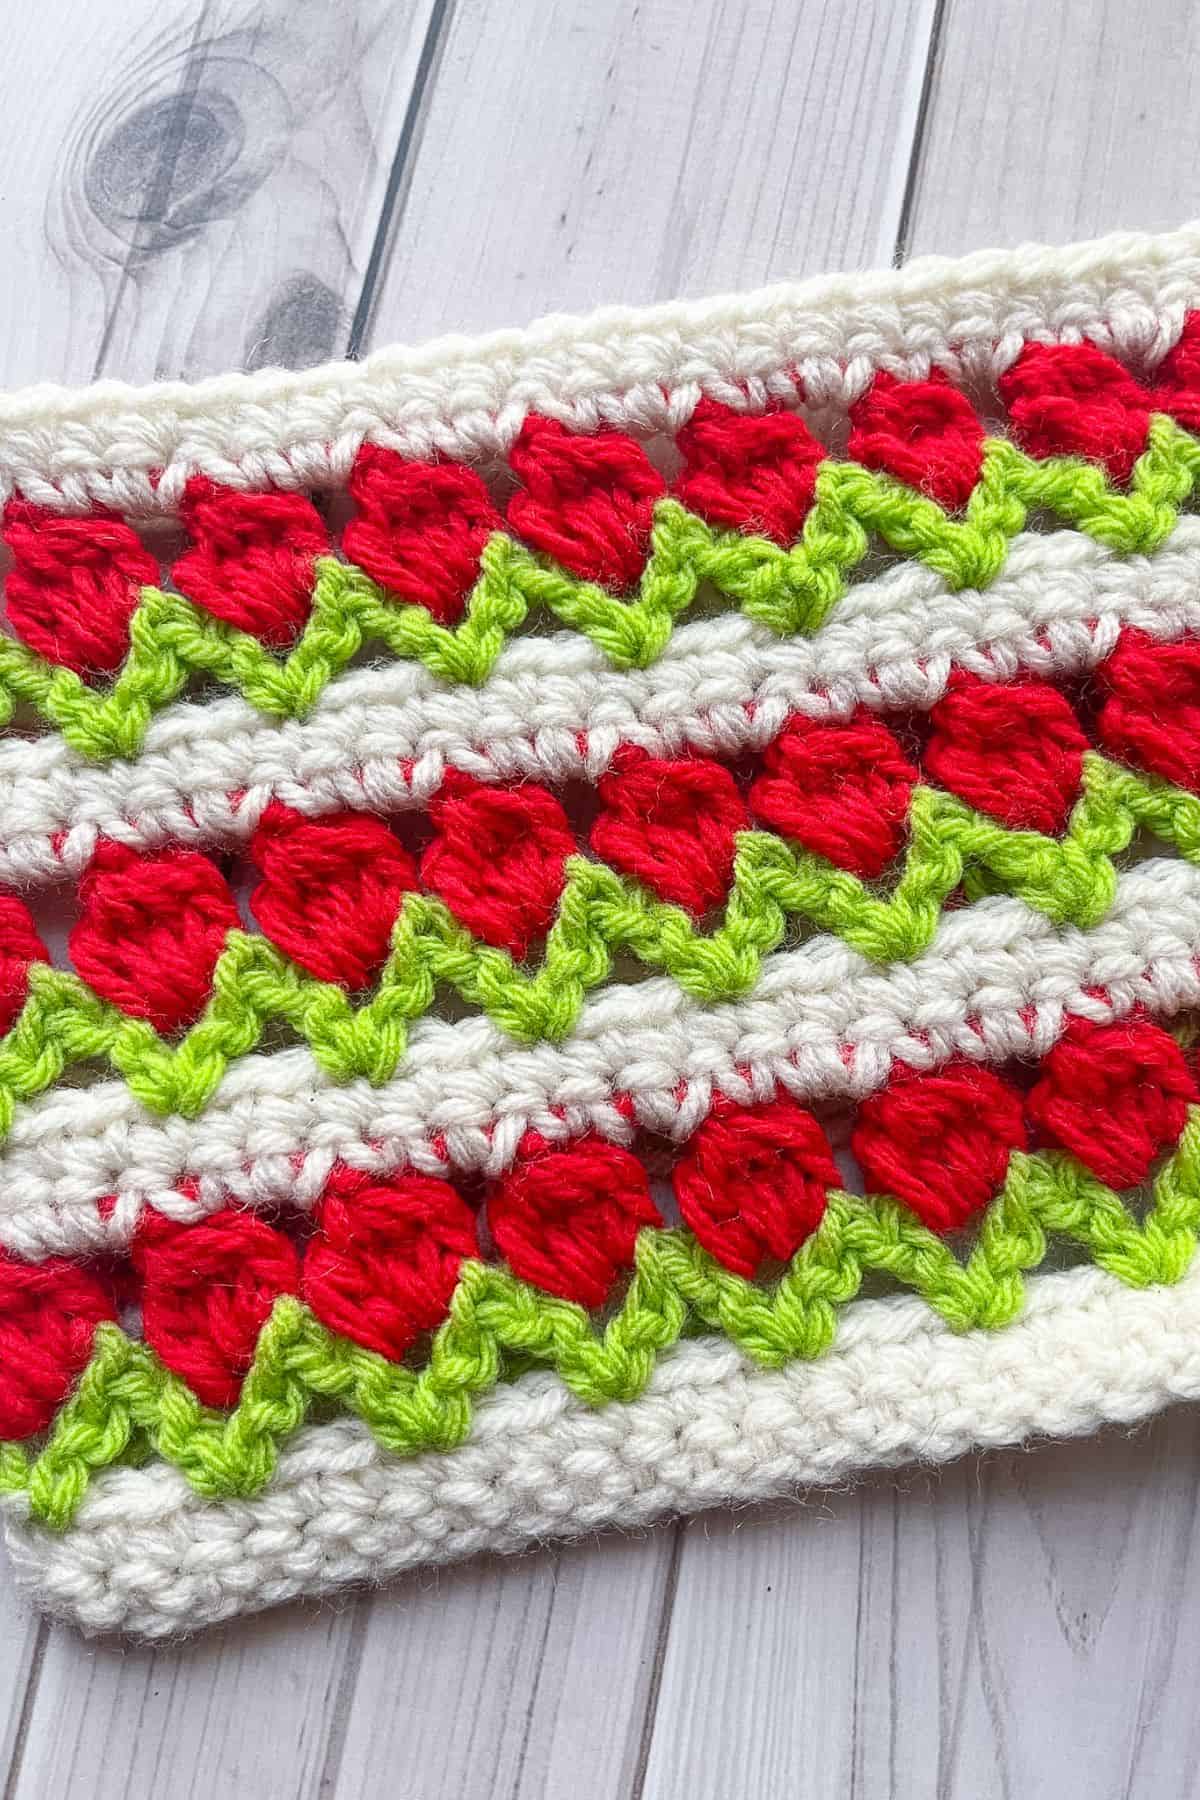
I love this tulip crochet stitch. Once I learned it, I couldn’t get enough of it. You can make crochet tulip bags, pillows and blankets with it! It's a very versatile stitch and looks great for a multitude of crochet projects!
I just made a crochet tulip headband (pattern coming soon), with it! It’s super cute and perfect for spring!
If you are wanting to make some other floral motifs, check out my tutorials for the African flower granny square and the crochet daisy applique pattern.
If you are looking for some more tulip themed patterns, check out my crochet tulip crochet coaster pattern, or if you want to use them for an applique, you can make my crochet tulip bag pattern. Another cute tulip pattern I have is my crochet tulip keychain pattern! It’s cute and can be made with any leftover scrap yarn since it is small enough.
Lets get started on this crochet tulip stitch written pattern!
Jump to:
✏️ Things To Note:
- Swatch: This pattern is for a small 6 inch crochet tulip stitch swatch, not a whole project. Adjust the starting chain length if you want to make this into a full project.
- Yarn: I used acrylic yarn for this tutorial, but you can use any type of yarn and yarn weight for the tulip crochet stitch.
- Between tulip rows: I use 2 rows of single crochet in between crochet tulip rows, but you can use whatever stitch you want. You just want it to be 2 rows so the tulips all face the same side.
🪡 Materials Needed
- 5mm crochet hook
- Tapestry needle
- Red Heart Yarn - aran
- Red Heart Yarn - cherry red
- Red Heart Yarn - spring green
💭Abbreviations to Remember (US terms)
- Chain - ch
- Single crochet - sc
- Double crochet - dc
- Double crochet 3 together - dc3tog
- Double crochet 4 together - dc4tog
🧋Variations
- Instead of doing a granny cluster for the flower you can always do a variation of a puff stitch if you want added texture to the blanket. You can also switch out the color yarn used for the flower.
🍵Instructions for Crochet Tulip Stitch Pattern
We will make the tulip crochet stitch in rows.

With the aran yarn, ch x26 (or any number that is a multiple of 3 +2).
Row 1: In the 2nd chain from the hook make a sc. Continue to make sc stitches for the rest of the row (25). Then ch x1 and turn.
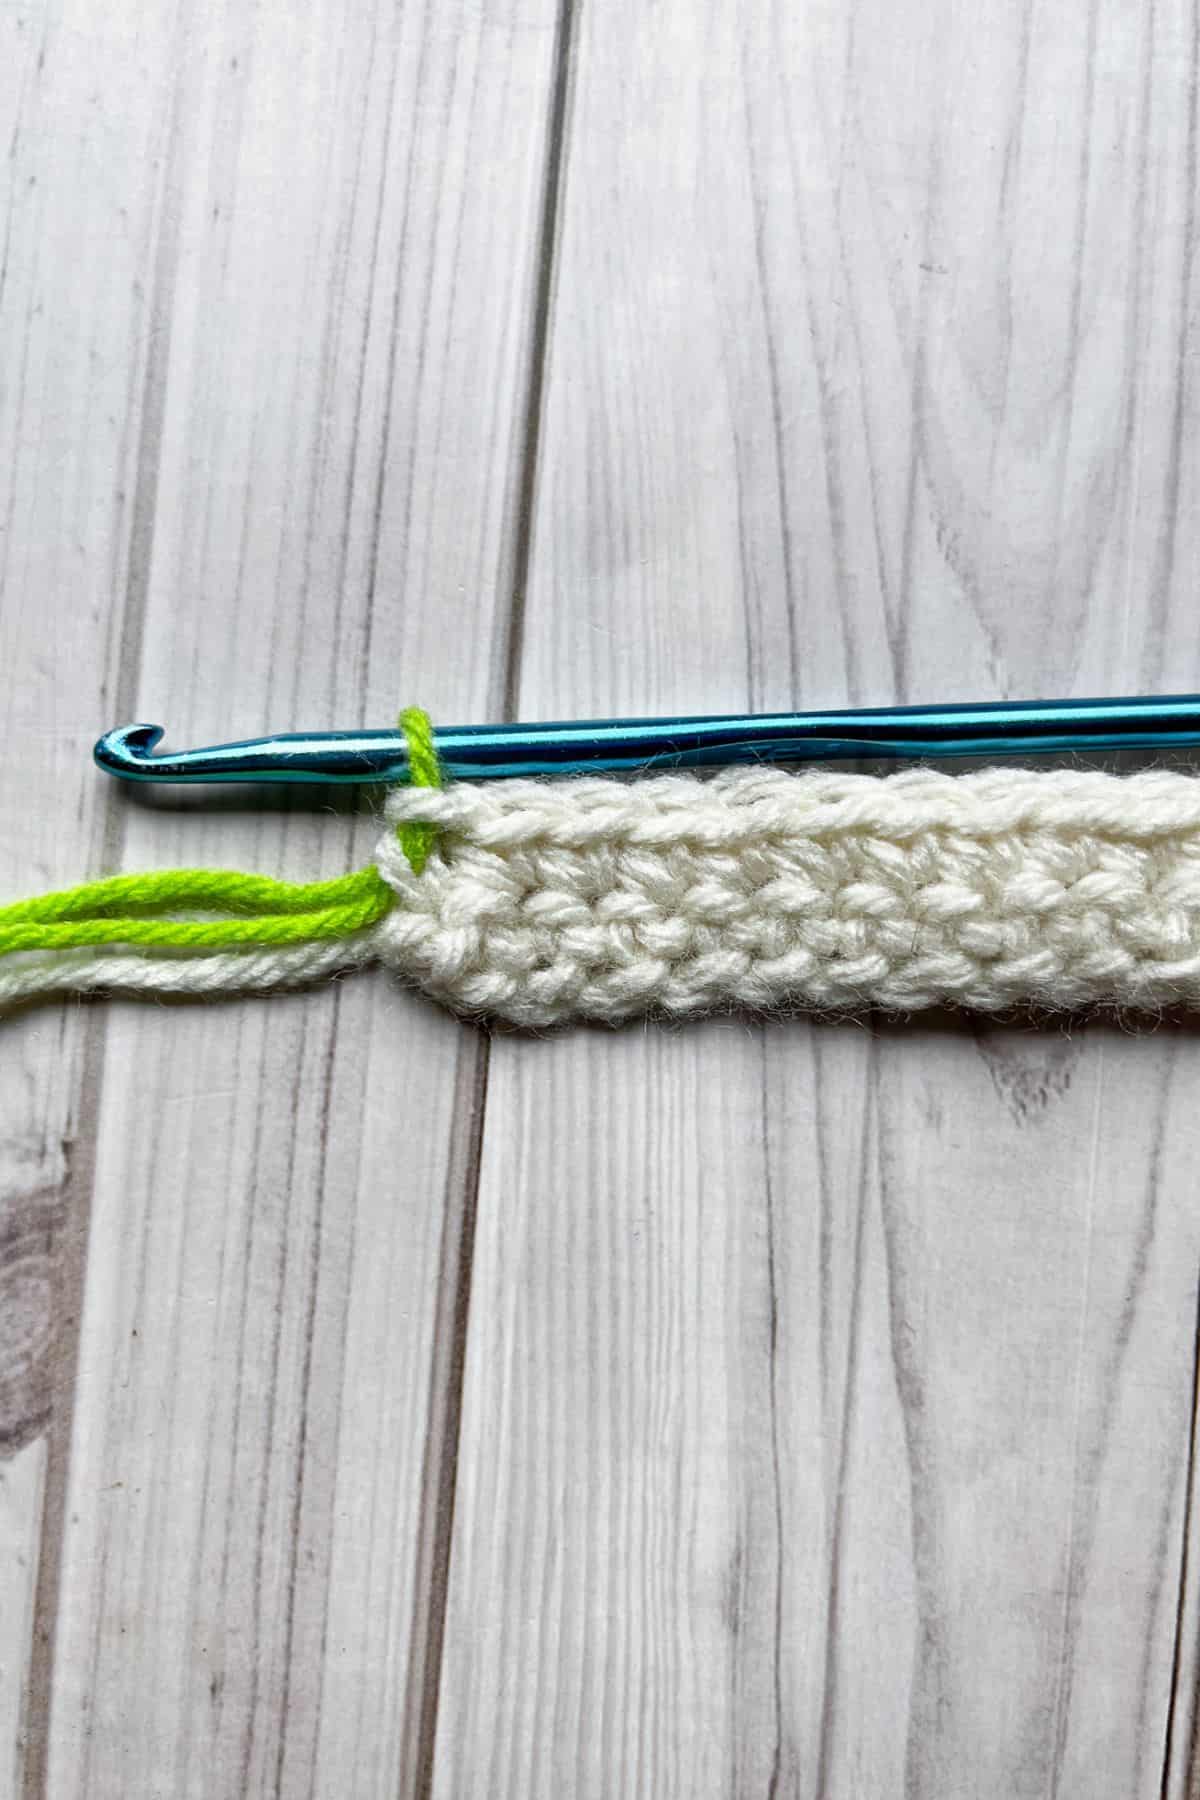
Row 2: Sc in every stitch (25). Then in the last stitch, fasten off the aran yarn and switch the color to green. With the green yarn ch x4 (this counts as a dc + ch) and turn.
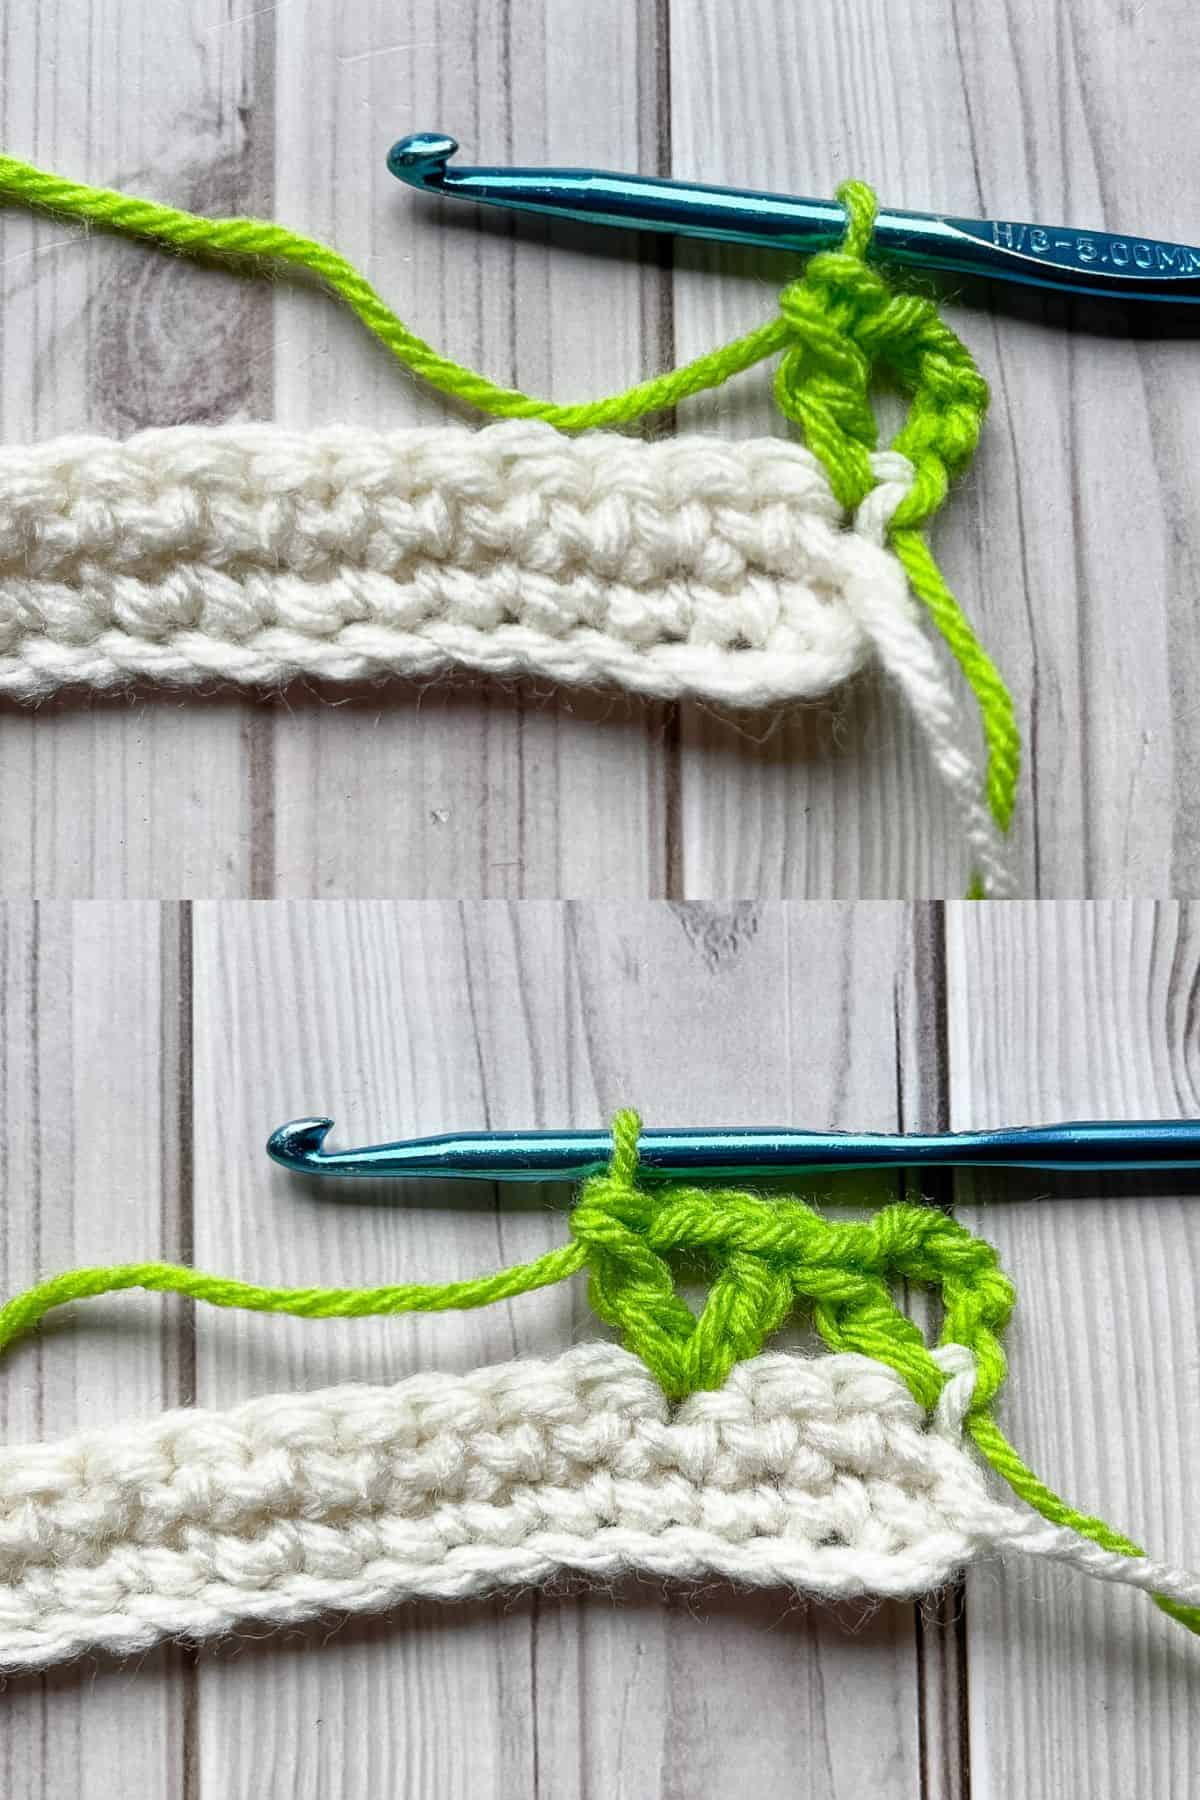
Row 3: Dc in the first stitch in the row. *Then skip 2 stitches and in the next stitch dc, ch x2, dc in 1 stitch to form a “V” stitch. Repeat from * for the rest of the row.

You should end the row with a dc, ch x2 and dc in the last stitch. In the last dc in the row, switch the yarn color to red. Then ch x2 and turn.
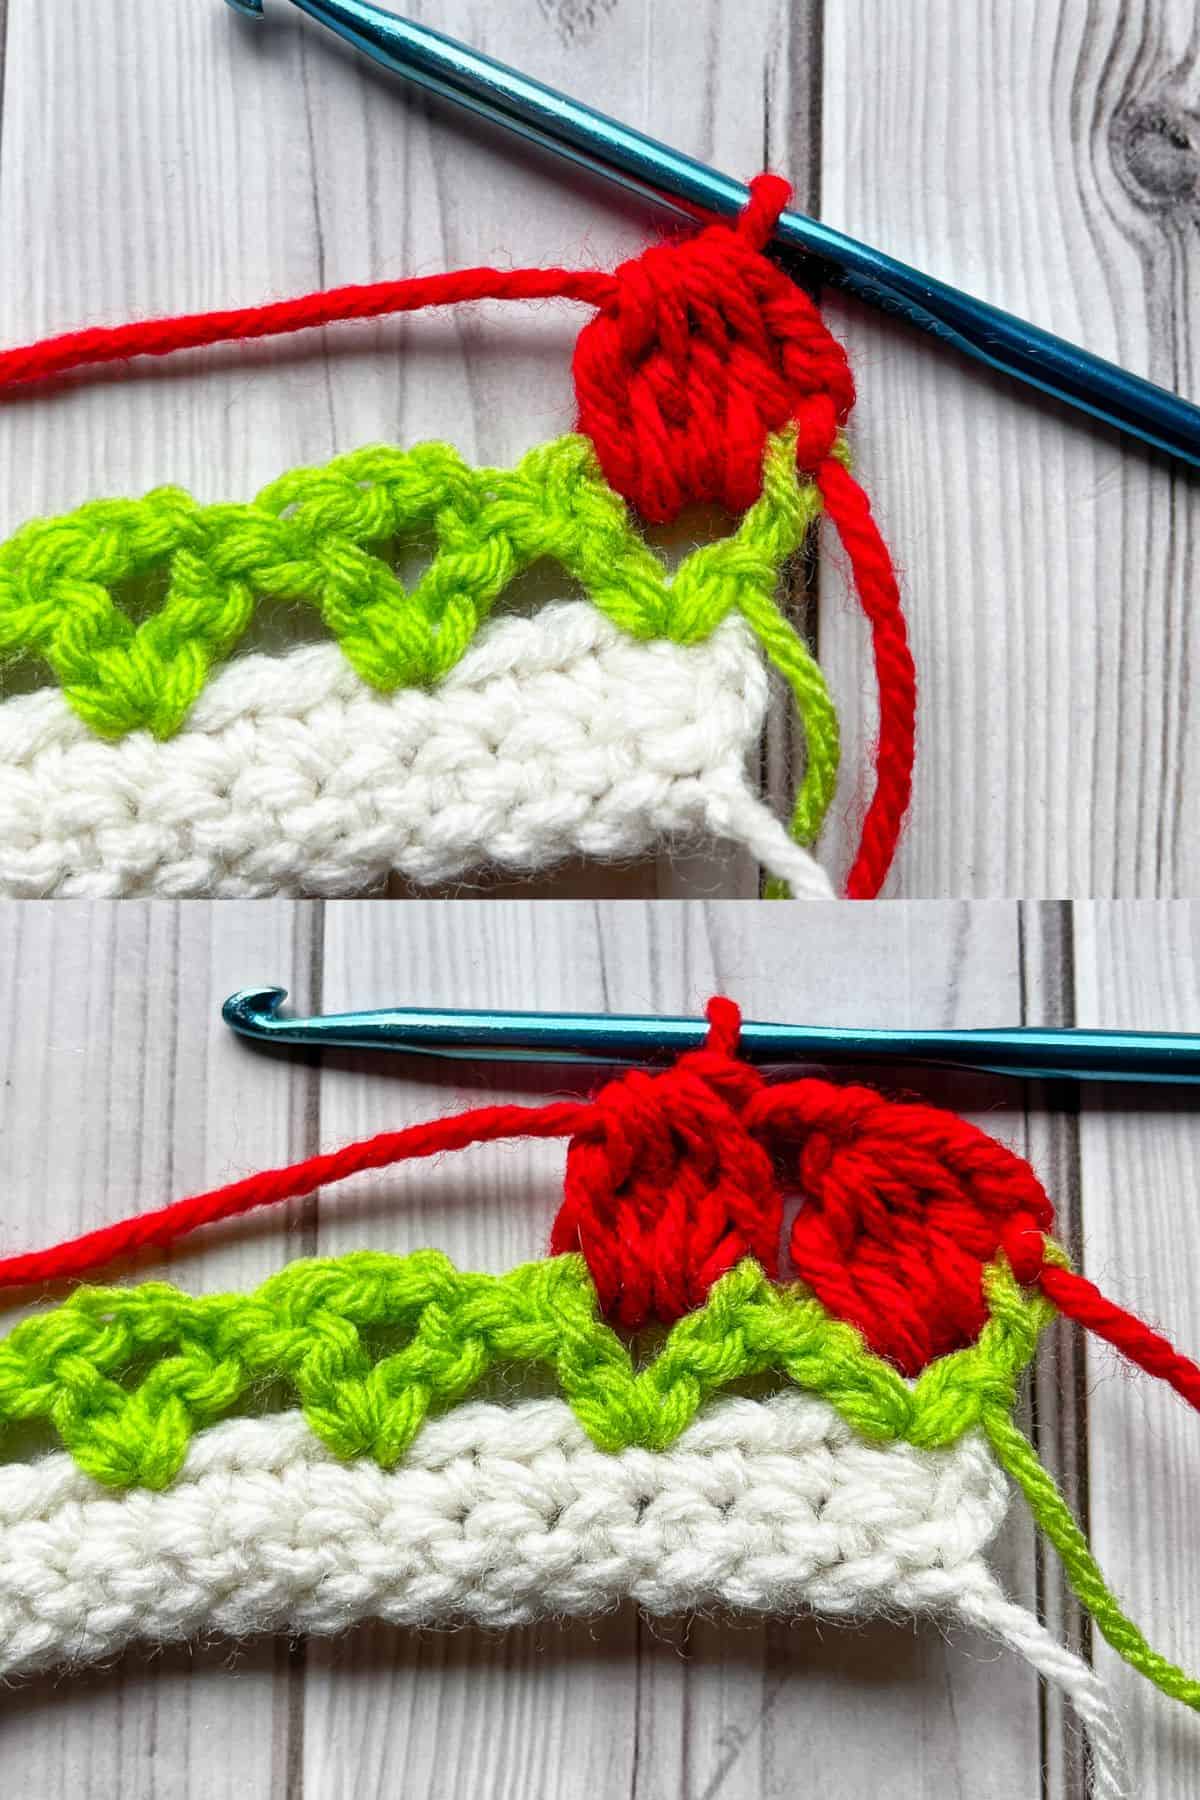
Row 4: In the ch-2 space, dc3tog. *Then ch x2 and dc4tog in the next ch-2 space. This should be in the middle of the “V” shape.
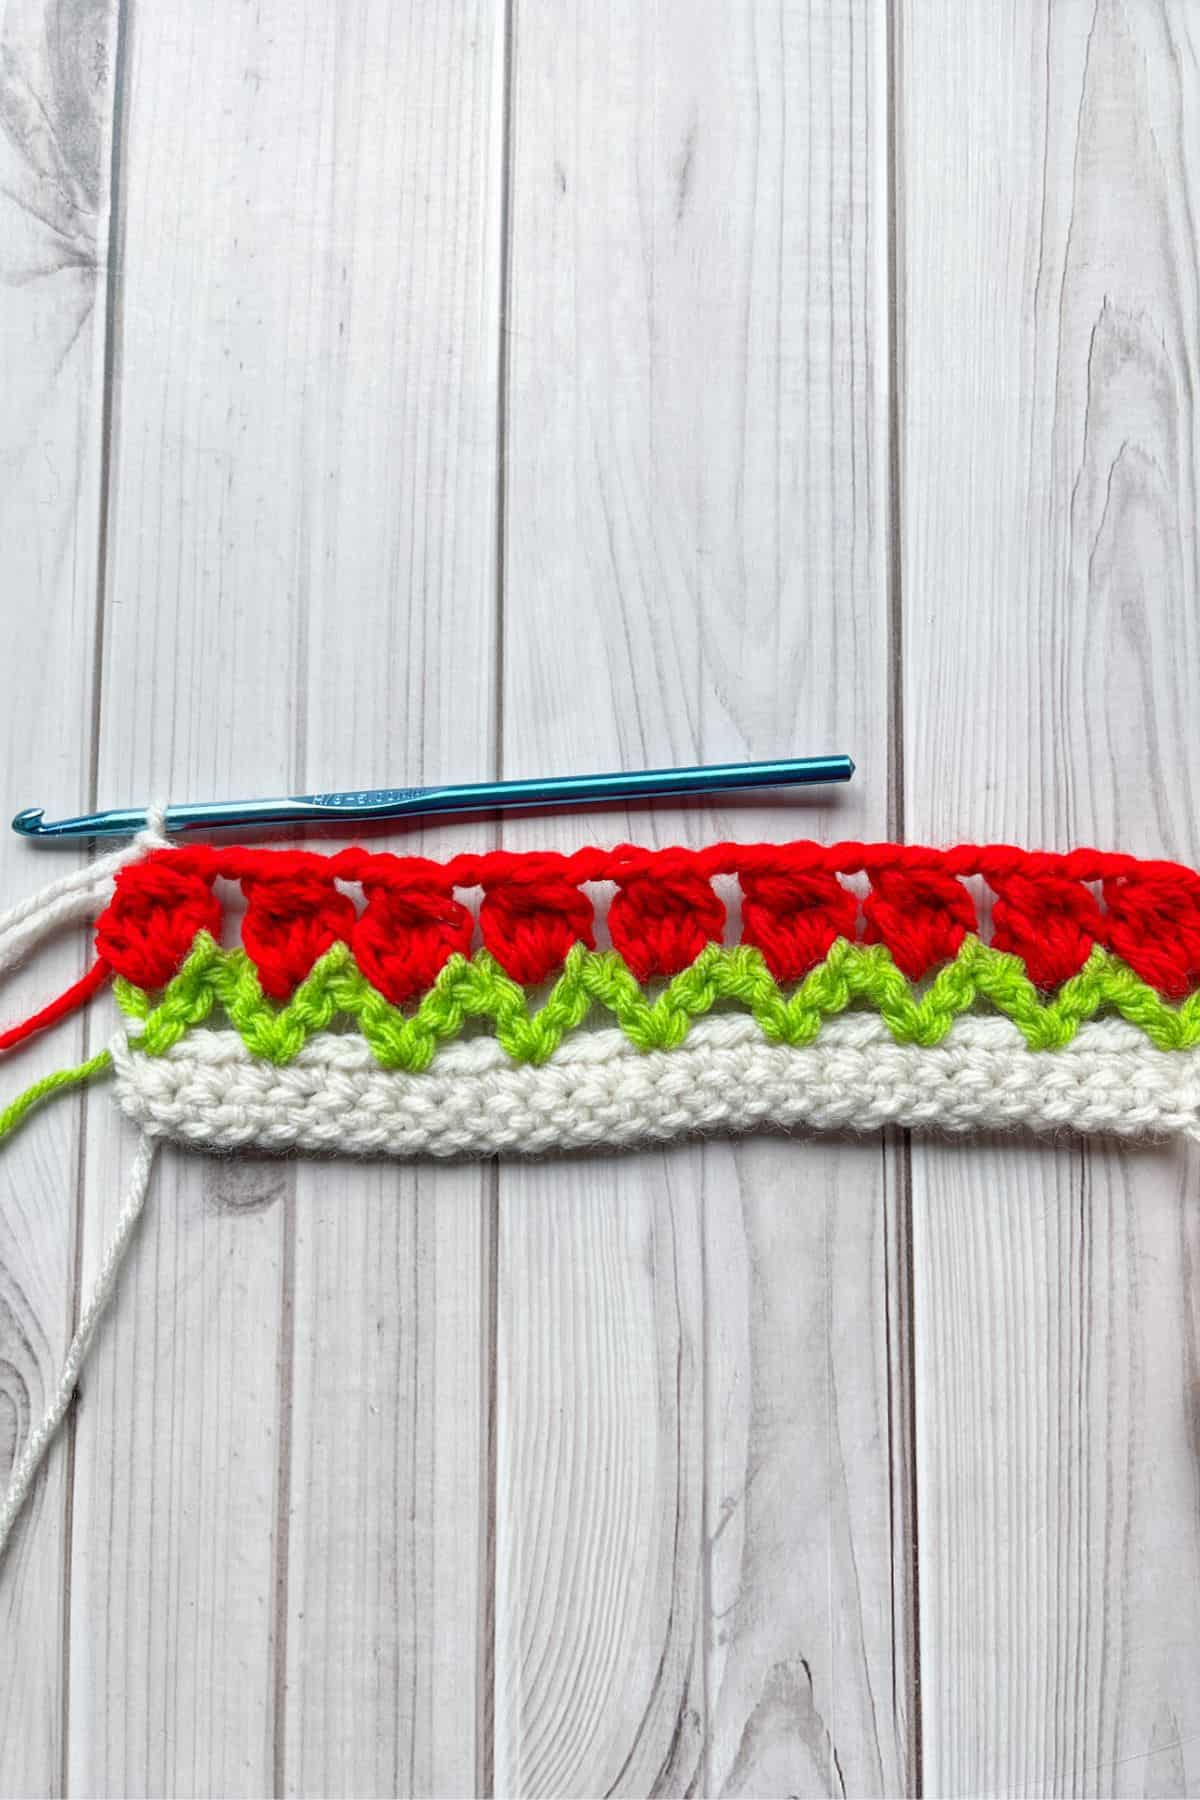
Repeat from * for the rest of the row and then fasten off the red yarn in the last cluster stitch in the row. Switch the yarn color to aran and ch x1.
NOTE: You can do the tulip cluster stitch with 3-5 dc stitches. If you dc3tog, for the main row you will get flat tulips, while dc5tog can make them very textured on one side and flat on the other. 4 stitches is in between the 2 and is a good medium, it just depends on the outcome you want.
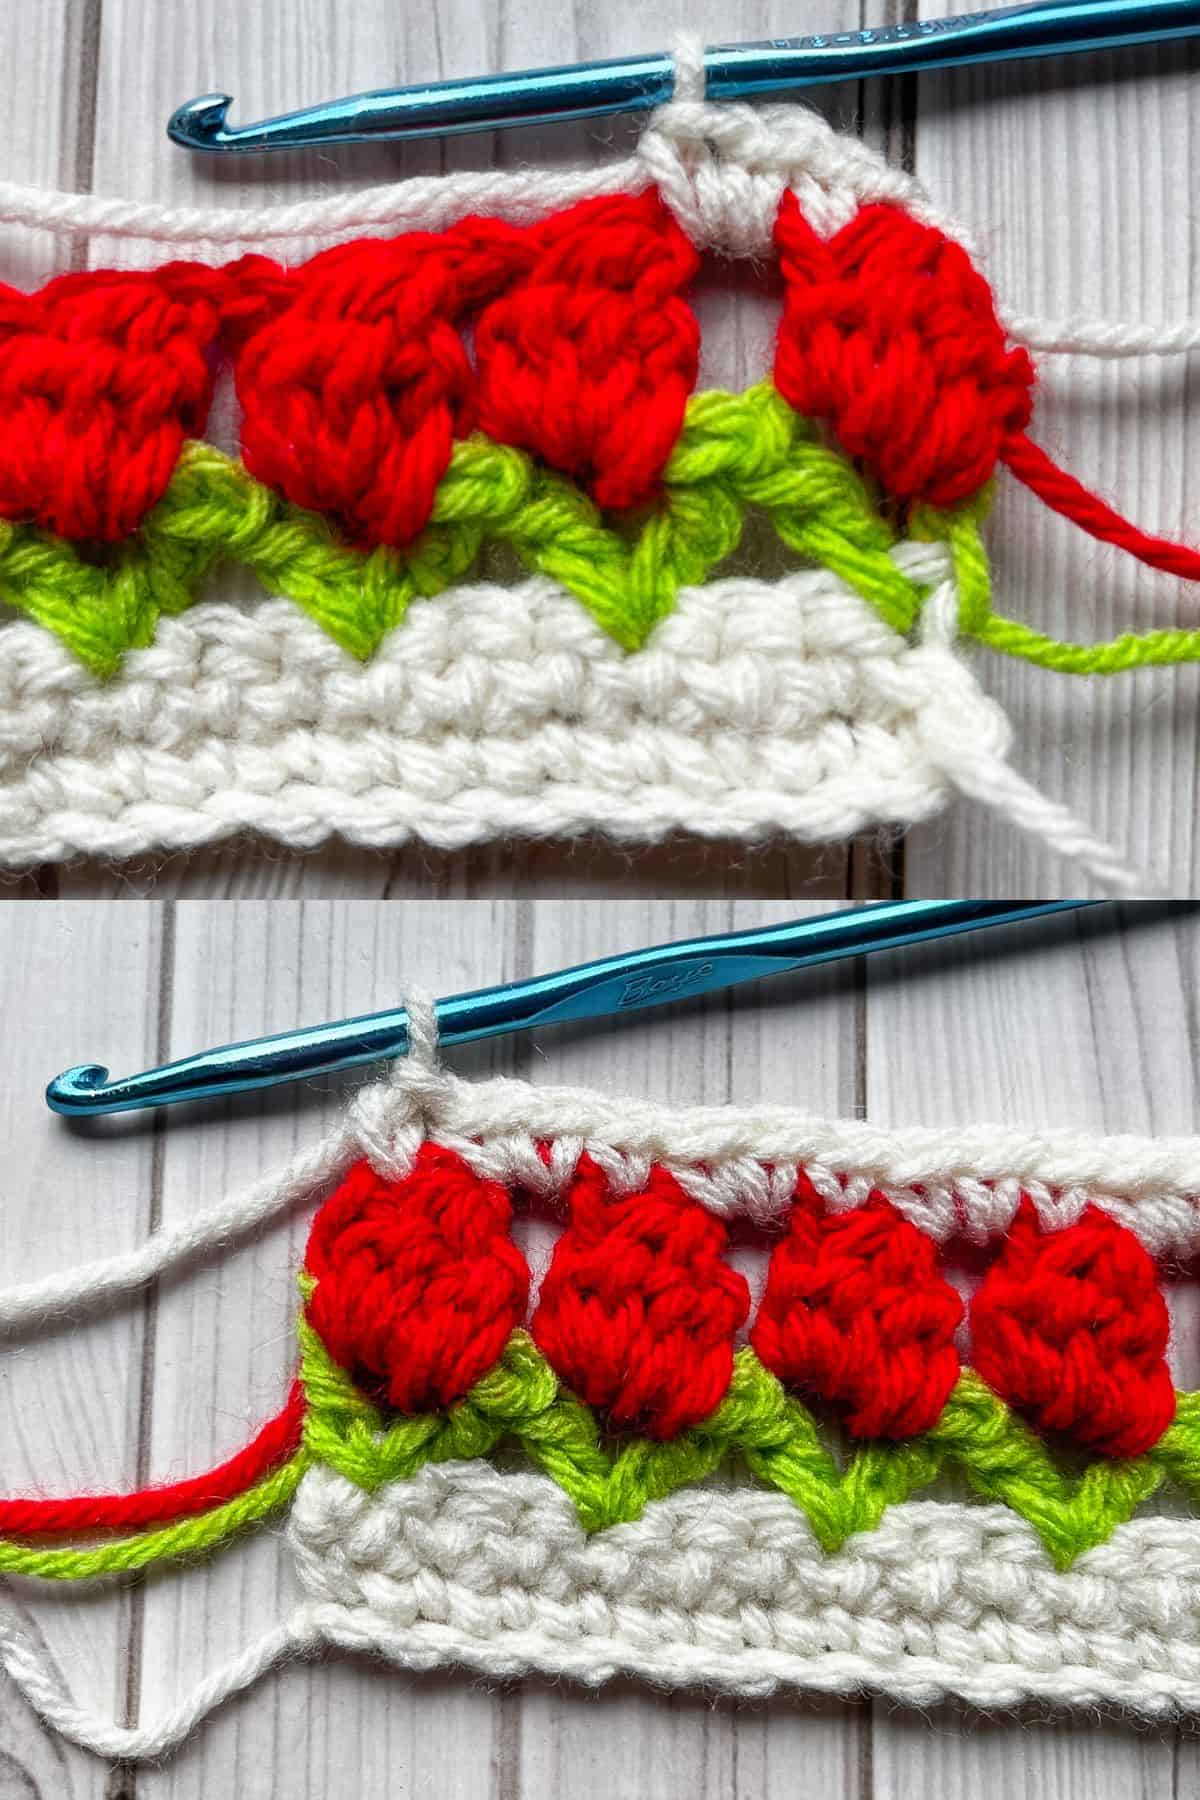
Row 5: *Sc into the top of the dc cluster stitch, sc x2 into the ch-2 space. Repeat from * for the rest of the row (25). Then ch x1 and turn.
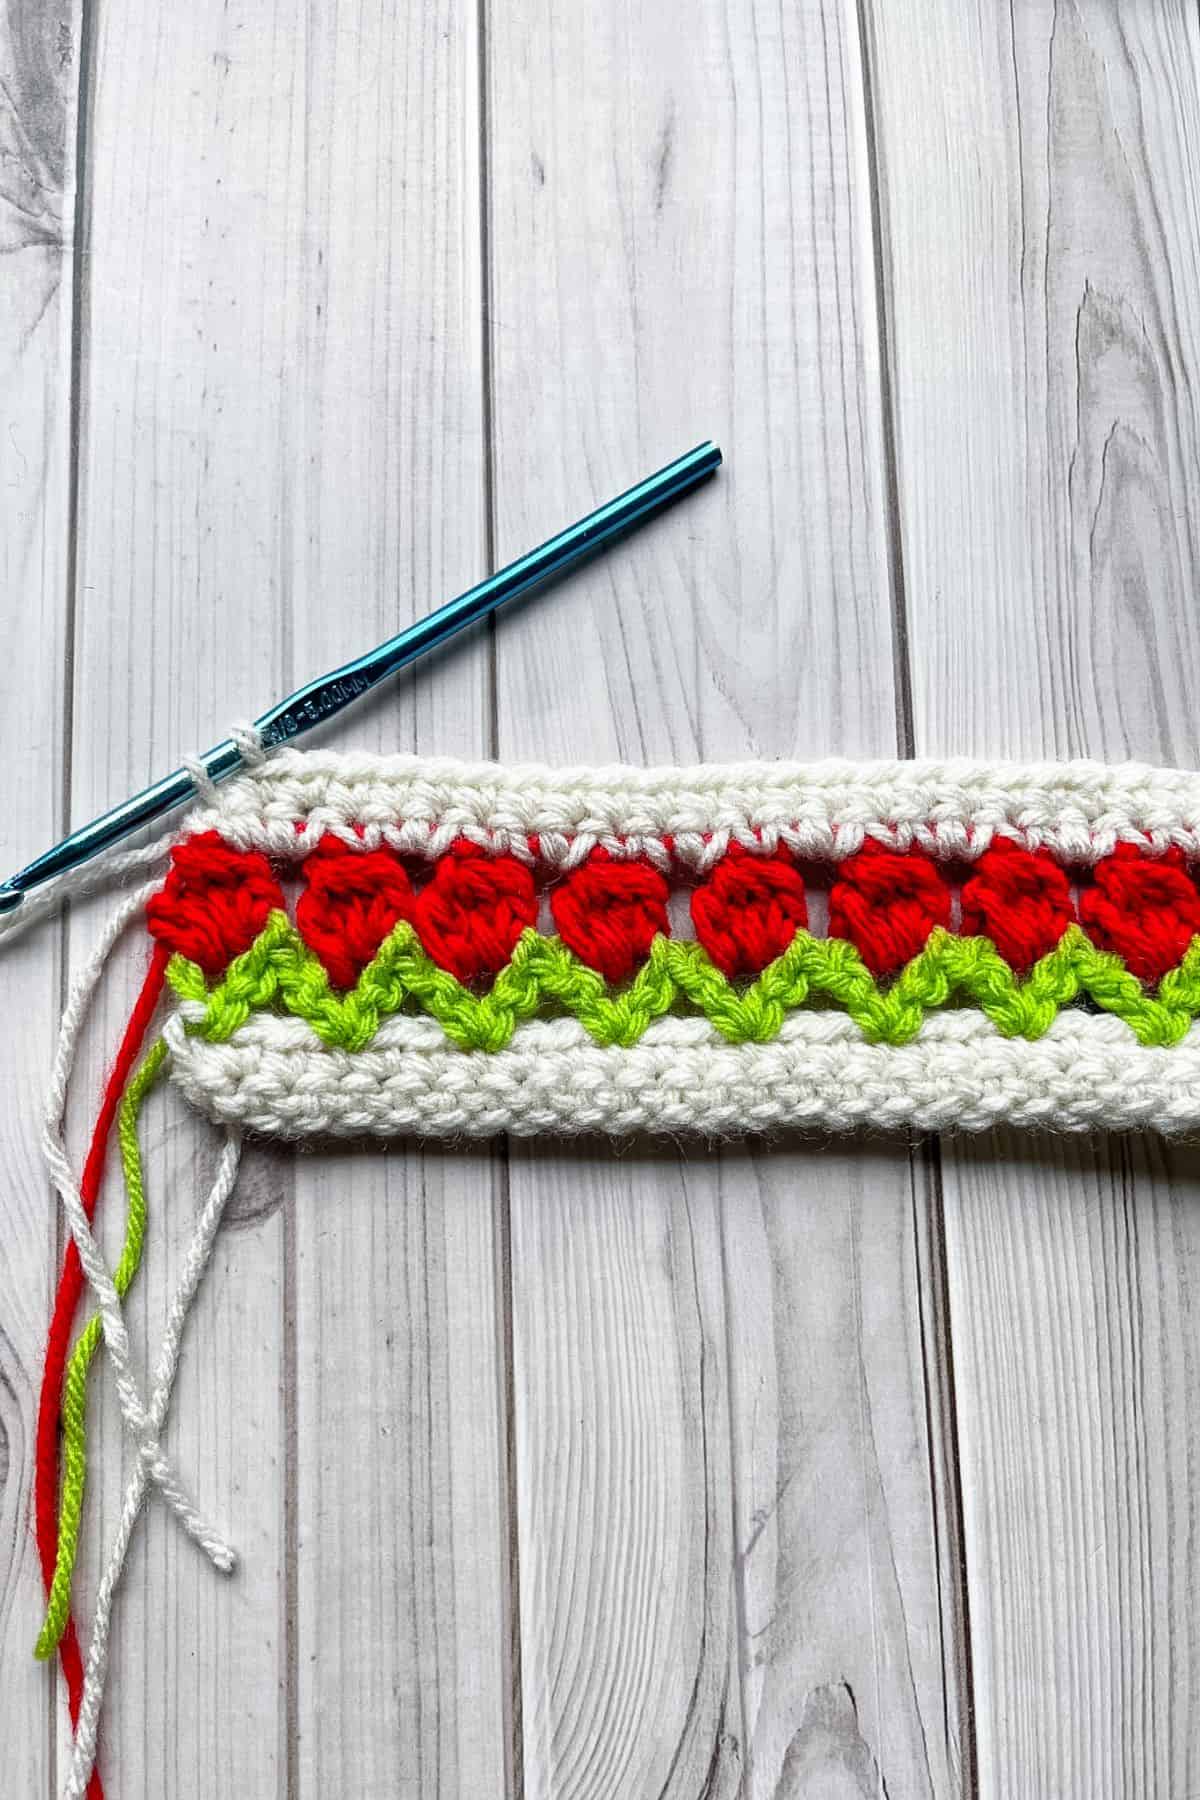
Row 6: Sc in every stitch (25). In the last stitch switch the color to green and ch x4.
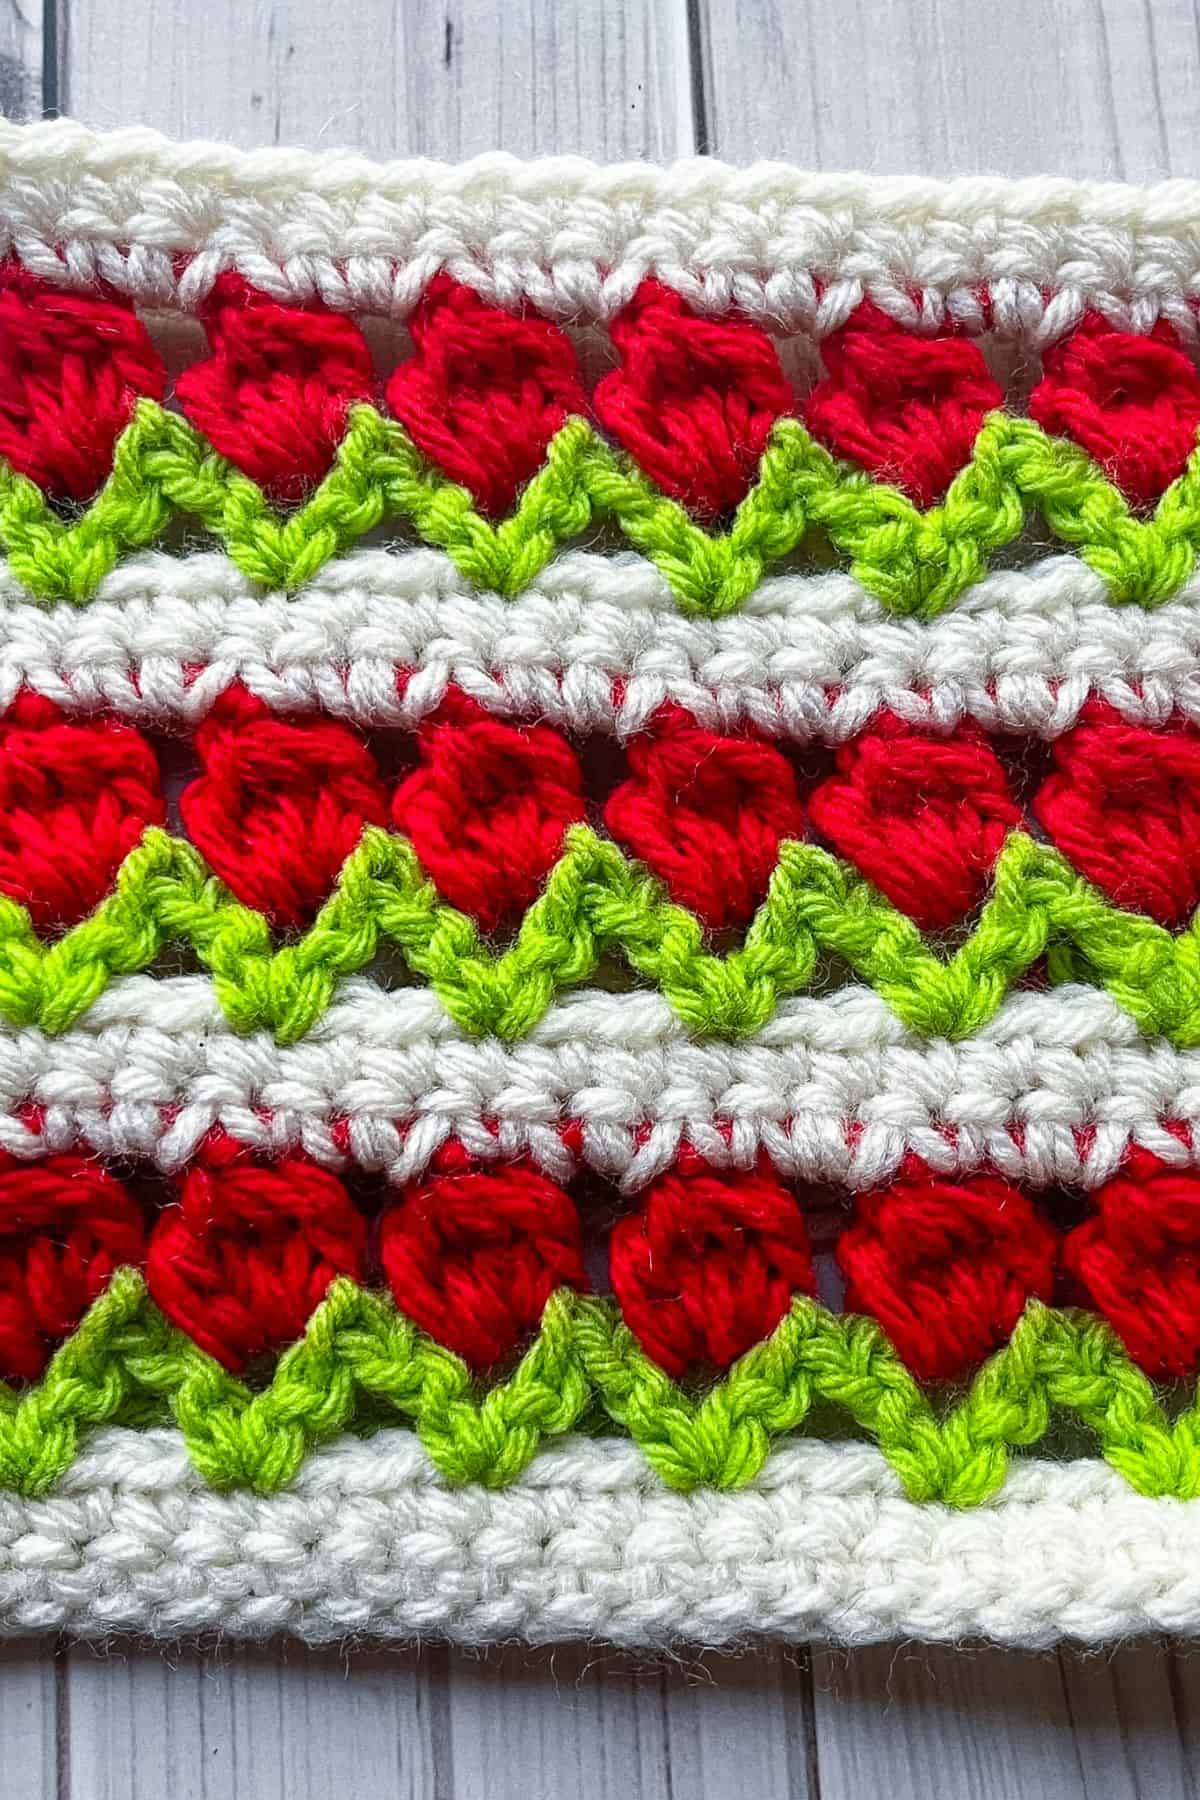
Repeat rows 3-6 for as many times as you need until you get the length you want for your project.
And now you know how to make the crochet tulip stitch! I hope you enjoyed this tutorial and if you are wanting to make more floral patterns, check out my crochet daisy bag pattern and my crochet lavender bouquet pattern.
🐌Expert Tips
- Texture: If you want to make your crochet tulip stitch segment to have more texture and pop out more, you can crochet a puff stitch or simply dc5tog. Dc3tog will result in a flatter tulip which will make it best for reversible projects like blankets.
- Weave in ends: The best way to make this color changing project is to weave in ends as you go, or if you would rather not do that - make the border be an envelope border - it encapsulates the ends between 2 sides for a thick border.
- Double checking stitch count: If you are unsure if you are losing stitches, an easy way to double check is to count the amount of tulips you have. There should be the same number of tulips and they should stack on top of each other.
🧵Pattern FAQs
If you have a lot of ends and don't want to weave them in, you can use an envelope border to hide the ends. Otherwise, I would keep it simple since it's already a pretty busy and striking stitch.
I like to use it for blankets, but it can work for any project! Clothing, accessories, blankets.
I would stay away from any yarn that is fuzzy, since the design can get lost easier, but anything with a smooth and even finish should be fine.
🧶More Crochet Stitch Patterns


If you tried this Crochet Tulip Stitch Pattern (or any other pattern on my website), please let me know how it went in the 📝 comments below. I'd love to hear from you!

Crochet Tulip Stitch Pattern
Materials
Abbreviations (US terms)
- Chain - ch
- Single crochet - sc
- Double crochet - dc
- Double crochet 3 together (dc3tog)
- Double crochet 4 together - dc4tog
Notes
- Swatch: This pattern is for a small 6 inch crochet tulip stitch swatch, not a whole project. Adjust the starting chain length if you want to make this into a full project.
- Yarn: I used acrylic yarn for this tutorial, but you can use any type of yarn and yarn weight for the tulip crochet stitch.
- Between tulip rows: I use 2 rows of single crochet in between crochet tulip rows, but you can use whatever stitch you want. You just want it to be 2 rows so the tulips all face the same side.
Instructions
- With the aran yarn, ch x26 (or any number that is a multiple of 3 +2).
- Row 1: In the 2nd chain from the hook make a sc. Continue to make sc stitches for the rest of the row (25). Then ch x1 and turn.
- Row 2: Sc in every stitch (25). Then in the last stitch, fasten off the aran yarn and switch the color to green. With the green yarn ch x4 (this counts as a dc + ch) and turn.
- Row 3: Dc in the first stitch in the row. *Then skip 2 stitches and in the next stitch dc, ch x2, dc in 1 stitch to form a “V” stitch. Repeat from * for the rest of the row. You should end the row with a dc, ch x2 and dc in the last stitch. In the last dc in the row, switch the yarn color to red. Then ch x2 and turn.
- Row 4: In the ch-2 space, dc3tog. *Then ch x2 and dc4tog in the next ch-2 space. This should be in the middle of the “V” shape. Repeat from * for the rest of the row and then fasten off the red yarn in the last cluster stitch in the row. Switch the yarn color to aran and ch x1.
- NOTE: You can do the tulip cluster stitch with 3-5 dc stitches. If you dc3tog, for the main row you will get flat tulips, while dc5tog can make them very textured on one side and flat on the other. 4 stitches is in between the 2 and is a good medium, it just depends on the outcome you want.
- Row 5: *Sc into the top of the dc cluster stitch, sc x2 into the ch-2 space. Repeat from * for the rest of the row (25). Then ch x1 and turn.
- Row 6: Sc in every stitch (25). In the last stitch switch the color to green and ch x4.
- Repeat rows 3-6 for as many times as you need until you get the length you want for your project.
- And now you know how to make the crochet tulip stitch!



Leave a Reply