
Get ready for Halloween with my Crochet Halloween Garland Pattern! Nothing says Halloween better than cobwebs and creepy crawlies!

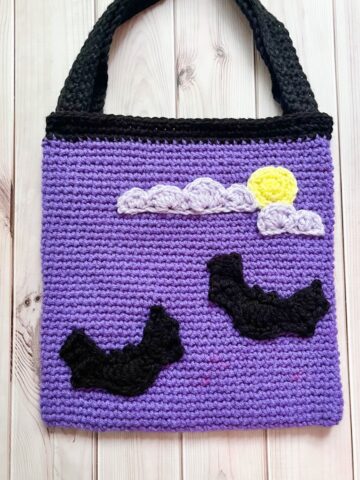
Halloween is my favorite time of year, and I love making spooky patterns like my crochet ghost coasters and creepy designs like my crochet amigurumi bat pattern. Every year I get inspired to crochet new ideas, and this year is no different.
Last year, I made a crochet spider pattern but never got around to creating a spider web. This year, that had to change—I had to incorporate spider webs into my Halloween decorations! Thus, the crochet spider web garland pattern was born.
This pattern is perfect for all crocheters, whether beginners or advanced, as it is a fairly simple and straightforward project. The trickiest part would be embroidering the spider web, but it just takes some practice to get right.
Jump to:
✏️ Things To Note:
- Yarn Selection. I made this pattern using worsted weight cotton because it was the yarn I had on hand that matched the colors I wanted. You can use cotton, acrylic, or any type of yarn you prefer.
- Consistent Stitches Matter. When crocheting the triangle, keep your stitches consistent and tight. This will create a stable base for your crochet spider appliqué and embroidery work.
- Secure Your Appliqué. When adding your appliqué, use a yarn needle and the same yarn to sew it on securely. Make sure to stitch around the edges and in the center to prevent it from lifting or shifting.
💭Abbreviations to Remember (US terms)
- Chains (ch)
- Single crochet (sc)
- Increase (inc) - 2 stitches in one space.
- Magic ring (mr)
- Slip stitch (sl st)
🧋Variations
Besides switching out the colors, you can add little pumpkins from my crochet coffee cup pattern to the black triangles instead of crochet spider webs to incorporate more Halloween elements into the bunting.
🍵Instructions for Crochet Halloween Garland Pattern
For this Crochet Halloween Garland Pattern, we will be working in rows. You can use any color as the base of the triangles, but I alternated using orange and black. You can find a more detailed tutorial for the triangles in my "How to Crochet Triangles Pattern."


Row 1: Ch 2 and turn
Row 2: In the second chain from the hook make an increase. (2) Ch 1 and turn. Do not work in the turning chains. Always skip those.
Row 3: Sc x2 (2). Ch 1 and turn
Row 4: Inc x2 (4). Ch 1 and turn
Row 5: Sc x4 (4). Ch 1 and turn
Row 6: Inc, sc x2, inc (6). Ch 1 and turn
Row 7: Sc x6 (6). Ch 1 and turn
Row 8: Inc, sc x4, inc (8). Ch 1 and turn
Row 9: Sc x8 (8). Ch 1 and turn
Row 10: Inc, sc x6, inc (10). Ch 1 and turn
Row 11: Sc x10 (10). Ch 1 and turn
Row 12: Inc, sc x8, inc (12). Ch 1 and turn
Row 13: Sc x12 (12). Ch 1 and turn
Row 14: Inc, sc x10, inc (14). Ch 1 and turn
Row 15: Sc x14 (14). Ch 1 and turn
Row 16: Inc, sc x12, inc (16). Ch 1 and turn
Row 17: Sc x16 (16). Ch 1 and turn
Row 18: Inc, sc x14, inc (18). Ch 1 and turn
Row 19: Sc x18 (18). Ch 1 and turn
Row 20: Inc, sc x16, inc (20). Ch 1 and turn
Row 21: Sc x20 (20). Ch 1 and turn

Now you can edge the triangle if you would like to create a cleaner finish. To do that make single crochets all around the triangle, for the edges that don’t have single crochet holes already, just make 1 single crochet for each row you made in the triangle.
For the corners do 3 single crochets to help round the corner so you can work the other side without the edges curling up on you. Once done, fasten off and weave in the ends.

Make as many orange and black triangles as you want for the crochet Halloween garland.
Crochet Spider Applique Pattern:

How to crochet a spider:
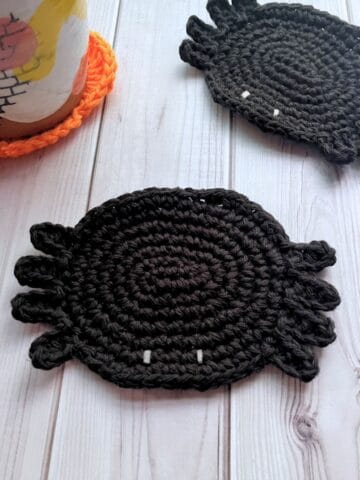
Round 1: Using black yarn, make a mr and then sc x6. Then pull the mr tight to close it. (6)
Round 2: Inc in every sc. (12).
Round 3: Inc, sc, then repeat until end of round. (18)
Round 4: This is where we will be making the spider legs.
Begin by making a slip stitch, then chain four. In the second chain from the hook, create a slip stitch. Continue with slip stitches for the remaining chain length. Then, slip stitch into the same stitch from which you started the slip stitch and chains. Repeat this process three more times for the next three stitches. You will have created four legs.
Sc x5. Then repeat what you did above for the other side's 4 spider legs. Sc x5 and then fasten off the yarn but leave a tail for sewing.
Embroidery:

I made a spider for each of my orange triangles.

Spider:
Sew the spider to the orange triangles near the top (starting the 3rd row down) then after the spider is sewn on, embroider the white eyes at the bottom of the spider, and a little line coming out the spider's butt near the top of the triangle so it looks like it is dangling down. Weave in any ends.

Spider web:
After securing the white yarn on the back of the black triangle, create four 4-inch radiating lines from the top right of the triangle.

To embroider the cross-section lines, split the yarn of the radiating lines as you pull the needle through. Be careful to insert your needle accurately to avoid wobbliness in the previous lines you embroidered. After completing the first row across the three gaps, move down an inch and repeat for two more rows.
I put a spiderweb on all of my black crochet triangles.
Now that the triangles have been made and adorned, string them up alternating the designs to create a pattern and now you have a lovely crochet Halloween garland for the season!
I hope you enjoyed my crochet Halloween garland pattern!
If you want to add variety to the garland you can also add in some of the ghosts from my crochet ghost garland pattern!
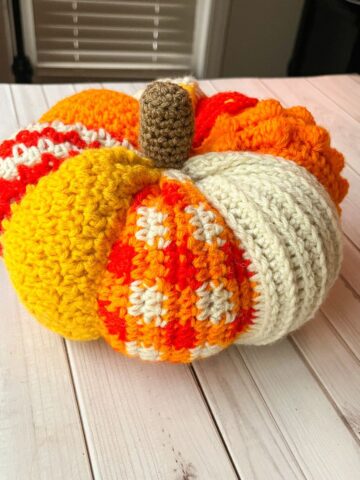
If you used cotton yarn when making the crochet spider web garland pattern and still had some orange leftover, you could make some crochet pumpkin coasters!

🐌Expert Tips
- Alternative Web Techniques: If embroidering the spider web for the crochet Halloween garland pattern feels too challenging, consider using surface crocheting or fabric paint for a similar effect.
- Maintain Even Tension: Make sure your tension is even when making the crochet Halloween garland pattern, especially when stitching edges, to keep the garland pieces flat and smooth.
- Prep Appliqués in Advance: To save time, create several appliqués in advance, so you can quickly assemble the crochet Halloween garland pattern.
- Use Yarn Scraps Creatively: Use leftover yarn scraps to make small Halloween-themed add-ons like mini bats or candy corn, adding more variety to your garland.
- Make Coordinating Decor: If you’re using cotton yarn and have leftovers, consider making coordinating pumpkin coasters or smaller garlands for added decor.
🧵Pattern FAQs
Garlands are flexible and can be draped over doors, banisters, or mantels. Most garlands are 6-10 feet but can also be as small as 3 feet depending on the size wanted and location.
While it is not required to do so, you can stiffen crochet bunting with a slurry of glue and water or use fabric stiffener.
Crochet a border around the triangle as mentioned above. If it still curls, loosen your tension when doing the border.

🧶More Halloween Crochet Patterns
If you tried this Crochet Halloween Garland Pattern (or any other pattern on my website), please let me know how it went in the 📝 comments below. I'd love to hear from you!

Crochet Halloween Garland Pattern
Materials
Abbreviations (US terms)
- Chains - ch
- Single crochet - sc
- Increase (inc) - 2 stitches in one space.
- Magic ring - mr
- Slip stitch - sl st
Notes
When crocheting the triangle, keep your stitches consistent and tight. This will create a stable base for your crochet spider appliqué and embroidery work
When adding your appliqué, use a yarn needle and the same yarn to sew it on securely. Make sure to stitch around the edges and in the center to prevent it from lifting or shifting.
Instructions
Crochet Triangle Pattern:
- For this pattern we will be working in rows. You can use any color as the base of the triangles but I alternated using orange and black. You can find a more detailed tutorial for the triangles with my How to Crochet Triangles Pattern.
- Row 1: Ch 2 and turn
- Row 2: In the second chain from the hook make an increase. (2) Ch 1 and turn. Do not work in the turning chains. Always skip those.
- Row 3: Sc x2 (2). Ch 1 and turn
- Row 4: Inc x2 (4). Ch 1 and turn
- Row 5: Sc x4 (4). Ch 1 and turn
- Row 6: Inc, sc x2, inc (6). Ch 1 and turn
- Row 7: Sc x6 (6). Ch 1 and turn
- Row 8: Inc, sc x4, inc (8). Ch 1 and turn
- Row 9: Sc x8 (8). Ch 1 and turn
- Row 10: Inc, sc x6, inc (10). Ch 1 and turn
- Row 11: Sc x10 (10). Ch 1 and turn
- Row 12: Inc, sc x8, inc (12). Ch 1 and turn
- Row 13: Sc x12 (12). Ch 1 and turn
- Row 14: Inc, sc x10, inc (14). Ch 1 and turn
- Row 15: Sc x14 (14). Ch 1 and turn
- Row 16: Inc, sc x12, inc (16). Ch 1 and turn
- Row 17: Sc x16 (16). Ch 1 and turn
- Row 18: Inc, sc x14, inc (18). Ch 1 and turn
- Row 19: Sc x18 (18). Ch 1 and turn
- Row 20: Inc, sc x16, inc (20). Ch 1 and turn
- Row 21: Sc x20 (20). Ch 1 and turn
- Now you can edge the triangle if you would like to create a cleaner finish. To do that make single crochets all around the triangle, for the edges that don’t have single crochet holes already, just make 1 single crochet for each row you made in the triangle.
- For the corners do 3 single crochets to help round the corner so you can work the otherside without the edges curling up on you. Once done, fasten off and weave in the ends.
Crochet Spider Applique:
- How to crochet a spider:Round 1: Using black yarn, make a mr and then sc x6. Then pull the mr tight to close it. (6)
- Round 2: Inc in every sc. (12).
- Round 3: Inc, sc, then repeat until end of round. (18)
- Round 4: This is where we will be making the spider legs.
- First make a sl st then ch x4, in the second ch from the hook make a sl st. Make a sl st for the rest of the ch length. Then sl st to the same stitch you made the sl st and chains from. Repeat the above process 3 more times for the next 3 stitches. You should now have 4 legs.
- Sc x5. Then repeat what you did above for the other side's 4 spider legs. Sc x5 and then fasten off the yarn but leave a tail for sewing.
- I made a spider for each of my orange triangles.
Embroidery:
- Spider:
- Sew the spider to the orange triangles near the top (starting the 3rd row down) then after the spider is sewn on, embroider the white eyes at the bottom of the spider, and a little line coming out the spiders butt near the top of the triangle so it looks like it is dangling down. Weave in any ends.
- Spider web:
- After securing the white yarn on the back of the black triangle, create four 4-inch radiating lines from the top right of the triangle.
- To embroider the cross-section lines, split the yarn of the radiating lines as you pull the needle through. Be careful to insert your needle accurately to avoid wobbliness in the previous lines you embroidered. After completing the first row across the three gaps, move down an inch and repeat for two more rows.
- I put a spiderweb on all of my black crochet triangles.
- Now that the triangles have been made and adorned, string them up alternating the designs to create a pattern and now you have a lovely crochet Halloween garland for the season!I hope you enjoyed my crochet Halloween garland pattern!
- If you used cotton yarn when making the crochet spider web garland pattern and still had some orange leftover, you could make some crochet pumpkin coasters!


Leave a Reply