

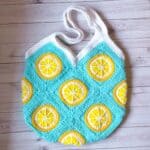
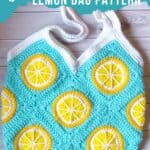
Bring a bit of summer to your next crochet project with my Crochet Lemon Bag Pattern! A timeless summer pattern for any occasion.
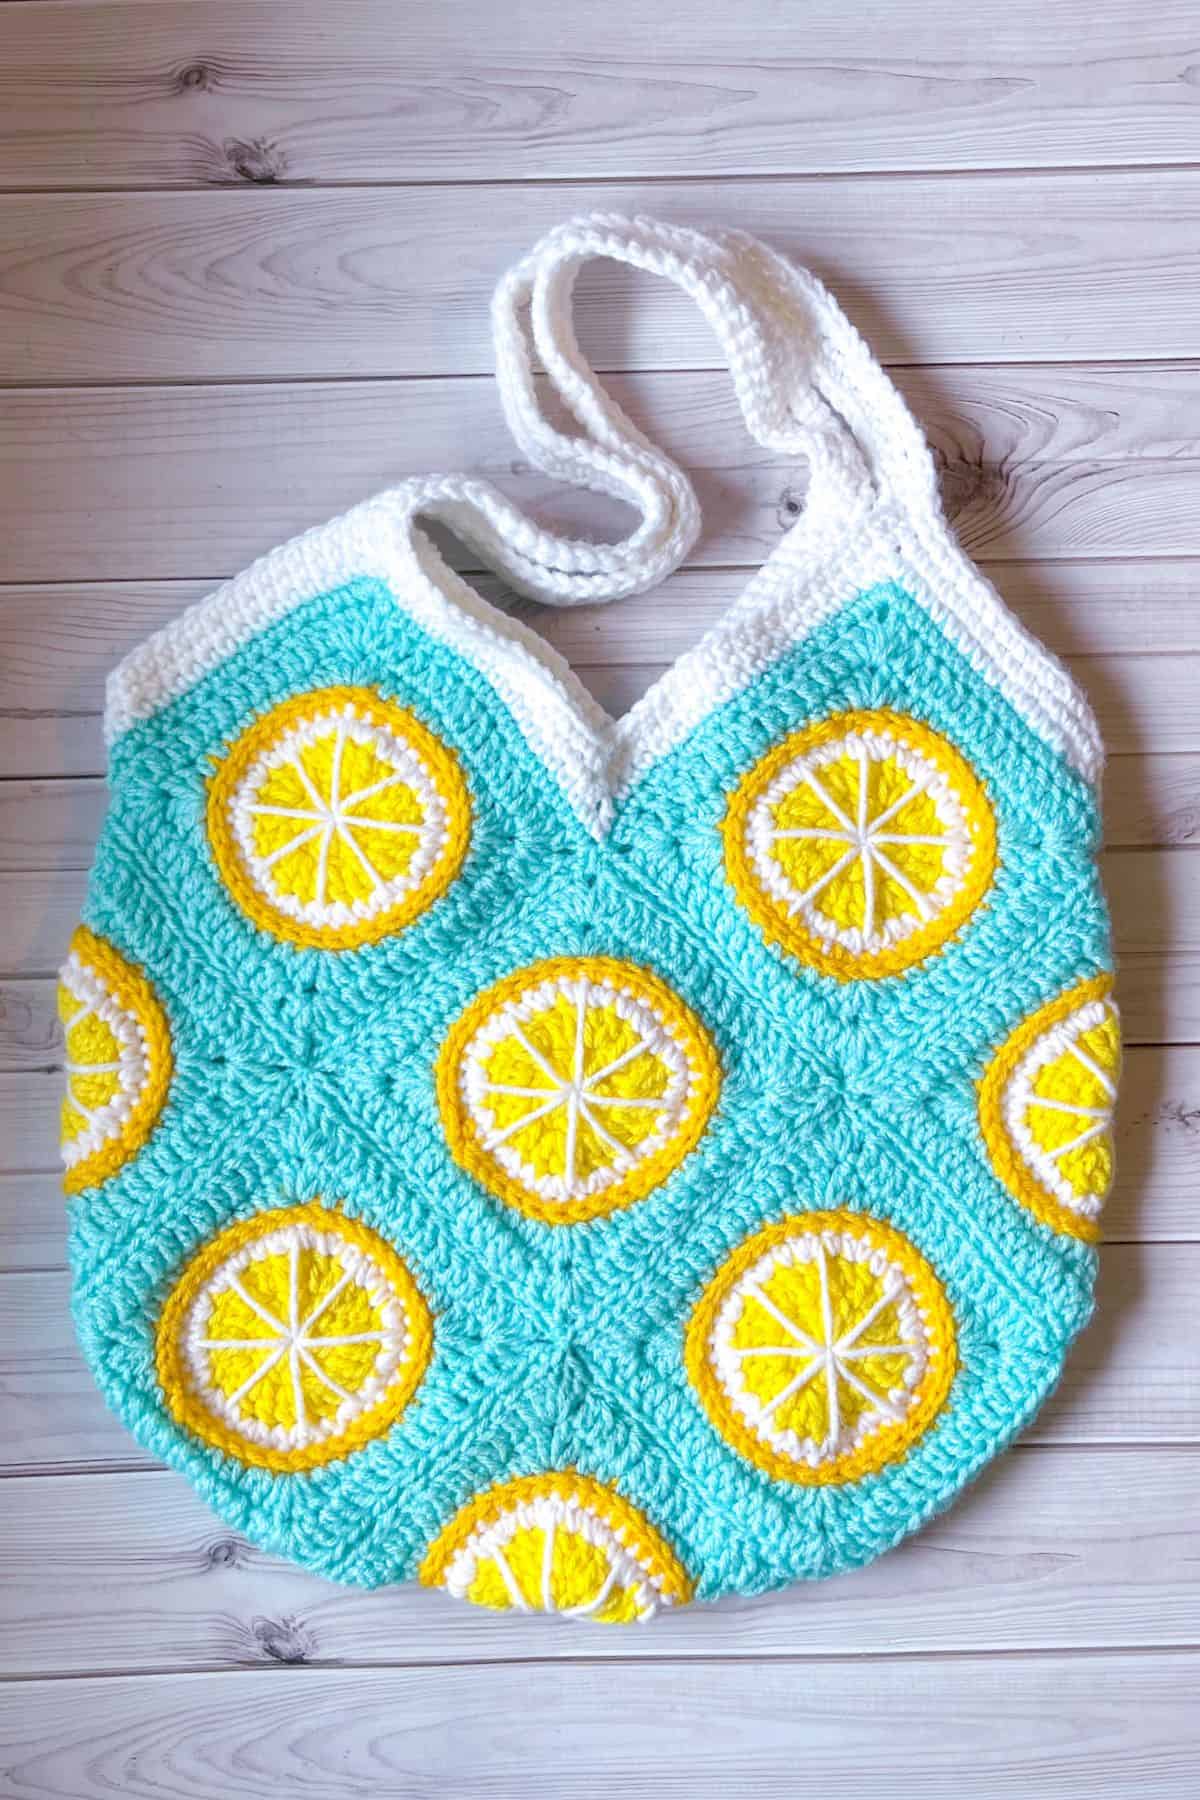
Whether you use this vibrant lemon crochet bag on vacation, at the beach, or as a market bag for grocery shopping, you’re sure to make a statement. Its playful, citrus-inspired look is both eye-catching and practical, making it a great accessory for all your summer outings.
I personally love everything citrus; it always brings to mind the carefree days of summer. The fresh, bright colors and tangy flavors feel like a celebration of the season. Whether it’s lemon meringue pie, a cool glass of lemonade, or even the scent of a ripe lemon, these little bursts of joy are a staple of my summer experiences.
To celebrate this love for citrus, I've also designed a crochet lemonade plushie pattern and a crochet lemon coaster pattern. It pairs beautifully with the lemon bag and adds even more summery fun to your projects.
Ready to bring this zest to your next project? Let’s get started on the crochet lemon bag pattern!
Jump to:
✏️ Things To Note:
- Citrus Variations. This crochet lemon bag pattern is adaptable! While I made crochet lemon granny squares, you can use it to create any type of citrus slice, such as orange, lime, or grapefruit. Mix and match for a colorful, fruity theme.
- Surface Crochet Alternative. If you’re not familiar with surface crochet, you can skip this step in the crochet lemon bag pattern or opt to crochet through the back loops of the single crochet row. Keep in mind that this may result in a different finish for the crochet lemon bag pattern, but it’s a simple way to modify the design.
- Adjusting Bag Size. The finished crochet lemon bag pattern measures approximately 14 inches in diameter. For a smaller bag, simply omit the second round when squaring off the lemon granny square.
💭Abbreviations to Remember (US terms)
- Magic ring - mr
- Chain - ch
- Single crochet - sc
- Double crochet - dc
- Half double crochet - hdc
- Slip stitch - sl st
- Increase - inc - written as dc inc or sc inc
- Decrease - dec
- Surface crochet - no abbreviation but you will need to know how to do this stitch.
🧋Variations
- Citrus Customization. Switch up the colors to create an orange or lime slice instead of a lemon! Make the crochet lemon bag pattern into a crochet lime bag pattern! You can also experiment with grapefruit or any other citrus fruit for a fun and vibrant mix.
- Alternative Crocheting Technique. If you prefer a simpler approach, you can omit the surface crochet. Instead, try crocheting in the back loop for one round when beginning to square off the circle with the turqua yarn. This creates a subtle, different texture without adding extra steps.
🍵Instructions for Crochet Lemon Bag Pattern
The crochet lemon bag pattern uses 13 granny squares.
The crochet lemon slice pattern is made in the round. Make 13 crochet circle square granny squares as instructed below.
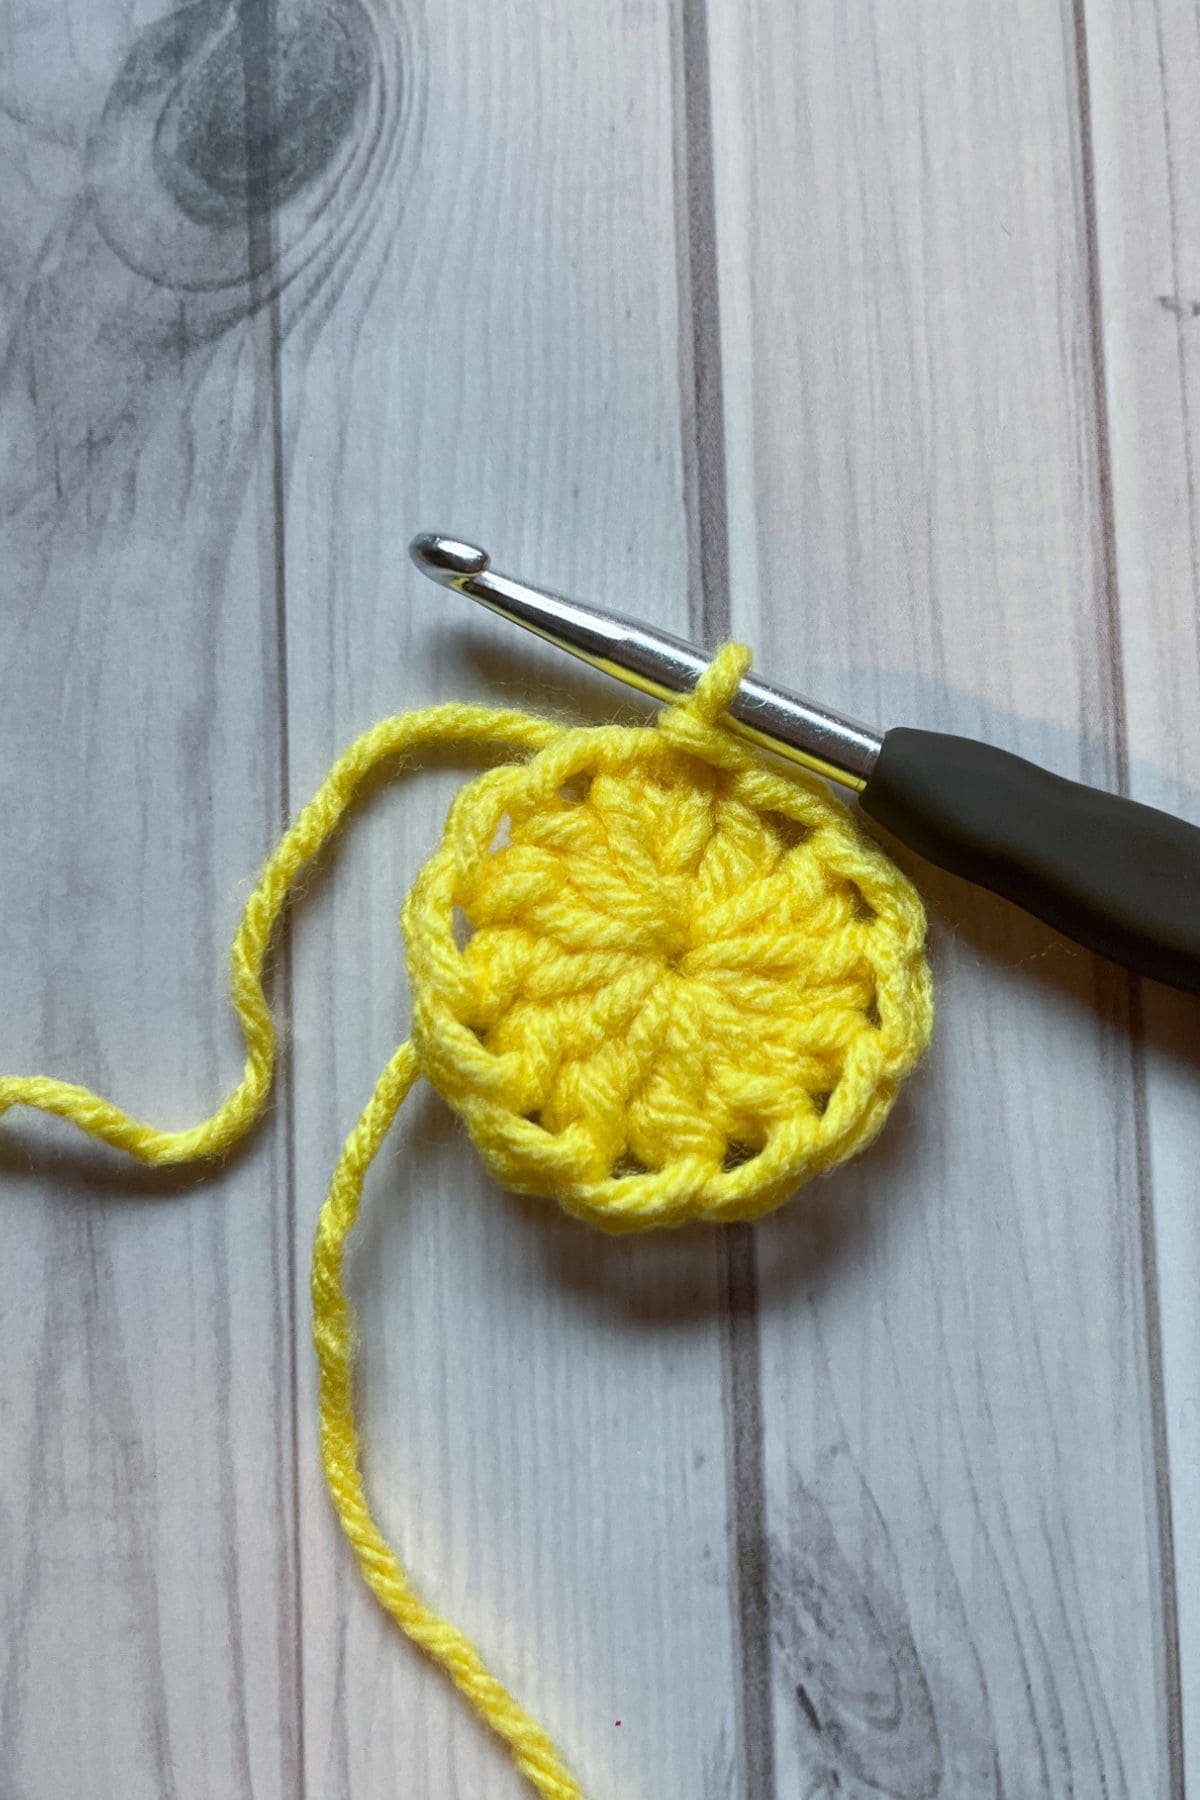
Round 1: With the yellow yarn, make a mr, next ch x2 (does not count as a dc) and then dc x12 into the mr, sl st to first dc (12).
If you find it difficult making a magic ring you can chain 4, slip stitch it together, and then in the newly formed circle, ch x2 and dc x12 in the hole, then sl st to first dc. (12)
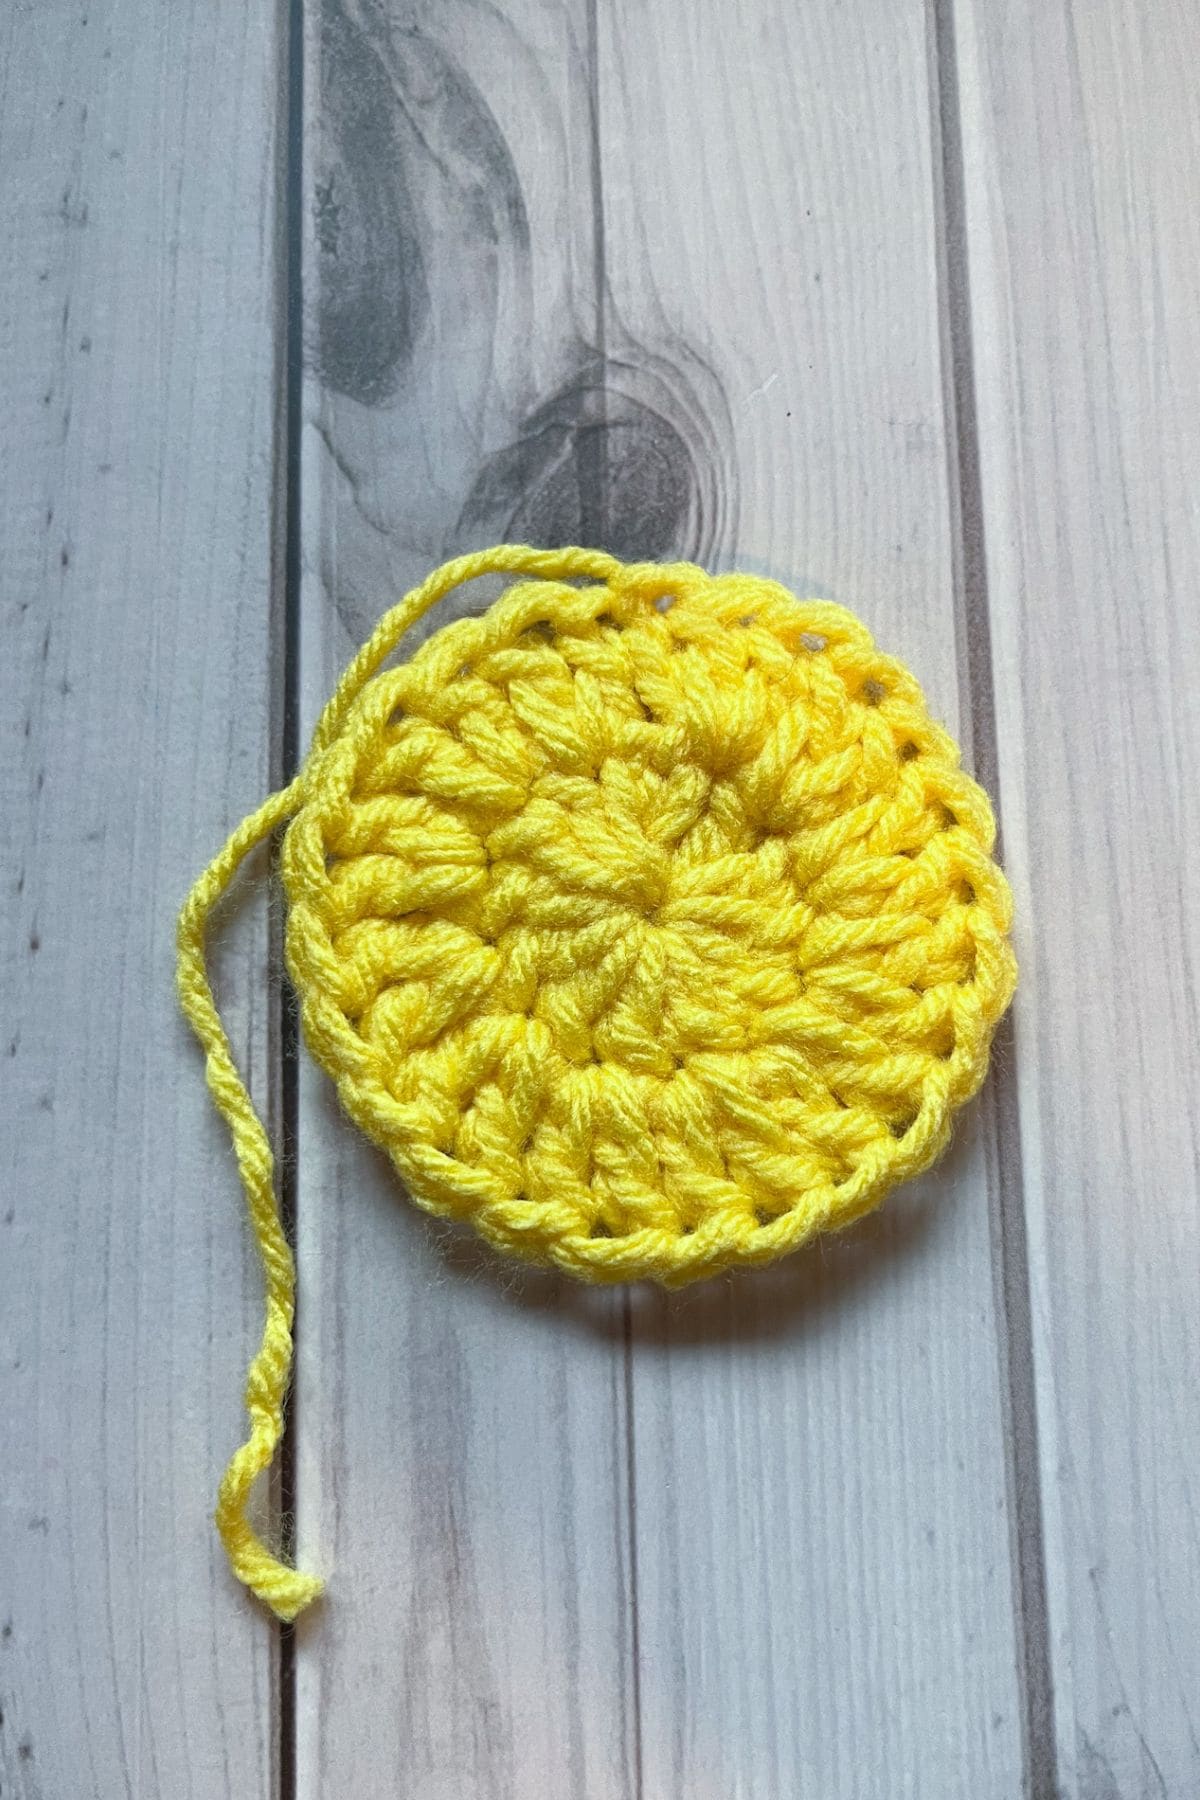
Round 2: Ch x2, dc inc in every dc, sl st to first dc. (24) Then change the color to white.
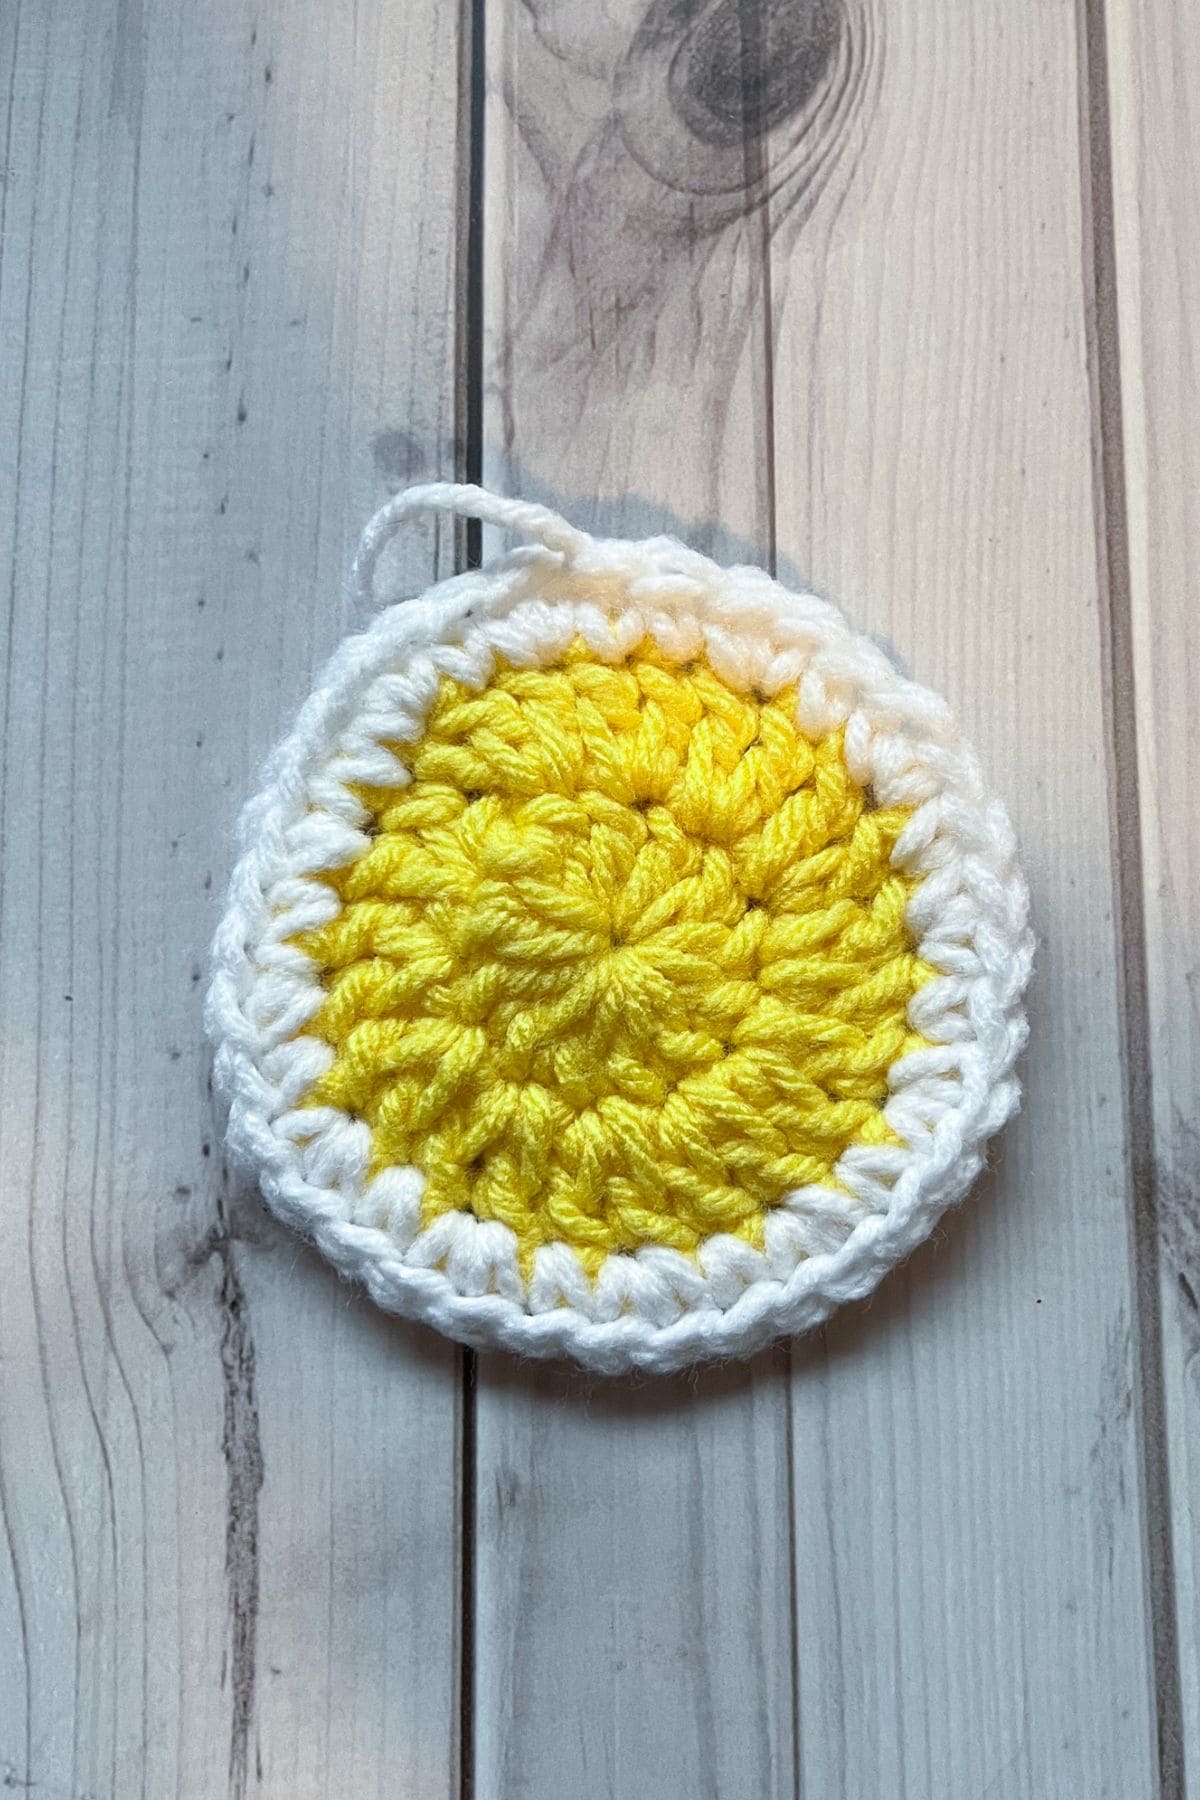
Round 3: With the white yarn, ch x1, then (sc inc, sc) and repeat what is in parenthesis for the rest of the round then sl st to first sc (36). Then change the color to the darker yellow yarn.

Round 4: With the darker yellow, ch x1 and then sc around the entire round with no increases, then sl st to the first sc. (36). Because the last sc round increased by 12 instead of 6 which is more normal for sc stitches in the round, we don't have to increase this round, which also makes it easier to surface crochet later on.
Switch the color to teal yarn.
Crocheting a Circle Into a Square:

Round 5: The lemon slice rounds are done and now we will start turning the circle into a square.
Ch x2, this counts as the first hdc.
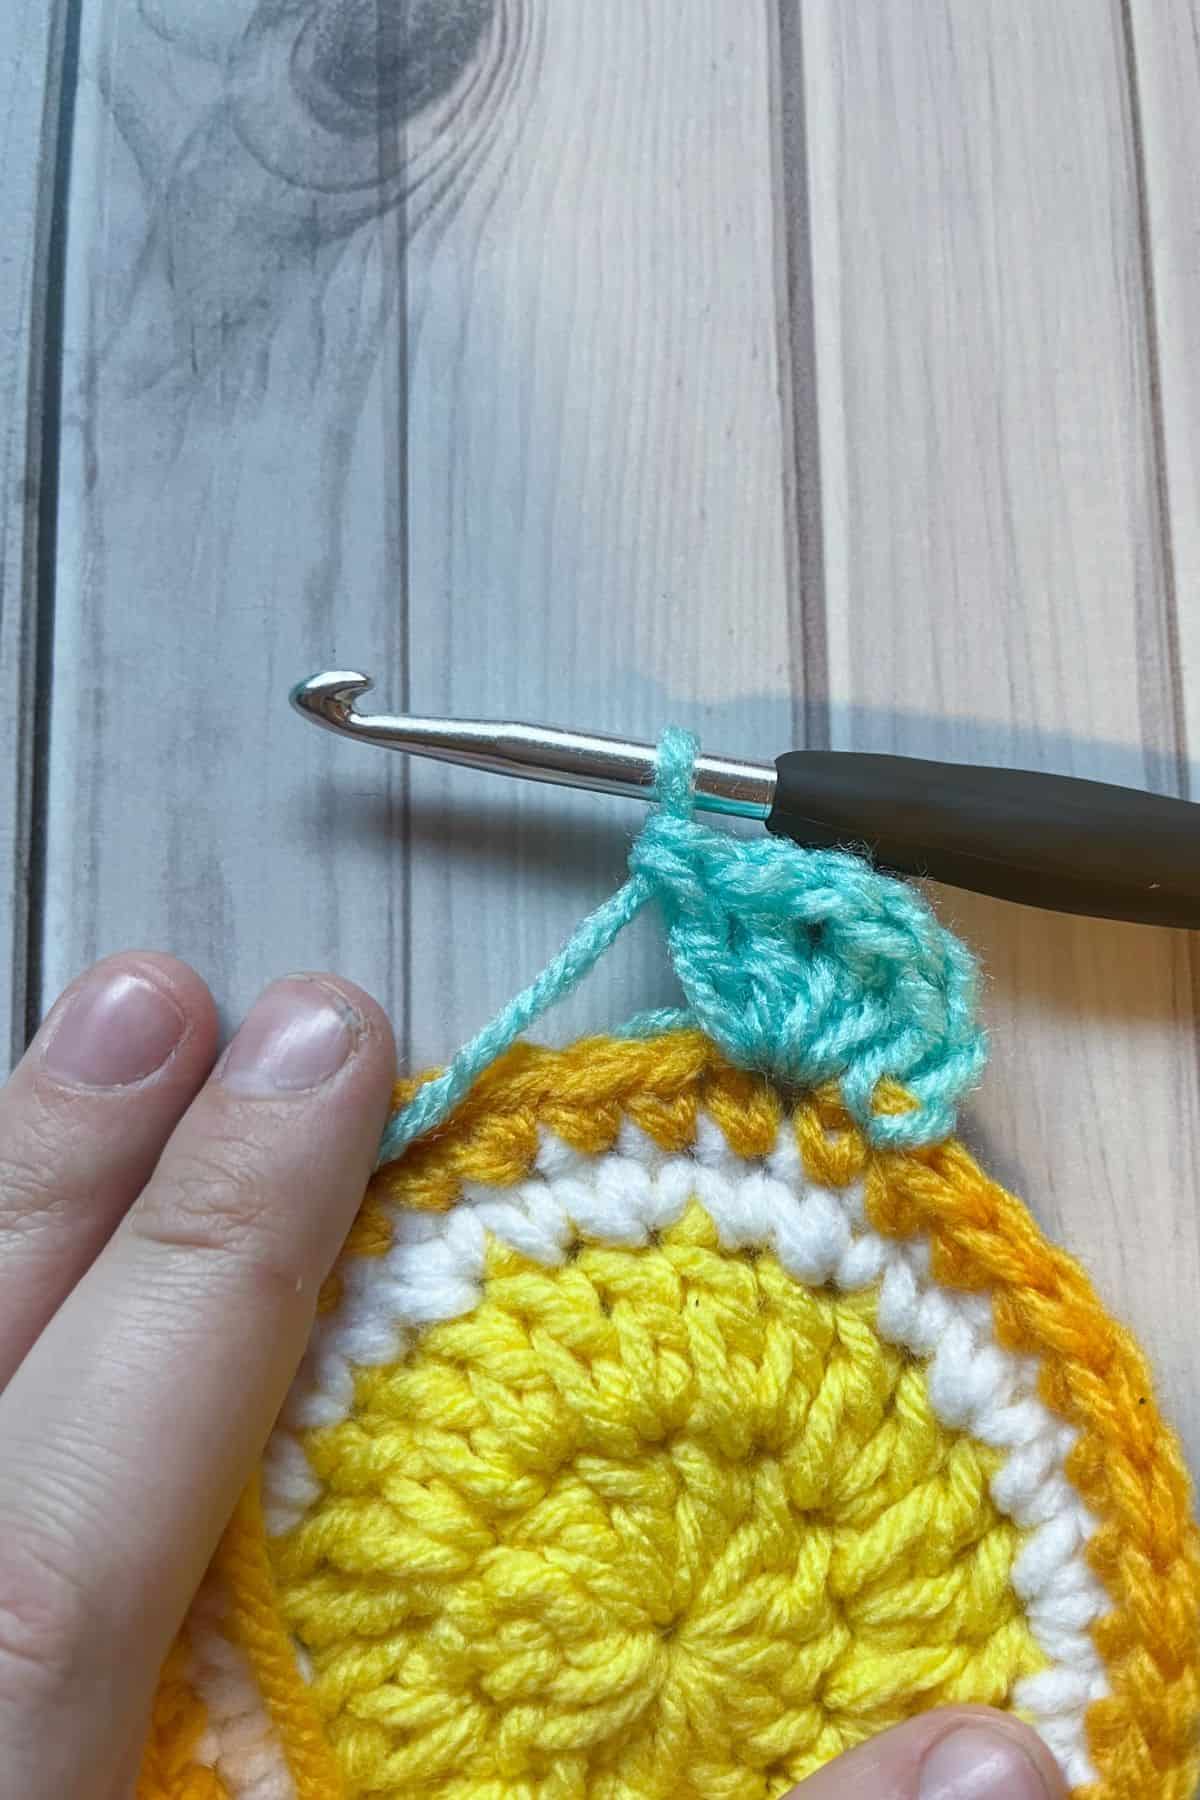
Dc inc + ch + dc inc in the following stitch. This is the first corner.
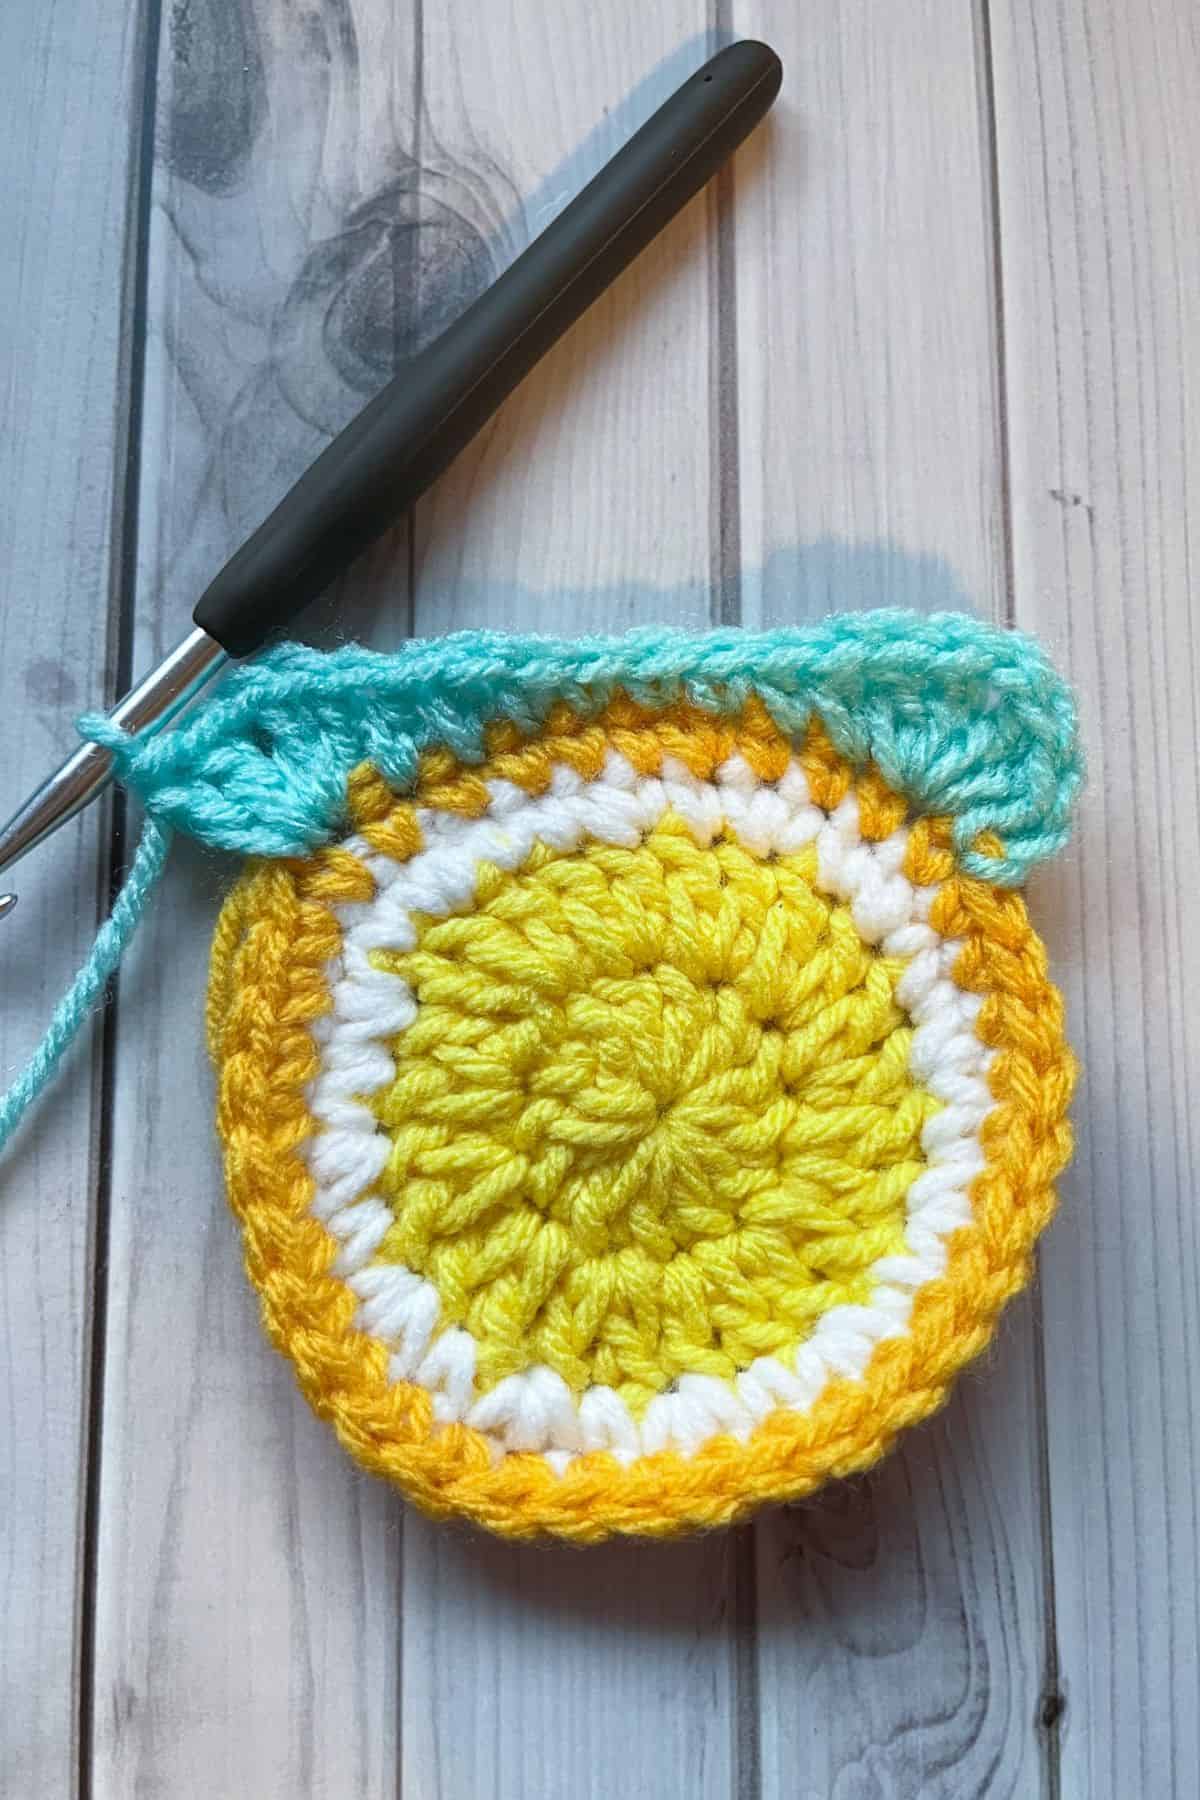
Make a hdc in the next 2 stitches, then a sc in the next 4 stitches, follow that with hdc stitches in the next 2 stitches and then finally make the corner stitch again (dc inc, ch x1, dc inc). The only stitch space with multiple stitches is the corner.
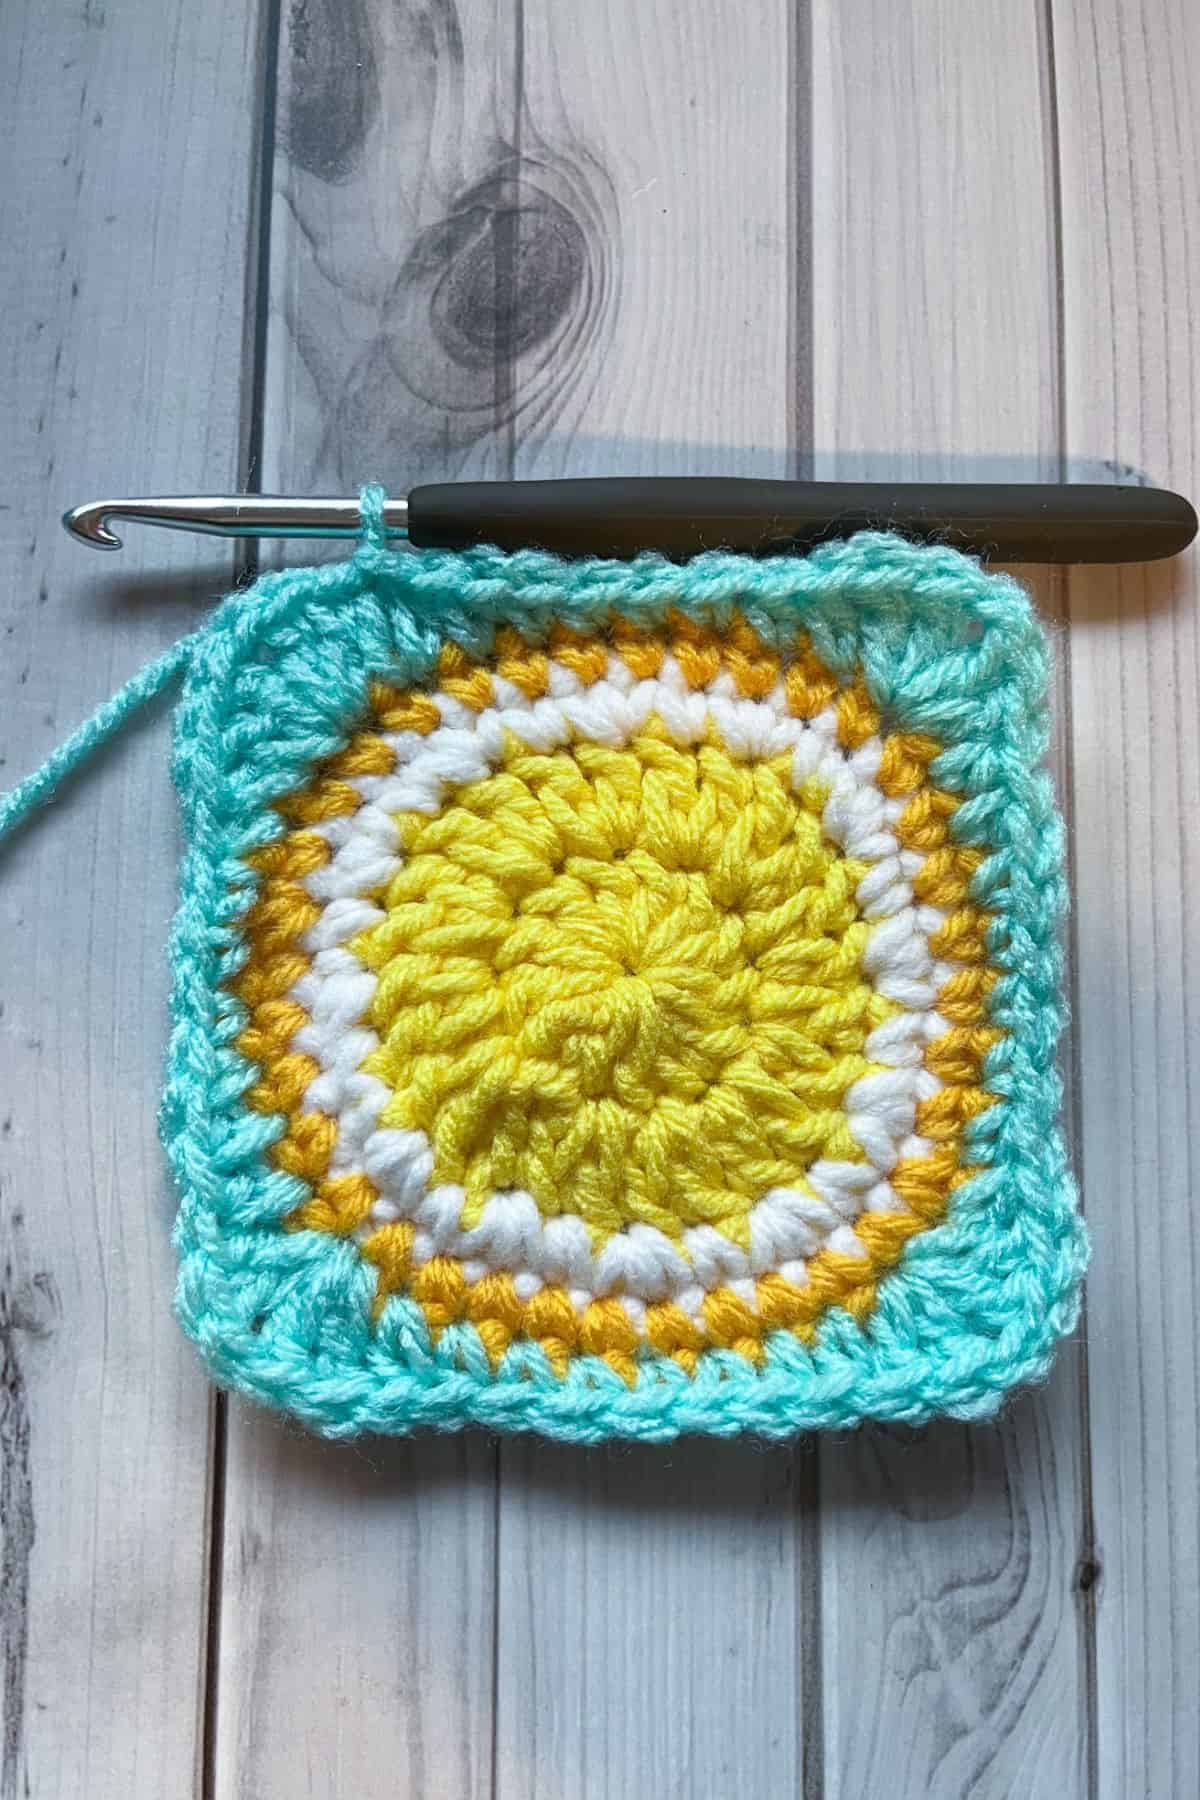
Now repeat the above 3 more times. After the last hdc in the round, sl st to the beginning chains that acts like a hdc. (48 stitches with 4 chain spaces)

Round 6: Ch x3, counts as a dc, then dc in the next stitch. When you get to the chain space in the corner make a dc inc + ch x2 + dc inc. Then dc the side of the square (12 per side without the corners).
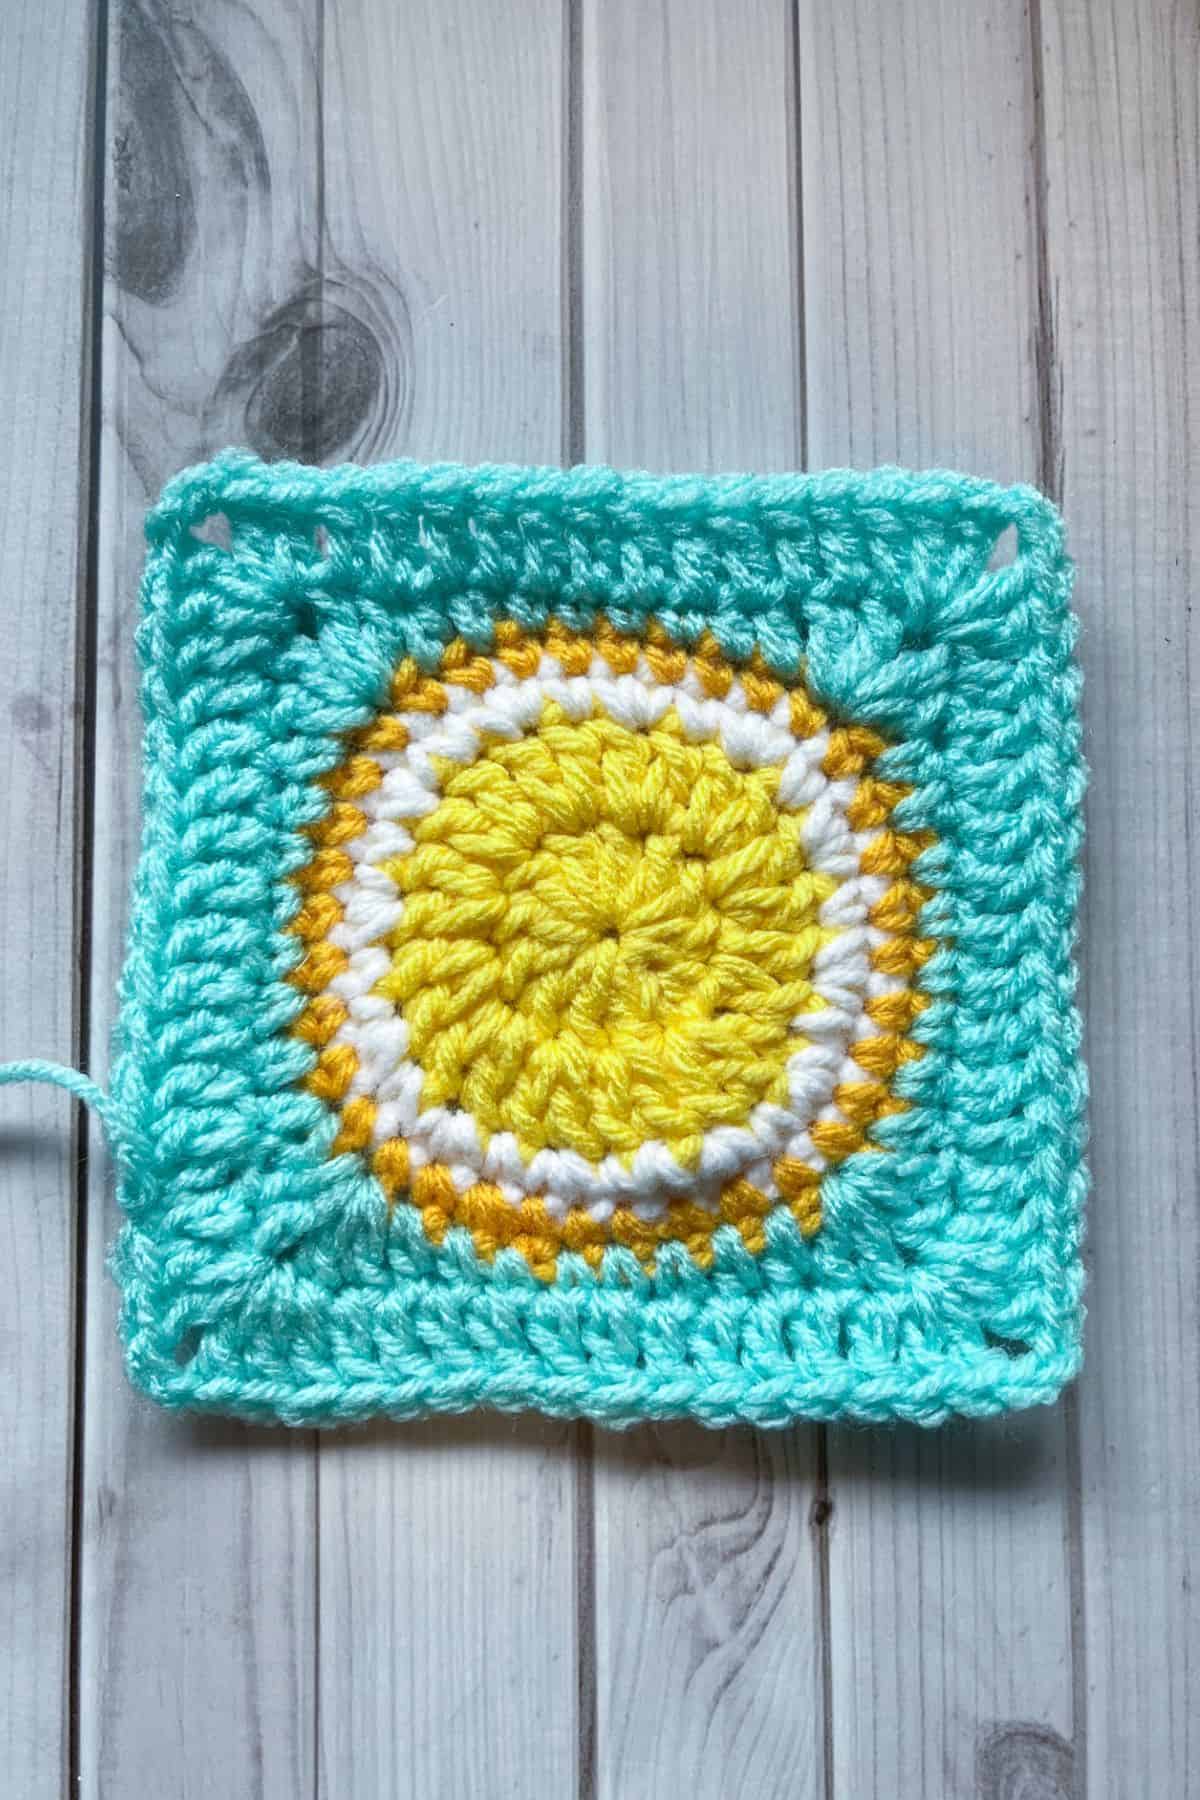
Repeat 3 more times for the rest of the round.
Once you make the last dc in the round, sl st to the beginning ch. Then fasten off the yarn.
Surface Crocheting:
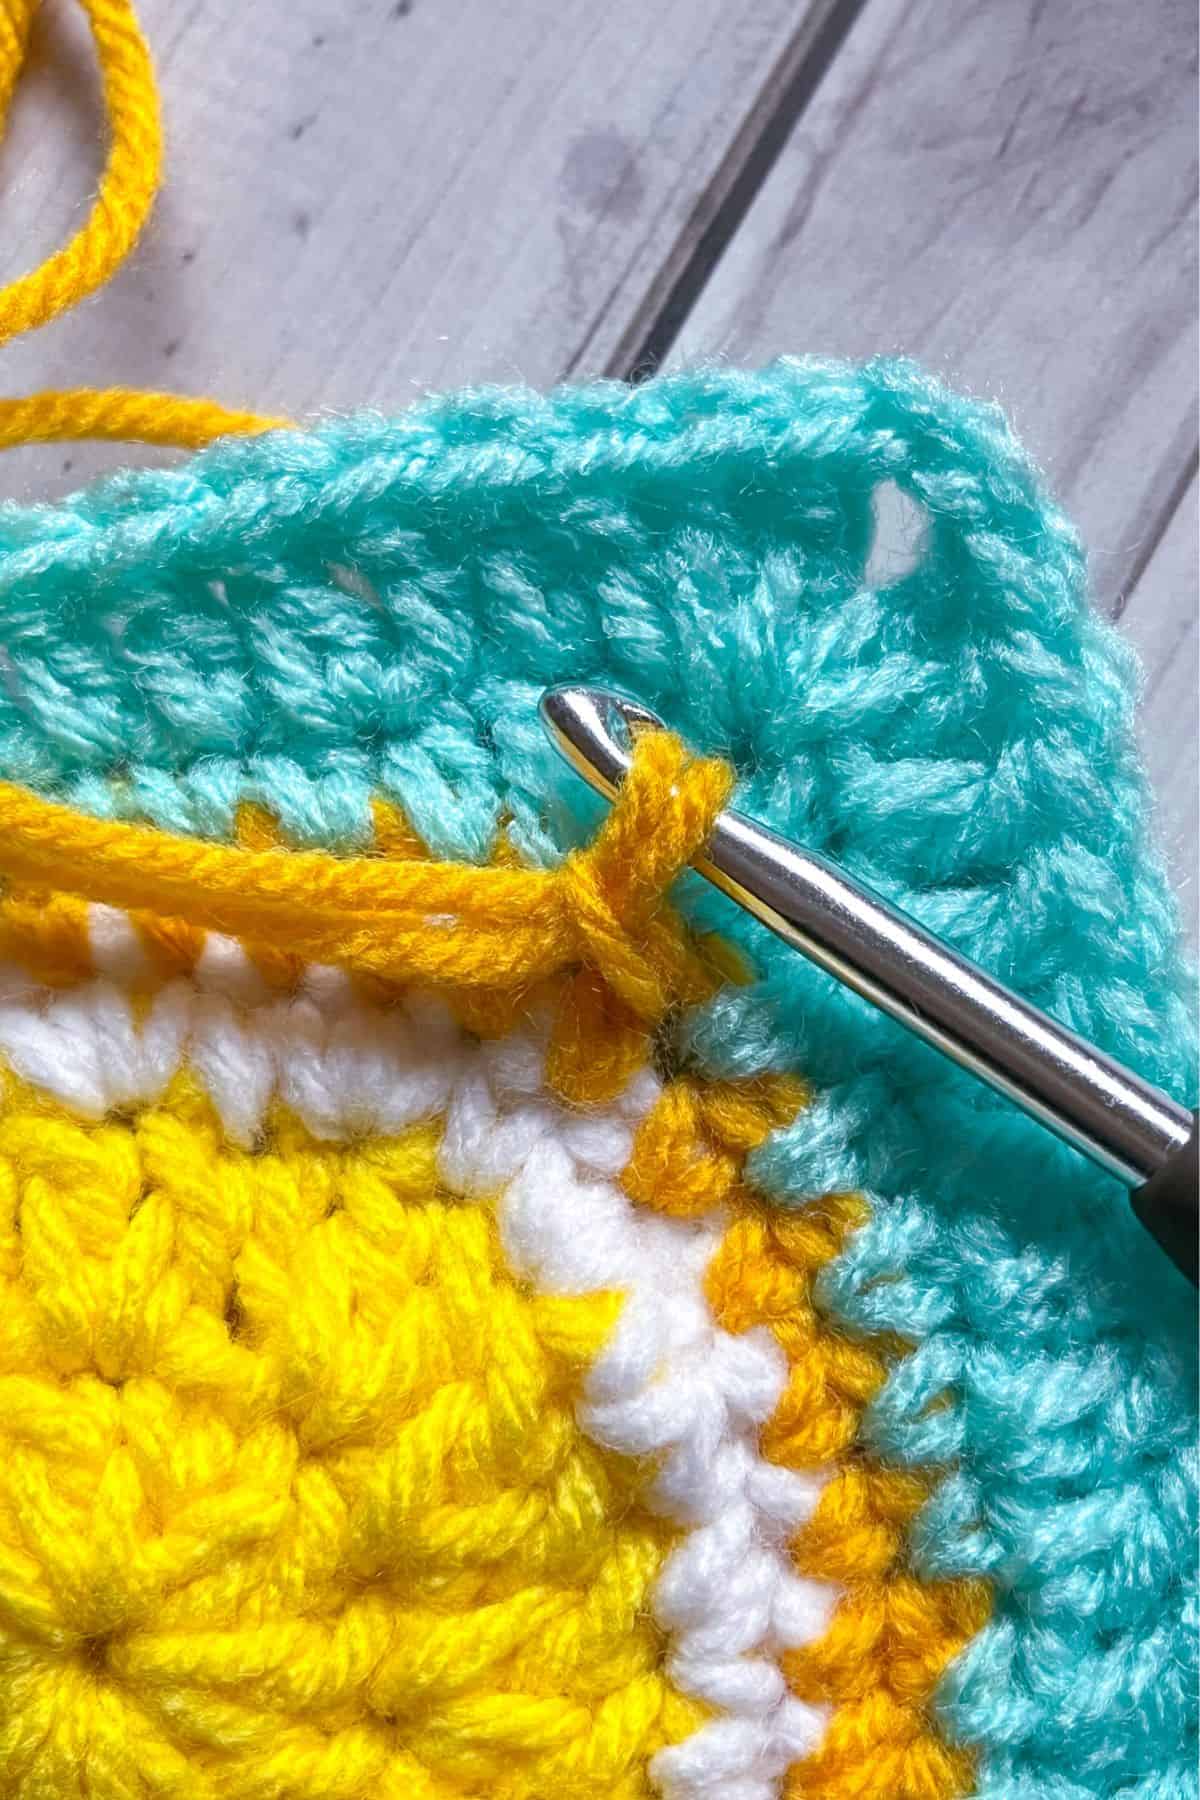
Insert your crochet hook into the lemon peel round by going around one of the single crochet posts. Then loop the yarn over and make a sl st. Go under the next sc post and make a sl st. This is slip stitching the surface or surface crocheting. Make the slip stitches loose otherwise your lemon granny square will dip. You can use a slightly larger hook (by 1-2 sizes) if it helps you make looser sl st for the surface.
Finish surface crocheting the rest of the lemon rind by repeating the above process. Sl st to the first stitch then fasten off. Weave in any ends.
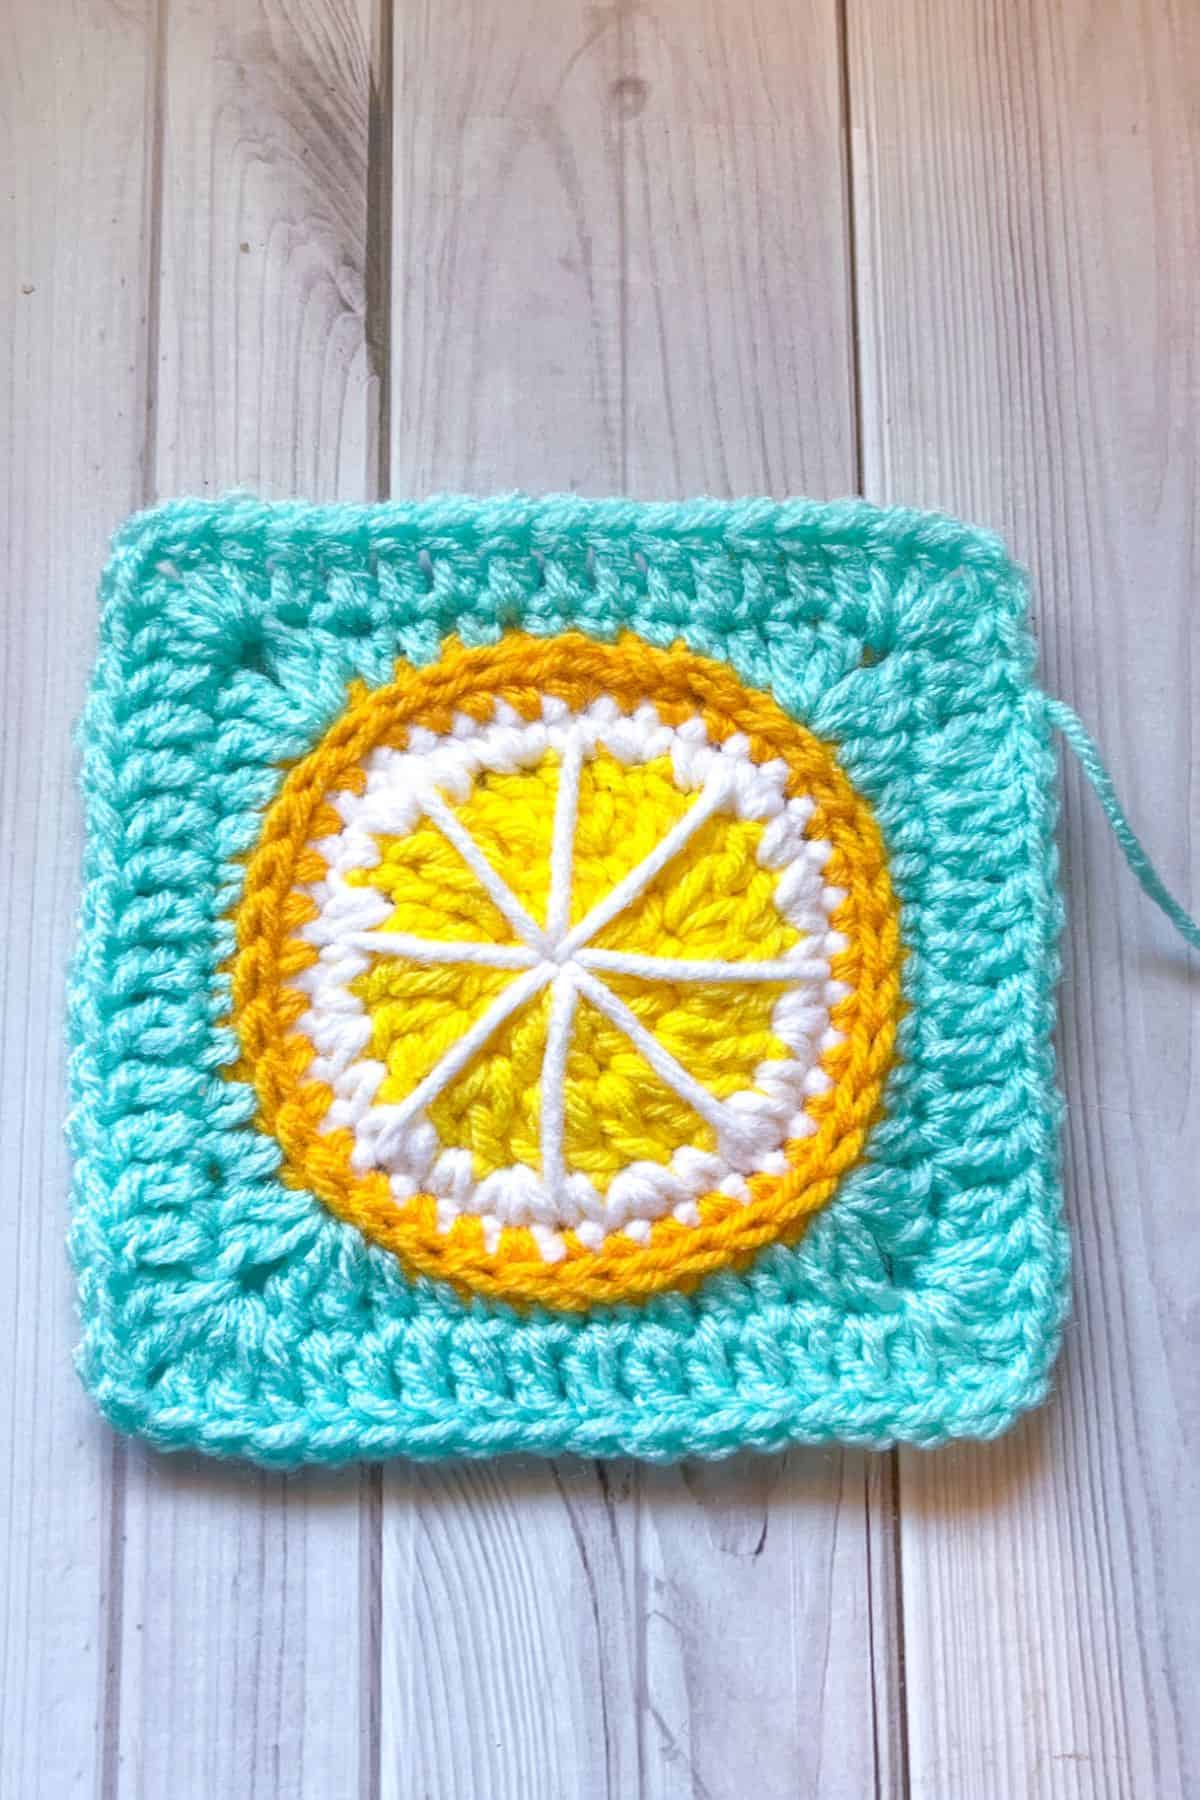
Embroidery: Take a long piece of white yarn and thread the yarn onto your tapestry needle, secure the yarn to the back of your lemon square and make lemon segments into your crochet lemon slice. I made 8 segments by going from the outer edge to the center and repeating the process 7 more times.
Weave in any loose ends on all 13 crochet lemon slice granny squares.
Building the Crochet Lemon Bag:

Once you have the 13 lemon granny squares made you want to lay them in a flat pattern as indicated by the photo. Then there are a few different methods you can use to attach the squares together.

- The first way to attach granny squares together is with the mattress stitch. This is a hand sewing technique that lends itself well to creating near invisible joins. This is what I use for my bag. You want to sew the granny squares together by sandwiching 2 squares together with the “correct” side facing inwards together. Then you want to take the turqua colored yarn and the tapestry needle and sew the pieces together by grabbing the outermost loops of the sandwiched granny squares stitches. You do not want to grab the inner stitch loops.
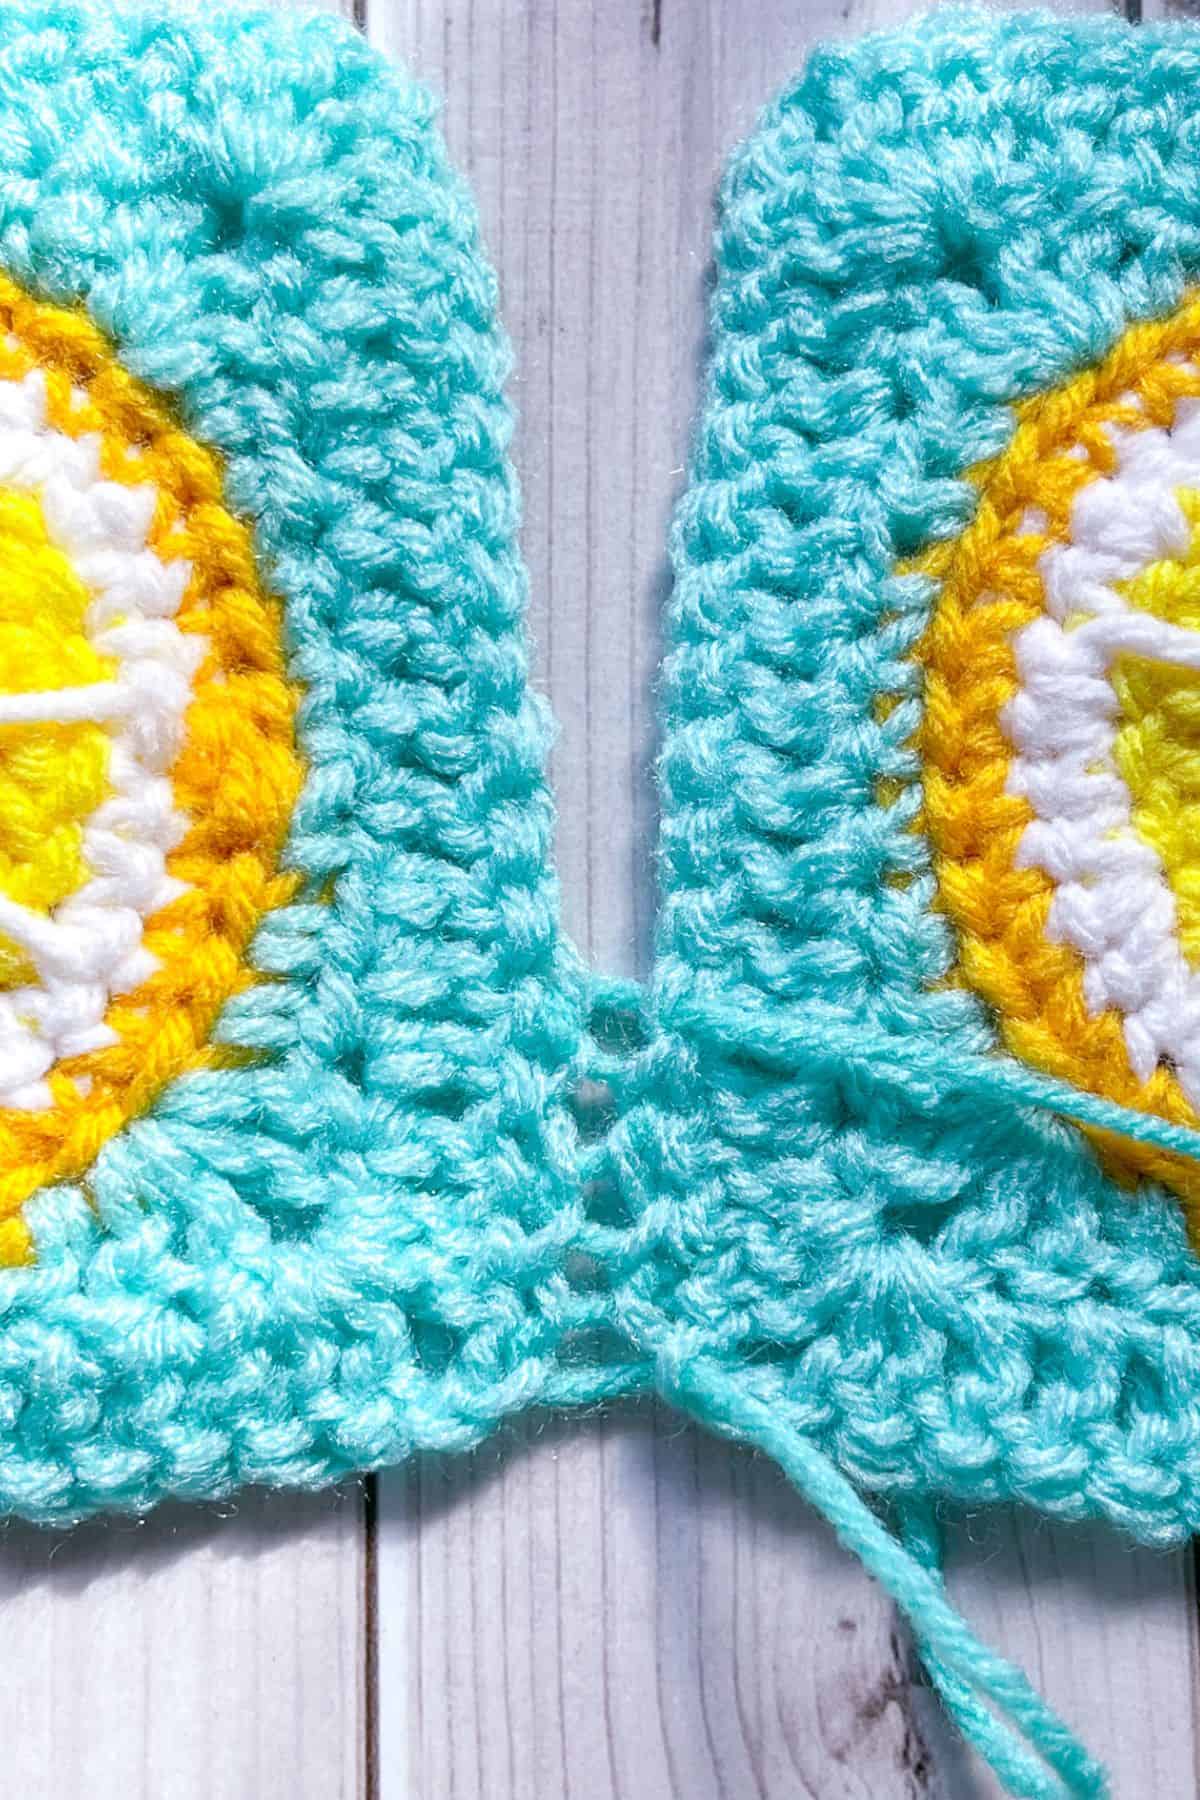
You are going in one stitch loop, then go into the next stitch loop, then go to the other granny square go through a stitch loop, then go through the stitch loop next to it and then cross back over to the next granny square.

Pull tight and this is what it should look like from the front. You can see the inner loops you didn't go through creates 2 lines.
2. If you don't feel like hand sewing, you can crochet the pieces together. Sandwich the squares together with the “correct” side facing outwards and by using turqua or another colored yarn single crochet or slip stitch the squares together by grabbing only the innermost stitch loops. Since I don't do this way of joining, I do not have a tutorial for it, but if you need additional help there are a lot of tutorials online.
Once you figured out which granny square joining method you are going to use, sew/crochet the granny squares together. There are many ways to go about this, but I sewed mine together in strips 2,3,3,4 with a spare one left over, then sewed the strips themselves together based on the diagram photo above.

Wrong side of the bag showing to finish the sewing.
Once the granny squares have all been joined together like in the diagram, fold it in half by bringing the bottom half to the top. Fold over the granny squares jutting from the sides and sew/crochet those pieces to the main body of the bag.
Once all the sewing of the bag has been completed you should have the 2 peaks and 3 valleys (an M essentially) as the top edge of the bag.
Now to move onto the handle.
Crochet Bag Top/Handle
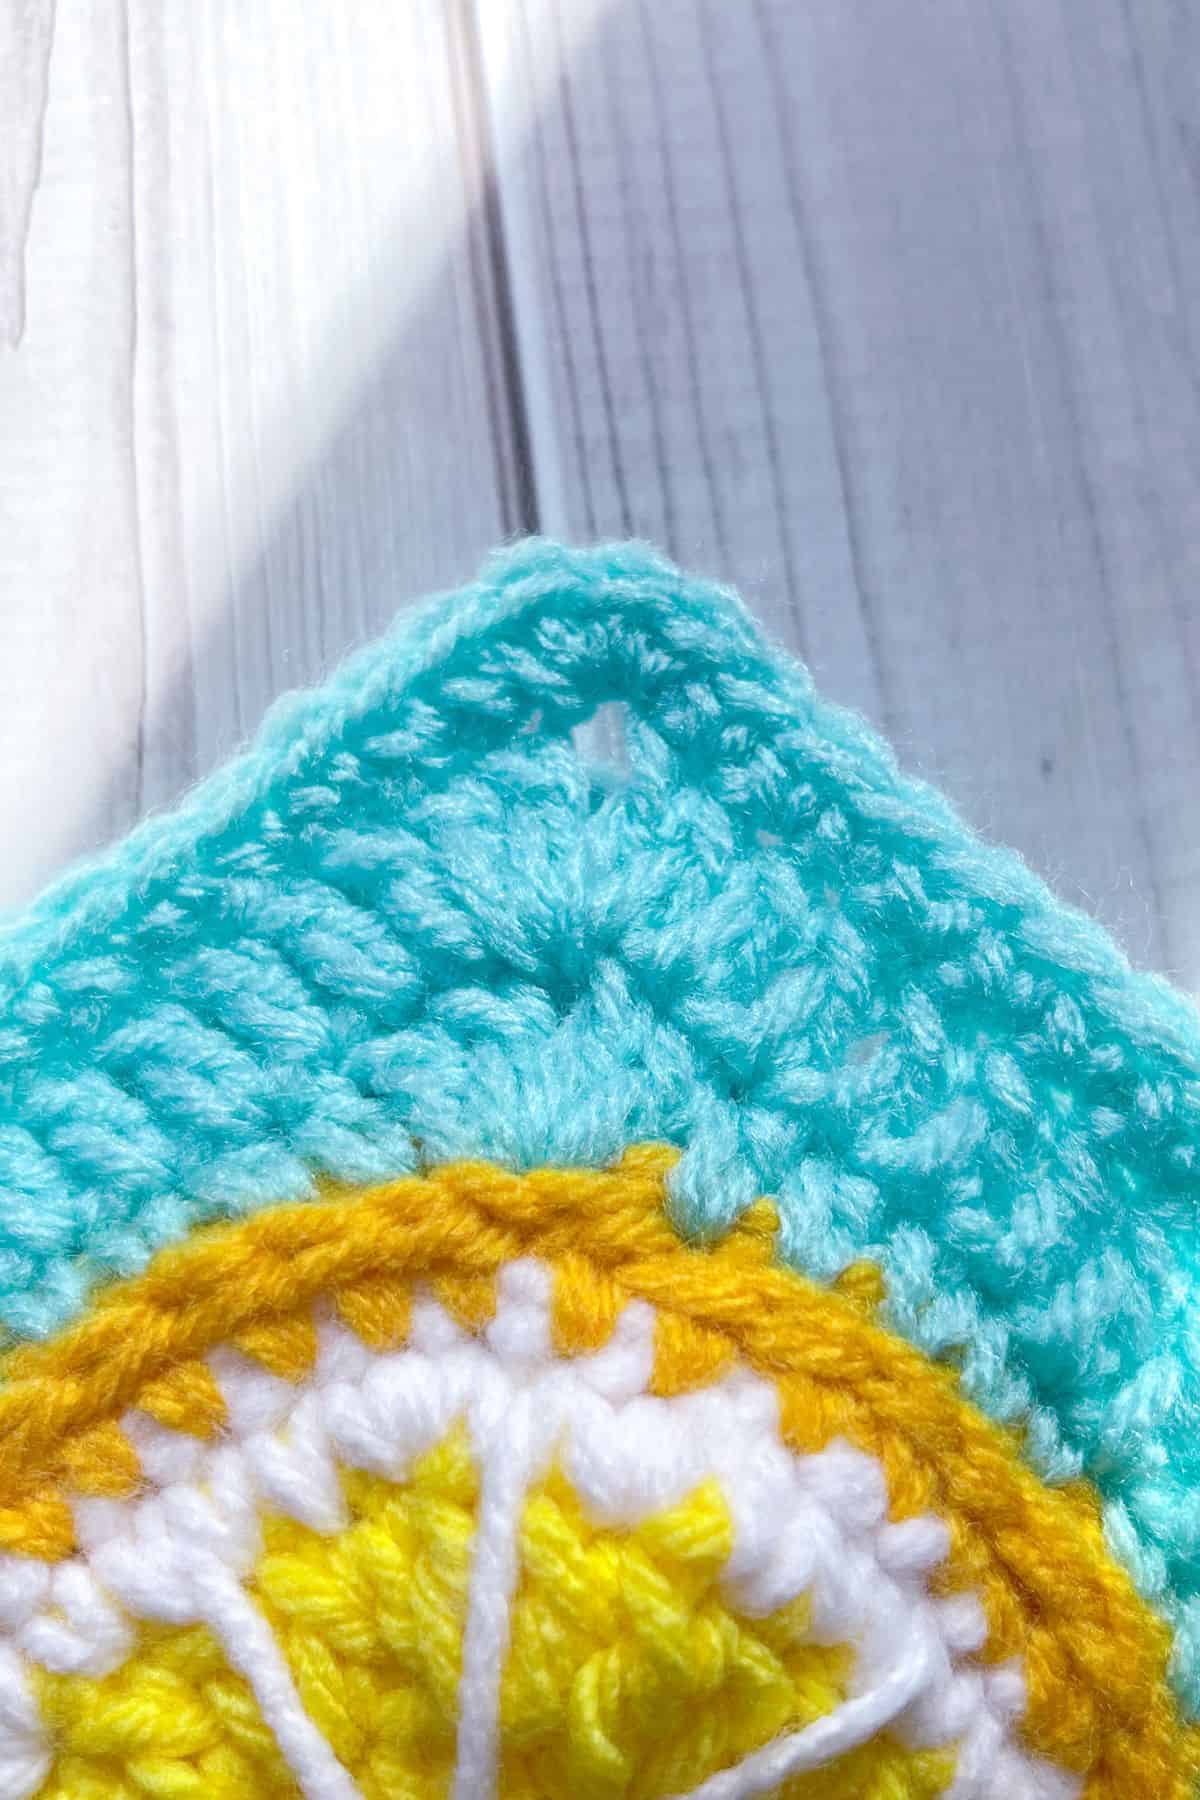
Round 1: The first thing to do is rejoin the blue yarn to the top edge of the bag, preferably the side in one of the valleys.

Then you will crochet the top edge of the bag with the blue yarn. 1 single crochet in each stitch, but when you come to the top of the squares, you want to make 3 single crochets in the very top stitches. Then for the part where the squares meet you want to crochet the 3 most bottom stitches together in a decrease, then continue up the side as before.

After 1 round of blue yarn, switch to white yarn.
Round 2: Repeat the above process 1 more time but in white.

Round 3: For the 3rd round, follow the above process again, but when you get to the peaks or the top of the M, ch x60 and then reattach the chain to the other top on the same side of the bag. Make sure the chain is not twisted.
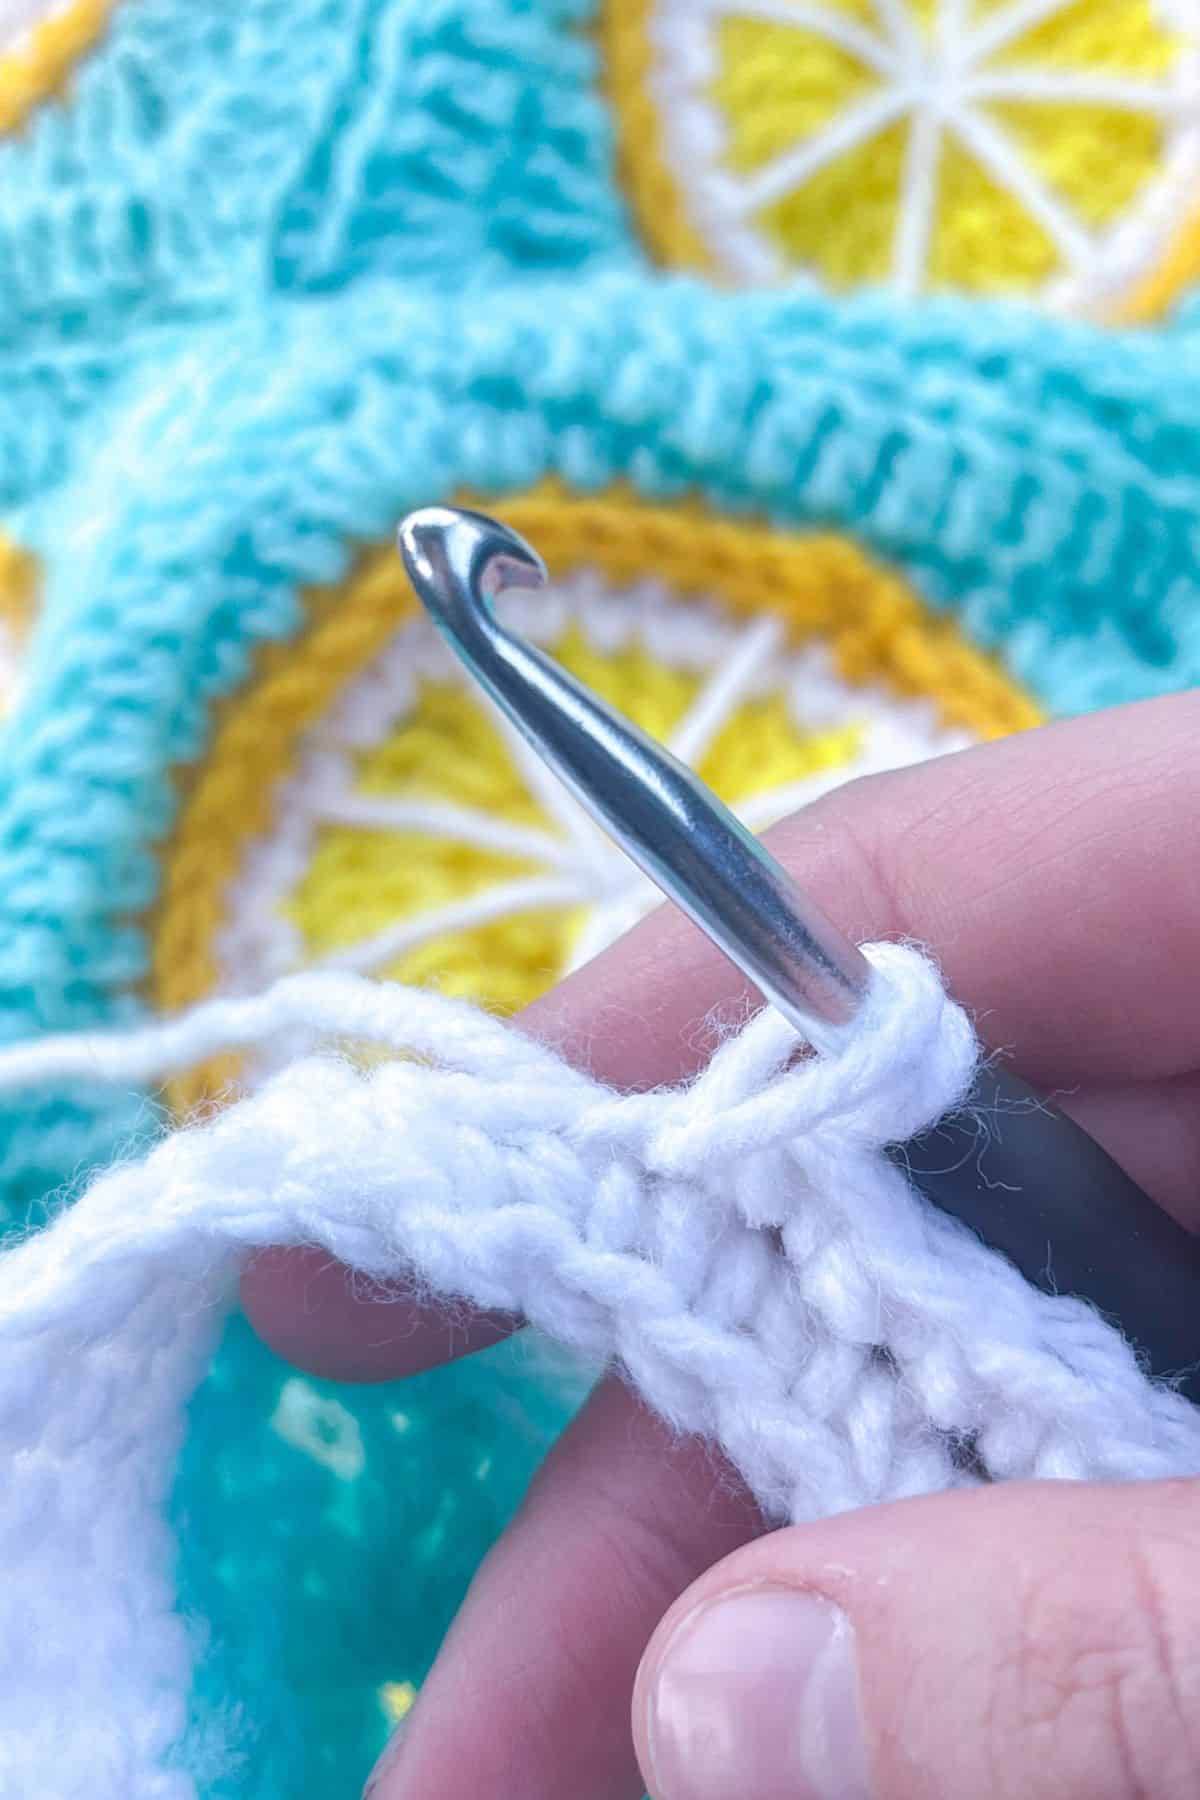
Round 4: Crochet around the top of the bag as before, when you get to the chains make a sc in each ch.
When the last round is completed fasten off and weave in the ends.
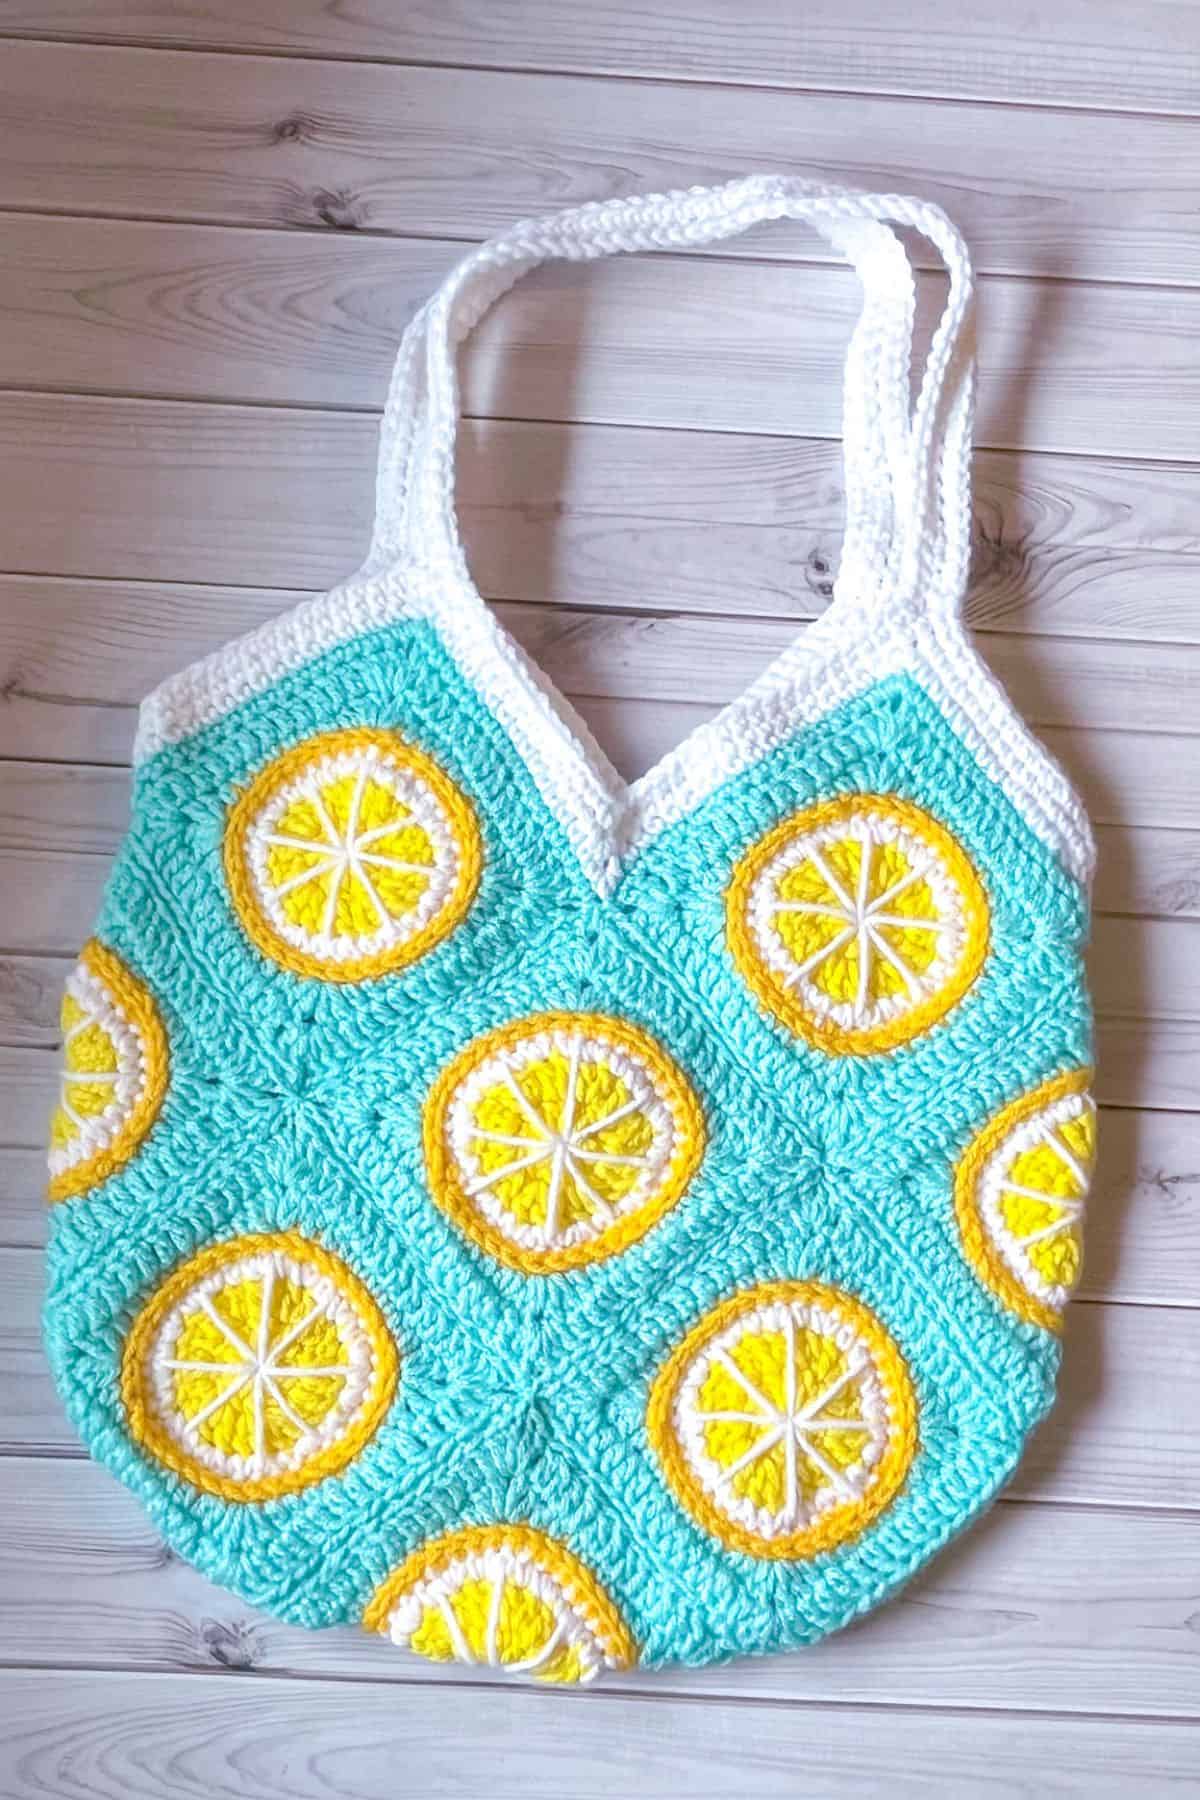
Inner handles round: Rejoin the white on the inside of the handles and crochet around the inner circle. Repeat this on both sides of the bag.
Weave in any ends.
And now you have finished my crochet lemon bag pattern. A perfect crochet lemon purse for summertime!
If you used cotton yarn for the crochet lemon bag pattern and have leftover yarn, you can make a few crochet lemon coasters and crochet citrus coasters! Coasters are great for cold drinks like iced coffee and lemonade!
Looking for summer patterns that aren't citrus? My crochet strawberry pillow and crochet bubble tea pattern could be your next project! Crochet all the best things summer has to offer to have a house decorated in crochet summer items or to sell at your summer markets.
Though if you want to continue the lemon theme, I do have a cute lemon plushie pattern available too. Which can also be made into a crochet charm for the bag if you add a keychain, but you may want to use thinner yarn or a smaller hook, so it isn't too big.

🐌Expert Tips
- Batch Crocheting: Batch-making each part of the granny squares (all centers, then the next step, etc.) can save time when making the crochet lemon bag pattern and keep your process organized.
- Surface Crochet Technique: Use a slightly larger hook for surface crochet to keep stitches loose and prevent the square from curling.
- Yarn Management: When switching colors frequently, pre-cutting yarn into manageable lengths can reduce tangling and speed up the project.
🧵Pattern FAQs
Absolutely! It will just be a rather large bag.
Yes, adjust the number of granny squares to suit your desired size.
You can make oranges, grapefruit, and limes!
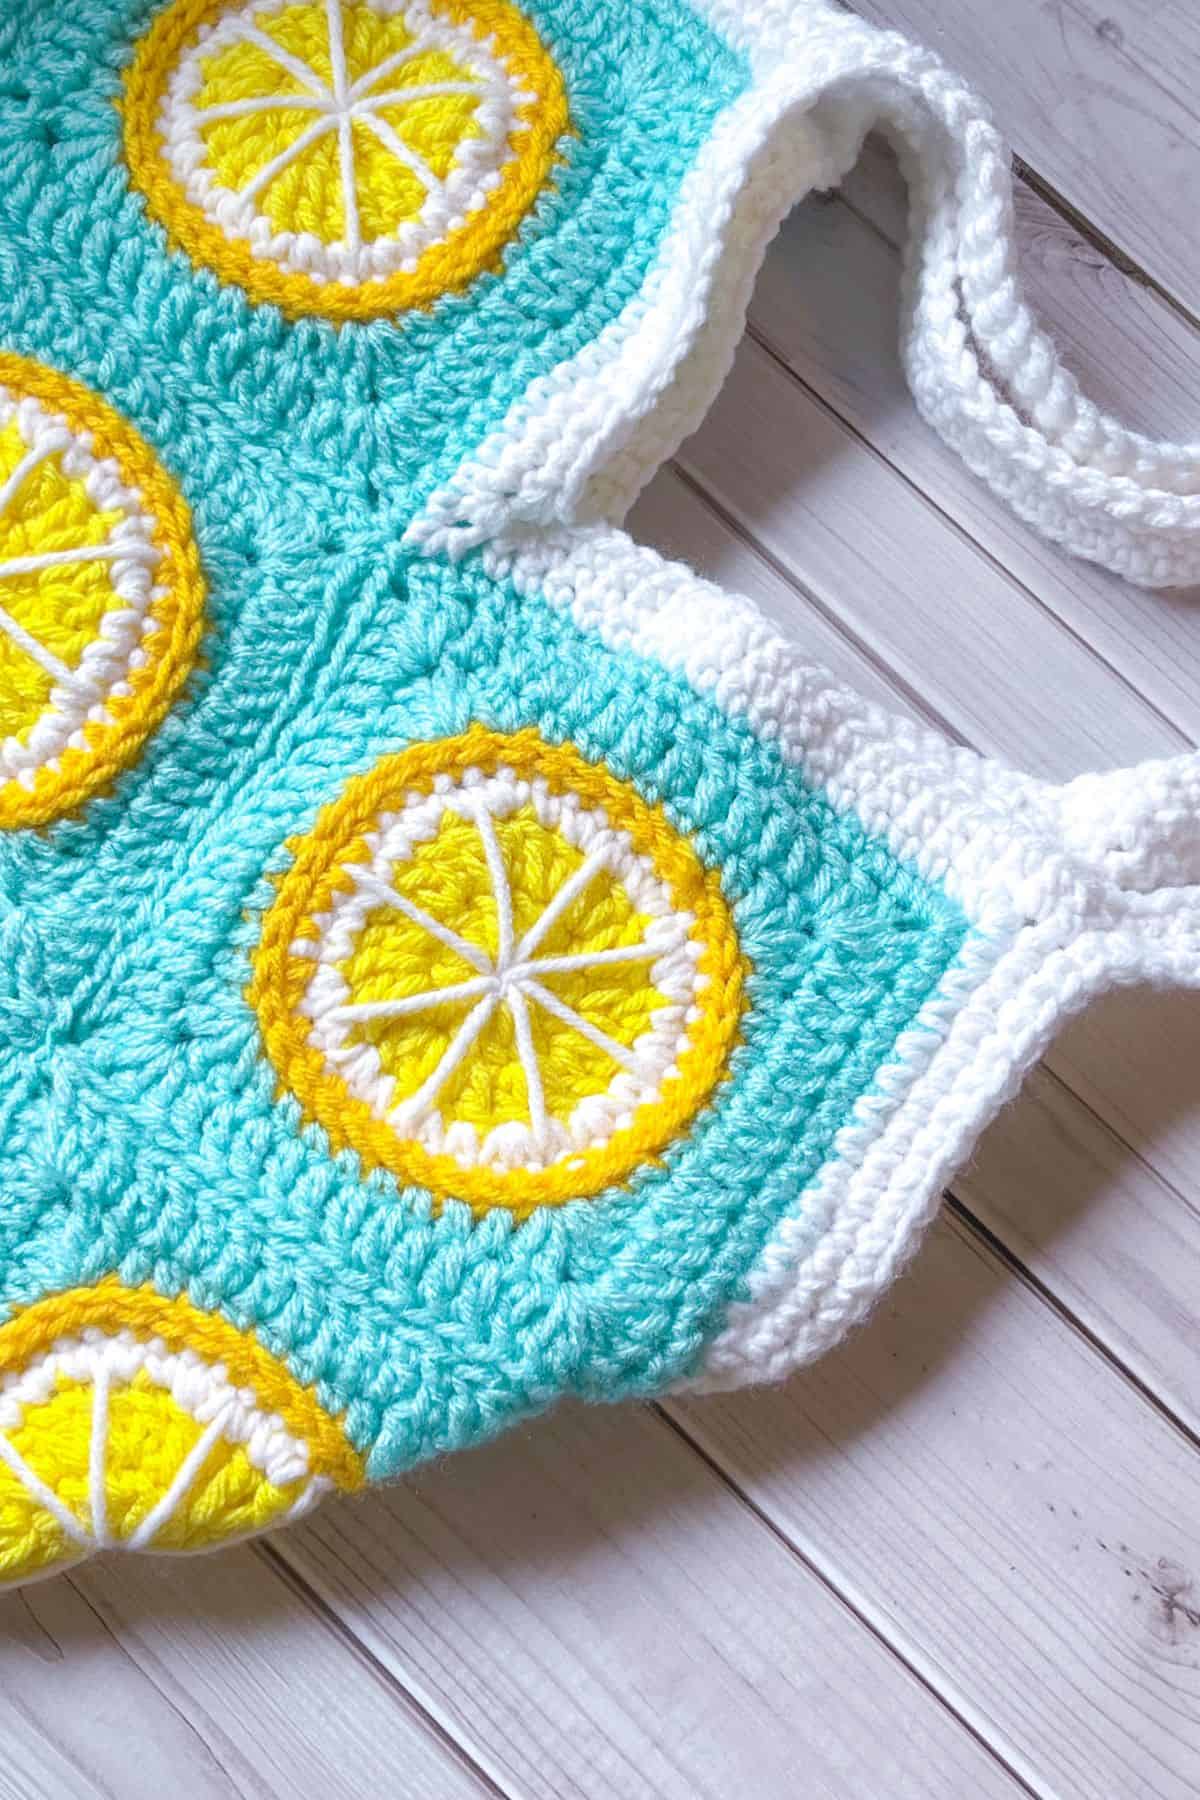
🧶More Crochet Bag Patterns


If you tried this Crochet Lemon Bag Pattern (or any other pattern on my website), please let me know how it went in the 📝 comments below. I'd love to hear from you!
Crochet Lemon Bag Pattern
Materials
Abbreviations (US terms)
- Magic ring - mr
- Chain - ch
- Single crochet - sc
- Double crochet - dc
- Half double crochet - hdc
- Slip stitch - sl st
- Increase - inc written as dc inc or sc inc
- Decrease - dec
- Surface crochet - no abbreviation but you will need to know how to do this stitch.
Notes
- I made crochet lemon granny squares from the crochet lemon bag pattern, but you can create any citrus slices.
- If you don't know surface crochet, skip it or crochet through the back loops of the single crochet row for a different finish.
- The finished crochet lemon bag pattern is about 14 inches in diameter; for a smaller size, omit the second squaring-off round.
Instructions
- The crochet lemon bag pattern is made in the round. Make x13 crochet circle squares.
- Round 1: With the yellow yarn, make a mr, next ch x2 (does npot count as a dc) and then dc x12 into the mr, sl st to first dc (12). If you find it difficult making a magic ring you can chain 4, slip stitch it together, and then in the newly formed circle, ch x2 and dc x12 in the hole, then sl st to first dc. (12)
- Round 2: Ch x2, dc inc in every dc, sl st to first dc. (24) Then change the color to white.
- Round 3: With the white yarn, ch x1, then (sc inc, sc) and repeat what is in parenthesis for the rest of the round then sl st to first sc (36). Then change the color to the darker yellow yarn.
- Round 4: With the darker yellow, ch x1 and then sc around the entire round with no increases, then sl st to the first sc. (36). Because the last sc round increased by 12 instead of 6 which is more normal for sc stitches in the round, we don't have to increase this round, which also makes it easier to surface crochet later on.
- Switch the color to teal yarn.
Crocheting a circle into a square:
- Round 5: The lemon slice rounds are done and now we will start turning the circle into a square.
- Ch x2, counts as the first hdc, dc inc + ch + dc inc in the following stitch. This is the first corner.
- Make a hdc in the next 2 stitches, then a sc in the next 4 stitches, follow that with hdc stitches in the next 2 stitches and then finally make the corner stitch again (dc inc, ch x1, dc inc). The only stitch space with multiple stitches is the corner.
- Now repeat the above 3 more times. After the last hdc in the round, sl st to the beginning chains in the round which acts as a hdc. (48 stitches with 4 chain spaces)
- Round 6: Ch x3, which acts as a dc, then dc in the next stitch. When you get to the chain space in the corner make a dc inc + ch x2 + dc inc. Then dc the side of the square (12 per side without the corners). Repeat 3 more times for the rest of the round.
- Once you make the last dc in the round, sl st to the beginning chains. Then fasten off the yarn.
Surface crocheting:
- Insert your crochet hook into the lemon peel round by going around one of the single crochet posts. Then loop the yarn over and make a sl st. Go under the next sc post and make a sl st. This is slip stitching the surface or surface crocheting. Make the slip stitches loose otherwise your lemon granny square will dip. You can use a slightly larger hook (by 1-2 sizes) if it helps you make looser sl st for the surface.
- Finish surface crocheting the rest of the lemon rind by repeating the above process. Sl st to the first stitch then fasten off. Weave in any ends.
- Embroidery: Take a long piece of white yarn and thread the yarn onto your tapestry needle, secure the yarn to the back of your lemon square and make lemon segments into your crochet lemon slice. I made 8 segments by going from the outer edge to the center and repeating the process 7 more times.
- Weave in any loose ends on all 13 crochet lemon slice granny squares.
Assembling:
- Once you have the 13 lemon granny squares made you want to lay them in a flat pattern as indicated by the photo. Then there are a few different methods you can use to attach the squares together.
- 1) The first way to attach granny squares together is with the mattress stitch. This is a hand sewing technique that lends itself well to creating near invisible joins. This is what I use for my bag. You want to sew the granny squares together by sandwiching 2 squares together with the “correct” side facing inwards together. Then you want to take the turqua colored yarn and the tapestry needle and sew the pieces together by grabbing the outermost loops of the sandwiched granny squares stitches. You do not want to grab the inner stitch loops.
- 2) If you don't feel like hand sewing, you can crochet the pieces together. Sandwich the squares together with the “correct” side facing outwards and by using turqua or another colored yarn single crochet or slip stitch the squares together by grabbing only the innermost stitch loops. Since I don't do this way of joining I do not have a tutorial for it, but if you need additional help there are a lot of tutorials online.
- Once you figured out which granny square joining method you are going to use, sew/crochet the granny squares together. There are many ways to go about this but I sewed mine together in strips 2,3,3,4 with a spare one left over, then sewed the strips themselves together based on the diagram photo above.
- Once the granny squares have all been joined together like in the diagram, fold it in half by bringing the bottom half to the top. Fold over the granny squares jutting from the sides and sew/crochet those pieces to the main body of the bag.
- Once all the sewing of the bag has been completed you should have the 2 peaks and 3 valleys (an M essentially) as the top edge of the bag.
- Now to move onto the handle.
Bag Top/Handle
- Round 1: The first thing to do is rejoin the blue yarn to the top edge of the bag, preferably the side in one of the valleys.
- Then you will crochet the top edge of the bag with the blue yarn. 1 single crochet in each stitch, but when you come to the top of the squares, you want to make 3 single crochets in the very top stitches. Then for the part where the squares meet you want to crochet the 3 most bottom stitches together in a decrease, then continue up the side as before.
- After 1 round of blue yarn, switch to white yarn.
- Round 2: Repeat the above process 1 more time but in white.
- Round 3: For the 3rd round, follow the above process again, but when you get to the peaks or the top of the M, ch x60 and then reattach the chain to the other top on the same side of the bag. Make sure the chain is not twisted.
- Round 4: Crochet around the top of the bag as before, when you get to the chains make a sc in each ch.
- When the last round is completed fasten off and weave in the ends.
- Inner handles round: Rejoin the white on the inside of the handles and crochet around the inner circle. Repeat this on both sides of the bag.
- Weave in any ends.
- And now you have a finished crochet lemon bag!

Lindsay says
Hello!
I am working on this beautiful pattern. Currently at the first round of teal. Does that chain two count as one of the HDC stitches when I finish the round? It’s looking a little wonky and my stitch count seems off by one, so that’s my suspicion.
Thanks for sharing such a fun pattern!
Kimberly Arenas says
Hi! I updated the pattern for the teal rounds - you are correct it should act as a hdc.
Daisy says
Hello, this is a wonderful pattern. I was wondering if you are okay if I use this pattern to create bags to sell at my local market as long as I credit you as the pattern creator. If not, I perfectly understand.
Kimberly Arenas says
OF COURSE!! 🙂 Thanks for asking 🙂
Sarah says
Thank you very much! I have just realized that the measurement for the finished square would be helpful as well! Thanks again!
Kimberly Arenas says
its roughly 5 inches finished 🙂
Sarah says
Hello, can you tell me this diameter of the lemon slice after rounds 2,3 and 4 please? I am using thinner yarn and a size 4 hook so I’m not sure how to make it the same size as yours. Thanks.
Kimberly Arenas says
Diameters for round 2: 2.5inches, round 3: 3 inches, round 4: 3.5 inches 🙂
Valerie says
I'd love to know length quantities on each color of yarn 🙂
Kimberly Arenas says
I don’t have exact yards, but the blue will need roughly 150 yards (like a half a skein), the yellow for the middle of the lemon will be closer to half of that so 75 yards, and then the other colors are smaller balls I had so maybe 25-50 yards for the darker yellow and white.
Candra says
Hi! I did the Lemon Granny square bag and it looks awesome!!!!! The pattern was very easy to follow and it worked great! It is always nice when someone does a good and easy Free pattern! Thank you Kim!
Kimberly Arenas says
Im glad you like the pattern!