
My Free Crochet Cactus Pattern is a perfect way to get away with hugging a cactus without getting hurt. My crochet cactus pillow is best for intermediate and advanced crocheters.
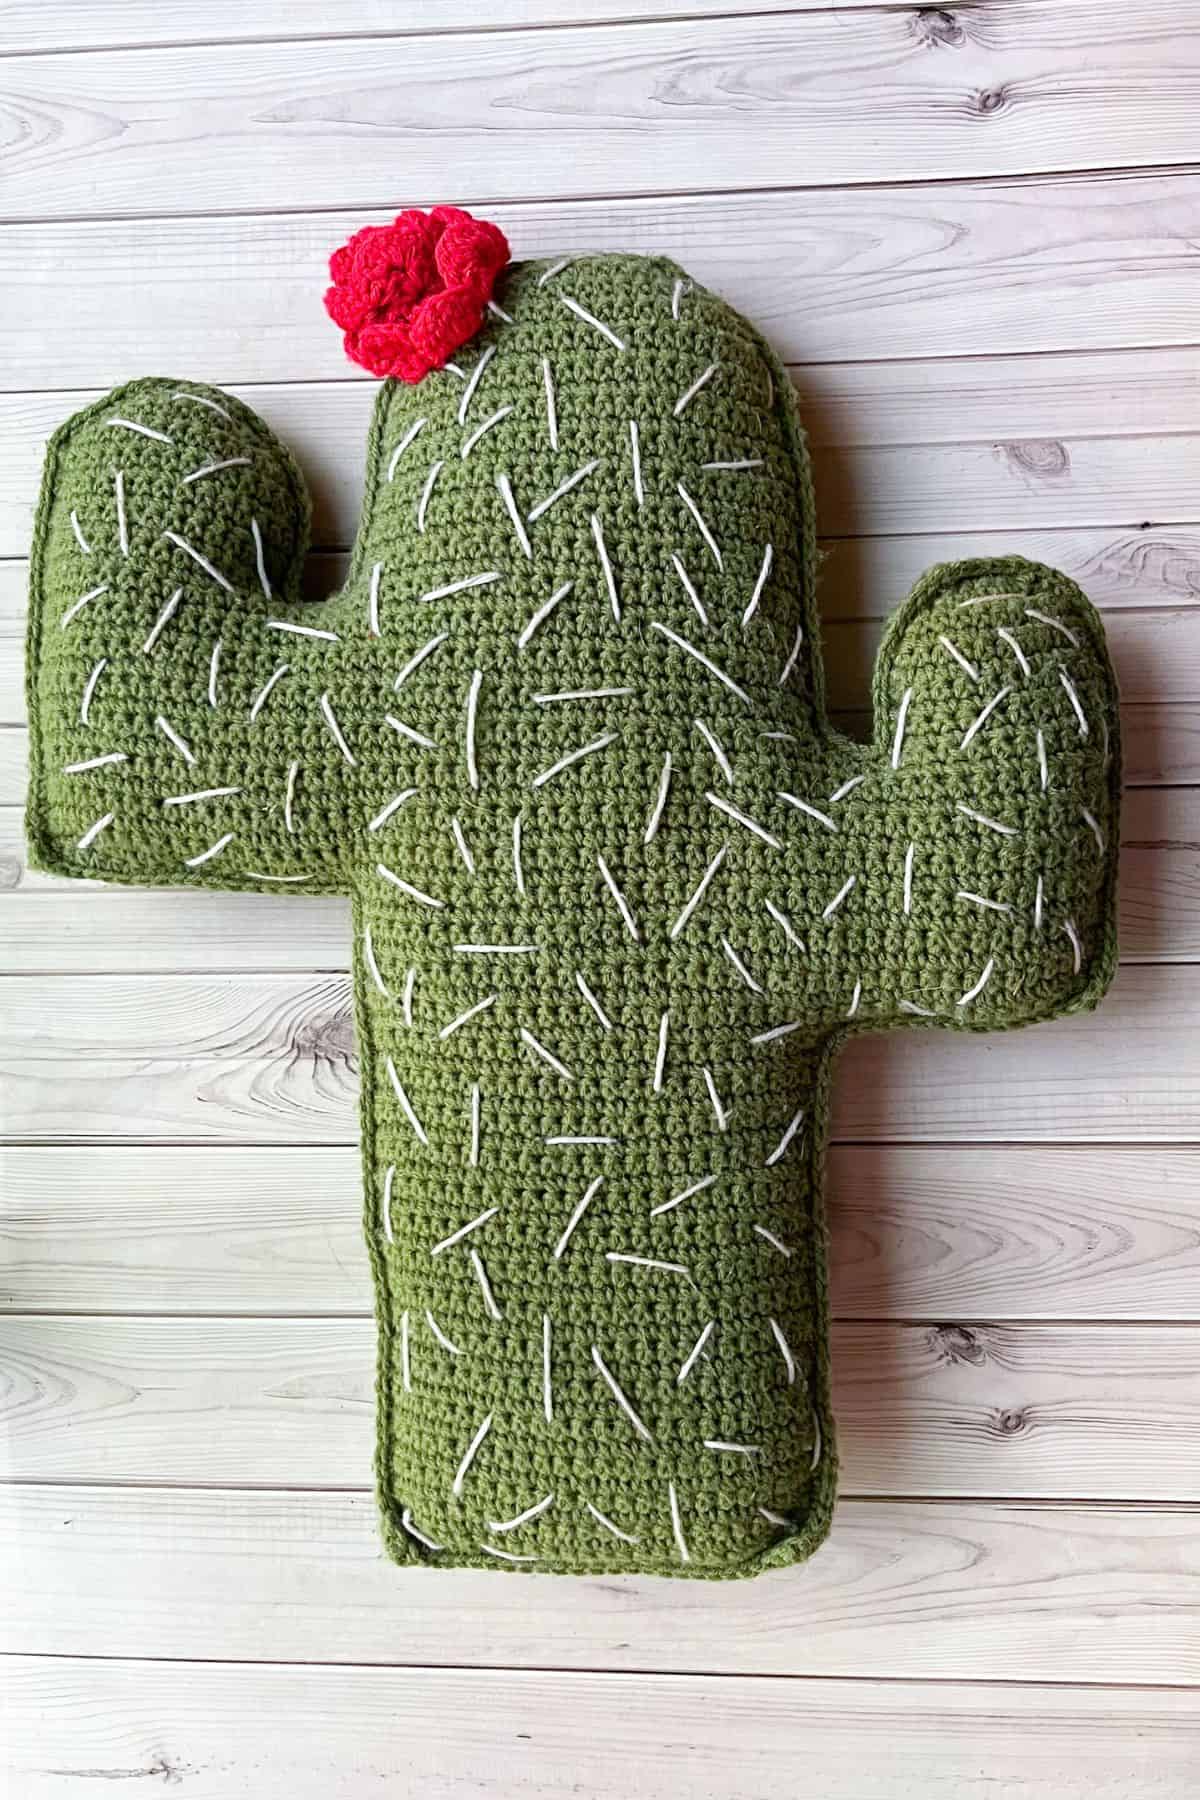
This free crochet cactus pattern is incredibly cute! I just love how the arms reach up like a saguaro cactus. Did you know that saguaro cacti grow super slowly? They don’t start growing their arms until they are around 50 years old! This means that those large ones you see in the Arizona deserts are often hundreds of years old!
If you want to create that desert chic vibe—or boho crochet desert chic in this case—you can make this cactus crochet pattern! For added variety, my Crochet Cactus Pillow Pattern is a perfect companion. Cactus-shaped pillows are great because you can squeeze them without getting pricked!
I also have a Bohemian Crochet Pillow that captures the crochet desert vibes if you want even more diversification. Pair the pillows with a boho crochet blanket or additional boho crochet pillows to achieve the full crochet boho desert aesthetic.
The main reason I made this cactus amigurumi pattern is that the saguaro cactus is one of my friend's favorite cacti! I love how this crochet cactus pattern turned out—it’s large and stands out! Just last month, I gave her a pair of my Crochet Cactus Coasters to feed her cacti obsession.
So, let's get started making this free crochet cactus pattern!
Jump to:
✏️ Things to Note:
- Yarn Selection: I made my free crochet cactus pattern using 2 skeins of olive yarn from Princess Yarns to emulate the color of the cactus and white for the prickles. You can use any green yarn and any brand of your choosing. I had a small ball of pink in my leftover yarn pile and used that for the flower.
- Type of Yarn: I made the free crochet cactus pattern with acrylic yarn since it’s what I had on hand, but this project can be completed with any type of yarn. I highly suggest cotton, acrylic, or chunky yarn. The chunky yarn would make this almost like a body pillow!
- Finished Size: The finished size of the crochet cactus, including the cactus flower, is roughly 2 feet in height and about a foot across.

🪡 Materials Needed
- 2 skeins of olive yarn
- A small ball of pink yarn
- And a small ball of white yarn
- J hook (6mm)
- Tapestry needle for weaving in the ends and sewing pieces together
- Polyfill for stuffing
💭 Abbreviations to Remember (US Terms)
- Single crochet (sc)
- Chains (ch)
- Decrease (dec)
- Increase (inc)
- Double crochet (dc)
🧋 Variations
Try using different green yarns to create different colored saguaro cacti. I made little white slashes for the prickles but try different methods to create the prickles! Like x's.
🍵 Instructions for Free Crochet Cactus Pattern
For the free crochet cactus pattern, we will be working in rows.
Crochet Cactus Pattern:


Cactus front and back x2:
Row 1: Ch x25 (25). Then add 1 turning chain.
Row 2: In the second ch from hook, sc. Then repeat for the rest of the round (25). Then ch x1 and turn.
Rows 3-29: Skip the ch (always skip the turning ch), and sc x25 (25). Then ch x1 and turn.
Row 30: Sc x25, then ch x15 (40). Then ch x1 and turn.
Row 31: In second ch from hook make a sc. Then sc the rest of the chains and sc in the row. (40). Ch x1 and turn.
Row 32-36: Sc x40 (40). Then ch x1 and turn.
Row 37: Sc x40, then ch x18, (58). Then ch x1, turn. The chains should be opposite of the other arm you started, if for some reason you end up on the same side just make an extra row to get to the other side.


Row 38: In the second ch from the hook make a sc. Then sc the rest of the chains and row (58). Then ch x1 and turn.
Row 39-46: Sc x58 (58), then ch x1 and turn. You should end row 46 on the side with the first cactus arm you started.
FIRST ARM ROWS ONLY:
Row A-G: Sc x12 (12). Then ch x1 and turn
Row H: Dec, sc x8, dec (10). Then ch x1 and turn
Row I: Dec, sc x6, then dec (8). Then ch x1 and turn.
Row J: Dec, sc x4, then dec (6). then ch x1, and turn.
Row K: Dec, sc x2, then dec (4). Slip stitch and fasten off. Then weave in the ends.
BACK TO THE MAIN CACTUS BODY:
Row 47: Restart crocheting the body and the second arm of the cactus by skipping 3 sc spaces between the first arm and where the body is.

You should have the newly finished arm on the right side of you, then looking at the base of the arm (row 46), reattach the yarn by inserting the hook into the stitch, yarn over, then pull the hook through the space, yarn over and pull through the loops. You can carry over the yarn tails or weave them in later. Sc the entire row (43). Then ch x1, and turn

Row 48-55: Sc x43 (43). Then ch x1 and turn.
Now you should be at the end of the row with the unfinished arm.


SECOND ARM ROWS ONLY:
Row a: Sc x15 (15). Then ch x1 and turn
Rows b -i: Sc x15 (15). Then ch x1 and turn
Row j: Dec, sc x11, dec (13). Then ch x1 and turn
Row k: Dec, sc x9, dec (11). Then ch x1 and turn
Row l: Dec, sc x7, dec (9). Then ch 1 and turn
Row m: Dec, sc x5, dec (7). Then ch x1 and turn
Row n: Dec, sc x3, dec (5). Slip stitch and fasten off. Weave in tail.
STARTING BACK ON THE MAIN BODY OF CACTUS:
The second arm you just finished should be on your right. Go down to row 55 (where we branched off to finish the arm) and skip 3 spaces. You should be lined up with the main body. Attach your yarn once more, just like how you did previously.
Row 56 -68: Sc x25 (25). Then ch x1 and turn.
Row 69: Dec, sc x21, dec. (23). Then ch x1 and turn.
Row 70: Dec, sc x19, dec. (21). Then ch x1 and turn.
Row 71: Dec, sc x17, dec. (19). Then ch x1 and turn.
Row 72: Dec, sc x15, dec. (17). Then ch x1 and turn.
Row 73: Dec, sc x13, dec. (15). Then ch x1 and turn.
Row 74: Dec, sc x11, dec. (13). Then ch x1 and turn.
Row 75: Dec, sc x9, dec. (11). Then ch x1 and turn.
Row 76: Dec, sc x7, dec. (9). Then ch x1 and turn.

You are going to make 2 of these cactus sides and then either sew them together with yarn and tapestry needle or (how I prefer to do it) single crochet along the entire edge lining up the 2 pieces and stuff as you go. This gives you a ragdoll pillow look.

To make the white lines on the cactus body and arms, thread a long piece of yarn on a needle, insert it into the cactus (making a discreet knot or tie) and then go in and out making lines go in every direction at random. I made my lines about an inch to an inch and half long and about that far apart.
Crochet Cactus Flower:


You can alter the size as you see fit. Just make sure that your starting ch is in multiples of 6 +5.
The flowers I make for my cactus patterns are very similar to crochet roses.
Row 1: Leave a long starting ch tail for sewing later. Ch x60, + ch x5, turn.
Row 2: Dc in 6th ch from hook. Then [ch 1, skip the next 2 chs on the foundation chain row, dc, ch 2, dc in the same stitch that you did the last dc in.] Repeat what is in the brackets for the rest of the row. At the end of the row, ch x3 and turn.
Row 3: Make a dc in the 2 chain gap between the pair of dc stitches in the row below. Don't stitch into the ch, stitch around its entirety. Then ch x2, and make dc x2 in the same gap.
So there should be 2 dc (the first dc is made of turning chains), 2 ch, and then 2 dc.
Then [ch x2, skip the single chain gap in the row below, and make dc x2 in the gap below that has the 2 ch, then ch x2, and dc x2.] Repeat what’s in the brackets for the rest of the row. At the end of the row ch x3, and turn.
Row 4: In the gap below dc x5, then make a sc in the next gap, then make [dc x6 in the following gap, and make a sc in the next gap], repeat what's in the brackets for the rest of the row.
This row should make a shell type top creating individual petals. Fasten off and weave in between the bottom of the petals, cinch closed but make sure the petals are going in a spiral formation so it looks more like a flower.
Sew the flower wherever you would like on the cactus. I like the areas on top of the head or arms.
END
Once the cactus is stitched together, stuffed, adorned with a flower, and embroidered with white little lines your cactus is complete! You now have a huggable squishable stuffed cactus pillow made from my free crochet cactus pattern!
If you have extra green yarn left over, you can make a Crochet Headphone Sprout Pattern or my crochet frog bag pattern for a little fun crochet project.
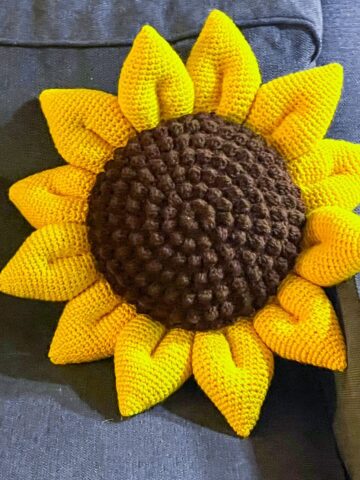
Bohemian crochet patterns don't just stop at pillows and cacti, I would think my Crochet Sunflower Blanket Pattern and the Sunflower Coaster Crochet Pattern would work nicely as well for a crochet boho theme.

🐌Expert Tips
- Stuffing: Use polyfill sparingly to maintain the desired shape of the cactus. If you find the cactus is too floppy, consider using a heavier stuffing like rice or dried beans at the bottom.
- Color Variations: Don’t hesitate to experiment with colors for the cactus and flowers! This pattern is versatile and can be customized to fit your decor.
- Adding Details: You can enhance your cactus with small crochet flowers or embellishments to give it a unique look. Consider using yarn in contrasting colors for added flair.
🧵 Pattern FAQs
You could omit this step, or if you want the prickles but a different look, you can take small pieces of white yarn and tie them to individual stitches - which might take a long time.
If you would like go for it!
The free crochet cactus pattern is meant to be made in rows so do not attempt to make it in the round.
🧶More Crochet Pillow Patterns

If you tried this Free Crochet Cactus Pattern (or any other pattern on my website), please let me know how it went in the 📝 comments below. I'd love to hear from you!

Free Crochet Cactus Pattern
Materials
- 2 skeins of olive yarn
- 1 small ball of pink yarn
- 1 small ball of white yarn
- 6mm hook
- Tapestry needle
- Polyfill
Abbreviations (US terms)
- sc = Single crochet
- dc = Double Crochet
- ch = Chain
- dec = Decrease
- inc = Increase
Notes
Instructions
- For the free crochet cactus pattern we will be working in rows.
Cactus x2:
- Row 1: Ch x25 (25) + 1 turning chain.
- Row 2: Sc x25, one in each ch, (25). Ch x1 and turn.
- Rows 3-29: Skip the ch (always skip the turning ch), and sc x25, one in each sc from the last row (25). Ch x1 and turn.
- Row 30: Sc x25, then ch x15 (40). Ch x1 and turn.
- Row 31: In second ch from hook make a sc. Then sc the rest of the chains and sc in the row. (40). Ch x1 and turn.
- Row 32-36: Sc x40 (40). Ch x1 and turn.
- Row 37: Sc x40, then ch x18, (58). Ch x1, turn. The chains should be opposite of the other arm you started, if for some reason you end up on the same side just make an extra row to get to the other side.
- Row 38: In the second ch from the hook make a sc. Then sc the rest of the chains and row (58) Ch x1 and turn.
- Row 39-46: Sc x58 (58), ch x1 and turn. You should end row 46 on the side with the first cactus arm you started.
FIRST ARM ROWS ONLY:
- Row A-G: Sc x12 (12), ch x1 and turn
- Row H: Dec, sc x8, dec (10). Ch x1 and turn
- Row I: Dec, sc x6, dec (8). Ch x1 and turn
- Row J: Dec, sc x4, dec (6). Ch x1, and turn
- Row K: Dec, sc x2, dec (4). Slip stitch and fasten off. Weave in the ends.
BACK TO THE MAIN CACTUS BODY:
- Row 47: Restart crocheting the body and the second arm of the cactus by skipping 3 sc spaces between the first arm and where the body is. You should have the newly finished arm on the right side of you, then looking at the base of the arm (row 46) , skip 3 spaces and then reattach the yarn by inserting the hook into the single crochet top, yarn over with the yarn, then pull the hook through the space, yarn over and pull through the hoops. You can carry over the yarn tails or weave them in later. Sc the entire row (43). Ch x1, and turn
- Row 48-55: Sc x43 (43) Ch x1 and turn.
- Now you should be at the end of the row with the unfinished arm.
SECOND ARM ROWS ONLY:
- Row a: Sc x15 (15). Ch x1 and turn
- Rows b -i: Sc x15 (15). Ch x1 and turn
- Row j: Dec, sc x11, dec (13). Ch x1 and turn
- Row k: Dec, sc x9, dec (11). Ch x1 and turn
- Row l: Dec, sc x7, dec (9). Ch 1 and turn
- Row m: Dec, sc x5, dec (7). Ch x1 and turn
- Row n: Dec, sc x3, dec (5). Slip stitch and fasten off. Weave in tail.
STARTING BACK ON THE MAIN BODY OF CACTUS:
- The second arm you just finished should be on your right. Go down to row 55 (where we branched off to finish the arm) and skip 3 spaces. You should be lined up with the main body. Attach your yarn once more, just like how you did previously.
- Row 56 -68: Sc x25 (25) Ch x1 and turn.
- Row 69: Dec, sc x21, dec. (23). Ch x1 and turn,
- Row 70: Dec, sc x19, dec. (21). Ch x1 and turn,
- Row 71: Dec, sc x17, dec. (19). Ch x1 and turn,
- Row 72: Dec, sc x15, dec. (17). Ch x1 and turn,
- Row 73: Dec, sc x13, dec. (15). Ch x1 and turn,
- Row 74: Dec, sc x11, dec. (13). Ch x1 and turn,
- Row 75: Dec, sc x9, dec. (11). Ch x1 and turn,
- Row 76: Dec, sc x7, dec. (9). Ch x1 and turn,
- You are going to make 2 of these cactus sides and then either sew them together with yarn and tapestry needle or (how I prefer to do it) single crochet along the entire edge lining up the 2 pieces and stuff as you go. This gives you a ragdoll pillow look.
Crochet Cactus Flower:
- You can alter the size as you see fit. Just make sure that your starting ch is in multiples of 6 +5.
- The flowers I make for my cactus patterns are very similar to crochet roses, just a little longer. I made one for my crocheted cactus but you can add as many as you want and can experiment adjusting the size!
- Row 1: Leave a long starting ch tail for sewing later. Ch x60, + ch x5, turn
- Row 2: Dc in 6th ch from hook. Then [ch 1, skip the next 2 chs on the foundation chain row, dc, ch 2, dc in the same stitch that you did the last dc in.] Repeat what is in the brackets for the rest of the row. At the end of the row, ch x3 and turn.
- Row 3: Make a dc in the 2 chain gap between the pair of dc stitches in the row below. Don't stitch into the ch, stitch around its entirety. Then ch x2, and make dc x2 in the same gap. So there should be 2 dc (the first dc is made of turning chains), 2 ch, and then 2 dc
- Then [ch x2, skip the single chain gap in the row below, and make dc x2 in the gap below that has the 2 ch, then ch x2, and dc x2.] Repeat what’s in the brackets for the rest of the row. At the end of the row ch x3, and turn
- Row 4: In the gap below dc x5, then make a sc in the next gap, then make [dc x6 in the following gap, and make a sc in the next gap], repeat what's in the brackets for the rest of the row. This row should make a shell type top creating individual petals. Fasten off and weave in between the bottom of the petals, cinch closed but make sure the petals are going in a spiral formation so it looks more like a flower.
- Sew the flower wherever you would like on the cactus. I like the areas on top of the head or arms.
- To make the white lines on the cactus body and arms, thread a long piece of yarn on a tapestry needle, insert it into the cactus (making a discreet embroidery knot or tie) and then go to town! I made my lines about an inch to an inch and half long and about that far apart. I made sure to have the lines go in different directions but you can be more uniform if you would like. You can also try other patterns like small x instead of lines if you would prefer.
- Once the cactus is stitched together, stuffed, adorned with a flower, and embroidered with white little lines your cactus is complete! You now have a huggable squishable stuffed cactus pillow made from my free crochet cactus pattern.


Leave a Reply