
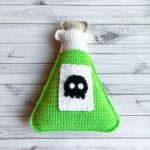
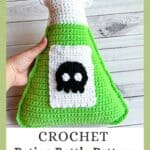
My crochet potion bottle pattern is a perfect addition to any home as Halloween decor! This pattern can double up as a Halloween crochet pillow for the couch or a plushie to play with or have sit on a shelf.
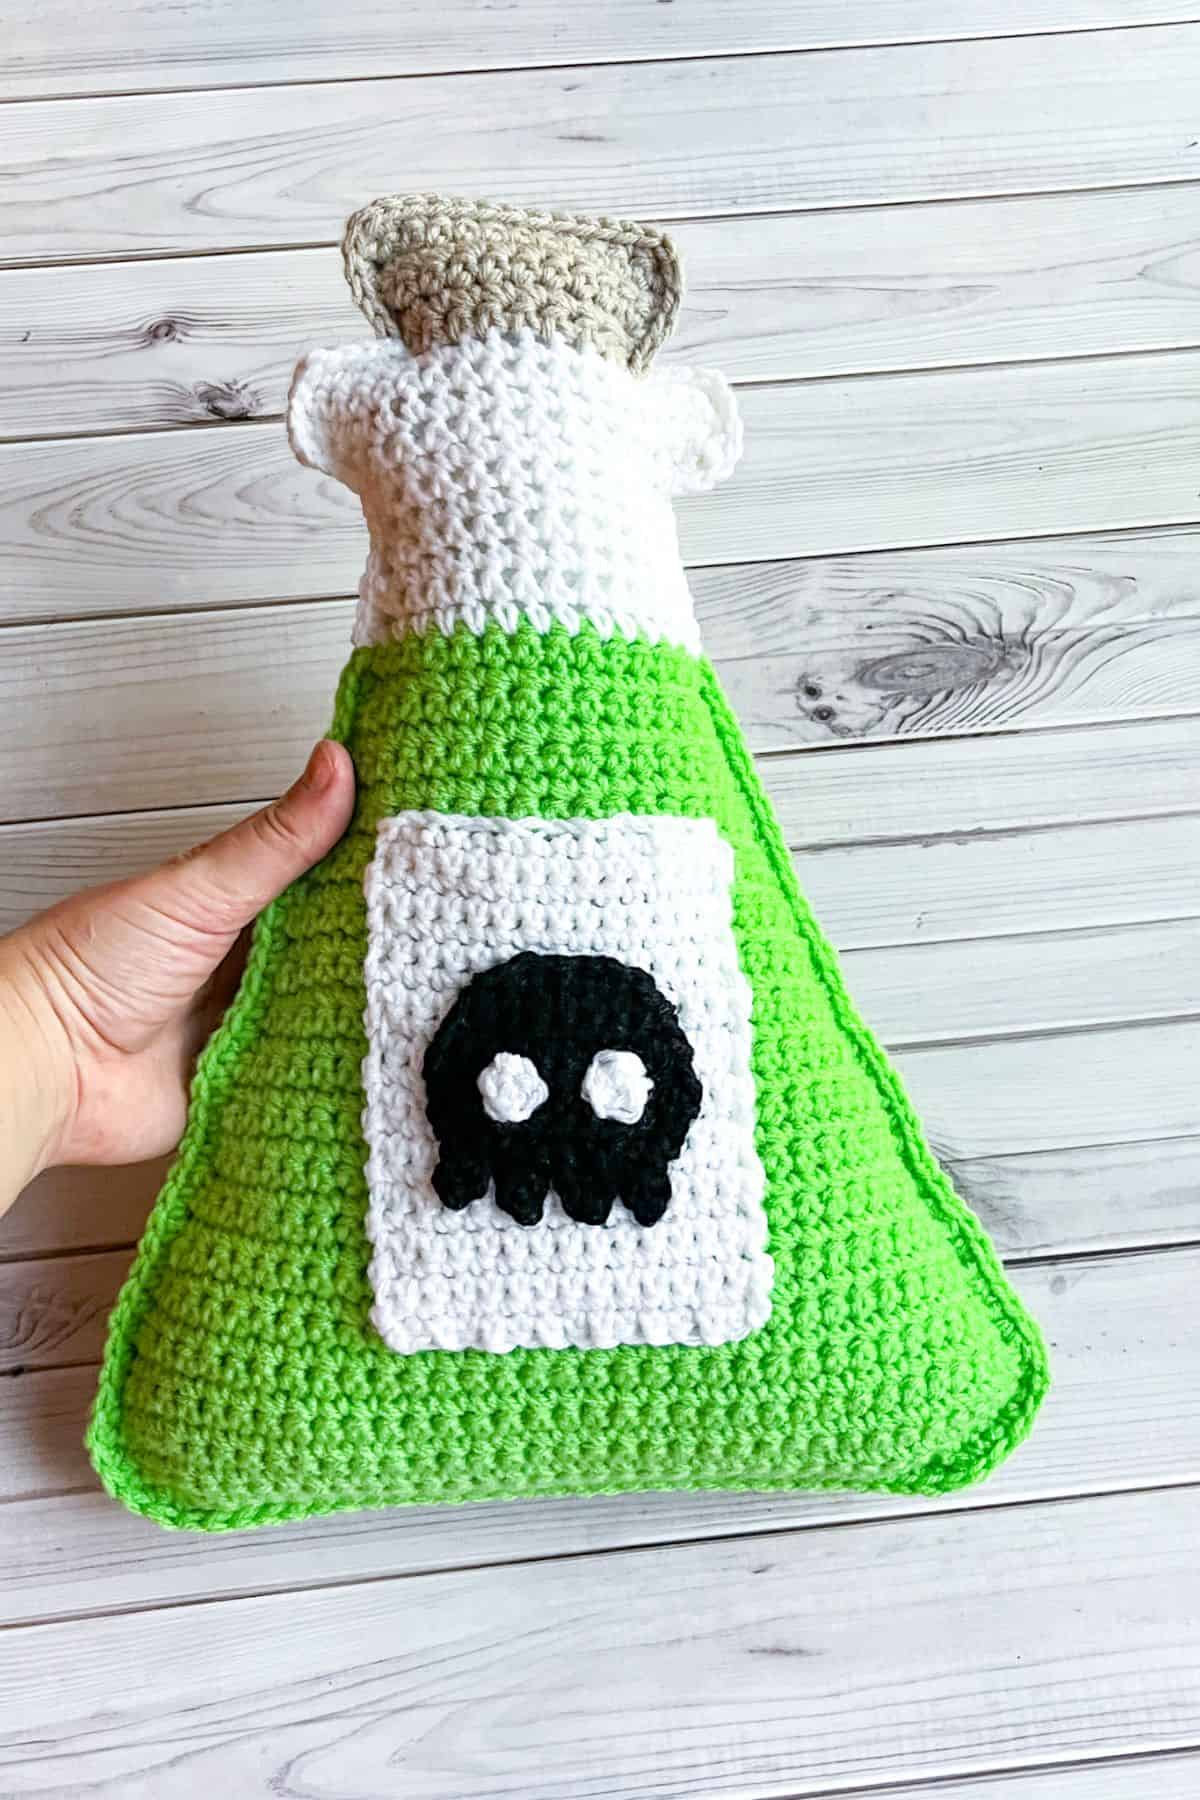
My husband loves playing DnD, and while I don’t know all the complexities, I know potions are a part of the game. With fall nearing, I decided to create a free Crochet Potion Bottle Pattern that works as both a Halloween decoration and a DnD-themed item for him to take to his campaigns.
This crochet potion bottle pattern will also be a hit with my 5-year-old, who loves the idea of magic and science. He’s the same reason I made a crochet planet and solar system playset—he’s fascinated by exploring science!
The crochet potion bottle pattern is easy to make and can be completed in just a few hours! If you have leftover yarn, consider making other Halloween-themed crochet projects like a crochet monster hat or a crochet crow.
So lets get started on the crochet potion bottle pattern! I promise it will be a lot of fun!
Jump to:
✏️ Things To Note:
- Yarn Choices. I made the crochet potion bottle pattern with worsted yarn, but you can use any yarn thickness. DK or smaller yarn will make the bottle smaller, while bulky yarn will increase its size—just use the corresponding hook size for the yarn thickness.
- Custom Applique. I chose a skull applique for the crochet potion bottle label, but you can use any design—like a llama or heart. Alternatively, cut and sew felt shapes if that’s easier for you.
- Size. The finished crochet potion bottle pattern is about 18” tall if using a 5.5mm hook and worsted yarn.
💭Abbreviations to Remember (US terms)
- Chain - ch
- Single crochet - sc
- Increase - inc
- Decrease - dec
- Magic ring - mr
- Slip Stitch - sl st
* The ch x1 at the end of each row does not count as a stitch in the row, it is a turning chain.
* If you see a stitch abbreviation with "x" after it, it means how many times you do that stitch in the following amount of stitches. For example: sc x6 would mean you make a single crochet in the next 6 stitches. Inc x2 means you make an inc in the next 2 stitches.
🧋Variations
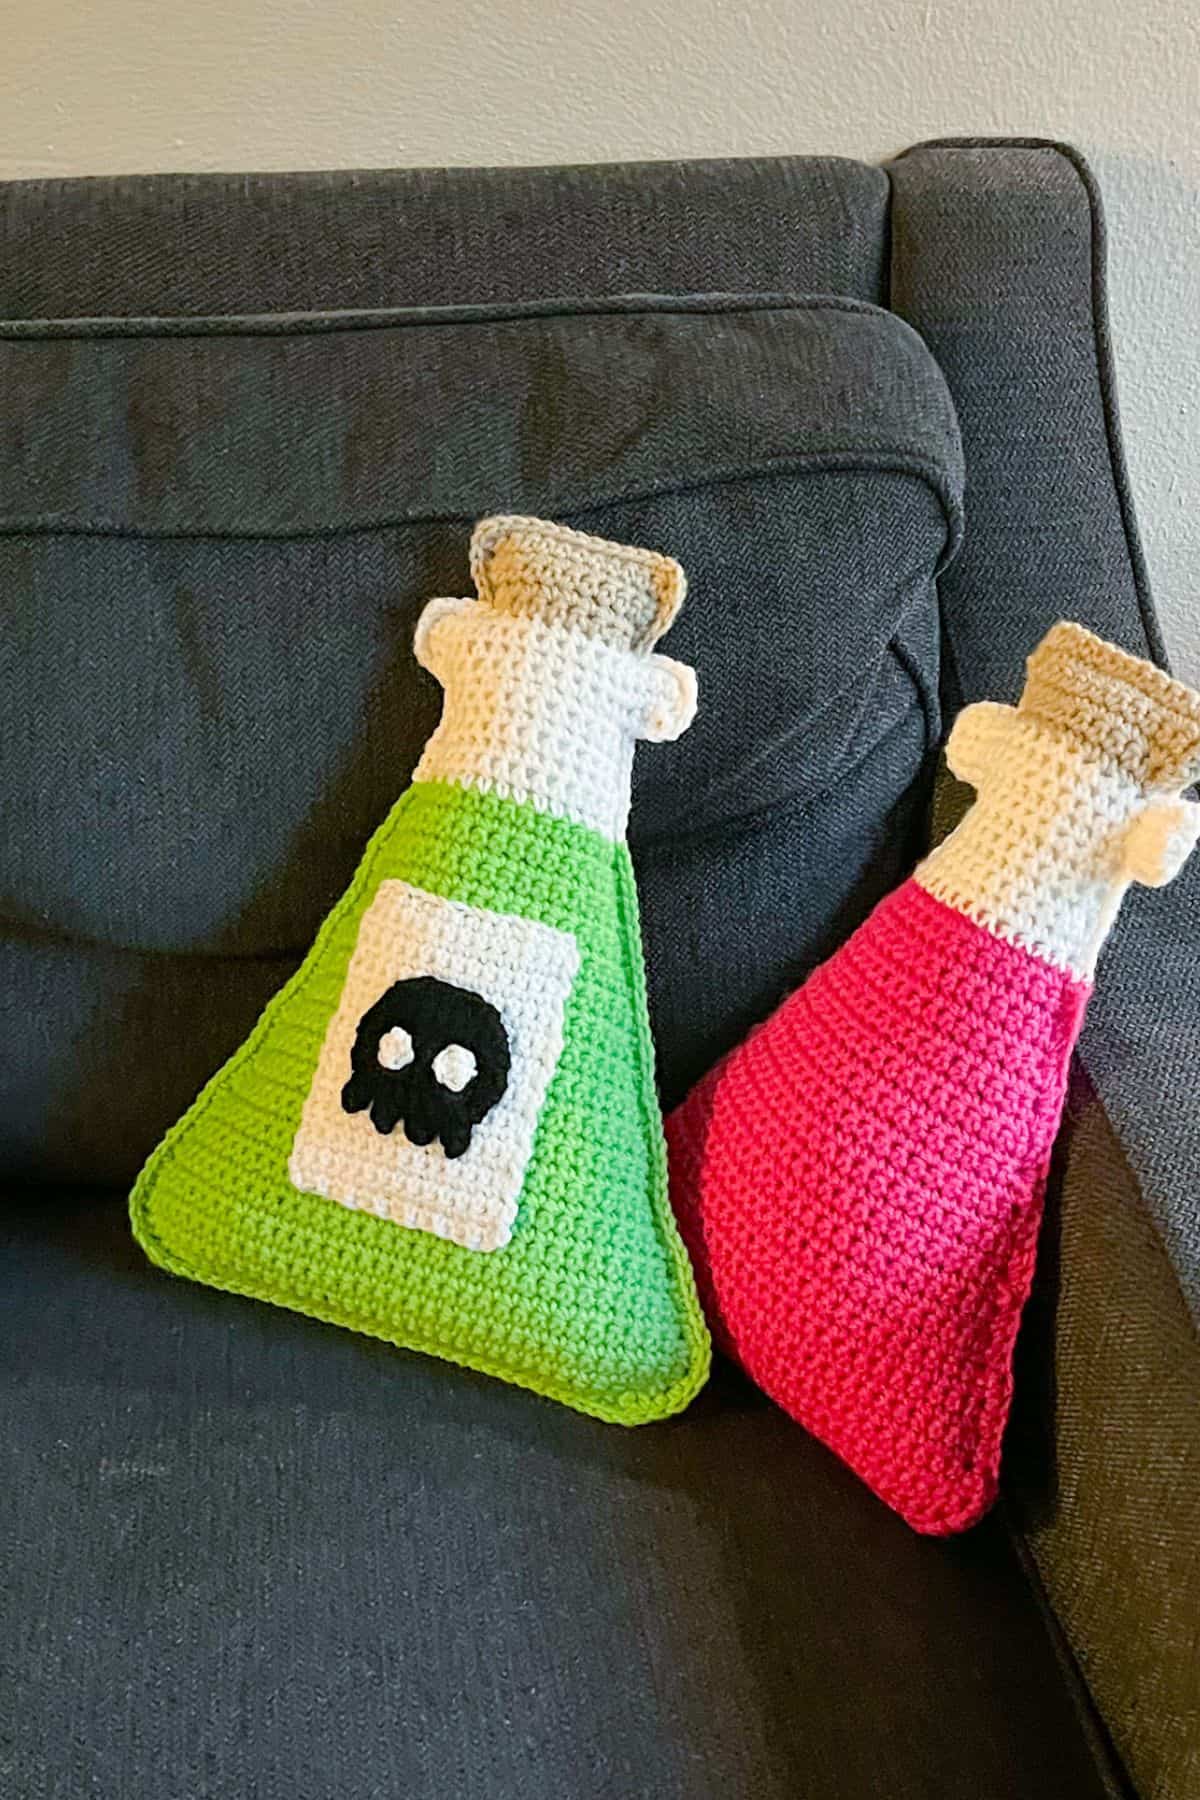
Feel free to customize this Crochet Potion Bottle Pattern by changing the potion color or applique to create an array of potion bottles for your Halloween or apothecary decor. Each variation can represent a different kind of potion!
Additional Applique Ideas
Use other patterns like a crochet mushroom applique, crochet bee applique from my crochet honeycomb blanket, or a crochet heart applique for a love potion, which you can find in my crochet love letter book sleeve pattern.
This crochet potion bottle pattern can serve as a playful decor piece or a functional pillow, and with the option to customize the applique, you can create your own magical collection.
🍵Instructions for Crochet Potion Bottle Pattern
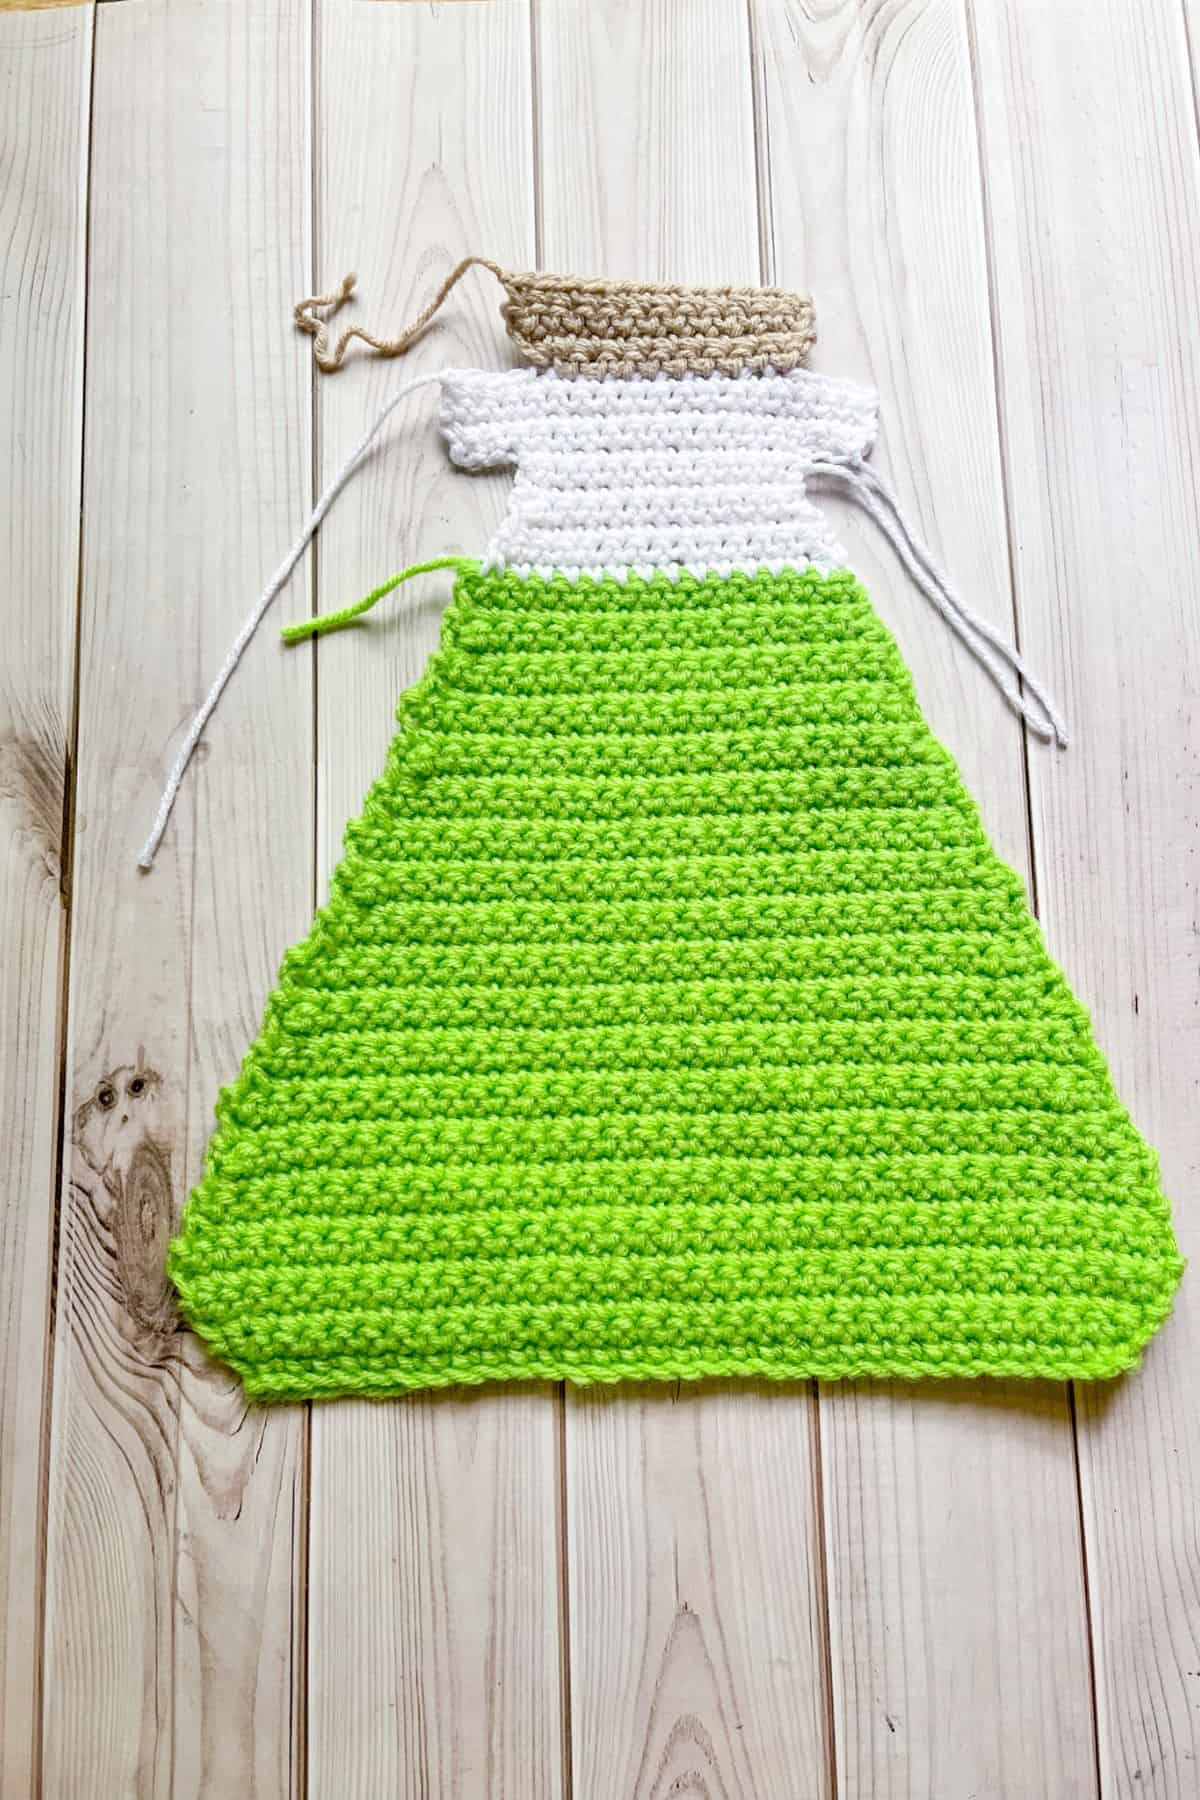
The crochet potion bottle pattern is made in rows and then sewn together. Below are the instructions for creating the flat sides and assembly.
Crochet Flat Sides: Make x2
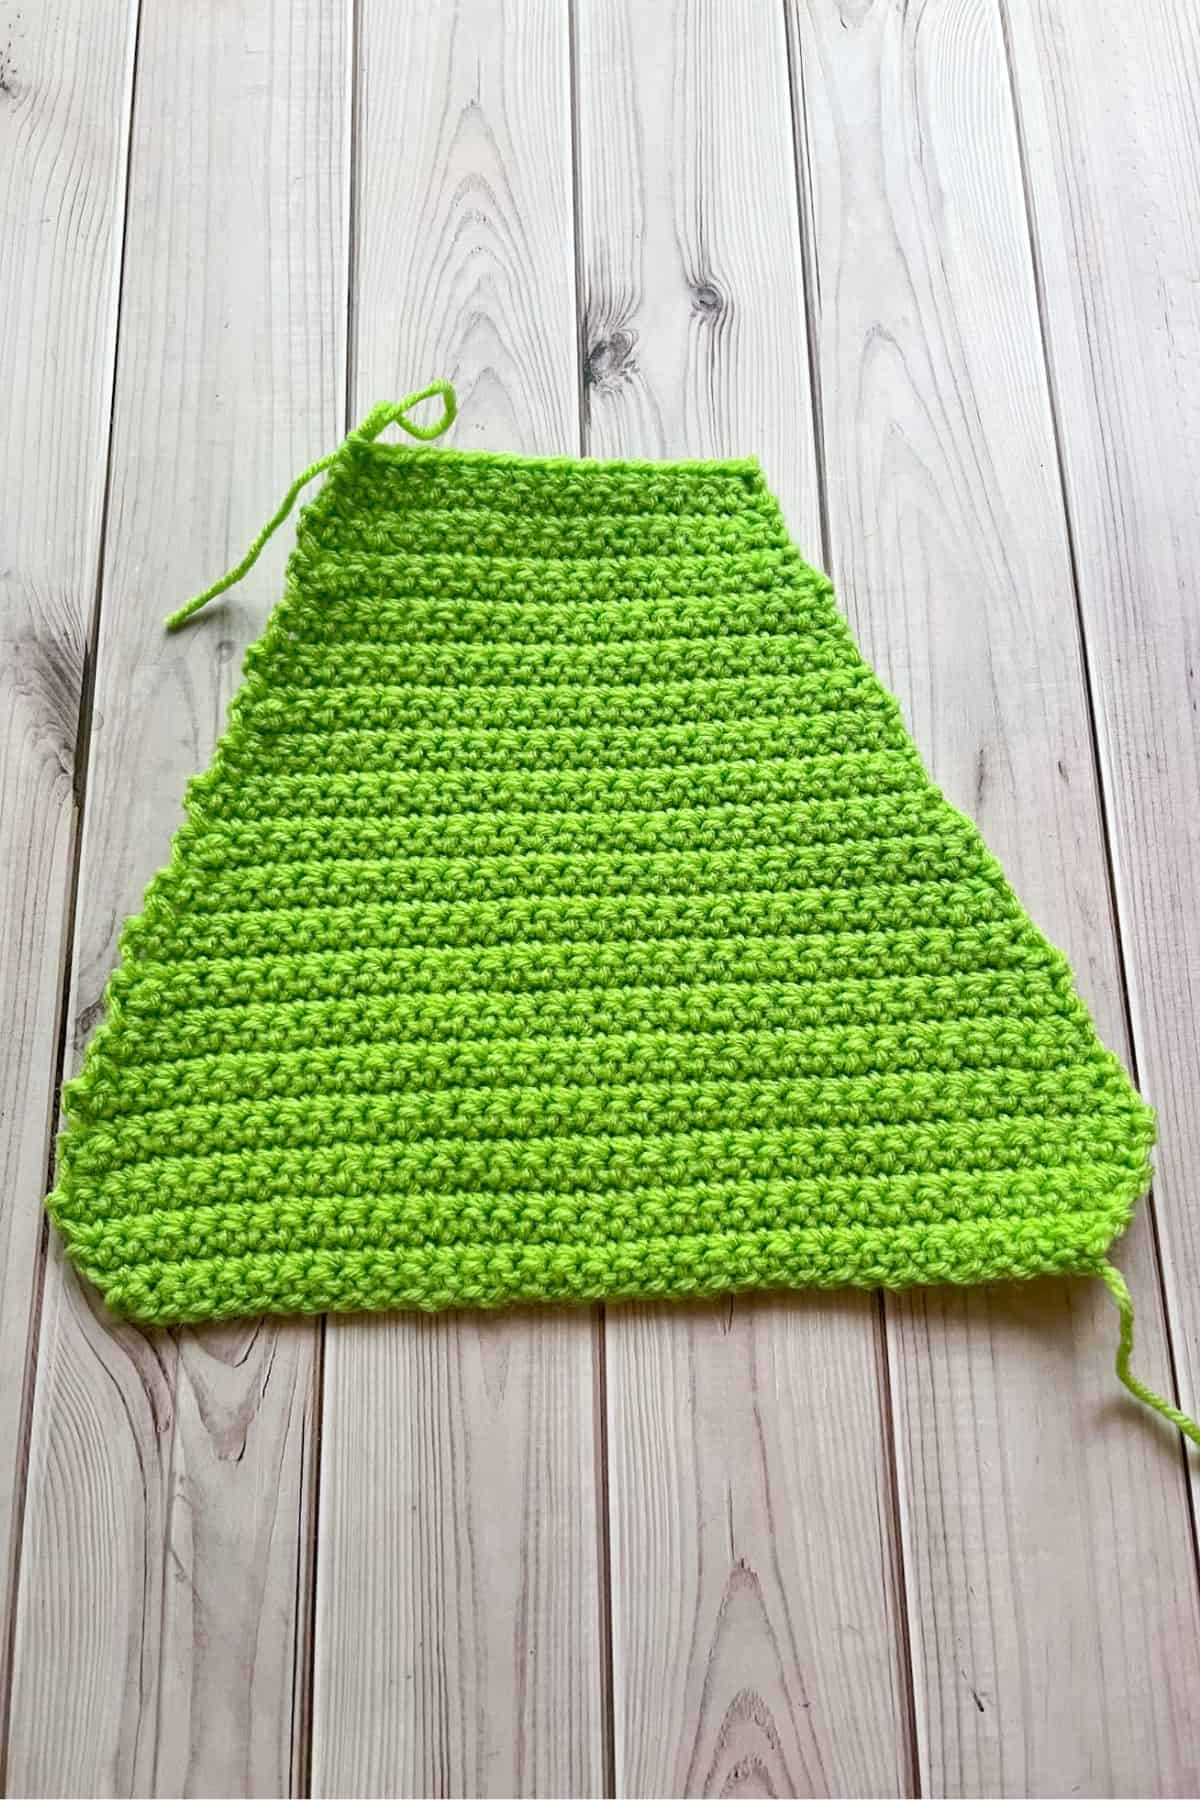
Row 1: Ch x33 in green, then turn.
Row 2: In the second chain from the hook make a sc. Then continue making sc for the entire chain length (32). After, ch x1 and then turn.
Row 3: Inc, then sc x30. In the last stitch in the row make a inc (34). Then ch x1 and turn.
Row 4: Sc in every stitch (34). Then ch x1 and turn.
Row 5: Inc, then sc x32. In the last stitch in the row make a inc (36). Then ch x1 and turn.
Row 6-7: Sc in every stitch (36). Then ch x1 and turn.
Row 8: Dec, then sc x32. In the last stitch in the row make a dec (34). Then ch x1 and turn.
Row 9-10: Sc in every stitch (34). Then ch x1 and turn.
Row 11: Dec, then sc x30. In the last stitch in the row make a dec (32). Then ch x1 and turn.
Row 12-13: Sc in every stitch (32). Then ch x1 and turn.
Row 14: Dec, then sc x28. In the last stitch in the row make a dec (30). Then ch x1 and turn.
Row 15-16: Sc in every stitch (30). Then ch x1 and turn.
Row 17: Dec, then sc x26. In the last stitch in the row make a dec (28). Then ch x1 and turn.
Row 18-19: Sc in every stitch (28). Then ch x1 and turn.
Row 20: Dec, then sc x24. In the last stitch in the row make a dec (26). Then ch x1 and turn.
Row 21-22: Sc in every stitch (26). Then ch x1 and turn.
Row 23: Dec, then sc x22. In the last stitch in the row make a dec (24). Then ch x1 and turn.
Row 24-25: Sc in every stitch (24). Then ch x1 and turn.
Row 26: Dec, then sc x20. In the last stitch in the row make a dec (22). Then ch x1 and turn.
Row 27-28: Sc in every stitch (22). Then ch x1 and turn.
Row 29: Dec, then sc x18. In the last stitch in the row make a dec (20). Then ch x1 and turn.
Row 30-31: Sc in every stitch (20). Then ch x1 and turn.
Row 32: Dec, then sc x16. In the last stitch in the row make a dec (18). Then ch x1 and turn.
Row 33-34: Sc in every stitch (18). Then ch x1 and turn.
Row 35: Dec, then sc x14. In the last stitch in the row make a dec (16). Then ch x1 and turn.
Row 36-37: Sc in every stitch (16). Then fasten off the green yarn and join the white, after that ch x1 and turn in the white yarn.
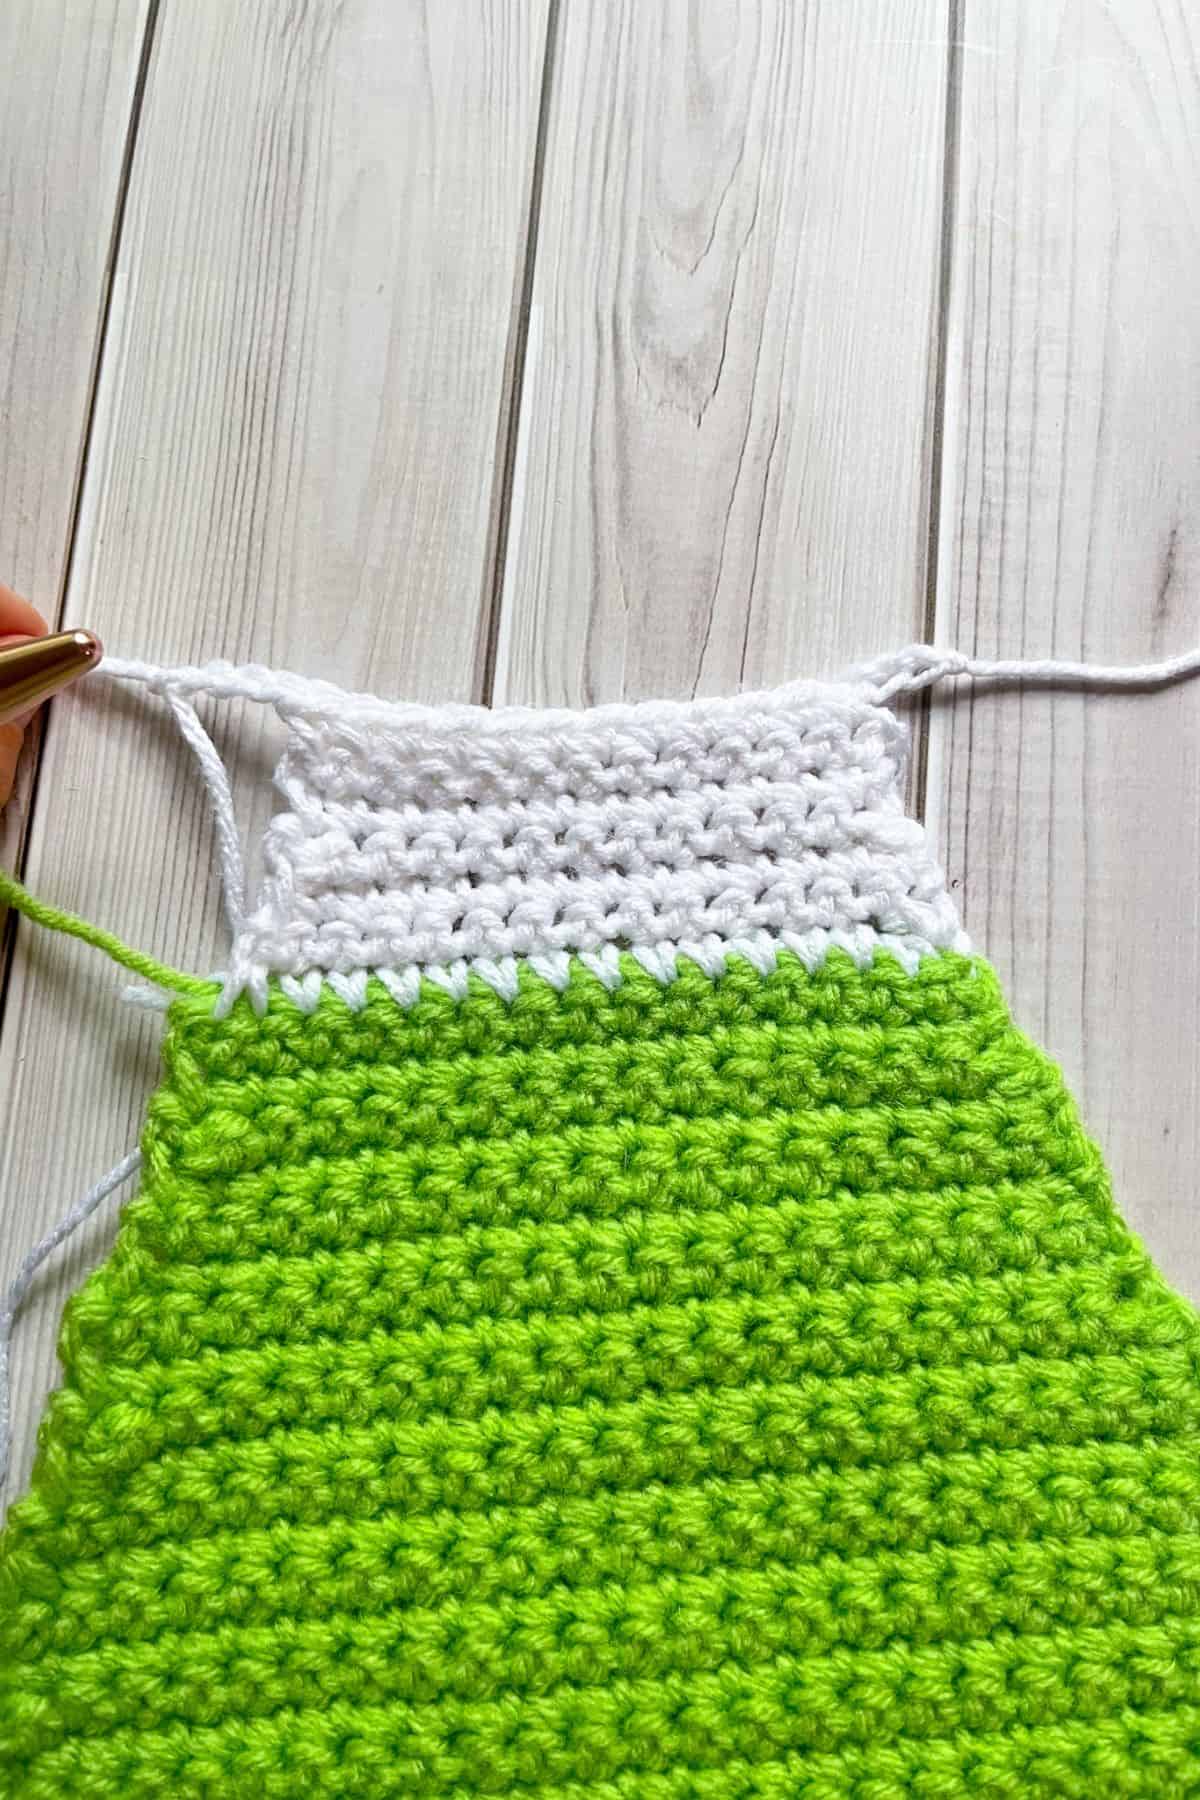
Row 38: Dec, then sc x12. In the last stitch in the row make a dec (14). Then ch x1 and turn.
Row 39-40: Sc in every stitch (14). Then ch x1 and turn.
Row 41: Dec, then sc x10. In the last stitch in the row make a dec (12). Then ch x1 and turn.
Row 42-43: Sc in every stitch (12). Then ch x1 and turn. After row 43 instead of chaining and turning, fasten off.
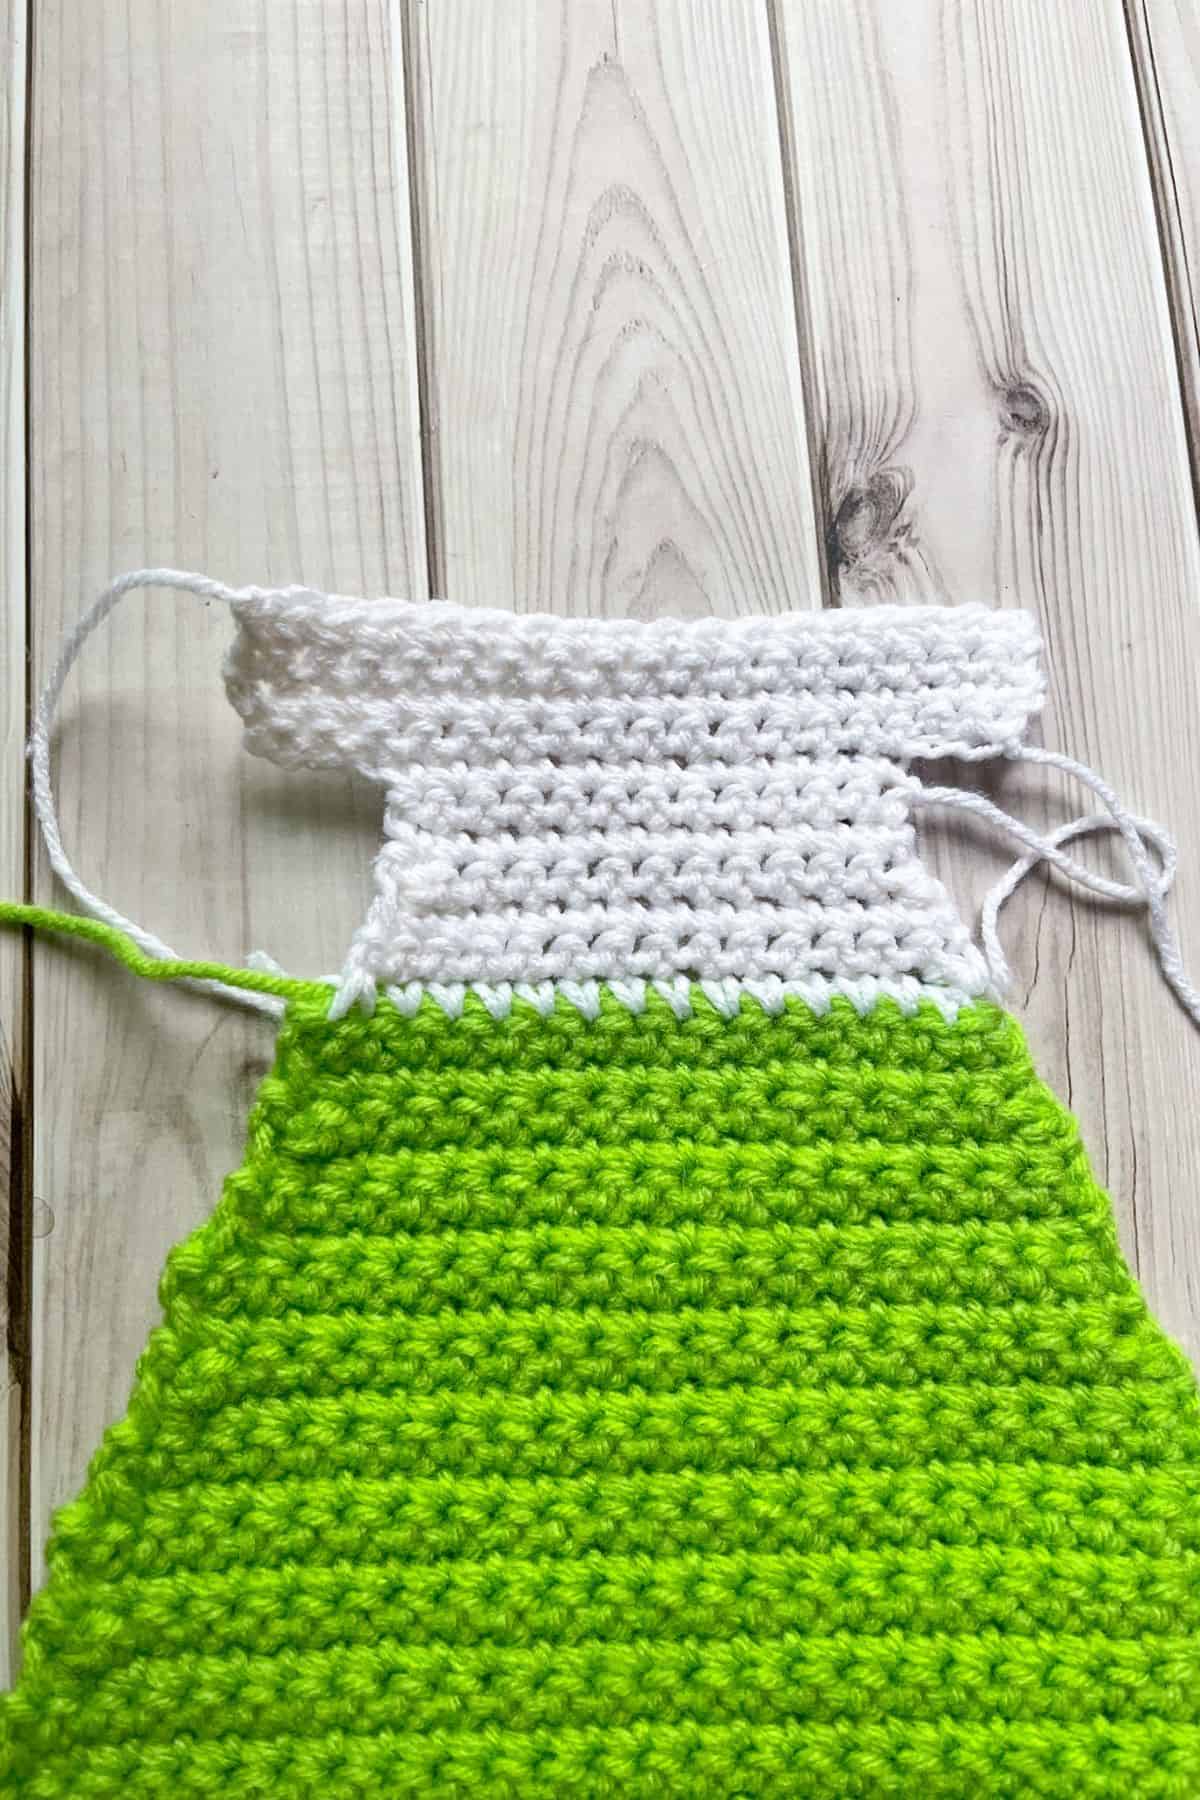
Row 44: With the white yarn, ch x3 and then reattach to the top of the bottle panel by crocheting into the last row you worked in. Crochet for the rest of the row, then ch x4 and turn (19).
Row 45: In the second ch, make a sc. Then make a sc in each of the next 2 chains. Then sc x12 and then sc in each of the last 3 chains (18). After, ch x1 and turn.
Row 46-48: Sc x18 (18). Then ch x1 and turn. After row 48, fasten off the yarn.
Row 49: Using the dove-colored yarn, skip 4 sc stitches in the last row you worked, and join the new yarn color. Then sc x10 (10). There should be 4 sc stitches from the previous row that you have not worked in, do not work in those. Then ch x1 and turn.
Row 50: Sc x10 and then ch x1 and turn (10).
Row 51: Inc, then sc x8. In the last stitch in the row make a inc (12). Then ch x1 and turn.
Row 52-53: Sc in every stitch (12). Then ch x1 and turn, but in the last row fasten off.
Make 2 of these panels.
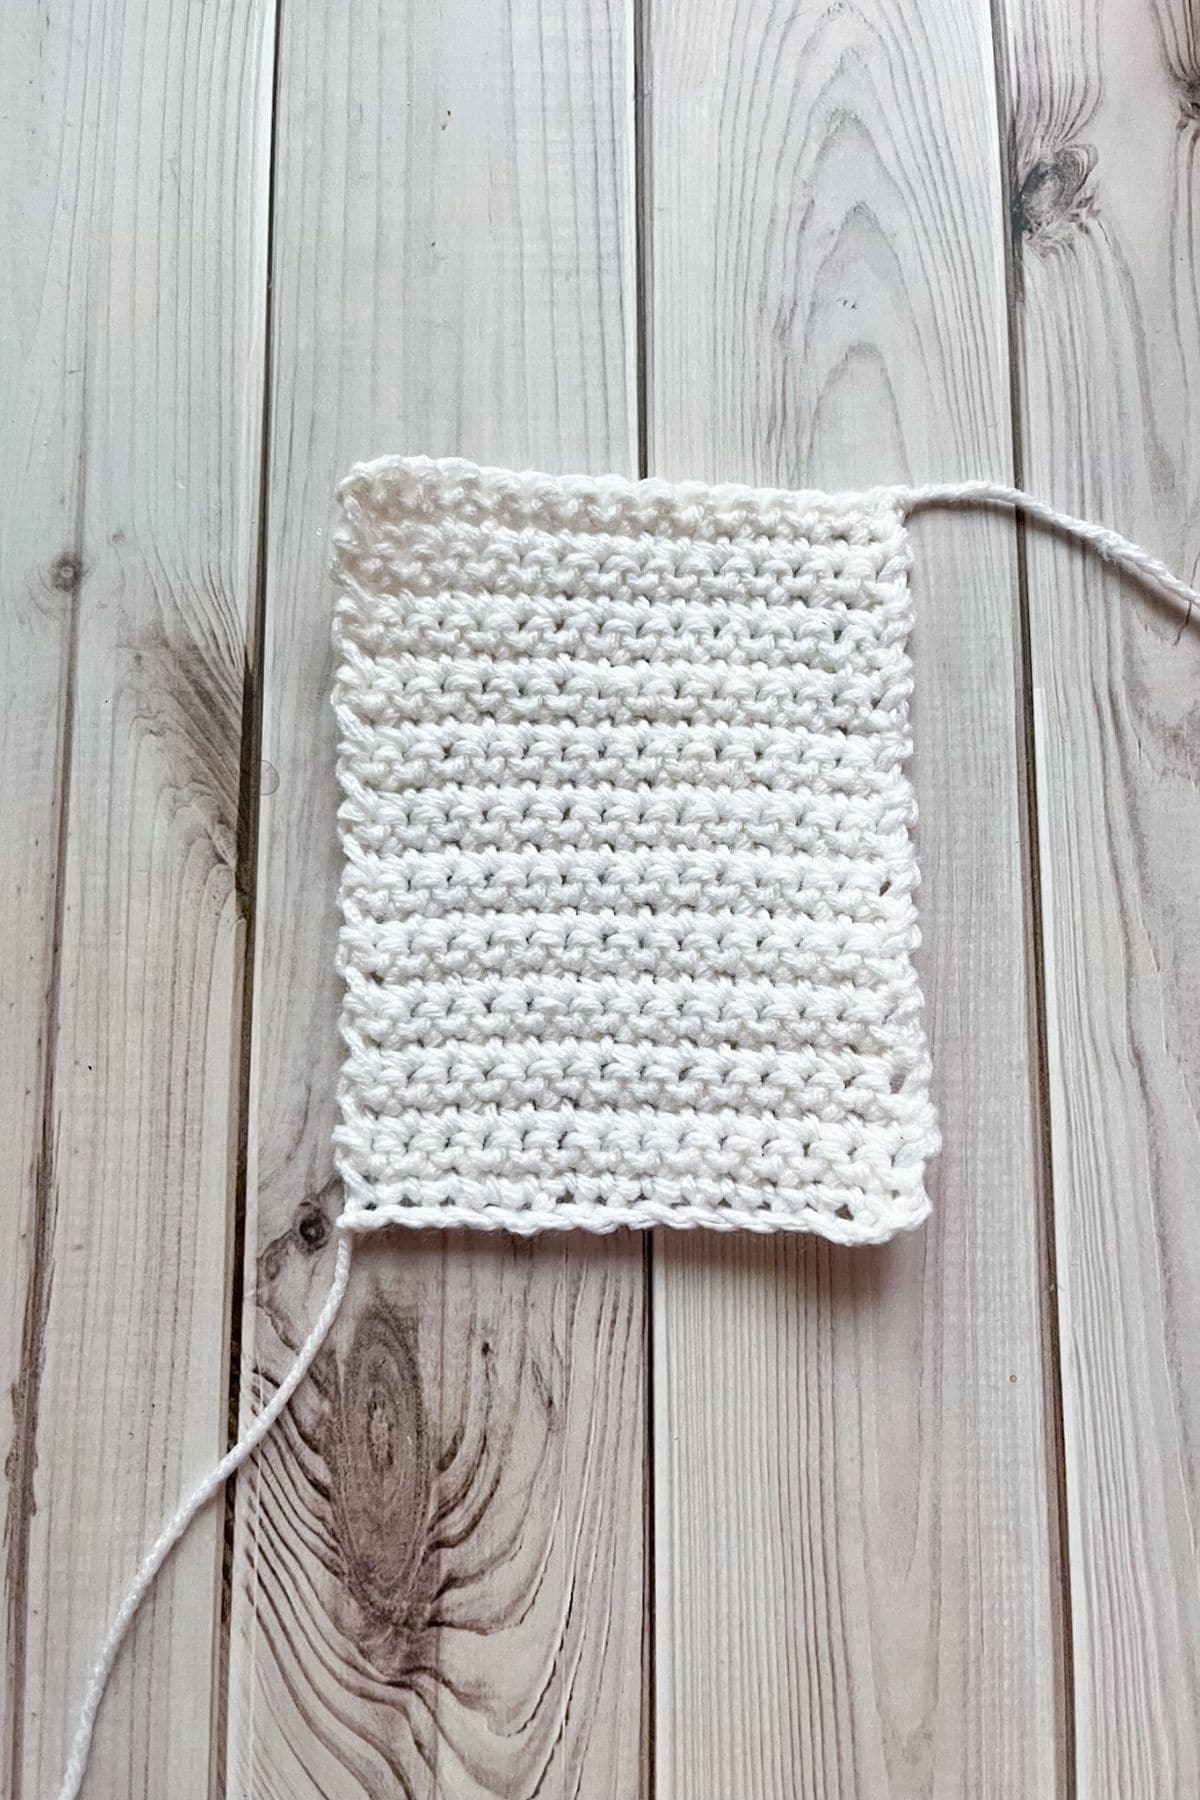
Crochet Potion Label:
Row 1: With the white yarn, ch x15 and then turn.
Row 2: In the second ch from the hook, make a sc and then continue making sc down the length of the chain (14). Then ch x1 and turn.
Row 3-24: Sc in every stitch (14). Then ch x1 and turn. After the last row, fasten off but leave a tail for sewing.
Crochet Skull Applique:
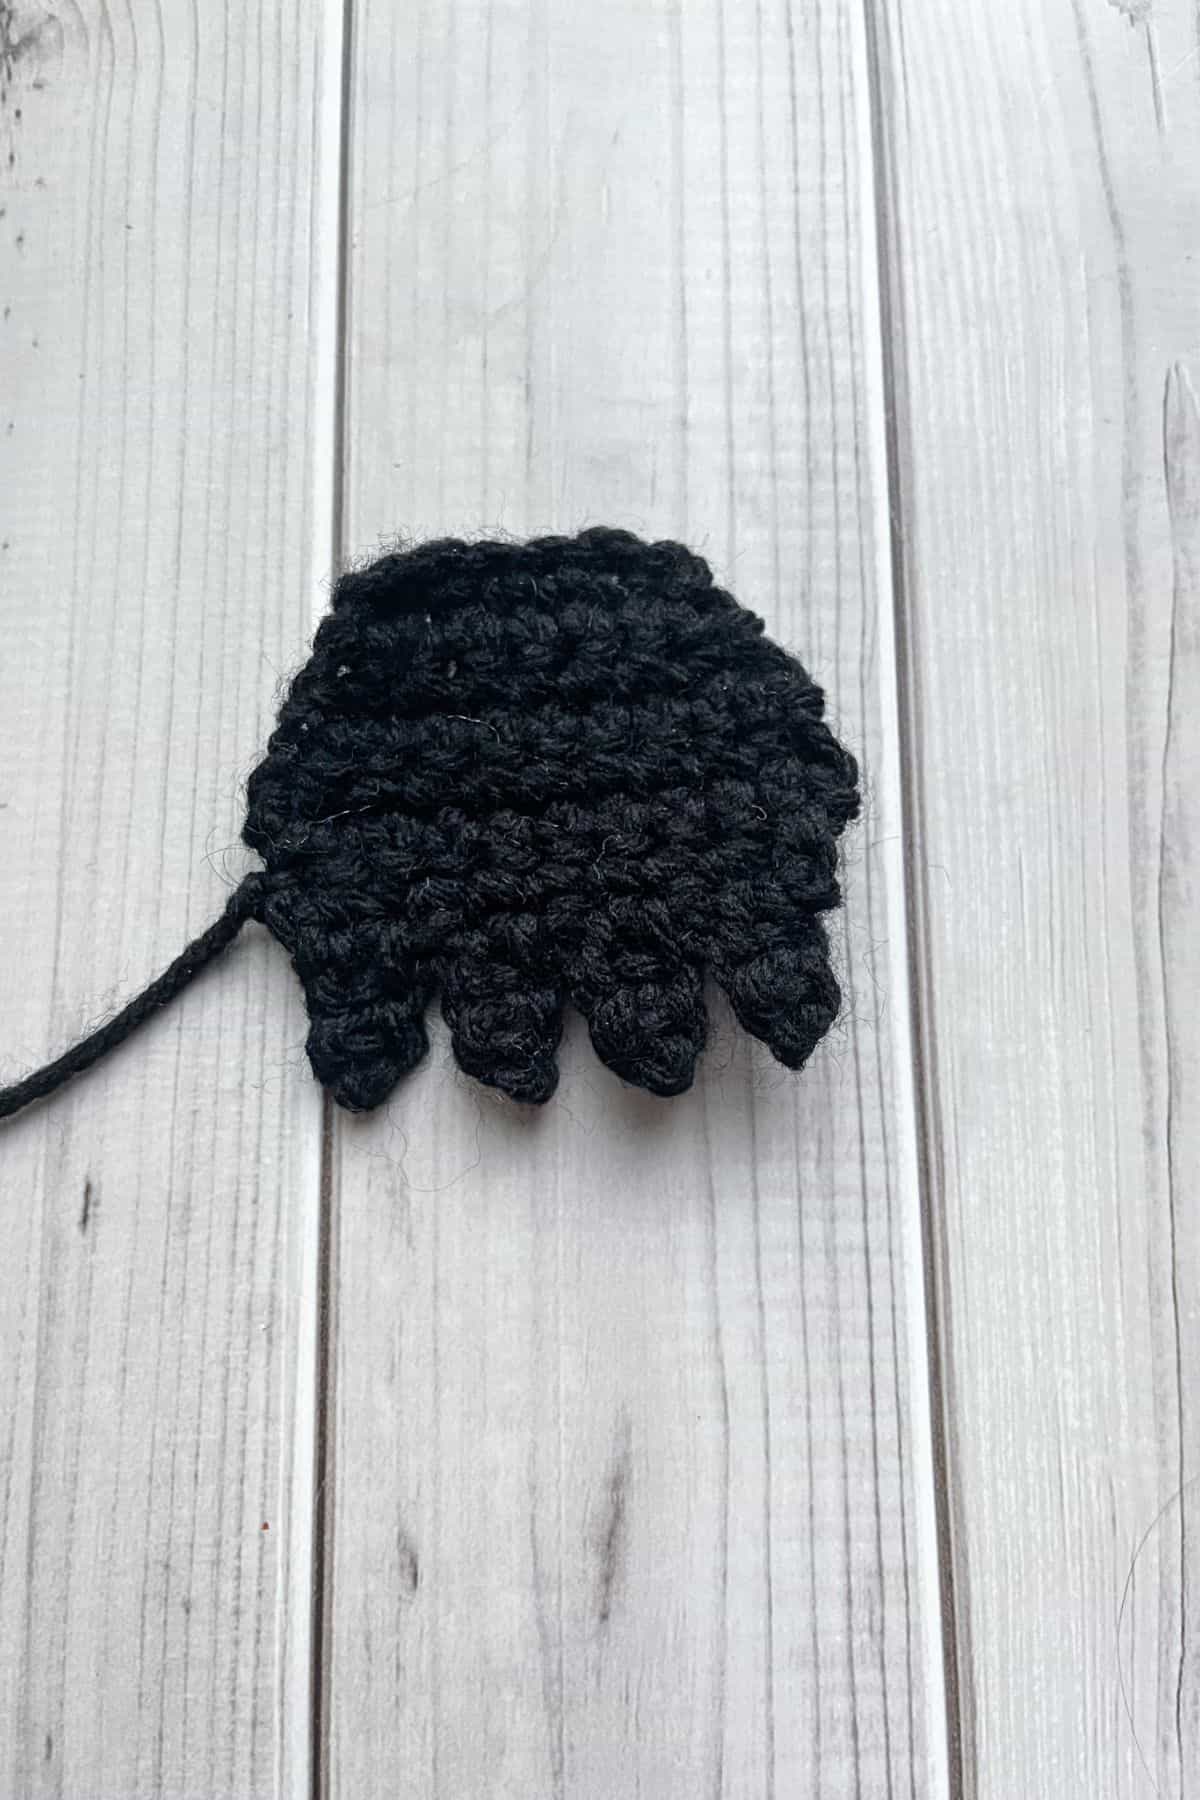
Row 1: With the black yarn, ch x7 and then turn.
Row 2: In the second ch from the hook, make a sc and then continue making sc down the length of the chain (6). Then ch x1 and turn.
Row 3: Inc, then sc x4. In the last stitch in the row make a inc (8). Then ch x1 and turn.
Row 4: Sc in every stitch (8). Then ch x1 and turn.
Row 5: Inc, then sc x6. In the last stitch in the row make a inc (10). Then ch x1 and turn.
Row 6-7: Sc in every stitch (10). Then ch x1 and turn.
Row 8: Dec, then sc x6. In the last stitch in the row make a dec (8). Then ch x1 and turn.
Row 9: This is the row we make the upper skull teeth.
*Sl st, then immediately ch x3 and make a sc in each of the 2nd and 3rd chains. After that, sl st in the next stitch from the previous row. * Repeat 3 more times between the *. You should have 4 teeth.
Fasten off the yarn and leave a tail for sewing.

Crochet Eyes:
Round 1: Make a mr, then immediately sc x6 in the circle, then sl st to the first stitch. Fasten off and leave a tail for sewing. Make 2.
Once the eyes are made, sew them to the skull.
Crochet Potion Bottle Assembly:
Crochet the 2 potion bottle sides together. You can use either 1 color yarn or switch the colors when crocheting the edge to the corresponding color block you are in. I started crocheting the edges together from the side of the potion bottle and went down and then around leaving the top open. I then began to stuff the pillow lightly with polyfill and continued crocheting the top of the bottle in its corresponding colors.
Once the potion bottle is crocheted closed, you can work on the label.
If you are using an applique to put on the label like my crochet skull pattern, you can sew the applique on the label and then sew the label to the bottle.
Once all the sewing is complete, weave in any ends.
And now you have a crochet potion bottle pillow! A perfect decoration for Halloween or DnD night. I hope you enjoyed my crochet potion pillow pattern!
If you have any leftover yarn you can make my crochet ghost garland pattern for additional Halloween fun!

🐌Expert Tips
- Maintaining Shape: Avoid overstuffing the crochet potion bottle, especially near the corners, as it can cause the bottom to bow. Stuff it just enough to maintain its shape.
- Adjusting Applique Sizes: If your applique doesn’t fit on the label, try using a smaller hook to reduce its size. For intricate designs, consider using felt cutouts instead of crocheted appliques—it's a quick and easy alternative.
- Polyfill Alternatives: If you prefer not to use acrylic polyfill for this Crochet Potion Bottle Pattern, consider cotton polyfill, yarn scraps, or other soft, washable materials.
🧵Pattern FAQs
Try using a smaller hook for a smaller applique or switch to felt shapes. Cut, sew, or glue them onto the label.
If you are having trouble finding a crochet applique that fits and looks right for your label for the crochet potion bottle, you can use felt. Buy some black felt, trace out what you want cut, then cut it and sew or glue it to the label. Sometimes it's necessary to save you from a headache.
If it's the acrylic polyfill you have issues with, you can always use cotton polyfill, yarn scraps, or other soft and washable materials to stuff the crochet potion bottle with.
🧶More Crochet Halloween Patterns
If you tried this Crochet Potion Bottle Pattern (or any other pattern on my website), please let me know how it went in the 📝 comments below. I'd love to hear from you!
Crochet Potion Bottle Pattern
Materials
Abbreviations (US terms)
- Chain - ch
- Single crochet - sc
- Increase - inc
- Decrease - dec
- Magic ring - mr
- Slip stitch - sl st
Notes
- I made the crochet potion bottle with worsted yarn, but any yarn thickness works.
- Smaller yarns (like DK) make the bottle smaller, and bulky yarns make it larger—just use the correct hook size for the yarn.
- I made a skull applique for the Halloween pillow pattern, but you can choose any applique, like a llama or heart.
- You can also cut and sew felt for the potion label if preferred.
- The finished bottle is about 18" tall when using a 5.5mm hook and worsted yarn.
Instructions
- The crochet potion bottle pillow is made in rows and then crocheted together.
Flat Sides: Make x2
- Row 1: Ch x33 in green, then turn.
- Row 2: In the second chain from the hook make a sc. Then continue making sc for the entire chain length (32). After, ch x1 and then turn.
- Row 3: Inc, then sc x30. In the last stitch in the row make a inc (34). Then ch x1 and turn.
- Row 4: Sc in every stitch (34). Then ch x1 and turn.
- Row 5: Inc, then sc x32. In the last stitch in the row make a inc (36). Then ch x1 and turn.
- Row 6-7: Sc in every stitch (36). Then ch x1 and turn.
- Row 8: Dec, then sc x32. In the last stitch in the row make a dec (34). Then ch x1 and turn.
- Row 9-10: Sc in every stitch (34). Then ch x1 and turn.
- Row 11: Dec, then sc x30. In the last stitch in the row make a dec (32). Then ch x1 and turn.
- Row 12-13: Sc in every stitch (32). Then ch x1 and turn.
- Row 14: Dec, then sc x28. In the last stitch in the row make a dec (30). Then ch x1 and turn.
- Row 15-16: Sc in every stitch (30). Then ch x1 and turn.
- Row 17: Dec, then sc x26. In the last stitch in the row make a dec (28). Then ch x1 and turn.
- Row 18-19: Sc in every stitch (28). Then ch x1 and turn.
- Row 20: Dec, then sc x24. In the last stitch in the row make a dec (26). Then ch x1 and turn.
- Row 21-22: Sc in every stitch (26). Then ch x1 and turn.
- Row 23: Dec, then sc 22. In the last stitch in the row make a dec (24). Then ch x1 and turn.
- Row 24-25: Sc in every stitch (24). Then ch x1 and turn.
- Row 26: Dec, then sc x20. In the last stitch in the row make a dec (22). Then ch x1 and turn.
- Row 27-28: Sc in every stitch (22). Then ch x1 and turn.
- Row 29: Dec, then sc x18. In the last stitch in the row make a dec (20). Then ch x1 and turn.
- Row 30-31: Sc in every stitch (20). Then ch x1 and turn.
- Row 32: Dec, then sc x16. In the last stitch in the row make a dec (18). Then ch x1 and turn.
- Row 33-34: Sc in every stitch (18). Then ch x1 and turn.
- Row 35: Dec, then sc x14. In the last stitch in the row make a dec (16). Then ch x1 and turn.
- Row 36-37: Sc in every stitch (16). Then fasten off the green yarn and join the white, after that ch x1 and turn in the white yarn.
- Row 38: Dec, then sc x12. In the last stitch in the row make a dec (14). Then ch x1 and turn.
- Row 39-40: Sc in every stitch (14). Then ch x1 and turn.
- Row 41: Dec, then sc x10. In the last stitch in the row make a dec (12). Then ch x1 and turn.
- Row 42-43: Sc in every stitch (12). Then ch x1 and turn. After row 43 instead of chaining and turning, fasten off.
- Row 44: With the white yarn, ch x3 and then reattach to the top of the bottle panel by crocheting into the last row you worked in. Crochet for the rest of the row, then ch x4 and turn (19).
- Row 45: In the second ch, make a sc. Then make a sc in each of the next 2 chains. Then sc x12 and then sc in each of the last 3 chains (18). After, ch x1 and turn.
- Row 46-48: Sc x18 (18). Then ch x1 and turn. After row 48, fasten off the yarn.
- Row 49: Using the dove colored yarn, skip 4 sc stitches in the last row you worked, and join the new yarn color. Then sc x10 (10). There should be 4 sc stitches from the previous row that you have not worked in, do not work in those. Then ch x1 and turn.
- Row 50: Sc x10 and then ch x1 and turn (10).
- Row 51: Inc, then sc x8. In the last stitch in the row make a inc (12). Then ch x1 and turn.
- Row 52-53: Sc in every stitch (12). Then ch x1 and turn, but in the last row fasten off.
Potion Label:
- Row 1: With the white yarn, ch x15 and then turn.
- Row 2: In the second ch from the hook, make a sc and then continue making sc down the length of the chain (14). Then ch x1 and turn.
- Row 3-24: Sc in every stitch (14). Then ch x1 and turn. After the last row, fasten off but leave a tail for sewing.
Skull Applique:
- Row 1: With the black yarn, ch x7 and then turn.
- Row 2: In the second ch from the hook, make a sc and then continue making sc down the length of the chain (6). Then ch x1 and turn.
- Row 3: Inc, then sc x4. In the last stitch in the row make a inc (8). Then ch x1 and turn.
- Row 4: Sc in every stitch (8). Then ch x1 and turn.
- Row 5: Inc, then sc x6. In the last stitch in the row make a inc (10). Then ch x1 and turn.
- Row 6-7: Sc in every stitch (10). Then ch x1 and turn.
- Row 8: Dec, then sc x6. In the last stitch in the row make a dec (8). Then ch x1 and turn.
- Row 9: This is the row we make the upper skull teeth.
- *Sl st, then immediately ch x3 and make a sc in each of the 2nd and 3rd chains. After that, sl st in the next stitch from the previous row. * Repeat 3 more times between the *. You should have 4 teeth.
- Fasten off the yarn and leave a tail for sewing.
Eyes:
- Round 1: Make a mr, then immediately sc x6 in the circle, then sl st to the first stitch. Fasten off and leave a tail for sewing. Make 2.
- Once the eyes are made, sew them to the skull.
Assembly:
- Crochet the 2 potion bottle sides together. You can use either 1 color yarn or switch the colors when crocheting the edge to the corresponding color block you are in. I started crocheting the edges together from the side of the potion bottle and went down and then around leaving the top open. I then began to stuff the pillow lightly with polyfill and continued crocheting the top of the bottle in its corresponding colors.
- Once the bottle is crocheted closed, you can work on the label.
- If you are using an applique to put on the label like my crochet skull pattern, you can sew the applique on the label and then sew the label to the bottle.
- Once all the sewing is complete, weave in any ends.
- It's finished! A perfect decoration for Halloween or DnD night. I hope you enjoyed my crochet potion bottle pattern!


Leave a Reply