
Get spooky with my Crochet Jack O' Lantern Pattern! These crochet jack o' lanterns are like regular crochet pumpkins but each comes with its own personality.

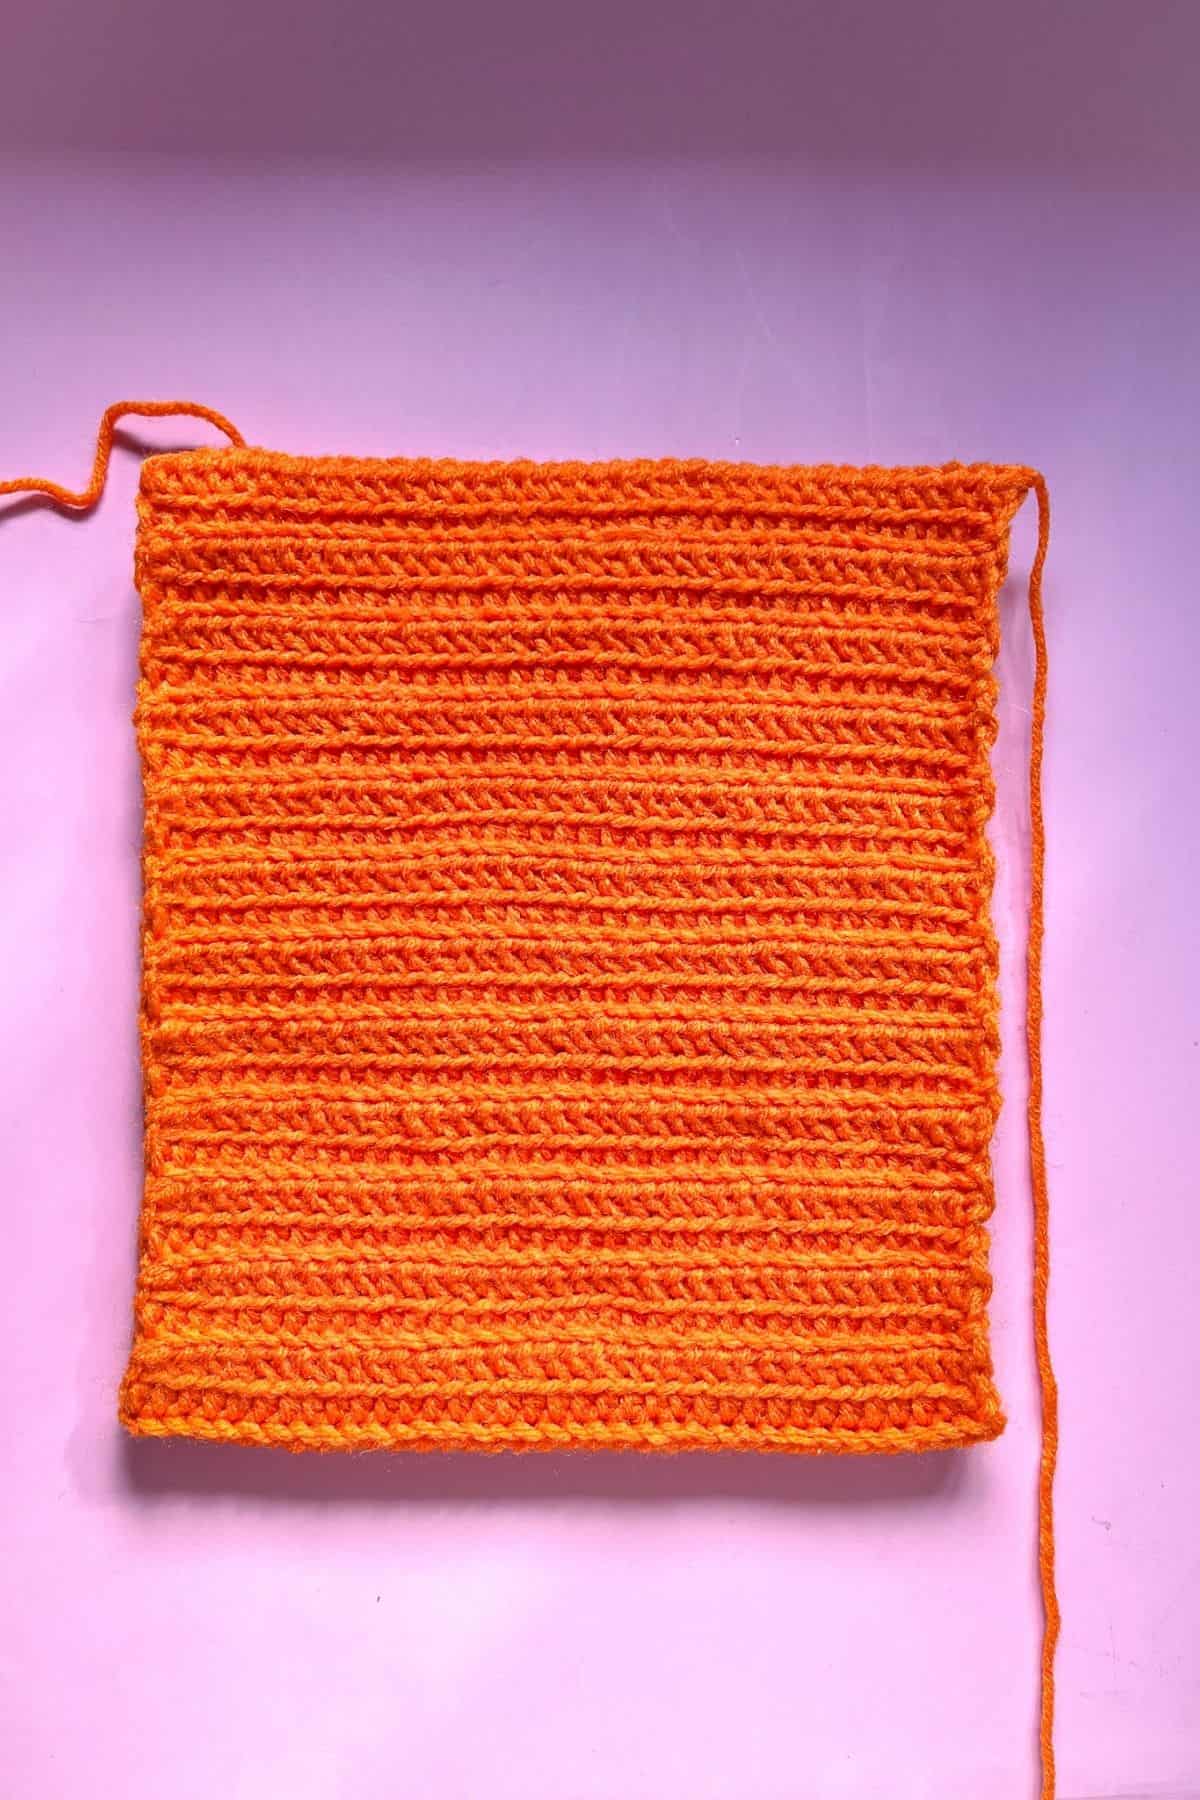
I love crocheting for Halloween. This design is a spin-off of my crochet pumpkin pattern, but it features different sizes for the pumpkins. The base pattern is straightforward; the pumpkins start as simple rectangles, which are then gathered and stitched to form a pumpkin shape.
Additional Halloween features, such as a crocheted jack-o'-lantern face, can be added to the pumpkins. However, these can be omitted, or you can use felt for more defined edges on the mouth and eyes.
The crochet jack o' lantern pattern is super simple to make and can be replicated in any color and yarn. I think this pattern would look fantastic in chunky yarn, allowing you to create a HUGE pumpkin friend to love and squish.
If you end up with extra yarn, you can use it to make my crochet crow pattern. To make your crochet jack o' lanterns even more festive, consider sewing the crow to the top of the pumpkins.
If you have extra orange yarn and want to expand your crochet pumpkin decorations, you can make my crochet fall garland, which features mini crochet pumpkins and acorns, or my crochet patchwork pumpkin, which adds texture through different stitches and techniques.
Jump to:
✏️ Things To Note:
- Yarn Amount: The crochet jack o' lantern was crafted using two shades of orange yarn from my scrap pile. The amount of yarn needed varies with the pumpkin's size; typically, a quarter to half a skein is sufficient for each pumpkin.
- Color Choices: While I opted for orange and yellow-orange, feel free to choose any color that appeals to you, such as yellow, orange, white, or blue. For the stem, brown is recommended, and any shade of green would work for the leaves.
- Yarn Type: I made the free crochet pumpkin pattern with acrylic yarn, but this project can be completed with any type of yarn. I highly suggest using cotton, acrylic, wool, or chunky yarn. If you use cotton yarn and have leftovers, consider making my crochet pumpkin coasters or crochet pumpkin pie potholders, both recommended to be made with cotton yarn.
- Size Dimensions: The finished size of the crocheted pumpkin with leaves is roughly 4 inches high and 6 inches wide for the small pumpkin, and 5 inches high and 8 inches wide for the large pumpkin.
💭 Abbreviations to Remember (US Terms)
- Magic ring (MR)
- Single crochet (sc)
- Increase (inc) - 2 stitches in the same stitch
- Chains (ch)
- Double crochet (dc)
- Half double crochet (hdc)
- Slip stitch (sl st)
- Back loop only (blo)
- Front loop only (flo)
🧋 Variations
- Use different colored yarns and mix and match the faces!
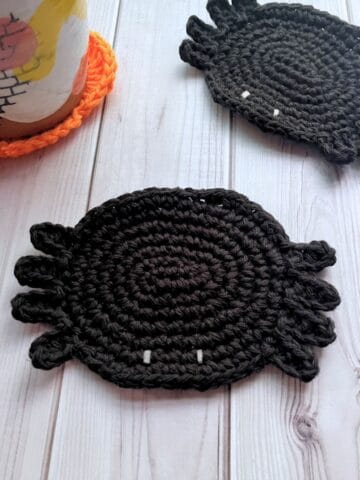
- Add small decorations to further spookify your crochet jack o' lanterns, like my crochet spider pattern!
🍵 Instructions for the Crochet Jack O Lantern Pattern
Small Crochet Pumpkin Pattern:
This part of the pattern is made in rows.

Row 1: Ch x25 (25), + ch x1 and turn.
Row 2: In the second ch from hook make a hdc, continue with the rest of the round making a hdc in each ch (25). At the end of the row ch x1 and turn.
Row 3: Back Loop Only HDC (BLO HDC) for the next row (25). Then ch x1 and turn.
*Back loop only is achieved by making a hdc like normal, but instead of going through both loops in the stitch from the row below, you just go through the one loop that is farthest to you.*
Row 4: Front Loop Only HDC ( FLO HDC) for the next row (25). Then ch x1 and turn.
This is similar to the last row but instead of going through the back loop, you go through the front.
Row 5-35: Repeat rows 3 and 4 (25) ch 1 and turn. Then fasten off and leave a long tail for sewing.
Crochet Large Pumpkin Pattern:
Row 1: Ch x35 (35), + ch x1 and turn.
Row 2: In the second ch from hook make a hdc, then continue with the rest of the round making a hdc in each ch (35). At the end of the row ch x1 and turn.
Row 3: Back Loop Only HDC (BLO HDC) for the next row (35). Then ch x1 and turn.
Row 4: Front Loop Only HDC ( FLO HDC) for the next row (35). Then ch x1 and turn.
Row 5-50: Repeat rows 3 and 4 (35). Then ch x1 and turn.
After completing all the rows, fasten off and leave a tail for sewing.
Assembling the Crochet Pumpkin:

Sew the side of the pumpkin so it creates a tube. Then sew the bottom and top of the pumpkin by weaving in between the rows on the edges, pull tight to cinch closed. Remember to stuff the pumpkins!
Now that the pumpkin is sewn closed, take either the tail that is long, or grab a new piece of pumpkin colored yarn and secure it to the pumpkin.

Now wrap the yarn around the pumpkin 3x making 6 different segments on the pumpkin. Do this tightly so the pumpkin segments puff out.
Once the 6 segments of the pumpkin are done, secure the yarn to either the top and bottom of the pumpkin and weave in the yarn ends.
Crochet Pumpkin Stem Pattern:
This part of the crochet pumpkin pattern is made in the round.

This is only for the top crochet jack o lantern.
Round 1: With the brown yarn, create a mr then crochet 6 sc in the circle. Slip stitch to the first sc and pull the magic ring string tight (6)
Round 2-6: Sc x5 (6). Slip stitch, fasten off and leave tail for sewing.
Crochet Pumpkin Leaves Pattern:

First Leaf:
Round 1: With the green yarn, make a mr and make 8 hdc in the circle and pull the circle closed. (Don’t slip stitch the circle together) (8). Then ch x1, turn.
Round 2: Skip the ch and dc x3 in the hdc stitch from the row below. Then dc, sl st, dc in the next stitch. Dc x2, sl st in the next stitch. Sc, hdc, dc in the next stitch. Dc, hdc, sc in the next stitch. Sl st, dc x2 in the next stitch. Dc, sl st, dc in the next stitch. Finally dc x3, sl st in the last stitch.
The first leaf is complete.
Second Leaf:
Ch x3 and turn.
Round 1: Work 8 hdc inside the second chain from the hook (8). Then ch x1, turn.
Round 2: Repeat the first leaf’s round 2 for this step.
Crochet Pumpkin Vine:
After sl st in the last stitch to finish the second leaf, ch x20 +1 turning chain.
Skip the first chain on the row of chains and make 2 sc in the second chain from the hook. This is also known as an increase (inc), make another 9x inc. This should curl the vine. For the last 10 chains make only 1 sc in each one. Then fasten and leave a tail for sewing.
Crochet Jack O Lantern Face Pattern:

Small Face:
Round 1: With the black yarn, create a mr then crochet 6 sc in the circle. Slip stitch to the first sc and pull the magic ring string tight (6), Slip stitch to the first sc, fasten off and leave tail for sewing.
Make 2 of these eyes.

Face For Larger Pumpkins:
Triangle Eyes: Ch x5, then in second ch from hook make a sc. in the following stitches make a hdc, dc, and tr. Then fasten off and leave a tail for sewing. Make 2 of these triangles for the eyes.
Mouth: Ch x28, in second ch from hook sc and then in the following 2 chs make 2 more sc. [In the next stitch make a sc, ch and sc. Sc x3 in the next 3 chs. Then, make a decrease in 3 chs by making a decrease like normal, but skipping the middle ch]. Repeat what's in the brackets until you run out of chains. Then fasten off and leave a tail for sewing.
Sewing:
Sew the stem to the top middle of the pumpkin on the smaller pumpkin.
Stitch the leaves to the pumpkin making sure to wrap the vine around the pumpkin stem, but leaving the curly end unattached so it can move freely.
Pin the faces to where you want them on the pumpkins and sew them on! Once the faces are sewn on you now have crochet jack o lanterns you can stack together (you can also sew them together!)
And now you have some crochet jack o lanterns!
If you have some leftover yarn, try making my crochet coffee cup!

🐌Expert Tips
- Choose the Right Yarn: For a plush texture, consider using bulky yarn. This will not only make your pumpkins squishier but also speed up the project.
- Customize the Faces: Experiment with different stitch patterns for the faces. You can also embellish with beads or sequins for an extra festive flair.
- Try Different Shapes: Instead of traditional round pumpkins, try making oval or even abstract shapes for a unique look!
- Finishing Touches: For a polished finish, block your completed pumpkins to help them hold their shape. This is especially useful if you're using cotton yarn.
- Adjust Sizes: To create larger pumpkins, simply increase the starting chain length and adjust the number of rows accordingly.
🧵 Pattern FAQs
Go ahead! You can change the stitches to whatever you stitch you prefer!
Absolutely! Whatever is easiest for you and makes your crochet pumpkin the best!
You can make the crochet pumpkins larger simply by making the starting chain longer and then adding extra rows to it. Additionally, you can use thicker yarn and a larger hook.

🧶More Crochet Halloween Patterns
If you tried this Crochet Jack O Lantern Pattern (or any other pattern on my website), please let me know how it went in the 📝 comments below. I'd love to hear from you!

Crochet Jack O Lantern Pattern
Materials
Abbreviations (US terms)
- Magic ring - mr
- Single crochet - sc
- Increase (inc) - 2 stitches in the same stitch
- Chains - ch
- Double crochet - dc
- Half double crochet - hdc
- Slip stitch - sl st
- Back loop only - blo
- Front loop only (flo)
Notes
- Made with two shades of orange scrap yarn.
- Yarn needed depends on size, usually ¼ to ½ skein per pumpkin.
- Used acrylic yarn, but any yarn works.
- Finished sizes:
- Small: 4 inches high, 6 inches wide.
- Larger: 5 inches high, 8 inches wide.
Instructions
Small Crochet Pumpkin Pattern:
- This part of the pattern is made in rows.
- Row 1: Ch x25 (25), + ch x1 and turn.
- Row 2: In the second ch from hook make a hdc, continue with the rest of the round making a hdc in each ch (25). At the end of the row ch x1 and turn.
- Row 3: Back Loop Only HDC (BLO HDC) for the next row (25). Then ch x1 and turn.
- *Back loop only is achieved by making a hdc like normal, but instead of going through both loops in the stitch from the row below, you just go through the one loop that is farthest to you.*
- Row 4: Front Loop Only HDC ( FLO HDC) for the next row (25). Then ch x1 and turn.
- This is similar to the last row but instead of going through the back loop, you go through the front.
- Row 5-35: Repeat rows 3 and 4 (25) ch 1 and turn. Then fasten off and leave a long tail for sewing.
Crochet Large Pumpkin Pattern:
- Row 1: Ch x35 (35), + ch x1 and turn.
- Row 2: In the second ch from hook make a hdc, then continue with the rest of the round making a hdc in each ch (35). At the end of the row ch x1 and turn.
- Row 3: Back Loop Only HDC (BLO HDC) for the next row (35). Then ch x1 and turn.
- Row 4: Front Loop Only HDC ( FLO HDC) for the next row (35). Then ch x1 and turn.
- Row 5-50: Repeat rows 3 and 4 (35). Then ch x1 and turn.
- After completing all the rows, fasten off and leave a tail for sewing.
Assembling the Crochet Pumpkin:
- Sew the side of the pumpkin so it creates a tube. Then sew the bottom and top of the pumpkin by weaving in between the rows on the edges, pull tight to cinch closed. Remember to stuff the pumpkins!
- Now that the pumpkin is sewn closed, take either the tail that is long, or grab a new piece of pumpkin colored yarn and secure it to the pumpkin.
- Now wrap the yarn around the pumpkin 3x making 6 different segments on the pumpkin. Do this tightly so the pumpkin segments puff out.
- Once the 6 segments of the pumpkin are done, secure the yarn to either the top and bottom of the pumpkin and weave in the yarn ends.
Crochet Pumpkin Stem Pattern:
- This part of the crochet pumpkin pattern is made in the round.
- This is only for the top crochet jack o lantern.
- Round 1: With the brown yarn, create a mr then crochet 6 sc in the circle. Slip stitch to the first sc and pull the magic ring string tight (6)
- Round 2-6: Sc x5 (6). Slip stitch, fasten off and leave tail for sewing.
Crochet Pumpkin Leaves Pattern:
First Leaf:
- Round 1: With the green yarn, make a mr and make 8 hdc in the circle and pull the circle closed. (Don’t slip stitch the circle together) (8). Then ch x1, turn.
- Round 2: Skip the ch and dc x3 in the hdc stitch from the row below. Then dc, sl st, dc in the next stitch. Dc x2, sl st in the next stitch. Sc, hdc, dc in the next stitch. Dc, hdc, sc in the next stitch. Sl st, dc x2 in the next stitch. Dc, sl st, dc in the next stitch. Finally dc x3, sl st in the last stitch.
- The first leaf is complete.
Second Leaf:
- Ch x3 and turn.
- Round 1: Work 8 hdc inside the second chain from the hook (8). Then ch x1, turn.
- Round 2: Repeat the first leaf’s round 2 for this step.
Crochet Pumpkin Vine:
- After sl st in the last stitch to finish the second leaf, ch x20 +1 turning chain.
- Skip the first chain on the row of chains and make 2 sc in the second chain from the hook. This is also known as an increase (inc), make another 9x inc. This should curl the vine. For the last 10 chains make only 1 sc in each one. Then fasten and leave a tail for sewing.
Crochet Jack O Lantern Face Pattern:
Small Face:
- Round 1: With the black yarn, create a mr then crochet 6 sc in the circle. Slip stitch to the first sc and pull the magic ring string tight (6), Slip stitch to the first sc, fasten off and leave tail for sewing.
- Make 2 of these eyes.
Face For Larger Pumpkins:
- Triangle Eyes: Ch x5, then in second ch from hook make a sc. in the following stitches make a hdc, dc, and tr. Then fasten off and leave a tail for sewing. Make 2 of these triangles for the eyes.
- Mouth: Ch x28, in second ch from hook sc and then in the following 2 chs make 2 more sc. [In the next stitch make a sc, ch and sc. Sc x3 in the next 3 chs. Then, make a decrease in 3 chs by making a decrease like normal, but skipping the middle ch]. Repeat what's in the brackets until you run out of chains. Then fasten off and leave a tail for sewing.
Sewing:
- Sew the stem to the top middle of the pumpkin on the smaller pumpkin.
- Stitch the leaves to the pumpkin making sure to wrap the vine around the pumpkin stem, but leaving the curly end unattached so it can move freely.
- Pin the faces to where you want them on the pumpkins and sew them on! Once the faces are sewn on you now have crochet jack o lanterns you can stack together (you can also sew them together!)
- And now you have some crochet jack o lanterns!


Leave a Reply