
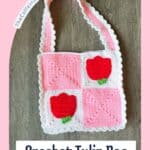
Spring is just around the corner, and there’s no better way to welcome the season than with a vibrant crochet tulip tote bag! This crochet tulip bag pattern can be made by crocheters of all skill levels, as long as you’re comfortable with basic foundational stitches.
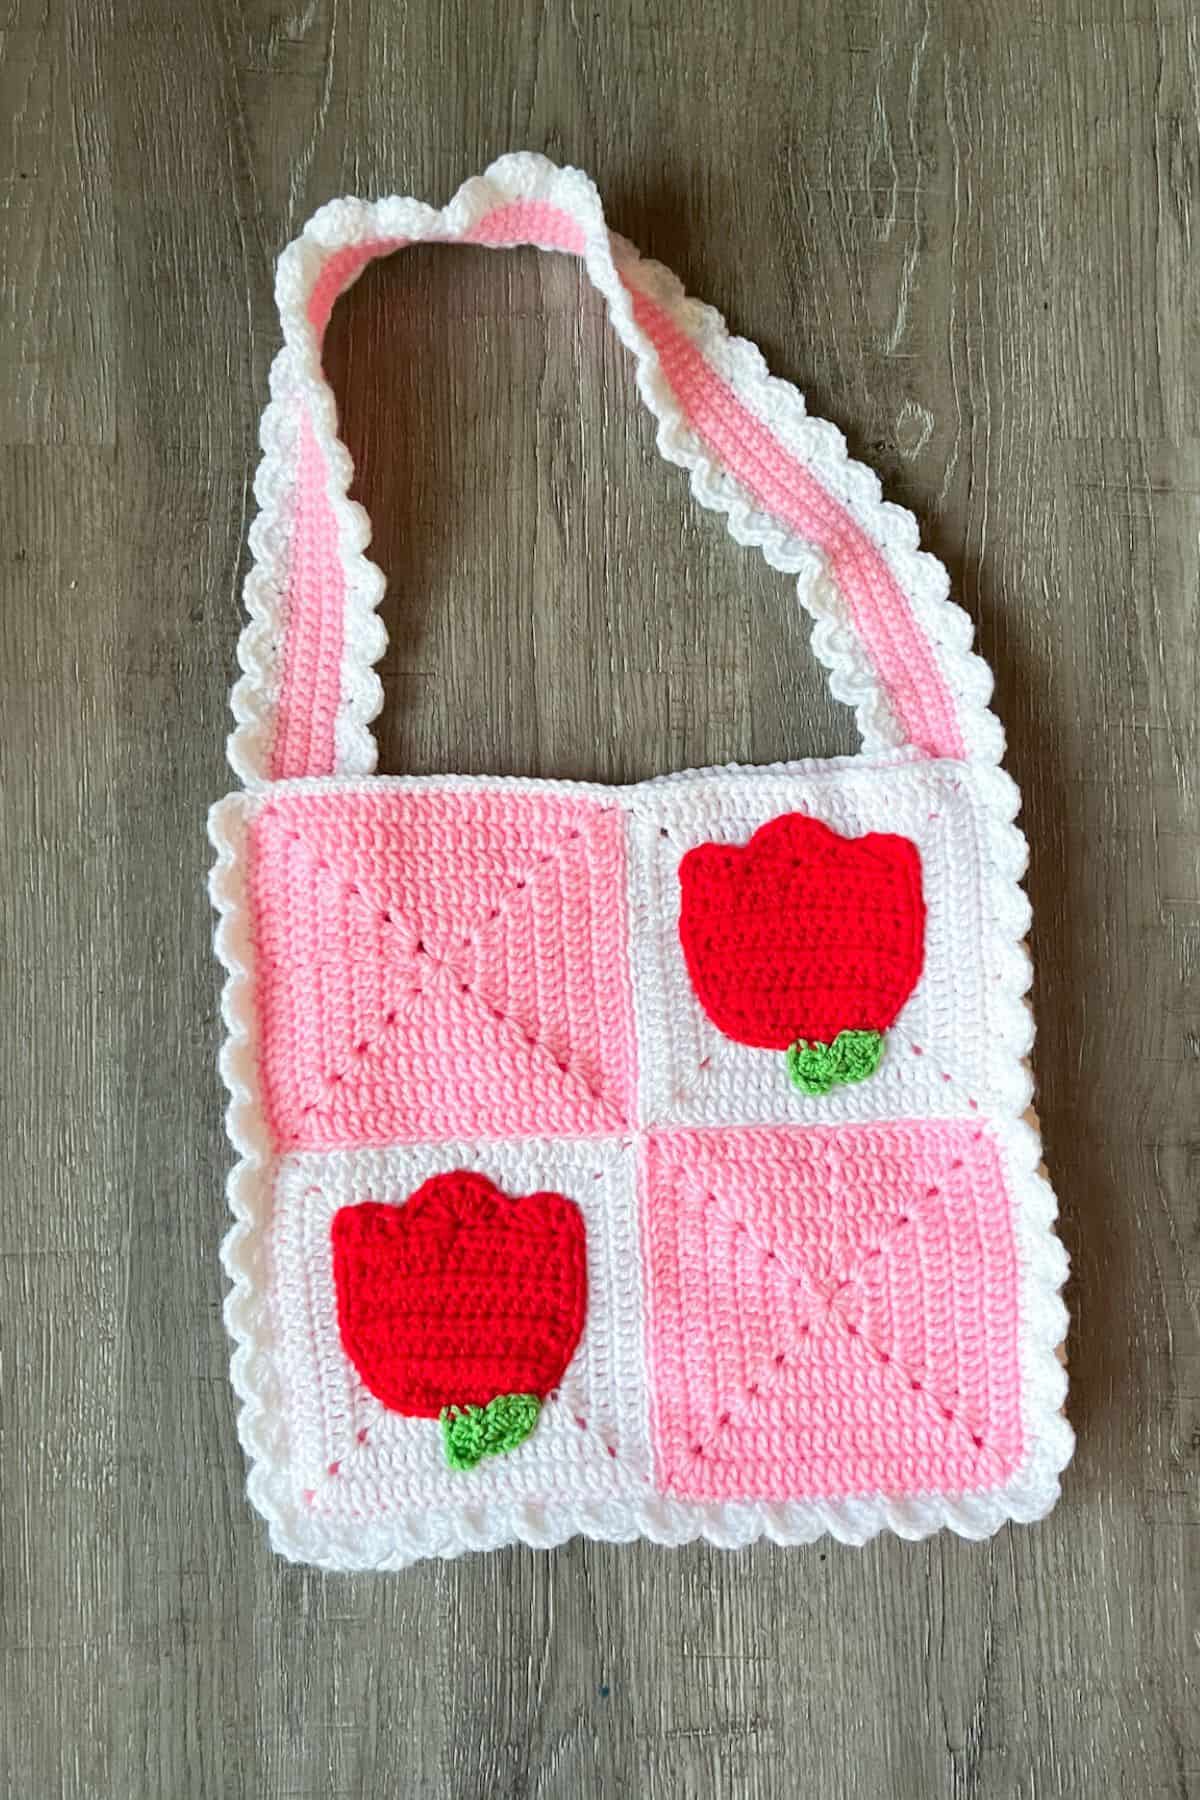
With its solid granny squares, cute tulip appliques (taken from my popular crochet tulip coaster pattern!), and a fun frilly shell stitch edge, the crochet tulip bag pattern is an absolute showstopper. Whether you’re carrying it to a Valentine’s Day event or just want to add a burst of color to your spring wardrobe, this bag is sure to turn heads.
Although I’ve used a combo of pink, red, and white yarn to give crochet tulip bag pattern a Valentine’s Day look, feel free to experiment with any color palette that speaks to you. For a softer spring feel, pastel shades like lavender, mint, or pale yellow would work beautifully! The beauty of this crochet flower bag is in how versatile it is—you can make it your own and truly personalize it.
I’m really excited to wear my crochet tulip bag to the tulip festival this spring, which is just a few hours away from me. I can already picture how lovely it will look in the blooming fields.
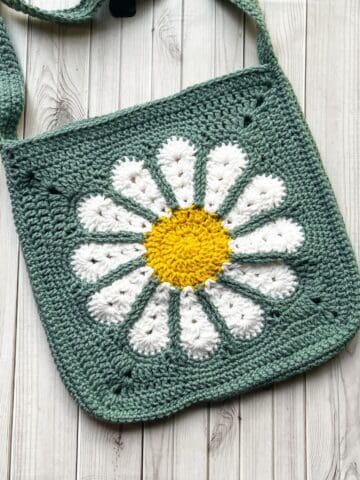
If you love this crochet tulip bag pattern, don’t forget to check out my other designs, like my crochet strawberry bag and crochet lemon bag, perfect for those sunny summer days ahead.
Let’s crochet some joy into this season—grab your yarn and get started!
Jump to:
✏️ Things To Note:
- Skill Level: The crochet tulip bag pattern is perfect for crocheters of all levels, as long as you’re comfortable with basic stitches like chains, double crochets, and slip stitches. If you’re new to granny squares or shell stitches, don’t worry—there are plenty of tutorials available to guide you through!
- Frilly Shell Edges: The shell stitch edging gives this bag a playful, frilly look. It’s easy to master and adds a lovely, textured finish to your crochet project.
- Size of the Bag: The finished crochet tulip bag pattern is a perfect size for everyday use, and it can easily hold all your essentials. You can also adjust the size by adding or removing granny squares if you want a larger or smaller bag. Or by using thinner yarn and smaller hook size.
🪡 Materials Needed
- Red Heart Yarn - white
- Red Heart Yarn - petal pink
- Red Heart Yarn - red
- Red Heart Yarn - spring green
- 4.5mm hook
- Tapestry needle
💭Abbreviations to Remember (US terms)
- Chains (ch)
- Magic ring (mr)
- Single crochet (sc)
- Half double crochet (hdc)
- Double crochet (dc)
- Slip stitch (sl st)
- Increase (inc)
* The ch x1 at the end of each row for the tulip applique does not count as a stitch in the row, it is a turning chain. The ch x2 for the granny square counts as a stitch in the round.
* If you see a stitch abbreviation with "x" after it, it means how many times you do that stitch in the following amount of stitches. For example: sc x6 would mean you make a single crochet in the next 6 stitches. Inc x2 means you make an inc in the next 2 stitches.
🧋Variations
- Color Variations: Change up the tulip colors to match different seasons or holidays. Try pastel hues for spring, bold reds and pinks for Valentine’s Day, or soft yellows and oranges for a warm, sunny look.
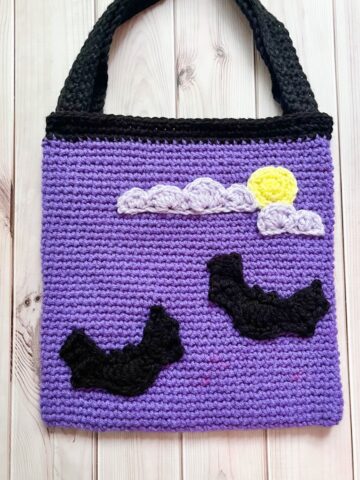
- Appliques: I use tulip coasters as my applique for the crochet tulip bag pattern, but you can really use any of my coaster designs as appliques - like my crochet frog coasters, bear coasters, and star coasters for instance!
🍵Instructions for Crochet Tulip Bag Pattern
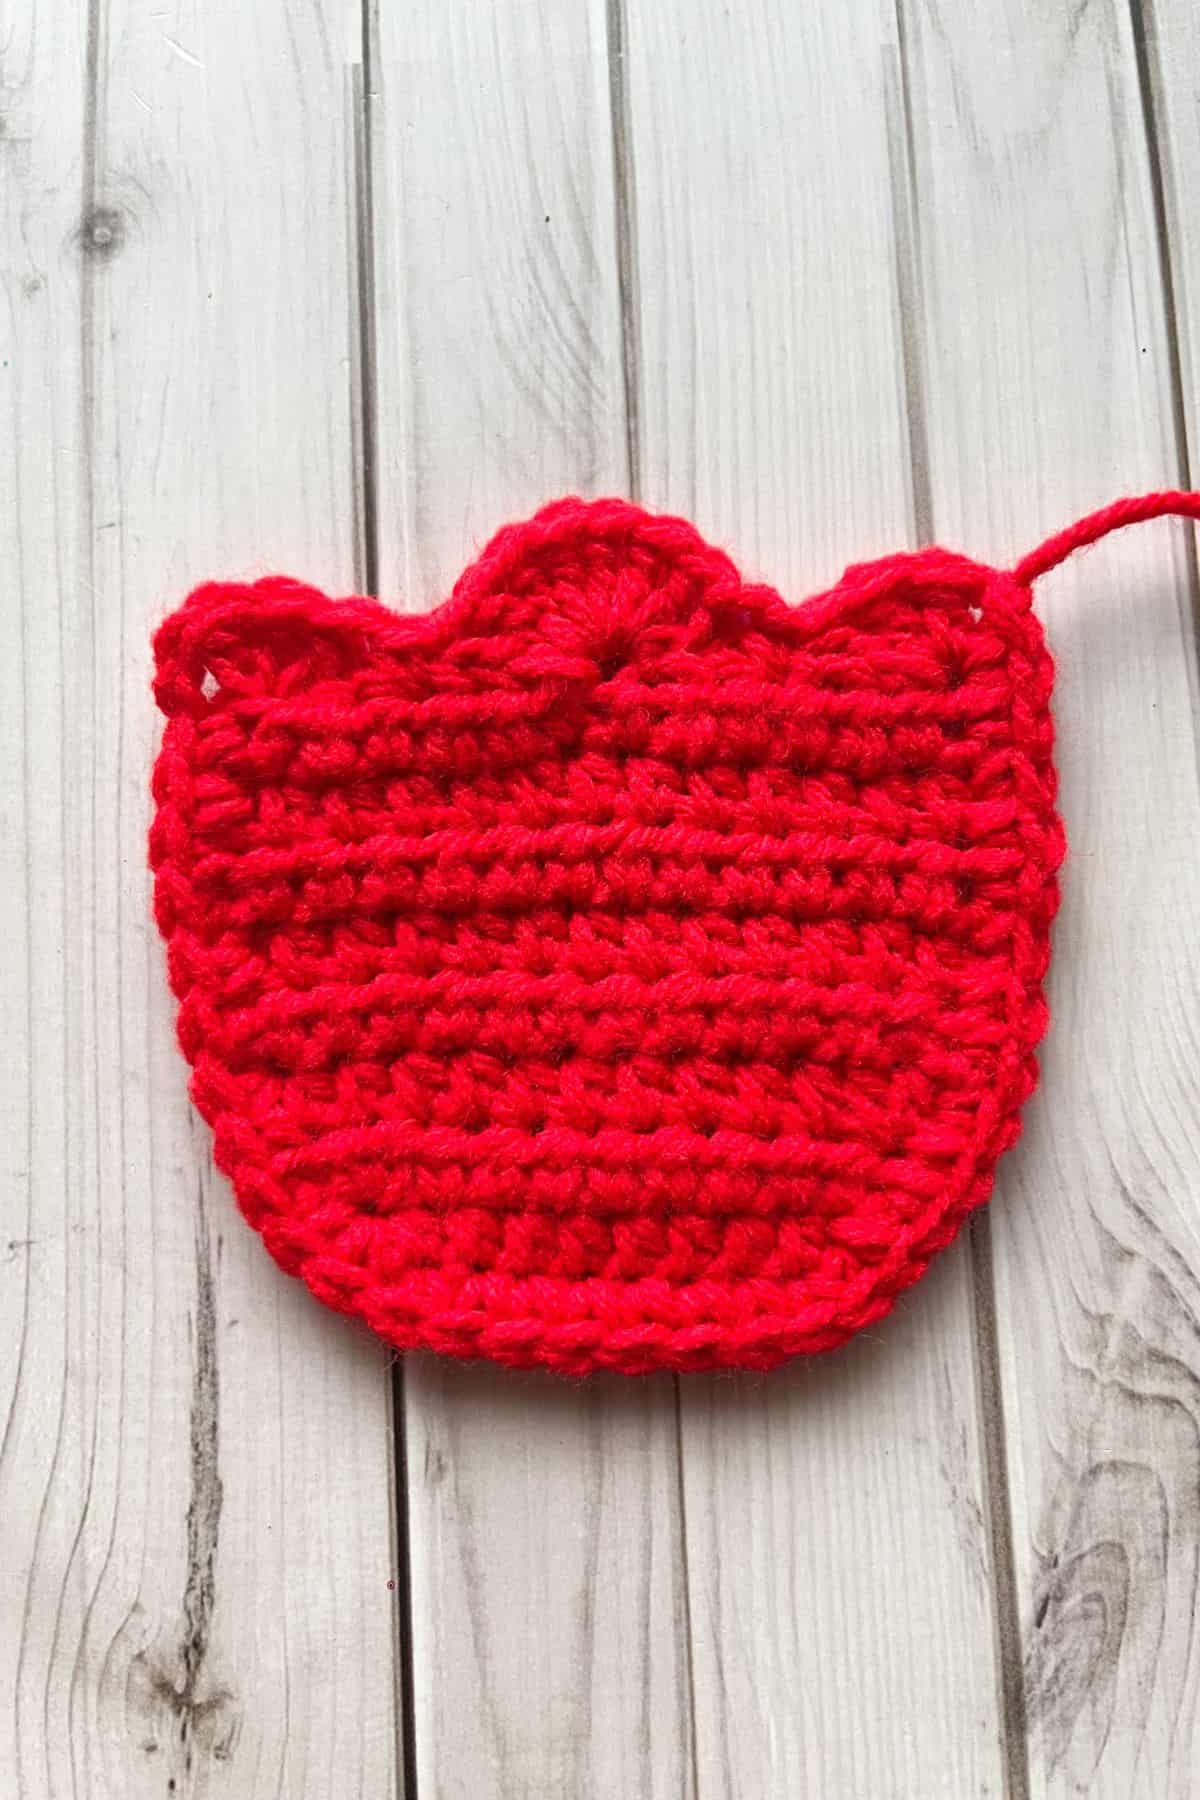
Crochet Tulip Flower Pattern:
Make 4 tulips for the crochet tulip bag pattern.
Row 1: Ch 10 and turn
Row 2: In the second ch from the hook make a hdc. Continue to make a hdc in each ch. (9)
Row 3: In the second chain from the hook make a hdc inc, then hdc x7 and in the last ch make another hdc inc (11). Then ch x1 and turn.
Row 4: Make a hdc inc, then hdc x9 and in the last stitch make another hdc inc (13). Then ch x1 and turn.
Row 5-9: Hdc in every stitch. Then ch x2 and turn.
Row 10: You will make the top of the tulip. Dc x3 in the first stitch in the row, then skip 2 stitches and make a sc in the 3rd stitch from the last stitch worked.
Then skip 2 more stitches and dc x8 into the same stitch, then skip 2 stitches and make a sc in the 3rd stitch from the last stitch worked.
Then skip 2 more stitches and in the last stitch in the row dc x3, ch x2 and then sl st to the same stitch you made the dc stitches from.
Lastly, sc around the edge of the tulip BUT NOT THE TOP, just around the U-shape of the flower. Try and make a 1-2 sc for each row, you may need more if it doesn’t lay flat and is curling. You will need less sc if the edge becomes wavy. Sometimes this isn’t an exact science as it is based on tension.
Fasten off and weave in any ends.
Crochet Stem:
Flip your tulip over so the top of the flower is at the bottom right-side facing you. Join your green yarn to the middle stitch (or what looks closest to the middle stitch - it doesn’t have to be exact).
Ch x5 and in the second ch from the hook hdc x4. Then sl st to the next stitch at the bottom of the flower to anchor the stem.
Fasten off and weave in any ends.
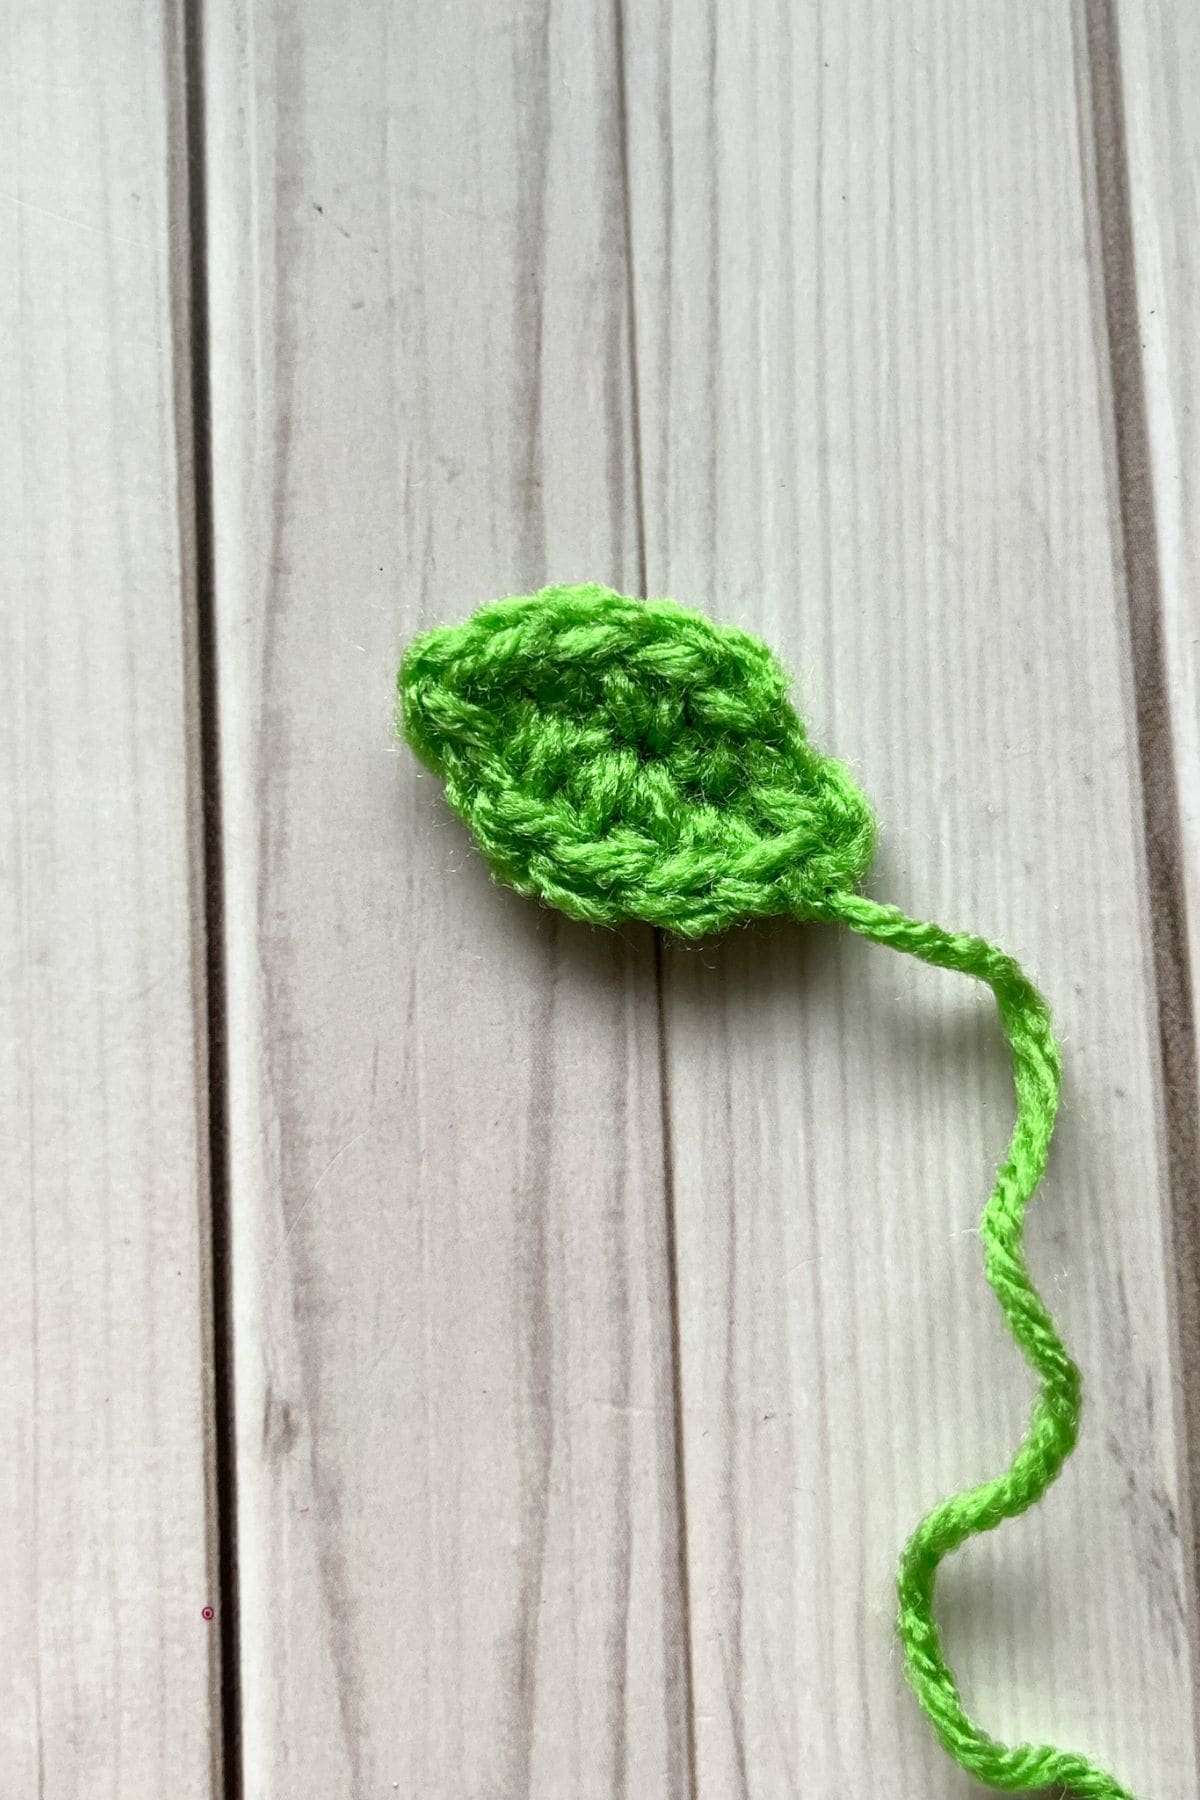
Crochet Leaf:
With your green yarn, ch x6. In the second ch from the hook make a sl st, in the next make a sc, in the following a hdc inc, and then another sc and sl st in the next 2 stitches. Ch x1 and turn.
Repeat the sequence of stitches for the other side of the chain - sl st, sc, hdc inc, sc, and sl st.
Fasten off and leave a long tail for sewing. Then, sew the leaf to the side of the tulip’s stem. You may need to also tack down the leaf top to the bottom of the flower so it lays flat.
Crochet Solid Granny Square:
Make 4 pink and 4 white granny squares.
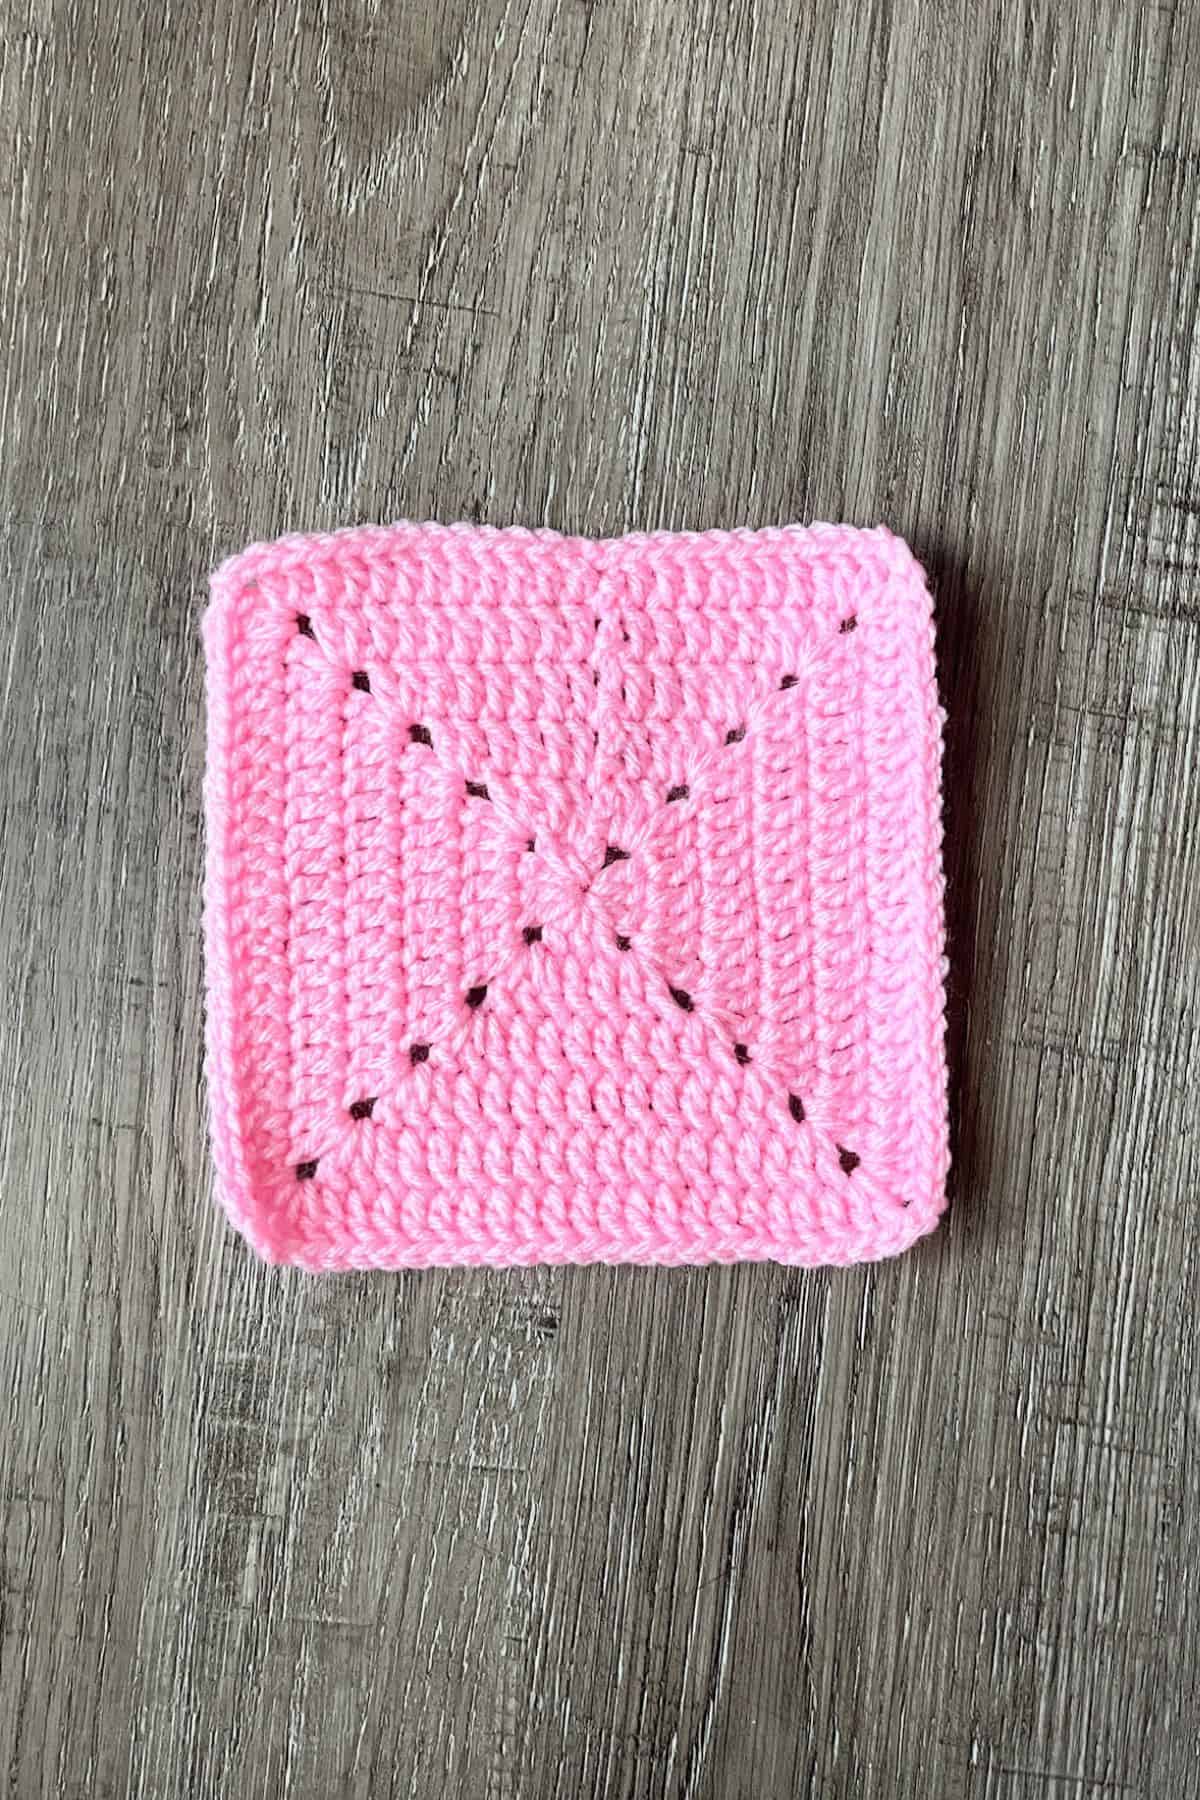
Round 1: Make a mr, ch x3 and then dc x2 in the circle. Ch x2, dc x3, ch x2 and dc x3, ch x2 and dc x3, ch x2 and sl st to the 3rd chain. You should have 4 sides. Pull the magic circle closed and you can see you have a small square.
Round 2-6: Ch x3. Dc in each dc stitch from the previous round, dc x2, ch x2, dc x2 in each chx2 corner stitch. Then sl st to the 3rd chain you made at the beginning when you get to the end of each round.
After the 6th round, fasten off and weave in any tails.
Crochet Strap:

This will also be the entire middle part of the bag to create a wider bag.
Row 1: With pink, ch x251.
Row 2: in the second ch from the hook make a sc. Then sc for the rest of the row. Ch x1 and turn (250).
Row 3-5: Sc in every stitch. Then ch x1 and turn. After the last row, fasten off the yarn. (250)
Finishing:

Sew the tulip appliques to the white squares. Make sure to center the tulips (you should have roughly 1 round above and below the applique top and bottom).

Sew the squares together like I did using the sewing technique, the mattress stitch.
Mattress Sewing Stitch:
- Align the Edges: Place the two crochet pieces you want to join side by side, with the right sides facing each other (the side you want to show should be facing inward). Make sure the edges you're joining are aligned properly.
- Thread Your Needle: Cut a length of yarn (about 18 inches) and thread it through your tapestry needle.
- Insert the Needle: Starting at one end of the edge, insert the needle through the outermost stitch on the first piece. You want to go under both loops of the stitch.
- Pull the Needle Through: Gently pull the yarn through, leaving a small tail to tie off later. Do not pull too tightly yet.
- Move to the Other Piece: Next, insert the needle into the corresponding stitch on the second piece, just slightly to the left of the edge. Go under both loops of the stitch, and pull the needle through.
- Repeat: Continue this process along the entire edge. Work your way back and forth between both pieces, stitching into the same stitch on each piece, always under both loops. Your stitches will create a “mattress” effect that lies flat against the crochet fabric.
- Even Tension: As you stitch, make sure to keep an even tension. You want the seam to be neat, but not so tight that it distorts the shape of the pieces.
- Finish Off: When you’ve reached the end, pull the yarn gently to tighten the stitches. Be sure the seam is secure, but not overly tight. Tie off the yarn at the end, weaving in the ends on the wrong side to finish.
Attaching the Crochet Strap:
Once you have the granny squares attached, it is time to attach the middle piece (which we will crochet together instead of sewing!)
Line the start of the pink strap to one of the top side edges of the crochet square. Join the white yarn to both pieces and single crochet the edge of the square and the outer row of the strap together, working downwards and around the crochet flower tote bag. When you get to the corners make 3 sc stitches.
Once you are done securing one crochet square face to the strap/middle of the bag, continue to sc the handle part of the strap until you get done with the row. Then sl st to the 1st sc you made with the white yarn to close the row and make it into a round. (You can sew the end and beginning of the strap together now if it is bothering you, otherwise you can do it after making a round of shell stitches.
Shell Stitches:
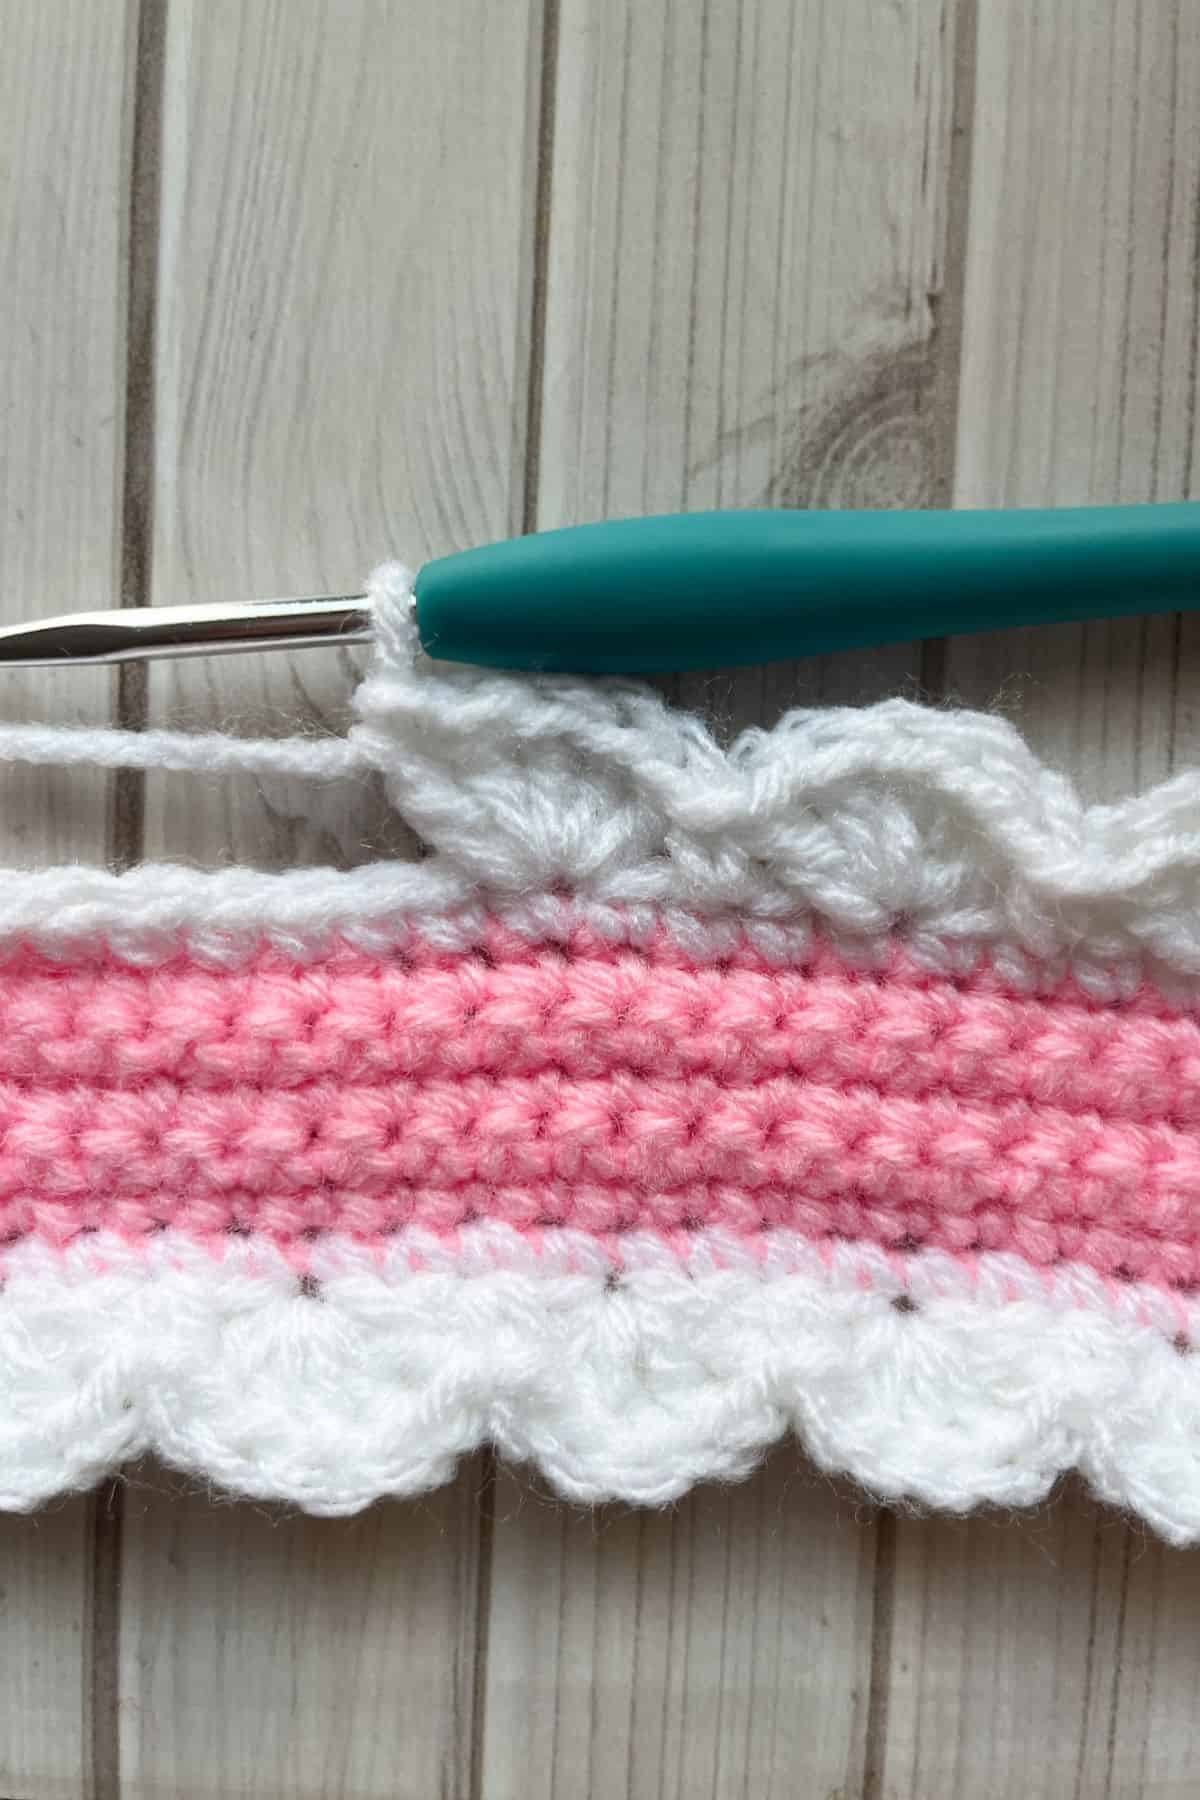
Skip a stitch and then make a shell stitch. To crochet a shell stitch, you will dc x5 into the same stitch or space. This will create the "shell." then skip a stitch and make a sc in the next stitch.
You will repeat making a skipped stitch, dc x5, skip a stitch, sc for the entire round.
If you do not have an even amount of stitches at the end you can fudge it a little for a stitch or two to make the shell stitches fit by either extending a shell an extra space or taking a skipped space away. It doesn’t have to be exact and no one will notice anyways.
Repeat the above process for attaching the other side of the granny square panel to the bag.
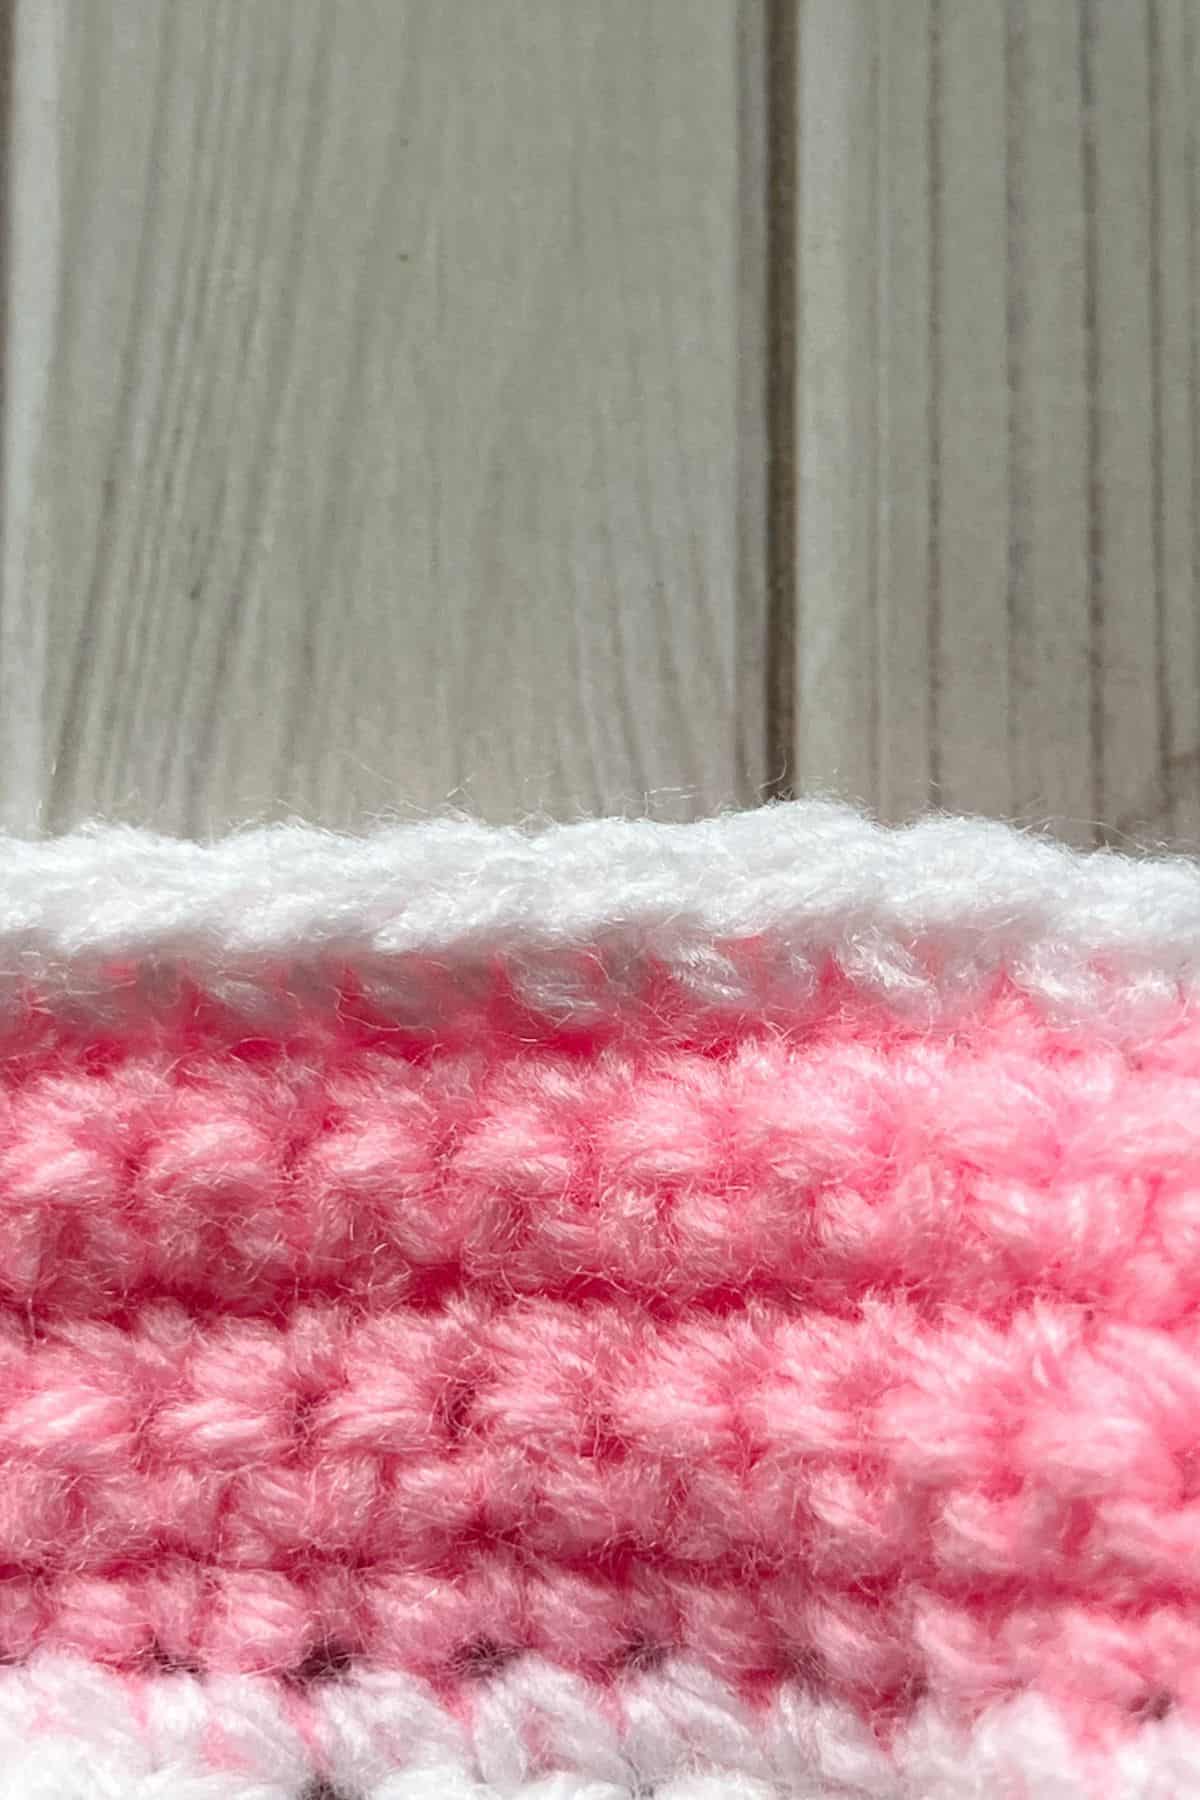
Once the othersides shell stitches are done, you are done attaching the bag pieces together! All I would do now is take the white yarn and attach it to the top edge of the bag and sc along the top of the bag for a cleaner finish.
Weave in any ends.
Optional: Sew a liner to the inside of the bag so the bag doesn't stretch out when in use.
And that’s it—the beautiful crochet tulip bag pattern is complete!
I hope you enjoyed making the crochet tulip bag pattern and that it brings a burst of spring to your crochet accessories. If you’re looking to add an extra touch of charm to your bag, why not try my crochet tulip keychain pattern? It’s the perfect little addition to complement your crochet tulip bag, adding a tiny tulip to your tote for even more fun and personality.

🐌Expert Tips
- Keep Tension Consistent: Maintaining even tension throughout the crochet tulip bag pattern is key to a smooth, professional-looking finish. Avoid pulling your yarn too tight or leaving it too loose, especially when working with the shell stitches or joining motifs.
- Block Your Pieces: After completing the crochet tulip bag pattern, consider blocking your pieces to give them a more polished and uniform look. Gently steam or wet-block the granny squares and appliques to ensure they lie flat and keep their shape.
- Crochet the Bag Lining: For added durability and to prevent stretching, consider lining your crochet tulip bag with fabric. You can hand-sew or machine-sew a simple lining that matches your bag, and it’ll help the bag hold its shape longer.
🧵Pattern FAQs
The tulips are attached using a simple whip stitch or running stitch that you would do in embroidery. All you need is a yarn tail and tapestry needle!
Yes! You can adjust the size of the bag by adding or removing granny squares. If you'd like a larger bag, increase the number of squares. For a smaller bag, simply decrease the number of squares you use.
You can personalize the crochet tulip bag pattern by adding a variety of appliques to make it even more unique! Here are some ideas: Crochet heart appliques, frog appliques, and capybara appliques!

🧶More Crochet Bag Patterns


If you tried this Crochet Tulip Bag Pattern (or any other pattern on my website), please let me know how it went in the 📝 comments below. I'd love to hear from you!

Crochet Tulip Bag Pattern
Materials
Abbreviations (US terms)
- Chains - ch
- Magic ring - mr
- Single crochet - sc
- Half double crochet - hdc
- Double crochet - dc
- Slip stitch - sl st
- Increase - inc
Notes
- Skill Level: The crochet tulip bag pattern is perfect for crocheters of all levels, as long as you’re comfortable with basic stitches like chains, double crochets, and slip stitches. If you’re new to granny squares or shell stitches, don’t worry—there are plenty of tutorials available to guide you through!
- Frilly Shell Edges: The shell stitch edging gives this bag a playful, frilly look. It’s easy to master and adds a lovely, textured finish to your crochet project.
- Size of the Bag: The finished bag is a perfect size for everyday use, and it can easily hold all your essentials. You can also adjust the size by adding or removing granny squares if you want a larger or smaller bag. Or by using thinner yarn and smaller hook size.
Instructions
Crochet Tulip Flower Pattern:
- Make 4 tulips.
- Row 1: Ch 10 and turn
- Row 2: In the second ch from the hook make a hdc. Continue to make a hdc in each ch. (9)
- Row 3: In the second chain from the hook make a hdc inc, then hdc x7 and in the last ch make another hdc inc (11). Then ch x1 and turn.
- Row 4: Make a hdc inc, then hdc x9 and in the last stitch make another hdc inc (13). Then ch x1 and turn.
- Row 5-9: Hdc in every stitch. Then ch x2 and turn.
- Row 10: You will make the top of the tulip. Dc x3 in the first stitch in the row, then skip 2 stitches and make a sc in the 3rd stitch from the last stitch worked.
- Then skip 2 more stitches and dc x8 into the same stitch, then skip 2 stitches and make a sc in the 3rd stitch from the last stitch worked.
- Then skip 2 more stitches and in the last stitch in the row dc x3, ch x2 and then sl st to the same stitch you made the dc stitches from.
- Lastly, sc around the edge of the tulip BUT NOT THE TOP, just around the U-shape of the flower. Try and make a 1-2 sc for each row, you may need more if it doesn’t lay flat and is curling. You will need less sc if the edge becomes wavy. Sometimes this isn’t an exact science as it is based on tension.
- Fasten off and weave in any ends.
Crochet Stem:
- Flip your tulip over so the top of the flower is at the bottom right-side facing you. Join your green yarn to the middle stitch (or what looks closest to the middle stitch - it doesn’t have to be exact).
- Ch x5 and in the second ch from the hook hdc x4. Then sl st to the next stitch at the bottom of the flower to anchor the stem.
- Fasten off and weave in any ends.
Crochet Leaf:
- With your green yarn, ch x6. In the second ch from the hook make a sl st, in the next make a sc, in the following a hdc inc, and then another sc and sl st in the next 2 stitches. Ch x1 and turn.
- Repeat the sequence of stitches for the other side of the chain - sl st, sc, hdc inc, sc, and sl st.
- Fasten off and leave a long tail for sewing. Then, sew the leaf to the side of the tulip’s stem. You may need to also tack down the leaf top to the bottom of the flower so it lays flat.
Crochet Solid Granny Square:
- Make 4 pink and 4 white granny squares.
- Round 1: Make a mr, ch x3 and then dc x2 in the circle. Ch x2, dc x3, ch x2 and dc x3, ch x2 and dc x3, ch x2 and sl st to the 3rd chain. You should have 4 sides. Pull the magic circle closed and you can see you have a small square.
- Round 2-6: Ch x3. Dc in each dc stitch from the previous round, dc x2, ch x2, dc x2 in each chx2 corner stitch. Then sl st to the 3rd chain you made at the beginning when you get to the end of each round.
- After the 6th round, fasten off and weave in any tails.
Crochet Strap:
- This will also be the entire middle part of the bag to create a wider bag.
- Row 1: With pink, ch x251.
- Row 2: in the second ch from the hook make a sc. Then sc for the rest of the row. Ch x1 and turn (250).
- Row 3-5: Sc in every stitch. Then ch x1 and turn. After the last row, fasten off the yarn. (250)
Finishing:
- Sew the tulip appliques to the white squares. Make sure to center the tulips (you should have roughly 1 round above and below the applique top and bottom).
- Sew the squares together like I did above using the sewing technique, the mattress stitch.
- Align the Edges: Place the two crochet pieces you want to join side by side, with the right sides facing each other (the side you want to show should be facing inward). Make sure the edges you're joining are aligned properly.
- Thread Your Needle: Cut a length of yarn (about 18 inches) and thread it through your tapestry needle.
- Insert the Needle: Starting at one end of the edge, insert the needle through the outermost stitch on the first piece. You want to go under both loops of the stitch.
- Pull the Needle Through: Gently pull the yarn through, leaving a small tail to tie off later. Do not pull too tightly yet.
- Move to the Other Piece: Next, insert the needle into the corresponding stitch on the second piece, just slightly to the left of the edge. Go under both loops of the stitch, and pull the needle through.
- Repeat: Continue this process along the entire edge. Work your way back and forth between both pieces, stitching into the same stitch on each piece, always under both loops. Your stitches will create a “mattress” effect that lies flat against the crochet fabric.
- Even Tension: As you stitch, make sure to keep an even tension. You want the seam to be neat, but not so tight that it distorts the shape of the pieces.
- Finish Off: When you’ve reached the end, pull the yarn gently to tighten the stitches. Be sure the seam is secure, but not overly tight. Tie off the yarn at the end, weaving in the ends on the wrong side to finish.
Attaching the Crochet Strap:
- Once you have the granny squares attached, it is time to attach the middle piece (which we will crochet together instead of sewing!)
- Line the start of the pink strap to one of the top side edges of the crochet square. Join the white yarn to both pieces and single crochet the edge of the square and the outer row of the strap together, working downwards and around the crochet flower tote bag. When you get to the corners make 3 sc stitches.
- Once you are done securing one crochet square face to the strap/middle of the bag, continue to sc the handle part of the strap until you get done with the row. Then sl st to the 1st sc you made with the white yarn to close the row and make it into a round. (You can sew the end and beginning of the strap together now if it is bothering you, otherwise you can do it after making a round of shell stitches.
Shell Stitches:
- Skip a stitch and then make a shell stitch. To crochet a shell stitch, you will dc x5 into the same stitch or space. This will create the "shell." then skip a stitch and make a sc in the next stitch.
- You will repeat making a skipped stitch, dc x5, skip a stitch, sc for the entire round.
- If you do not have an even amount of stitches at the end you can fudge it a little for a stitch or two to make the shell stitches fit by either extending a shell an extra space or taking a skipped space away. It doesn’t have to be exact and no one will notice anyways.
- Repeat the above process for attaching the other side of the granny square panel to the bag.
- Once the othersides shell stitches are done, you are done attaching the bag pieces together! All I would do now is take the white yarn and attach it to the top edge of the bag and sc along the top of the bag for a cleaner finish.
- Weave in any ends.
- Optional: Sew a liner to the inside of the bag so the bag doesn't stretch out when in use.
- And that’s it—your beautiful crochet tulip tote bag is complete!

Megan says
Hello! Im am about to the finishing section where I need to sew the prices together. Do you have a tutorial showing the assembly? I’m a little confused. Thanks !
Kimberly Arenas says
hi, I don't have a video doing the mattress stitch for the assembly I made ( sorry! 🙁 ) but I do have a video of just doing the whip stitch for sewing with my crochet backpack tutorial. https://www.youtube.com/watch?v=44tv9ZIsISE (its a different technique for sewing but it still looks good!) For sewing the appliques on I would just hand sew them on with yarn by going in and out of the applique and granny square making a little running stitch.