
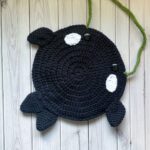
Get ready for summer with this cute Crochet Orca Pattern perfect for holding phones, wallets, and other small items. And wearing it to the zoo!
I love making unique crochet bag patterns that are simple, fast, and easy for markets. My designs often catch attention even this crochet orca pattern; I frequently get asked where I found my bags at Comic Con, especially my Crochet Japanese Knot Bag and my crochet possum bag. At farmers markets, my Crochet Lemon Bag gets similar reactions!
Living in the PNW, where orcas play in Puget Sound, I was inspired to create this crochet orca pattern bag after hearing about their summer appearances. A few days later, I hiked near the water and saw them! It was a magical experience that I like to think I conjured by sending out good orca vibes.
I designed this crochet killer whale pattern shortly after creating my crochet whale shark bag pattern. Converting it into another aquatic pattern was easy with just a few adjustments! As always, this crochet orca pattern is free for you to make and sell the finished product—just don’t sell my pattern. Let’s get started!
Jump to:
✏️ Things To Note:
- Color Options: You can use any shade of black and even gray for the main color of the crochet orca pattern if you want to add variety.
- Design Structure: The crochet killer whale pattern is made flat, so there is no middle piece to go with the bag. However, if you need your crochet whale bag to have more depth, feel free to create a middle piece. I include a middle piece in my Crochet Strawberry Bag Pattern.
- Size: The crochet orca pattern is roughly 8 inches in diameter.
💭Abbreviations to Remember (US terms)
- Magic ring - mr
- Chain - ch
- Slip stitch - sl st
- Single crochet - sc
- Double crochet - dc
- Half Double Crochet - hdc
- Increase - inc - 2 stitches in 1 stitch, seen as inc for single crochet increase and dc inc for double crochet increase for this pattern.
- Decrease - dec
🧋Variations
- Adaptable Designs: Use this crochet orca pattern as a base for many other whale or fish bags, like my crochet whale shark bag. You can easily adapt it into a shark, goldfish, rainbow fish, and more.
- Hot Pad or Potholder: If you use cotton instead of acrylic yarn for the crochet orca pattern, and sew it completely together without leaving an opening, you can transform it into a crochet hot pad or potholder. I do this with my Crochet Pumpkin Pie Potholder Pattern.
🍵Instructions for Crochet Orca Bag Pattern
This part of the orca whale crochet pattern is made mostly in the round.
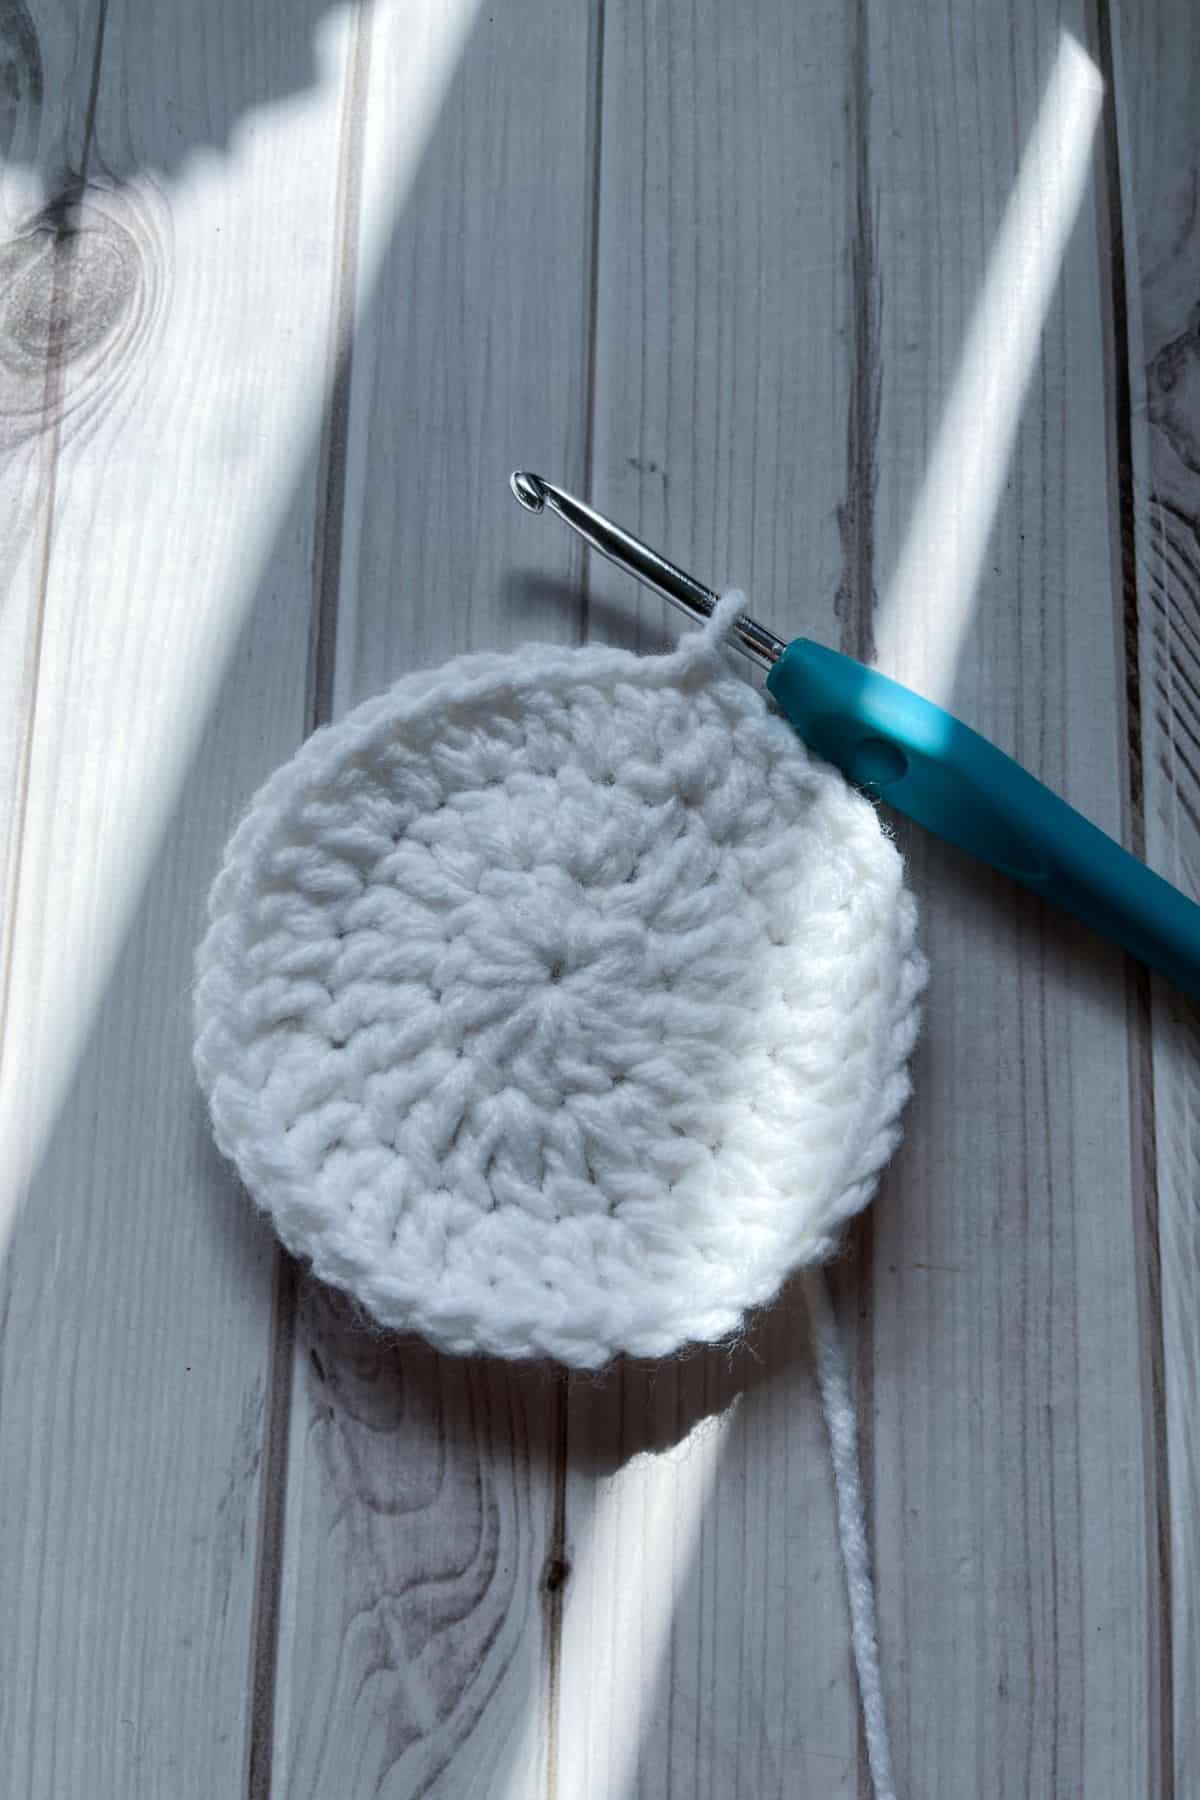
Round 1: Make a mr, ch x2 (does not count as a stitch) and dc x12. Then sl st to the first dc (skip the chains) and pull the circle tight. (12)
Round 2: Ch x2. Then dc inc in every stitch. Then sl st to the first dc (24).
Round 3: Ch x2. Then dc Inc, dc, then repeat for the entire round. Then sl st to the first dc. (36)
Round 4: Ch x2. Then dc Inc, dc x2, then repeat for the entire round. Then sl st to the first dc. (48)
Round 5: Ch x2. Then dc Inc, dc x3, repeat for the entire round. Then sl st to the first dc. (60)
Round 6: Ch x2. Then dc Inc, dc x4, repeat for the entire round. Then sl st to the first dc. (72)
Round 7: Ch x2. Then dc Inc, dc x5, repeat for the entire round. Then sl st to the first dc. (84)
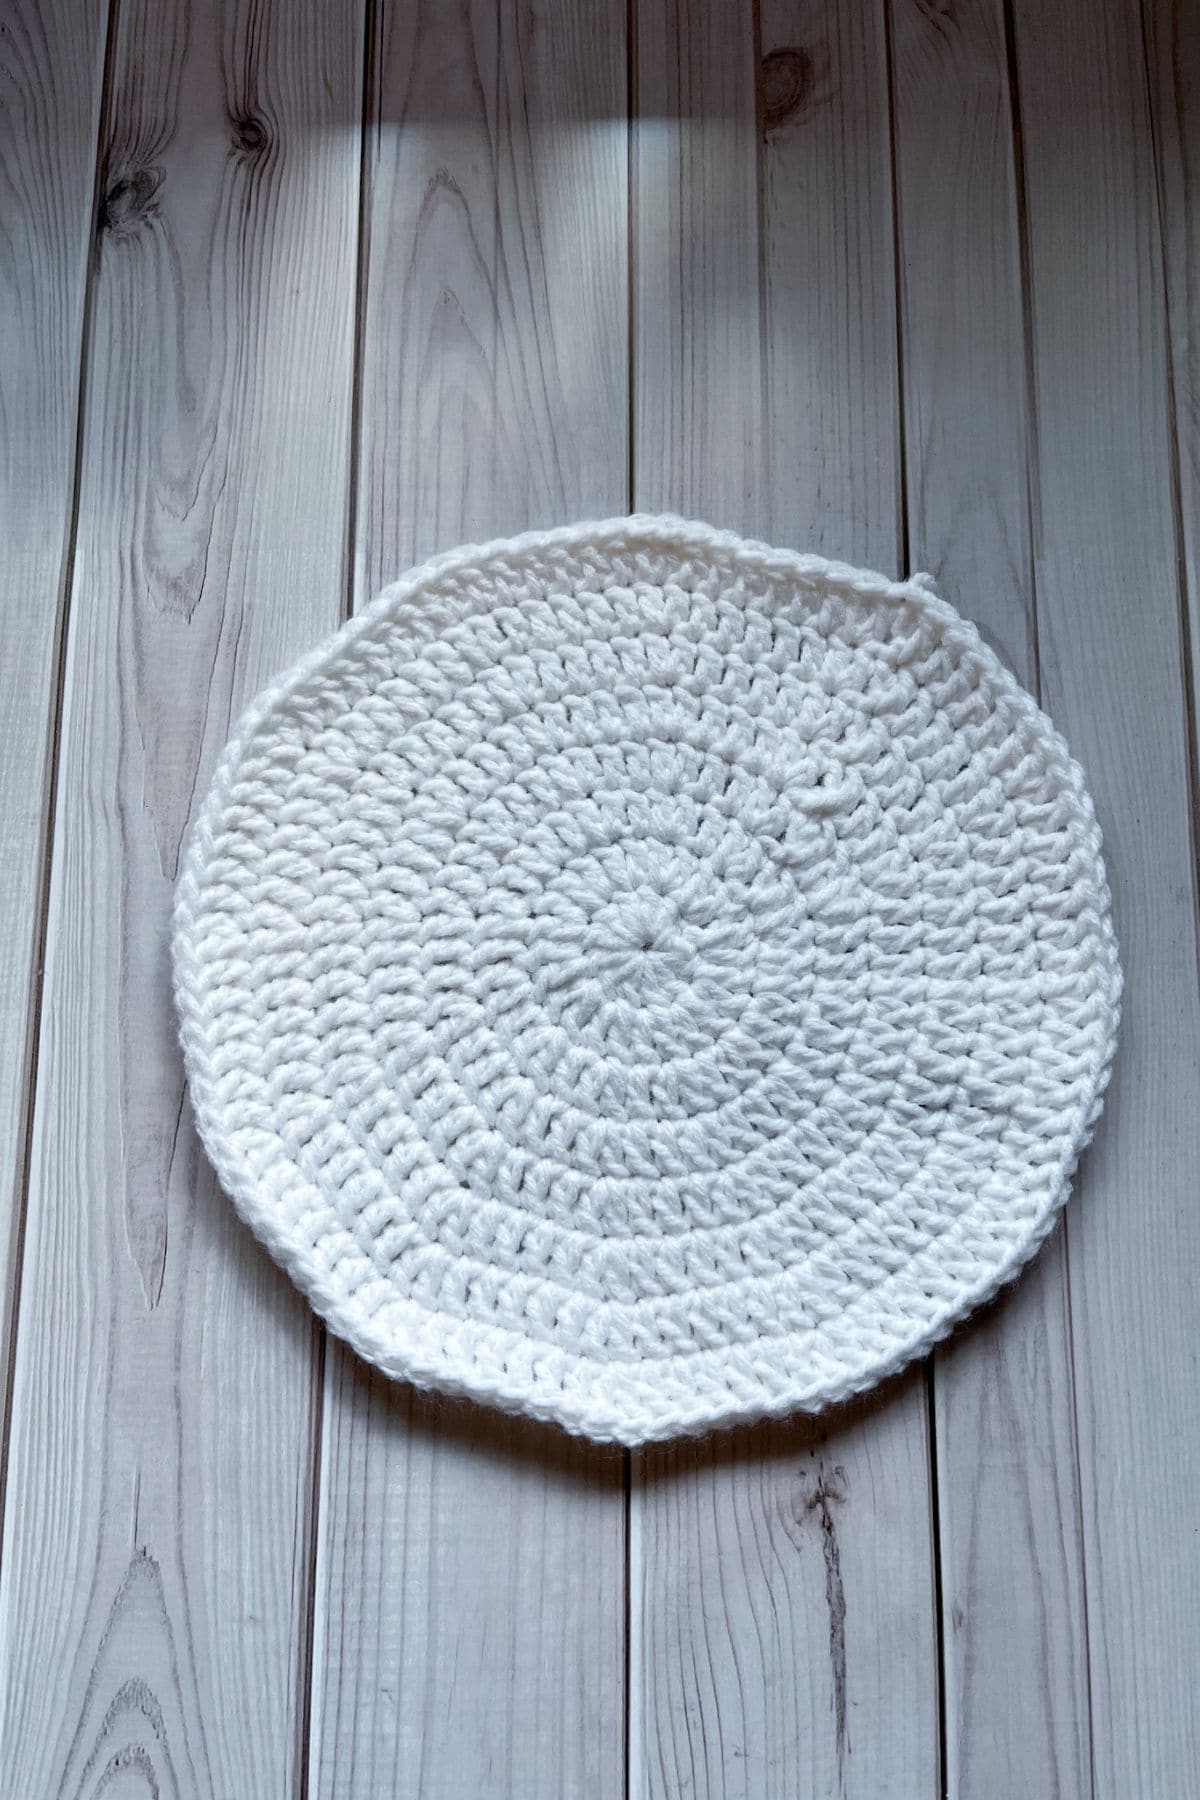
Round 8: Ch x2. Then dc Inc, dc x6, repeat for the entire round. Then sl st to the first dc. (96)
Then fasten off the yarn.
Make 2 circles, one white and one black.
Crochet Whale Fins:
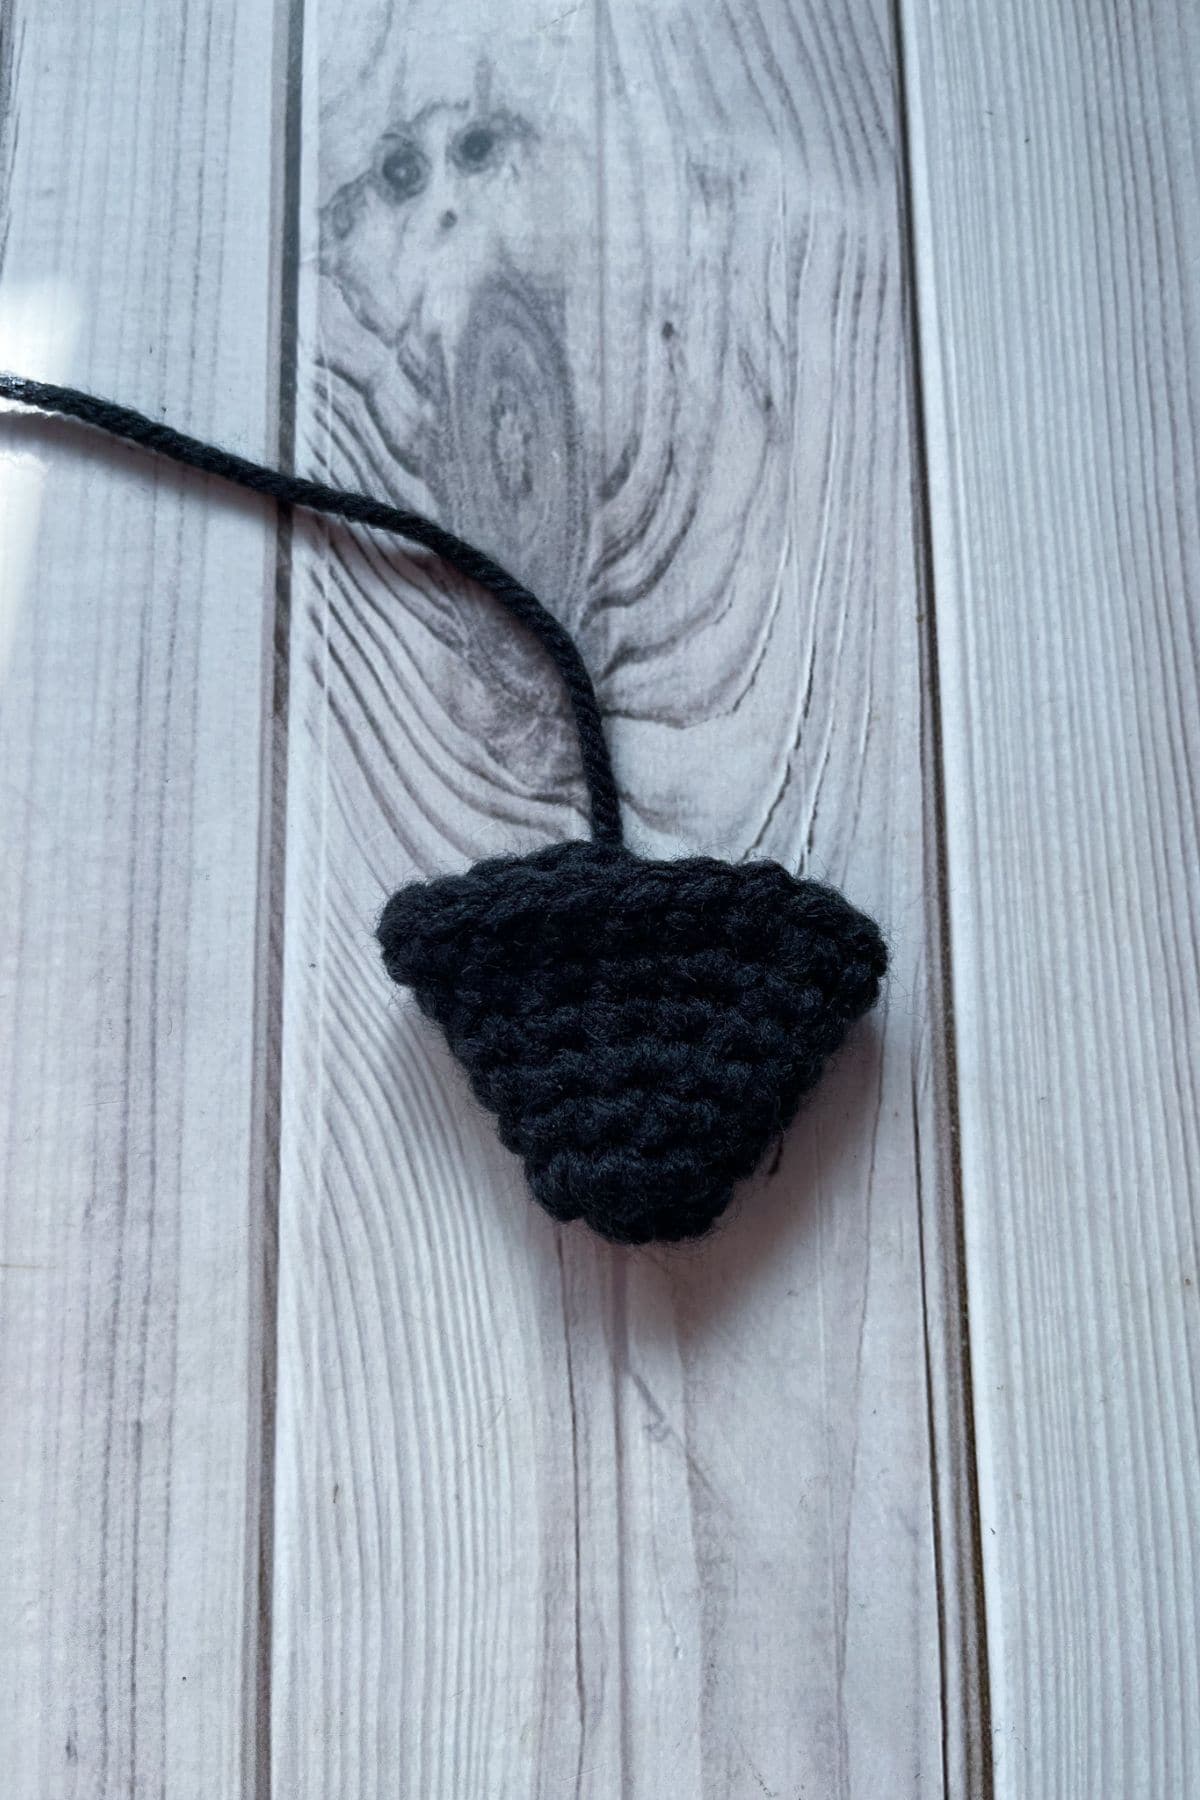

Arm Fins:
Make 2 with the black yarn.
Round 1: Make a mr and then sc x6 into the circle. Then pull the circle tight. (6)
Round 2: In the first sc you made, make an inc. Then in the following stitch make a sc. Repeat for the rest of the round. (9)
Round 3: Sc for the entire round (9).
Round 4: Inc, then in the following 2 stitches make a sc. Then repeat for the rest of the round. (12)
Round 5: Sc for the entire round (12).
Round 6: Inc, then in the following 3 stitches make a sc. Then repeat for the rest of the round. (15)
Round 7: Inc, then in the following 4 stitches make a sc. Then repeat for the rest of the round. (18)
Round 8: Dec, then in the following 4 stitches make a sc. Then repeat for the rest of the round. (15)
Round 9: Dec, then in the following 3 stitches make a sc. Then repeat for the rest of the round. (12)
Round 10: Dec, then in the following 2 stitches make a sc. Then repeat for the rest of the round. (9)
Round 11: Dec, then in the following stitch make a sc. Then repeat for the rest of the round. (6). Then fasten off and leave a tail for sewing.

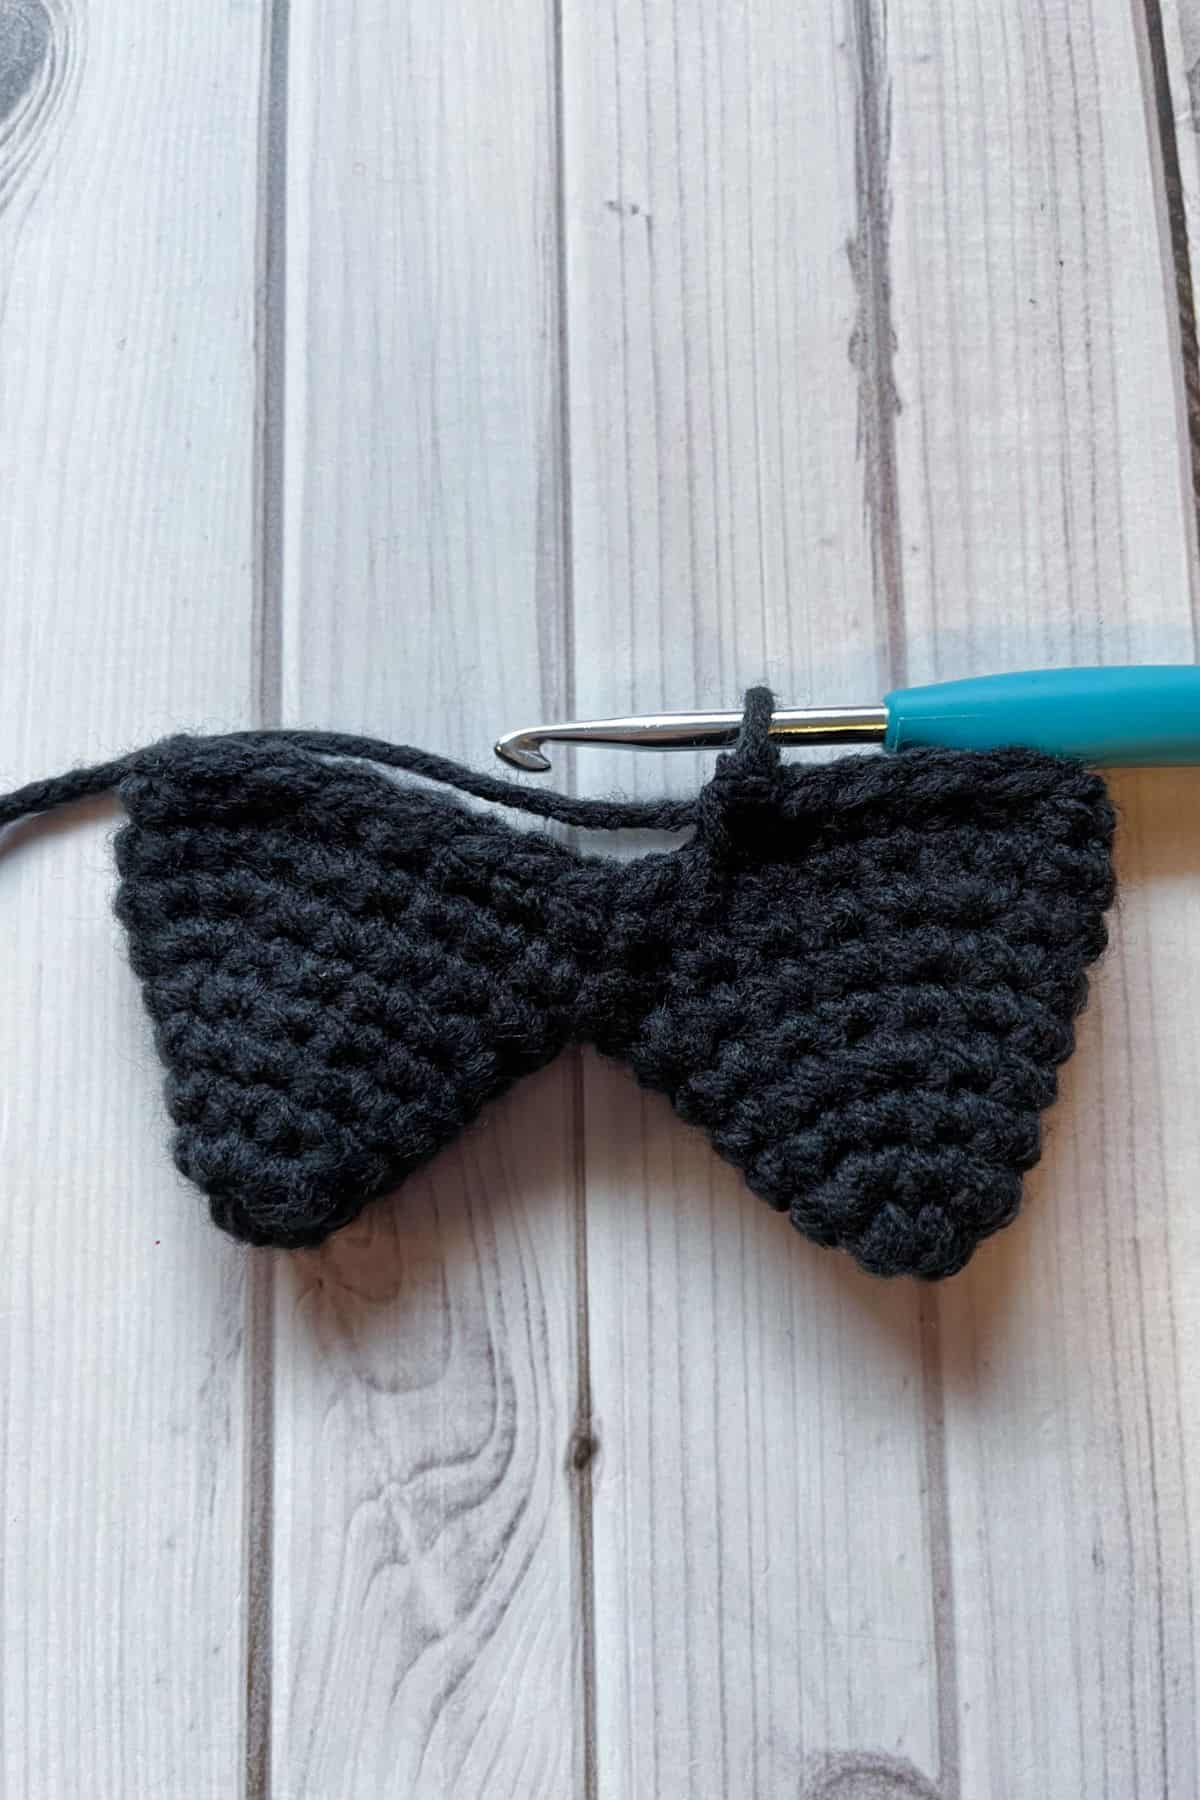
Tail Fin:
Make using the black yarn.
Repeat Round 1-7 from the arm fin pattern 2 times to start your tail fin. Fasten off the first tail fin tip, but not the second one.
Round 8: Join the 2 fin tips together by crocheting into the other edge of the crochet fin and crochet around the entire edge of both fin tips. They should join only where the 2 fins meet in the middle (36).
Round 9: Dec, then in the following 4 stitches make a sc. Then repeat for the rest of the round. (30)
Round 10: Sc for the entire round (30).
Round 11: Dec, then in the following 3 stitches make a sc. Then repeat for the rest of the round. (24)
Round 12: Sc for the entire round (24). Fasten off and leave a tail for sewing.
Finishing:
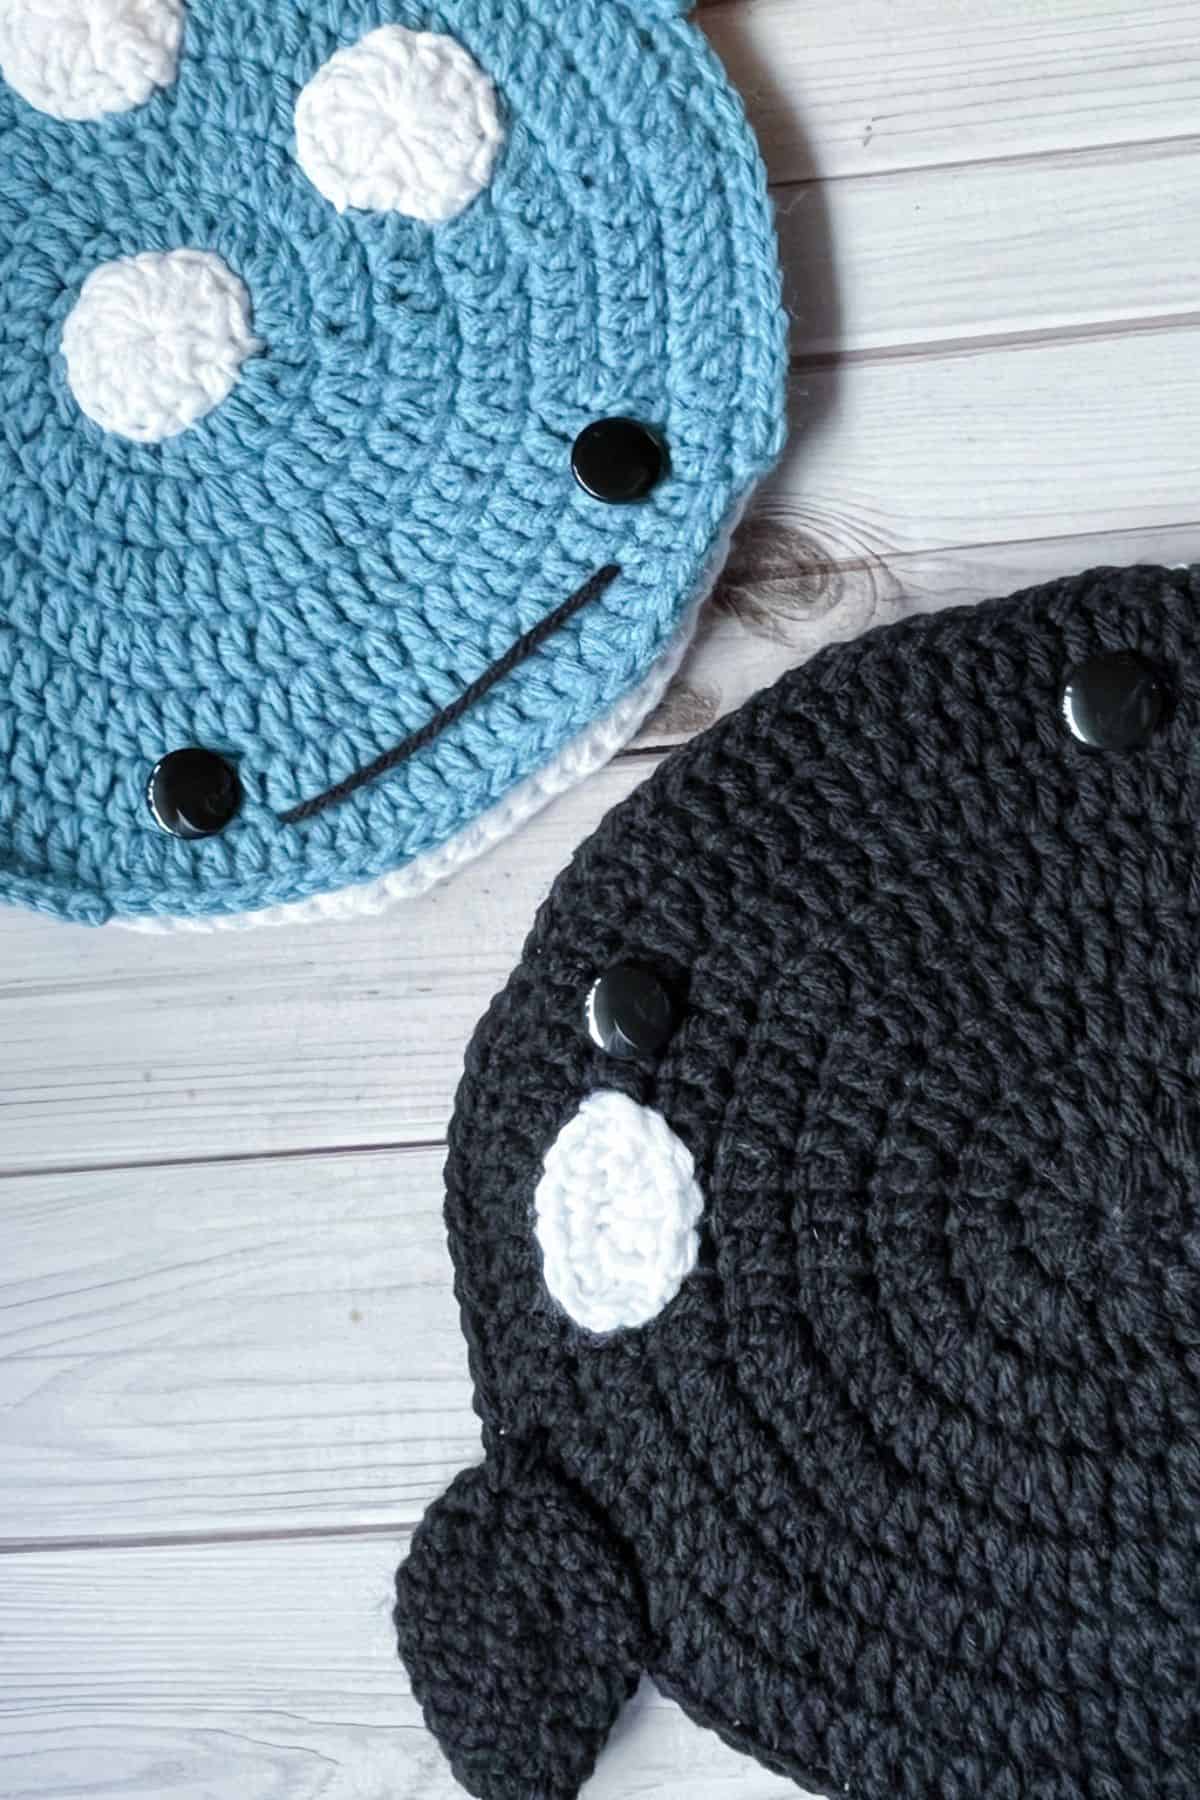
Orca Eye Circles:
Make 2.
Round 1: With the white yarn, ch x7 and make a dc in the 3rd ch from the hook. Make 3 more dc in the next 3 chains. Hdc in the last ch. Sc x2 in the last ch to move to the opposite side of the ch. Sc x5 and sl st. Then fasten off the yarn and leave a tail for sewing.
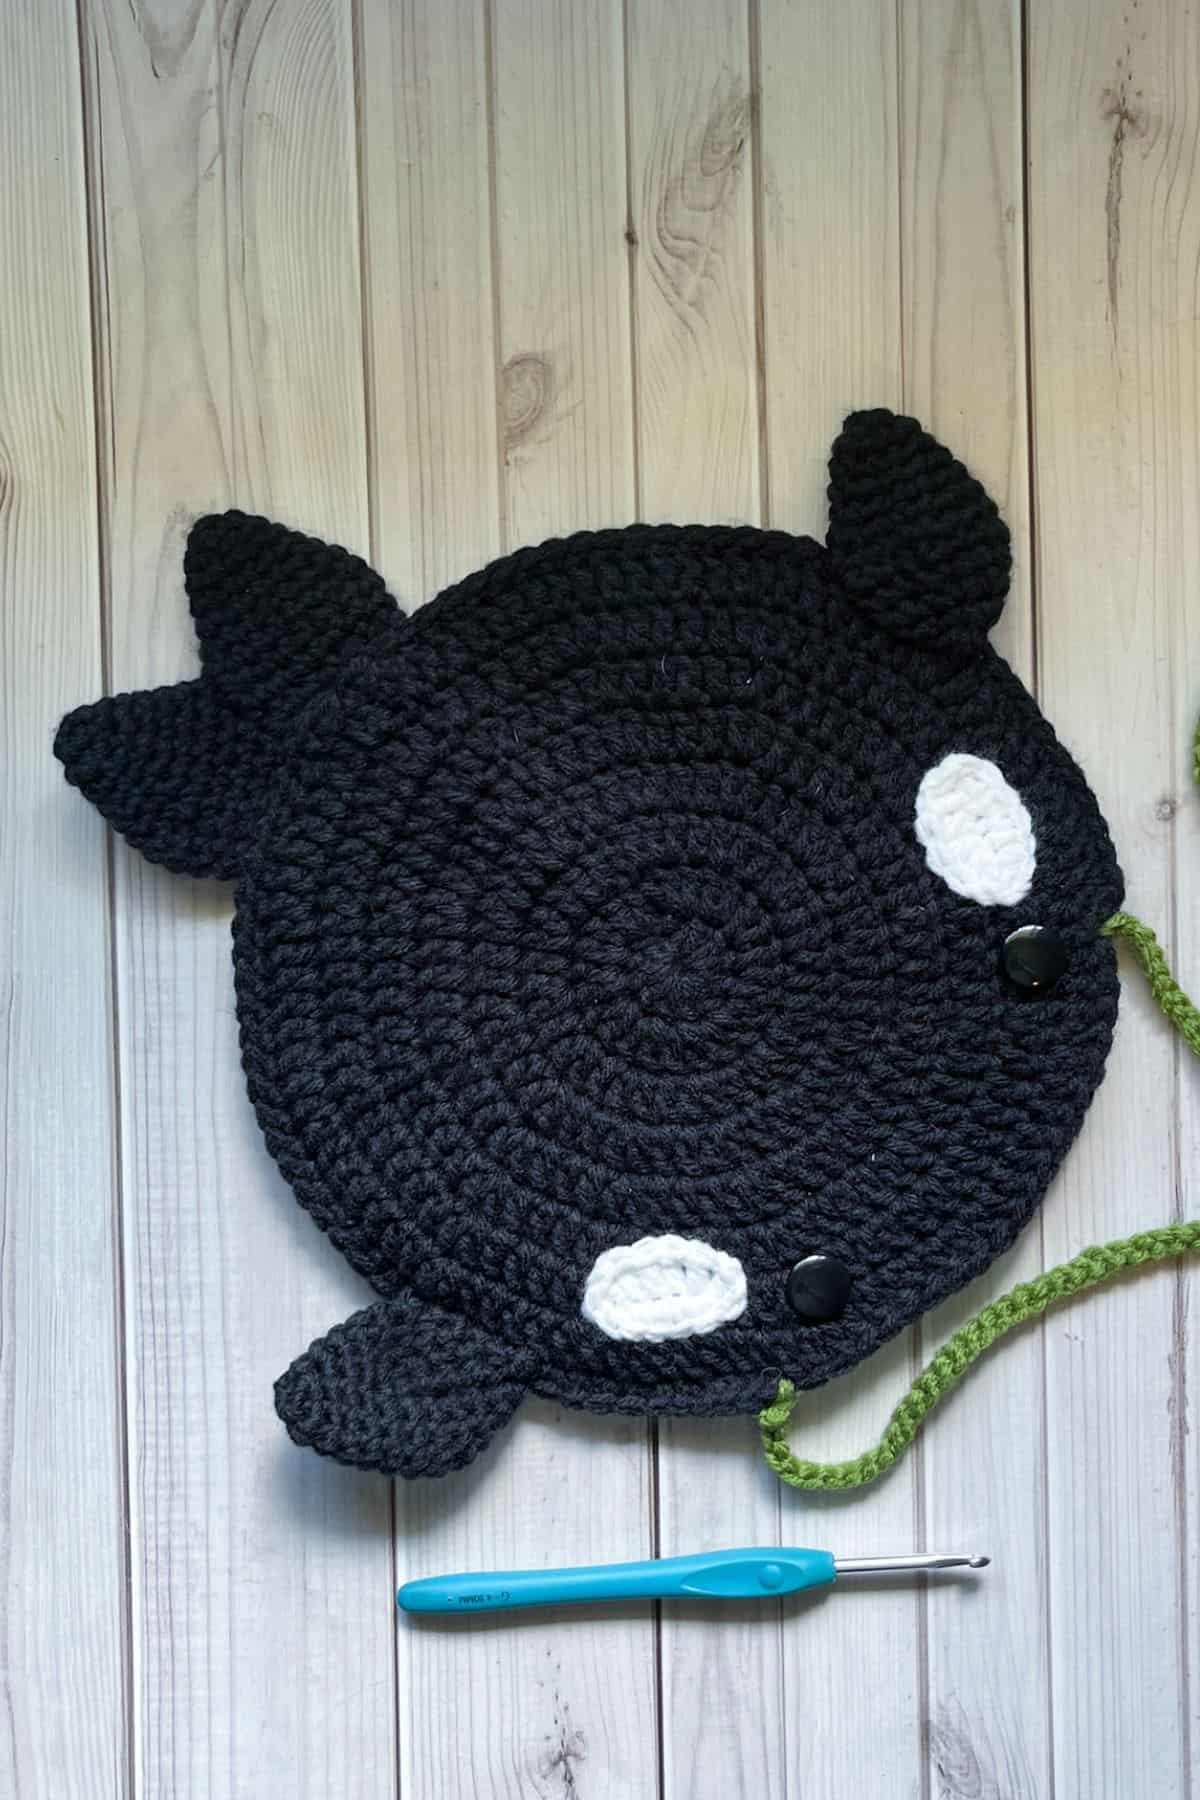
Once you have made 2 circles you want to single crochet the edges together. To do this you want to hold the 2 circles together and line them up in relation to stitch openings. Then rejoin the black yarn to the outer edge going through both circles. Then sc around the edge for about ¾ -⅘ of the way. You want to leave an opening about the size of a hand so you can easily grab things out of the bag.
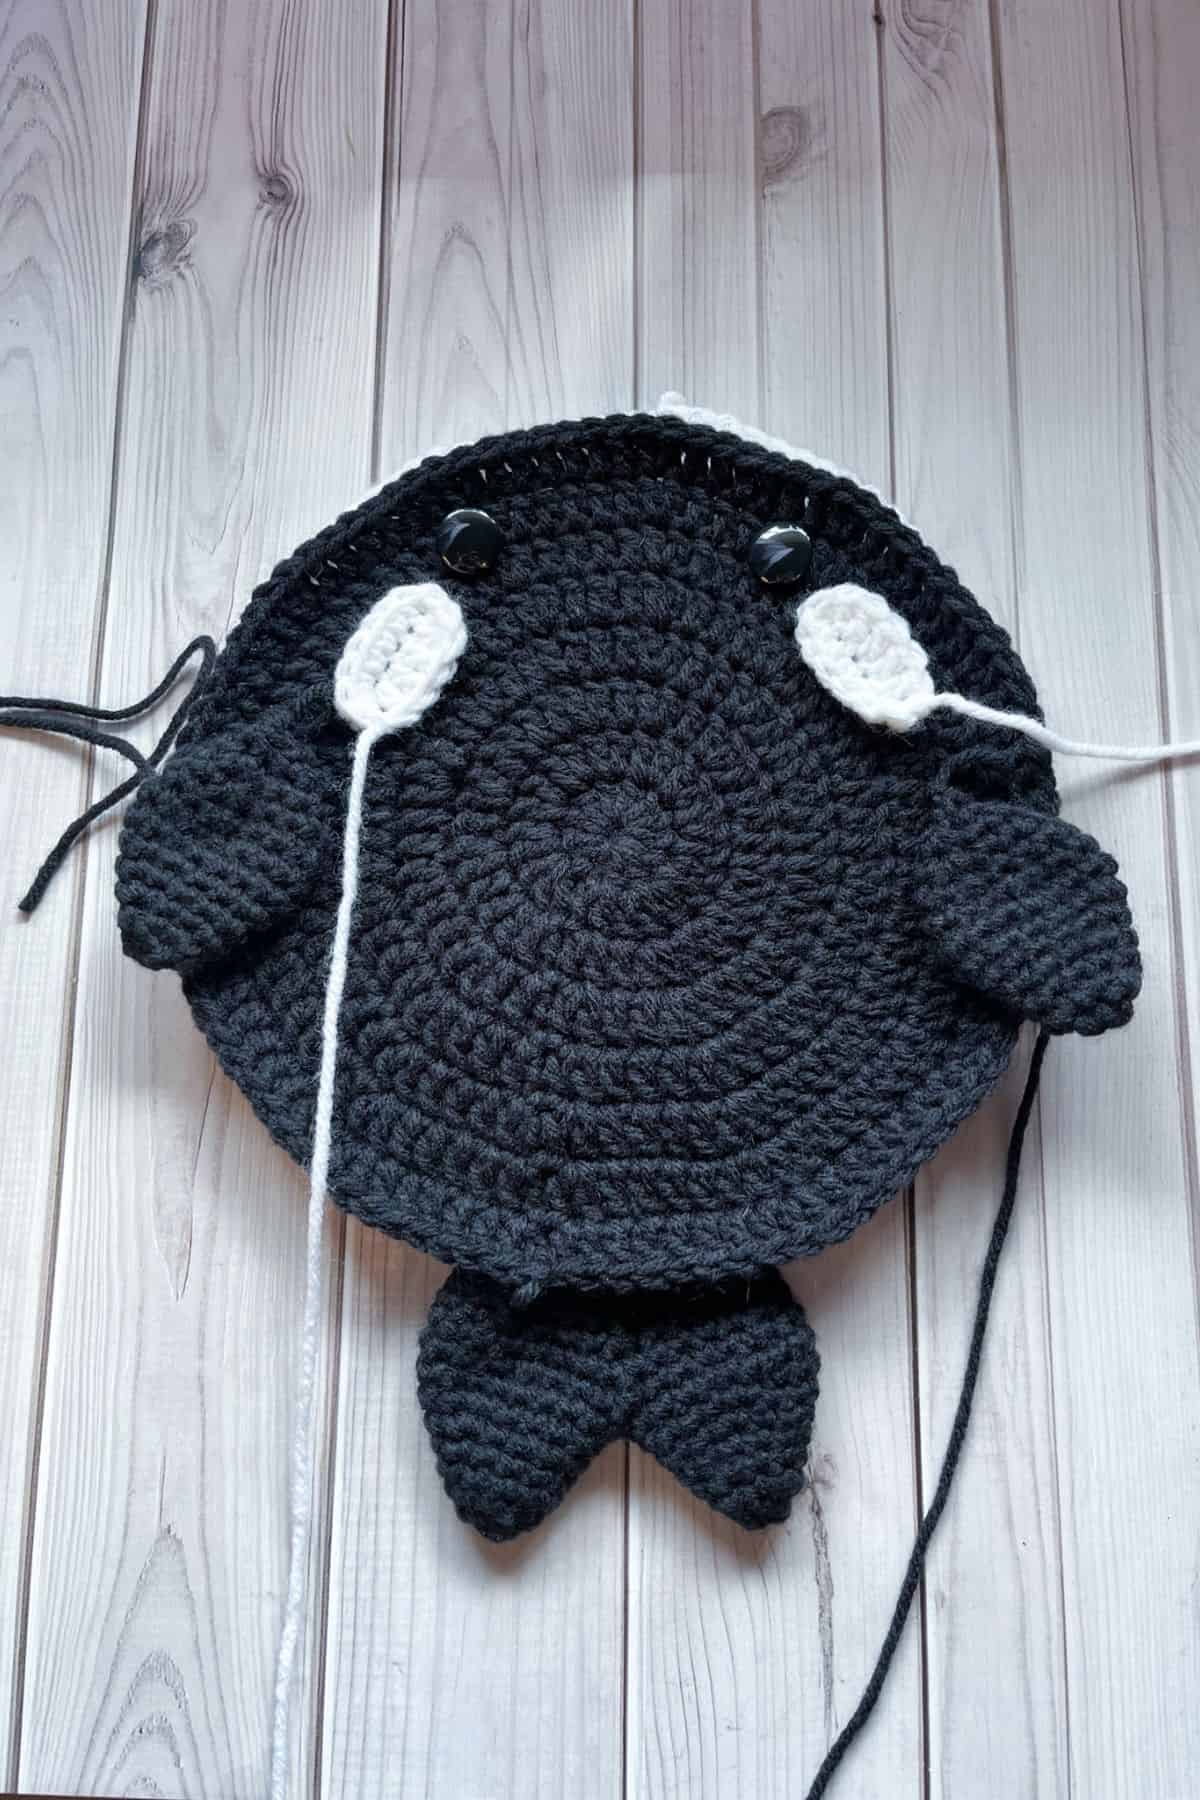
Sew the arm fins and tail fins to the orca bag.
Sew on the eyes. Then sew on the white eye spots after placing the eyes.
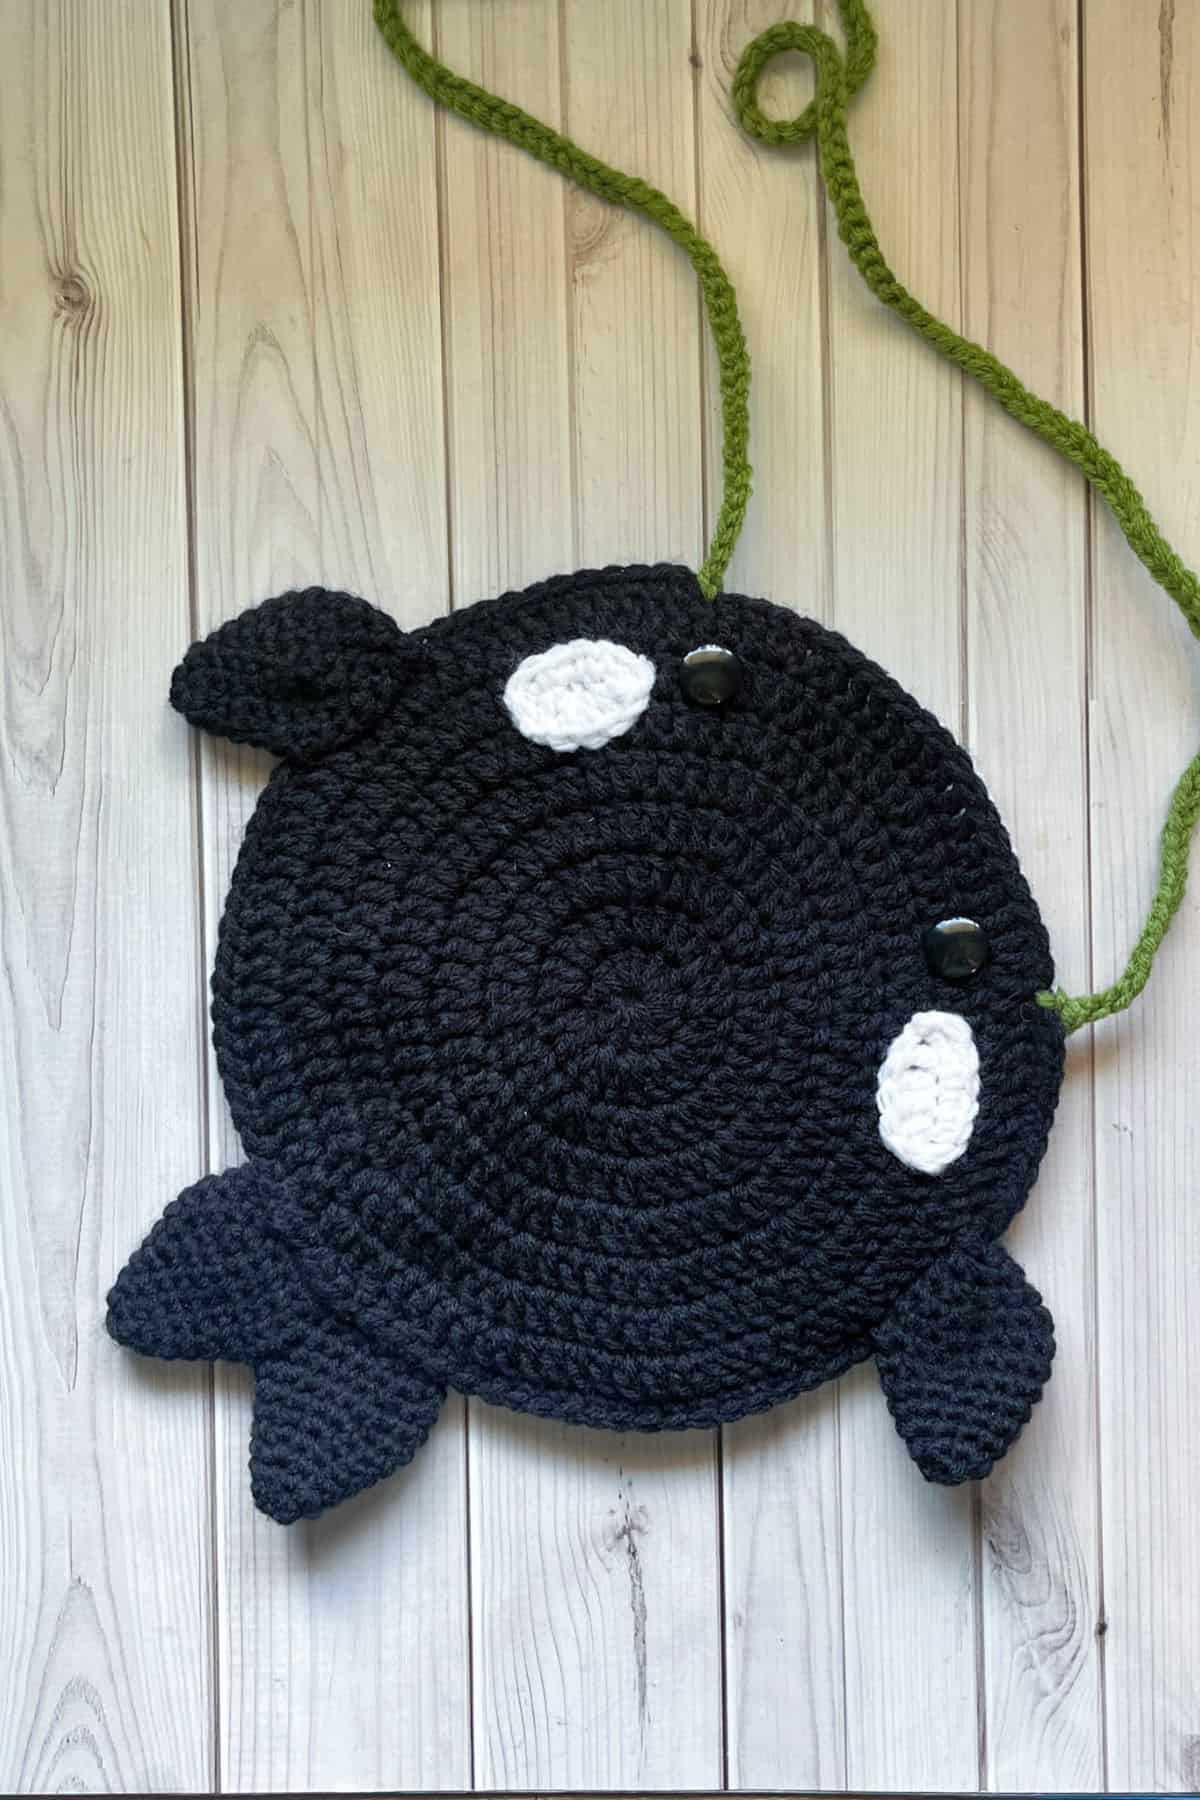
Now for the strap:
Split the yarn into 2 balls (you really don't need much, just a couple arm spans of yarn) and double the yarn up so you will be working with 2 yarns not 1. Join the double stranded green yarn to one corner of the mouth and make a series of crochet chains. I made 150 chains, but you may need more or less depending on the length you are going for. Then join to the opposite side of the bag. Fasten off and weave in any yarn ends.
END
Now the crochet orca bag should be done. I hope you enjoyed my crochet orca pattern!
If you have any black and white yarn leftover from the crochet orca pattern, you can try making my Crochet Houndstooth Scarf since it uses the same color yarn or my crochet panda pattern if you were wanting to make another black and white animal..
🐌Expert Tips
- Fabric Liner: If you plan to carry heavier items in the bag, consider making a fabric liner to prevent distortion or stretching. A phone or wallet's weight should be fine without a liner.
- Reinforced Handles: For added durability, you might use thicker yarn for the straps or consider adding fabric handles instead of crocheted ones.
- Color Variations: Experiment with different colors or textures of yarn to create a unique look for your orca bag.
- Personalization: Add embellishments like beads or crochet flowers to personalize your bag further.
🧵Pattern FAQs
Of course, chunky yarn would make the bag become a large tote versus a phone bag so keep that in mind.
Of course! I usually make my handles out of crochet, but you can always add on a different handle if you want it to be stronger.
Sure! It doesn’t matter which order you assemble the bag.
🧶More Crochet Animal Patterns

If you tried this Crochet Orca Bag Pattern (or any other pattern on my website), please let me know how it went in the 📝 comments below. I'd love to hear from you!
Crochet Orca Bag Pattern
Materials
Abbreviations (US terms)
- Magic ring - mr
- Chain - ch
- Slip stitch - sl st
- Single crochet - sc
- Double crochet - dc
- Half double crochet - hdc
- Increase - inc - 2 stitches in 1 stitch, seen as inc for single crochet increase and dc inc for double crochet increase for this pattern.
- Decrease - dec
Notes
- Color Options: You can use any shade of black and even gray for the main color of the crochet orca pattern if you want to add variety.
- Design Structure: The crochet killer whale pattern is made flat, so there is no middle piece to go with the bag. However, if you need your crochet whale bag to have more depth, feel free to create a middle piece. I include a middle piece in my Crochet Strawberry Bag Pattern.
- Size: The crochet orca pattern is roughly 8 inches in diameter.
Instructions
This part of the orca whale crochet pattern is made mostly in the round.
- Round 1: Make a mr, ch x2 (does not count as a stitch) and dc x12. Then sl st to the first dc (skip the chains) and pull the circle tight. (12)
- Round 2: Ch x2. Then dc inc in every stitch. Then sl st to the first dc (24).
- Round 3: Ch x2. Then dc Inc, dc, then repeat for the entire round. Then sl st to the first dc. (36)
- Round 4: Ch x2. Then dc Inc, dc x2, then repeat for the entire round. Then sl st to the first dc. (48)
- Round 5: Ch x2. Then dc Inc, dc x3, repeat for the entire round. Then sl st to the first dc. (60)
- Round 6: Ch x2. Then dc Inc, dc x4, repeat for the entire round. Then sl st to the first dc. (72)
- Round 7: Ch x2. Then dc Inc, dc x5, repeat for the entire round. Then sl st to the first dc. (84)
- Round 8: Ch x2. Then dc Inc, dc x6, repeat for the entire round. Then sl st to the first dc. (96)
- Then fasten off the yarn.
- Make 2 circles, one white and one black.
Crochet Whale Fins:
Arm Fins:
- Make 2 with the black yarn.
- Round 1: Make a mr and then sc x6 into the circle. Then pull the circle tight. (6)
- Round 2: In the first sc you made, make an inc. Then in the following stitch make a sc. Repeat for the rest of the round. (9)
- Round 3: Sc for the entire round (9).
- Round 4: Inc, then in the following 2 stitches make a sc. Then repeat for the rest of the round. (12)
- Round 5: Sc for the entire round (12).
- Round 6: Inc, then in the following 3 stitches make a sc. Then repeat for the rest of the round. (15)
- Round 7: Inc, then in the following 4 stitches make a sc. Then repeat for the rest of the round. (18)
- Round 8: Dec, then in the following 4 stitches make a sc. Then repeat for the rest of the round. (15)
- Round 9: Dec, then in the following 3 stitches make a sc. Then repeat for the rest of the round. (12)
- Round 10: Dec, then in the following 2 stitches make a sc. Then repeat for the rest of the round. (9)
- Round 11: Dec, then in the following stitch make a sc. Then repeat for the rest of the round. (6). Then fasten off and leave a tail for sewing.
Tail Fin:
- Make using the black yarn.
- Repeat Round 1-7 from the arm fin pattern 2 times to start your tail fin. Fasten off the first tail fin tip, but not the second one.
- Round 8: Join the 2 fin tips together by crocheting into the other edge of the crochet fin and crochet around the entire edge of both fin tips. They should join only where the 2 fins meet in the middle (36).
- Round 9: Dec, then in the following 4 stitches make a sc. Then repeat for the rest of the round. (30)
- Round 10: Sc for the entire round (30).
- Round 11: Dec, then in the following 3 stitches make a sc. Then repeat for the rest of the round. (24)
- Round 12: Sc for the entire round (24). Fasten off and leave a tail for sewing.
Finishing:
Orca Eye Circles:
- Make 2.
- Round 1: With the white yarn, ch x7 and make a dc in the 3rd ch from the hook. Make 3 more dc in the next 3 chains. Hdc in the last ch. Sc x2 in the last ch to move to the opposite side of the ch. Sc x5 and sl st. Then fasten off the yarn and leave a tail for sewing.
- Once you have made 2 circles you want to single crochet the edges together. To do this you want to hold the 2 circles together and line them up in relation to stitch openings. Then rejoin the black yarn to the outer edge going through both circles. Then sc around the edge for about ¾ -⅘ of the way. You want to leave an opening about the size of a hand so you can easily grab things out of the bag.
- Sew the arm fins and tail fins to the orca bag.
- Sew on the eyes. Then sew on the white eye spots after placing the eyes.
Now for the strap:
- Split the yarn into 2 balls (you really don't need much, just a couple arm spans of yarn) and double the yarn up so you will be working with 2 yarns not 1. Join the double stranded green yarn to one corner of the mouth and make a series of crochet chains. I made 150 chains, but you may need more or less depending on the length you are going for. Then join to the opposite side of the bag. Fasten off and weave in any yarn ends.And now the crochet orca bag is done! I hope you enjoyed my crochet orca pattern 🙂


Leave a Reply