
Say hello to the boldest breakfast accessory you never knew you needed—the crochet toast bag pattern! This easy-to-make, quirky, and totally adorable crochet food bag is perfect for anyone looking to add a little fun to their wardrobe.

Looking for a unique crochet bag that stands out from the typical store-bought options? This is it. Soft, squishy, and shaped like everyone’s favorite breakfast staple, this crochet bread bag makes a charming statement piece for brunch dates, market strolls, or just adding a playful touch to your outfit. Whether you’re a seasoned hook pro or just getting started, this project is simple, satisfying, and guaranteed to turn heads.
The inspiration for this crochet toast bag pattern goes way back. Over a decade ago in high school, I crocheted a giant toast backpack for a friend. Sadly, I don’t have a picture of it anymore, but I do remember how much they loved it—and how often they used it. That memory sparked the idea to bring a bite-sized version to life for all of you.
Feeling creative? Customize your crochet toast bag with a happy face, blushing cheeks, or even a pat of butter! It’s a great canvas for adding personality and that extra sprinkle of pizzazz.
Looking for more fun crochet food bag patterns? You might be interested in checking out my crochet strawberry bag pattern. Perfect for spring picnics or farmers market visits, it features a plump berry shape, a leafy green top, and optional embroidered seeds for extra detail. It’s the perfect pop of color and whimsy for any outfit.
Or maybe my 2 citrus themed bags - my crochet orange bag pattern and my crochet lemon bag pattern. Both are refreshing and ready for summer or year-round use!
Each one of my crochet bag patterns is packed with personality and designed to make you (and everyone around you) smile.
Grab your yarn, get your toast color ready, and let’s make something deliciously fun!
Jump to:
✏️ Things To Note:
- Skill Level: Beginner to intermediate. If you’re comfortable with basic stitches (like single crochet, increasing, and decreasing), you’ll be able to make my crochet toast bag pattern in no time!
- Yarn Matters: Choose a sturdy yarn, like worsted weight cotton or acrylic for the crochet toast bag. Cotton offers great durability and structure, while acrylic is soft, affordable, and comes in tons of fun colors. For novelty bags, you can mix in textured or variegated yarns to add personality! I used acrylic worsted weight yarn for this bag. If you use chunky yarn, know that your bag will be bigger and if you use dk or smaller yarn it will be smaller. Adjust the hook size as needed.
- Lining Is Optional (But Awesome): For extra durability (especially if your bag will carry heavier items), consider sewing in a fabric lining. It helps prevent the crochet toast bag from stretching and keeps smaller items from slipping through stitches.
🪡 Materials Needed
- Red Heart - aran yarn
- Red Heart - cafe yarn
- Red Heart - yellow yarn
- Red Heart - coffee yarn (or an alternative for the crochet bag strap)
- 5 mm Hook
- Tapestry needle
💭Abbreviations to Remember (US terms)
- Chains (ch)
- Single crochet (sc)
- Increase (inc)
- Decrease (dec)
🍵Instructions for Crochet Toast Bag Pattern
For this crochet toast bag pattern, we will be working in rows.
Crochet Toast:
Make x2.


Row 1: With the aran yarn, ch x26 then in the second ch from the hook make a sc. Continue to make sc for the rest of the row. Then ch x1 and turn.
Row 2-24: Sc x25. Then ch x1 and turn.
Now we are going to make the top of the bread.
Row 25: Sc x12. Then ch x1 and turn.
Row 26: Dec, sc x8, dec. Then ch x1 and turn.
Row 27: Dec, sc x6, dec. Then ch x1 and turn.
Row 28: Dec, sc x4, dec. Then ch x1 and turn.
Row 29: Dec, sc x2, dec. Then fasten off the yarn and weave in any ends.


Rejoin the aran yarn to the otherside of row 24 and repeat rows 25-29.
Crochet Bread Crust:
We are now going to work around the bread shape we just made. This part is based on tension. Your tension. So adjust as needed. The only hard rule about this part is make sure you do the same amount of stitches on both bread pieces, otherwise it gets hard to line up the 2 pieces together and sew them together properly.
Round 1: With aran yarn, sc around the entire edge of the bread shape. Do it for both pieces. Then fasten off the yarn and weave in any ends. When you get to the corners, do not add additional stitches, just sc x1 and move to the next stitch. This is how we get sharper corners at the bottom of the toast bag.
Round 2-3: Join the cafe yarn to any stitch in the last round, then sc around the entire edge just like you did in the previous round. Then fasten off the yarn and repeat on the other piece.


Once both pieces have the bread crust added, smoosh the front sides of the pieces together. And sew the crusts together. You want to start on the side of the toast right below where you want the bag to have its opening and work your way all the way around the edge until you get to the opposite side. Then fasten off the yarn and weave in any ends.
Flip the toast right side out and you have the base of the bag done!
Crochet Bag Straps:
Make x2.
Row 1: With the coffee yarn, ch x151 then in the second ch from the hook make a sc. Continue to make sc for the rest of the row. Then ch x1 and turn.
Row 2-4: Sc x150. Then sc x1 and turn. When you get to the end of the last row, fasten off the yarn but leave a tail for sewing.
Once you have 2 straps made, sew each one to the top of the bag. For each strip I had the beginning end on one side of the opening, and the end on the other side of the opening of the bag but on the same side of the purse.


Crochet Butter:
Row 1: With the yellow yarn, ch x10 then in the second ch from the hook make a sc. Continue to make sc for the rest of the row. Then ch x1 and turn.
Row 2-9: Sc x9. Then ch x1 and turn. When you get to the end of the last row, fasten off the yarn but leave a long tail for sewing.
Sew to whatever side of the bag you would like to be the front.
And there you have it—your very own crochet toast bag, fresh off the hook and ready to add a delicious dose of charm to your day! I hope you had as much fun making this little cutie as I did designing it.
If you have any yarn leftover try making my crochet toast coaster pattern and turn it into a little toast pouch for coins by crocheting 2 together!
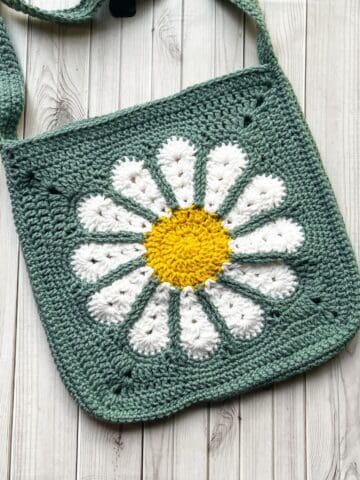
Crocheting bags is one of my favorite ways to combine function and creativity, and if you're feeling inspired to keep stitching, I’ve got plenty more quirky and original patterns to explore. If toast was your jam, then you’ll definitely want to check out some of my other very cool and wonderfully off-the-cuff designs like my crochet stingray bag pattern that looks like a pancake and is a great way to use any extra yarn you may have from this project. Or my crochet sunflower bag pattern that can use the extra brown you have for the middle of the flower. Or you can make the matching crochet sunflower pillow pattern too.
Each of these bags has its own personality and flair, and they’re just waiting for your personal touch. Be sure to share your finished toast bag with me—I LOVE seeing your creations!
Until next time, keep those hooks moving and your imagination toasted golden brown.

🐌Expert Tips
- Tension is Everything: Use a tighter tension than you normally would for garments. A tight, even stitch gives your bag more structure and durability—plus, it looks super polished.
- Block Your Bag: Blocking helps your pieces lay flat, keeps your shaping crisp, and gives your bag a more professional finish—especially if your design includes appliqué or shaping details.
- Have Fun with Customization: Your bag is a blank canvas! Embroidery, buttons, beads, faces, fringe—anything goes. That’s the magic of a truly unique crochet bag.
🧵Pattern FAQs
This pattern is beginner-friendly with some light intermediate techniques. If you're comfortable with basic stitches like single crochet, increases, and decreases, you’re good to go!
The finished crochet toast bag is approximately 8–9 inches tall and 7–8 inches wide (excluding straps), making it the perfect size for essentials like your phone, wallet, and keys. You can size it up or down by adjusting your yarn weight and hook!
Absolutely! This bag is a blank canvas. Add a face, embroider jam, stitch on a butter pat, or use multicolor yarn for a funky twist. You can also adjust strap length or even turn it into a mini backpack!

🧶More Crochet Bag Patterns
If you tried this Crochet Toast Bag Pattern (or any other pattern on my website), please let me know how it went in the 📝 comments below. I'd love to hear from you!

Crochet Toast Bag Pattern
Materials
- Red Heart - aran yarn
- Red Heart - cafe yarn
- Red Heart - yellow yarn
- Red Heart - coffee yarn or an alternative for the crochet bag strap
- 5 mm Hook
- Tapestry needle
Abbreviations (US terms)
- Chains - ch
- Single crochet - sc
- Increase - inc
- Decrease - dec
Notes
- Skill Level: Beginner to intermediate. If you’re comfortable with basic stitches (like single crochet, increasing, and decreasing), you’ll be toasting in no time!
- Yarn Matters: Choose a sturdy yarn, like worsted weight cotton or acrylic. Cotton offers great durability and structure, while acrylic is soft, affordable, and comes in tons of fun colors. For novelty bags, you can mix in textured or variegated yarns to add personality! I used acrylic worsted weight yarn for this bag. If you use chunky yarn, know that your bag will be bigger and if you use dk or smaller yarn it will be smaller. Adjust the hook size as needed.
- Lining Is Optional (But Awesome): For extra durability (especially if your bag will carry heavier items), consider sewing in a fabric lining. It helps prevent the bag from stretching and keeps smaller items from slipping through stitches.
Instructions
- For this crochet toast bag pattern, we will be working in rows.
Crochet Toast:
- Make x2.
- Row 1: With the aran yarn, ch x26 then in the second ch from the hook make a sc. Continue to make sc for the rest of the row. Then ch x1 and turn.
- Row 2-24: Sc x25. Then ch x1 and turn.
- Now we are going to make the top of the bread.
- Row 25: Sc x12. Then ch x1 and turn.
- Row 26: Dec, sc x8, dec. Then ch x1 and turn.
- Row 27: Dec, sc x6, dec. Then ch x1 and turn.
- Row 28: Dec, sc x4, dec. Then ch x1 and turn.
- Row 29: Dec, sc x2, dec. Then fasten off the yarn and weave in any ends.
- Rejoin the aran yarn to the otherside of row 24 and repeat rows 25-29.
Crochet Bread Crust:
- We are now going to work around the bread shape we just made. This part is based on tension. Your tension. So adjust as needed. The only hard rule about this part is make sure you do the same amount of stitches on both bread pieces, otherwise it gets hard to line up the 2 pieces together and sew them together properly.
- Round 1: With aran yarn, sc around the entire edge of the bread shape. Do it for both pieces. Then fasten off the yarn and weave in any ends. When you get to the corners, do not add additional stitches, just sc x1 and move to the next stitch. This is how we get sharper corners at the bottom of the toast bag.
- Round 2-3: Join the cafe yarn to any stitch in the last round, then sc around the entire edge just like you did in the previous round. Then fasten off the yarn and repeat on the other piece.
- Once both pieces have the bread crust added, smoosh the front sides of the pieces together. And sew the crusts together. You want to start on the side of the toast right below where you want the bag to have its opening and work your way all the way around the edge until you get to the opposite side. Then fasten off the yarn and weave in any ends.
- Flip the toast right side out and you have the base of the bag done!
Crochet Bag Straps:
- Make x2.
- Row 1: With the coffee yarn, ch x151 then in the second ch from the hook make a sc. Continue to make sc for the rest of the row. Then ch x1 and turn.
- Row 2-4: Sc x150. Then sc x1 and turn. When you get to the end of the last row, fasten off the yarn but leave a tail for sewing.
- Once you have 2 straps made, sew each one to the top of the bag. For each strip I had the beginning end on one side of the opening, and the end on the other side of the opening of the bag but on the same side of the purse.
Crochet Butter:
- Row 1: With the yellow yarn, ch x10 then in the second ch from the hook make a sc. Continue to make sc for the rest of the row. Then ch x1 and turn.
- Row 2-9: Sc x9. Then ch x1 and turn. When you get to the end of the last row, fasten off the yarn but leave a long tail for sewing.
- Sew to whatever side of the bag you would like to be the front.
- And there you have it—your very own crochet toast bag, fresh off the hook and ready to add a delicious dose of charm to your day! I hope you had as much fun making this little cutie as I did designing it.


Leave a Reply