
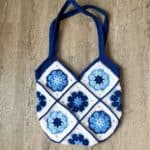
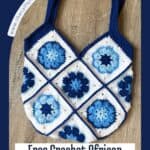
This crochet African flower bag is the perfect blend of color and style, made with 13 gorgeous 8 petal African flower crochet squares. With a fun, rounded bottom and endless color possibilities, it’s a must-make project that’s both practical and beautiful!
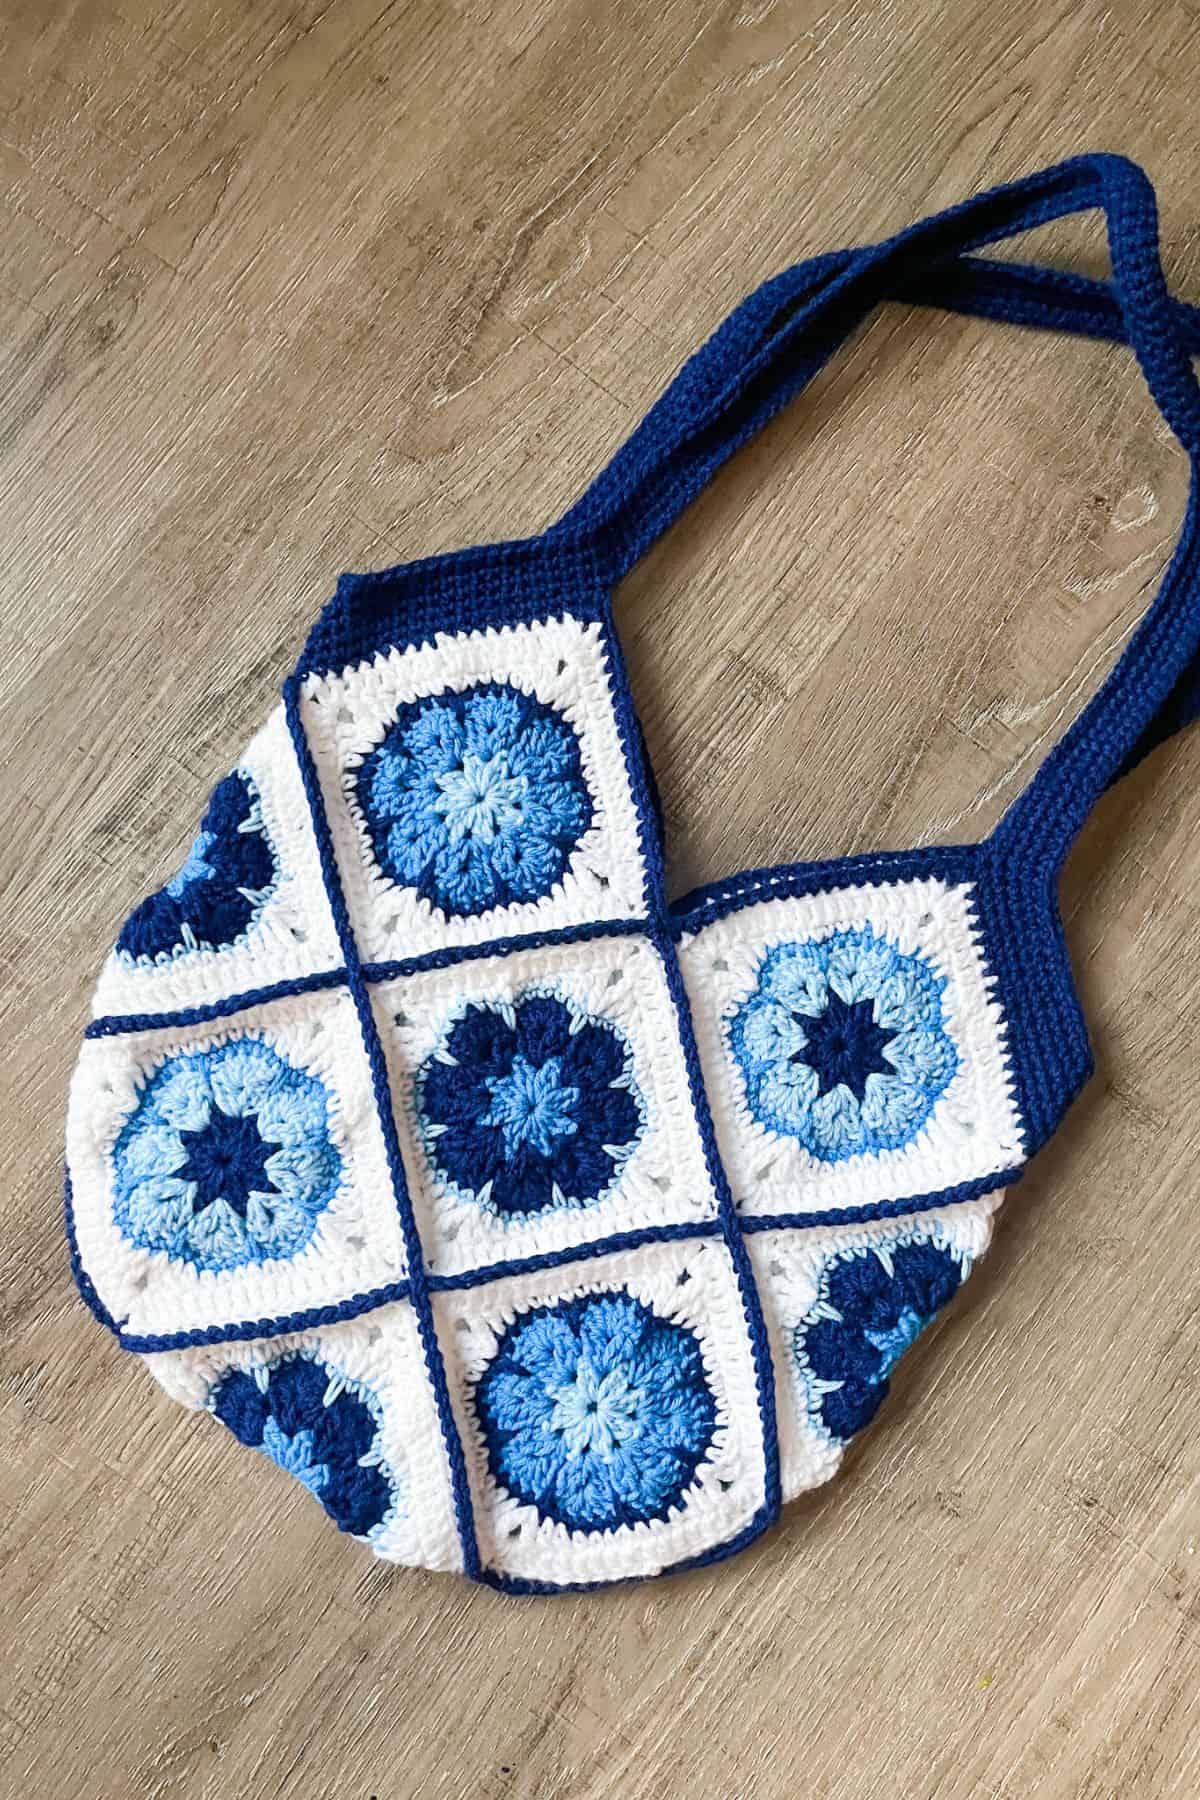
The crochet African flower bag is made from 13x 8 petal African flower crochet squares, carefully arranged using my favorite granny shape configuration, which you may recognize from my crochet emoji bag and crochet lemon bag pattern. I absolutely love this bag shape because it strikes the perfect balance—wide and tall, but with a slightly rounded bottom that makes it not only practical but also visually appealing. There’s just something about the curve that I find so charming!
The crochet African flower bag was also inspired by the classic beauty of Delft Blue Pottery, the iconic Dutch blue and white pottery. That’s why I chose to use three different shades of blue paired with crisp white, but the beauty of this design is that you can choose whatever color scheme you like to make it your own. The versatility of the African flower crochet purse means you can easily match it with any outfit or personal style.
The crochet African flower square is such a versatile element in this design, and the African flower granny square pattern offers endless opportunities for color play and texture. The 8 petal African flower crochet pattern creates a beautiful, symmetrical effect, perfect for crafting a stylish, sturdy bag that stands the test of time.
Whether you're new to crochet or an experienced maker, this crochet African flower bag is a fun project that results in a stunning accessory you’ll want to carry everywhere.
Jump to:
✏️ Things To Note:
- Square Size: Make sure each 8 petal African flower crochet square is the same size to ensure even stitching when assembling the bag. A tight tension will give you cleaner edges.
- Customizing the Size: If you want a larger or smaller bag, simply adjust the number of rounds used after creating the flower, or use thinner yarn and a smaller hook.
- Strap: Feel free to customize the strap length or width to your preference, whether you prefer a longer crossbody strap or a shorter handle for the crochet African flower bag pattern.
🪡 Materials Needed
- Red Heart Yarn - Light Blue
- Red Heart Yarn - Delft Blue
- Red Heart Yarn - Soft Navy
- Red Heart Yarn - White
- 5mm hook
- Tapestry needle
💭Abbreviations to Remember (US terms)
- Chains (ch)
- Single crochet (sc)
- Long single crochet (long sc)
- Double crochet (dc)
- Half double crochet (hdc)
- Triple crochet (tr)
- Slip stitch (sl st)
🧋Variations
- Color Combinations: Instead of sticking to a blue and white palette, experiment with vibrant, bold colors or pastel shades for a fresh look. You could even try a gradient effect across the squares for a striking ombré design.
- Shape and Size: If you want a smaller bag, use fewer squares, or if you’re craving a larger bag, increase the number of squares you use. You can also change the size of each square by adjusting your stitch tension or hook size.
- Add a Lining: For extra durability and to make your bag even more polished, consider lining the inside with fabric. You can match the fabric to your yarn colors or use a contrasting print for a fun surprise when you open the bag!
🍵Instructions for Crochet African Flower Bag Pattern
For this crochet African flower bag pattern, we will be working in rounds.
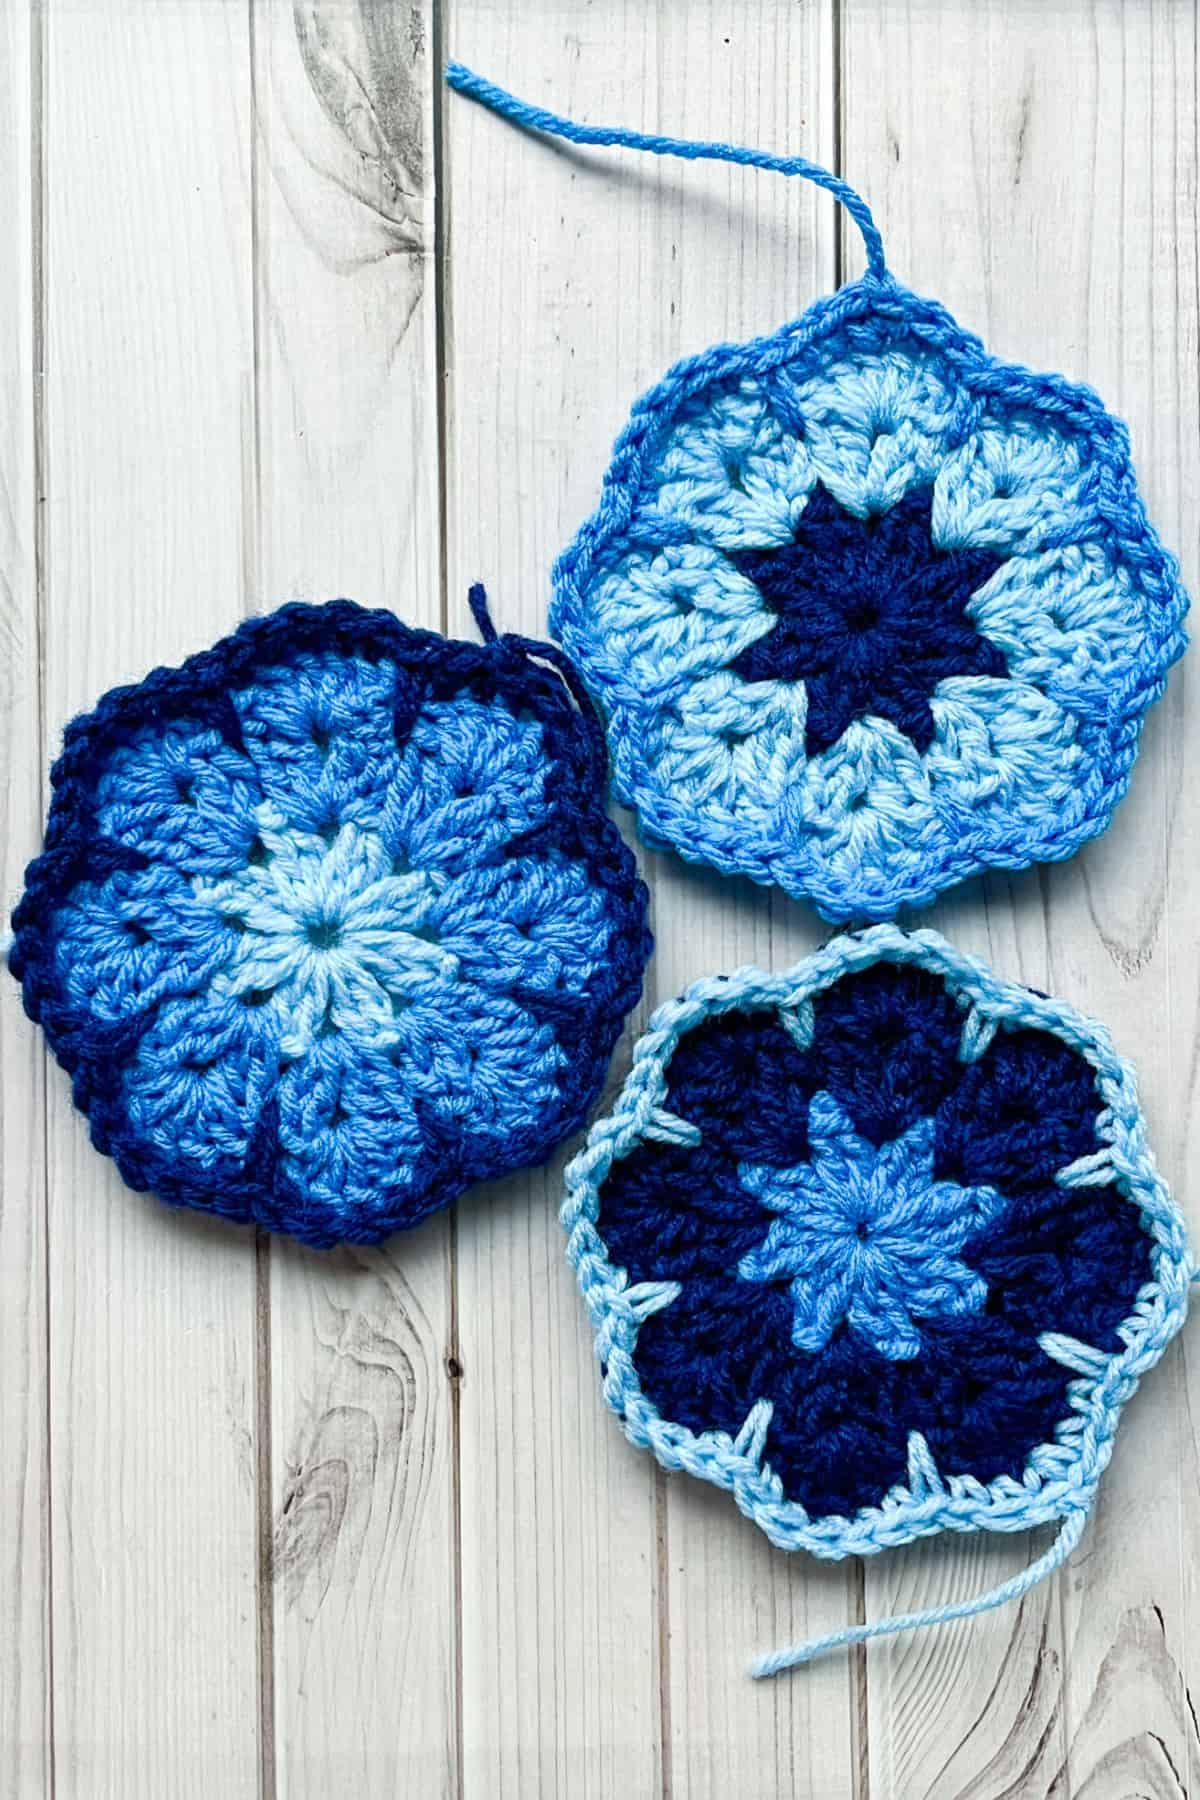
Crochet 8 Petal African Flower:
Round 1: See instructions below.
Round 2: See instructions below.
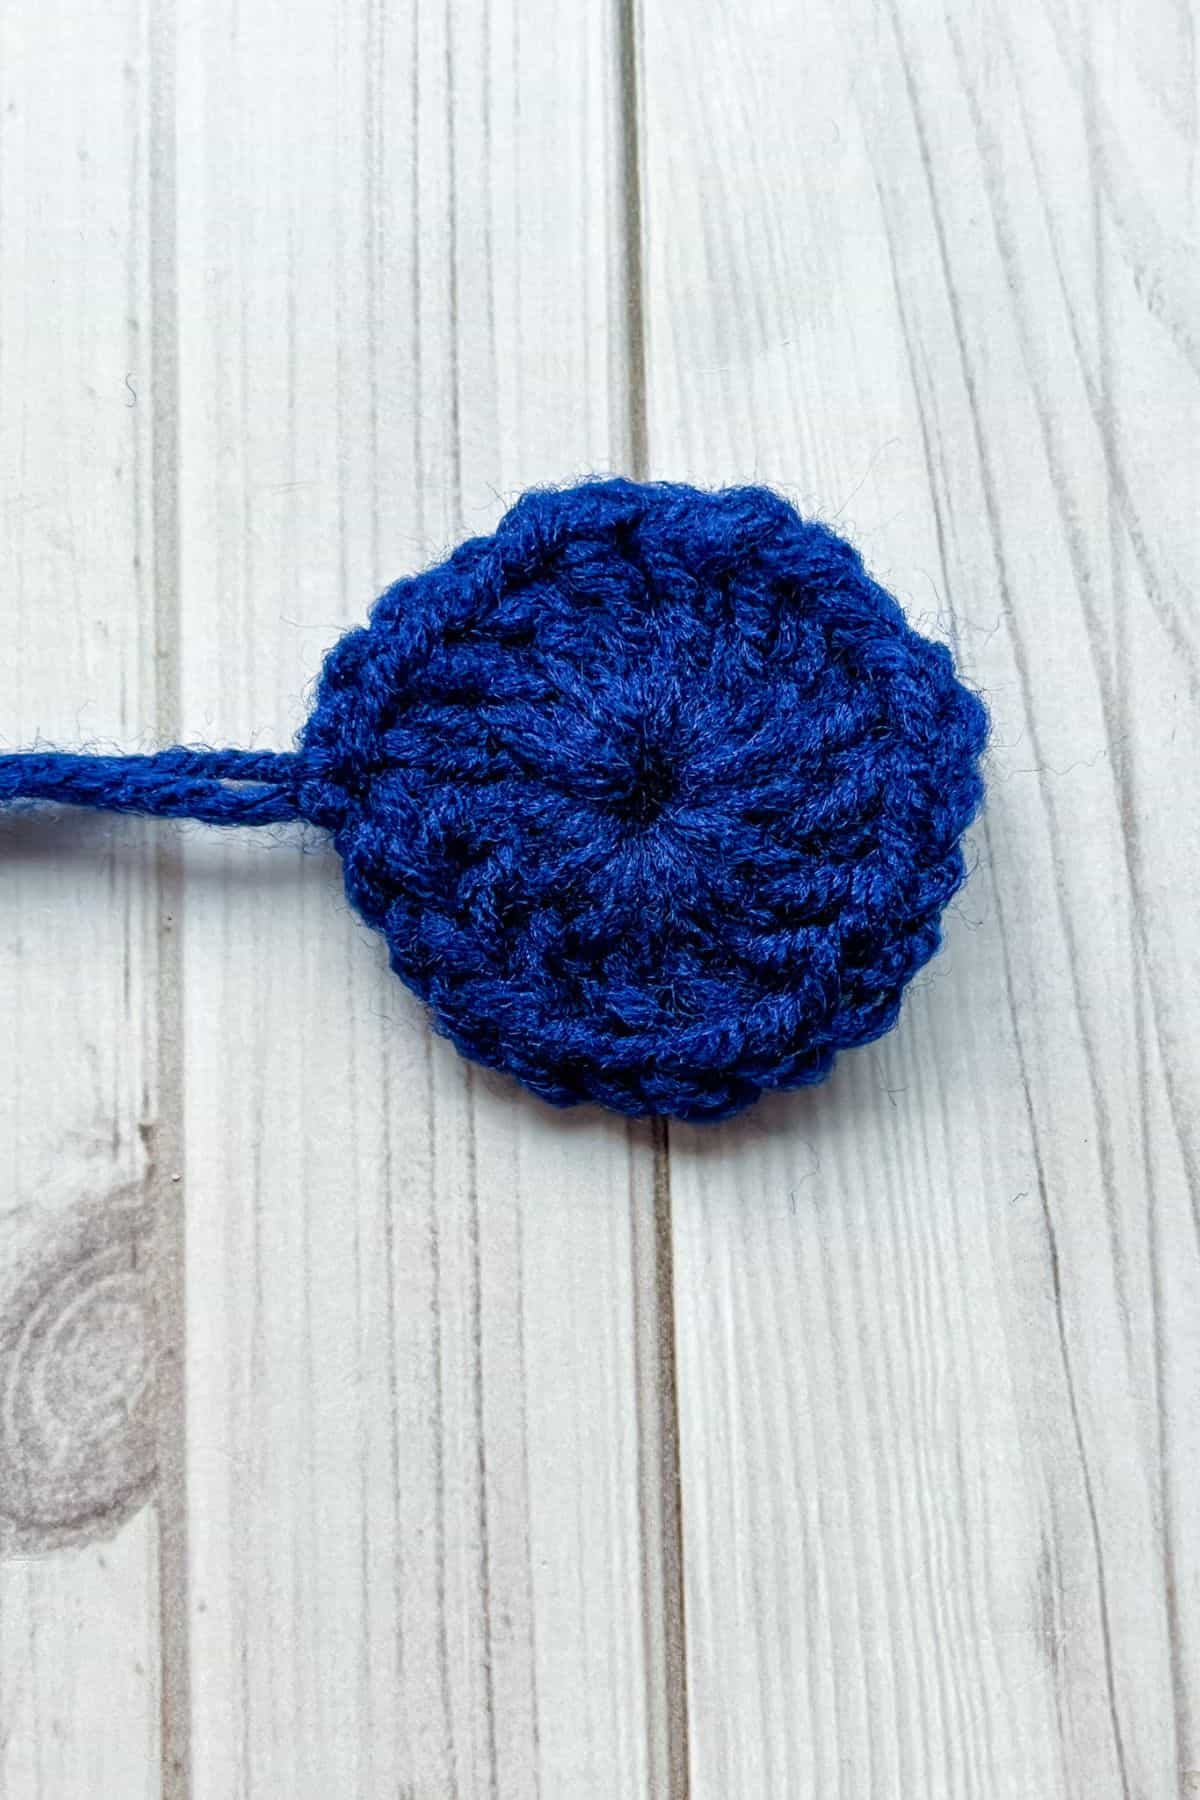
With color A: Ch x5 and join with a sl st to form a closed circle.
Round 1: Ch x3 (counts as a dc), dc, ch x1. *Dc x2, ch x1* and then repeat 6 more times. Then join with a sl st to top of the beginning ch x3 (16 dc + 8 ch spaces).
Round 2: Join color B to any ch x1 space. Ch x3 and dc, ch x1, dc x2 in the same ch x1 space from the round below. *Then dc x2, ch x1, and dc x2 into the next ch x1 space*. Repeat from * for the rest of the round and make a sl st to the top of the beginning ch x3 (32 dc + 8 ch spaces).
See instructions below.

See instructions below.
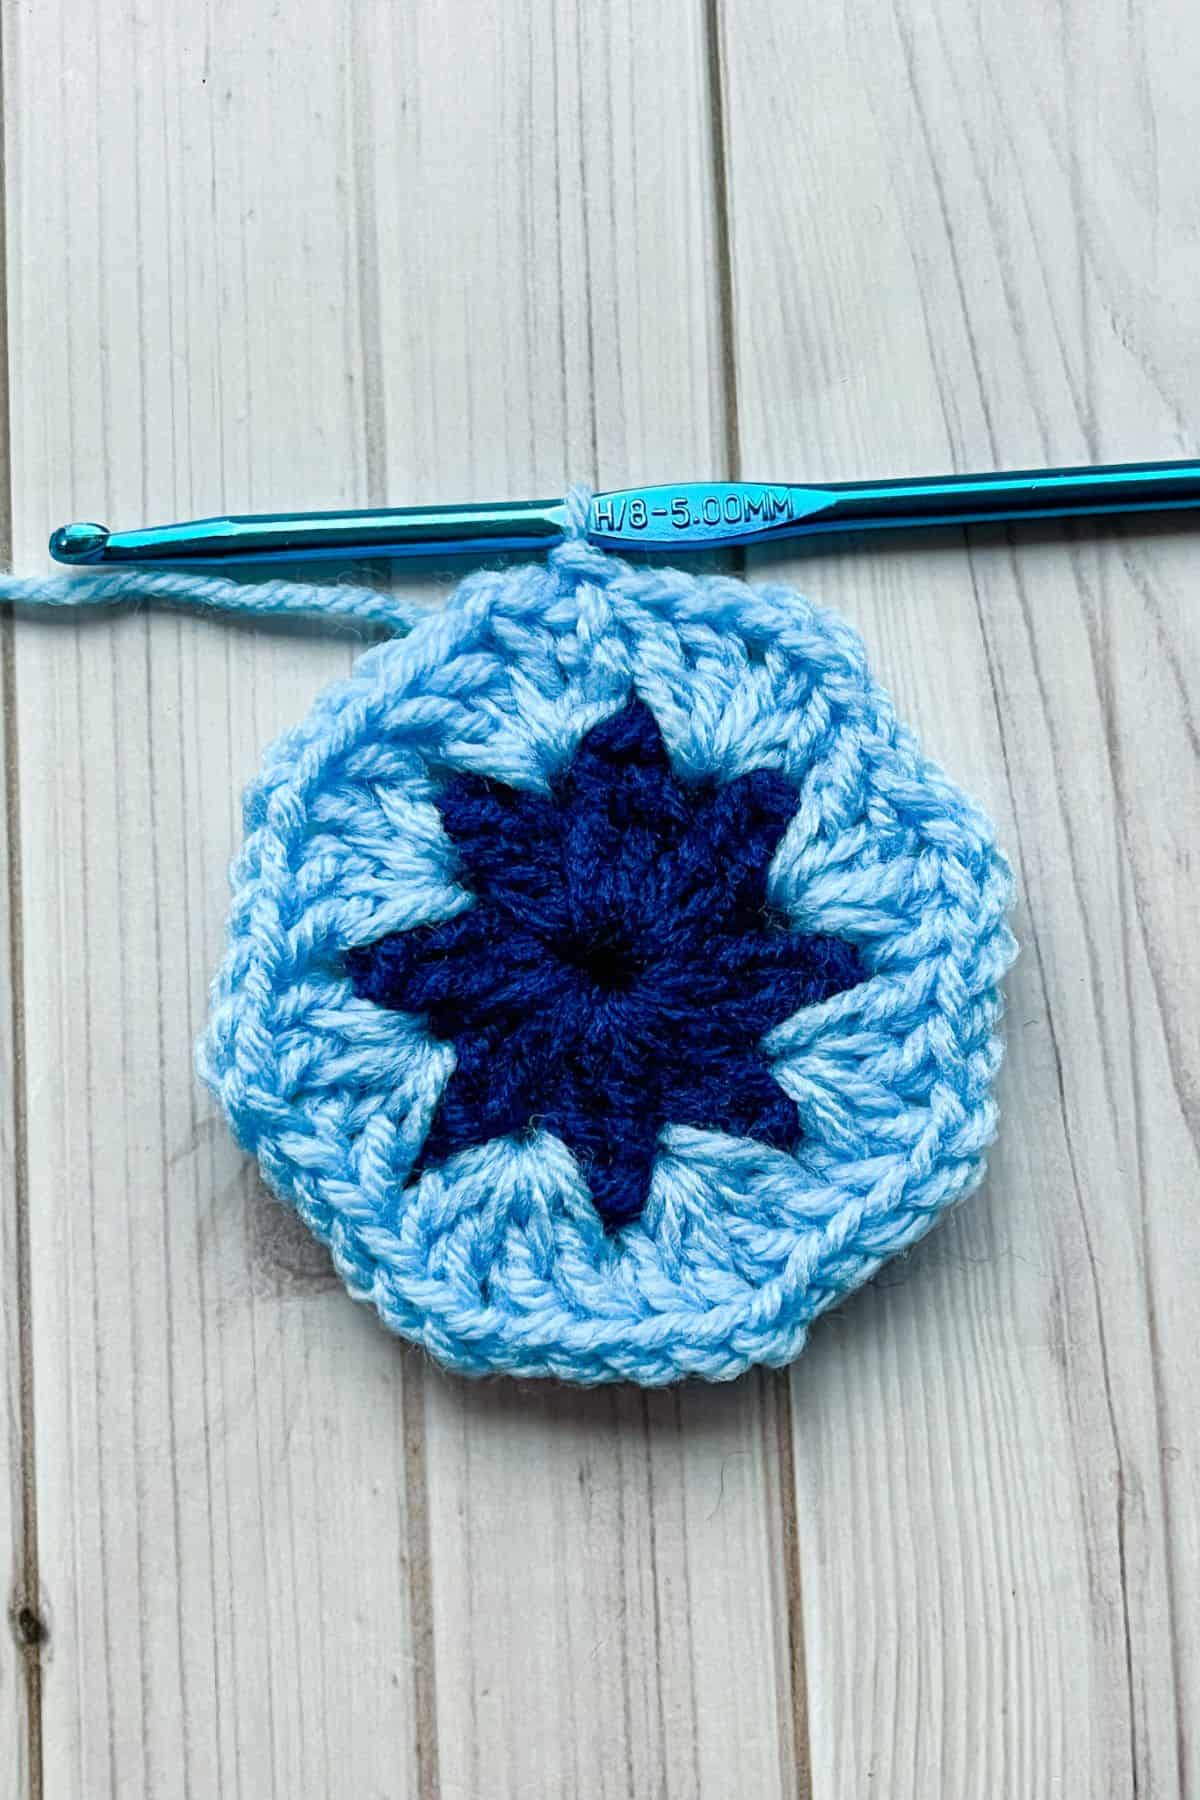
Round 3: Sl st into the next stitch. Then sl st into the ch x1 space. Ch x3 and dc x4 into the ch x1 space. Then *in the next ch x1 space dc x5*, repeat from * for the rest of the round (8 shells). Next, fasten off the yarn.
Round 4: Join color C into any flower petal top. Make a sc into every stitch you made in the last round, but make a long sc in between petals.
A long sc is made by going down an extra row and then pulling up the yarn to be even with your current round and making a sc like normal. You want to pull the yarn up to your current round so that your flower doesn’t curl and lays flat better. After completing the round, then make a sl st to the first sc (5 sc on top of each petal + a long sc in between petals). Then fasten off the yarn.

Round 5 and 6: See instructions below.
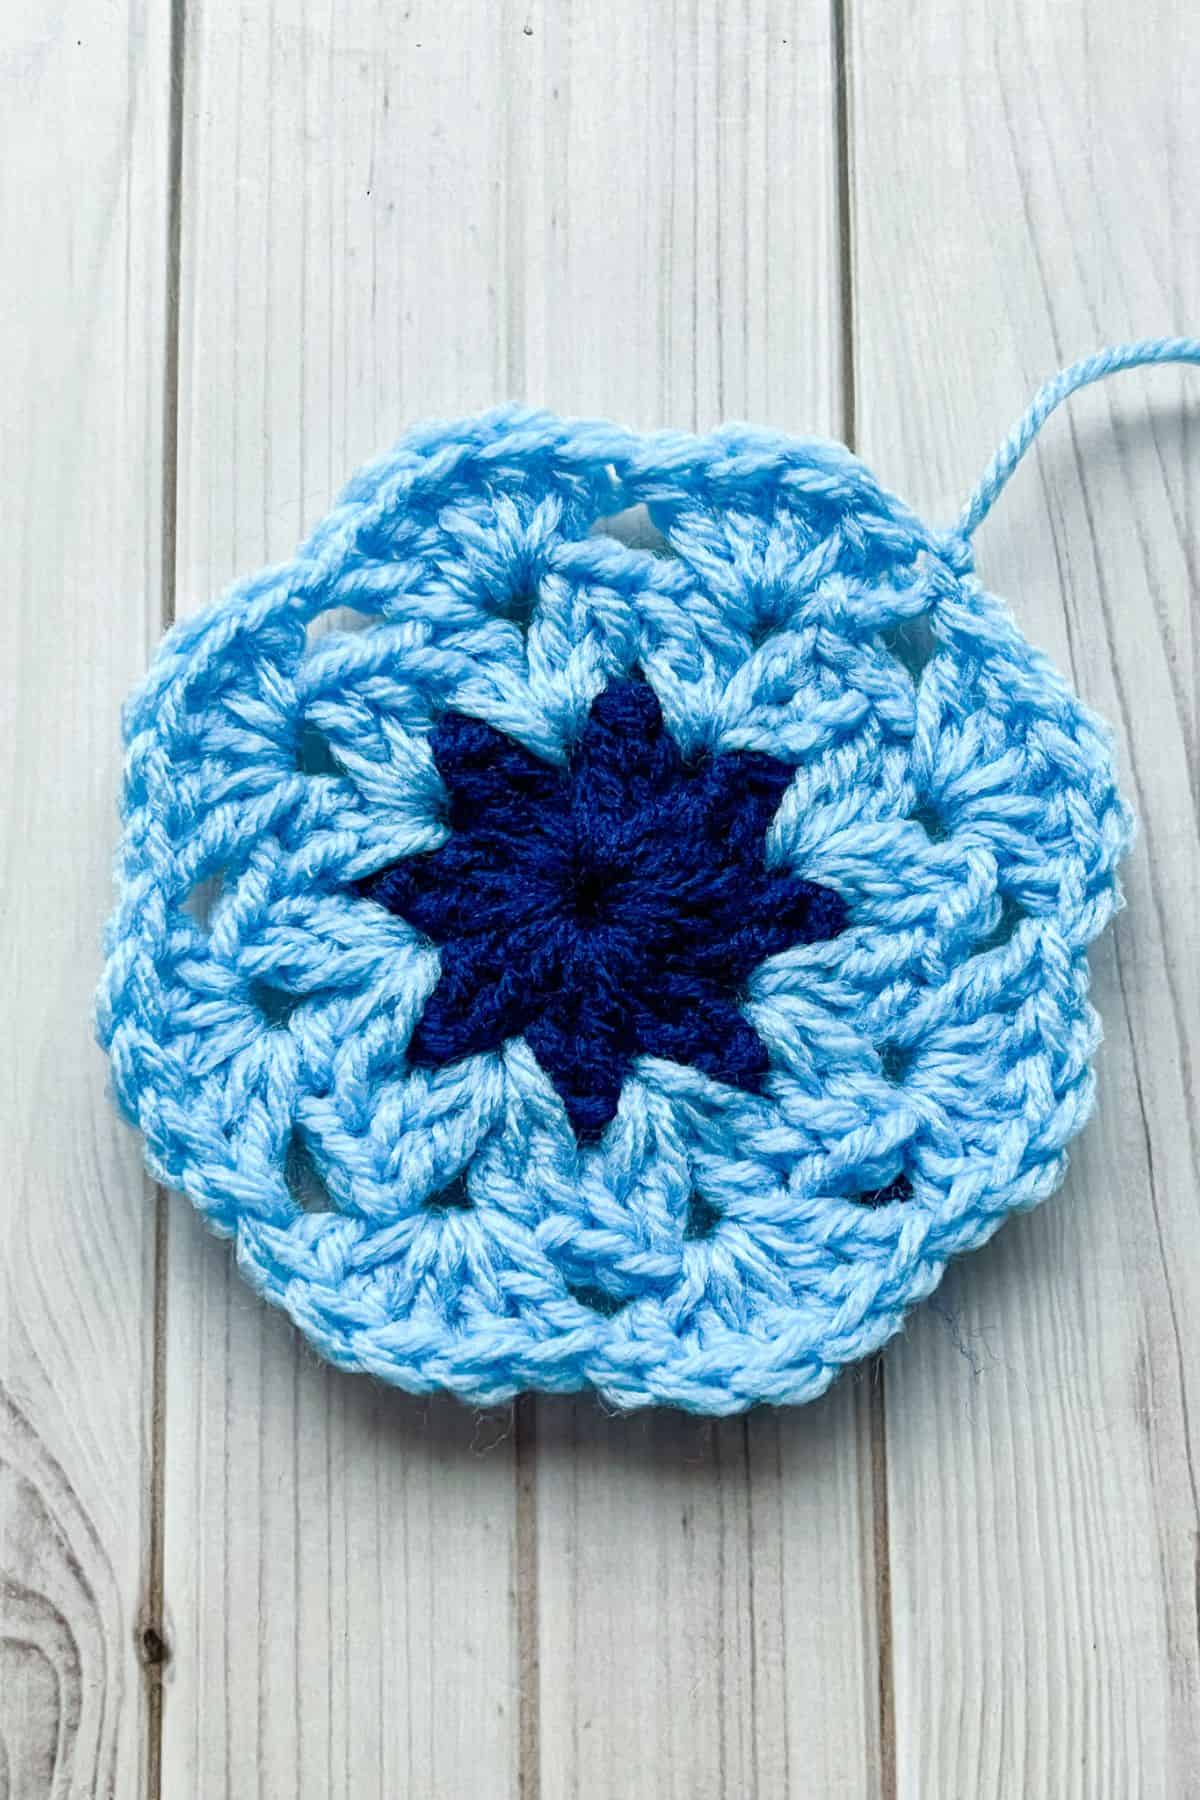
Round 5: Join the white yarn to the top of any long sc from round 4. Make a sc into the same stitch, then sc into the next 2 stitches. Hdc, dc, and then dc again in the following stitches. Tr, ch x2, tr in the next stitch, this is your first corner and should be made into one of the long sc stitches from round 4. * Dc in the next 2 stitches, hdc, 1 sc in the next 5 stitches, hdc, dc in the next 2 stitches. Then make a corner: tr, ch x2, tr.* Repeat * 2 more times.
Dc in the next 2 stitches, hdc, and 1 sc in the final 2 stitches. Then join with a sl st to the 1st sc.
Round 6: Ch x2, then dc in the next stitch and the following stitches until you reach a corner. When you get to the chain space in the corner make a dc x2 + ch x2 + dc x2. Then continue making dc stitches into the next side of the square. Repeat 3 more times for the rest of the round. Then sl st to the first dc in the round. Finally, fasten off the yarn.
Assembling the Crochet African Flower Bag:
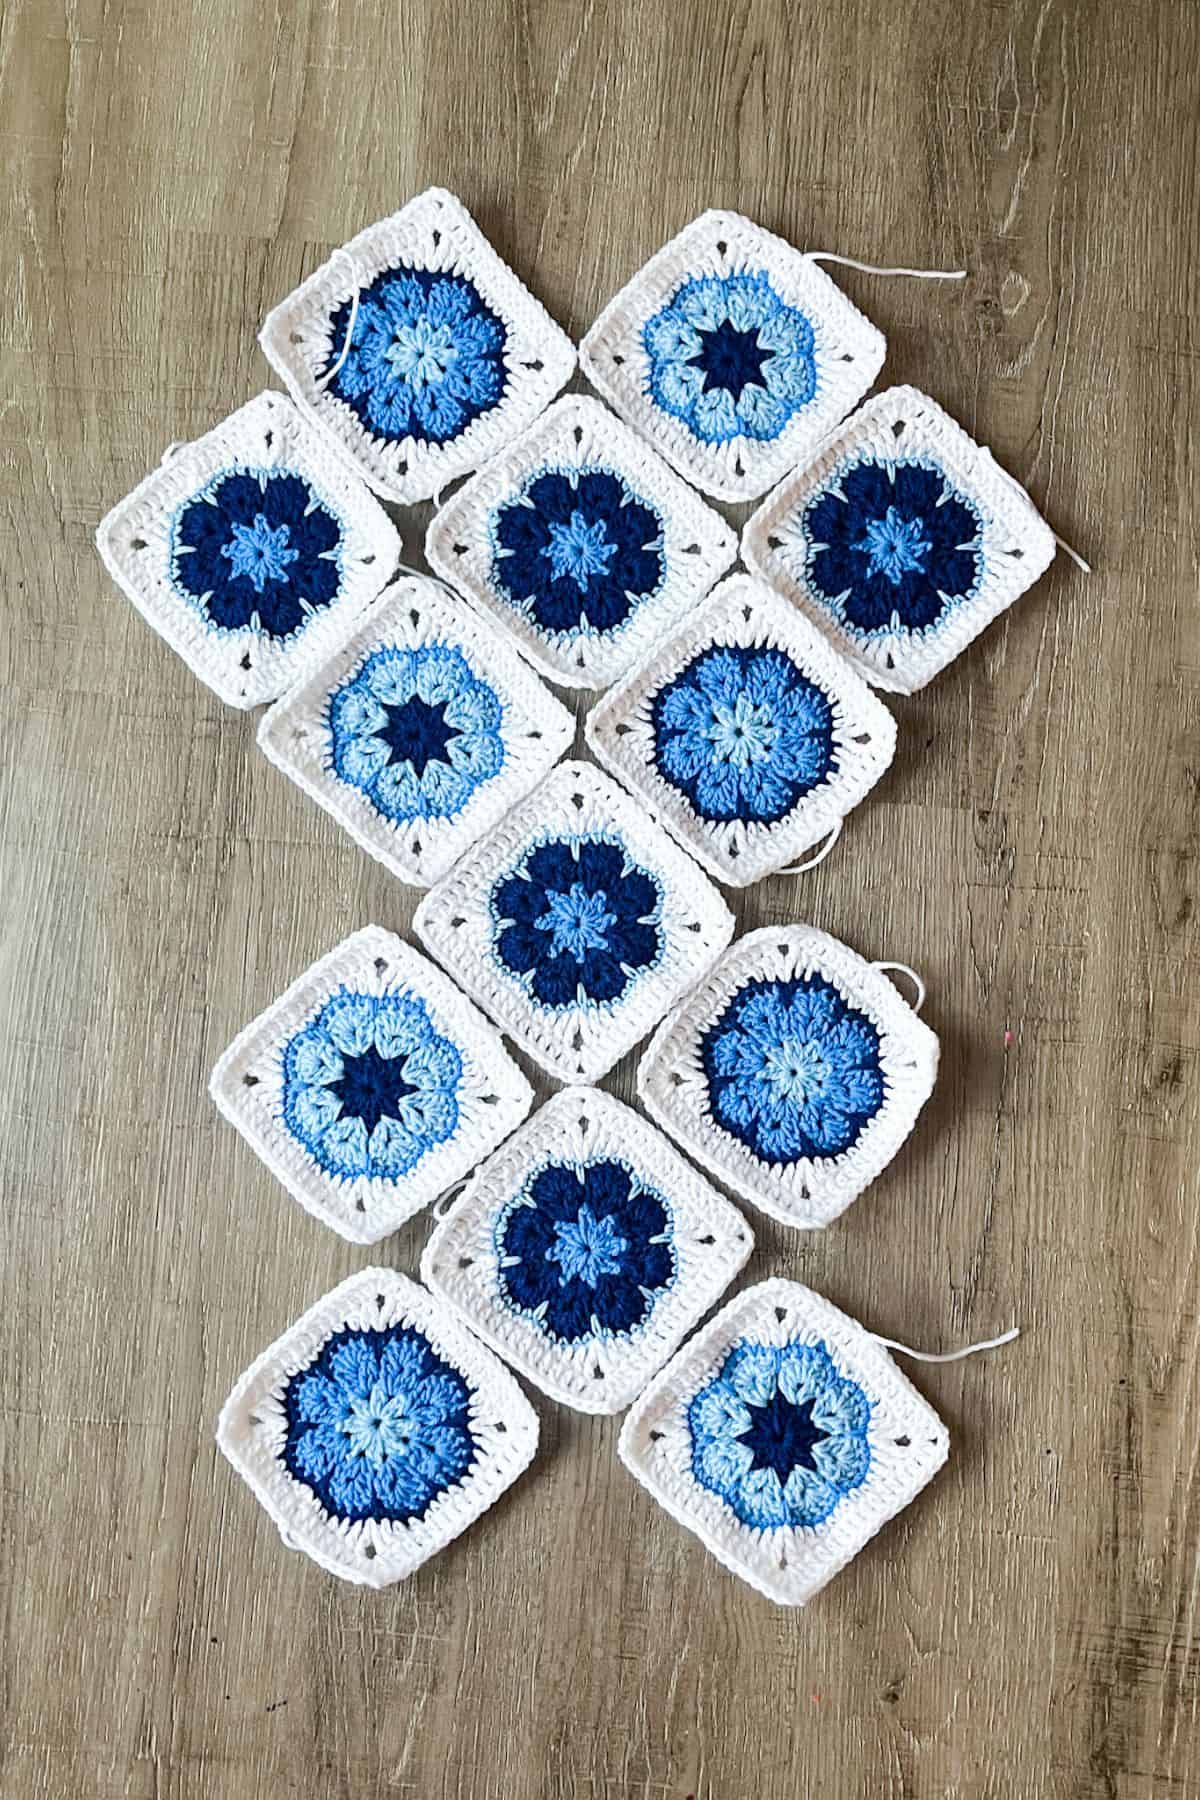
Once you have the 13 crochet African flower squares made you want to lay them in a flat pattern as indicated by the photo.
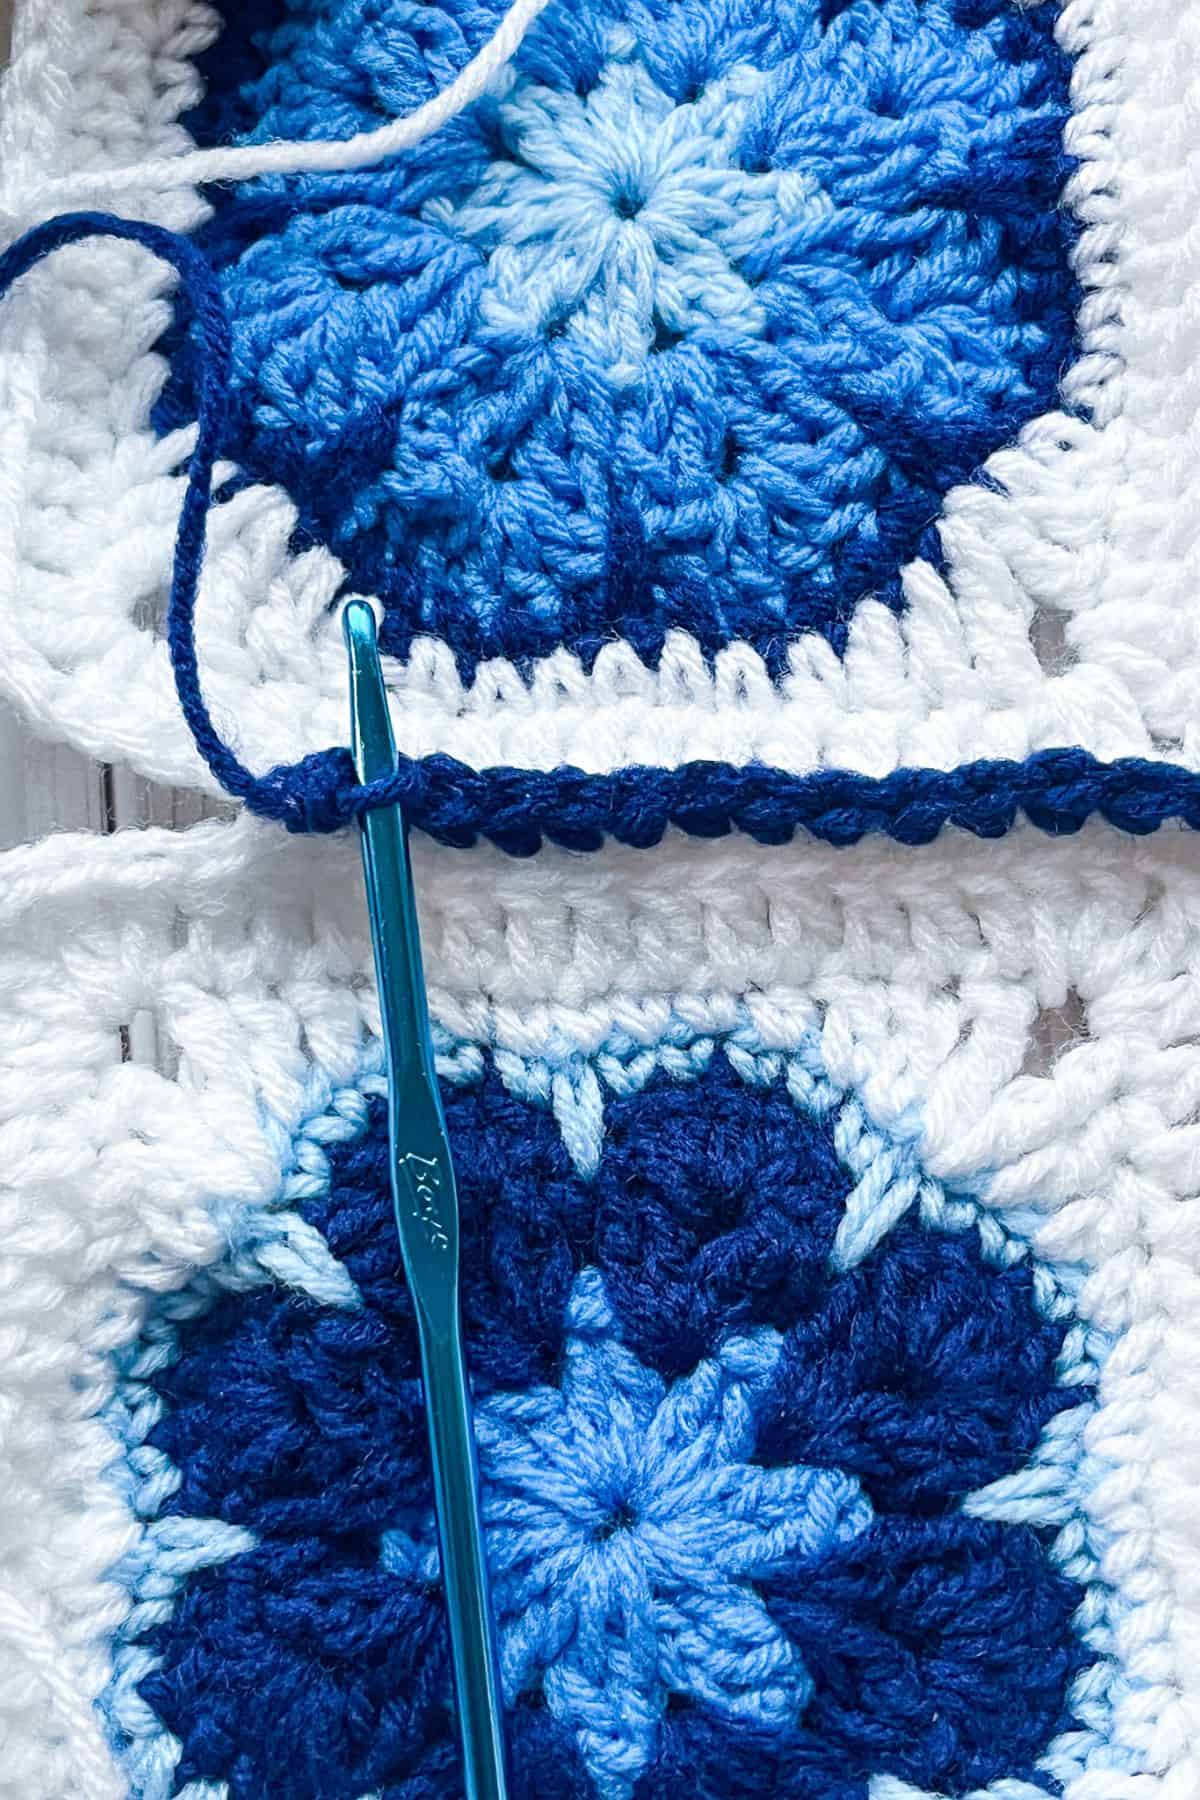
Sl st the squares together like I did above using the soft navy yarn.
- Align the Edges: Place the two crochet pieces you want to join side by side, with the wrong sides facing each other (the side you want to show should be facing outward). Make sure the edges you're joining are aligned properly.
- Insert the Hook: Starting at one end of the edge, insert the crochet hook through the outermost stitch on the first piece.
- Move to the Other Piece: Next, insert the hook into the corresponding stitch on the second piece.
- Make a Sl St: Yarn over and pull through the 2 white stitch loops. Now you should have 2 navy loops on your hook. Then make a sl st like normal.
- Repeat: Continue this process along the entire edge. Work your way back and forth between both pieces, stitching into the same stitch on each piece.
- Even Tension: As you stitch, make sure to keep an even tension. You want the seam to be neat, but not so tight that it distorts the shape of the pieces.
- Finish Off: When you’ve reached the end, pull the yarn gently to tighten the stitches. Be sure the seam is secure, but not overly tight. Tie off the yarn at the end, weaving in the ends on the wrong side to finish.

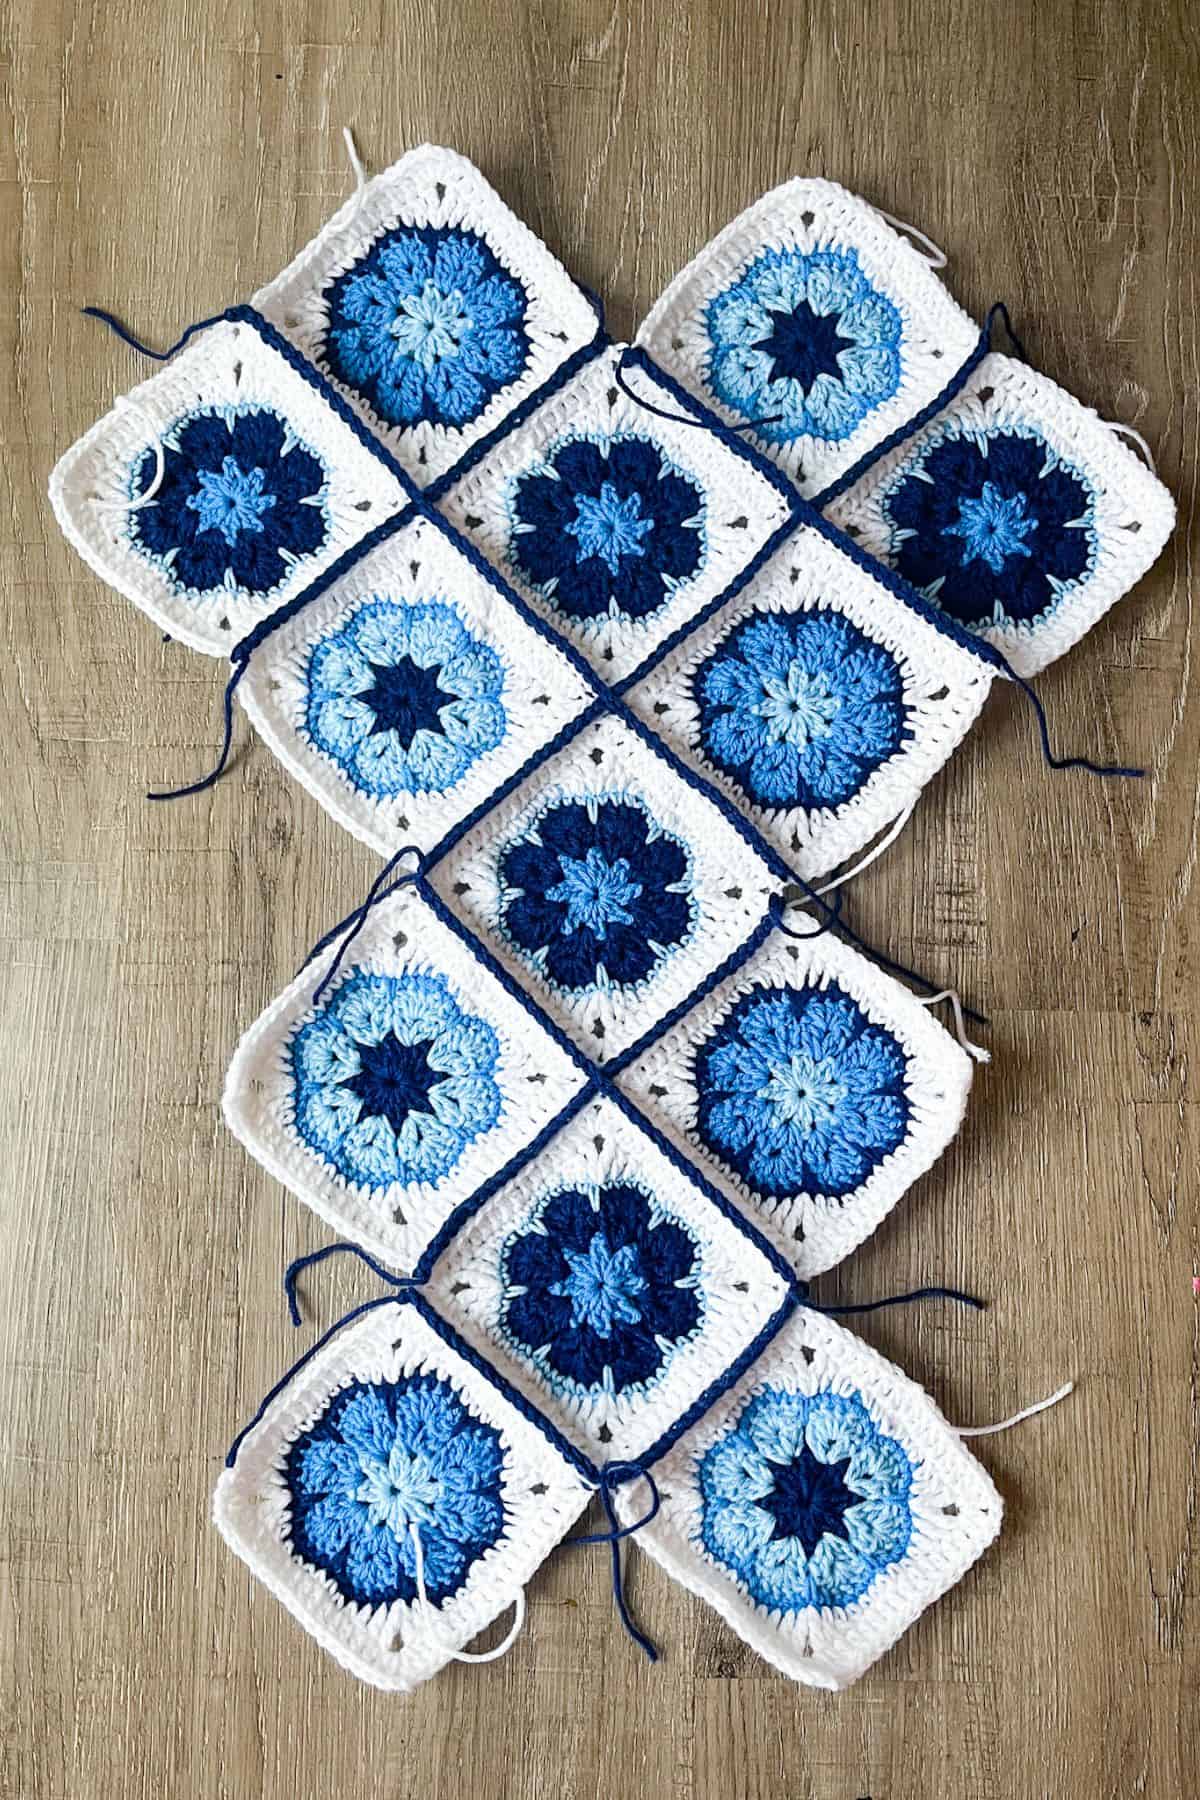

Once the granny squares have all been joined together like in the picture, fold it in half by bringing the bottom half to the top. Fold over the granny squares jutting from the sides and crochet those pieces to the main body of the bag.
Once all the slip stitch sewing of the bag has been completed you should have an M shape as the top of the bag.
Now to move onto the handle.
Crochet Handle for the Tote Bag:

See instructions below.

See instructions below.
Round 1: The first thing to do is rejoin the navy yarn to the top edge of the bag, preferably the dip on the side to hide any seams.
Then you will crochet the top edge of the bag with the navy yarn. 1 single crochet in each stitch, but when you come to the top of the squares, you want to make 3 single crochets in the very top stitches. Then for the part where the squares meet you want to crochet the 3 most bottom stitches together in a decrease, then continue up the side as before.
Round 2: Repeat the above process 1 more time but when you get to the first top of the bag chain 80-100 stitches (depending on the length you want the handle to be) and rejoin the chain to the other top of the bag on the same side. Then continue to sc the side of the bag and repeat the process for the other side of the bag. Make sure you have the same amount of chains on both sides for even handles.
Round 3-6: Sc around the entire outer round including the chains to add length to the bag and width to the bag's handles.
When the last round is completed fasten off and weave in the ends.
Now your crochet African flower bag pattern is complete! If you have any holes where the granny squares meet up take some extra navy yarn and your needle and sew the holes closed for a neater finish.
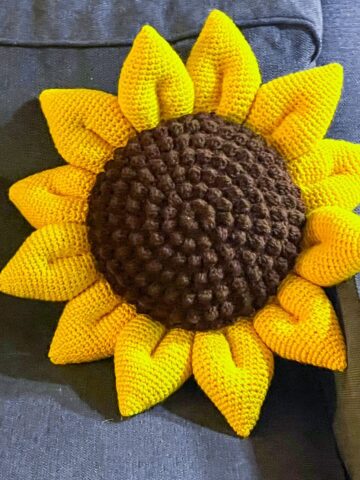
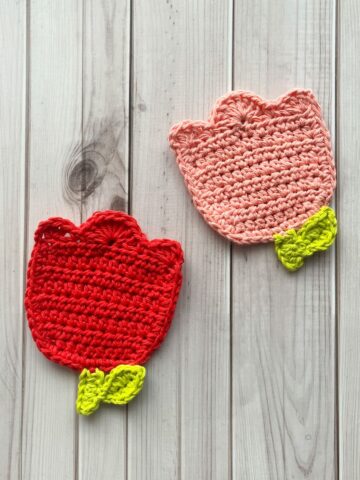
I hope you’re as excited to make your own Crochet African Flower Bag as I was to design it! I It's the perfect way to showcase your crochet skills and creativity. Don’t forget to check out my other crochet flower bag patterns, like the crochet tulip bag pattern and the crochet sunflower bag pattern, for even more floral fun and inspiration.
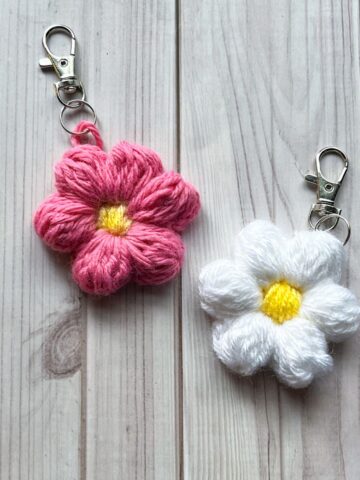
If you enjoyed making the crochet African flower motif, check out my crochet turtle coaster pattern which uses the 6 petal African flower as the turtle shell.
Also, if you happen to have extra blue and white yarn, you can make bags, blankets, or other crochet projects using my crochet snowflake granny square pattern and a simple rendition of my crochet Japanese knot bag pattern.
Happy crocheting!
🐌Expert Tips
- Consistent Tension: Maintaining a consistent tension is crucial for neat squares and a sturdy bag. If your squares are too tight, they can become stiff and difficult to join, while loose squares might not hold their shape properly.
- Even Petals: When working the 8 petal African flower crochet pattern, make sure the petals are evenly spaced. This ensures that the flower maintains a smooth, symmetrical look. Use stitch markers if needed to keep track of the stitch count for each petal.
- Perfecting the Join: To join the squares seamlessly, I recommend the slip stitch join or whip stitch. These methods provide a clean, almost invisible seam. Take your time to align the edges properly to avoid uneven gaps between squares.
- Blocking: Before you start assembling your squares, consider blocking them to ensure they are the correct size and shape. This step can help to even out any minor imperfections and gives your squares a polished, professional finish.
🧵Pattern FAQs
You can use any yarn that suits your style and preferences. But I recommend a medium-weight yarn (like worsted weight) for a sturdy bag. Cotton yarns work great for a more structured feel, while acrylics are softer and easier to care for.
Absolutely! While the pattern uses a classic blue and white palette inspired by Delft Blue Pottery. You can choose any color combination that suits your style. Mix vibrant colors, pastels, or even monochromatic shades for a unique look.
While lining the bag isn’t required, it can add extra durability and structure, as well as a smooth interior. You can use any fabric that complements the crochet design or adds a fun surprise inside!

🧶More Crochet Flower Patterns
If you tried this Crochet African Flower Bag Pattern (or any other pattern on my website), please let me know how it went in the 📝 comments below. I'd love to hear from you!
Crochet African Flower Bag Pattern
Materials
Abbreviations (US terms)
- Chains - ch
- Single crochet - sc
- Long single crochet (long sc)
- Double crochet - dc
- Half double crochet - hdc
- Triple crochet - tr
- Slip stitch - sl st
Notes
- Square Size: Make sure each 8 petal African flower crochet square is the same size to ensure even stitching when assembling the bag. A tight tension will give you cleaner edges.
- Customizing the Size: If you want a larger or smaller bag, simply adjust the number of rounds used after creating the flower, or use thinner yarn and a smaller hook.
- Strap: Feel free to customize the strap length or width to your preference, whether you prefer a longer crossbody strap or a shorter handle for the crochet African flower bag pattern.
Instructions
Crochet 8 Petal African Flower:
- With color A: Ch x5 and join with a sl st to form a closed circle.
- Round 1: Ch x3 (counts as a dc), dc, ch x1. *Dc x2, ch x1* and then repeat 6 more times. Then join with a sl st to top of the beginning ch x3 (16 dc + 8 ch spaces).
- Round 2: Join color B to any ch x1 space. Ch x3 and dc, ch x1, dc x2 in the same ch x1 space from the round below. *Then dc x2, ch x1, and dc x2 into the next ch x1 space*. Repeat from * for the rest of the round and make a sl st to the top of the beginning ch x3 (32 dc + 8 ch spaces).
- Round 3: Sl st into the next stitch. Then sl st into the ch x1 space. Ch x3 and dc x4 into the ch x1 space. Then *in the next ch x1 space dc x5*, repeat from * for the rest of the round (8 shells). Next, fasten off the yarn.
- Round 4: Join color C into any flower petal top. Make a sc into every stitch you made in the last round, but make a long sc in between petals.
- A long sc is made by going down an extra row and then pulling up the yarn to be even with your current round and making a sc like normal. You want to pull the yarn up to your current round so that your flower doesn’t curl and lays flat better. After completing the round, then make a sl st to the first sc (5 sc on top of each petal + a long sc in between petals). Then fasten off the yarn.
- Round 5: Join the white yarn to the top of any long sc from round 4. Make a sc into the same stitch, then sc into the next 2 stitches. Hdc, dc, and then dc again in the following stitches. Tr, ch x2, tr in the next stitch, this is your first corner and should be made into one of the long sc stitches from round 4. * Dc in the next 2 stitches, hdc, 1 sc in the next 5 stitches, hdc, dc in the next 2 stitches. Then make a corner: tr, ch x2, tr.* Repeat from * 2 more times.
- Dc in the next 2 stitches, hdc, and 1 sc in the final 2 stitches. Then join with a sl st to the 1st sc.
- Round 6: Ch x2, then dc in the next stitch and the following stitches until you reach a corner. When you get to the chain space in the corner make a dc x2 + ch x2 + dc x2. Then continue making dc stitches into the next side of the square. Repeat 3 more times for the rest of the round. Then sl st to the first dc in the round. Finally, fasten off the yarn.
Building the Crochet African Flower Bag:
- Once you have the 13 crochet African flower squares made you want to lay them in a flat pattern as indicated by the photo.
- Sl st the squares together like I did above using the soft navy yarn.
- Align the Edges: Place the two crochet pieces you want to join side by side, with the wrong sides facing each other (the side you want to show should be facing outward). Make sure the edges you're joining are aligned properly.
- Insert the Hook: Starting at one end of the edge, insert the crochet hook through the outermost stitch on the first piece.
- Move to the Other Piece: Next, insert the hook into the corresponding stitch on the second piece.
- Make a Sl St: Yarn over and pull through the 2 white stitch loops. Now you should have 2 navy loops on your hook. Then make a sl st like normal.
- Repeat: Continue this process along the entire edge. Work your way back and forth between both pieces, stitching into the same stitch on each piece.
- Even Tension: As you stitch, make sure to keep an even tension. You want the seam to be neat, but not so tight that it distorts the shape of the pieces.
- Finish Off: When you’ve reached the end, pull the yarn gently to tighten the stitches. Be sure the seam is secure, but not overly tight. Tie off the yarn at the end, weaving in the ends on the wrong side to finish.
- Once the granny squares have all been joined together like in the picture, fold it in half by bringing the bottom half to the top. Fold over the granny squares jutting from the sides and crochet those pieces to the main body of the bag.
- Once all the slip stitch sewing of the bag has been completed you should have an M shape as the top of the bag.
- Now to move onto the handle.
Crochet Handle for the Tote Bag:
- Round 1: The first thing to do is rejoin the navy yarn to the top edge of the bag, preferably the dip on the side to hide any seams.
- Then you will crochet the top edge of the bag with the navy yarn. 1 single crochet in each stitch, but when you come to the top of the squares, you want to make 3 single crochets in the very top stitches. Then for the part where the squares meet you want to crochet the 3 most bottom stitches together in a decrease, then continue up the side as before.
- Round 2: Repeat the above process 1 more time but when you get to the first top of the bag chain 80-100 stitches (depending on the length you want the handle to be) and rejoin the chain to the other top of the bag on the same side. Then continue to sc the side of the bag and repeat the process for the other side of the bag. Make sure you have the same amount of chains on both sides for even handles.
- Round 3-6: Sc around the entire outer round including the chains to add length to the bag and width to the bag's handles.
- When the last round is completed fasten off and weave in the ends.
- Now your crochet African flower bag pattern is complete! If you have any holes where the granny squares meet up take some extra navy yarn and your needle and sew the holes closed for a neater finish.
- I hope you’re as excited to make your own Crochet African Flower Bag as I was to design it! I It's the perfect way to showcase your crochet skills and creativity.

M says
I saw this one come out on tiktok and as a Dutchie just had to make it.
So I made this a while ago and love the results. I lined the inside with some fabric to avoid anything falling from the holes. A bit of trial and error, but once I got the hang of it, it was fine.
Small note Delfts blue is Dutch and not Danish
Kimberly Arenas says
I'm glad you liked the pattern! Once I posted the video and rewatched it (to make sure there wasn't any auditory issues while uploading) I realized my mistake calling it Danish and not Dutch and made a note in the caption 🙂