
Bring on Christmas and winter vibes with my Crochet Peppermint Coaster Pattern. Reminiscent of those peppermint swirl candies - all you need is a cup of hot cocoa to go with it.

I love Christmas, primarily because I adore all things winter, and Christmas seems to encapsulate that spirit. My favorite drink during the holiday season, besides some mulled wine, is hot cocoa—especially when it's made with peppermint and marshmallows! Yum!
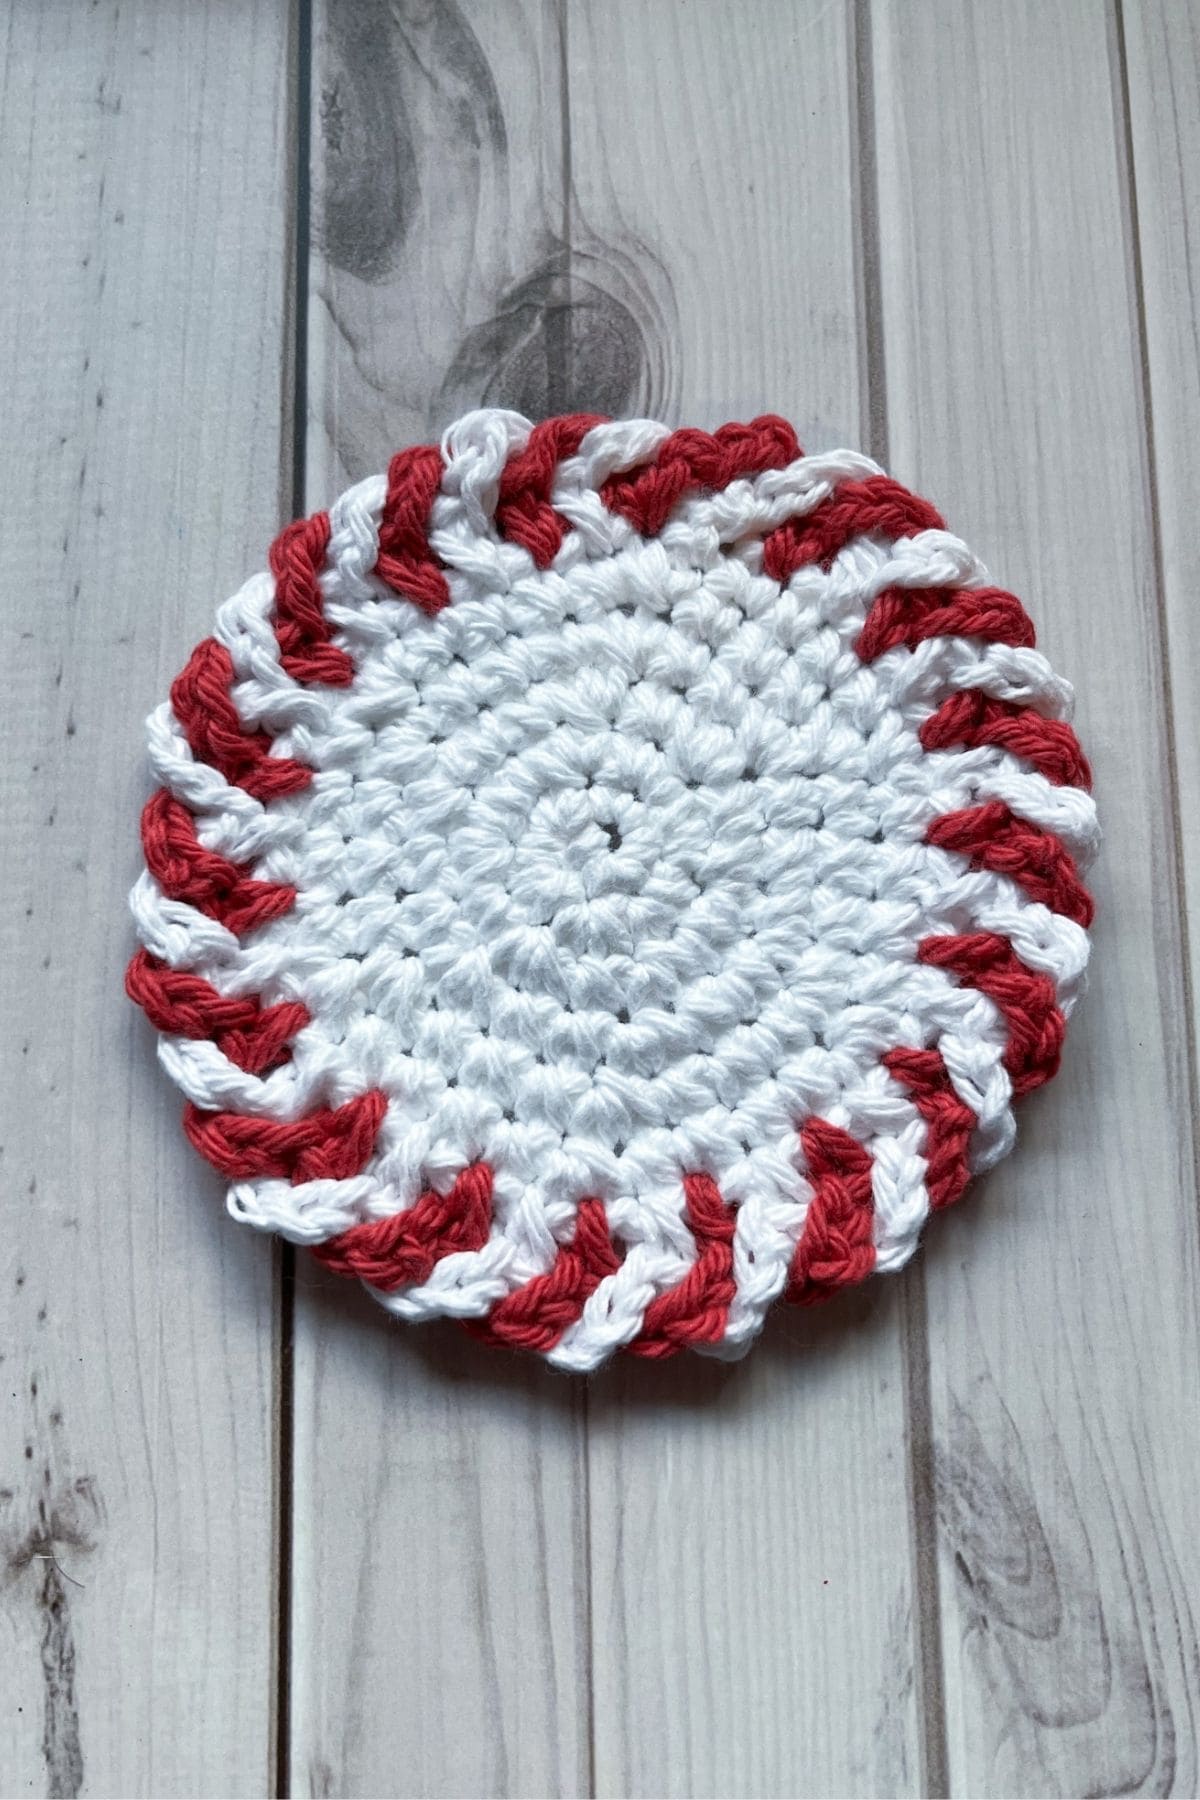
This cute little crochet peppermint coaster is perfect for the season! The best part? These coasters are super easy to make! It's just a few single crochet flat rounds without any color changes, followed by a charming candy cane crochet edging.
One reason I designed the peppermint crochet coasters this way is that traditional patterns, which start with the peppermint swirl in the middle, can be too advanced for most beginners. This pattern, however, is ideal for first projects and quick creations for holiday markets! I even use the candy cane border on holiday blankets like my crochet candy cane border blanket!
Jump to:
✏️ Things To Note:
- Yarn Choice. I used cotton yarn for this crochet winter coaster pattern. Cotton is great for crochet coasters because it is heat-resistant, so it won't melt, and it absorbs liquid easily. Acrylic yarn doesn't offer these benefits.
- Color Options. While I designed the crochet peppermint coaster pattern to resemble peppermint candy, feel free to switch the colors as you like.
- Finished Size. The size of the coaster is approximately 4.5 inches in diameter. You can adjust the number of rows needed depending on how big you want the coaster to be.
💭Abbreviations to Remember (US terms)
- Magic ring - mr
- Single crochet - sc
- Chain - ch
- Increase - inc
- Slip Stitch - sl st
* If you see a stitch abbreviation with "x" after it, it means how many times you do that stitch in the following amount of stitches. For example: sc x6 would mean you make a single crochet in the next 6 stitches. Inc x2 means you make an inc in the next 2 stitches.
🧋Variations
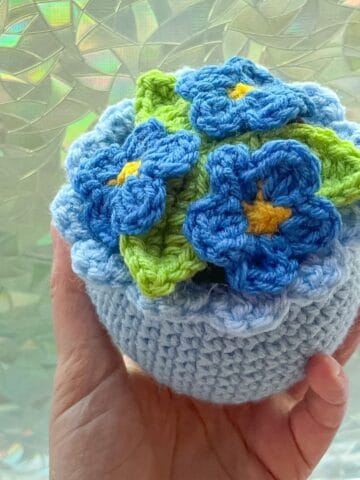
To keep the holiday theme going, change the colors: red and green for Christmas, light blue and white for an overall winter theme, white and gold for New Year's, or orange and black for Halloween. The options are endless!
🍵Instructions for Crochet Peppermint Coaster Pattern
The crochet peppermint coaster pattern is made in the round.
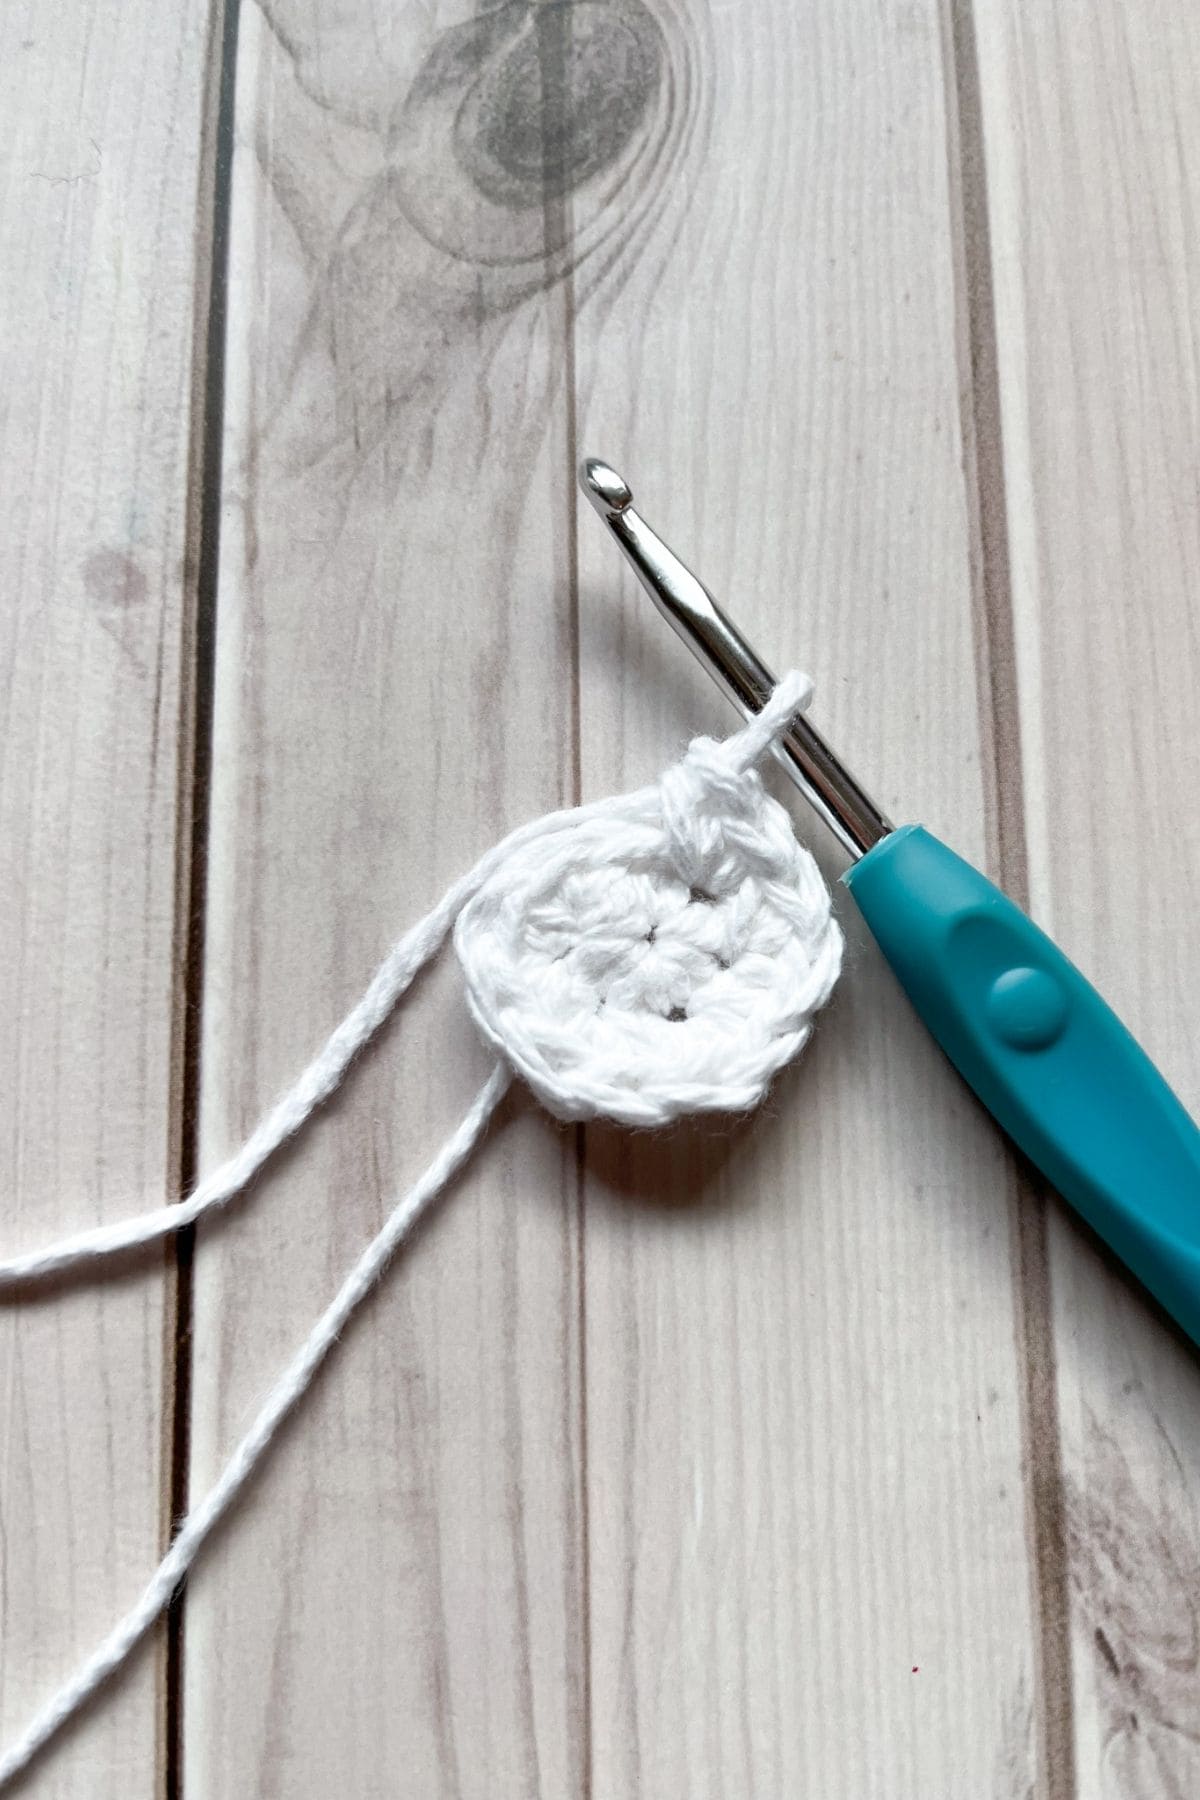
Round 1: Using white cotton yarn, make a mr and sc x6 in the circle. If you find it difficult making a magic ring you can chain 2 and then sc x6 in the second chain from the hook. (6)
Round 2: Inc in every sc. (12)
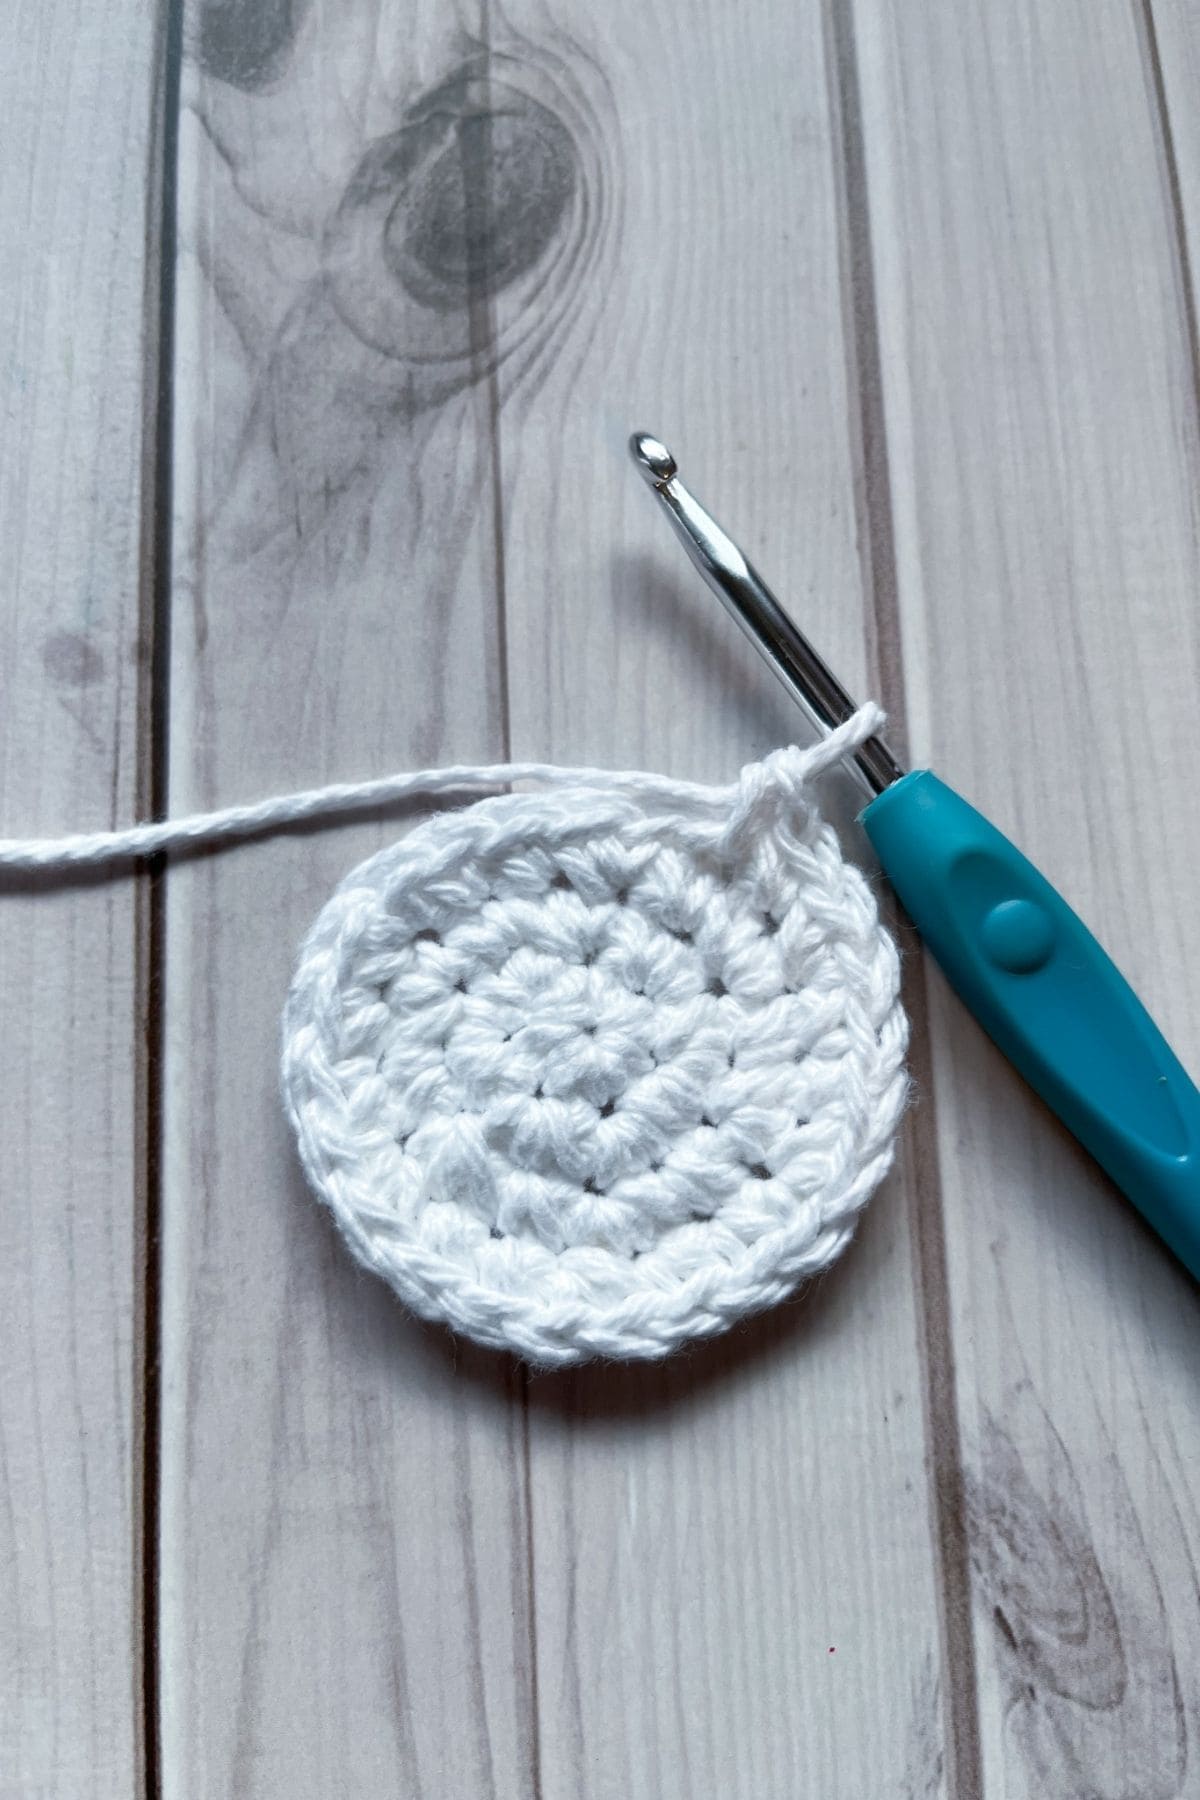
Round 3: Inc, sc. Then repeat until end of round. (18).
Round 4: Inc, sc x2. Then repeat until end of round. (24).
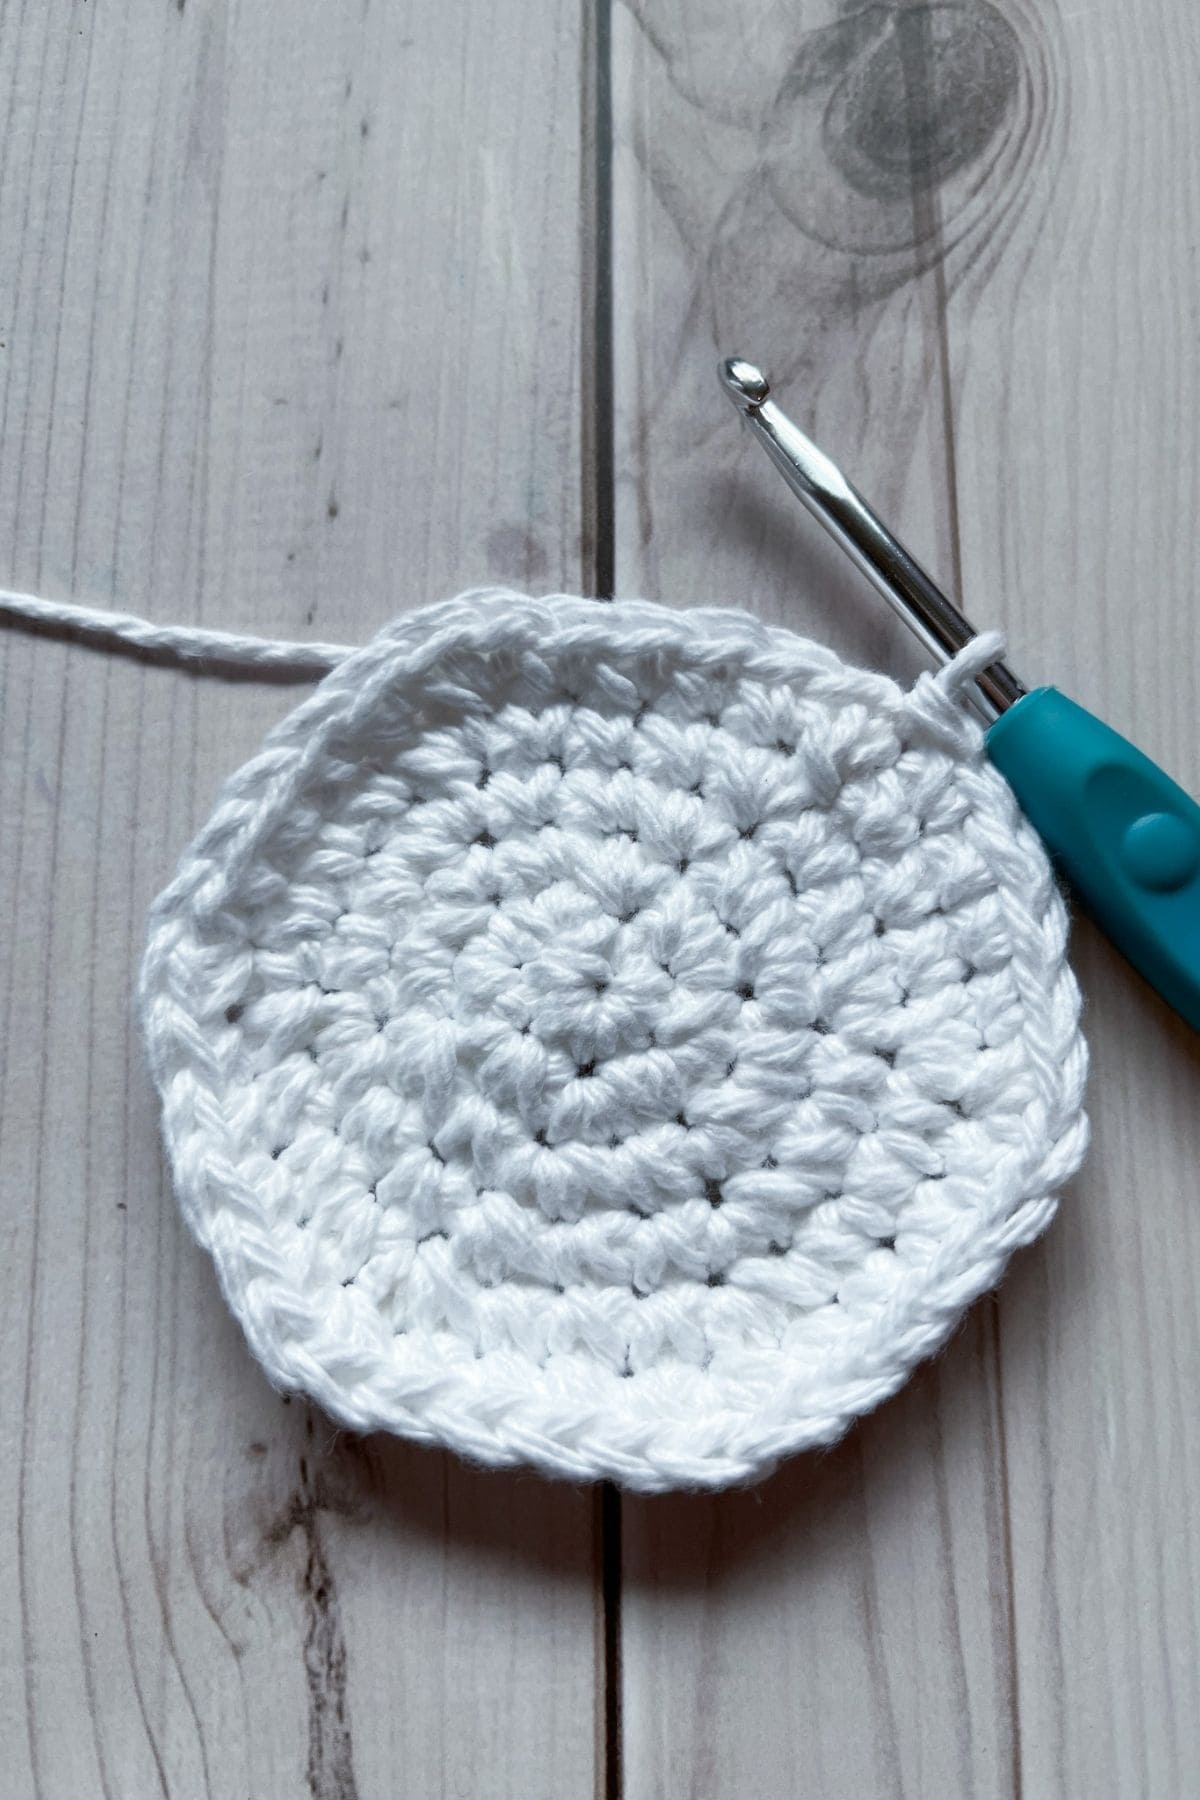
Round 5: Inc, sc x3. Then repeat until end of round. (30).
Round 6: Inc, sc x4. Then repeat until end of round. (36)
Crochet Candy Cane Border:
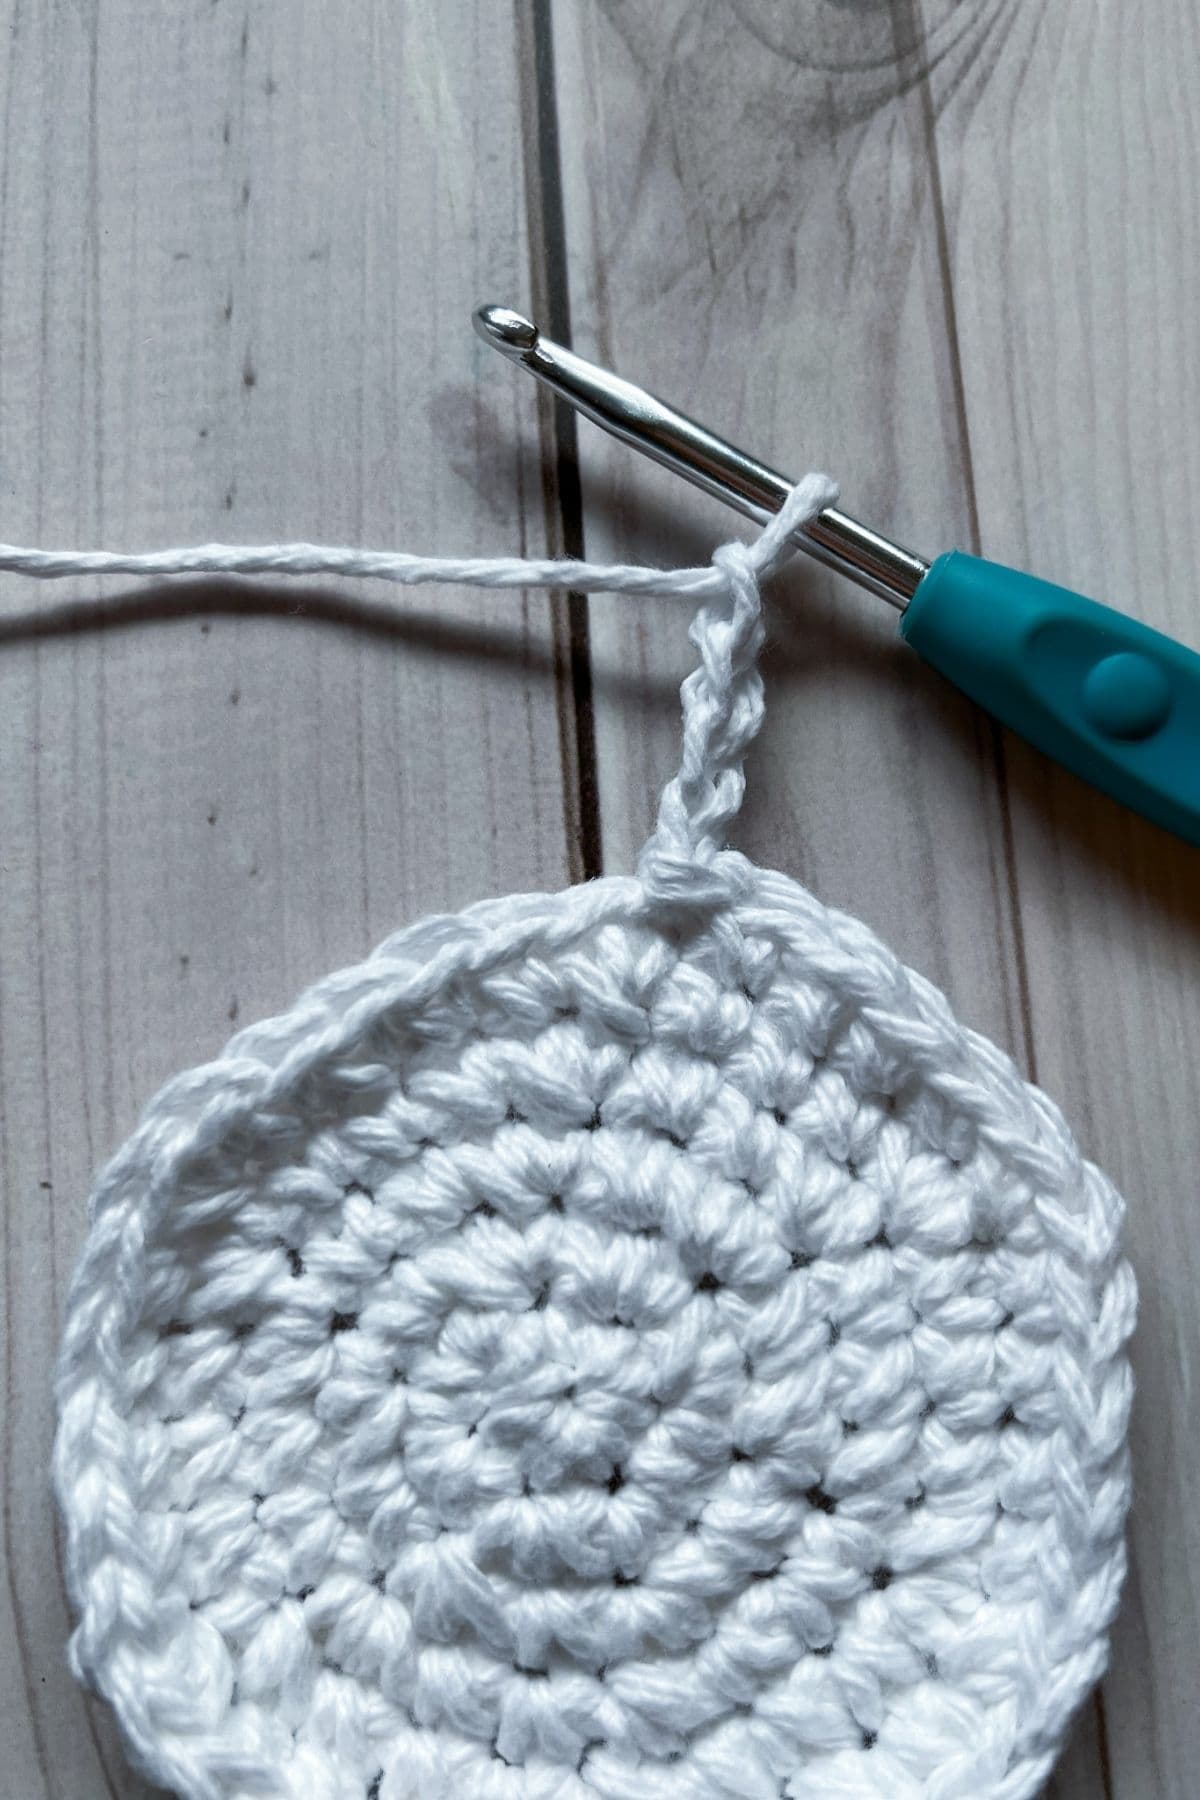
Step 1: Without fastening off the white yarn, ch x4 then set the yarn aside (do not fasten off).
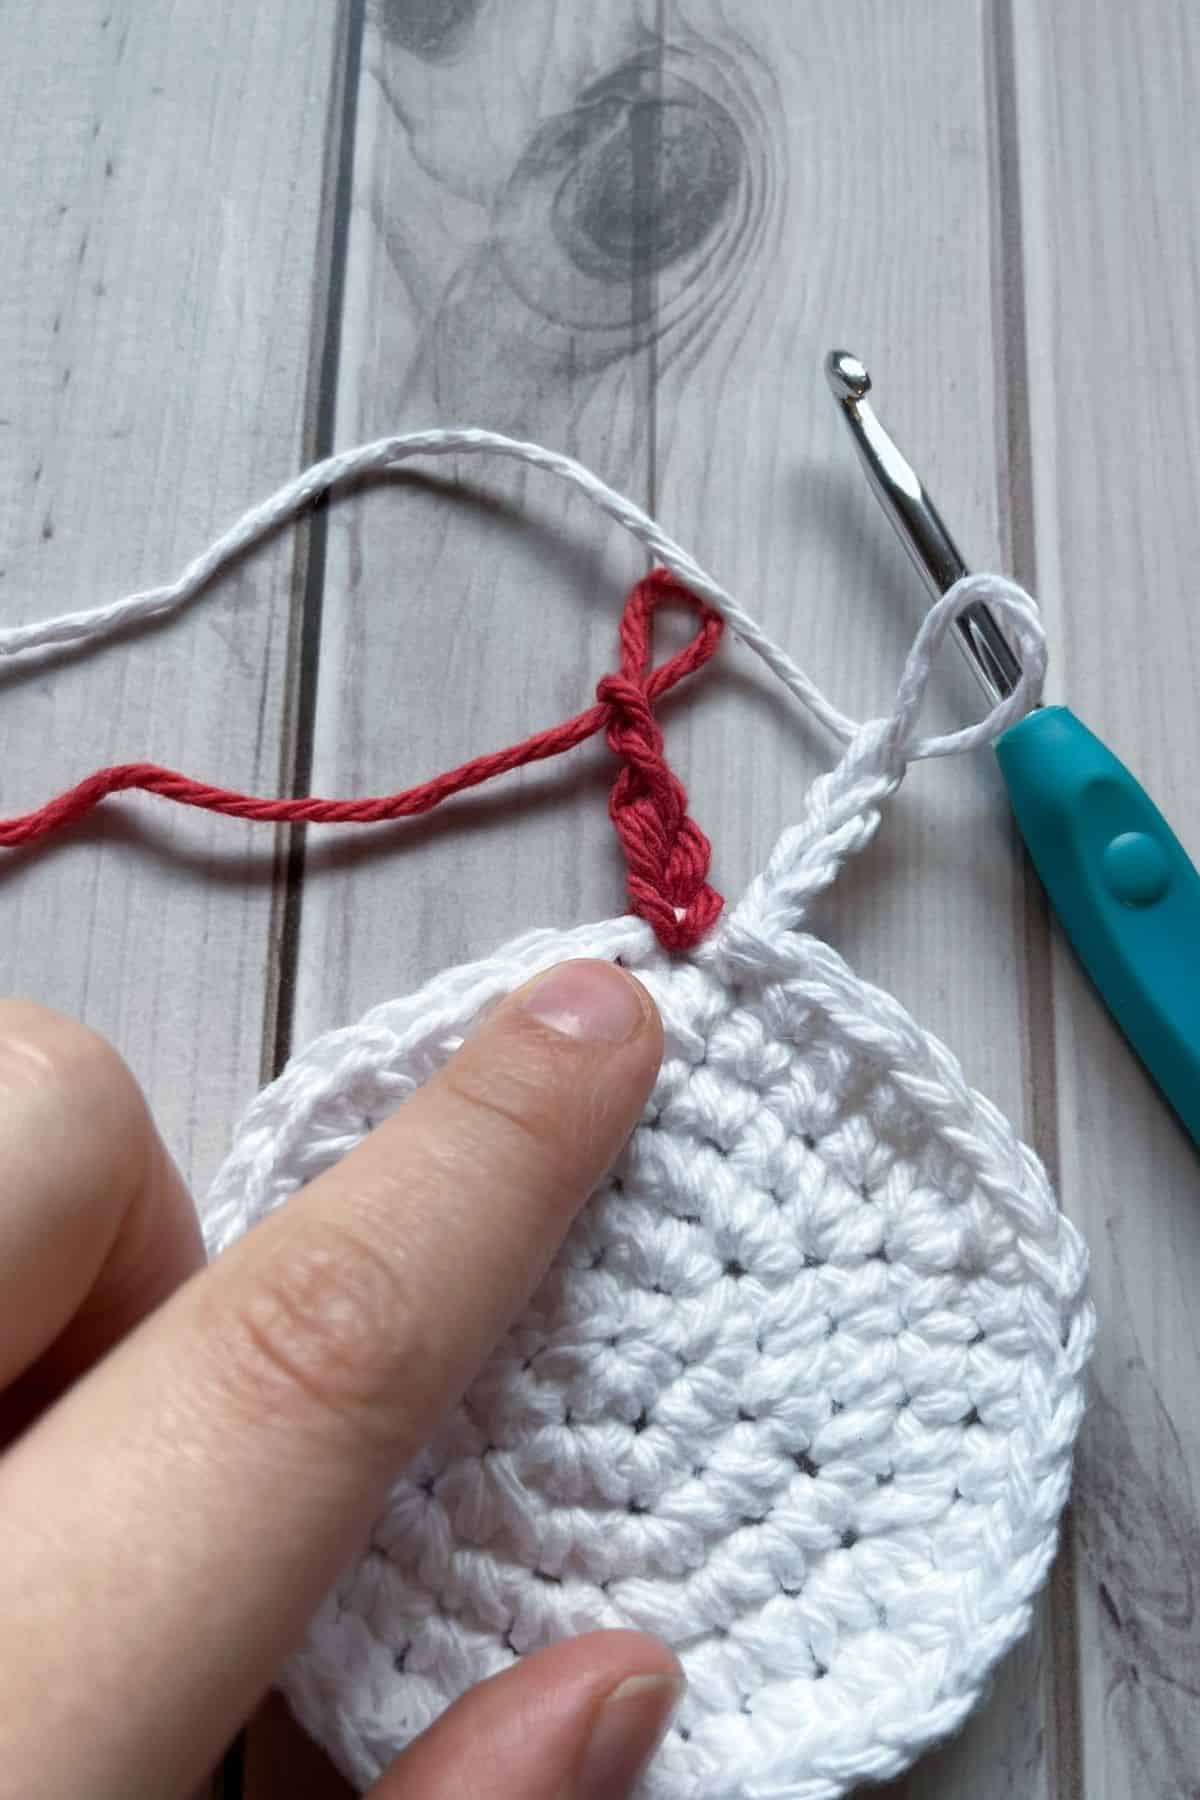
In the next stitch, attach the red yarn and then ch x4.
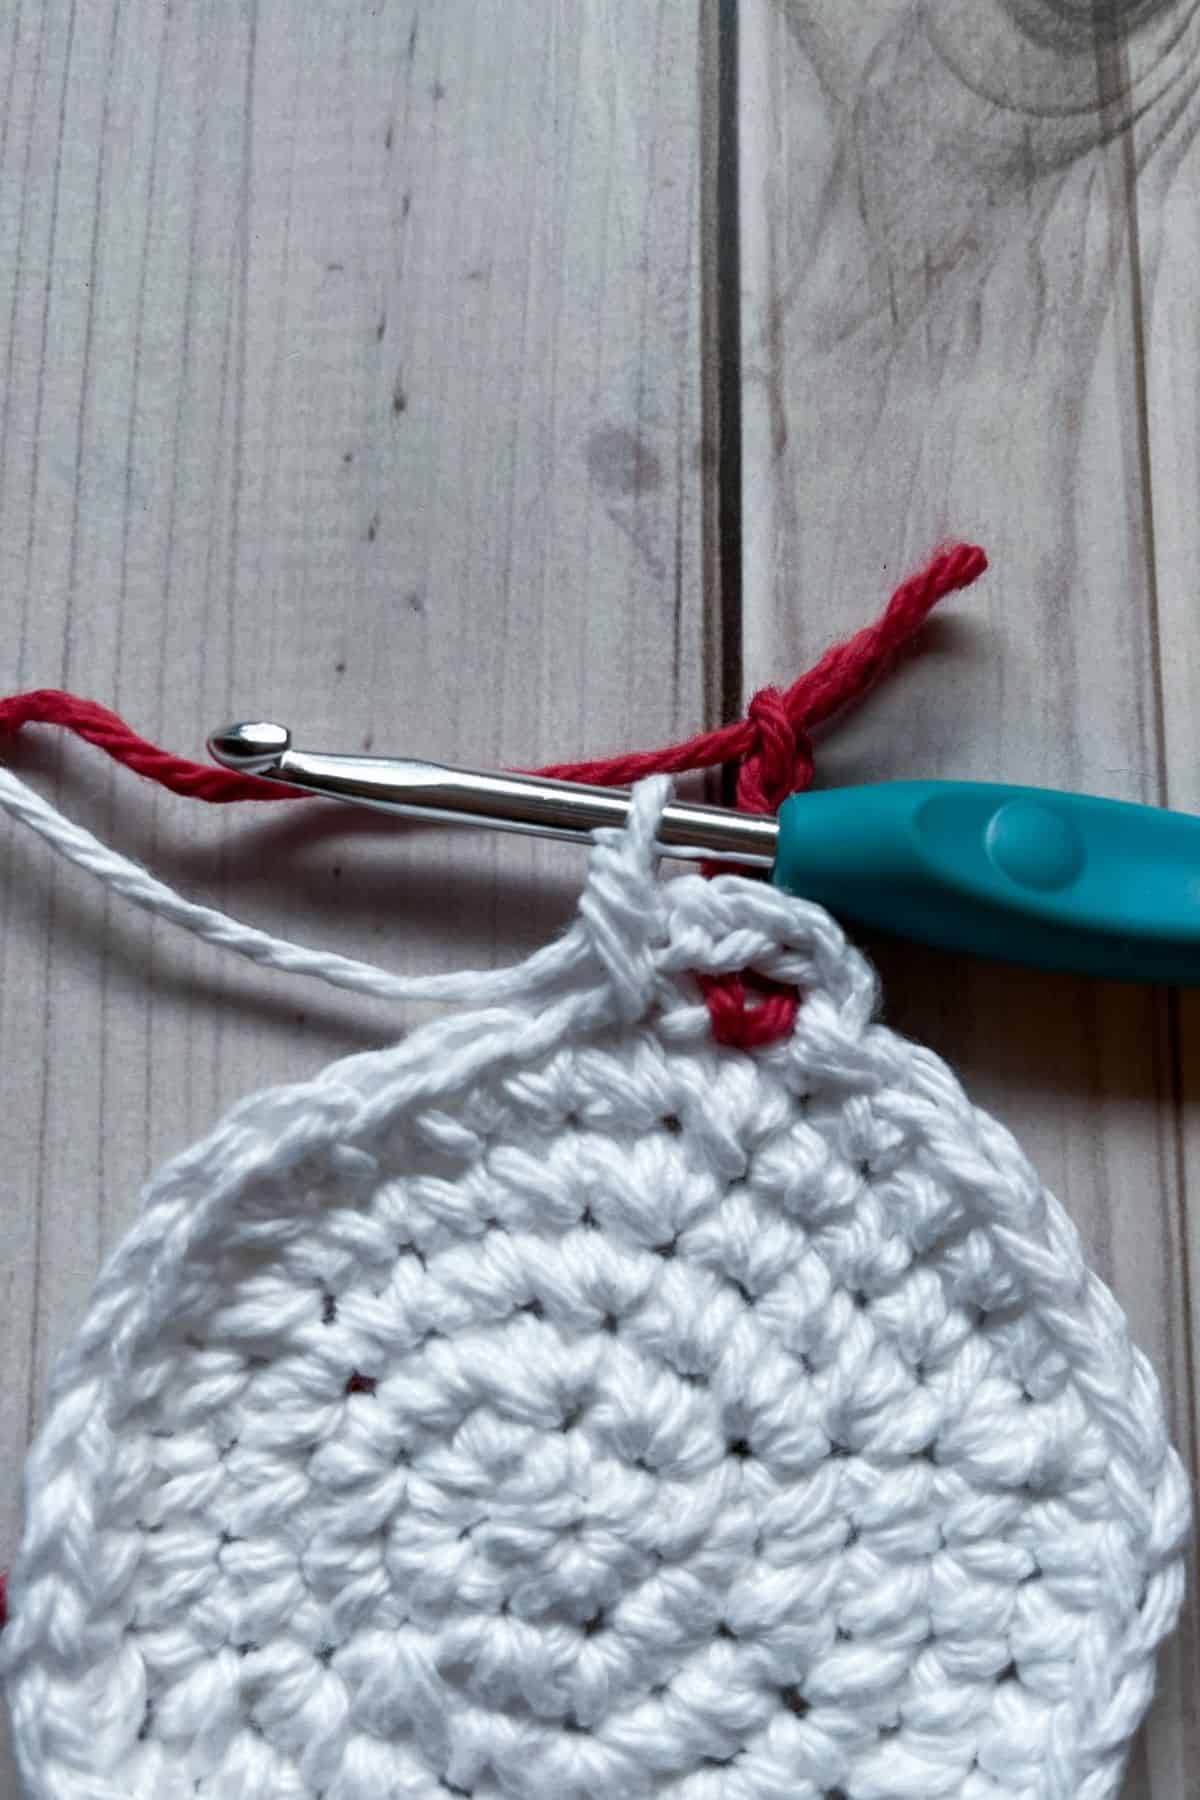
Step 2: Then put your crochet hook back into the working loop in your white yarn and make a single crochet in the next available stitch. So you should skip over the red and start making a repetitive pattern.
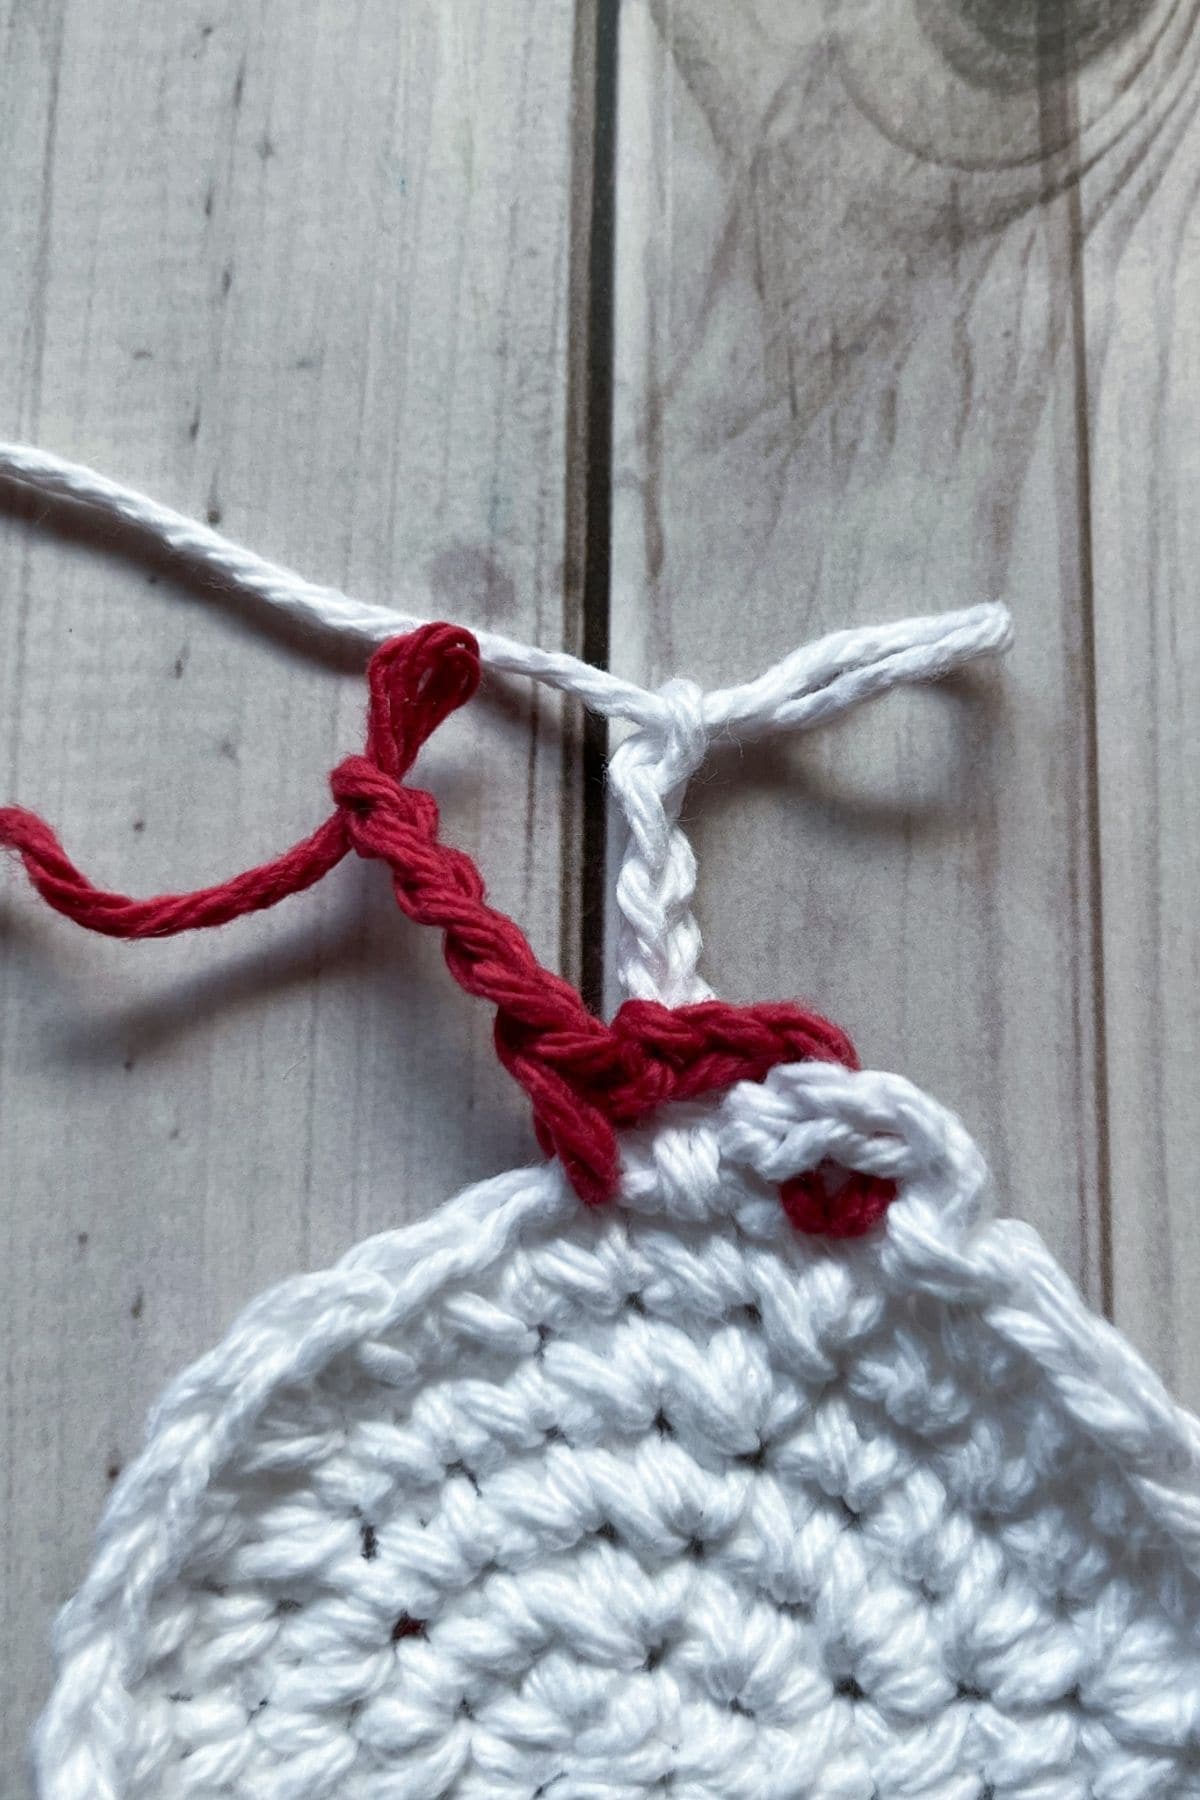
Now do the same with the red yarn. Sc into the stitch available. Now you should have 2 finished loops for the border, one red and one white.
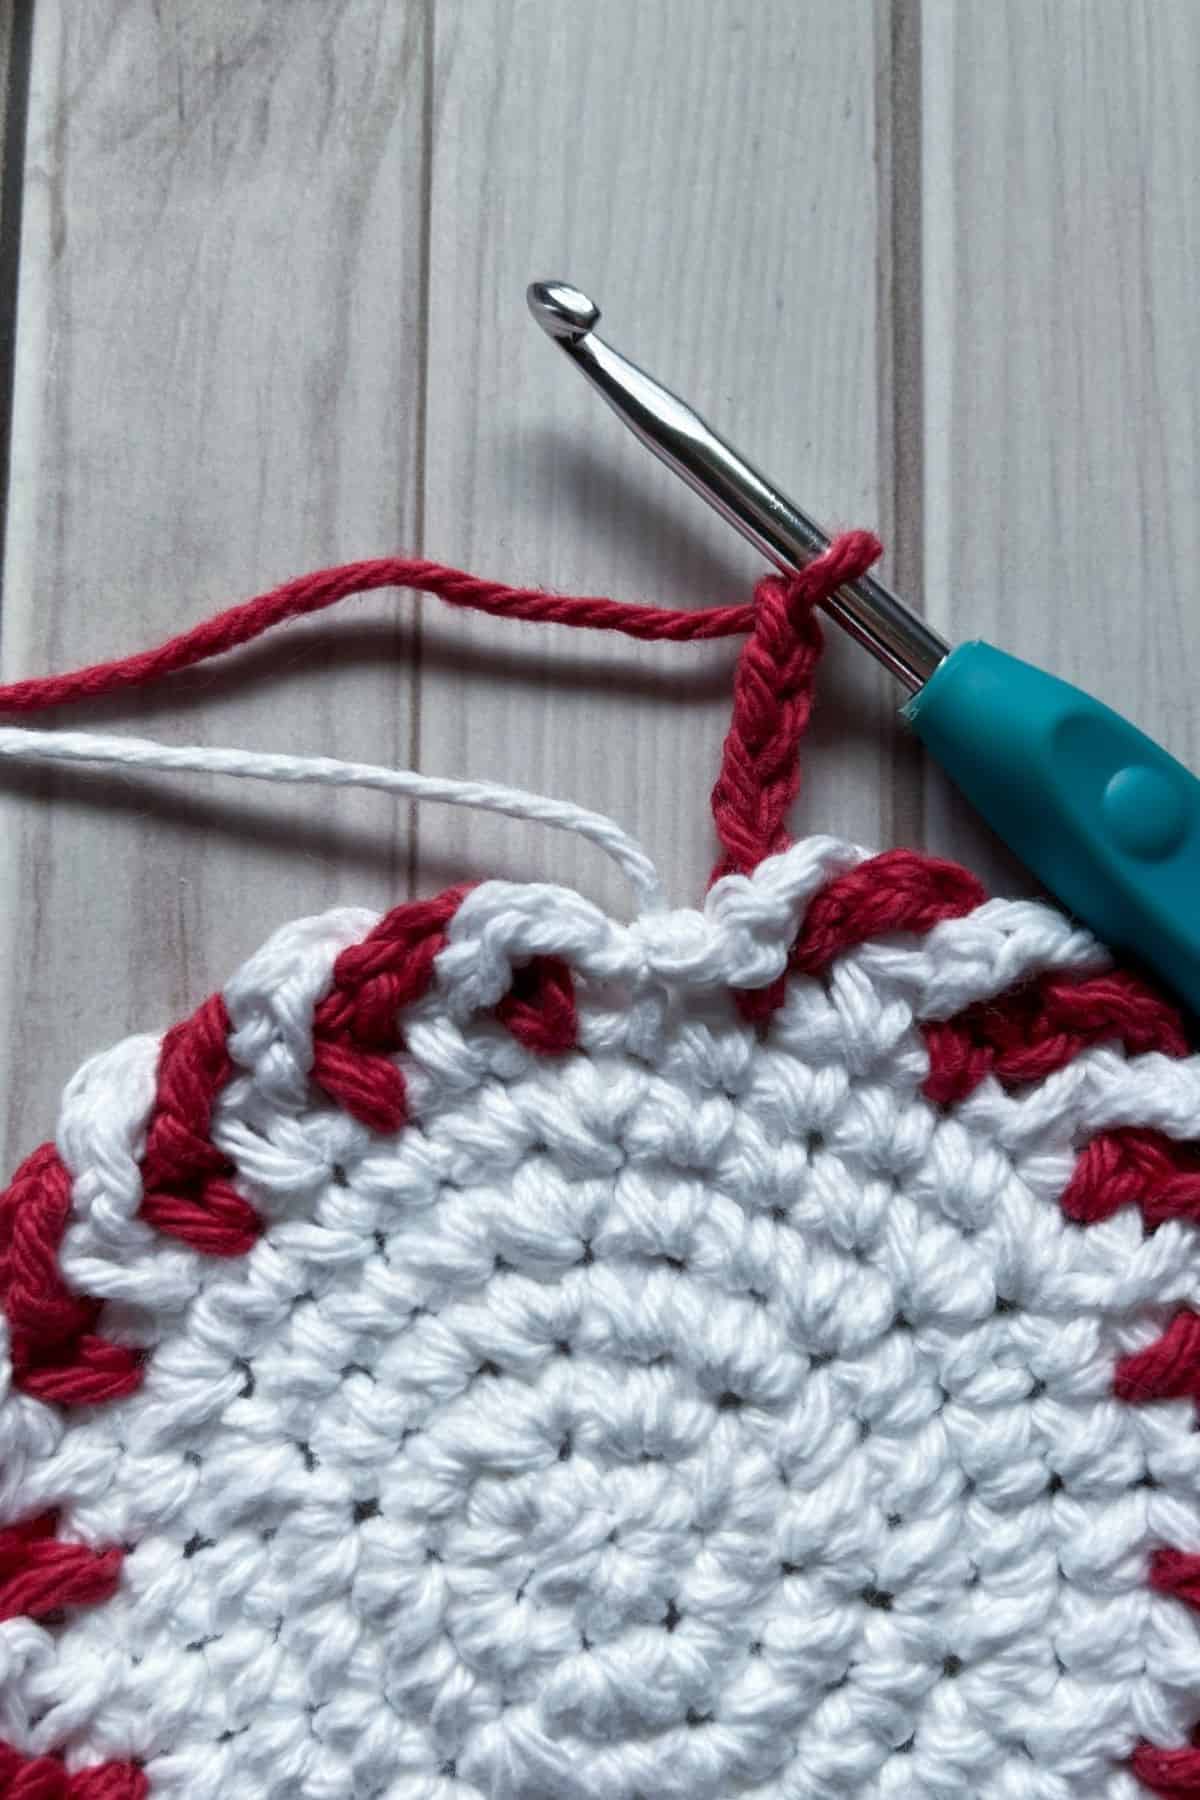
Step 3: Repeat step 1 and 2 until the border is finished.
When you have no extra stitches to work in, attach your last ch x4 in red with a sl st to the same stitch you joined the red in at the beginning of the round. And then sl st the white ch x4 to the start of the round (the stitch the first white ch x4 was made from).
Fasten off and weave in any ends.
And now you know how to do the candy cane crochet border for these super easy and festive crochet peppermint coasters!
If you have any extra red and white yarn you can make crochet apple coasters.
Have more white cotton yarn? Try making my crochet snowman coaster pattern or my crochet snowflake coaster pattern.
If you are wanting more holiday inspired patterns, check out my crochet Christmas potholder patterns, crochet star coaster pattern, or crochet santa coaster pattern —which also double as cute quick holiday gifts!
🐌Expert Tips
- Chain Loops. If you want a tighter chain loop, you can use 3 chains, but I wouldn't recommend making them larger, as they might snag on something.
- Use Cotton Yarn. Stick to cotton yarn for best results. It’s more durable and functional for coasters than acrylic.
- Finishing Touches. Consider adding a non-slip backing to your coasters for added stability on smooth surfaces.
- Customize for Gifting. These coasters make great gifts! Pair them with a hot cocoa mix and a mug for a lovely holiday present.
🧵Pattern FAQs
Wool is a good alternative since it is heat-resistant, water-absorbent, and antimicrobial.
It isn’t necessary, but if you feel it would help your crochet peppermint candy coasters stay in place on your desk, give it a shot!
You can use them as appliqués for totes, cardigans, blankets, pillows, etc.

🧶More Crochet Coaster Patterns


If you tried this Crochet Peppermint Coaster Pattern (or any other pattern on my website), please let me know how it went in the 📝 comments below. I'd love to hear from you!

Crochet Peppermint Coaster Pattern
Materials
Abbreviations (US terms)
- mr = Magic ring
- sc = Single crochet
- ch = Chain
- sl st = Slip Stitch
Notes
- Use cotton yarn for heat-resistant and liquid-absorbent crochet coasters.
- Resembles peppermint candy; colors can be changed.
- Coaster size: 4.5 inches in diameter; adjust rows for size.
- Vary colors for themes: red and green for Christmas or light blue and white for winter.
- Options are endless!
Instructions
- This pattern is made in the round.
- Round 1: Using white cotton yarn, make a mr and sc x6 in the circle. If you find it difficult making a magic ring you can chain 2 and then sc x6 in the second chain from the hook. (6)
- Round 2: Inc in every sc. (12)
- Round 3: Inc, sc. Then repeat until end of round (18).
- Round 4: Inc, sc x2. Then repeat until end of round (24).
- Round 5: Inc, sc x3. Then repeat until end of round (30).
- Round 6: Inc, sc x4. Then repeat until end of round (36).
Candy Cane Border:
- Step 1: Without fastening off the white yarn, ch x4. Set the yarn aside (do not fasten off). In the next stitch, attach the red yarn and then ch x4.
- Step 2: Put your crochet hook back into the working loop in your white yarn and make a single crochet in the next available stitch. So you should skip over the red and start making a repetitive pattern.
- Now do the same with the red yarn. Sc into the stitch available. Now you should have 2 finished loops for the border, one red and one white.
- Step 3: Repeat step 1 and 2 until the border is finished.When you have no extra stitches to work in, attach your last ch x4 in red with a sl st to the same stitch you joined the red in at the beginning of the round. And then sl st the white ch x4 to the start of the round (the stitch the first white ch x4 was made from).Fasten off and weave in any ends.
- And now it's finished! Enjoy!


Janine says
Making these peppermint coasters is addicting! This pattern is easy to follow and turns out beautiful, as pictured. Can't wait to give sets of these as hostess gifts this holiday season!
Kimberly Arenas says
I am happy you are enjoying the pattern! 🙂