
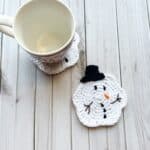
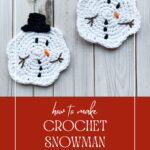
Even if the weather outside is still a little too warm for actual snow, you can bring the frosty fun inside with this adorable crochet snowman coaster pattern!
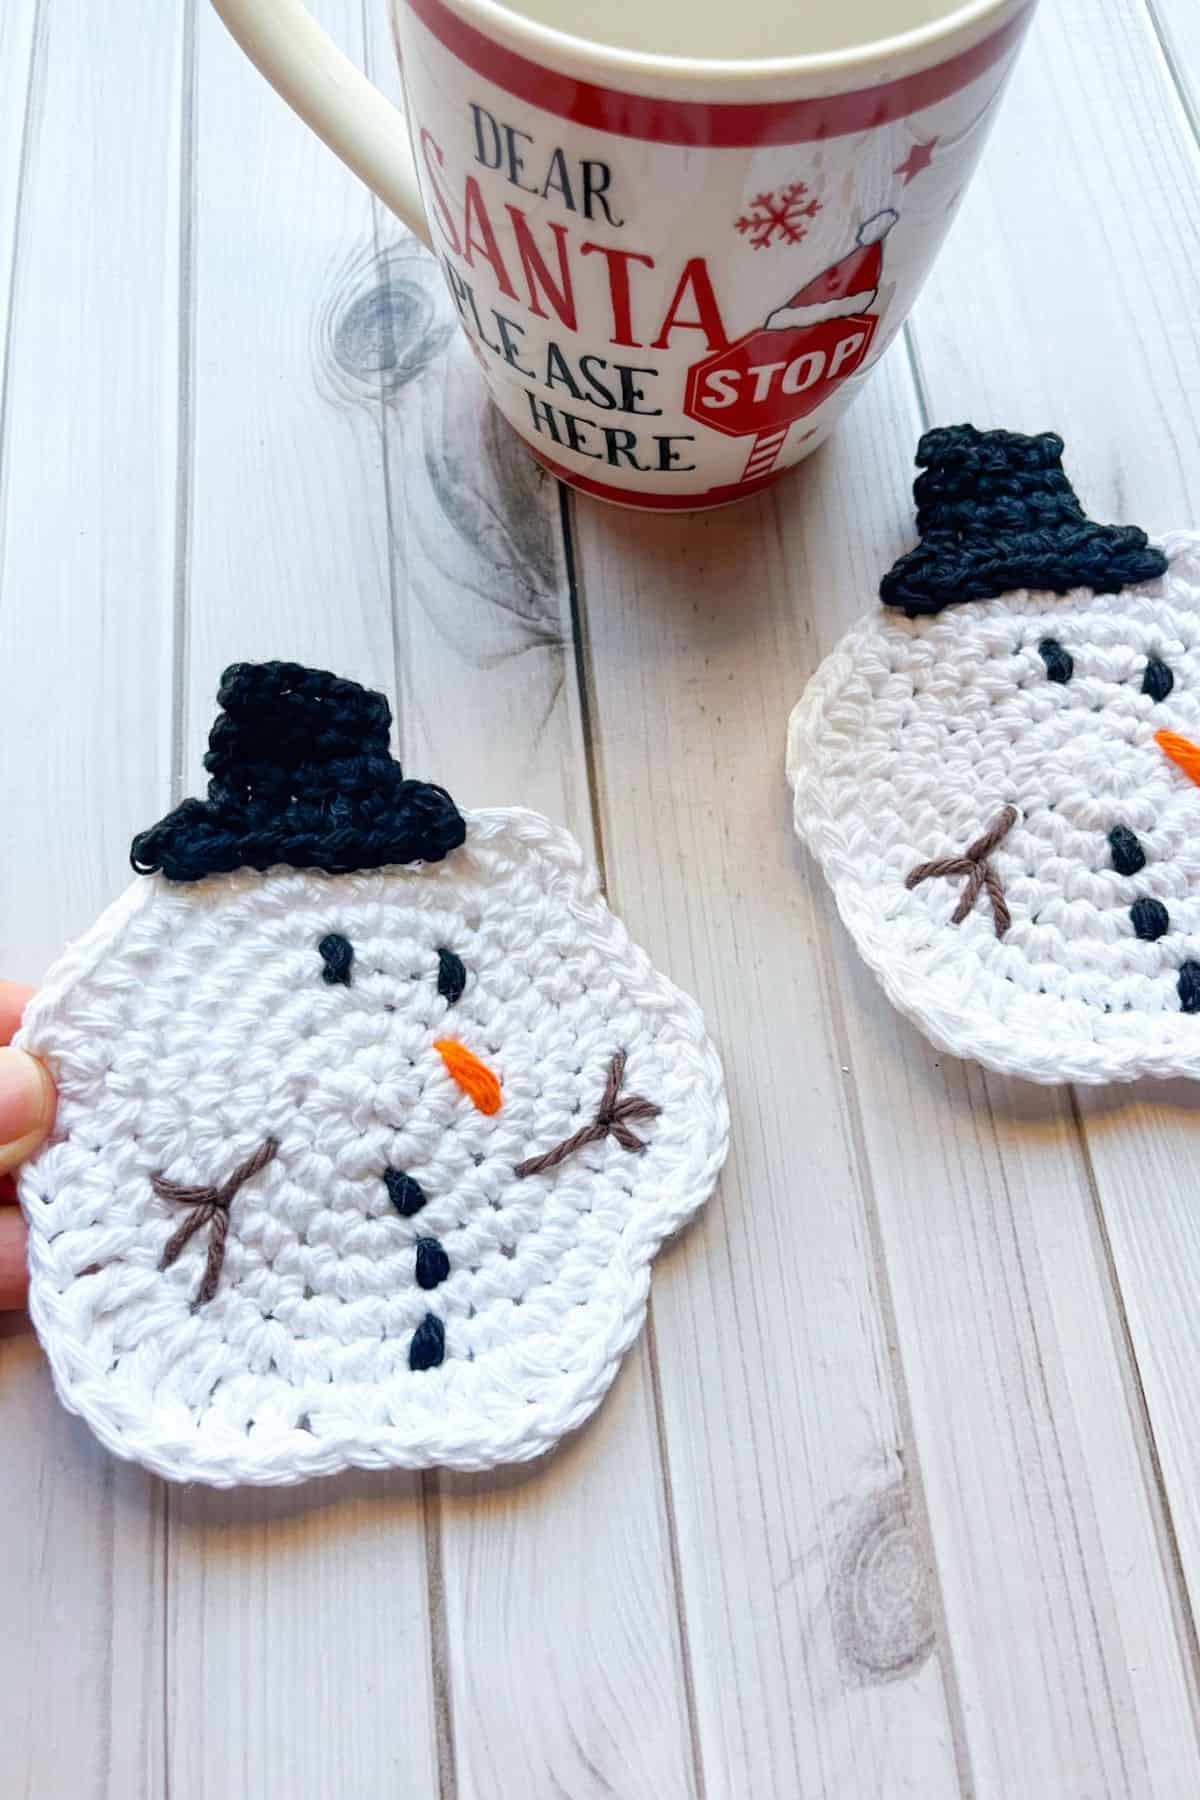
Yes, you read that right. I’m talking about crochet snowman coasters, but with a little twist (or should I say, drip?). These coasters are melted! As in, your snowman is just a bit too cozy next to your hot cocoa, and is slowly losing his cool. But don’t worry, it’s a look. In fact, it’s a unique look, and that’s what makes these crochet Christmas coasters so much fun to make—and use!
This crochet snowman coaster pattern features a cute, quirky design where your snowman’s "body" is melting away, revealing a little extra creative flair that makes it stand out among the sea of traditional crochet Christmas coasters.
Now, let’s talk about the pattern. I’m not going to lie—these coasters are ridiculously easy to make! Whether you're a crochet newbie or a seasoned pro, you’ll love how quickly they come together. Like my crochet snowflake coaster pattern, this pattern is beginner-friendly but allows for plenty of creativity. You can tweak the size, the colors, or add some extra "drips" of melting snow for that perfect touch of whimsy.
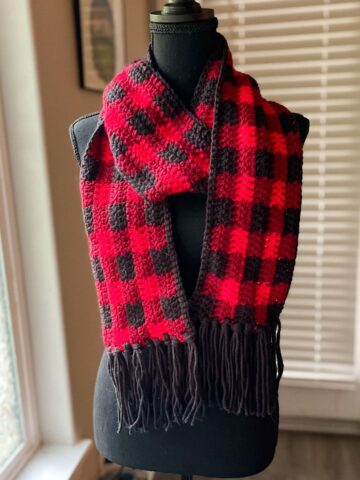
If you’ve ever wanted a fun and fast project to get into the holiday spirit—without stressing over an intricate sweater or scarf (like my crochet Christmas scarf)—this crochet snowman coaster pattern is for you! You’ll get the satisfaction of creating something both functional and festive in no time.
Jump to:
✏️ Things To Note:
- Yarn Choice: Use a sturdy, medium-weight yarn for durability. Cotton yarn works well, as it’s easy to clean and holds its shape.
- Hook Size: Choose the appropriate hook size for your yarn to achieve the desired stitch tension. A smaller hook can create a tighter fabric, which is ideal for tags.
- Adaptable for Different Skill Levels: While this crochet snowman coaster pattern is designed to be simple, the beauty of this pattern is its flexibility. Beginners can easily follow along, but more advanced crocheters can add their own spin—whether it’s creating custom snowman hats, adding tiny scarves, or even experimenting with different yarn colors for a unique look!
🪡 Materials Needed
- Lily Sugar n Cream Cotton Yarn - white
- Lily Sugar n Cream Cotton Yarn - black
- Lily Sugar n Cream Cotton Yarn - warm brown
- Lily Sugar n Cream Cotton Yarn - orange
- 5mm hook
- Tapestry needle
💭Abbreviations to Remember (US terms)
- Chains (ch)
- Magic ring (mr)
- Single crochet (sc)
- Slip stitch (sl st)
- Half double crochet (hdc)
- Double crochet (dc)
- Triple crochet (tr)
- Increase (inc) - versions include sc inc, hdc inc, dc inc, tr inc (essentially 2 stitches in 1 stitch)
* If you see a stitch abbreviation with "x" after it, it means how many times you do that stitch in the following amount of stitches. For example: sc x6 would mean you make a single crochet in the next 6 stitches. Inc x2 means you make an inc in the next 2 stitches.
🧋Variations
Customize the "Melt": The "melting" effect is what makes these coasters truly unique! You can adjust how much your snowman melts—maybe it’s a slight drip, or perhaps the whole bottom half of the snowman is turning into a puddle. Play around with the pattern to make each coaster as "melted" as you want.
🍵Instructions for Crochet Snowman Coaster Pattern
For this crochet snowman coaster pattern, we will be working in the round.
Melted Snowman:

Round 1: Using white yarn, make a mr and make sc x6 in the circle. If you find it difficult making a magic ring you can chain 2 and then crochet sc x6 in the second chain from the hook. (6)
Round 2: Sc inc in every sc. (12)
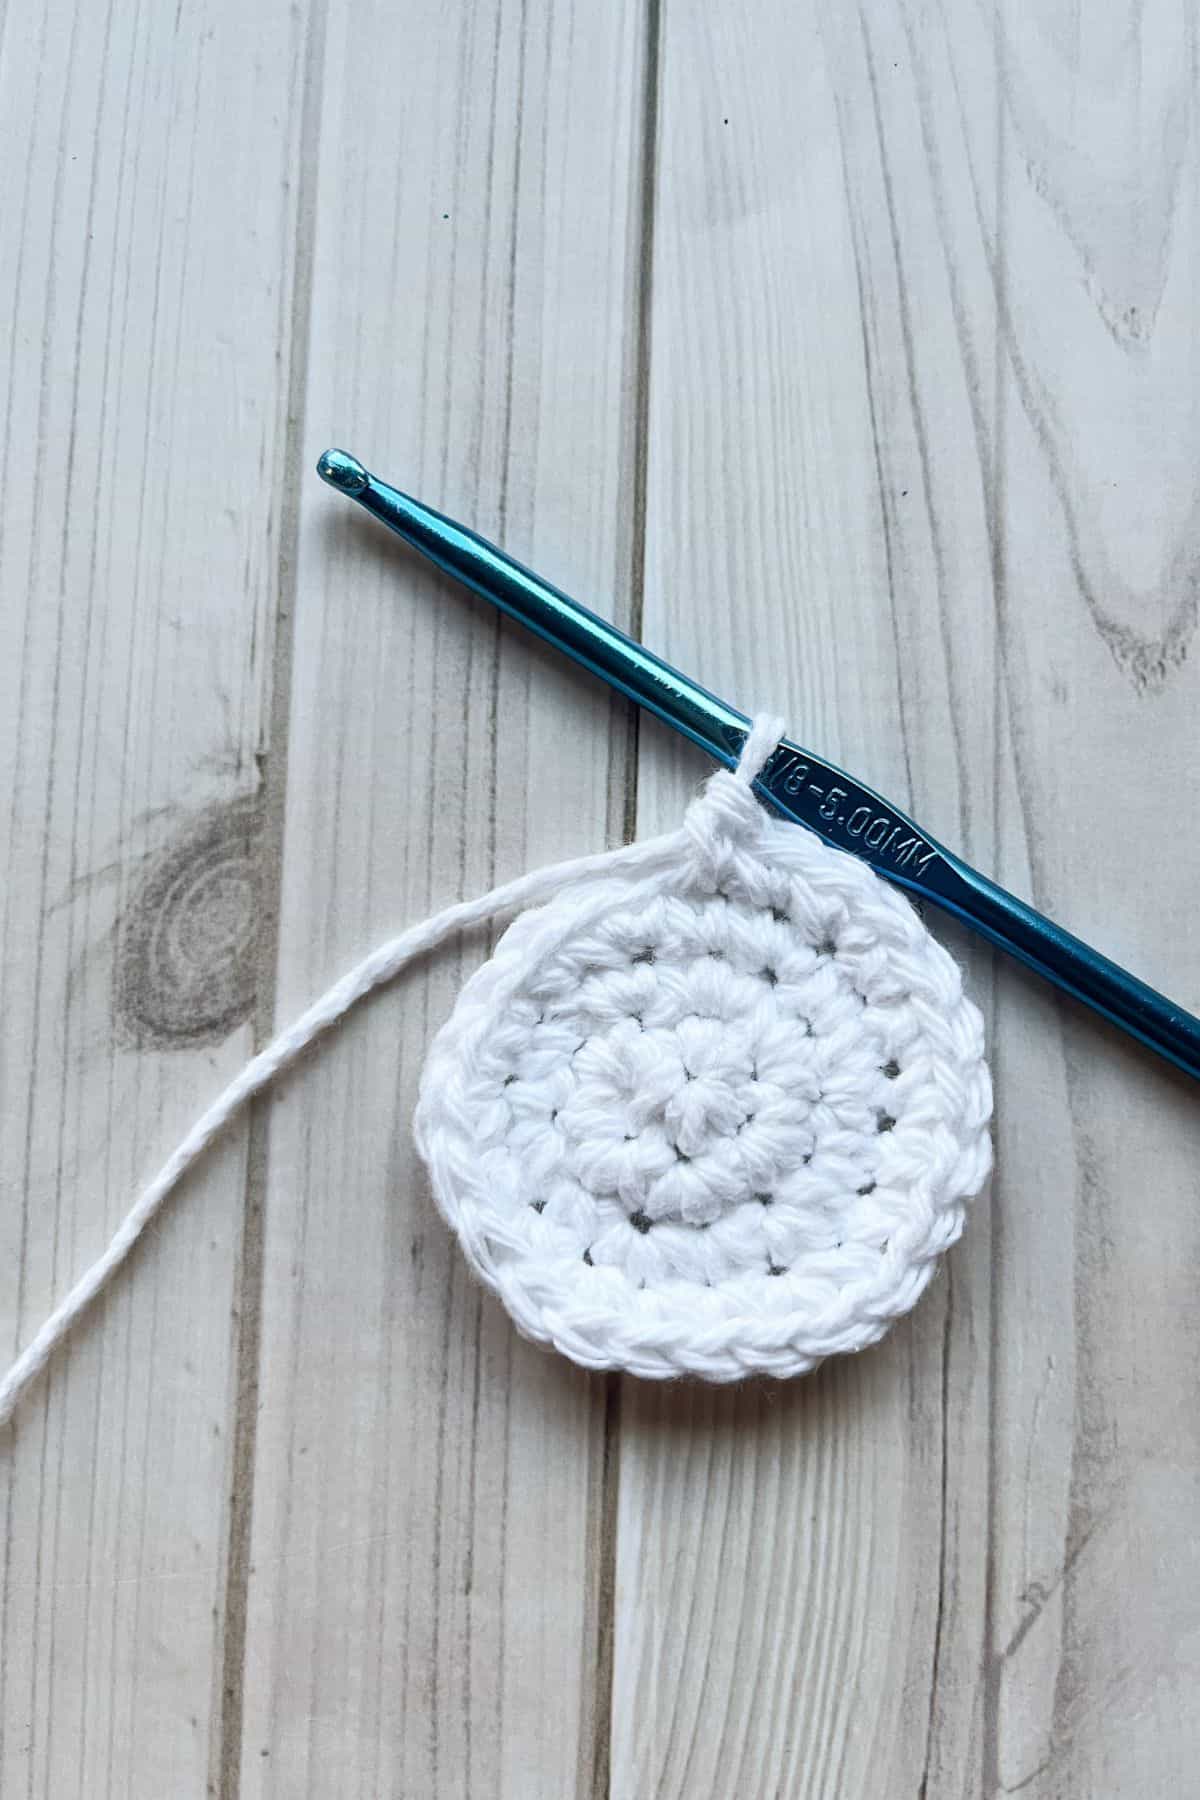
Round 3: Inc, sc. Then repeat until the end of round (18).
Round 4: Inc, sc x2. Then repeat until the end of round (24).
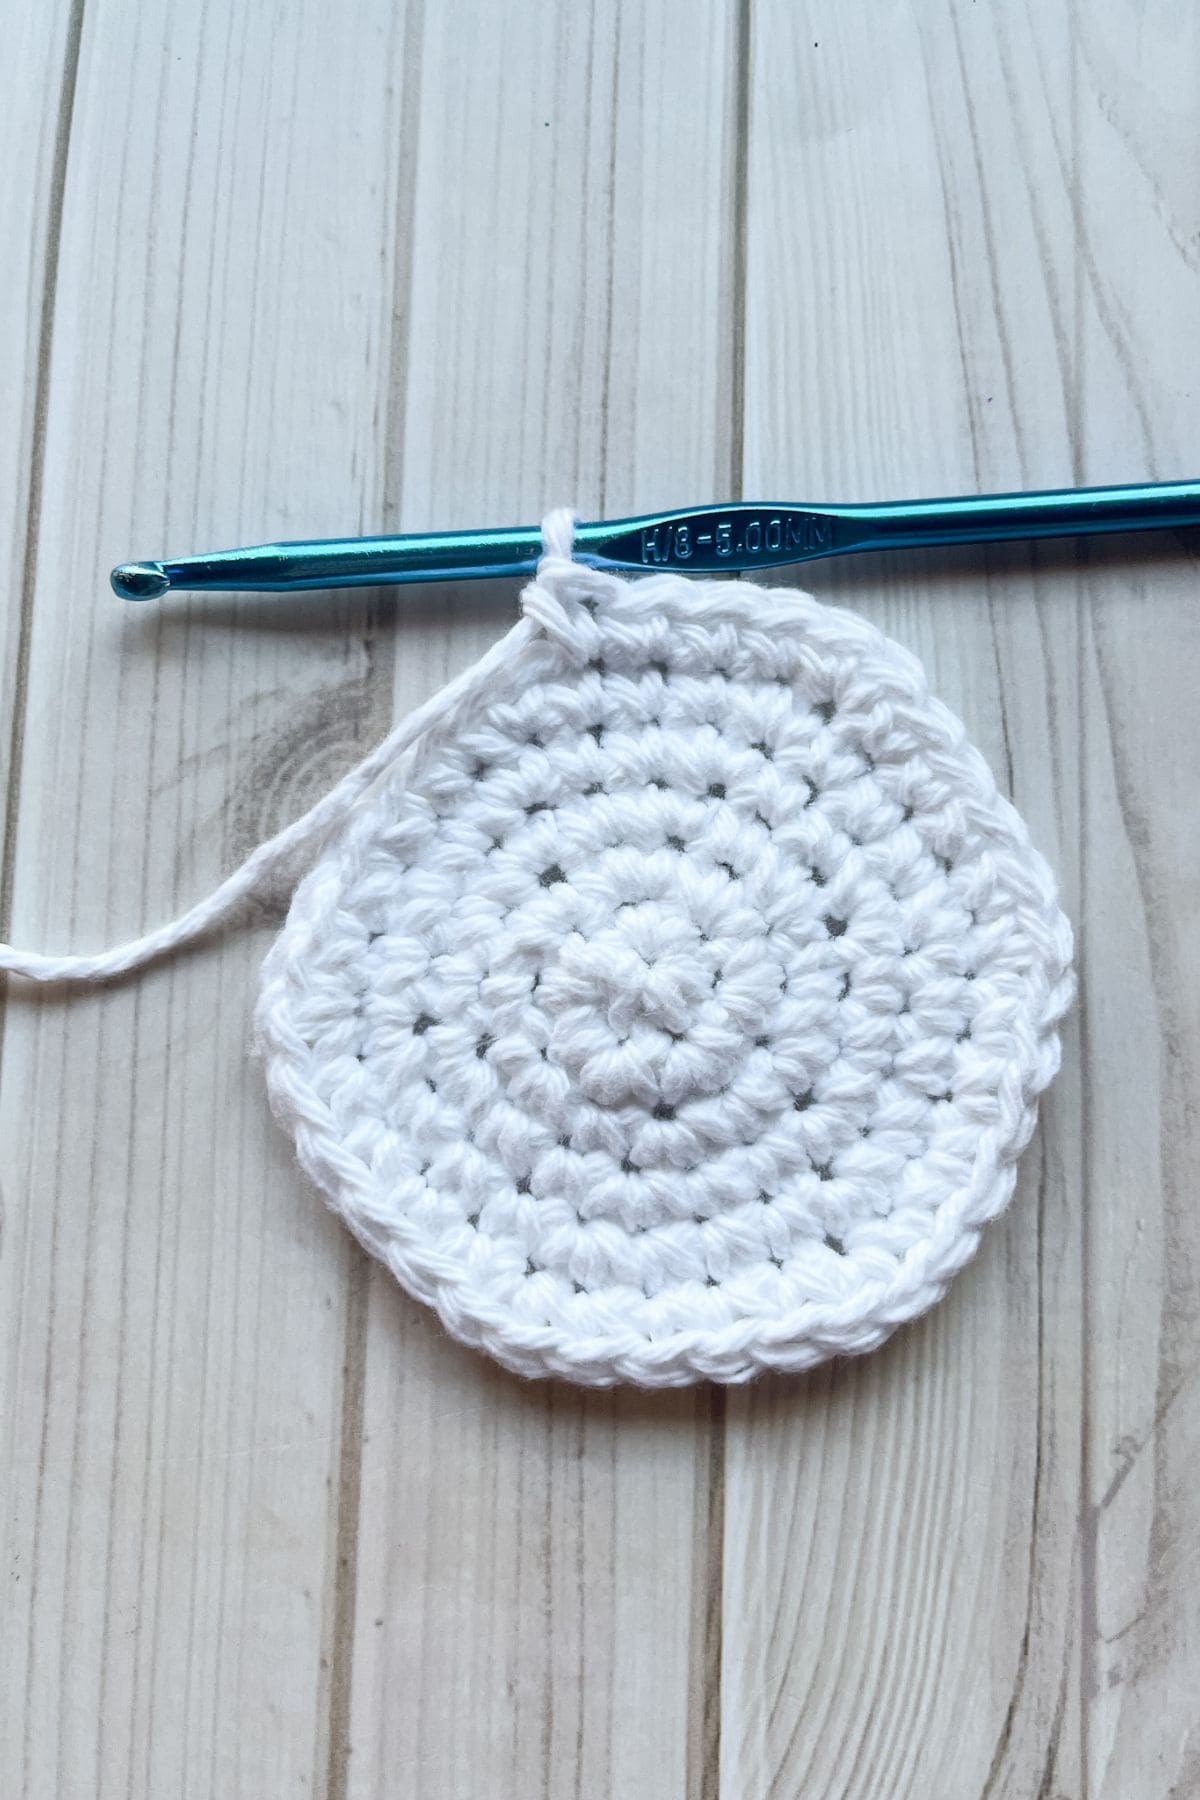
Round 5: Inc, sc x3. Then repeat until the end of round (30).
Round 6: Inc, sc x4. Then repeat until the end of round (36).
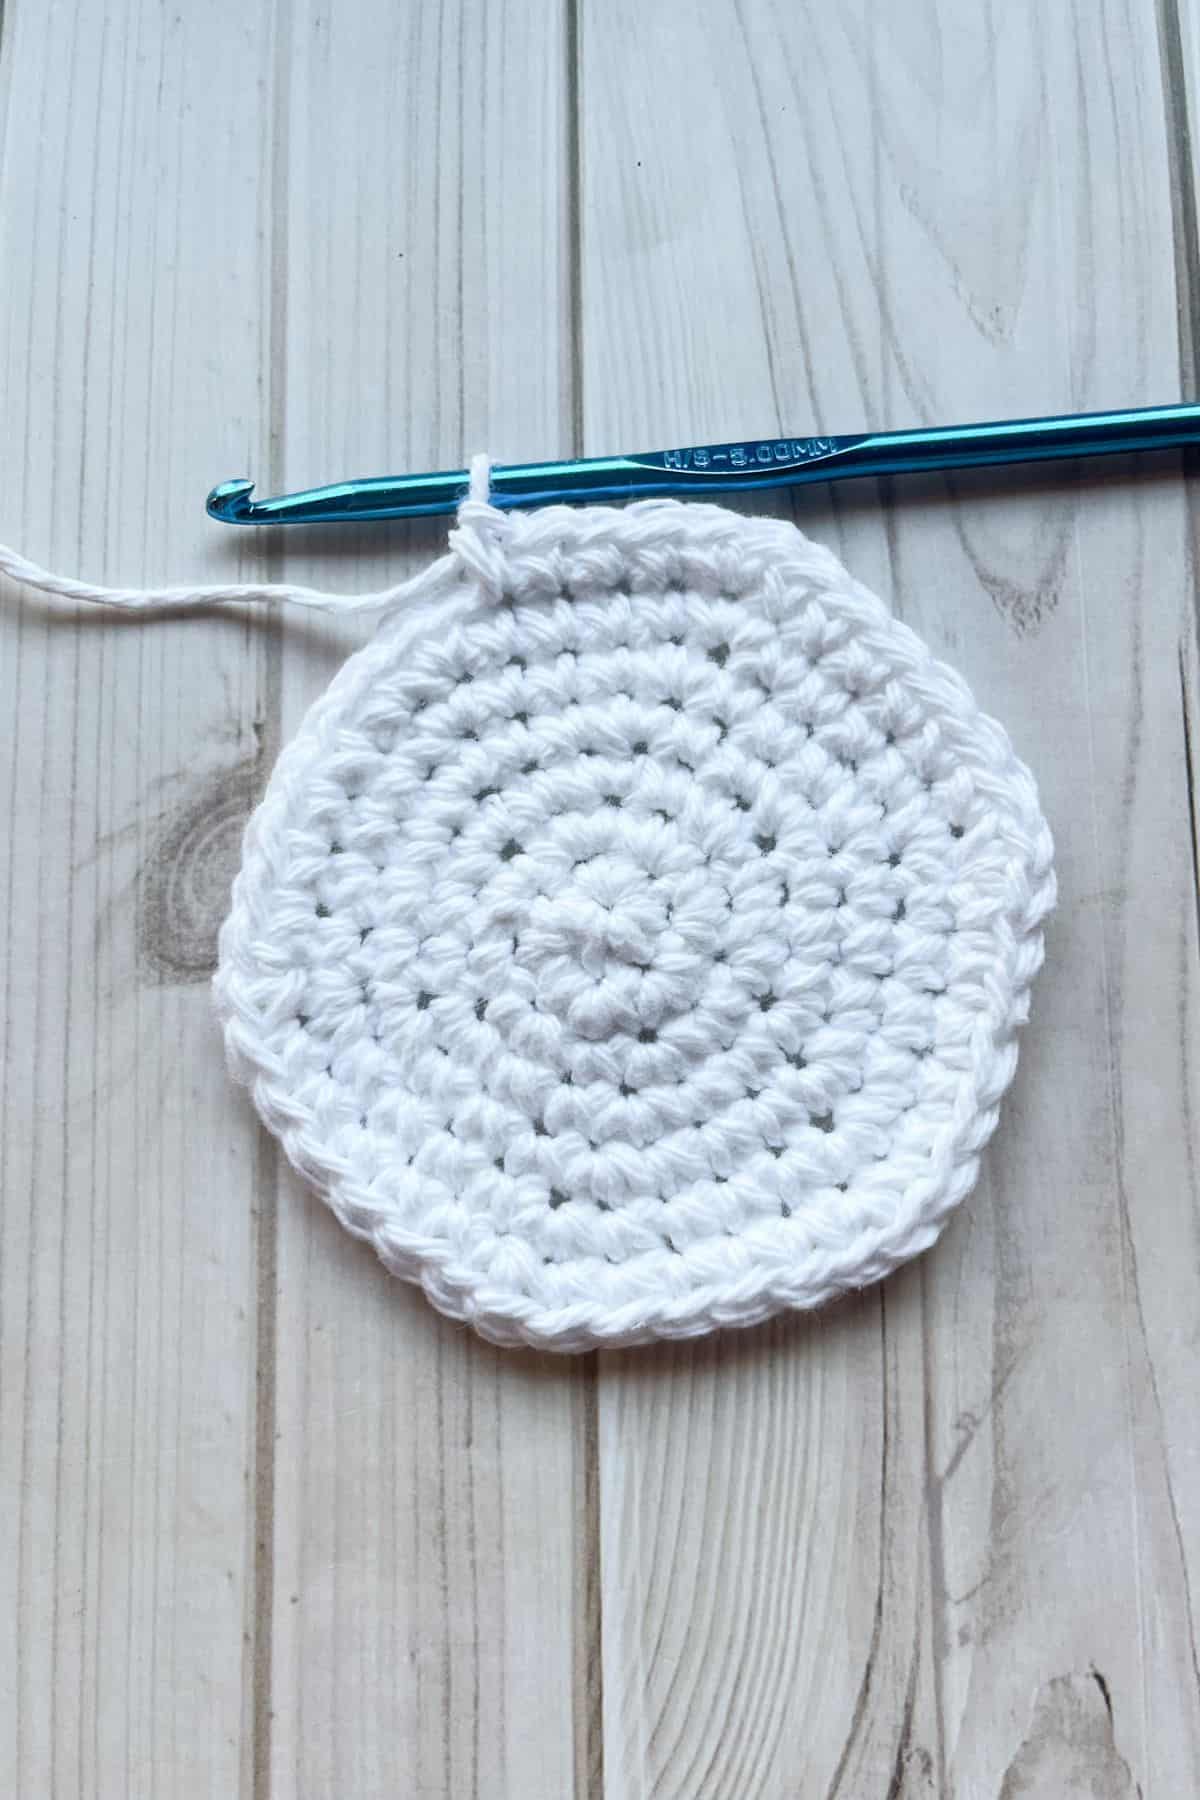
Round 7: Inc, sc x5. Then repeat until the end of round (42).
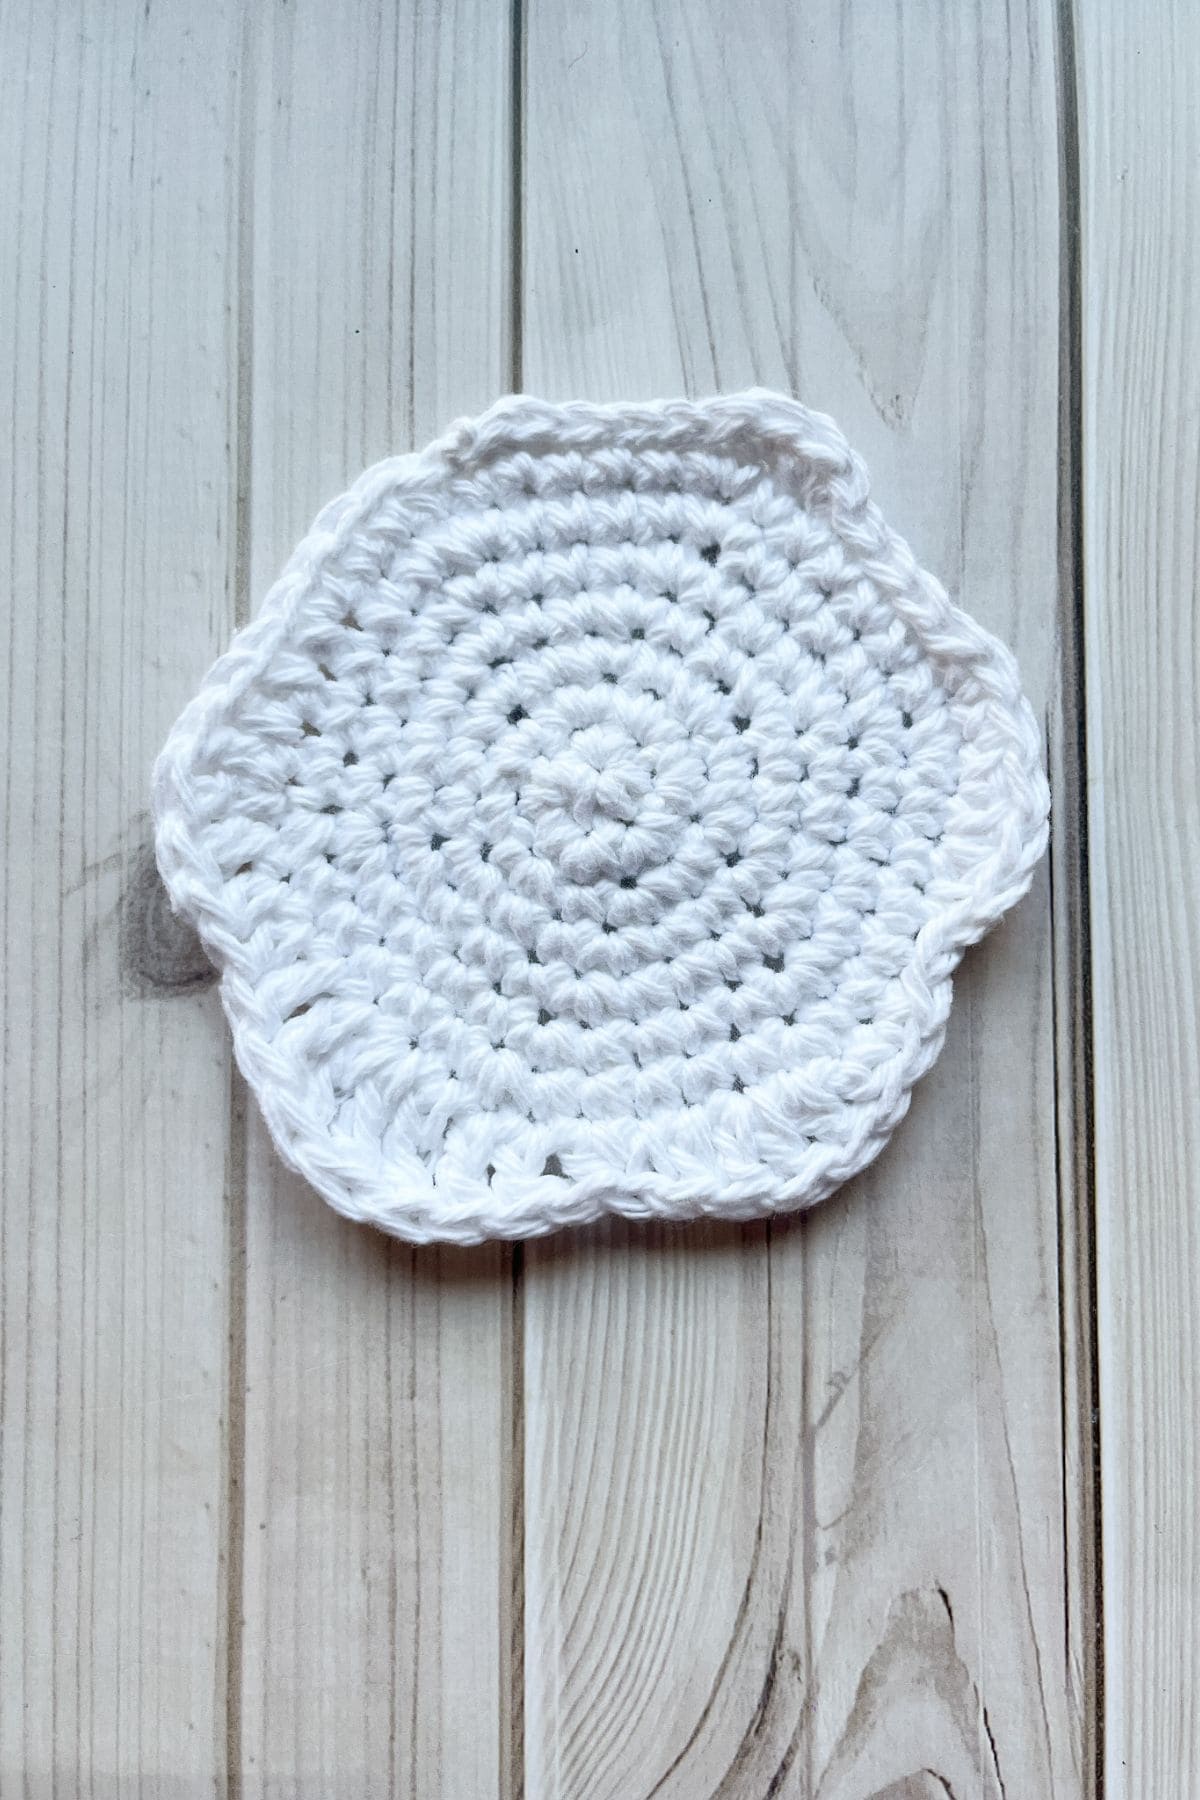
Round 8: Now we are going to create the melty part of the snowman in this round.
Sc x4, sc inc, sc, hdc, dc inc, dc, hdc x2, dc x2, tr inc, tr, dc x2, hdc, dc, hdc, dc inc, dc, hdc, sc, sl st x 2, sc, hdc inc, hdc, sc x2, sl st x4, sc inc, sc, sl st x4, sc. Then fasten off the yarn and weave in any ends.
Crochet Snowman Hat:

Row 1: With black, ch x5
Row 2: In the second ch from the hook, make a sc. Then continue making sc for the rest of the ch length (4). Then ch x1 and turn.
Row 3: Repeat row 2. Then fasten off the yarn. You should have a little square (4).
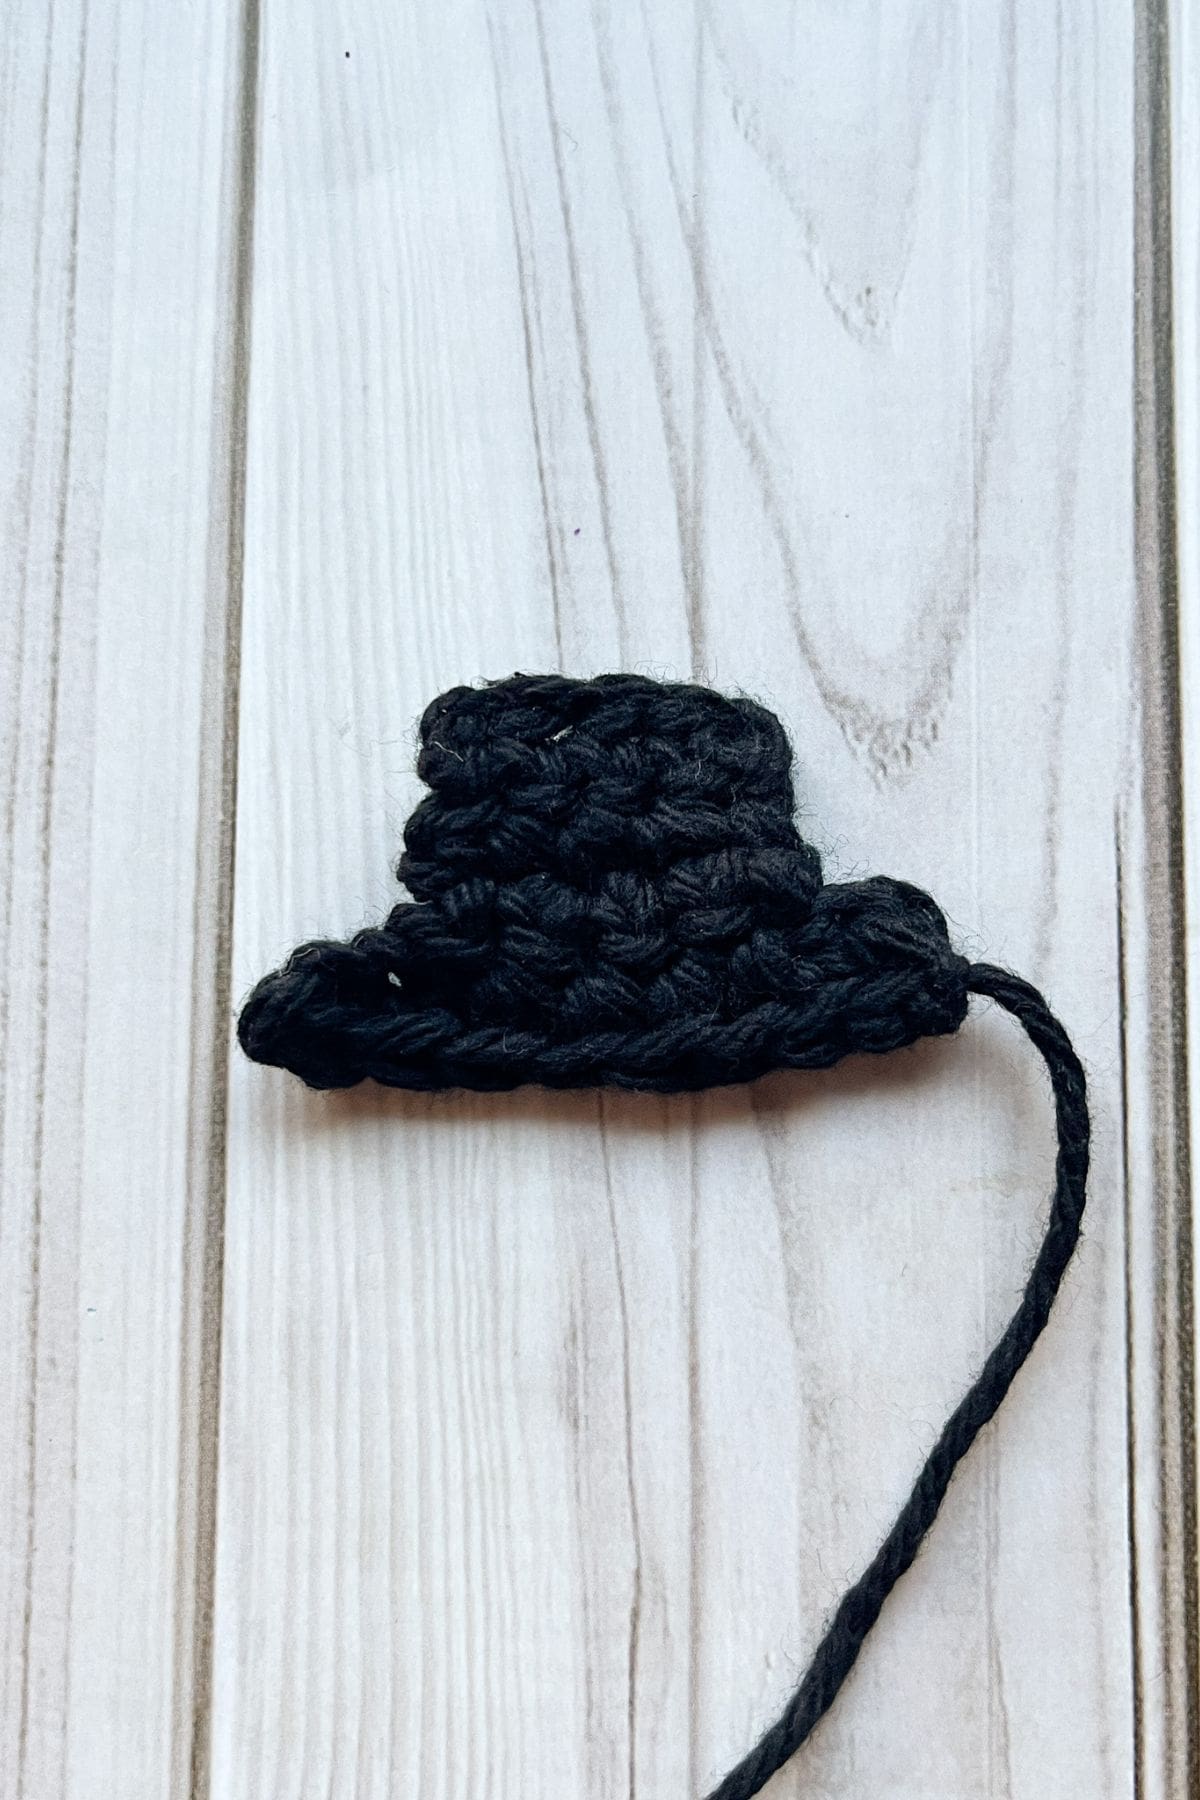
Row 4: Ch x2 and then reattach the yarn to the square where you left off and sc across the row, then ch x3 ( ch 2, 4 sc, ch 3)
Row 5: In the second ch from the hook, make a sc. Then continue making sc for the rest of the ch length (8). Then fasten off the yarn, leaving a long tail for sewing. Weave in any additional ends.
Finishing:
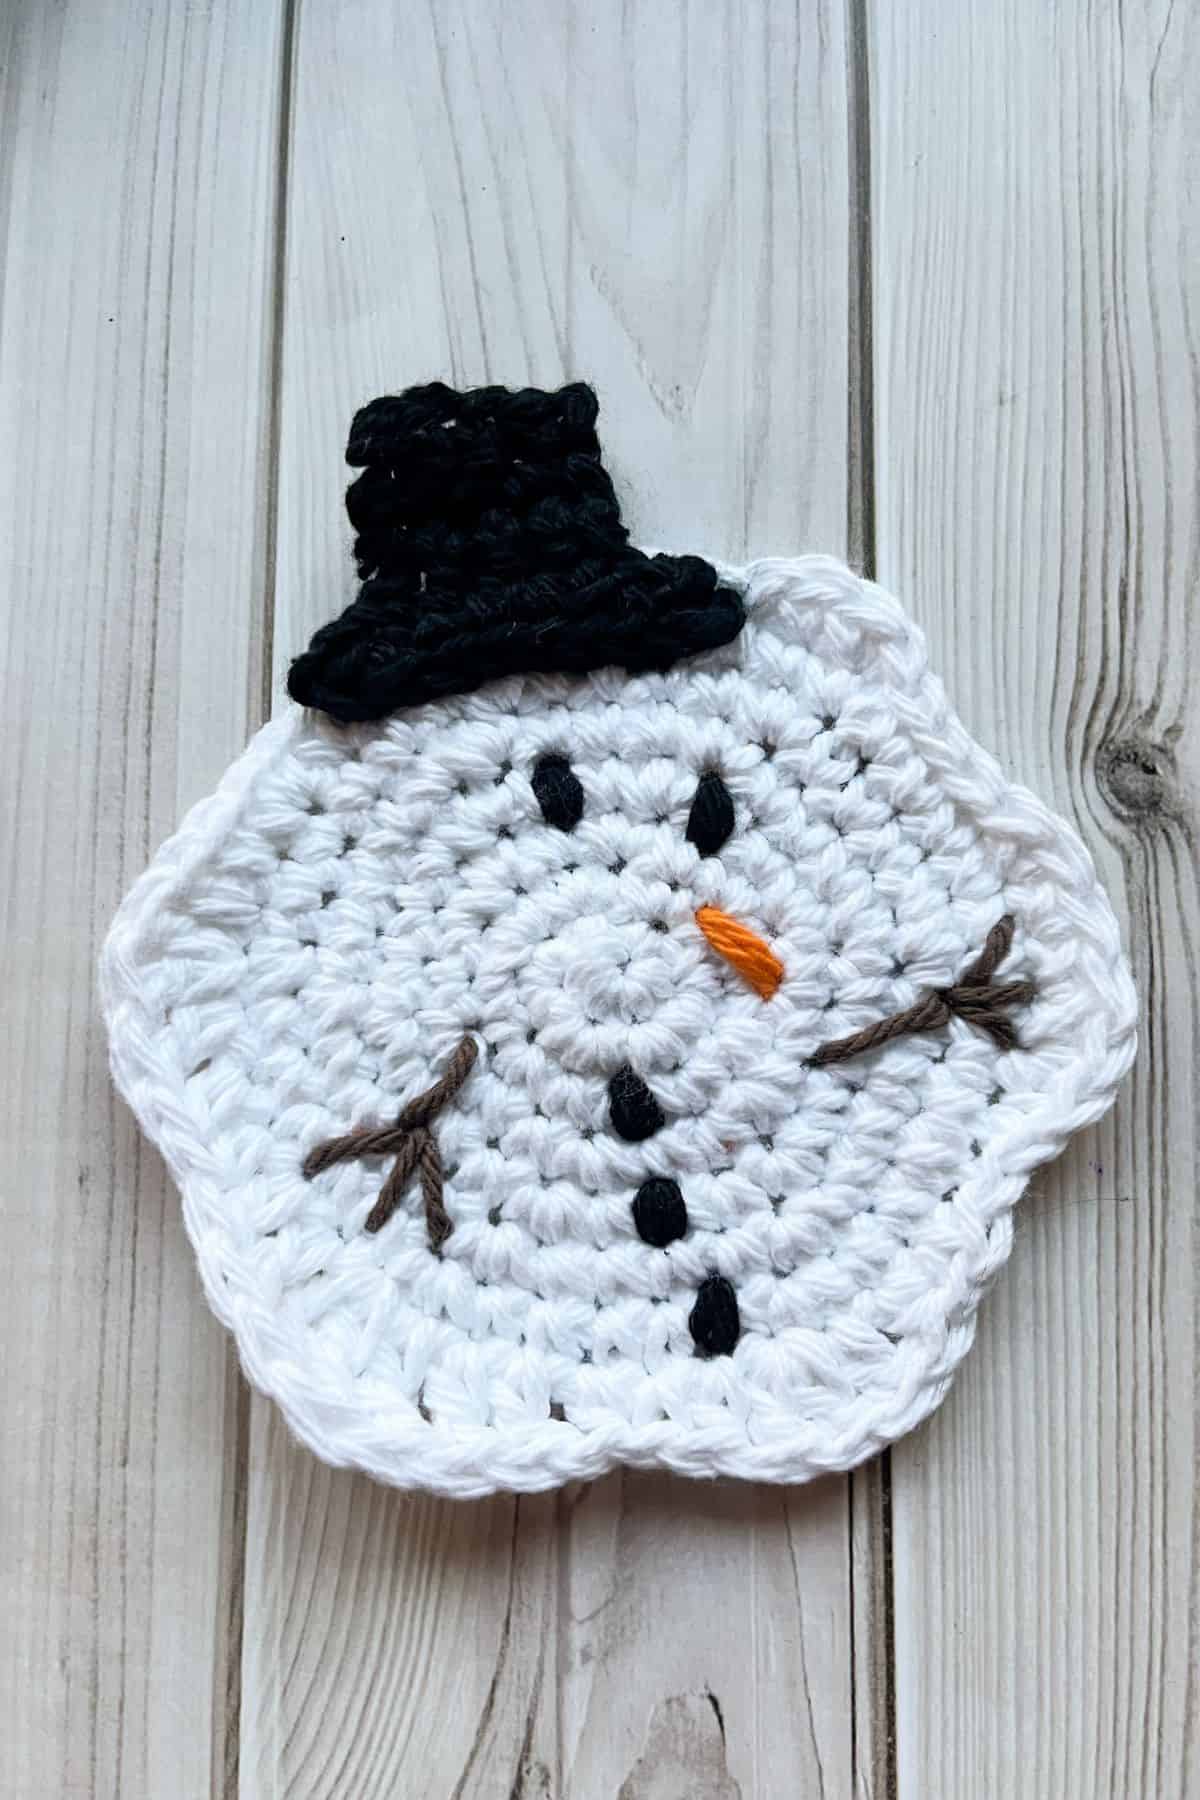
First sew the hat to the top part of the snowman, this is where there are less drips and it's more flat.
Then, with the black yarn, embroider the eyes to round 4 and the buttons in round 3, 5, and 7.
Next, with the orange yarn, embroider the carrot nose in the 3rd round right of the center of the snowman.
Finally, With the brown yarn, embroider arms to each side of the snowman, starting in either round 4 or 5.
Once all the embroidery is completed and the tails have been woven into the back - your crochet snowman coaster is completed! The back will be a bit messy, but you can always add additional felt backing to the back of the coaster to make it tidy if you are concerned about it.
Otherwise you can always use puffy paint to paint on the embroidered details.
These coasters are not just functional, but they also add a whimsical, quirky touch to any holiday spread. You’ll want to whip up a few extra sets to gift to friends and family. Just imagine the smiles when they unwrap a set of your one-of-a-kind crochet Christmas coasters! If you have extra cotton yarn, try making my crochet peppermint coaster pattern or my crochet gift tag pattern for more holiday fun!
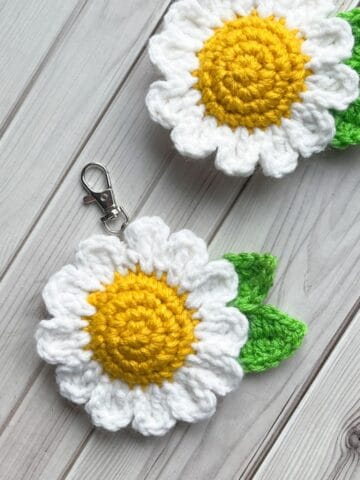
If you have extra white yarn, you can make my crochet egg coasters or crochet flower coasters for extra last minute holiday gifts. You can even make crochet ghost coasters for Halloween for next year or for your spooky-all-year-long friend!

🐌Expert Tips
- Consider Adding a Backing for Extra Stability: If you’re looking for a more durable coaster that can hold up to both hot and cold drinks, add a fabric or felt backing to your crochet coasters. Simply cut out a circle of felt or fabric slightly larger than the coaster and sew it to the back using a whip stitch or fabric glue.
- Sewing on Attachments: If you plan to attach tinier items like a small scarf or mittens to the snowman, ensure that the attachment points are secure and won’t come undone easily.
- Finishing Touches: Don’t forget to weave in any loose ends carefully to keep your crochet snowman coasters looking neat and polished.
🧵Pattern FAQs
For crochet coasters, it's best to use a sturdy and absorbent yarn. Cotton yarn is a top choice because it’s durable, easy to wash, and absorbs moisture well. It also tends to hold its shape nicely. You can also use cotton blends or linen yarns. Avoid super-soft or slippery yarns like acrylic, as they may not offer the necessary stability for a coaster that will handle hot or cold drinks.
Make sure your tension is consistent. Crocheting too tightly or too loosely can cause the coaster to warp. Try to maintain an even tension throughout the project.
A single coaster typically takes anywhere from 30 minutes to crochet, depending on your skill level, the complexity of the design, and the type of yarn you’re using. If you’re making a set of coasters, plan for more time, but they’re still relatively quick projects!

🧶More Crochet Winter Patterns


If you tried this Crochet Snowman Coaster Pattern (or any other pattern on my website), please let me know how it went in the 📝 comments below. I'd love to hear from you!
Crochet Snowman Coaster Pattern
Materials
Abbreviations (US terms)
- Chains - ch
- Magic ring - mr
- Single crochet - sc
- Slip stitch - sl st
- Half double crochet - hdc
- Double crochet - dc
- Triple crochet - tr
- Increase - inc
Notes
- Yarn Choice: Use a sturdy, medium-weight yarn for durability. Cotton yarn works well, as it’s easy to clean and holds its shape.
- Hook Size: Choose the appropriate hook size for your yarn to achieve the desired stitch tension. A smaller hook can create a tighter fabric, which is ideal for tags.
- Adaptable for Different Skill Levels: While these crochet snowman coasters are designed to be simple, the beauty of this pattern is its flexibility. Beginners can easily follow along, but more advanced crocheters can add their own spin—whether it’s creating custom snowman hats, adding tiny scarves, or even experimenting with different yarn colors for a unique look!
Instructions
Melted Snowman:
- For this crochet snowman coaster pattern, we will be working in rounds.
- Round 1: Using white yarn, make a mr and make sc x6 in the circle. If you find it difficult making a magic ring you can chain 2 and then crochet sc x6 in the second chain from the hook. (6)
- Round 2: Sc inc in every sc. (12)
- Round 3: Inc, sc. Then repeat until the end of round (18).
- Round 4: Inc, sc x2. Then repeat until the end of round (24).
- Round 5: Inc, sc x3. Then repeat until the end of round (30).
- Round 6: Inc, sc x4. Then repeat until the end of round (36).
- Round 7: Inc, sc x5. Then repeat until the end of round (42).
- Round 8: Now we are going to create the melty part of the snowman in this round.
- Sc x4, sc inc, sc, hdc, dc inc, dc, hdc x2, dc x2, tr inc, tr, dc x2, hdc, dc, hdc, dc inc, dc, hdc, sc, sl st x 2, sc, hdc inc, hdc, sc x2, sl st x4, sc inc, sc, sl st x4, sc. Then fasten off the yarn and weave in any ends.
Crochet Snowman Hat:
- Row 1: With black, ch x5
- Row 2: In the second ch from the hook, make a sc. Then continue making sc for the rest of the ch length (4). Then ch x1 and turn.
- Row 3: Repeat row 2. Then fasten off the yarn. You should have a little square (4).
- Row 4: Ch x2 and then reattach the yarn to the square where you left off and sc across the row, then ch x3 ( ch 2, 4 sc, ch 3)
- Row 5: In the second ch from the hook, make a sc. Then continue making sc for the rest of the ch length (8). Then fasten off the yarn, leaving a long tail for sewing. Weave in any additional ends.
Finishing:
- First sew the hat to the top part of the snowman, this is where there are less drips and it's more flat.
- Then, with the black yarn, embroider the eyes to round 4 and the buttons in round 3, 5, and 7.
- Next, with the orange yarn, embroider the carrot nose in the 3rd round right of the center of the snowman.
- Finally, With the brown yarn, embroider arms to each side of the snowman, starting in either round 4 or 5.
- Once all the embroidery is completed and the tails have been woven into the back - your crochet snowman coaster is completed! The back will be a bit messy, but you can always add additional felt backing to the back of the coaster to make it tidy if you are concerned about it.
- Otherwise you can always use puffy paint to paint on the embroidered details.
Leave a Reply