
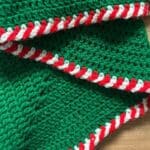
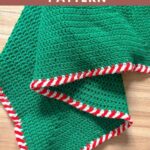
My Candy Cane Crochet Border is the perfect way to bring the holidays into your home with a subtle yet festive look. It's ideal for those who want to celebrate the holidays all winter long.

I come from a household divided when it comes to holiday decorating. Some of us, like myself, enjoy decorating every nook and cranny, while others prefer to keep it minimal—a tree and nothing else. But where's the fun in that? The holidays feel even more magical when surrounded by decorations that evoke the spirit of the season.
During fall and winter, I love to crochet blankets because they keep me cozy. Who wants to crochet a blanket in 80-degree summer heat? Not me!
The crochet candy cane border may look complicated, but it’s fairly easy to achieve if you can keep your yarn colors untangled in the process! Besides managing the yarn colors, this simple border primarily uses chains and single crochet stitches.
And the best part is if you have extra yarn you can also make a crochet mitten ornament and crochet mini Christmas stocking to decorate the Christmas tree!
Jump to:
✏️ Things To Note:
- Yarn Colors: I used red and white acrylic yarn for the crochet candy cane border, but feel free to use any colors you like—black and orange for Halloween, for example!
- Multiple Colors: You can use more than two colors at once. I stuck with two to keep the yarn manageable, but if you can handle it, feel free to experiment with a rainbow of colors!
- Compatibility: This border pairs wonderfully with any blanket pattern. I love using it for solid granny squares, but it works just as well for textured blankets or other granny square designs. It also works well as a border for my crochet peppermint coaster pattern.

🪡 Materials Needed
- 1 skein of red heart red yarn
- 1 skein of red heart white yarn
- 5mm hook
- Tapestry needle
💭Abbreviations to Remember (US Terms)
- Chains - ch
- Single crochet - sc
🧋Variations
You can use this border for blankets, placemats, coasters, and more! Change up the colors for different holidays—like black and orange for Halloween. Feel free to incorporate more than two colors for a more complex look!
This post focuses on making the crochet candy cane border, but for reference, I made a continuous solid granny square in green for the base.
🍵Instructions for Candy Cane Crochet Border
Before beginning, if you have not done your blanket in the round, make a round of single crochets along every edge so you have single crochets to work the border in.
The candy cane crochet border pattern is made in the round.

Step 1: Starting at any point along the edge, attach the red yarn and ch x4. Set the yarn aside (do not fasten off). In the next stitch, attach the white yarn and then ch x4.
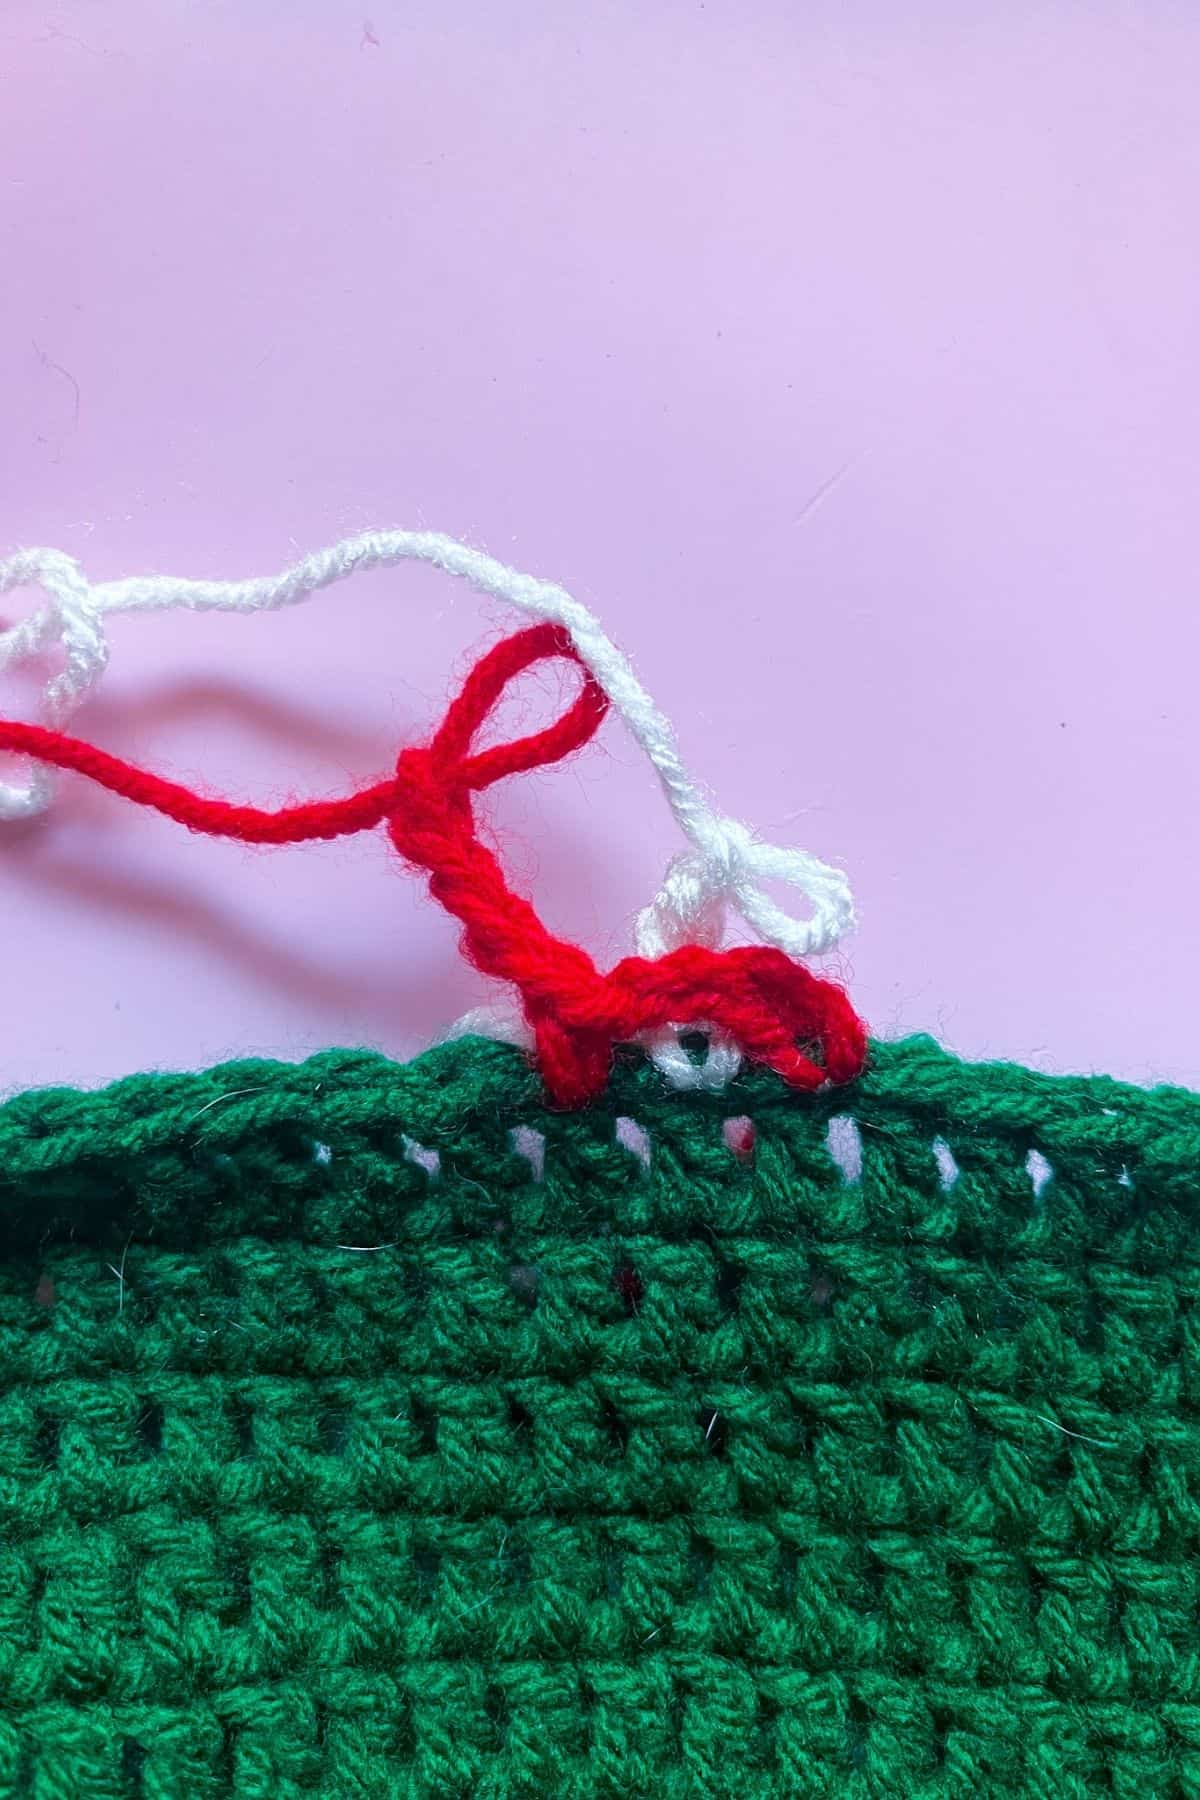
Step 2: Put your crochet hook back into the working loop in your red yarn and make a single crochet in the next available stitch. So you should skip over the white and start making a repetitive pattern.

Now do the same with the white yarn. Sc into the stitch available. Now you should have 2 finished loops for the border, one red and one white.

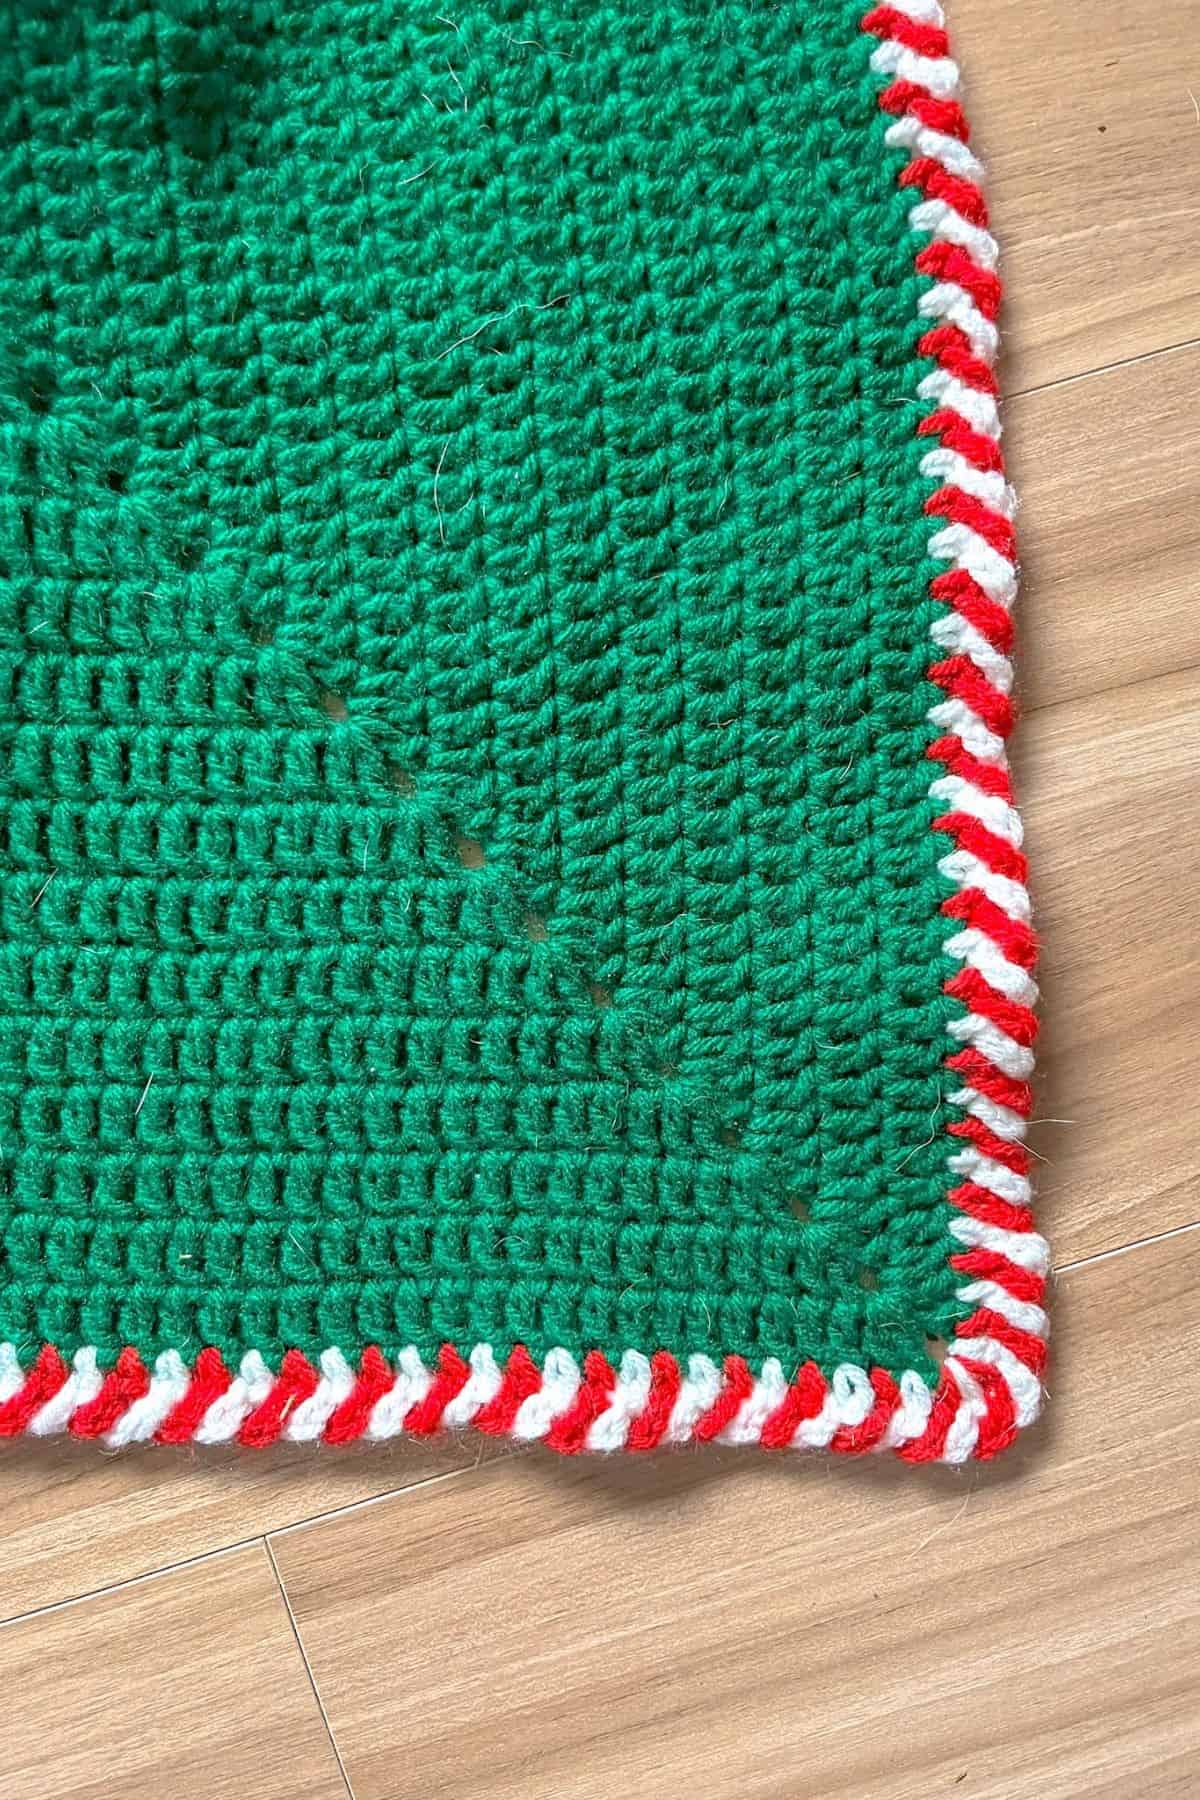
Step 3: Repeat step 1 and 2 until the border is finished. When you get to the corners make 2 red and 2 white in the corners, for a total of 4 stitches.
At the end of the border, if you have an extra space or two colors next to each other, you can fudge it a little by skipping a sc so the pattern has no mistakes. In the end you can’t even tell a stitch was skipped.
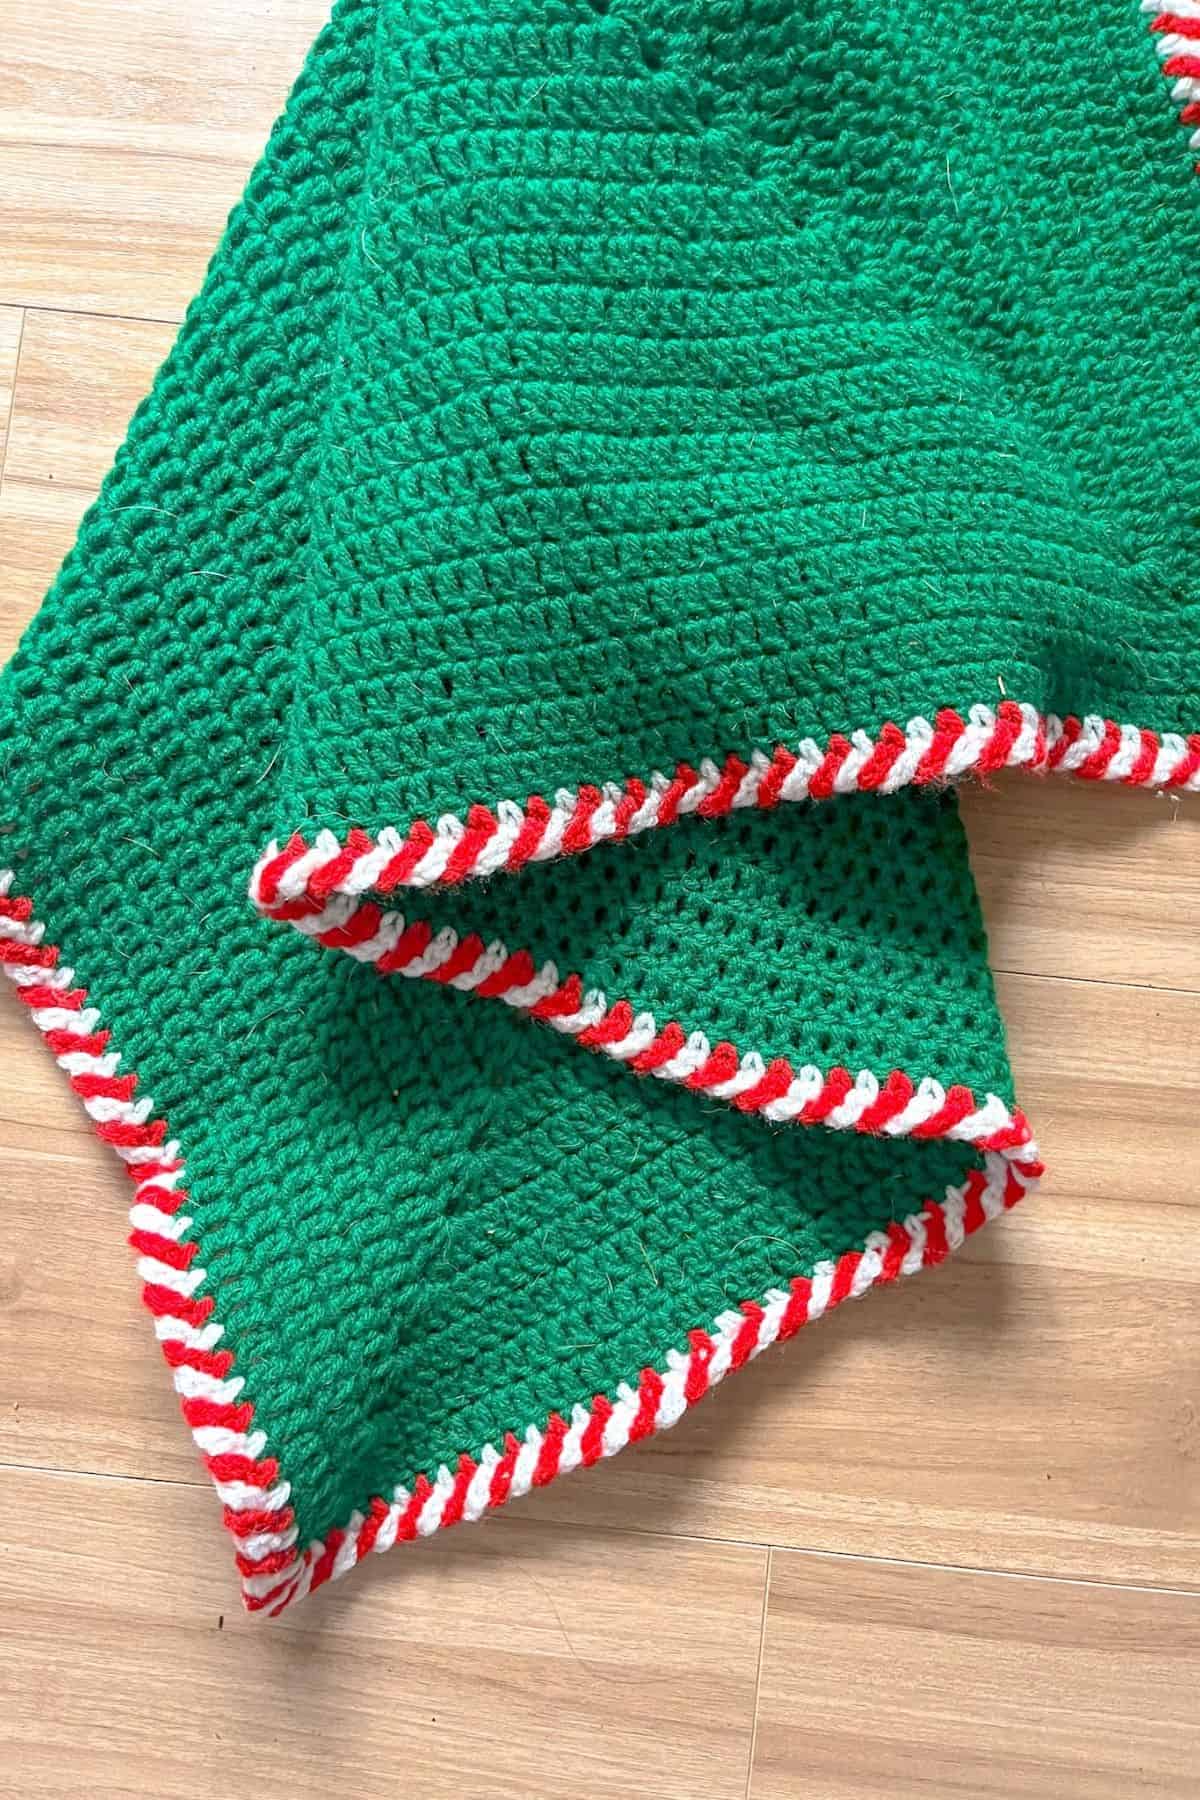
I hope you enjoyed learning how to create this fun and festive crochet candy cane border! It’s a simple yet charming way to add some holiday cheer to your projects. Whether you’re decorating a blanket, scarf, or any other handmade piece, this border will definitely bring a touch of seasonal magic. Don’t forget to get creative with the stripe sizes and colors to make it your own.
Happy crocheting, and I can’t wait to see how you use this design in your next project!
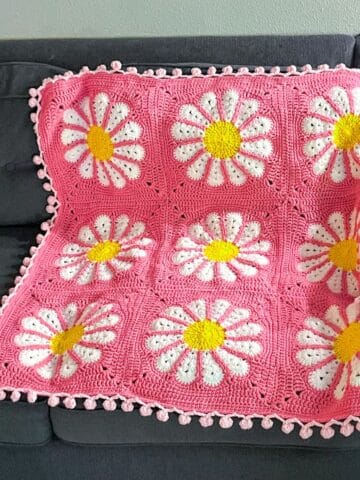
If you are looking for other candy cane themed projects, check out my crochet candy cane scarf pattern and my crochet candy cane blanket pattern!
If you are wanting to make more Christmas themed projects, check out my crochet tree coaster pattern!
🐌Expert Tips
- Manage Tangling: The more colors you use, the more likely your yarn can tangle. Keep the balls of different colors on opposite sides of your body to minimize tangling. If you do see any tangling, untangle it before continuing to avoid a bigger mess later on!
- Maintain Tension: Keep a consistent tension while working the border to ensure that the stitches remain even and neat.
- Practice: If you’re new to working with multiple colors, practice on a swatch before starting on your final project.
🧵Pattern FAQs
I use smaller balls and keep them on different sides of my body so the yarn doesn’t get twisted together.
Can I use 2 strands of yarn at a time for a thicker blanket border?
Absolutely! It should be okay to do 2 strands.
I would advise not to use any type of fuzzy or textured yarn for the border as the design would look muddled and not as crisp.
🧶More Crochet Christmas Patterns


If you tried this Candy Cane Crochet Border, (or any other pattern on my website), please let me know how it went in the 📝 comments below. I'd love to hear from you!
Candy Cane Crochet Border
Materials
Abbreviations (US terms)
- ch = Chain
- sc = Single crochet
Notes
- Used red and white acrylic yarn for the candy cane border; any colors work (e.g., black and orange for Halloween).
- Experiment with more than two colors for a vibrant rainbow effect.
- Versatile border complements various blanket patterns, including granny squares and textured blankets.
- Use it on blankets, placemats, coasters, and more.
- Modify colors for holidays or use multiple colors for a complex look!
Instructions
- This pattern is specifically about how to make the crochet candy cane border, but for reference I made a continuous solid granny square for the base in green.
- Before beginning, if you have not done your blanket in the round, make a round of single crochets along every edge so you have single crochets to work the border in.The candy cane crochet border pattern is made in the round.
- Step 1: Starting at any point along the edge, attach the red yarn and ch x4. Set the yarn aside (do not fasten off). In the next stitch, attach the white yarn and then ch x4.
- Step 2: Put your crochet hook back into the working loop in your red yarn and make a single crochet in the next available stitch. So you should skip over the white and start making a repetitive pattern.
- Now do the same with the white yarn. Sc into the stitch available. Now you should have 2 finished loops for the border, one red and one white.
- Step 3: Repeat step 1 and 2 until the border is finished. When you get to the corners make 2 red and 2 white in the corners, for a total of 4 stitches.
- At the end of the border, if you have an extra space or two colors next to each other, you can fudge it a little by skipping a sc so the pattern has no mistakes. In the end you can’t even tell a stitch was skipped.
- I hope you enjoyed learning how to create this fun and festive crochet candy cane border! It’s a simple yet charming way to add some holiday cheer to your projects. Whether you’re decorating a blanket, scarf, or any other handmade piece, this border will definitely bring a touch of seasonal magic. Don’t forget to get creative with the stripe sizes and colors to make it your own.Happy crocheting, and I can’t wait to see how you use this design in your next project!


Leave a Reply