
This Crochet Panda Pattern allows you to make an amigurumi panda similar to a real panda, but smaller and cuddlier of course. Let me tell you, this crochet panda plushie is perfect for cuddles!

I love panda bears, I mean who doesn't? They are cute, soft, and just love to eat bamboo! Because I love panda bears (and now so does my son) I chose to redo my crochet panda bear pattern I made years ago and give it some new life after I leveled up my amigurumi skills!
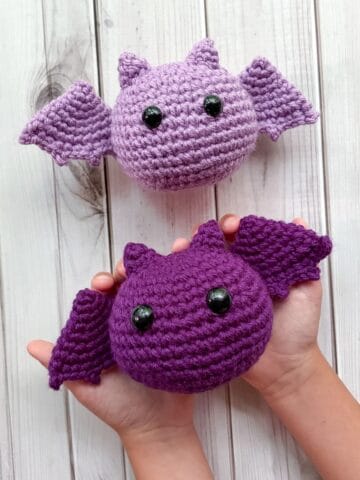
Honestly, I love how the crochet panda pattern came out! It is simple and easy enough for a beginner to do! No complicated color switches, just a lot of sewing.... Couldn't escape the sewing aspect for this amigurumi panda! Although I do have a few "no-sew" amigurumi patterns if that's more your style—like my crochet squid pattern, crochet crab pattern and crochet clam pattern (I am hoping to make a few more "no-sew" or "low-sew" patterns like my crochet spider pattern).
So let's get started so I can show you how to crochet a panda!
Jump to:
✏️ Things To Note:
- Yarn Type: I used acrylic yarn for this little free crochet panda pattern. Any type of yarn would work for this panda pattern—cotton, chunky, etc. Chunky yarn would make this a GIANT stuffed panda!
- Stitch Tension: My stitches are very tight when I crochet stuffed animals. The crochet panda pattern is no exception haha. If your tension is a bit loose, try yarning under instead of over to make the stitches tighter and more closely knit.
- Size: Using a 4mm hook, the final size of the crochet panda pattern is roughly 7 inches high and 6 inches across if we include the arms.

🪡 Materials Needed
- Polyfill
- 4.5mm hook
- 10mm Safety eyes (with a safety nose)
- Caron One Pound - white
- Caron One Pound - black
- Tapestry needle
💭 Abbreviations to Remember (US Terms)
- Magic ring (mr)
- Single crochet (sc)
- Half double crochet (hdc)
- Slip Stitch (sl st)
- Increase (inc) - 2 stitches in 1 stitch
- Decrease (dec) - 1 stitch in 2 stitches
🧋 Variations
- Try using chunky yarn to make a giant crochet panda!
- Who said pandas need to be black and white? Experiment with different colors to create a variety of pandas!
🍵 Instructions for Crochet Panda Pattern
For this crochet panda pattern we will be working in rounds.
Note: I have laid out the basic pattern (the one I made and followed), for the decreases and increases in the crochet panda pattern, but if you prefer not to stack your increases and decreases and feel up to it —you can distribute them over different stitches to create less visible lines or bumps.
Crochet Panda Head:

Round 1: Using white yarn, make a MR and sc x6 into the circle. If you find it difficult making a magic ring you can chain x2 and then sc x6 into the second chain from the hook (6).
Round 2: Inc in every sc (12).
Round 3: Inc, sc. Then repeat until the end of the round (18).
Round 4: Inc, sc x2. Then repeat until the end of the round (24).
Round 5: Inc, sc x3. Then repeat until the end of the round (30).
Round 6: Inc, sc x4. Then repeat until the end of the round (36).
Round 7: Inc, sc x5. Then repeat until the end of the round (42).
Round 8: Inc, sc x6. Then repeat until the end of the round (48).
Round 9-13: Sc in every stitch in the round (48). If using a safety nose, place the nose in between rounds 11-12.
Round 14: Inc, sc x11. Then repeat 3 more times for this round (52).
Round 15: Sc in every stitch in the round (52).
Round 16: Inc, sc x12. Then repeat 3 more times for this round (56).
Round 17: Sc in every stitch in the round (56).
Round 18: Dec, sc x5. Then repeat for the rest of the round (48).
Round 19: Dec, sc x4. Then repeat for the rest of the round (40).
Round 20: Dec, sc x3. Then repeat for the resto f the round (32).
Round 21: Dec, sc x2. Then repeat for the rest of the round (24). Stuff the head.
Round 22: Dec, sc. Then repeat for the rest of the round (16). Fasten off and weave in the tail.
Crochet Panda Body:

Round 1: Using white yarn, make a MR and sc x8 into the circle (8).
Round 2: Inc in every sc (16).
Round 3: Inc, sc. Then repeat until the end of the round (24).
Round 4: Inc, sc x2. Then repeat until the end of the round (32).
Round 5: Inc, sc x3. Then repeat until the end of the round (40).
Round 6: Inc, sc x4. Then repeat until the end of the round (48).
Round 7-11: Sc in every stitch in the round (48).
Round 12: Dec, sc x10. Repeat 3 more times for the rest of the round (44).
Round 13: Sc in every stitch in the round (44).
Round 14: Dec, sc x9. Repeat 3 more times for the rest of the round (40).
Round 15: Sc in every stitch in the round (40).
Round 16: Dec, sc x8. Repeat 3 more times for the rest of the round (36).
Round 17: Sc in every stitch in the round (36). Fasten off the white yarn and switch to black.
Round 18: Now with the black yarn, dec, sc x7. Repeat 3 more times for the rest of the round (32).
Round 19: sc in every stitch in the round (32).
Round 20: Dec, sc x6. Repeat 3 more times for the rest of the round (28).
Round 21: Dec, sc x5. Repeat 3 more times for the rest of the round (24). Fasten off but leave a tail for sewing to the head. Stuff the body.
Crochet Panda Eyes:

Make x2.
Round 1: Using black yarn, ch x4. Then in the second ch from the hook make a sc. Make a sc in the next stitch. In the last ch, hdc x4. Working on the unworked side of the chain, make a sc in the next stitch. Sc x2 into the last stitch and then sl st to the first sc you made.
Round 2: Sc in the next stitch, hdc inc (2 hdc in each hdc) x4. Then sc x1 and make the normal sc inc in the next 3 stitches. Sl st to the next stitch and fasten off the yarn, leaving a tail for sewing.
Add the safety eyes to the end of the chain that has the single crochets.
Crochet Panda Ears:

Make x2.
Round 1: Using black yarn, make a MR and make sc x6 in the circle (6).
Round 2: Inc in every stitch (12).
Round 3-4: Sc in every stitch (12). Then fasten off the ear and leave a tail for sewing.
Crochet Arms and Legs:


Crochet Panda Arms:
Make x2
Round 1: With the black yarn make a MR and sc x5 into the circle. Pull tight (5).
Round 2: Inc in every stitch (10).
Round 3-8: Sc in every stitch (10). Then take a small marble sized piece of polyfill and stuff the arm. Flatten the top of the arm, with the stitch your working from in one of the corners. Now sc the top of the arm closed, fasten off and leave a tail for sewing.
Crochet Panda Legs:
Make x2
Round 1: With the black yarn, make a MR and then sc x8 into it. Pull tight.
Round 2: Inc in every stitch (16).
Round 3-4: Sc in every stitch (16).
Round 5: Dec, sc x6, dec, sc x6 (14).
Round 6: Dec, sc x5, dec, sc x5 (12). Then fasten off the yarn and leave a tail for sewing. Stuff the legs.
Crochet Panda Tail:

Round 1: Using white yarn, make a MR and make sc x6 in the circle (6).
Round 2: Inc in every stitch (12).
Round 3: Sc in every stitch (12).
Round 4: Dec, sc x2. Then repeat for the rest of the round (9). Then fasten off and leave a tail for sewing.
Assembling the Crochet Panda:

- Sew the ears at the halfway point at the head -4 rounds down. The bottom of the ear should be sewn to round 8.
- Eyes should be placed with the sc side closest to the nose, with the hdc side at the bottom and on the diagonal. In relation to the nose, the black panda eye circle should be 2 stitches from the nose (5 stitches from one circle to the other). And the safety eyes should be basically 7 stitches apart (a stitch or two is covered so it's an estimation). Sew the eye circles between rounds 10-14.
- Sew the head to the body. It should be sewn to the heads round of 24 sc and the body round of 24 sc.
- Sew each arm on each side of the panda amigurumi at round 18.
- Sew each leg between rounds 9 and 13 — they should be almost parallel to the eyes.
- Sew the tail on the back, near the base around rounds 7and 9.
And now you have a completed amigurumi panda made from my crochet panda pattern!
If you have any extra black yarn you can make my baby crochet crow pattern. Or if you have extra white and want some more fun, you can make my crochet bunny keychain pattern or my crochet tooth fairy pillow pattern!
If you finish your panda, remember to tag me on my socials! I LOVE seeing everyone's creations from my patterns!

🐌Expert Tips
- Filling Options: I used polyfill as the filling for the crochet panda pattern, but you can make the panda heavier by adding beans or beads to the bottom to create a weighted stuffed animal. This option is great if you want it to stand up or serve as a weighted comfort toy.
- Adding Weight: If you decide to add beans or beads for a weighted effect to the crochet panda pattern, consider using a small fabric pouch to contain them. This prevents the filling from shifting and helps maintain the shape of your crochet panda.
- Embellishing Details: For added character to the crochet panda pattern, consider using felt or embroidery to create facial features or patterns. This can give your crochet panda a unique personality.
🧵 Pattern FAQs
Of course! Do what works for you! The crochet panda pattern might look complex, but it is very easy and can be adapted to fit your preferences!
Usually, I work with black yarn in a naturally lit room with a bright table lamp directed at my work. I also have a set of light-up crochet hooks that I use when I need more visibility.
I've never made the crochet panda pattern with size 6 yarn, but it would probably be closer to 16-18 inches tall.
🧶More Crochet Stuffie Patterns


If you tried this Crochet Panda Pattern (or any other pattern on my website), please let me know how it went in the 📝 comments below. I'd love to hear from you!

Crochet Panda Pattern
Materials
- Polyfill
- 10 mm Safety eyes with a safety nose
- Caron One Pound - white
- Caron One Pound - black
- 4.5mm hook
- Tapestry needle
Abbreviations (US terms)
- Magic ring - mr
- Single crochet - sc
- Half double crochet - hdc
- Increase (inc) - 2 stitches in the same stitch
- Decrease (dec) - 1 stitch in 2 stitches
Notes
- Yarn Type: I used acrylic yarn for this little free crochet panda pattern. Any type of yarn would work for this panda pattern—cotton, chunky, etc. Chunky yarn would make this a GIANT stuffed panda!
- Stitch Tension: My stitches are very tight when I crochet stuffed animals. If your tension is a bit loose, try yarning under instead of over to make the stitches tighter and more closely knit.
- Size: Using a 4mm hook, the final size of the crochet panda pattern is roughly 7 inches high and 6 inches across if we include the arms.
Instructions
- For this crochet panda amigurumi pattern we will be working in rounds.Note: I have laid out the basic pattern (the one I made and followed), for the decreases and increases in the crochet panda pattern, but if you prefer not to stack your increases and decreases and feel up to it —you can distribute them over different stitches to create less visible lines or bumps.
Crochet Panda Head:
- Round 1: Using white yarn, make a MR and sc x6 into the circle. If you find it difficult making a magic ring you can chain x2 and then sc x6 into the second chain from the hook (6).
- Round 2: Inc in every sc (12).
- Round 3: Inc, sc. Then repeat until the end of the round (18).
- Round 4: Inc, sc x2. Then repeat until the end of the round (24).
- Round 5: Inc, sc x3. Then repeat until the end of the round (30).
- Round 6: Inc, sc x4. Then repeat until the end of the round (36).
- Round 7: Inc, sc x5. Then repeat until the end of the round (42).
- Round 8: Inc, sc x6. Then repeat until the end of the round (48).
- Round 9-13: Sc in every stitch in the round (48). If using a safety nose, place the nose in between rounds 11-12.
- Round 14: Inc, sc x11. Then repeat 3 more times for this round (52).
- Round 15: Sc in every stitch in the round (52).
- Round 16: Inc, sc x12. Then repeat 3 more times for this round (56).
- Round 17: Sc in every stitch in the round (56).
- Round 18: Dec, sc x5. Then repeat for the rest of the round (48).
- Round 19: Dec, sc x4. Then repeat for the rest of the round (40).
- Round 20: Dec, sc x3. Then repeat for the resto f the round (32).
- Round 21: Dec, sc x2. Then repeat for the rest of the round (24). Stuff the head.
- Round 22: Dec, sc. Then repeat for the rest of the round (16). Fasten off and weave in the tail.
Crochet Panda Body:
- Round 1: Using white yarn, make a MR and sc x8 into the circle (8).
- Round 2: Inc in every sc (16).
- Round 3: Inc, sc. Then repeat until the end of the round (24).
- Round 4: Inc, sc x2. Then repeat until the end of the round (32).
- Round 5: Inc, sc x3. Then repeat until the end of the round (40).
- Round 6: Inc, sc x4. Then repeat until the end of the round (48).
- Round 7-11: Sc in every stitch in the round (48).
- Round 12: Dec, sc x10. Repeat 3 more times for the rest of the round (44).
- Round 13: Sc in every stitch in the round (44).
- Round 14: Dec, sc x9. Repeat 3 more times for the rest of the round (40).
- Round 15: Sc in every stitch in the round (40).
- Round 16: Dec, sc x8. Repeat 3 more times for the rest of the round (36).
- Round 17: Sc in every stitch in the round (36). Fasten off the white yarn and switch to black.
- Round 18: Now with the black yarn, dec, sc x7. Repeat 3 more times for the rest of the round (32).
- Round 19: sc in every stitch in the round (32).
- Round 20: Dec, sc x6. Repeat 3 more times for the rest of the round (28).
- Round 21: Dec, sc x5. Repeat 3 more times for the rest of the round (24). Fasten off but leave a tail for sewing to the head. Stuff the body.
Crochet Panda Eyes:
- Make x2.
- Round 1: Using black yarn, ch x4. Then in the second ch from the hook make a sc. Make a sc in the next stitch. In the last ch, hdc x4. Working on the unworked side of the chain, make a sc in the next stitch. Sc x2 into the last stitch and then sl st to the first sc you made.
- Round 2: Sc in the next stitch, hdc inc (2 hdc in each hdc) x4. Then sc x1 and make the normal sc inc in the next 3 stitches. Sl st to the next stitch and fasten off the yarn, leaving a tail for sewing.
- Add the safety eyes to the end of the chain that has the single crochets.
Crochet Panda Ears:
- Make x2.
- Round 1: Using black yarn, make a MR and make sc x6 in the circle (6).
- Round 2: Inc in every stitch (12).
- Round 3-4: Sc in every stitch (12). Then fasten off the ear and leave a tail for sewing.
Crochet Arms and Legs:
Crochet Panda Arms:
- Make x2
- Round 1: With the black yarn make a MR and sc x5 into the circle. Pull tight (5).
- Round 2: Inc in every stitch (10).
- Round 3-8: Sc in every stitch (10). Then take a small marble sized piece of polyfill and stuff the arm. Flatten the top of the arm, with the stitch your working from in one of the corners. Now sc the top of the arm closed, fasten off and leave a tail for sewing.
Crochet Panda Legs:
- Make x2
- Round 1: With the black yarn, make a MR and then sc x8 into it. Pull tight.
- Round 2: Inc in every stitch (16).
- Round 3-4: Sc in every stitch (16).
- Round 5: Dec, sc x6, dec, sc x6 (14).
- Round 6: Dec, sc x5, dec, sc x5 (12). Then fasten off the yarn and leave a tail for sewing. Stuff the legs.
Crochet Panda Tail:
- Round 1: Using white yarn, make a MR and make sc x6 in the circle (6).
- Round 2: Inc in every stitch (12).
- Round 3: Sc in every stitch (12).
- Round 4: Dec, sc x2. Then repeat for the rest of the round (9). Then fasten off and leave a tail for sewing.
Assembling the Crochet Panda:
- *Sew the ears at the halfway point at the head -4 rounds down. The bottom of the ear should be sewn to round 8.
- *Eyes should be placed with the sc side closest to the nose, with the hdc side at the bottom and on the diagonal. In relation to the nose, the black panda eye circle should be 2 stitches from the nose (5 stitches from one circle to the other). And the safety eyes should be basically 7 stitches apart (a stitch or two is covered so it's an estimation). Sew the eye circles between rounds 10-14.
- *Sew the head to the body. It should be sewn to the heads round of 24 sc and the body round of 24 sc.
- *Sew each arm on each side of the panda amigurumi at round 18.
- *Sew each leg between rounds 9 and 13 — they should be almost parallel to the eyes.
- *Sew the tail on the back, near the base around rounds 7and 9.
- And now you have a completed amigurumi panda made from my crochet panda pattern!
.


Eliza Armstrong says
So I got to the head and it says weave the tail in, but it doesn’t say the sphere closes as it leave 16 stitches. Is the supposed to be the bottom, the part you sew on the body or was it supposed to be weaved closed?
Kimberly Arenas says
You leave the hole open since the hole will be covered by the body - if you want you can always add an additional round and then close it completely if you are more comfortable with that.