
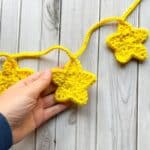
Unleash your creativity this holiday season with my easy Crochet Star Garland Pattern! Transform simple crochet stitches into delightful stars that can be used for festive decorations or heartfelt gifts.
Crocheting a star might seem intimidating, but I’m here to simplify the process with my Crochet Star Garland Pattern! You’ll start by making individual stars and then crochet them together using chains.
While many crochet shapes like squares, rectangles, circles, ovals and crochet triangles are easy to master, stars can be a bit more challenging. With five points extending in all directions, it’s no wonder they can be confusing.
To create the crochet star in this pattern, you'll need to know a few basic stitches: magic ring, single crochet, double crochet, triple crochet, chains, and slip stitches. Once you’ve got those down, you're all set!
If you are wanting to make larger stars, you can use my crochet star coaster pattern and chain them together.
If you’re comfortable with these stitches, you can craft multiple stars and transform them into a stunning crochet star garland.
Jump to:
✏️ Things To Note:
- Yarn Choice: While I used acrylic yarn for this project, feel free to choose any yarn type you prefer. Just be mindful of the yarn's thickness and make sure to select an appropriate hook size to match.
- Stars Versatility: This pattern is designed for a crochet star garland, but the stars themselves can stand alone as a decorative piece. If you prefer, you can skip the garland and use the stars in other ways, such as adding them to ornaments, greeting cards, or any other project that suits your style. The possibilities are endless, and you can let your creativity guide you. You can use them as an applique like I do with hearts for my crochet heart pillow pattern.
- Blocking: After crocheting the stars, I strongly recommend blocking them. Crochet can often have a tendency to create soft, rounded shapes, and blocking helps to define the edges and give the stars a sharper, more crisp look. Blocking will improve the overall appearance and structure of your work, making the stars stand out even more. It’s a simple step that can make a big difference in the final result, especially if you’re aiming for a polished, professional finish.
🪡 Materials Needed
- Any yellow yarn
- 1 4mm hook
- 1 tapestry needle
💭Abbreviations to Remember (US Terms)
- Magic ring - mr
- Chain - ch
- Single crochet - sc
- Double crochet - dc
- Triple crochet - tr
- Slip stitch - sl st
🧋Variations
- Once you get the crochet small star pattern down, you can make them in any color!
- Add them to a garland for room decor or to decorate your Christmas tree for the holidays.
- You can also applique them onto anything, like blankets, pillows, and sweaters! The possibilities are endless!
🍵Instructions for Crochet Star Garland Pattern
The crochet star garland pattern is worked in rounds.
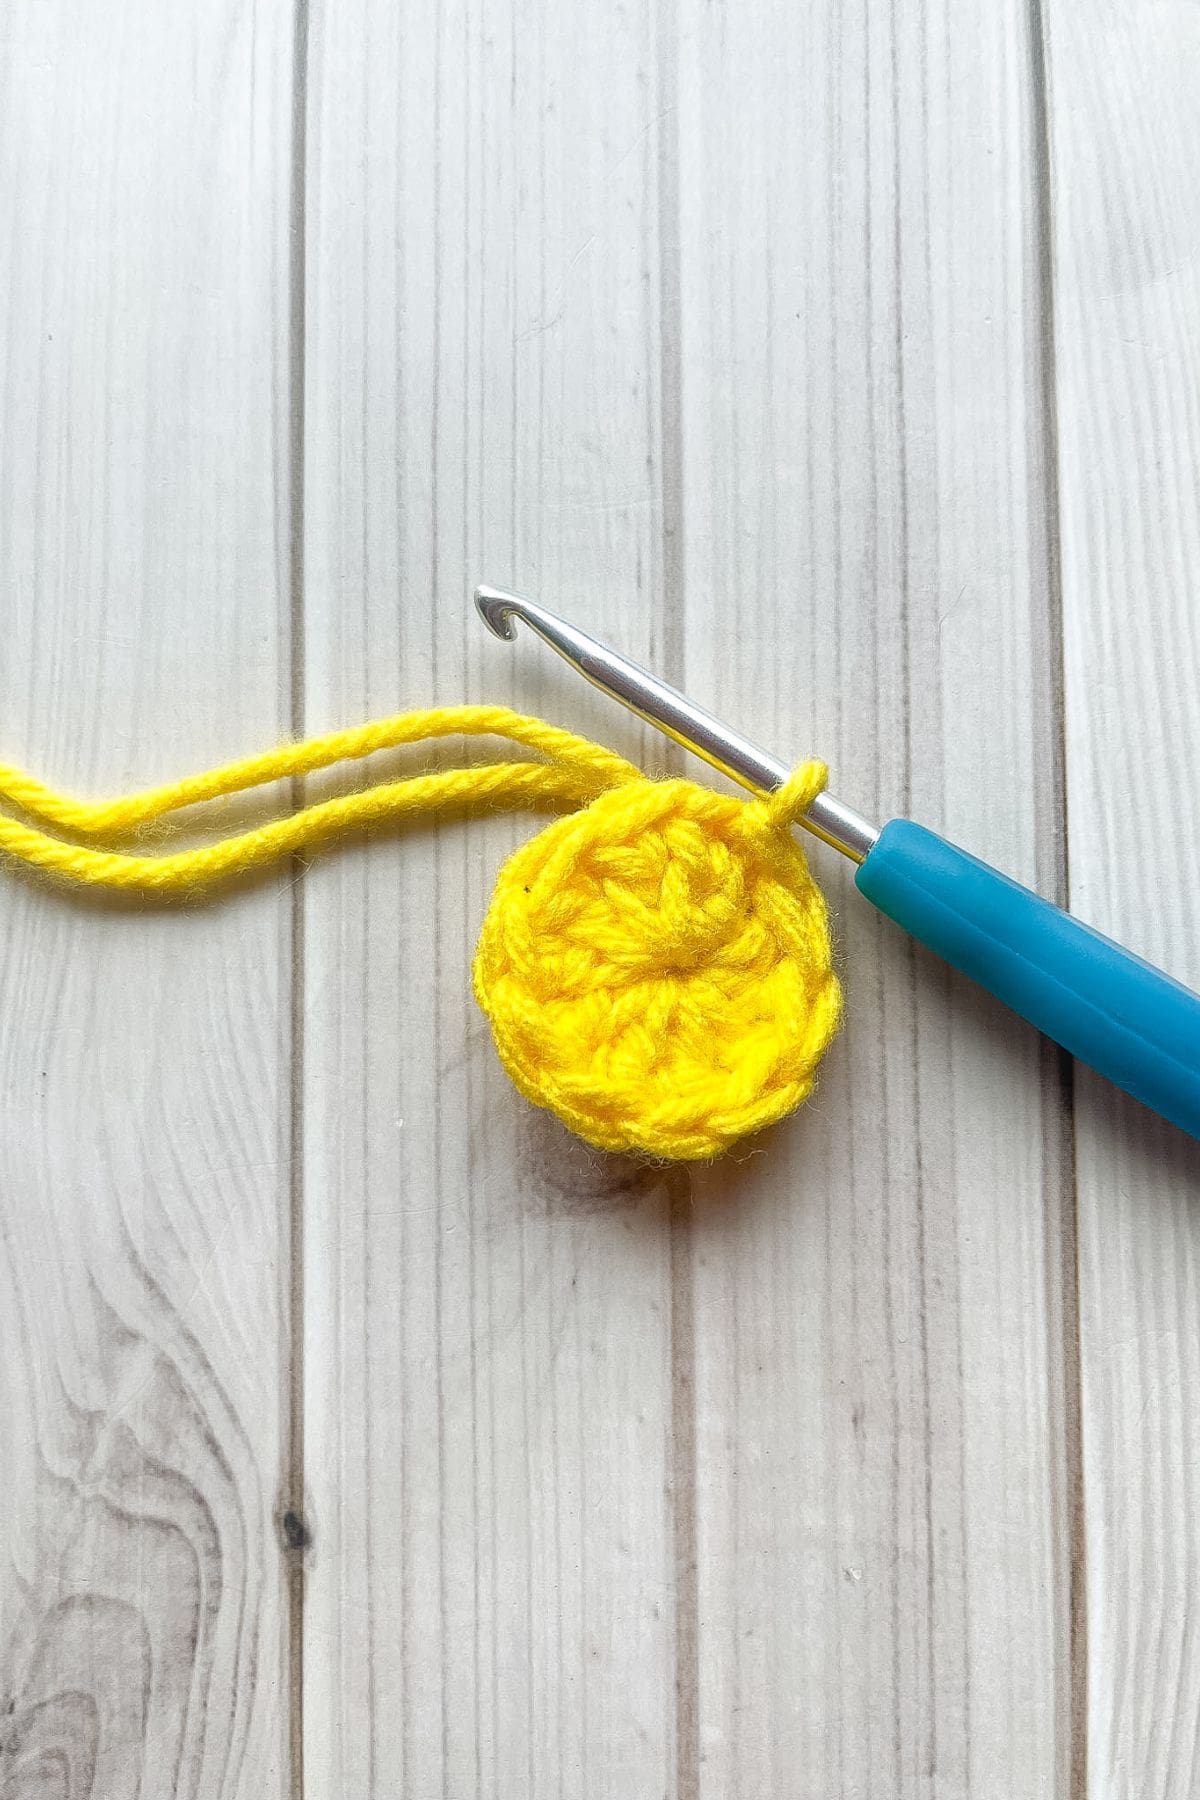
Round 1: Using yellow yarn, make a mr, and ch x2 (this does NOT count as a double crochet). Then dc x10 into the circle. Sl st to the FIRST dc (10).
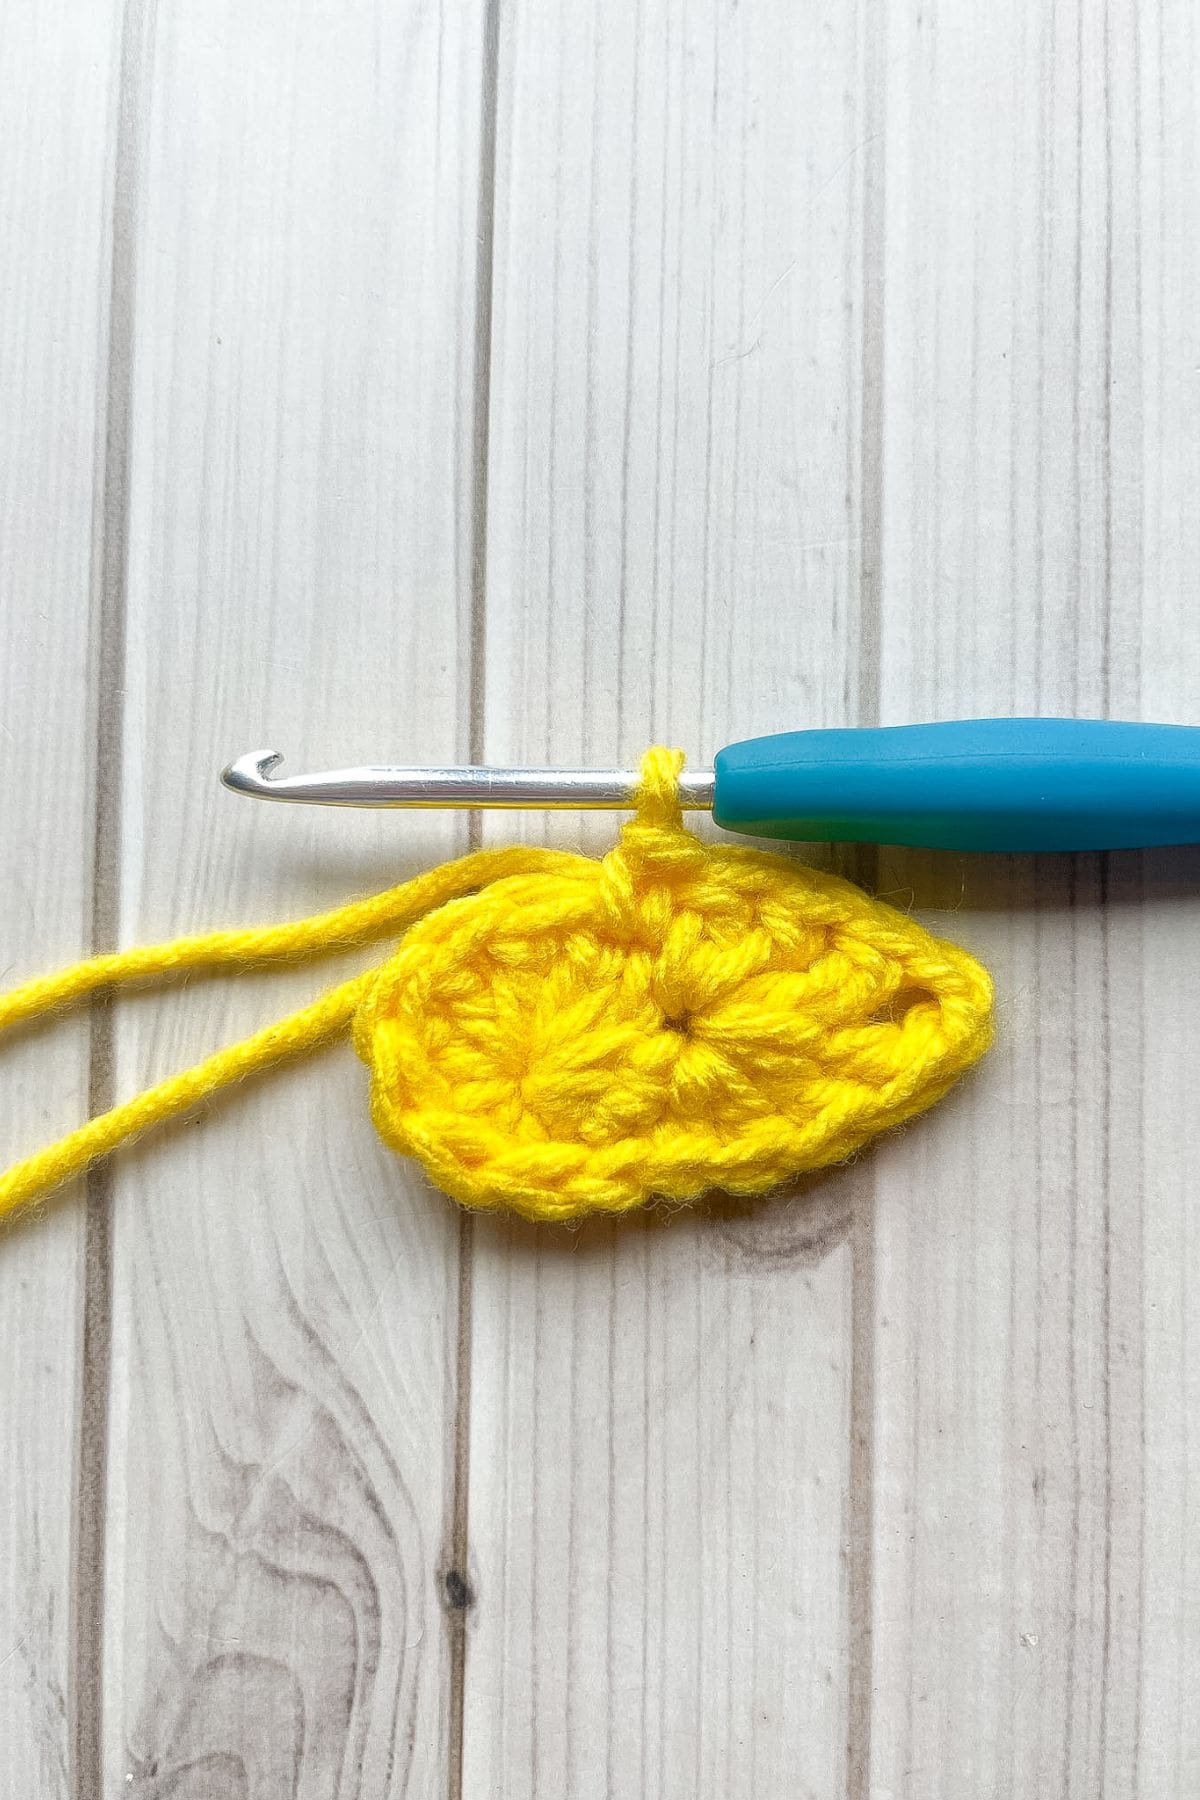
Round 2: *Sc in the next stitch. Then in the following stitch: (dc x2, tr, ch x2, tr, dc x2) in one stitch.
Then repeat from * 4 more times. After you are done making the 5th star arm, sl st to the first sc in the round.
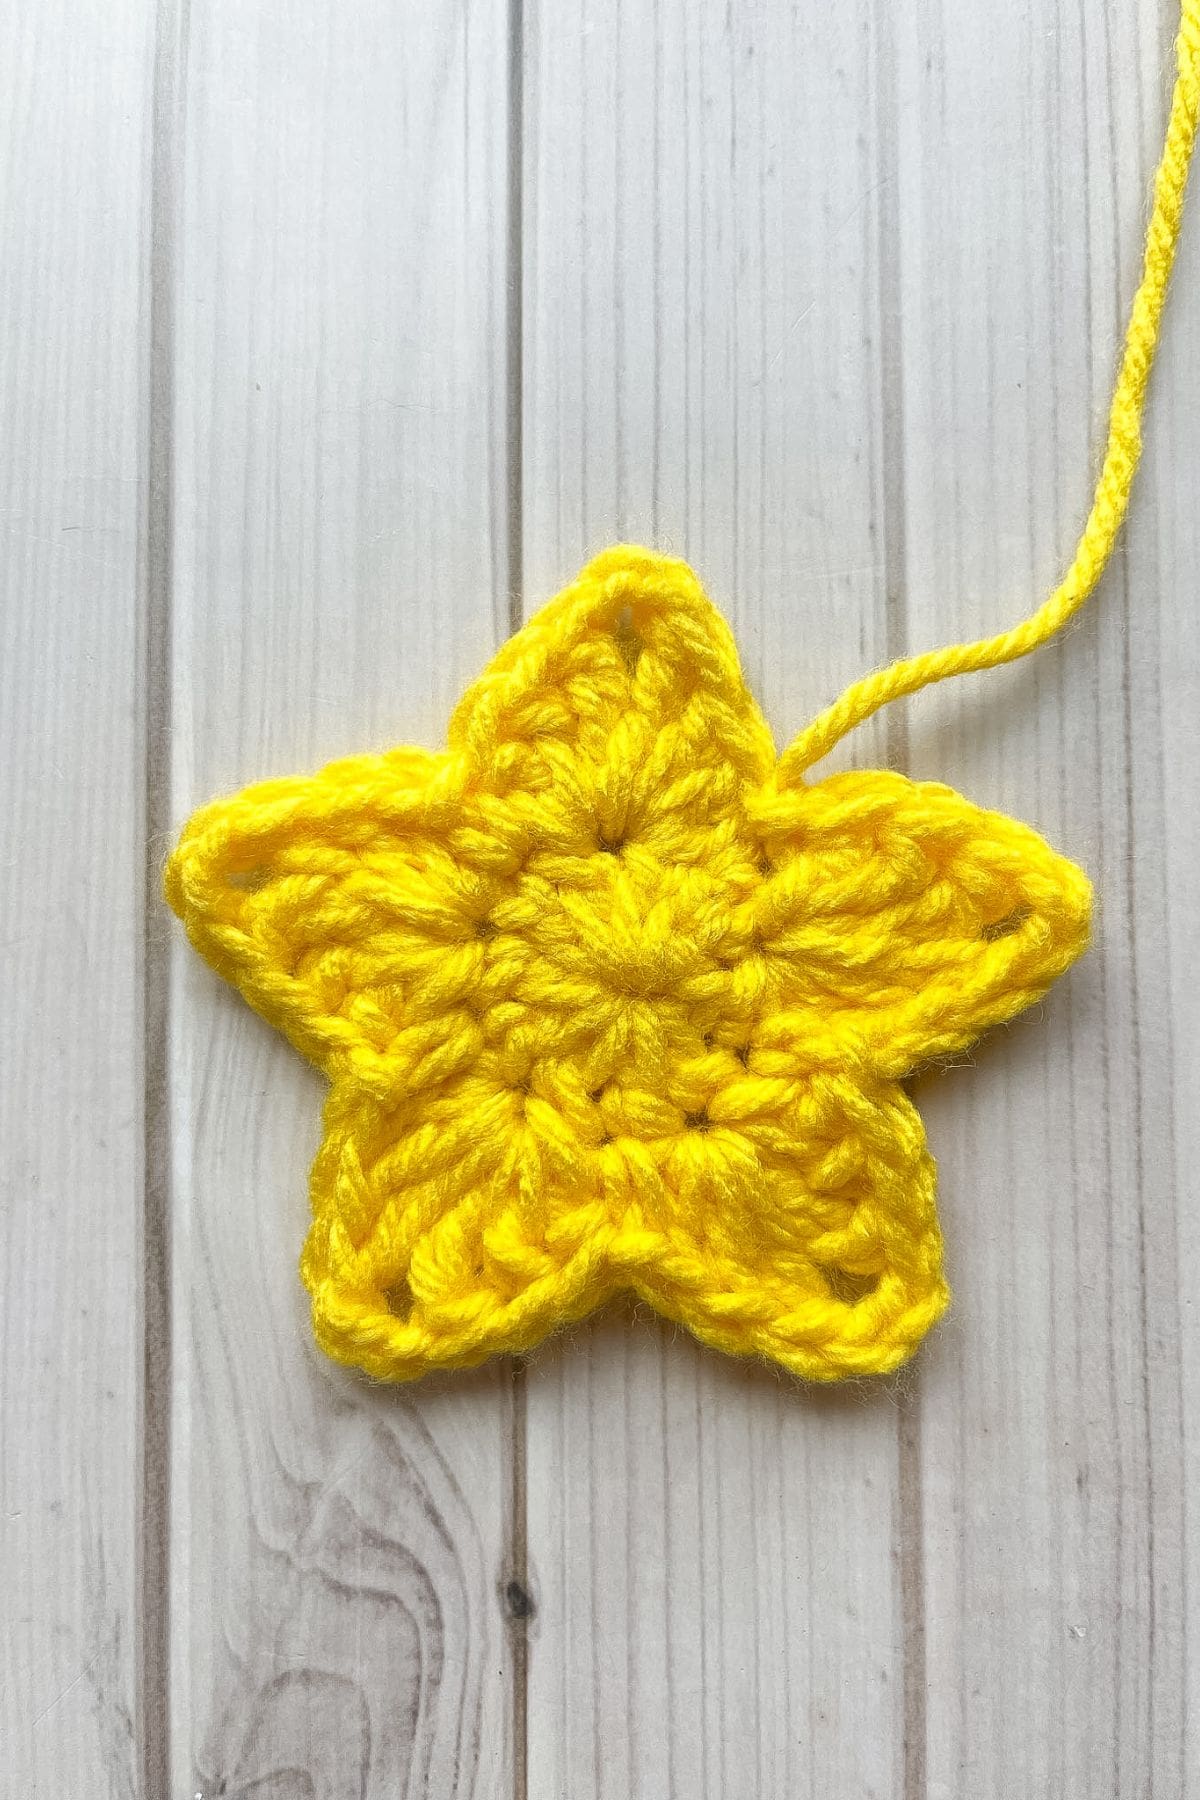
Fasten off and weave in the tails.
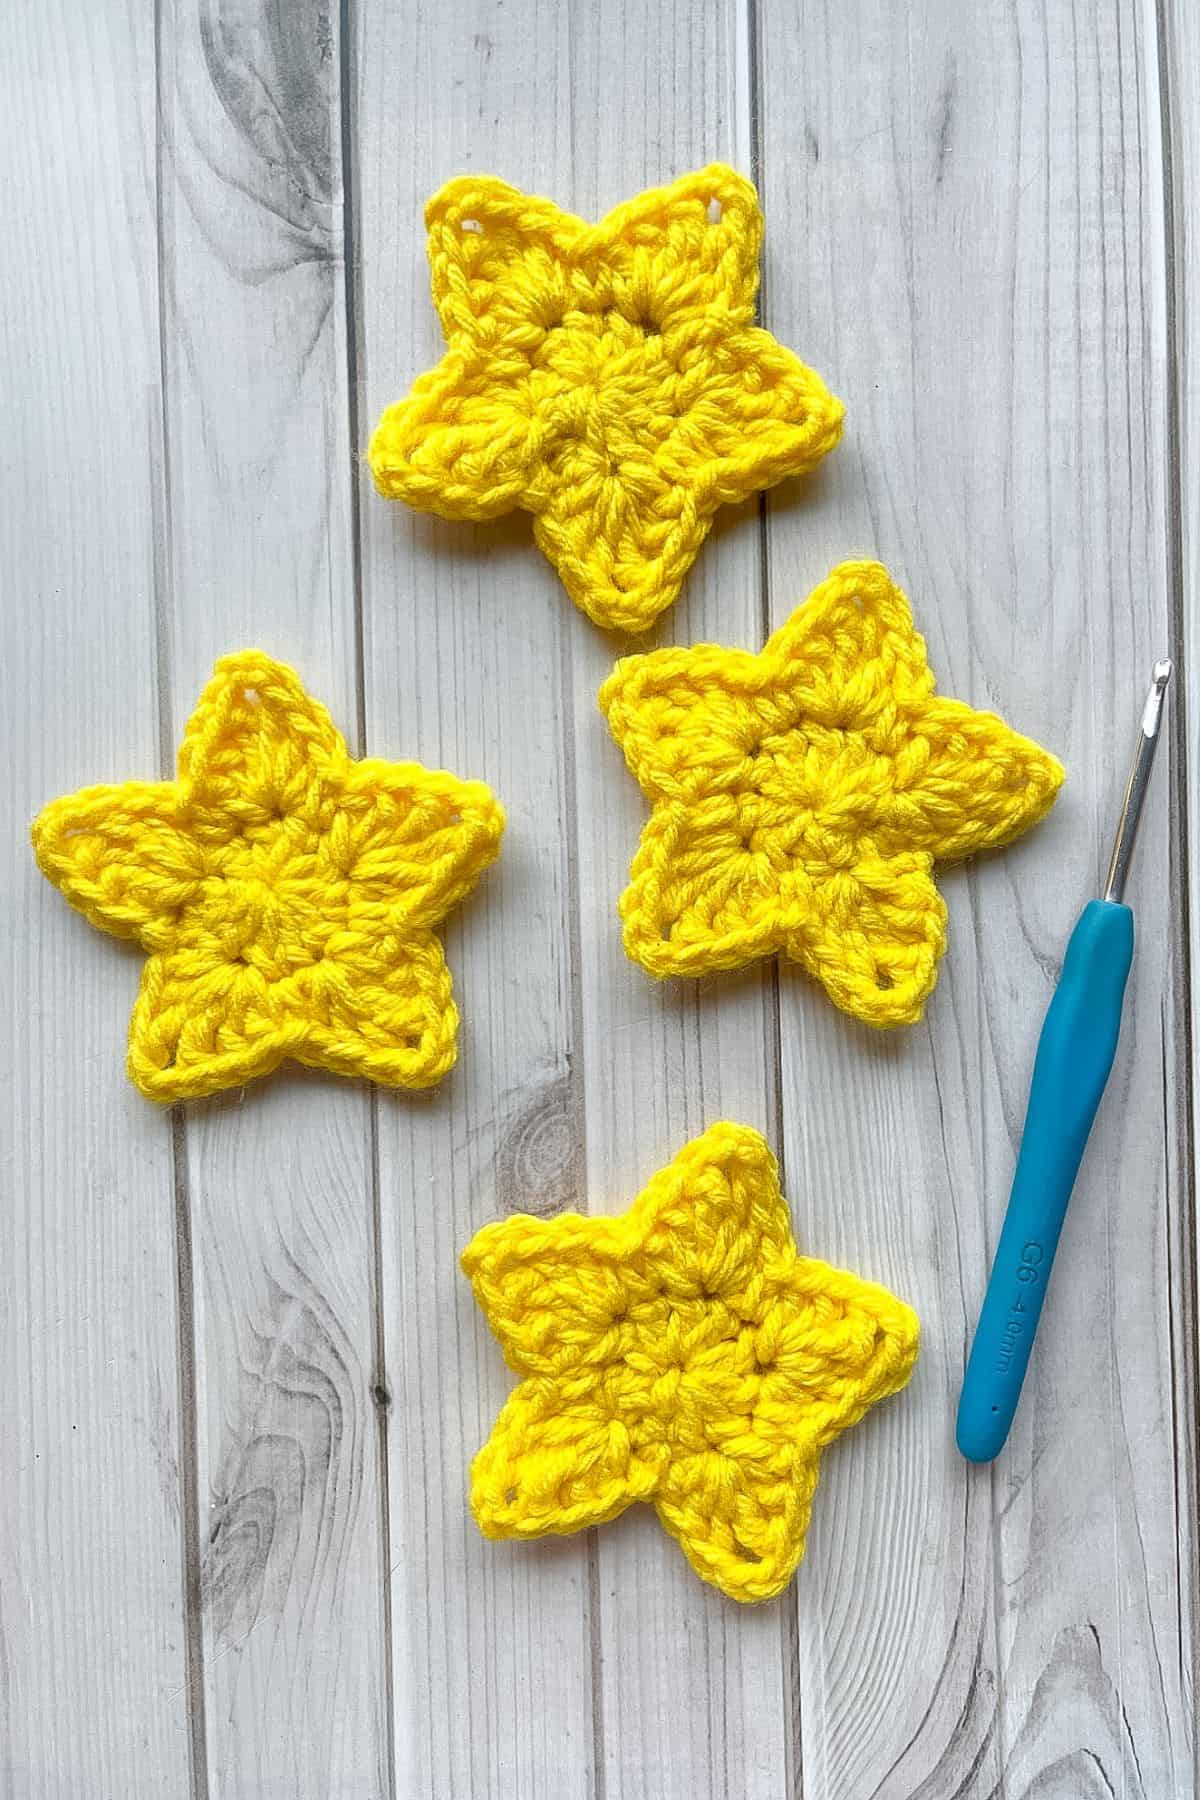
Block the stars if you would like them to be more star-like in shape otherwise they will be a bit rounded at the points.
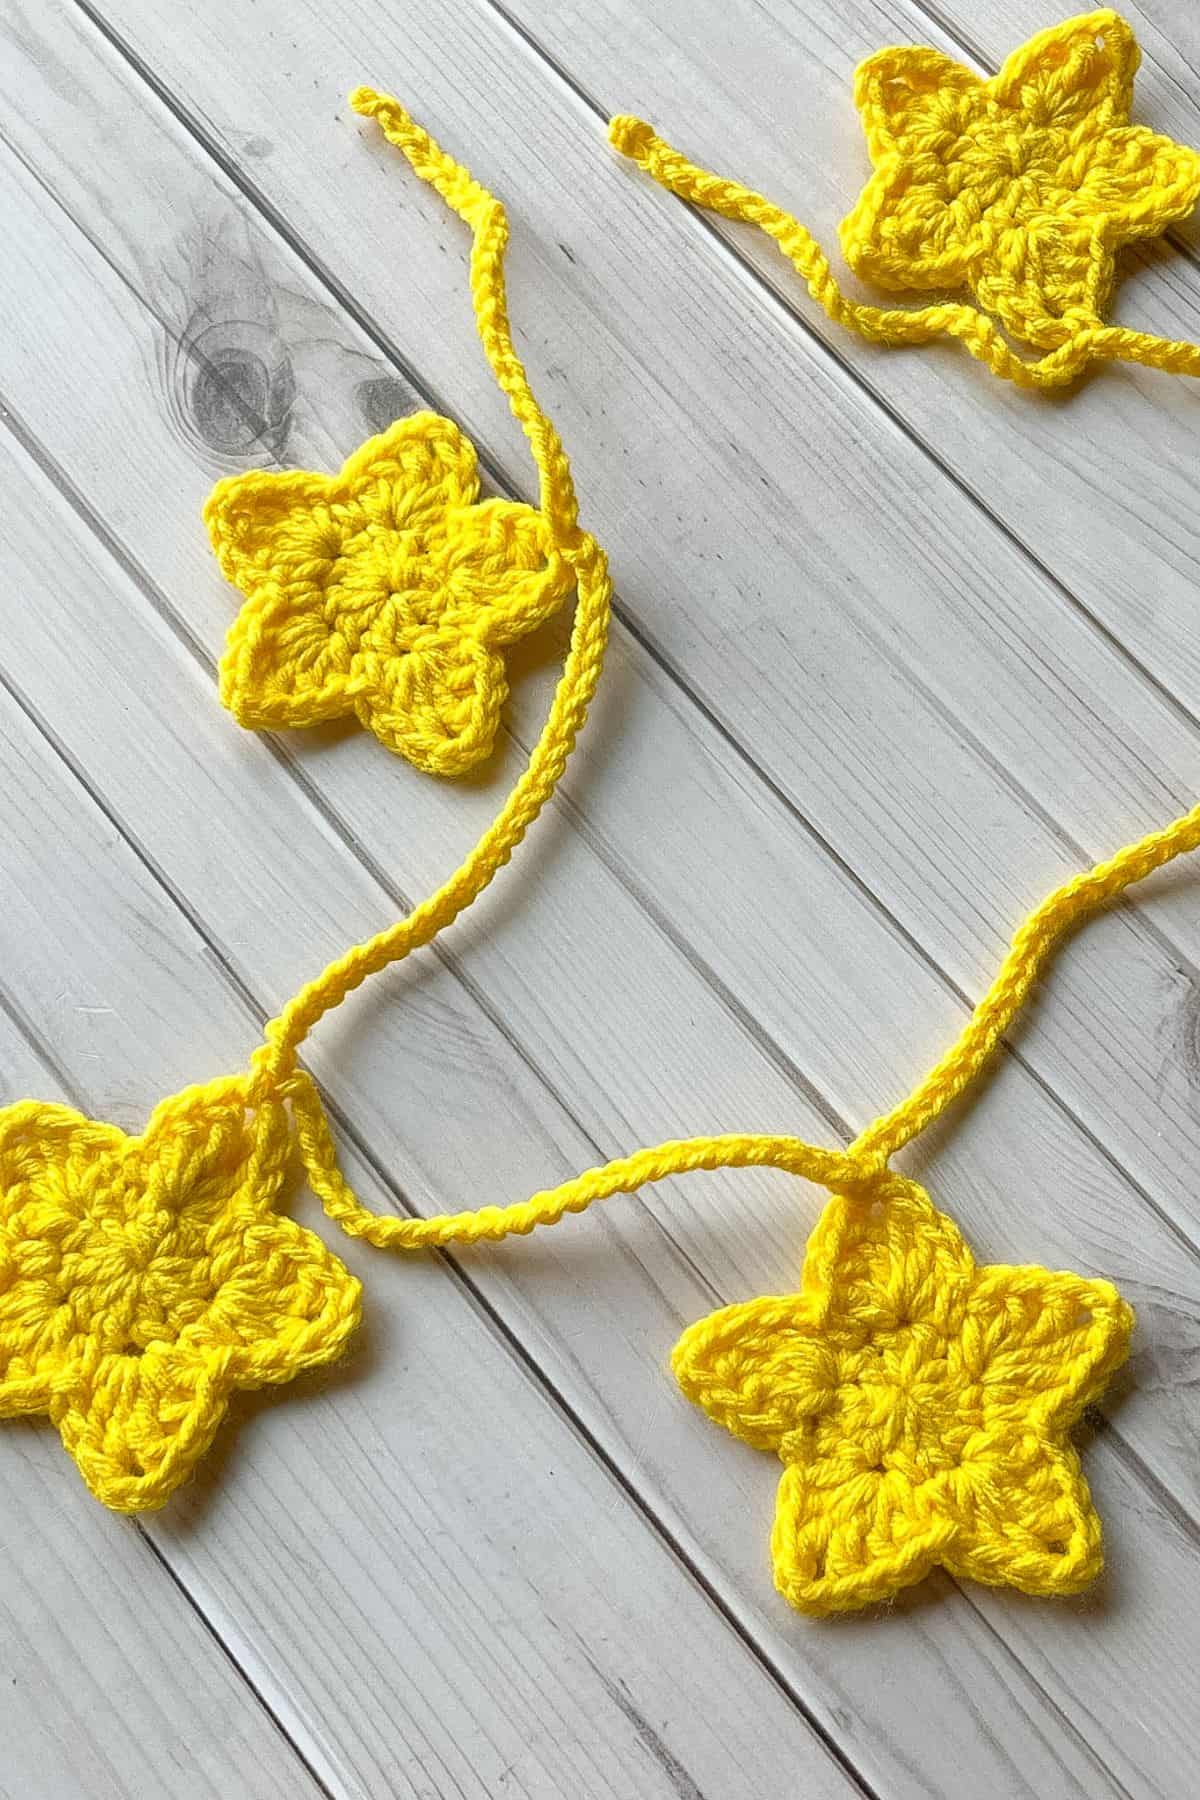
To create a beautiful crochet star garland, start by crocheting as many stars as you want. Once your stars are ready, you’ll need to crochet a chain to connect them.
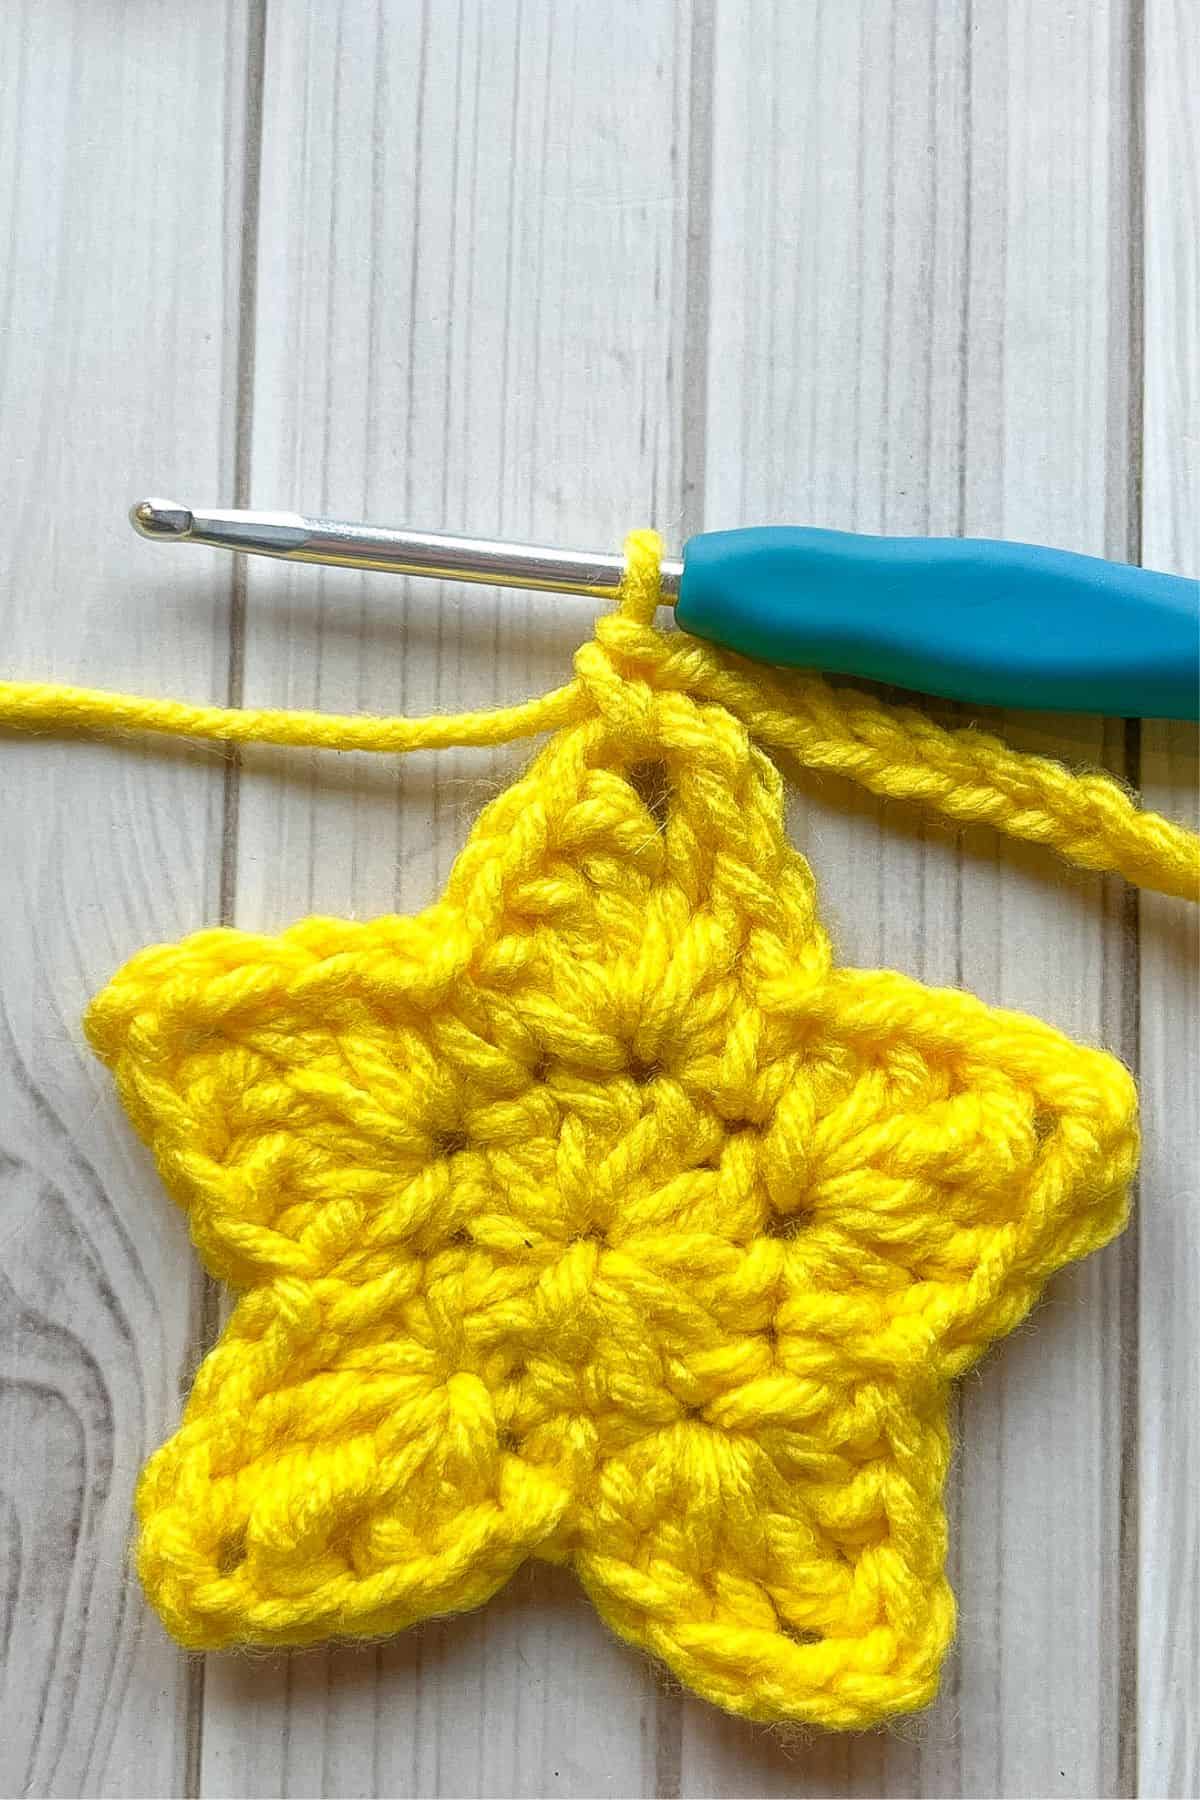
The number of chs between each star is up to you. I spaced mine out with 25 chs between each star for a balanced look.
To attach each star to the chain, simply make a sc in the ch-sp of one of the star points. This will securely fasten the star to the garland and keep them evenly spaced. You can adjust the spacing between stars based on your preferences, whether you want them closer together or more spread out for a different visual effect.
This method allows for flexibility, so feel free to customize the length and style of your garland.
Once you've connected all the stars, you'll have a charming, handmade decoration perfect for any occasion. Whether you're making it for a holiday, party, or just to brighten up a space, this star garland will add a lovely touch to your home or event.
If you are looking for other celestial crochet patterns, check out my crochet moon granny square and crochet sun granny square. I used them as pockets for a Rapunzel themed cardigan for a friend, but they can be used for any project you have in mind! I also have a crochet moon pillow pattern that would be perfect decor for couches.

🐌Expert Tips
- Blocking Techniques: If you don’t have a blocking board, don’t worry! You can still block your crochet stars effectively using a few simple tools. Just grab some sewing pins, a folded towel, or a foam mat. Pin each star into place on your chosen surface to help it maintain its shape as it dries. This method works great for giving your stars a defined, crisp look.
- Color Combinations:Get creative with color combinations to give your project a personalized touch. For a festive vibe, you could use traditional colors like red and green for a Christmas theme or go for soft pastel hues to create a light, airy spring garland. The beauty of this project lies in its versatility, so feel free to mix and match colors based on the season, occasion, or your preferred color palette.
- Adding More Texture: For an extra layer of visual appeal, consider adding texture to your stars. Incorporating puff stitches or a decorative edging can enhance the overall design and make your stars stand out even more. These simple additions can elevate your crochet project, making it even more dynamic and interesting. Whether you choose to add extra texture for a more detailed look or keep it simple, these small tweaks can make a big difference in the final result.
🧵Pattern FAQs
Blocking isn't required, but it’s highly recommended. It helps to give your crochet star a sharper, more defined shape, which can be difficult to achieve with crocheting alone. Blocking ensures the edges are crisp and neat, enhancing the overall appearance and making your stars look more polished.
Crochet stars can be used in a variety of projects. I’ve used them for garlands and baby blankets, but the options are endless! They can be added to ornaments, greeting cards, home decor, or even clothing accessories. Get creative and incorporate them wherever you want a little sparkle!
While I haven't tried adding rows to make the star bigger, it’s definitely possible to experiment. If you want a larger star, try using thicker yarn and a bigger hook. This will allow you to create a more substantial version while maintaining the star’s shape and structure.

🧶More Crochet Garland Patterns
If you tried this Crochet Star Garland Pattern (or any other pattern on my website), please let me know how it went in the 📝 comments below. I'd love to hear from you!
Crochet Star Garland Pattern
Materials
- Any yellow yarn
- 4mm hook
- Tapestry needle
Abbreviations (US terms)
- mr = Magic ring
- ch = Chain
- sc = Single crochet
- dc = Double Crochet
- tr = Triple Crochet
- sl st = Slip Stitch
Notes
- Used acrylic yarn, but any type works; follow size and hook guidelines.
- Can be made as a star garland or standalone stars.
- Blocking is recommended to soften edges.
- Experiment with colors for decor, Christmas trees, or appliques on blankets and pillows.
- Endless creative possibilities!
Instructions
- The crochet star garland pattern is worked in rounds.
- Round 1: Using yellow yarn, make a mr, and ch x2 (this does NOT count as a double crochet). Then dc x10 into the circle. Sl st to the FIRST dc (10).
- Round 2: *Sc in the next stitch. Then in the following stitch: (dc x2, tr, ch x2, tr, dc x2) in one stitch.Then repeat from * 4 more times. After you are done making the 5th star arm, sl st to the first sc in the round.
- Fasten off and weave in the tails.
- Block the stars if you would like them to be more star-like in shape.
- To create a beautiful crochet star garland, start by crocheting as many stars as you want. Once your stars are ready, you’ll need to crochet a chain to connect them.The number of chs between each star is up to you. I spaced mine out with 25 chs between each star for a balanced look.To attach each star to the chain, simply make a sc in the ch-sp of one of the star points. This will securely fasten the star to the garland and keep them evenly spaced. You can adjust the spacing between stars based on your preferences, whether you want them closer together or more spread out for a different visual effect.This method allows for flexibility, so feel free to customize the length and style of your garland.

Leave a Reply