
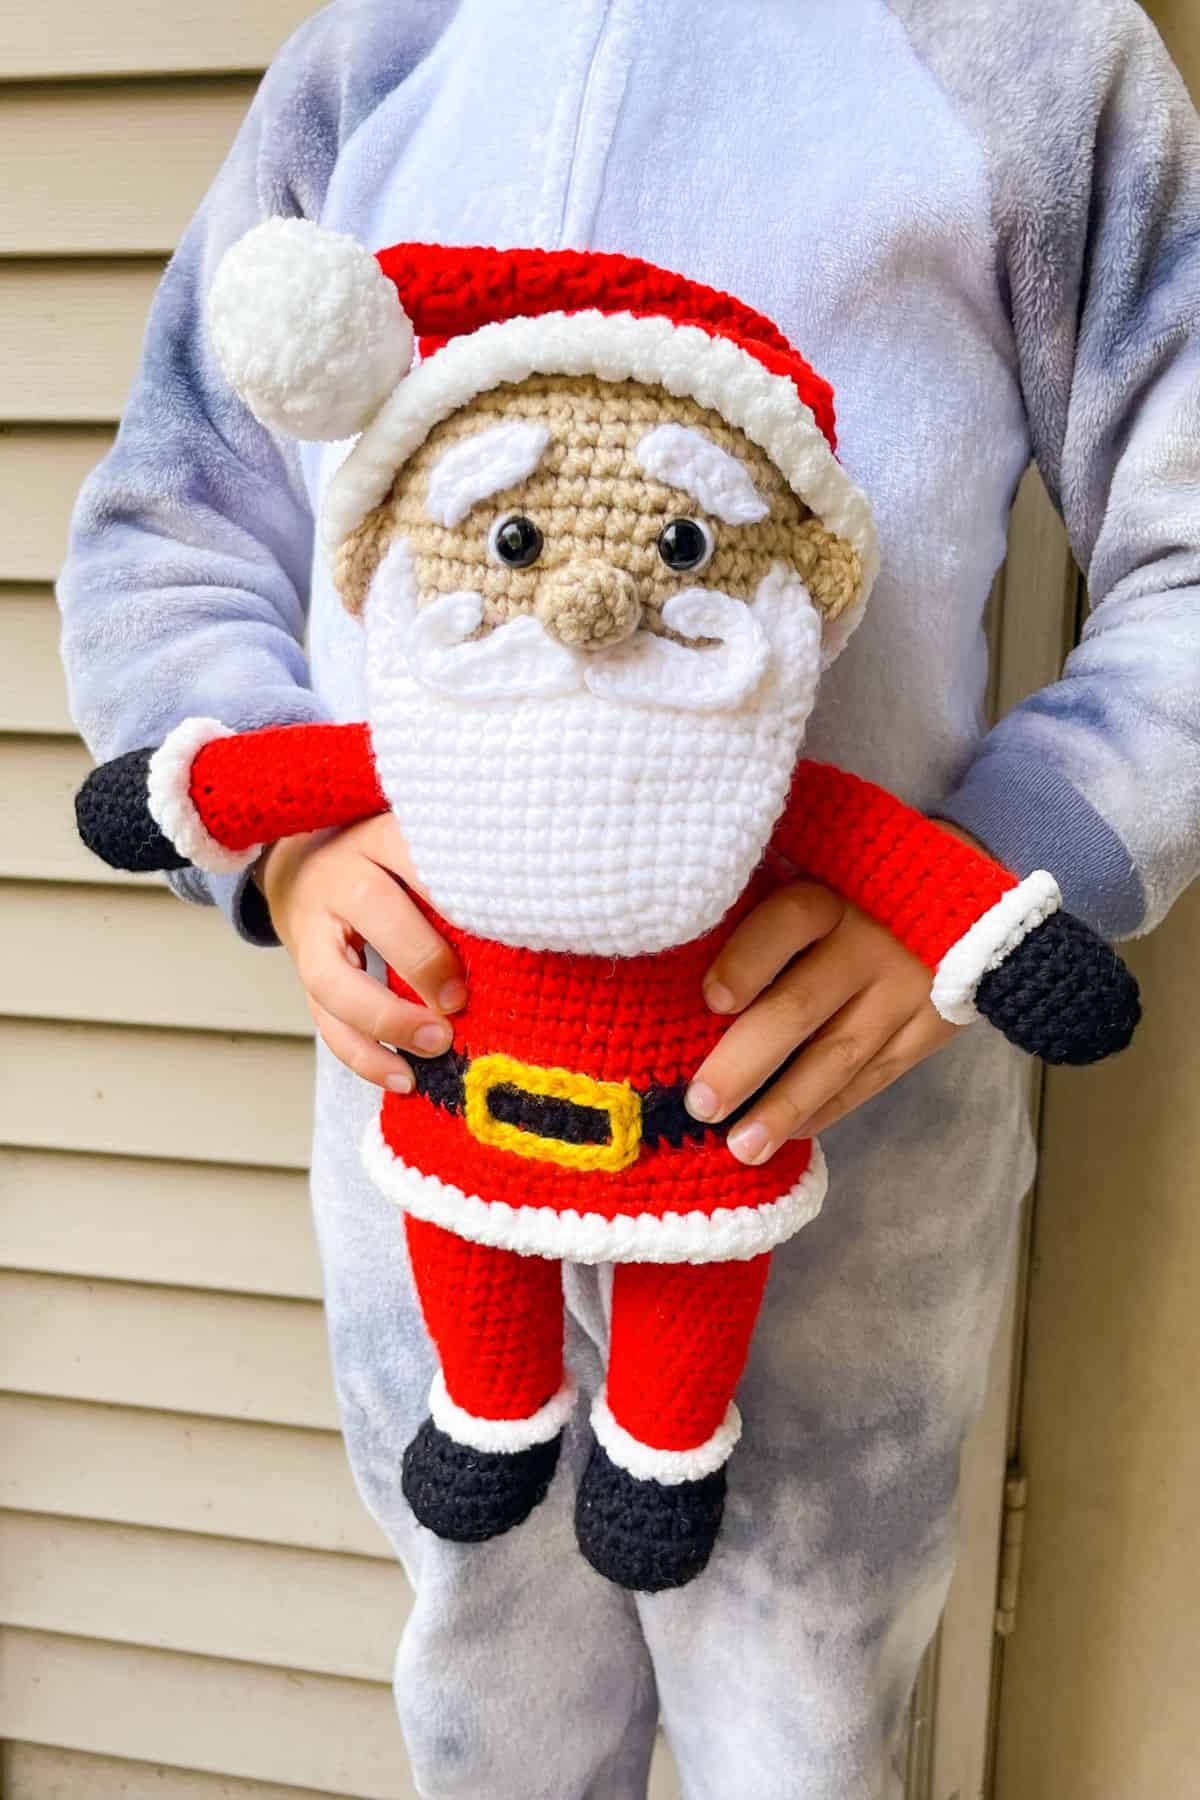
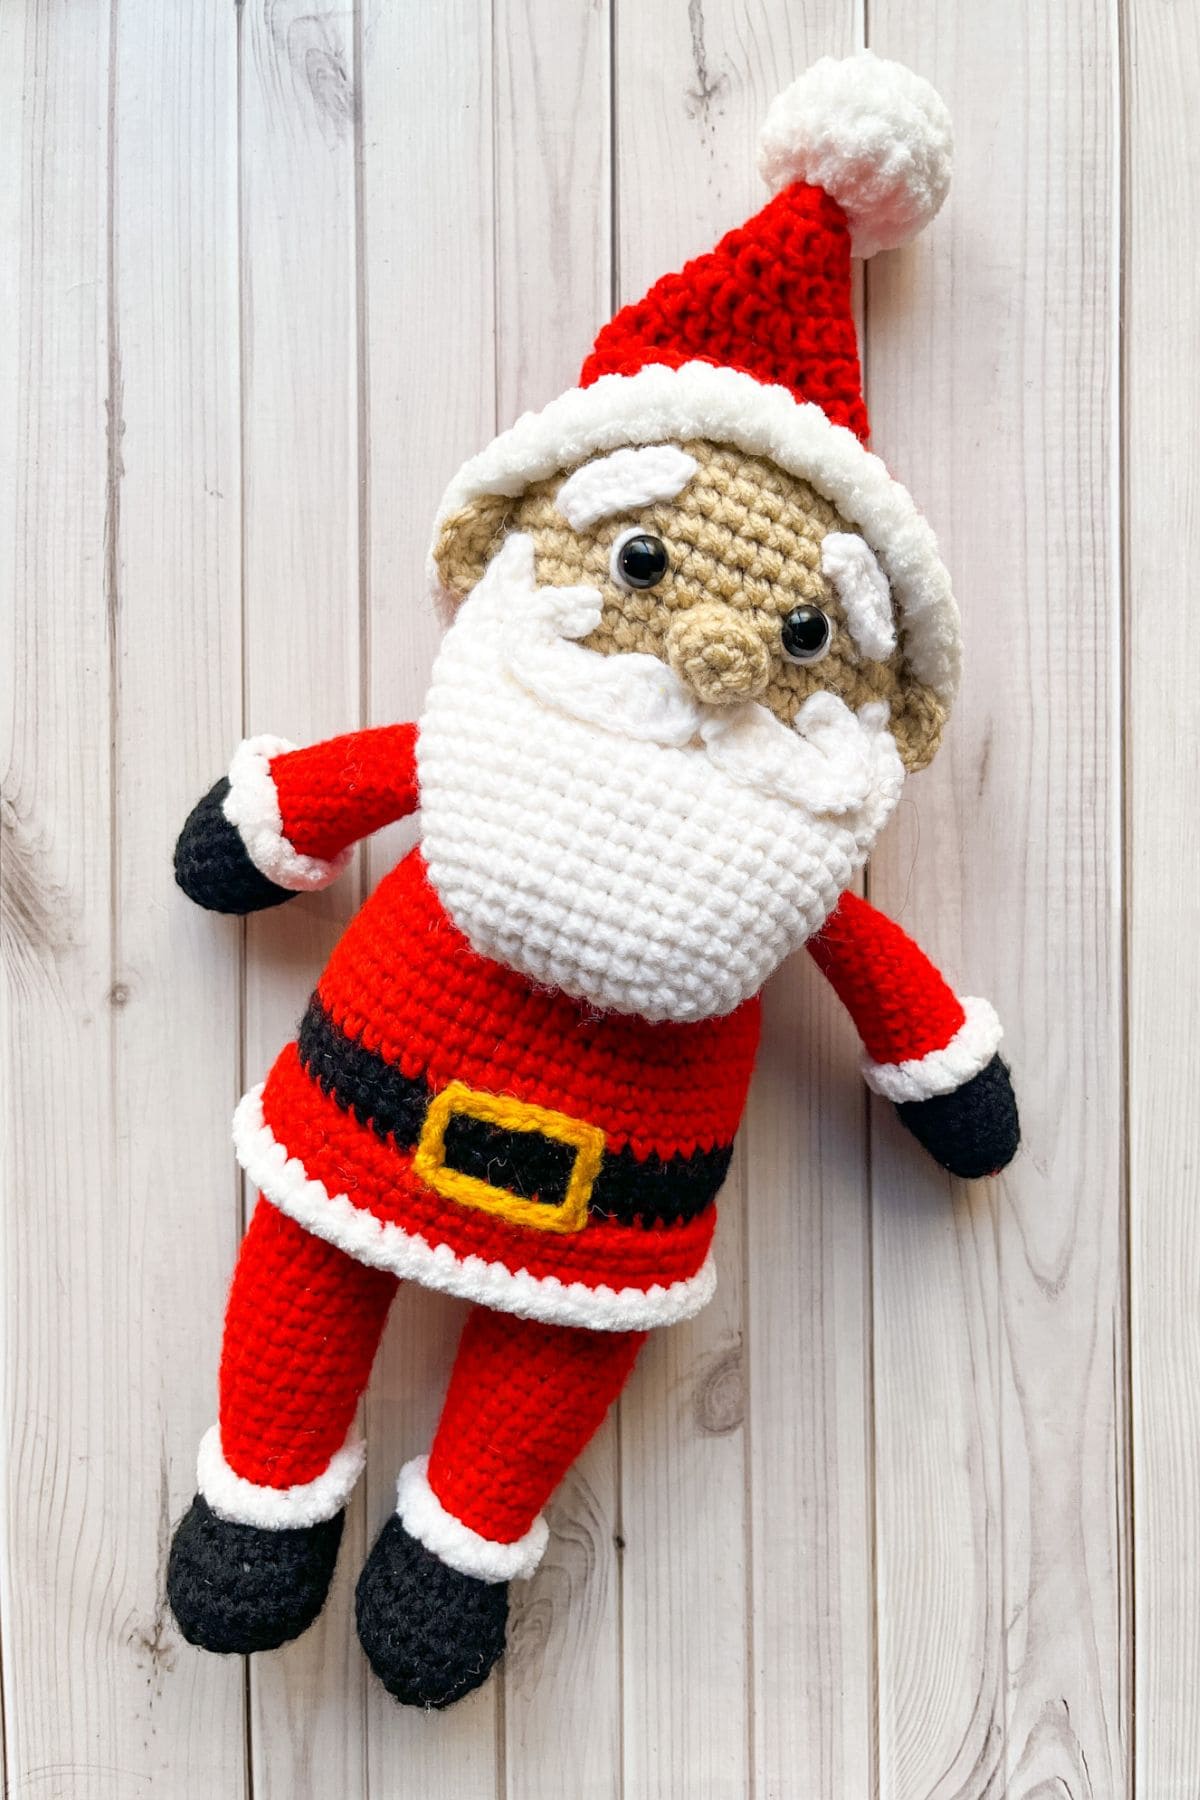
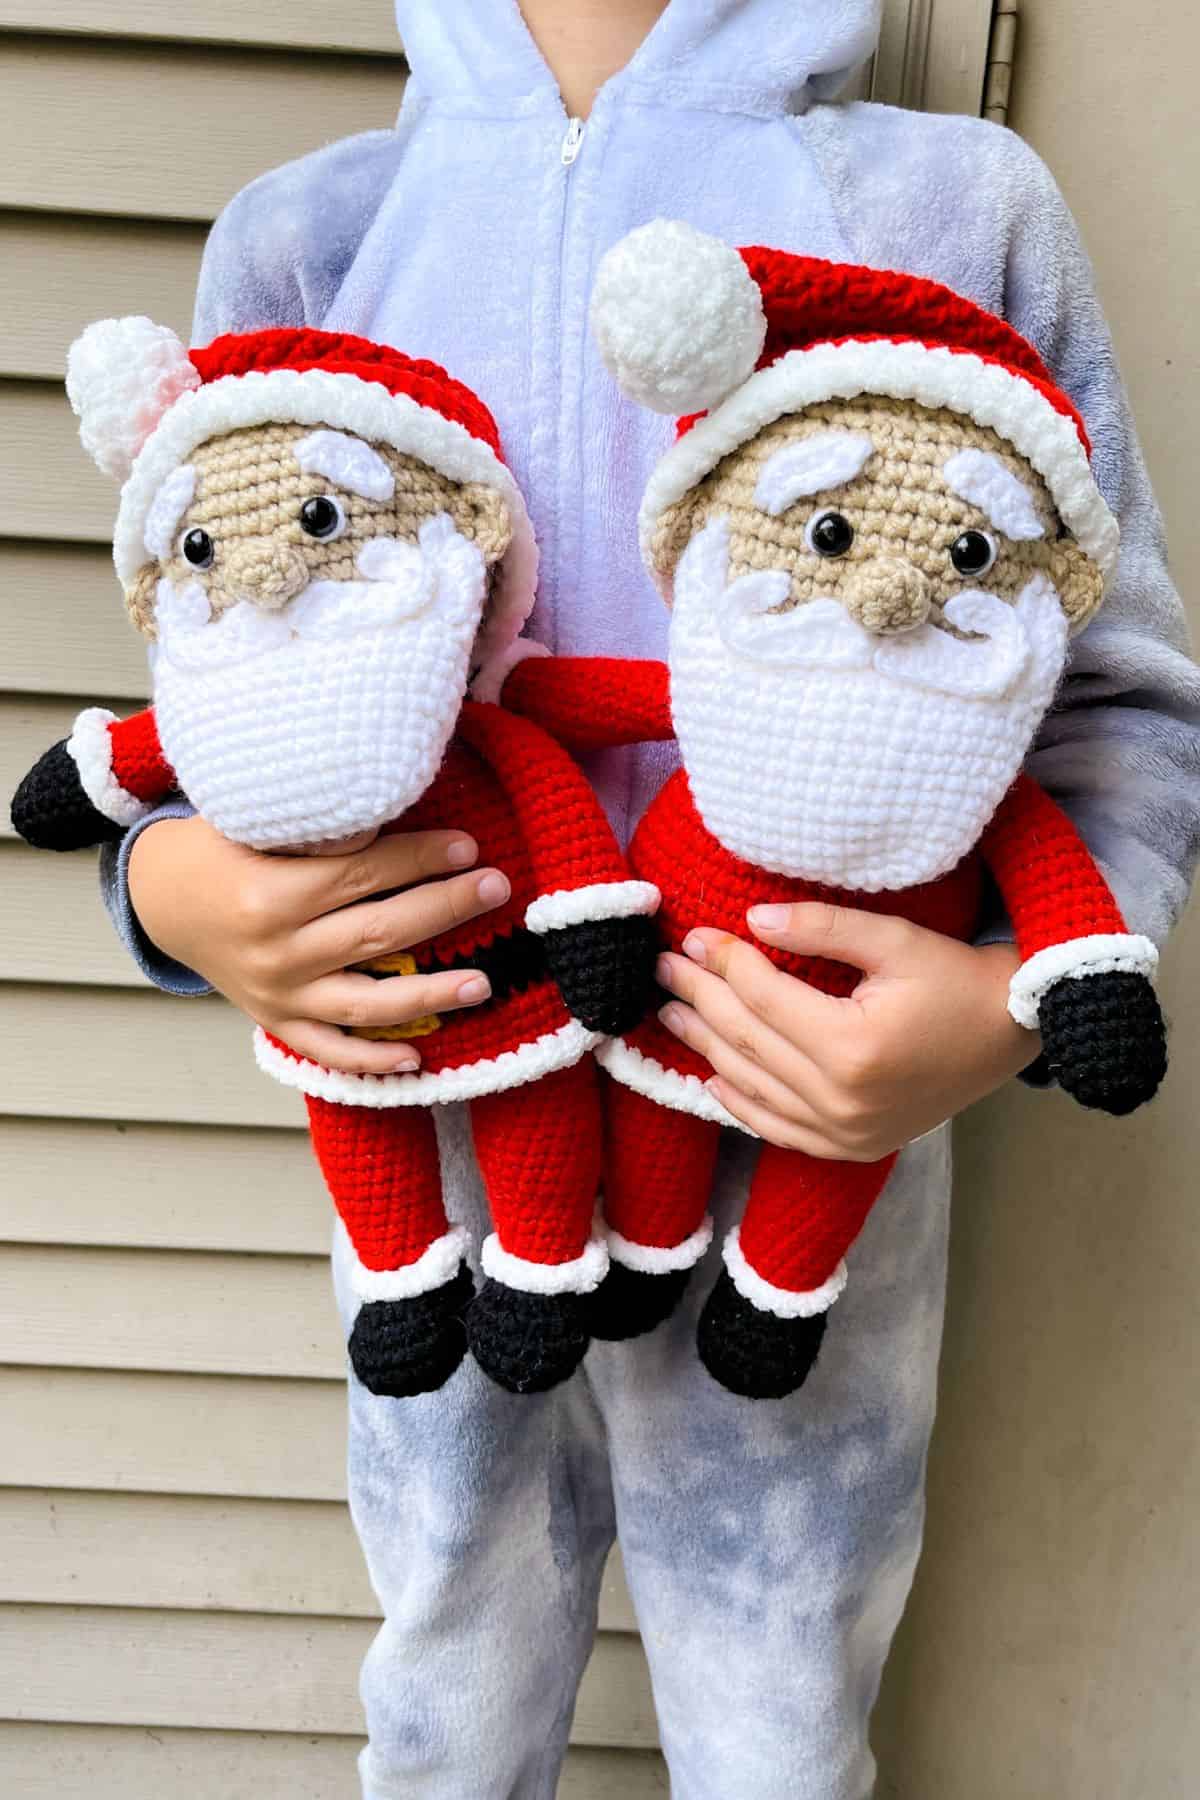
Get into the holiday spirit by making my free crochet Santa Claus pattern! This jolly crochet Christmas pattern is perfect to use as house decor or as a plushie toy for a loved one!
I love Christmas. Usually I skip right over Thanksgiving and have my house decorated for the holidays in early November. I try to wait until our Halloween jack-o-lanterns are decaying on our doorstep —which isn’t long since I live in a very wet area.
This year I was so focused on Halloween and fall crochet patterns, like my recently released crochet chestnut pattern and my crochet bat granny square pattern that I COMPLETELY forgot about Christmas! Yes, I started crocheting the crochet Santa Claus pattern halfway through October, but for a pattern designer, that tends to be a little late since many people are prepping markets months in advance!
Regardless, this free crochet Santa pattern is finished and can now join some of my other crochet Christmas patterns and decor. Like my crochet star garland pattern and my crochet tree coaster pattern.
Enough talking and let's begin making this crochet Santa Claus pattern!
Jump to:
✏️ Things To Note:
- Size: The Santa amigurumi pattern is roughly 14inches without a hat. If you use chunky yarn, realize that the finished crochet santa claus will be a few feet tall.
- Yarn under: I am starting to make my amigurumi in yarn under, the crochet Santa Claus pattern is no exception. I like the way it looks compared to traditional crochet. If you have trouble yarning under, you can make the pattern normally, but realize the proportions will be off since yarn under results in tighter rounds.
- Sewing: The legs, belly, and head of the crochet Santa Claus pattern is made in just one piece. Everything else is sewn on, make sure your amigurumi sewing skills are good, otherwise you might find it difficult.
🪡 Materials Needed
- Bernat Baby Blanket Yarn - white
- Caron One Pound - lace
- Caron One Pound - red
- Caron One Pound - white
- Caron One Pound - black
- Caron One Pound - sunflower
- 12mm safety eyes
- Tapestry needle
- Polyfil
- 4mm hook
- Stitch markers
💭Abbreviations to Remember (US terms)
- Magic ring - mr
- Chains - ch
- Single crochet - sc
- Half double crochet - hdc
- Double crochet - dc
- Slip stitch - sl st
- Increase - inc
- Decrease - dec
- Back loop only - blo
- Front loop only - flo
*If you see a stitch abbreviation with "x" after it, it means how many times you do that stitch in the following amount of stitches. For example: sc x6 would mean you make a single crochet in the next 6 stitches. Inc x2 means you make an inc in the next 2 stitches.
🍵Instructions for Crochet Santa Claus Pattern
The crochet Santa Claus pattern is made mostly in the round in yarn under single crochet unless specified.
Crochet Arm:
Make x2.
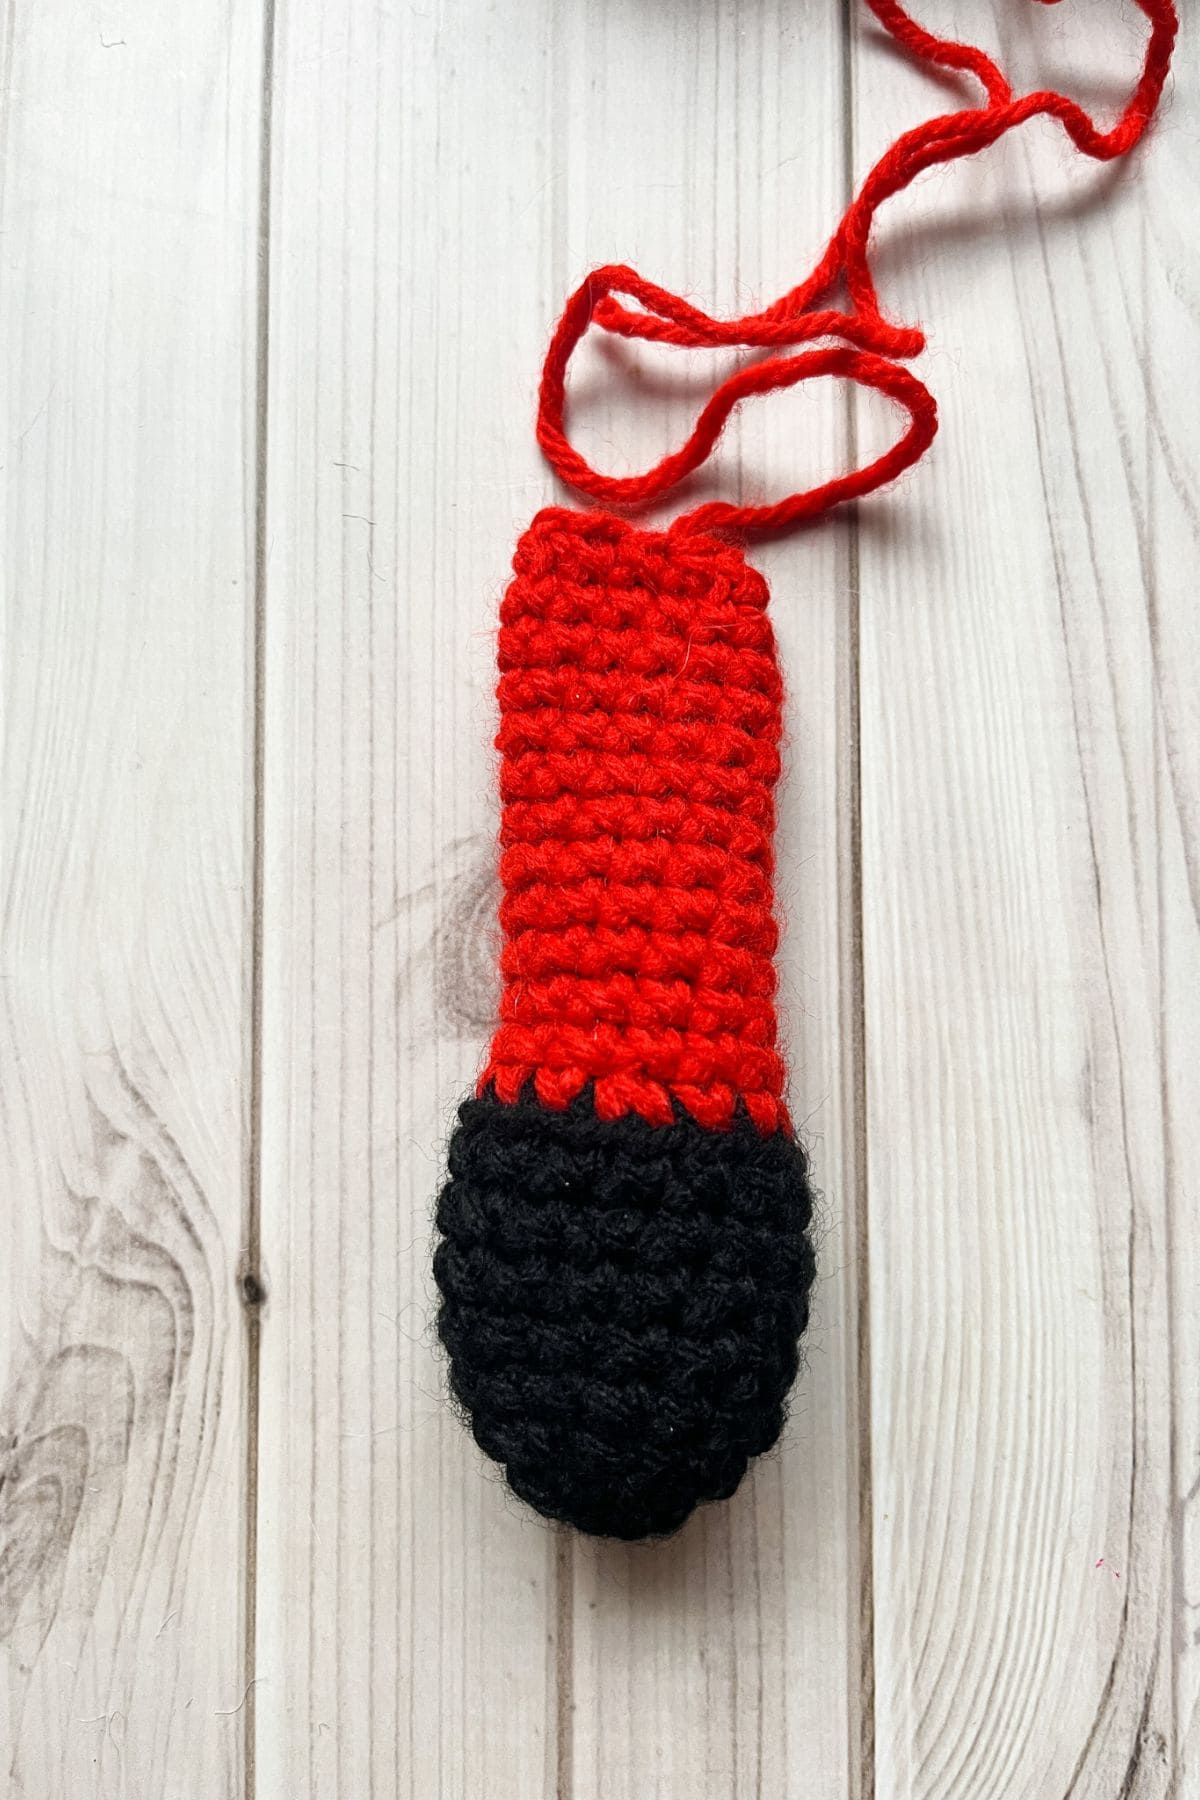
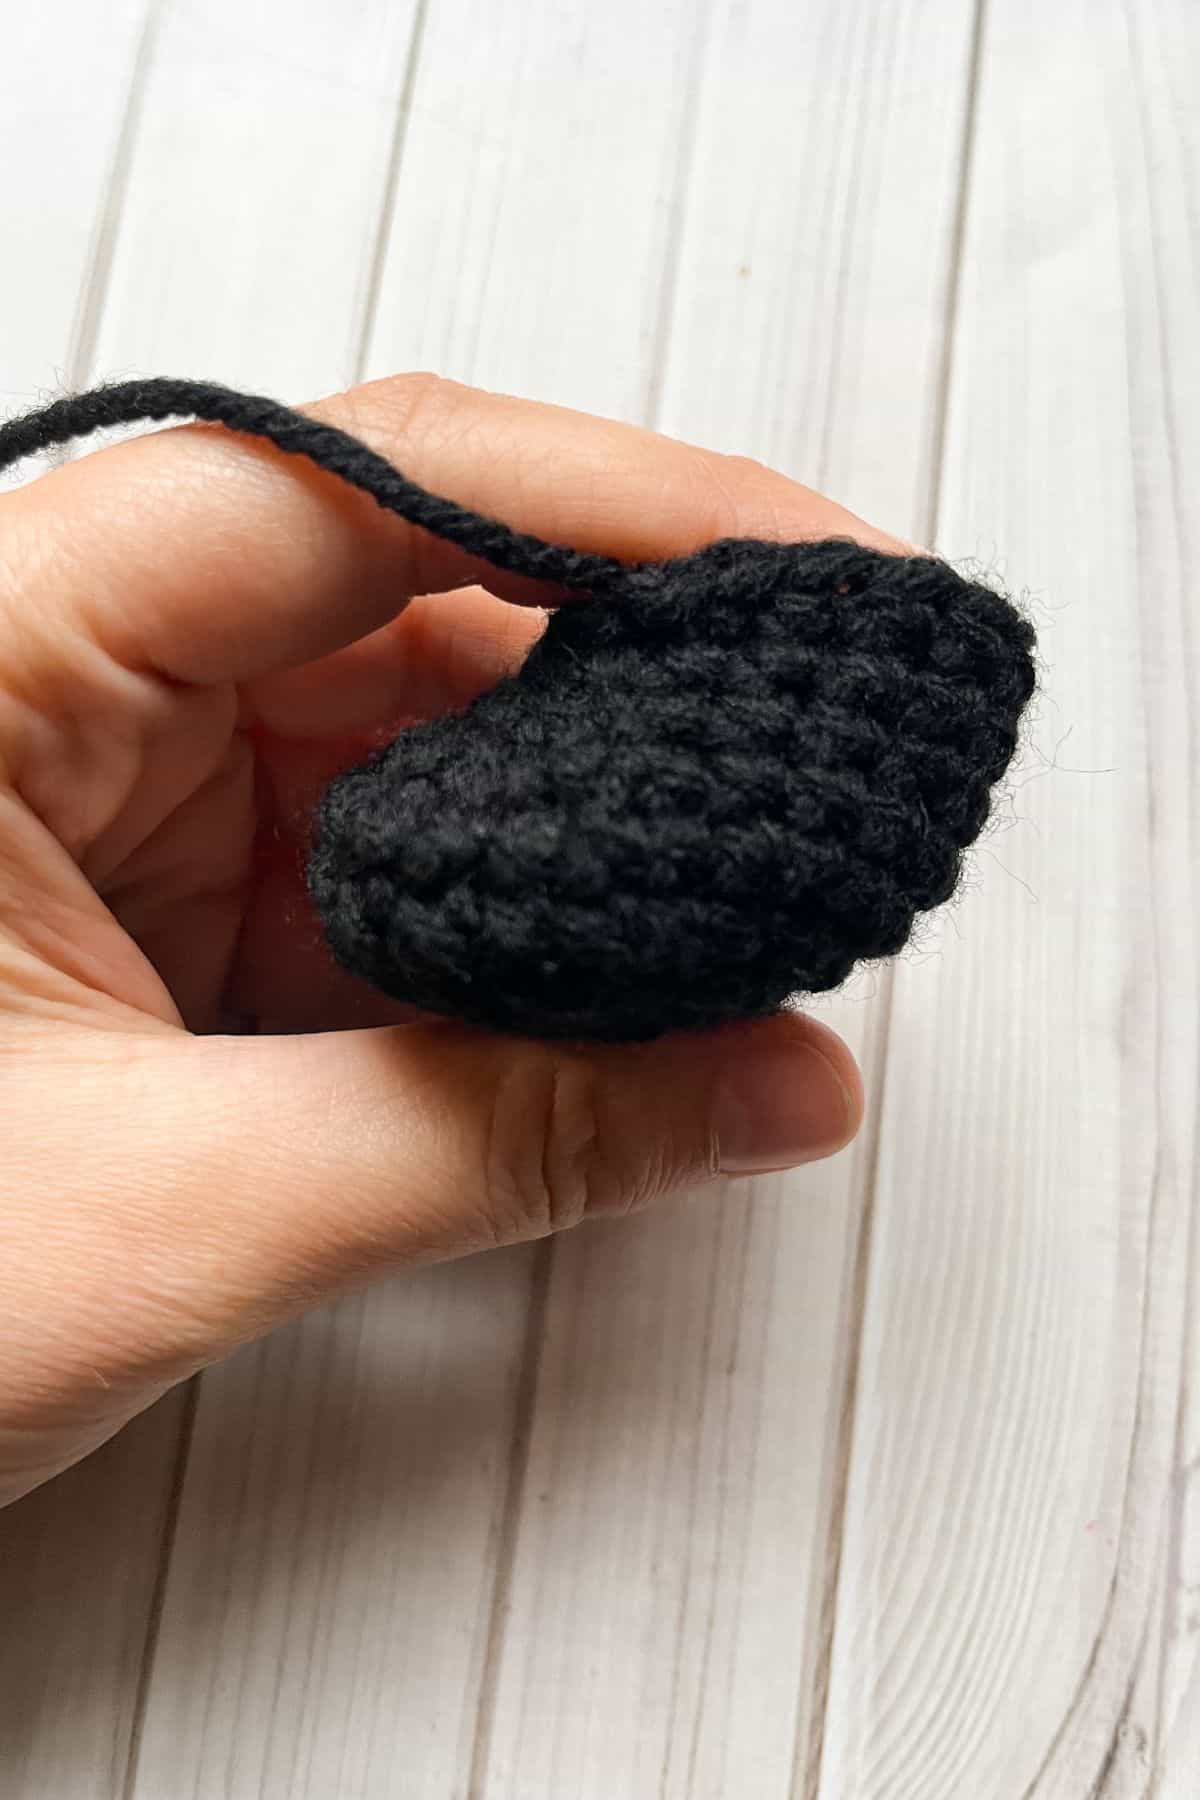
Round 1: Starting with the black yarn, make a mr. Then sc x6 into the circle and pull tight when you are done (6).
Round 2: Inc in every stitch (12).
Round 3: Inc, sc x3. Then repeat for the rest of the round (15).
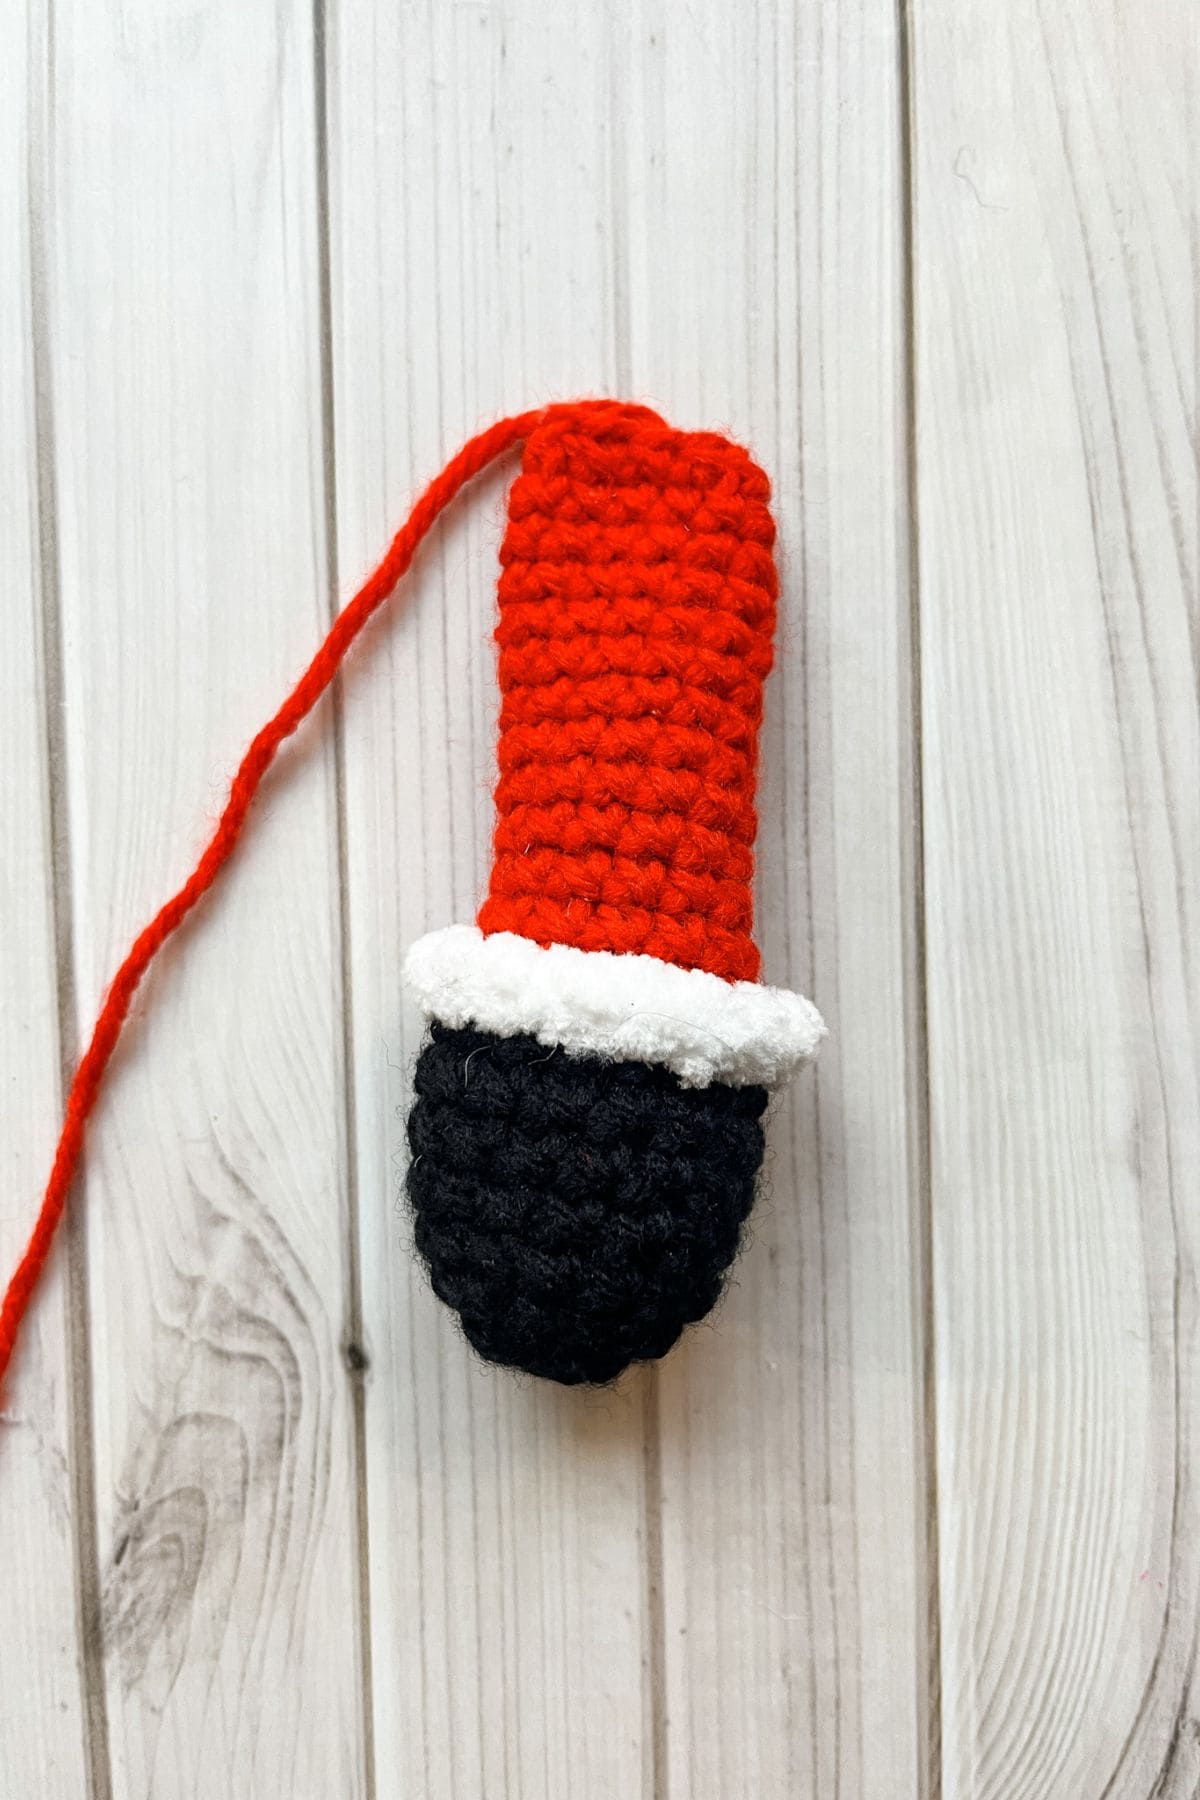
Round 4-8: Sc in every stitch (15). Fasten off the black yarn.
Round 9: Join the red yarn to where you left off last round but only in blo! In blo - dec, sc x3. Then repeat for the rest of the round (12).
Round 10-21: Sc in every stitch (12). At this point you want to stuff the arm ⅔ of the way.
Round 22: Dec, sc x2. Then repeat for the rest of the round (9).
Round 23: Sc in every stitch (9). Then fasten off the yarn and leave a tail for sewing.
Round 9 FLO: In round 9 flo, join the bernat blanket yarn and sl st the entire flo round. Then sl st to the beginning and fasten off. Weave in the ends.
If you see little black dots in the fur trimming, roll the yarn up and most of the dots disappear.
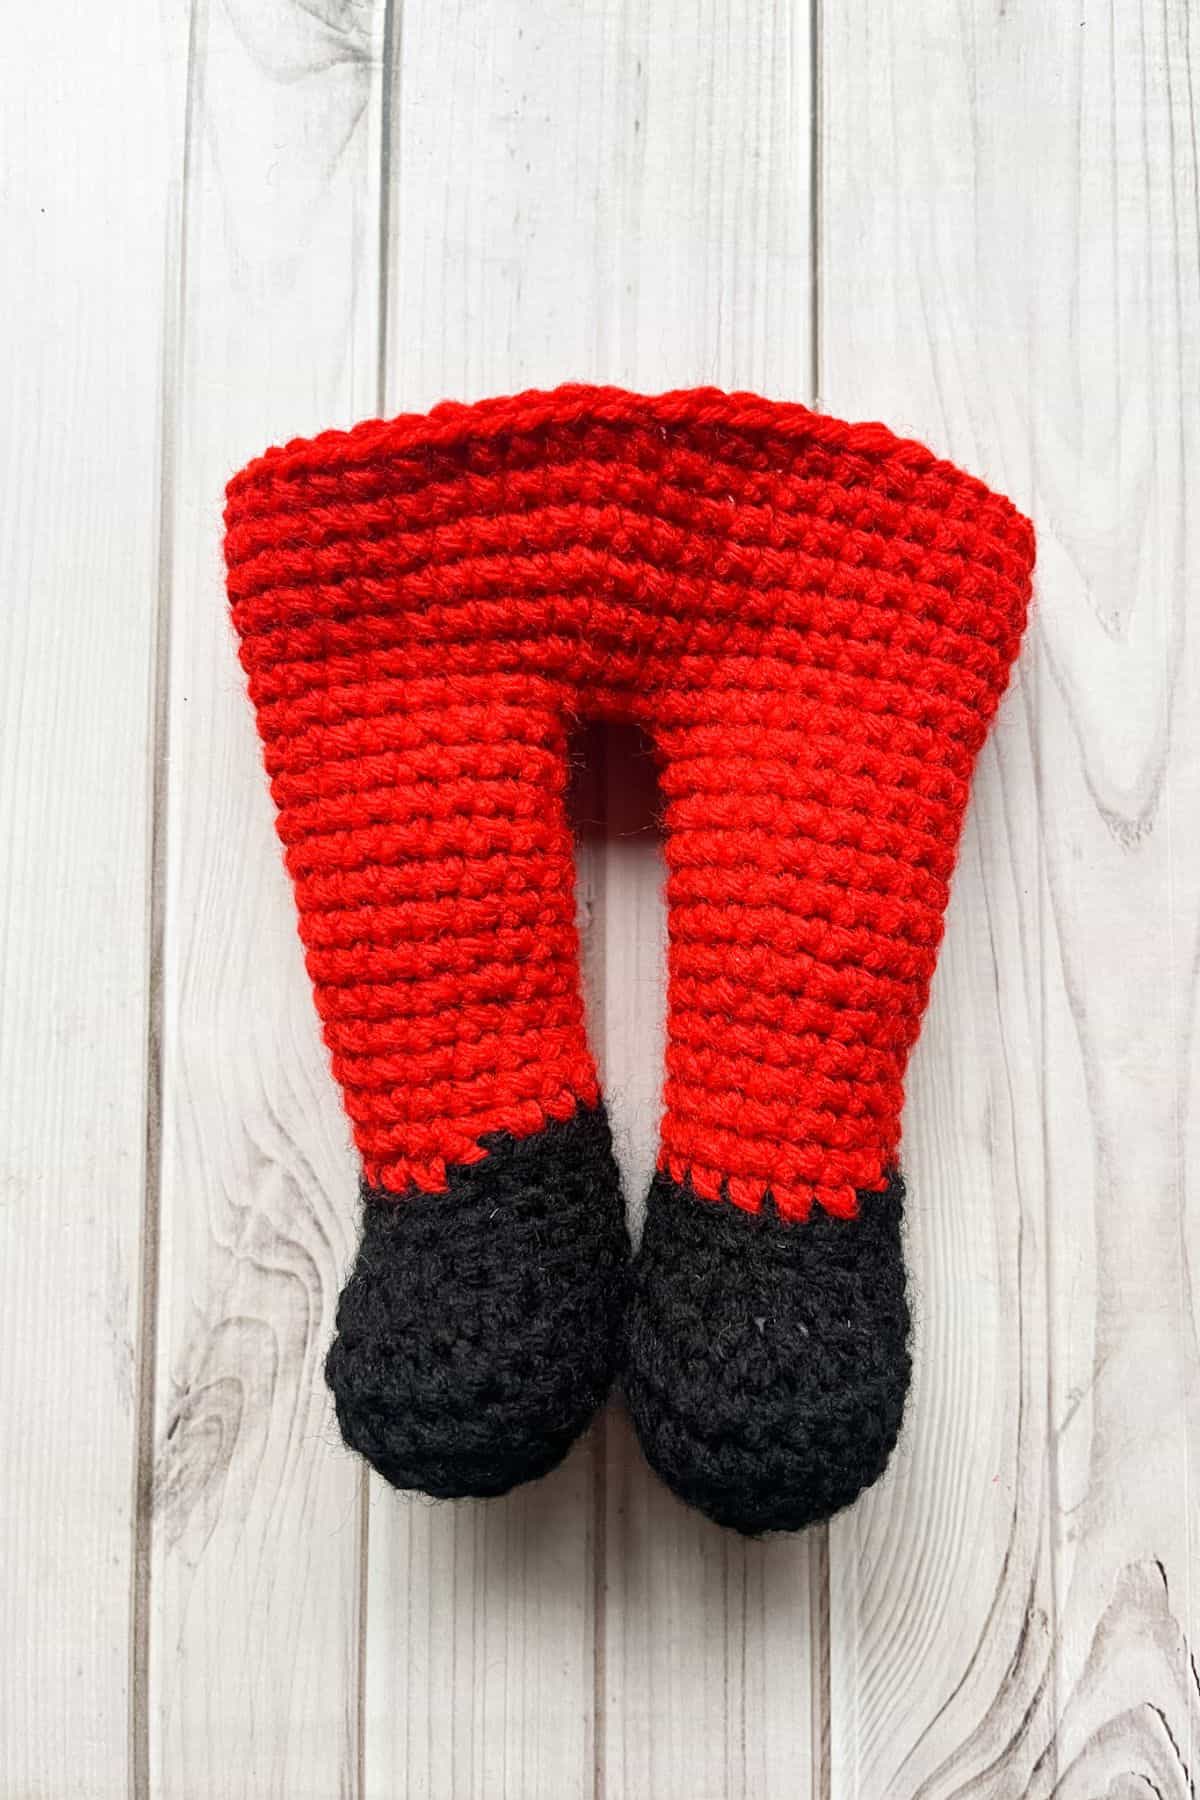
Crochet Leg:
Make x2. Fasten off one leg, do not fasten off the other.

Round 1: Starting with the black yarn, make a mr. Then sc x6 into the circle and pull tight when you are done (6).
Round 2: Inc in every stitch (12).
Round 3: Inc, sc. Then repeat in every stitch (18).
Round 4: Inc, sc x2. Then repeat in every stitch (24).
Round 5-6: Sc in every stitch (24).
Round 7: Dec x6, sc x12 (18).
Round 8: Dec x3, sc x12 (15).
Round 9: Sc in every stitch (15). Fasten off the black yarn.
Round 10: Join the red yarn in blo where you left off last round. Sc in blo for this round (15).
Round 11-14: Sc in every stitch in the round (15). You should stuff the tip of the shoe at this point.
Round 15: Inc, sc x4. Then repeat for the rest of the round (18).
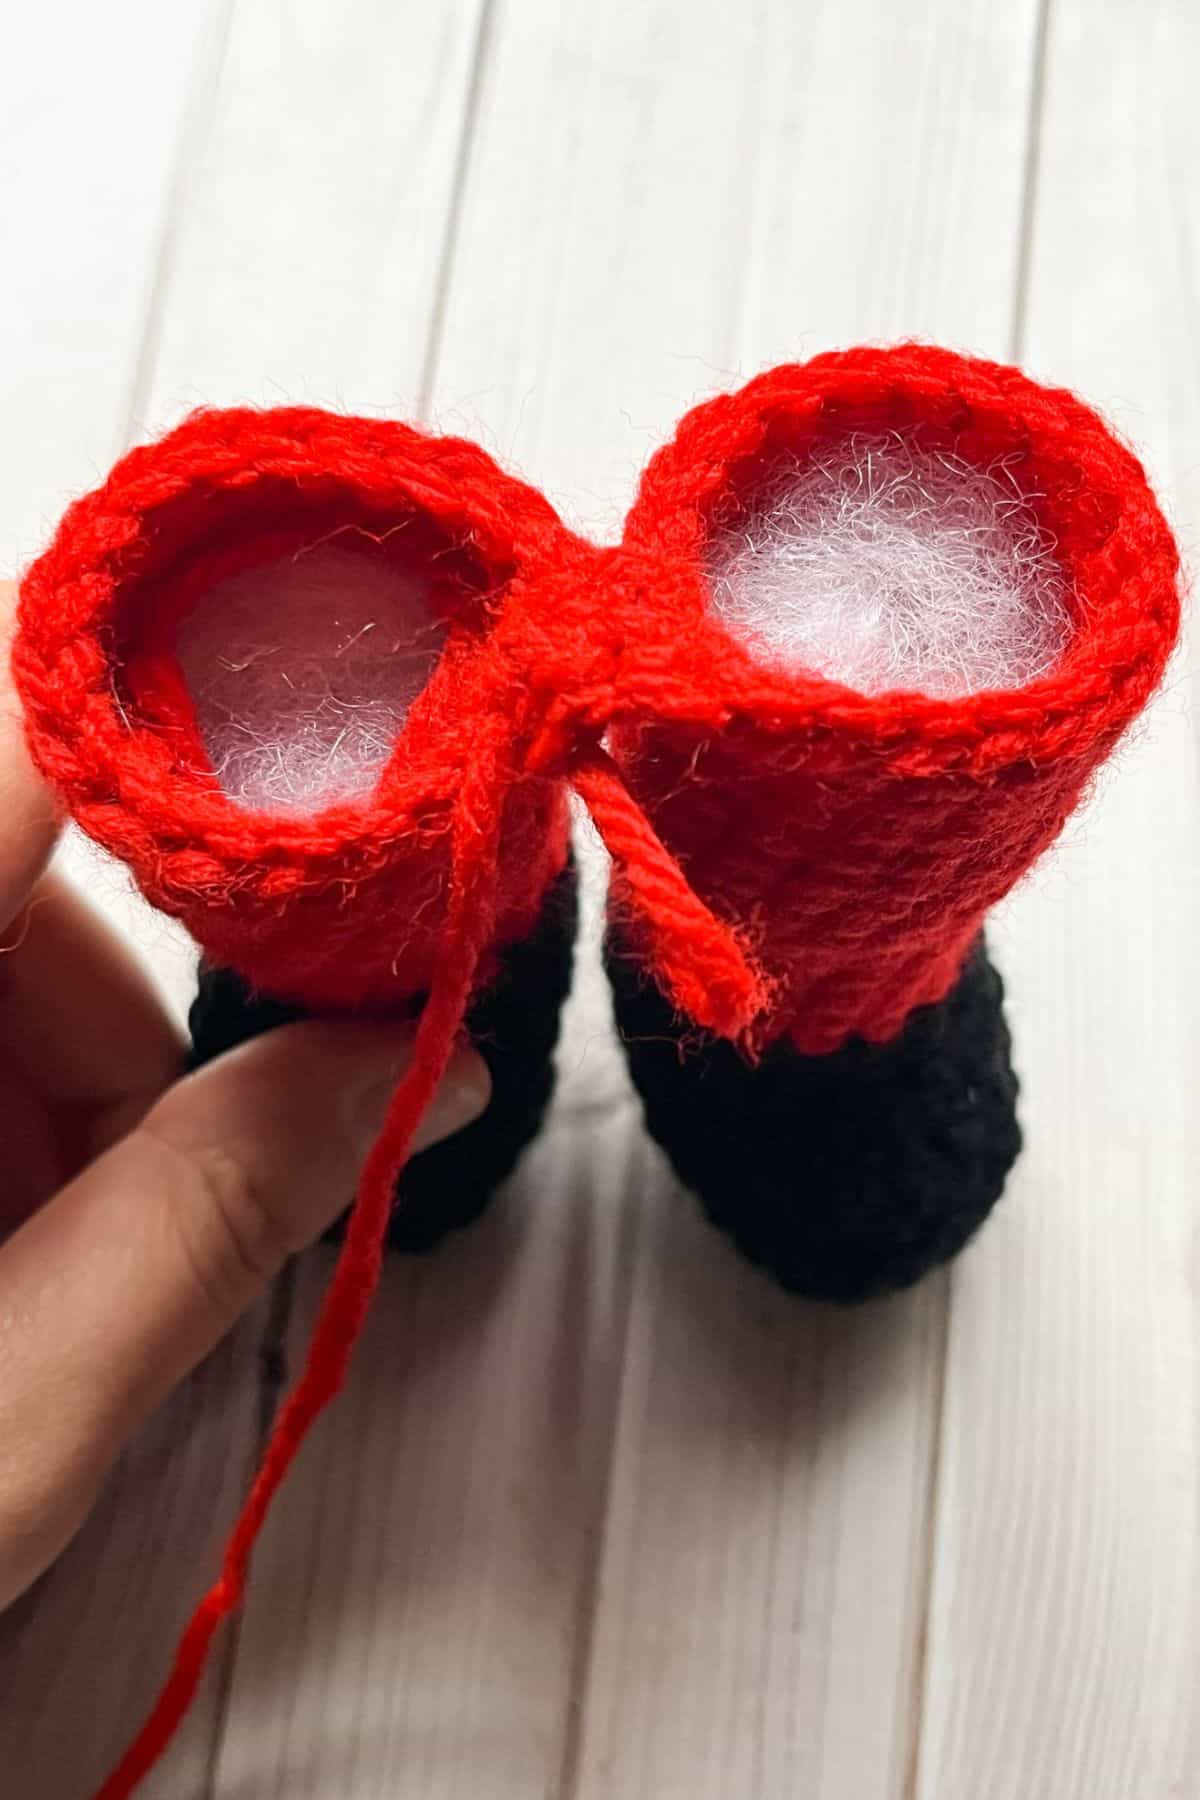
Round 16-21: Sc in every stitch (18). Fasten off one leg, do not fasten off the other. Stuff both legs.
Round 10 FLO: In round 9 flo, join the bernat blanket yarn and sl st the entire flo round. Then sl st to the beginning and fasten off. Weave in the ends.
Joining the Legs:
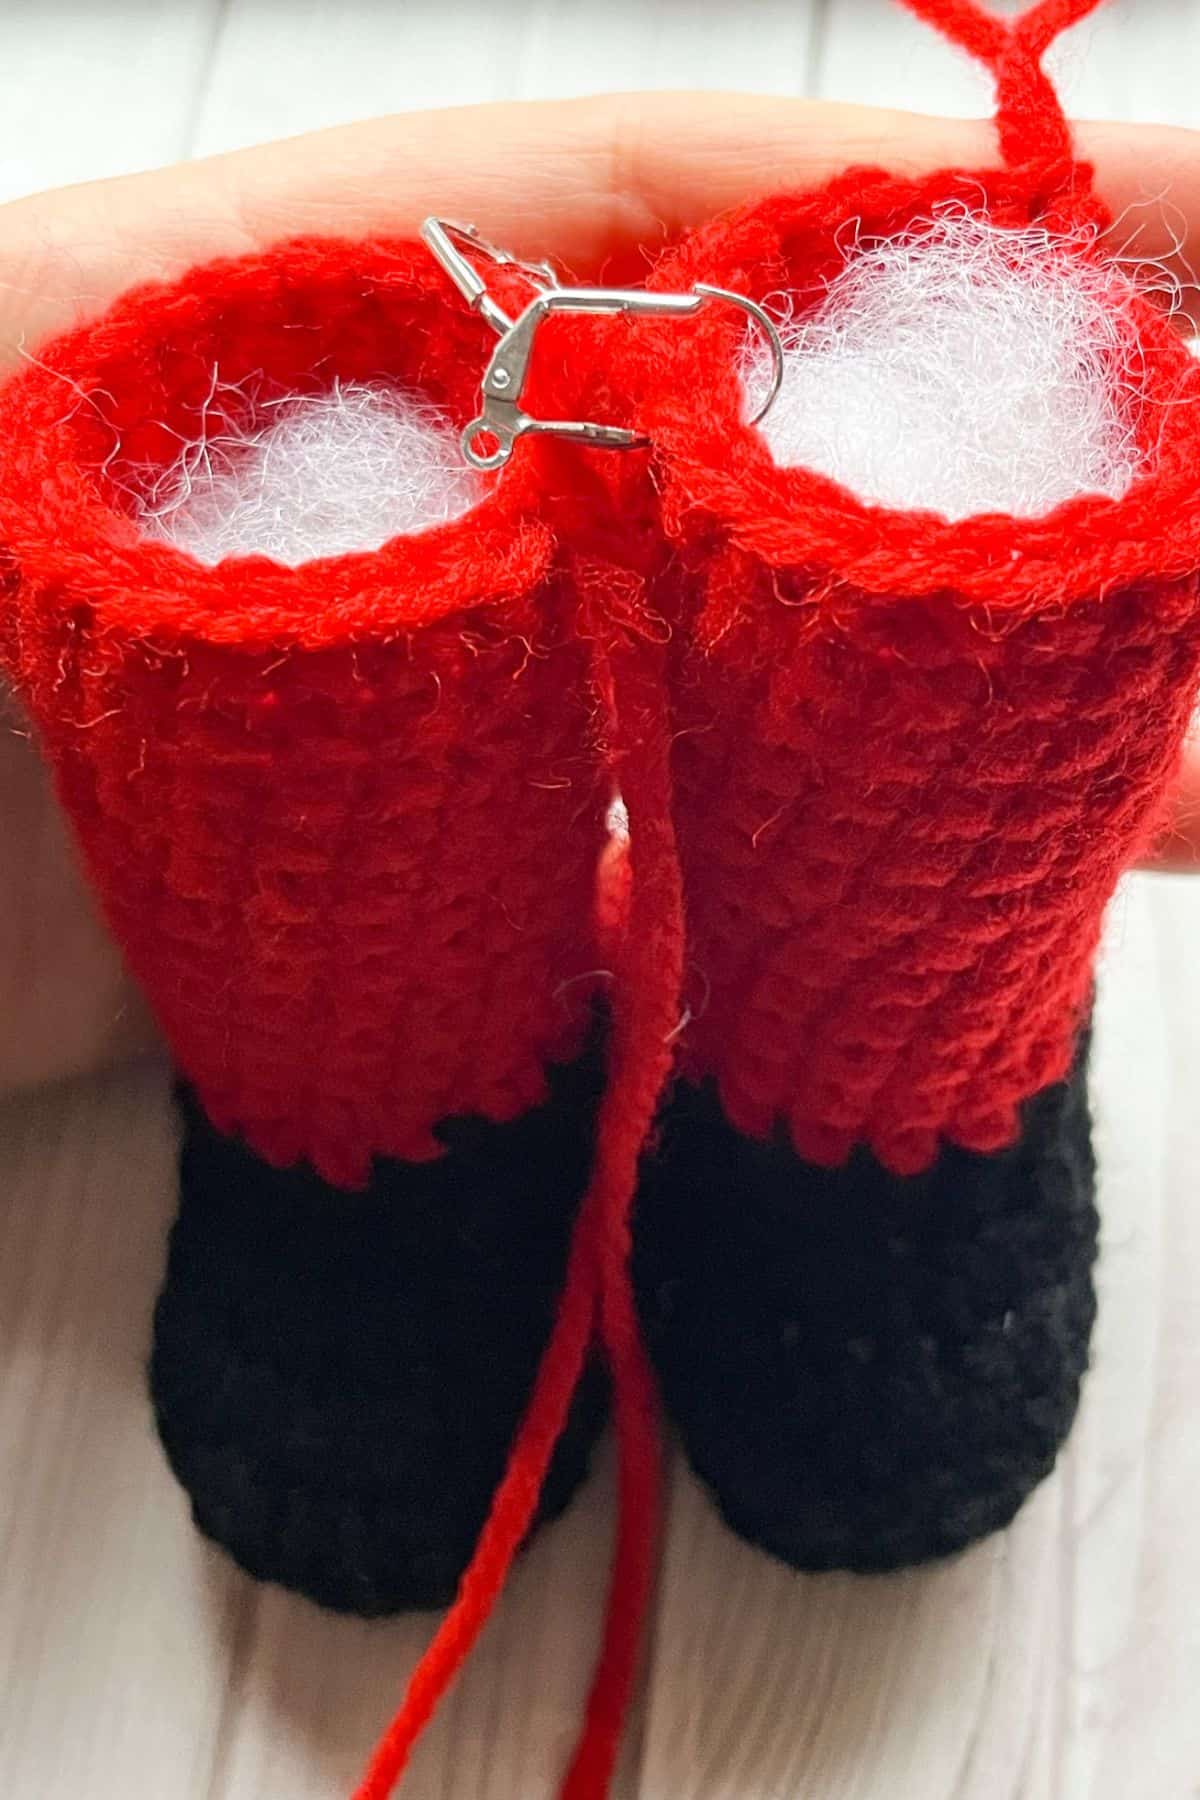
With the leg that you haven't fastened off on your left, line the legs up, feet facing you. Add 2 stitch markers to the inner middle stitches on each leg, the stitch markers do not need to be connected to both legs —just one leg. So you will use 4 stitch markers in total.
Round 22: Sc until you reach the first stitch marker, then remove the stitch marker and sc into that stitch. Ch x3 and make a sc in the OTHER LEG’s reciprocal stitch. Sc around the second leg until you reach the chain 3 you just made. Then sc into the back bumps of the chains. Next, sc around the other leg and then sc into the chain 3 you made.
This is the new beginning/end to your rounds (42).
Round 23: Sc in every stitch (42).
Round 24: Inc, sc x13. Then repeat for the rest of the round (45).
Round 25: Sc in every stitch (45).
Round 26: Inc, sc x14. Then repeat for the rest of the round (48).
Round 27-29: Sc in every stitch (48). Fasten off the red yarn.
Round 30: Join the black yarn in blo. Sc in blo for the entire round (48).
Round 31-32: Sc in every stitch (48). Then fasten off the black yarn.
Round 33-38: Join the red yarn. Then sc in every stitch (48).
Round 39: Dec, sc x6. Then repeat for the rest of the round (42).
Round 40: Sc in every stitch (42).
Round 41: Dec, sc x5. Then repeat for the rest of the round (36).
Round 42: Sc in every stitch (36).
Round 43: Dec, sc x4. Then repeat for the rest of the round (30).
Round 44: Sc in every stitch (30). Stuff the body if you haven't started.
Round 45: Dec, sc x3. Then repeat for the rest of the round (24).
Round 46: Sc in every stitch (24).
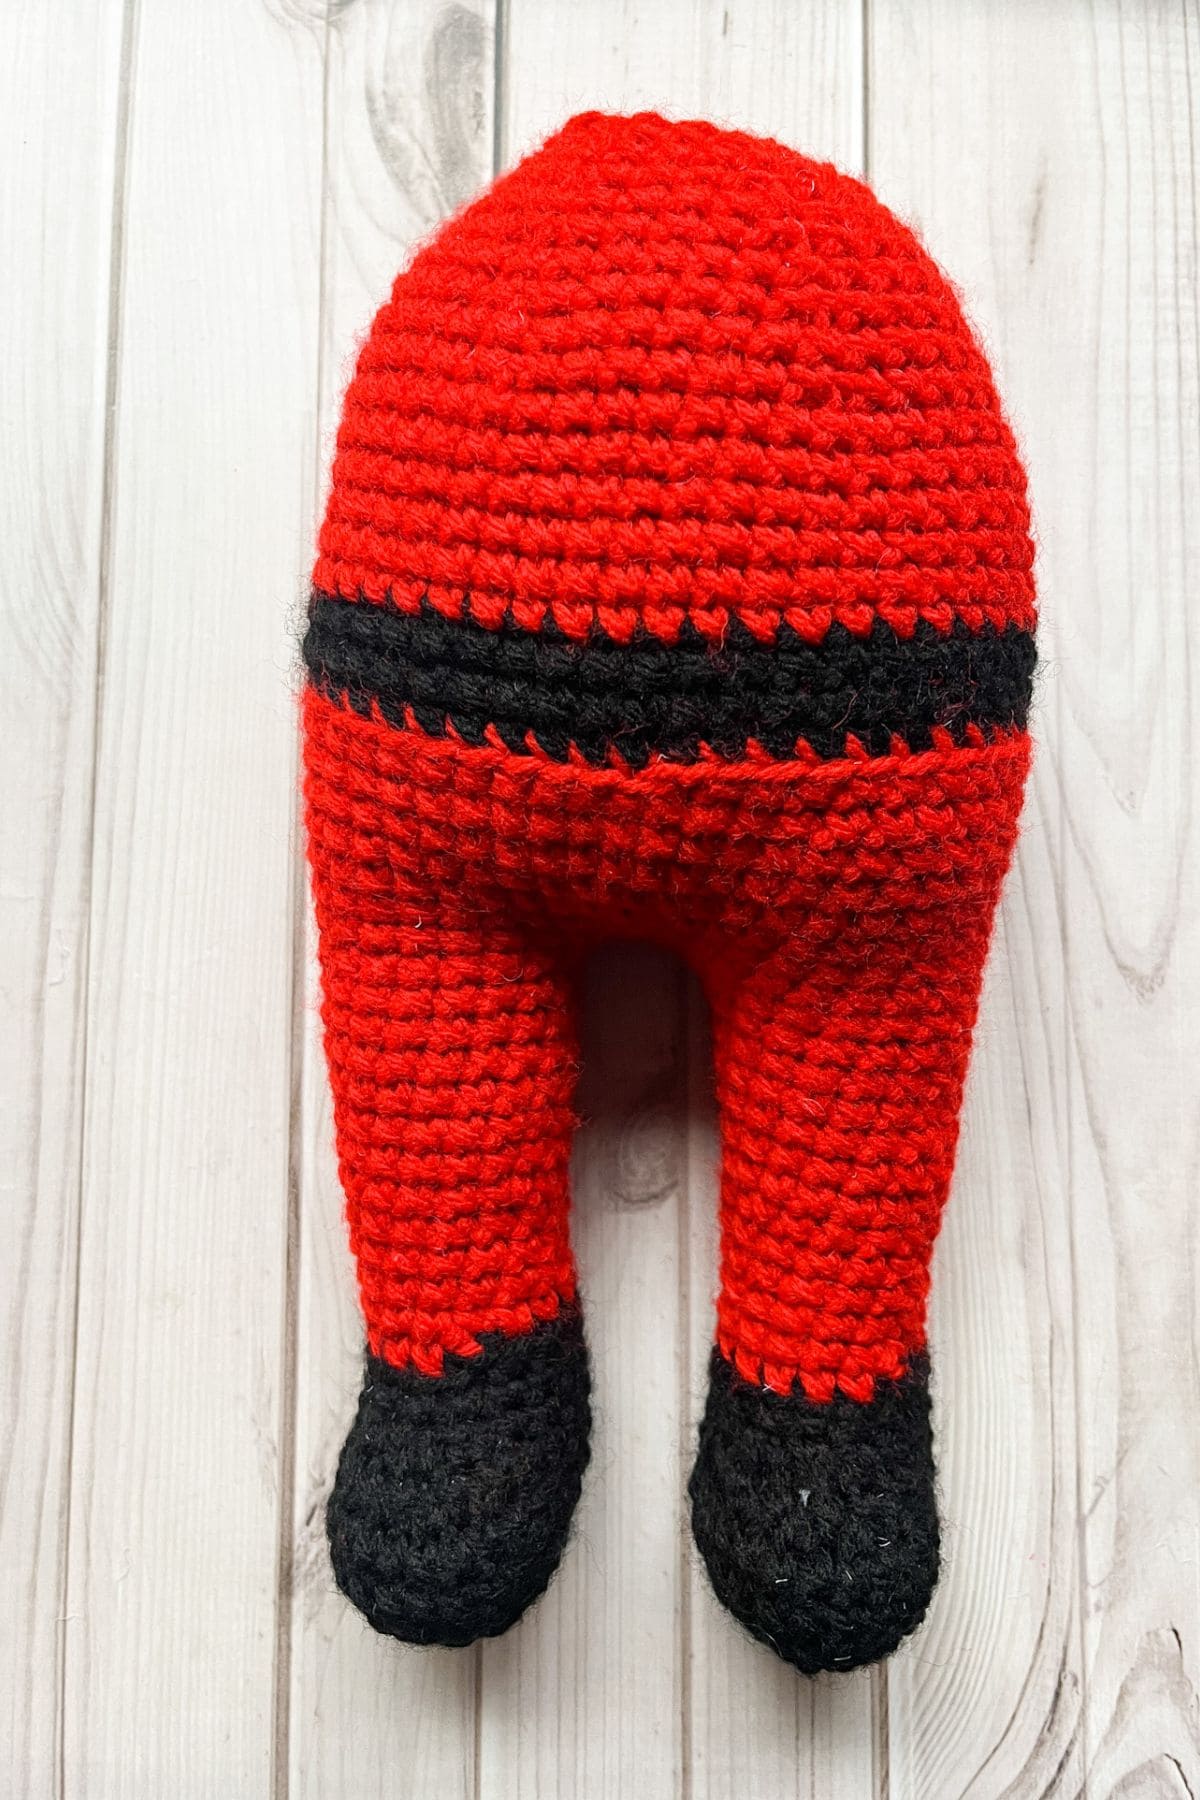
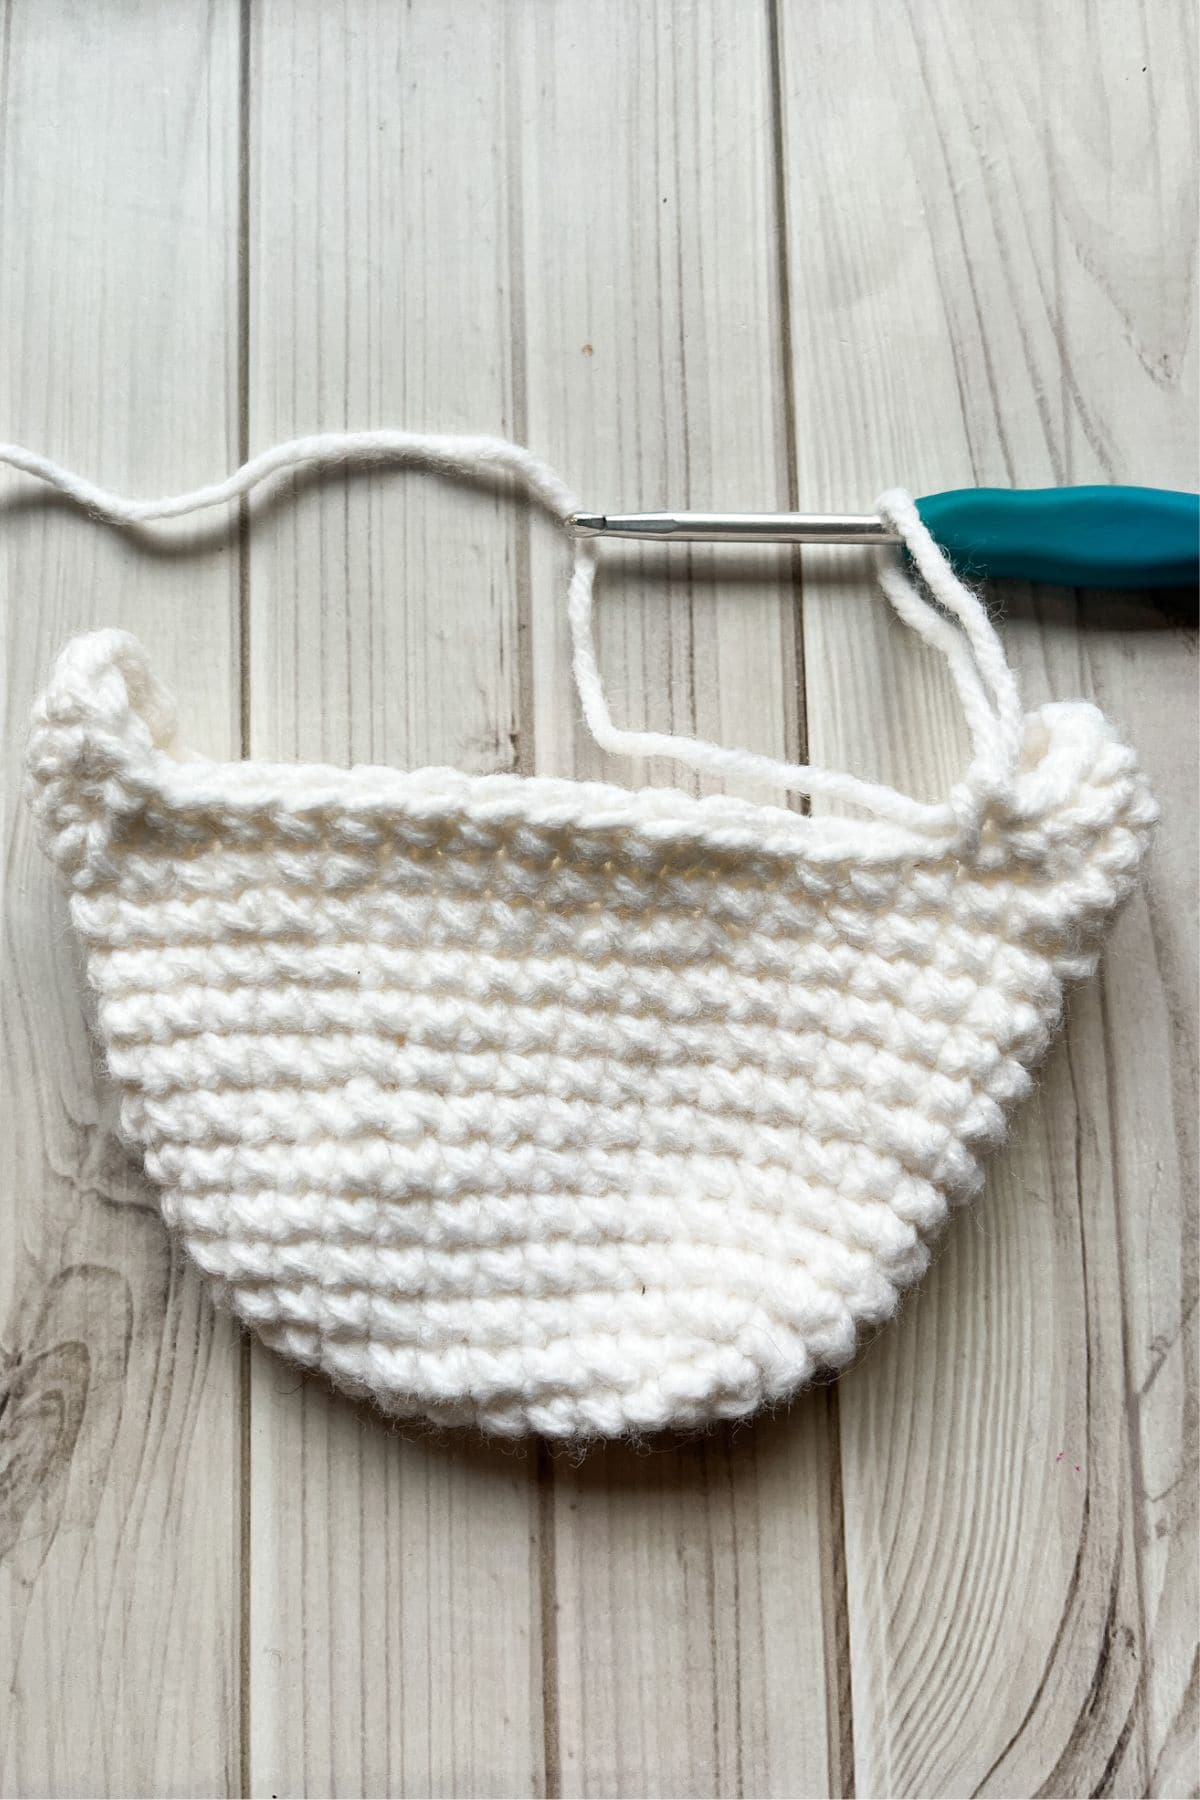
Round 47: Dec, sc x2. Then repeat for the rest of the round (18). Fasten off the red yarn. We will come back to making the head in a little bit, first we will finish the coat trim.
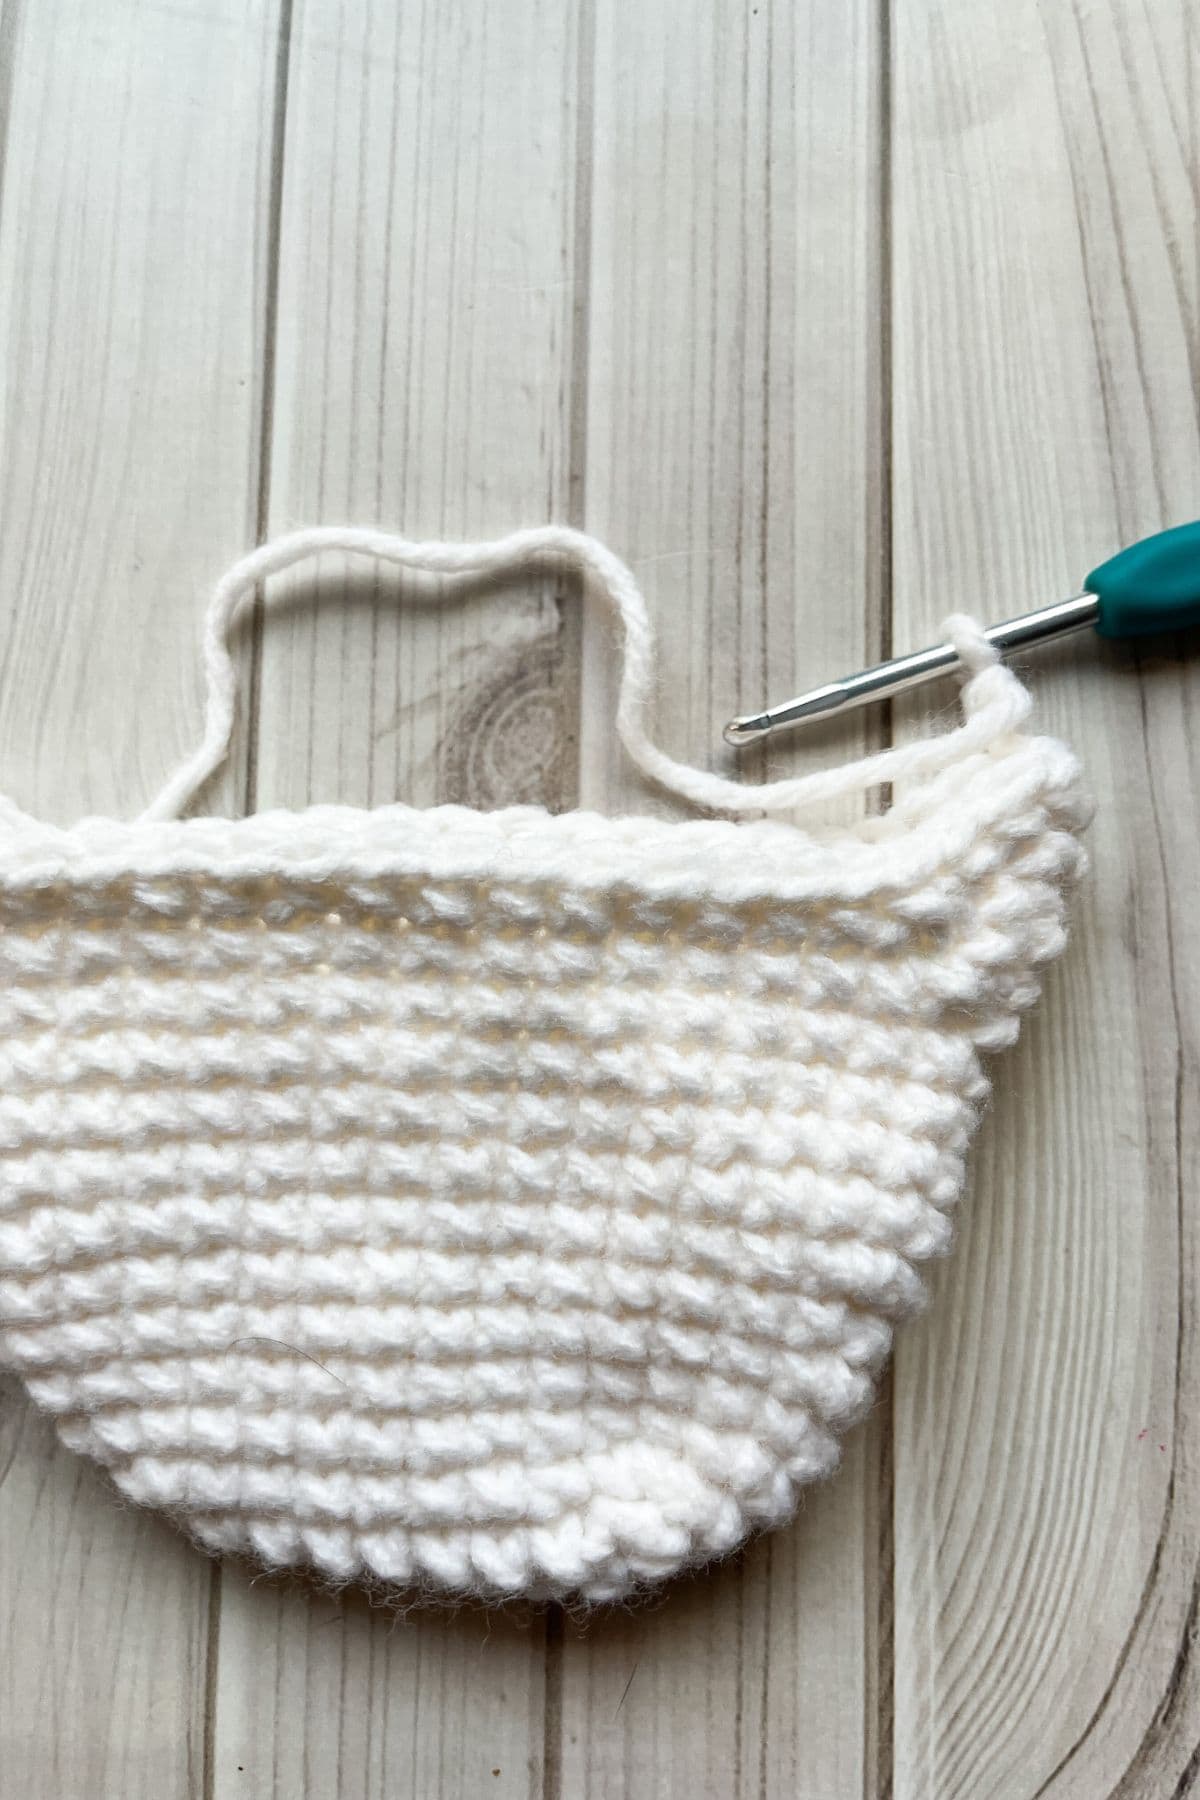
Coat Trim:

Flip your santa upside down, so the body is close to you and the feet are away from you.
Round 1: Join the red yarn anywhere in the FLO ROUND under the belt and make a round of slip stitches, make sure you do not make them tight (48).
Round 2-4: Sc in every stitch. Then fasten off the red yarn (48).
Round 5: Join the blanket yarn and make a round of sc stitches (48).
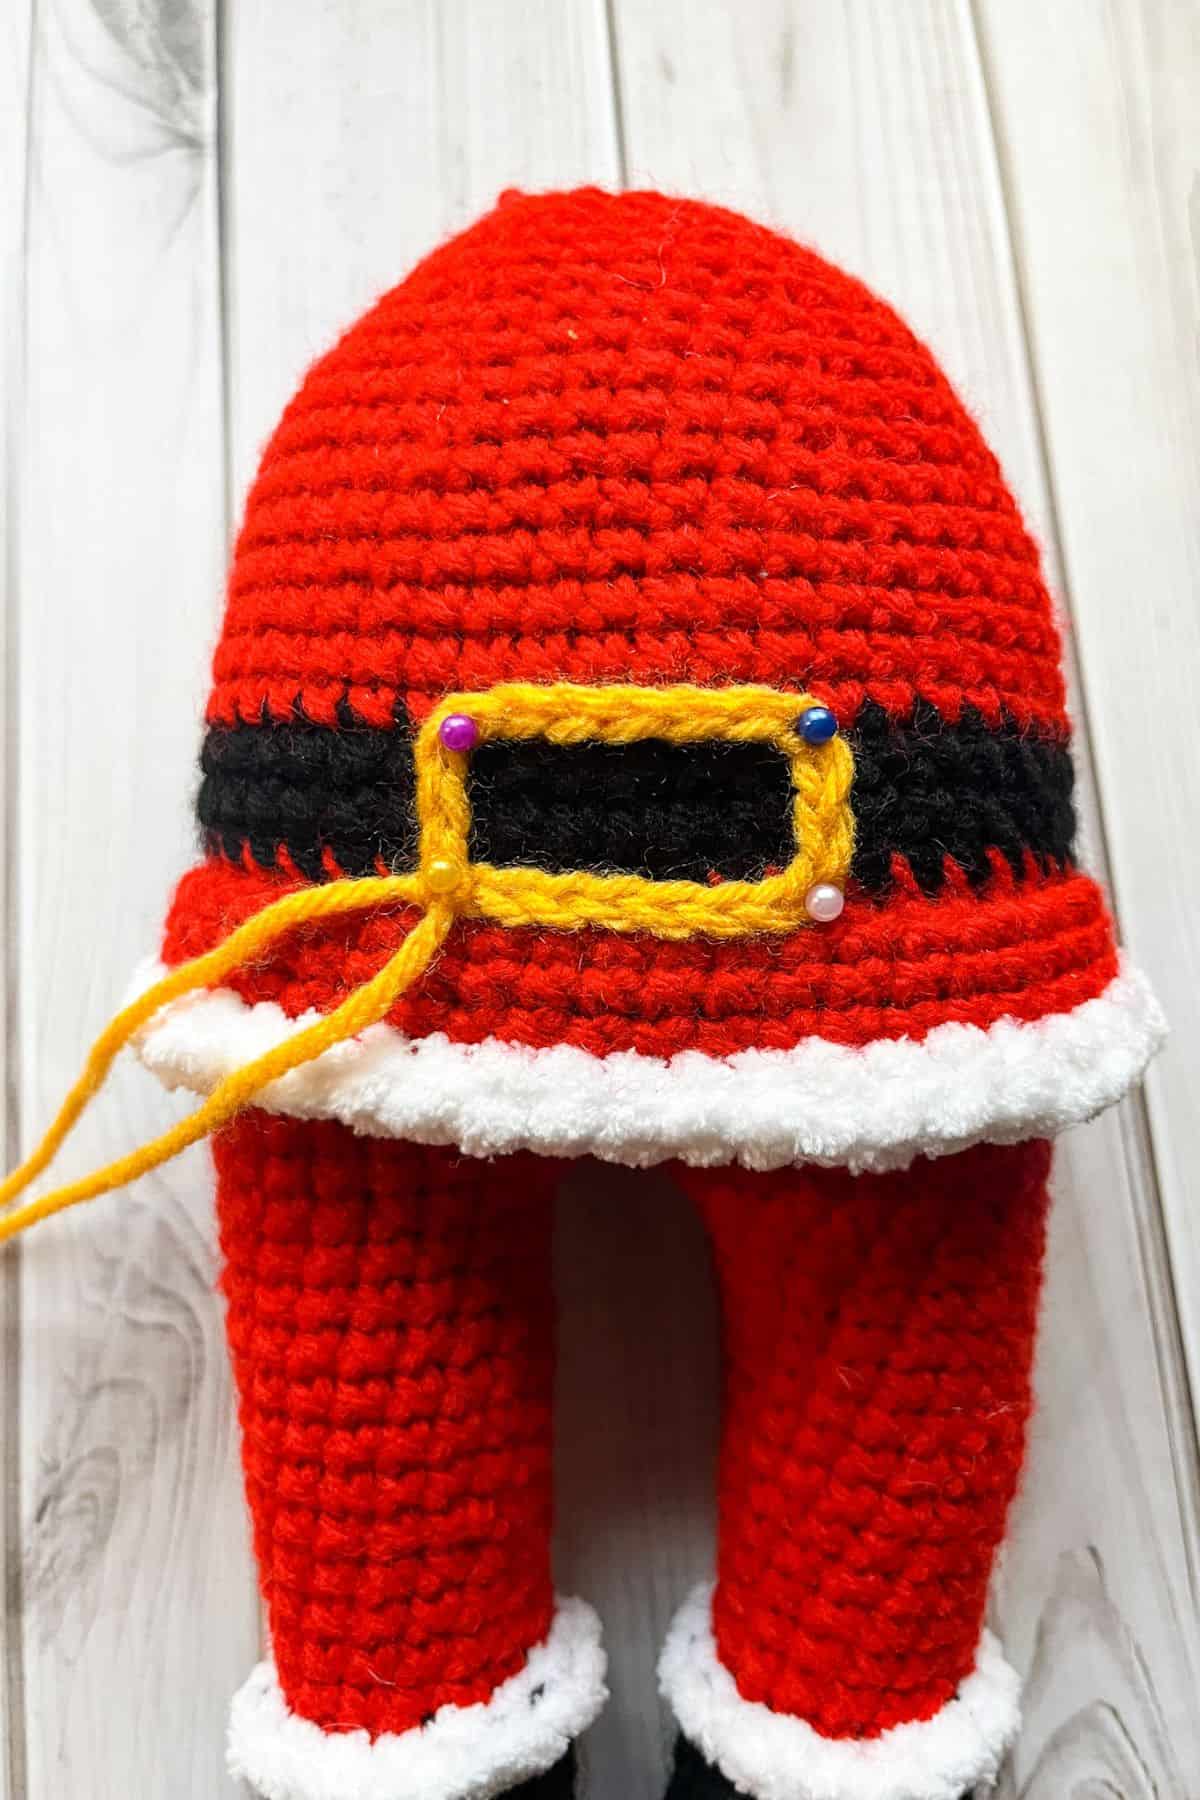
Crochet Belt Buckle:
With the yellow yarn, ch x21 and fasten off —leave a tail for sewing.
Okay now back to the head.
Crochet Head:
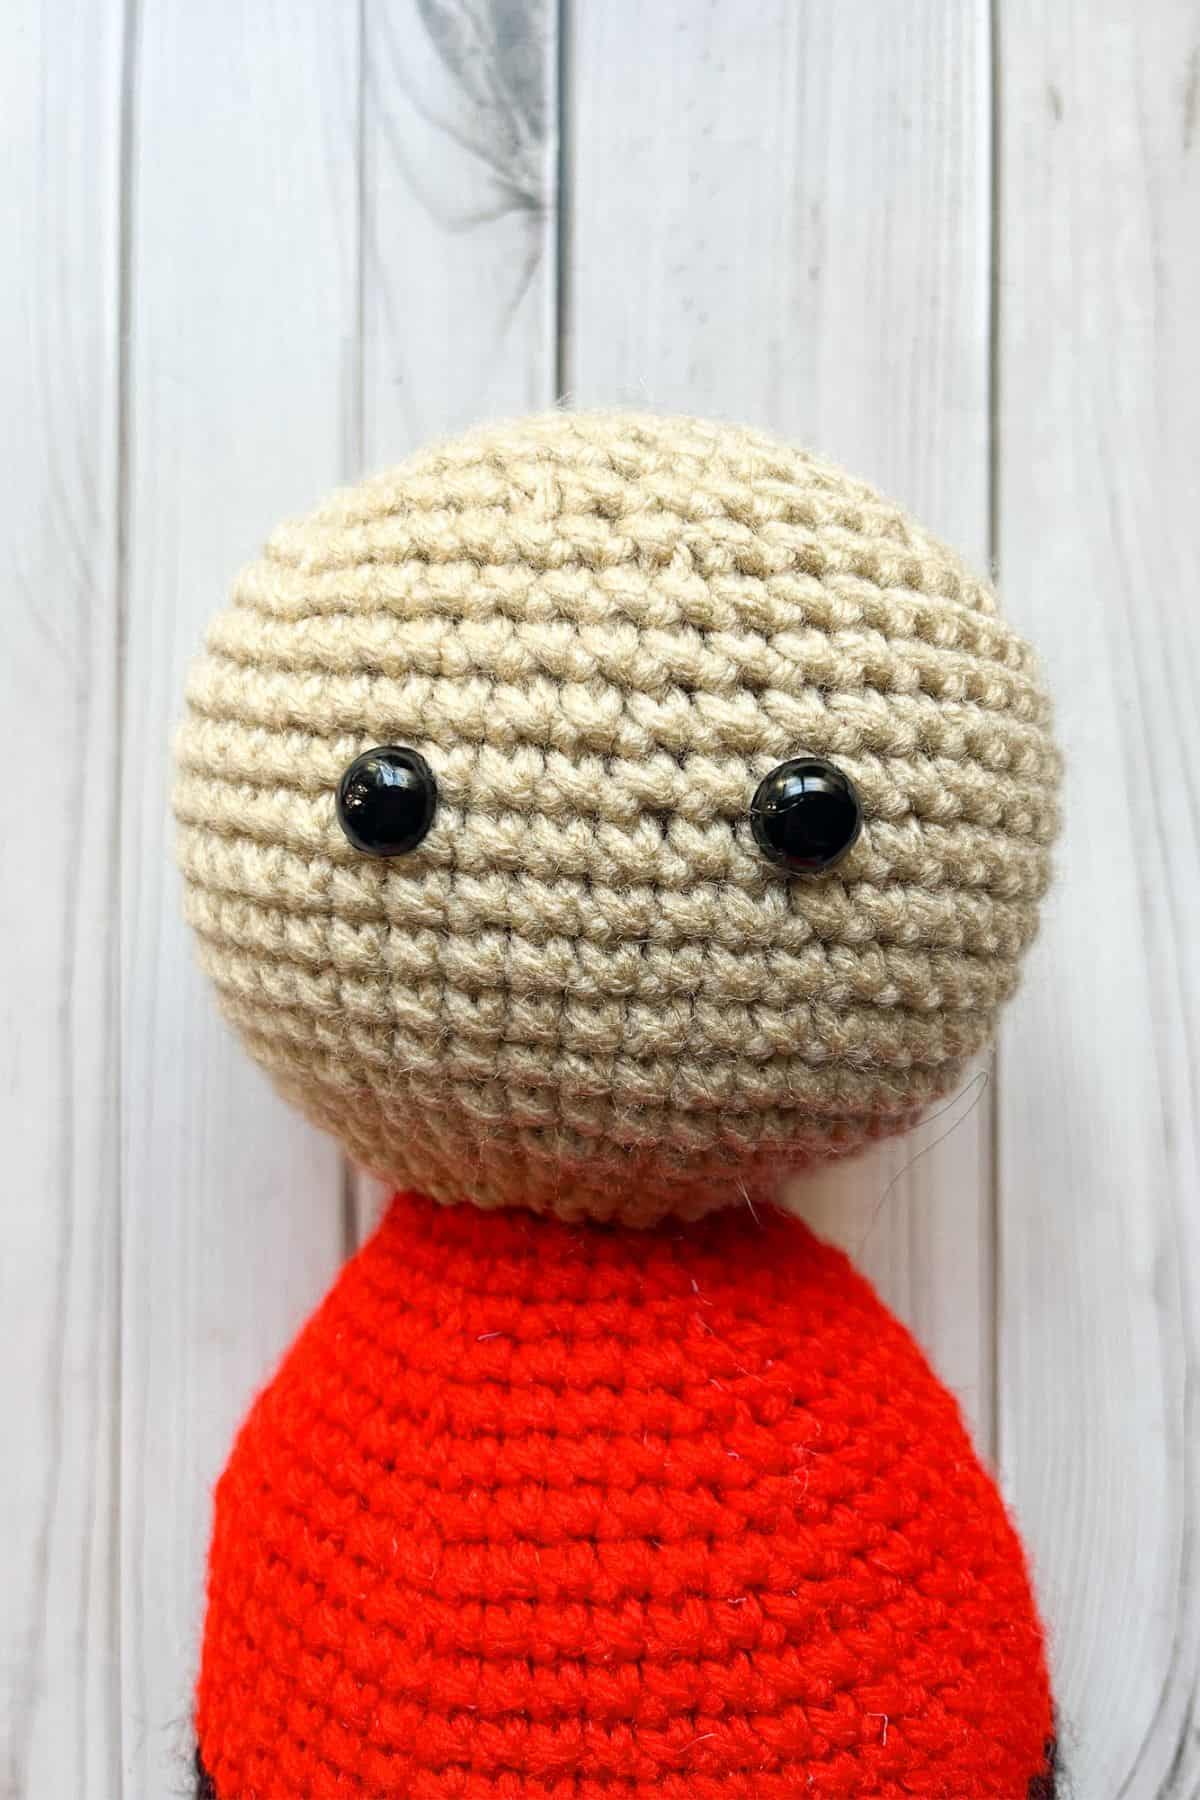
Round 48: Join the Lace colored yarn, or another skin tone colored yarn, to the FLO OF THE TOP OF THE BODY (round 47). Inc, sc x2. Then repeat for the rest of the round (24).
Round 49: Sc x1, inc, sc x2. Then repeat for the rest of the round (30).
Round 50: Sc x3, inc, sc x1. Then repeat for the rest of the round (36).
Round 51: Sc x2, inc, sc x3. Then repeat for the rest of the round (42).
Round 52: Inc, sc x6. Then repeat for the rest of the round (48).
Round 53-61: Sc in every stitch (48).
Round 62: Dec, sc x6. Then repeat for the rest of the round (42).
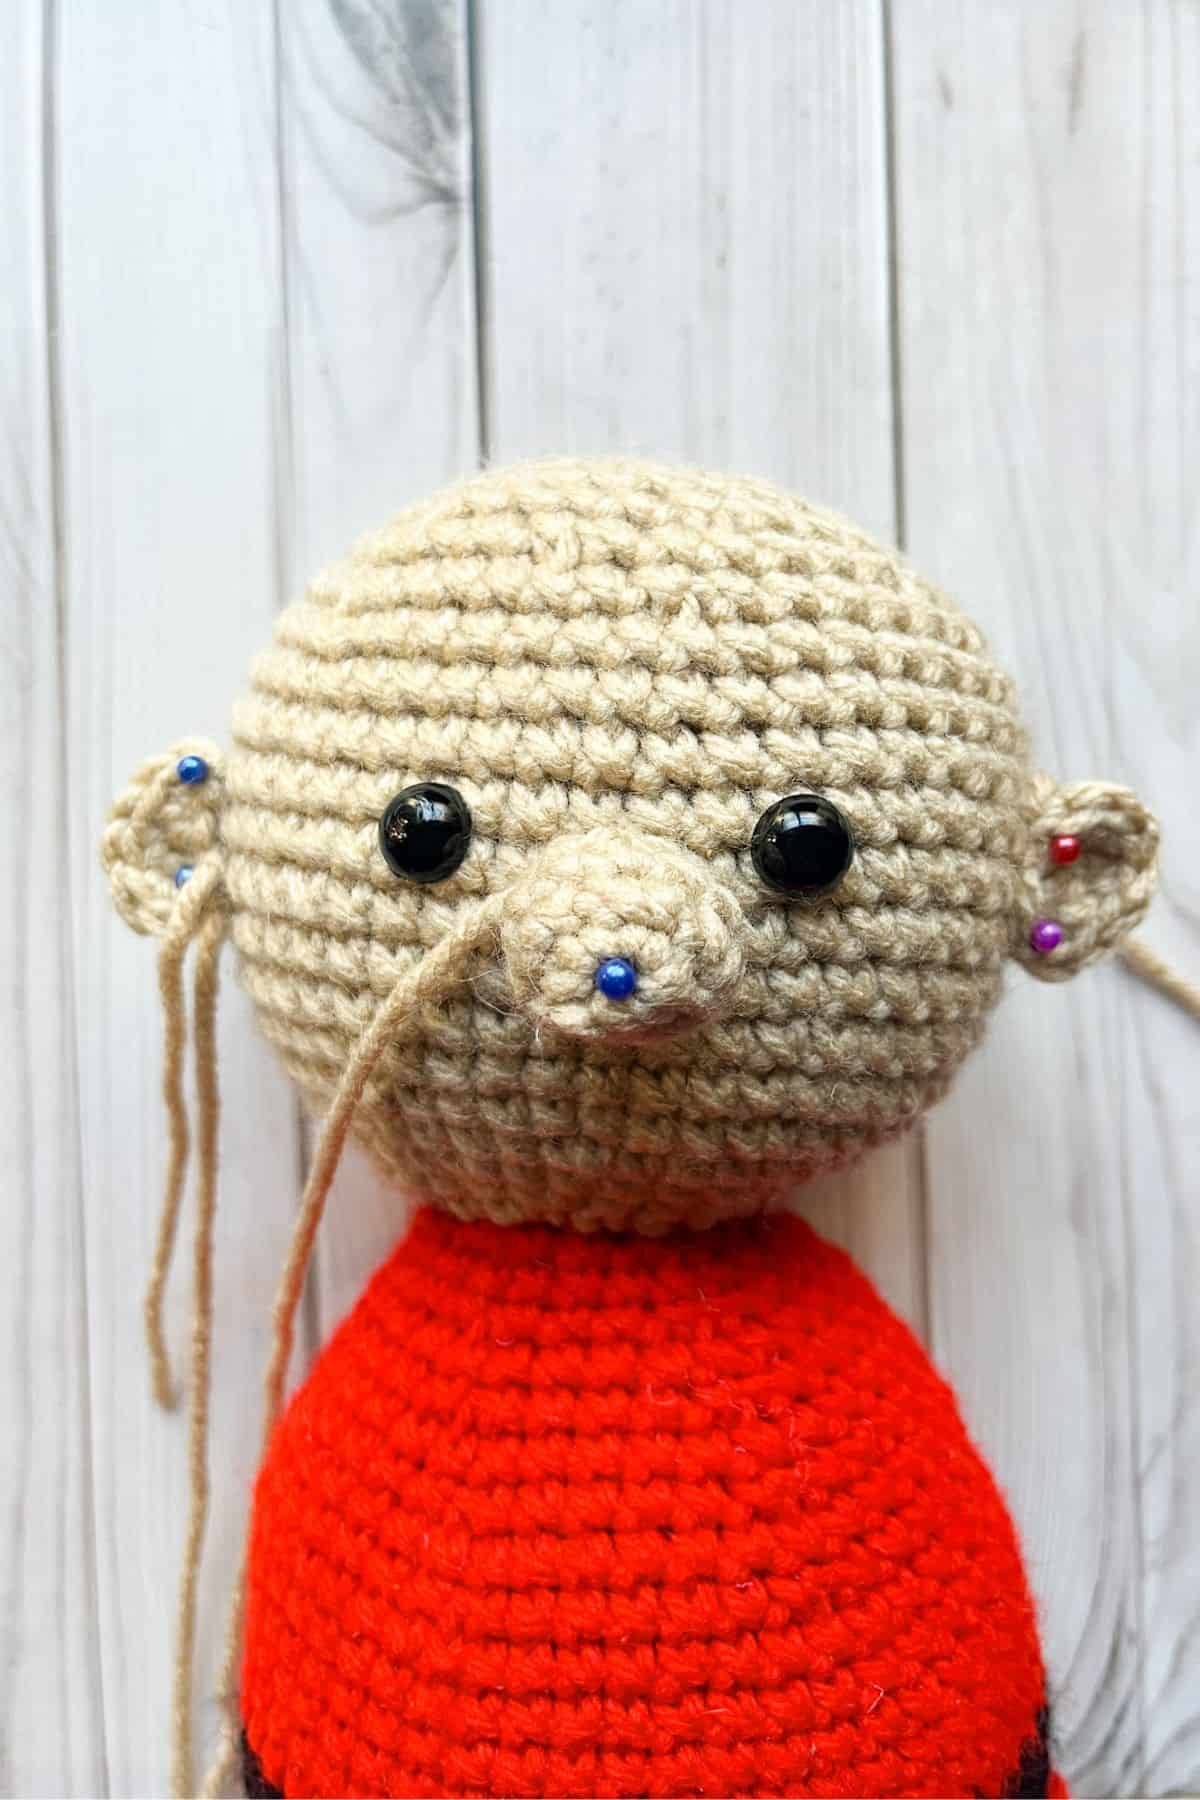
Round 63: Dec, sc x5. Then repeat for the rest of the round (36). Counting from the bottom of the head, add the eyes between rounds 10-11, as centered to the doll as you can, but with 6 or so stitches in between.
Round 64: Dec, sc x4. Then repeat for the rest of the round (30).
Round 65: Dec, sc x3. Then repeat for the rest of the round (24). Stuff the head with polyfil.
Round 66: Dec, sc x2. Then repeat for the rest of the round (18).
Round 67: Dec, sc. Then repeat for the rest of the round (12).
Round 68: Dec, then repeat for the rest of the round (6). Fasten off the head and sew the top of the head closed.
Facial Features:
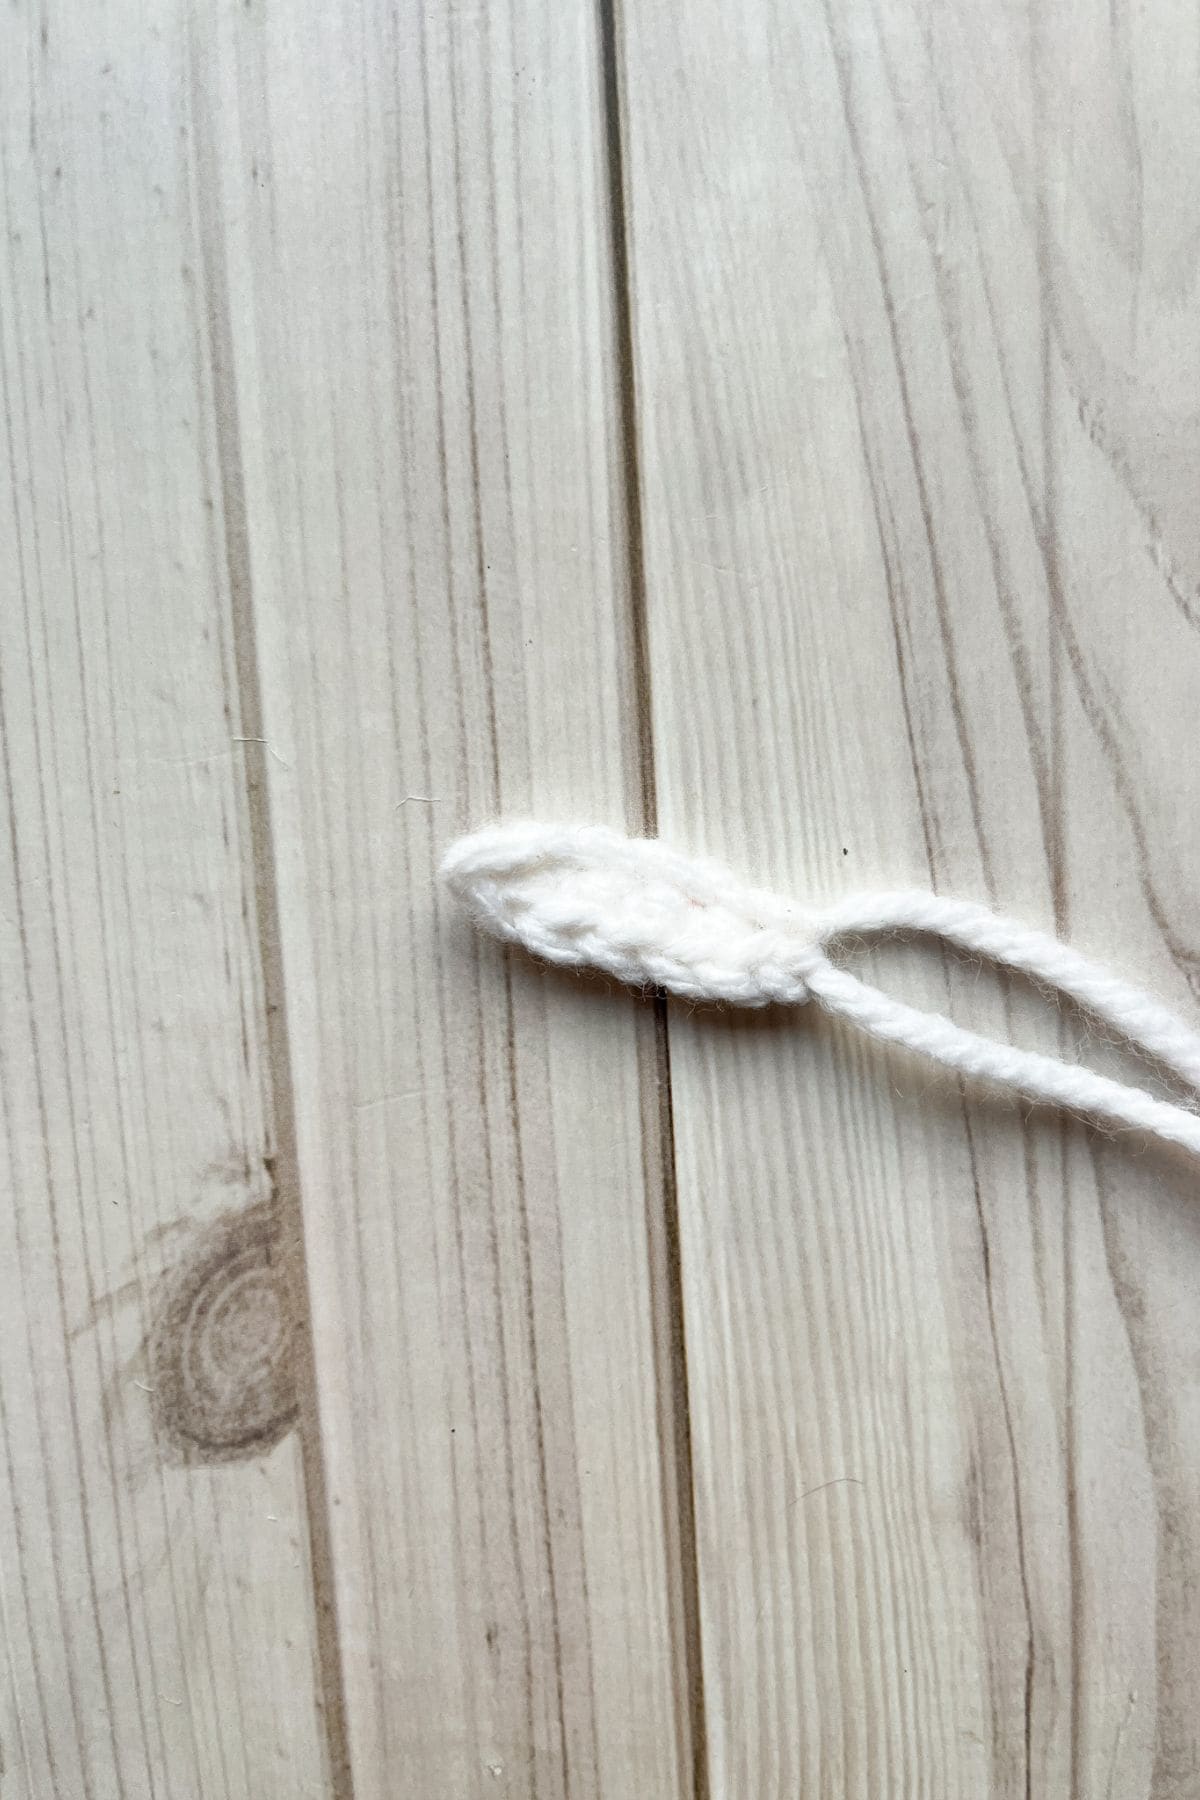
Crochet Ear:
Make x2.
Round 1: With the lace yarn, chain 2, then in the second ch from the hook, make 3 sc stitches. Then ch x1 and turn.
Round 2: Inc in every stitch. Then sl st back to the ch x2 you made at the beginning. Fasten off and leave a tail for sewing.
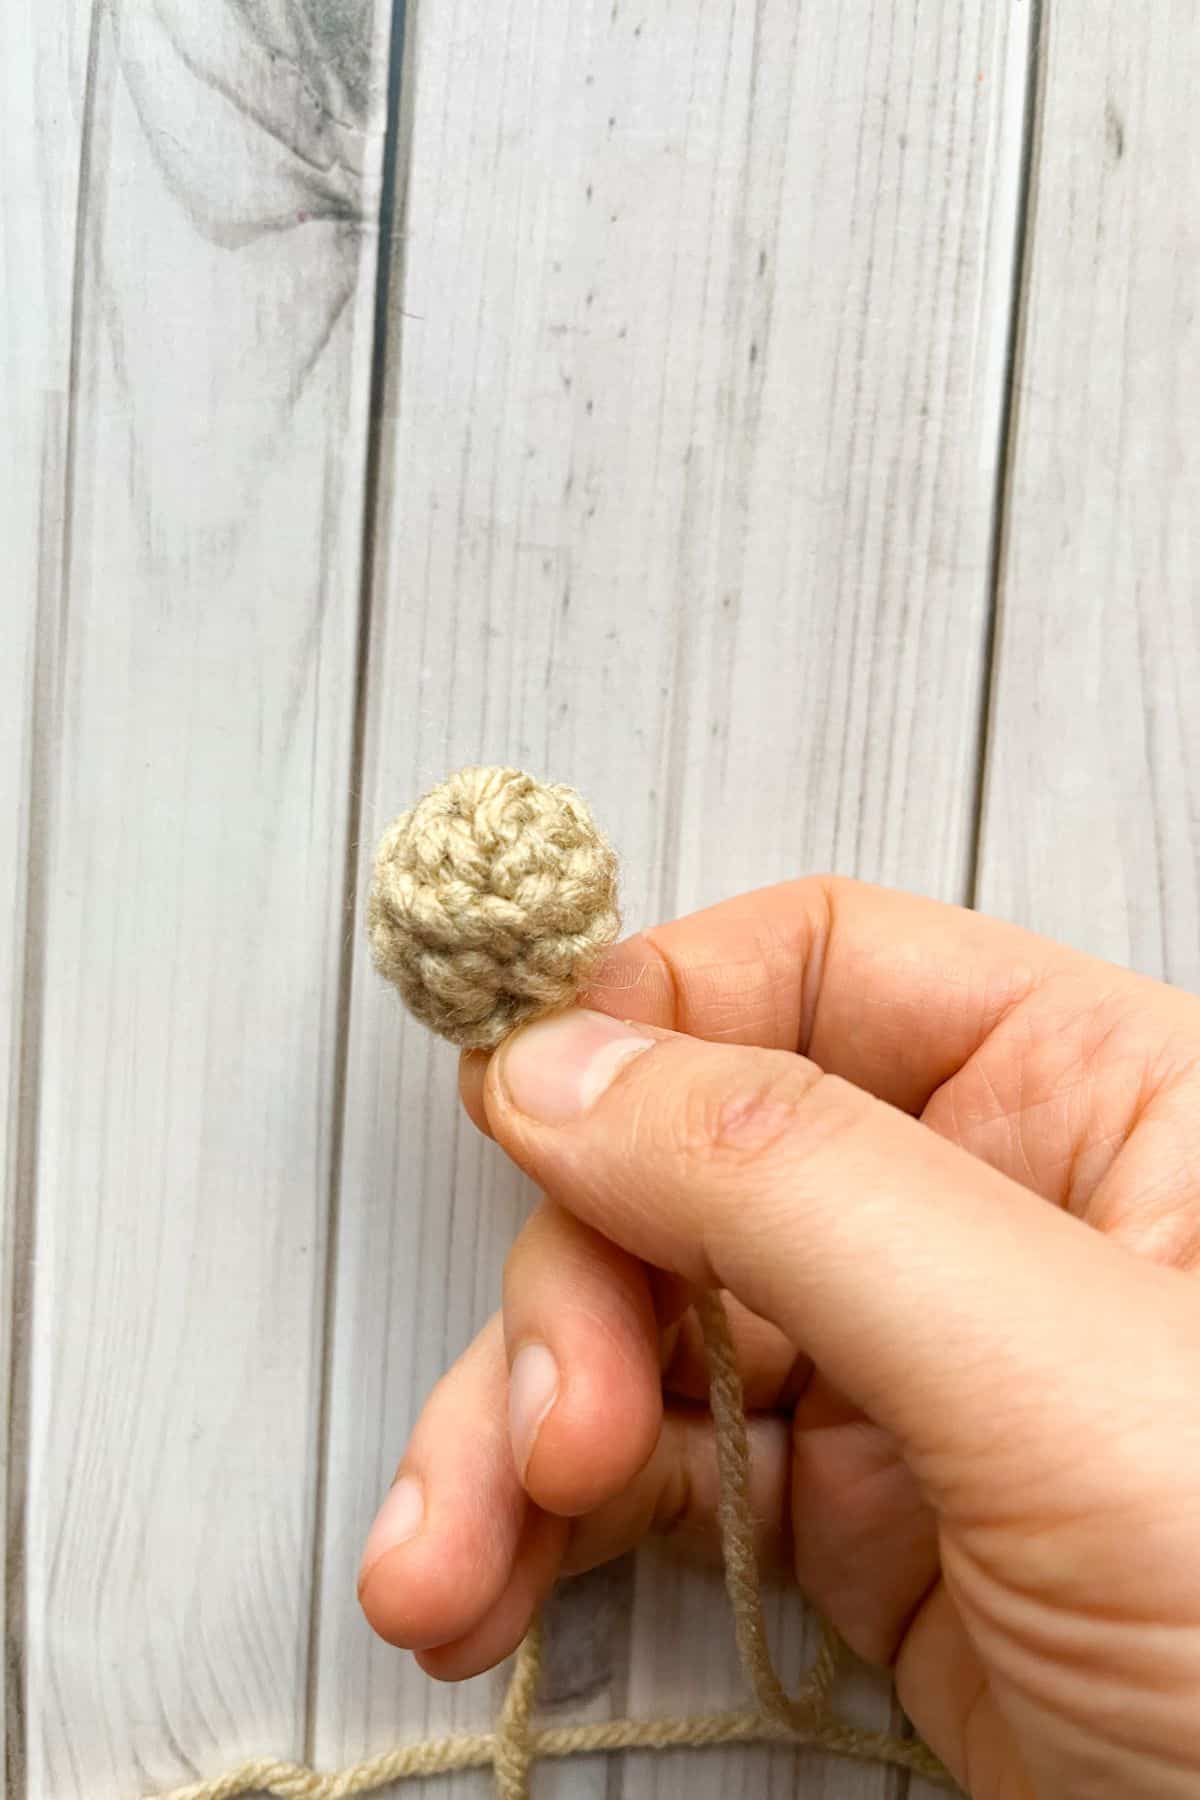
Crochet Nose:
Round 1: With the lace yarn, make a mr and sc x5 into the circle. Then pull tight.
Round 2: Inc in every stitch (10).
Round 3: Sc in every stitch (10).
Round 4: Dec in every stitch (5). Stuff lightly. Fasten off and leave a tail for sewing.
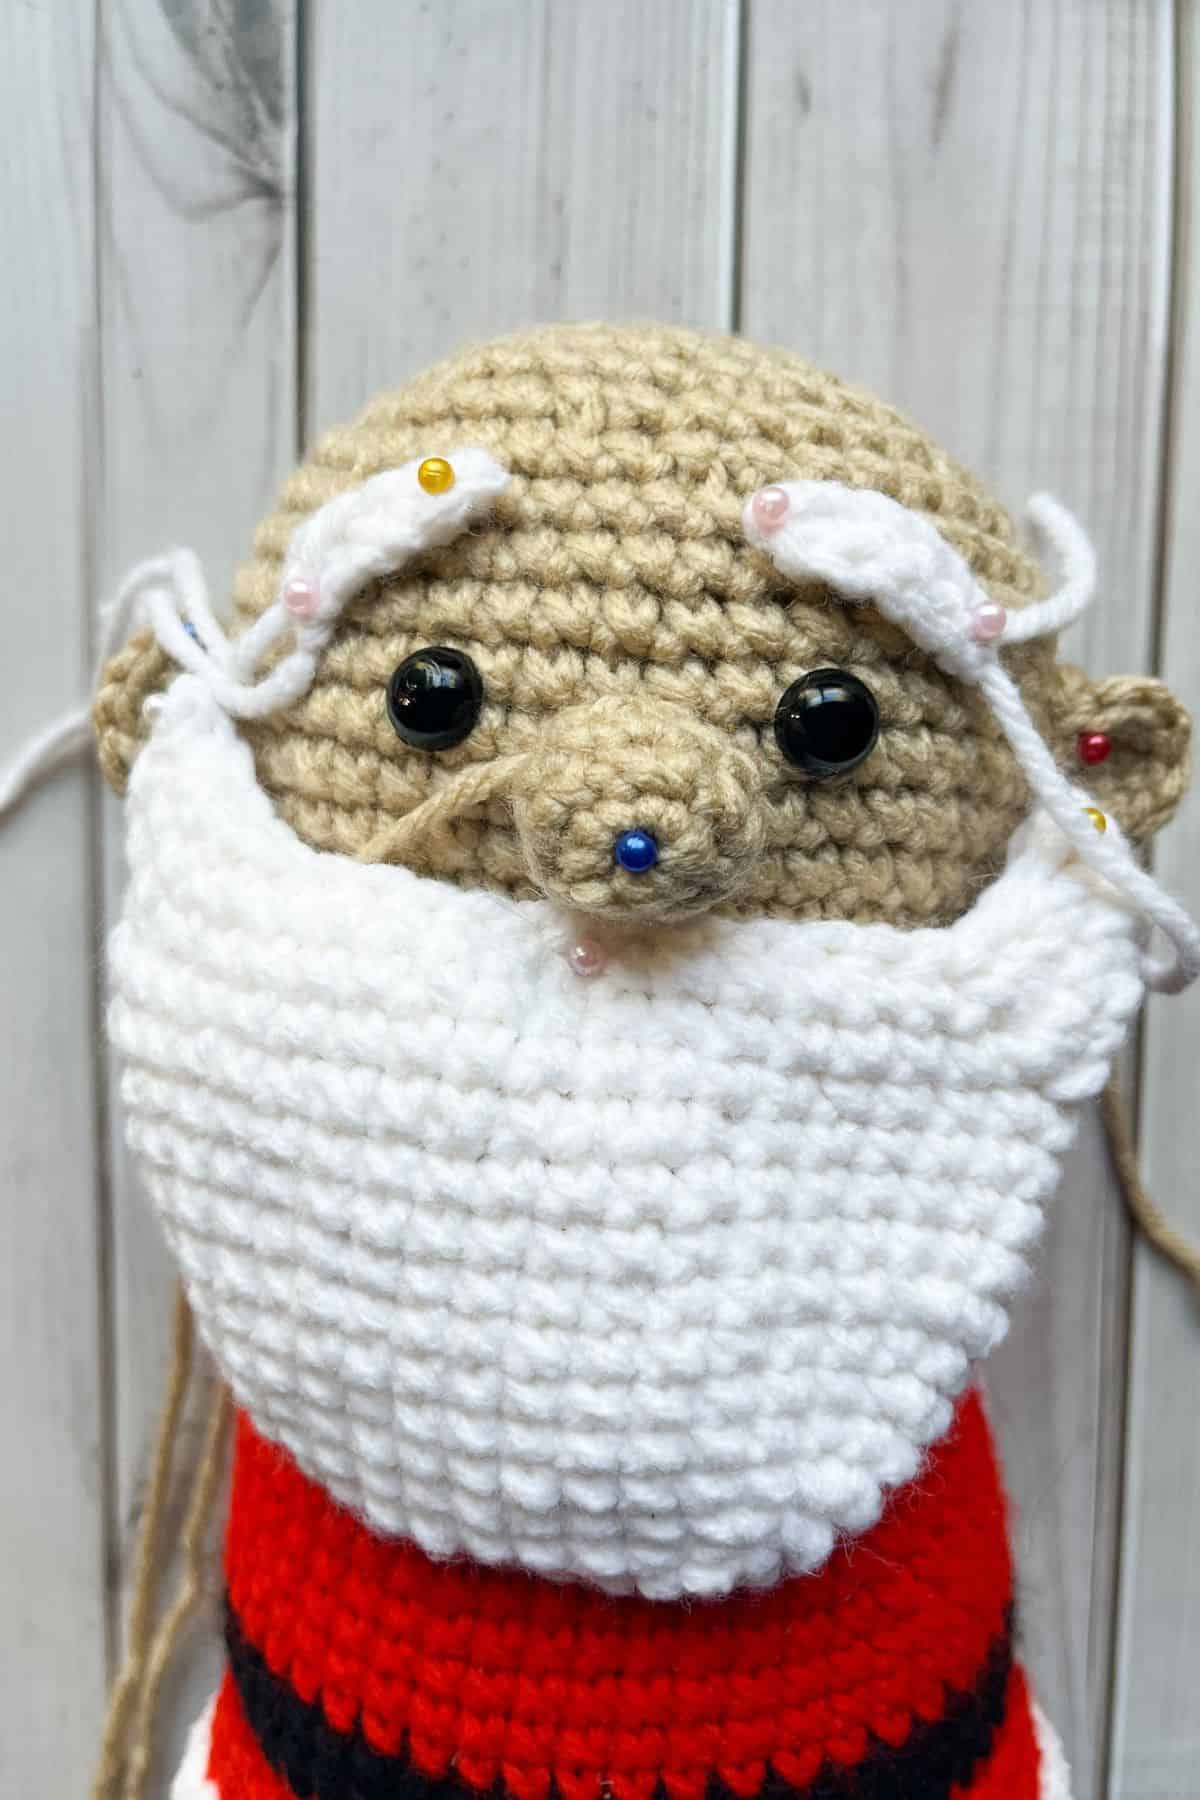
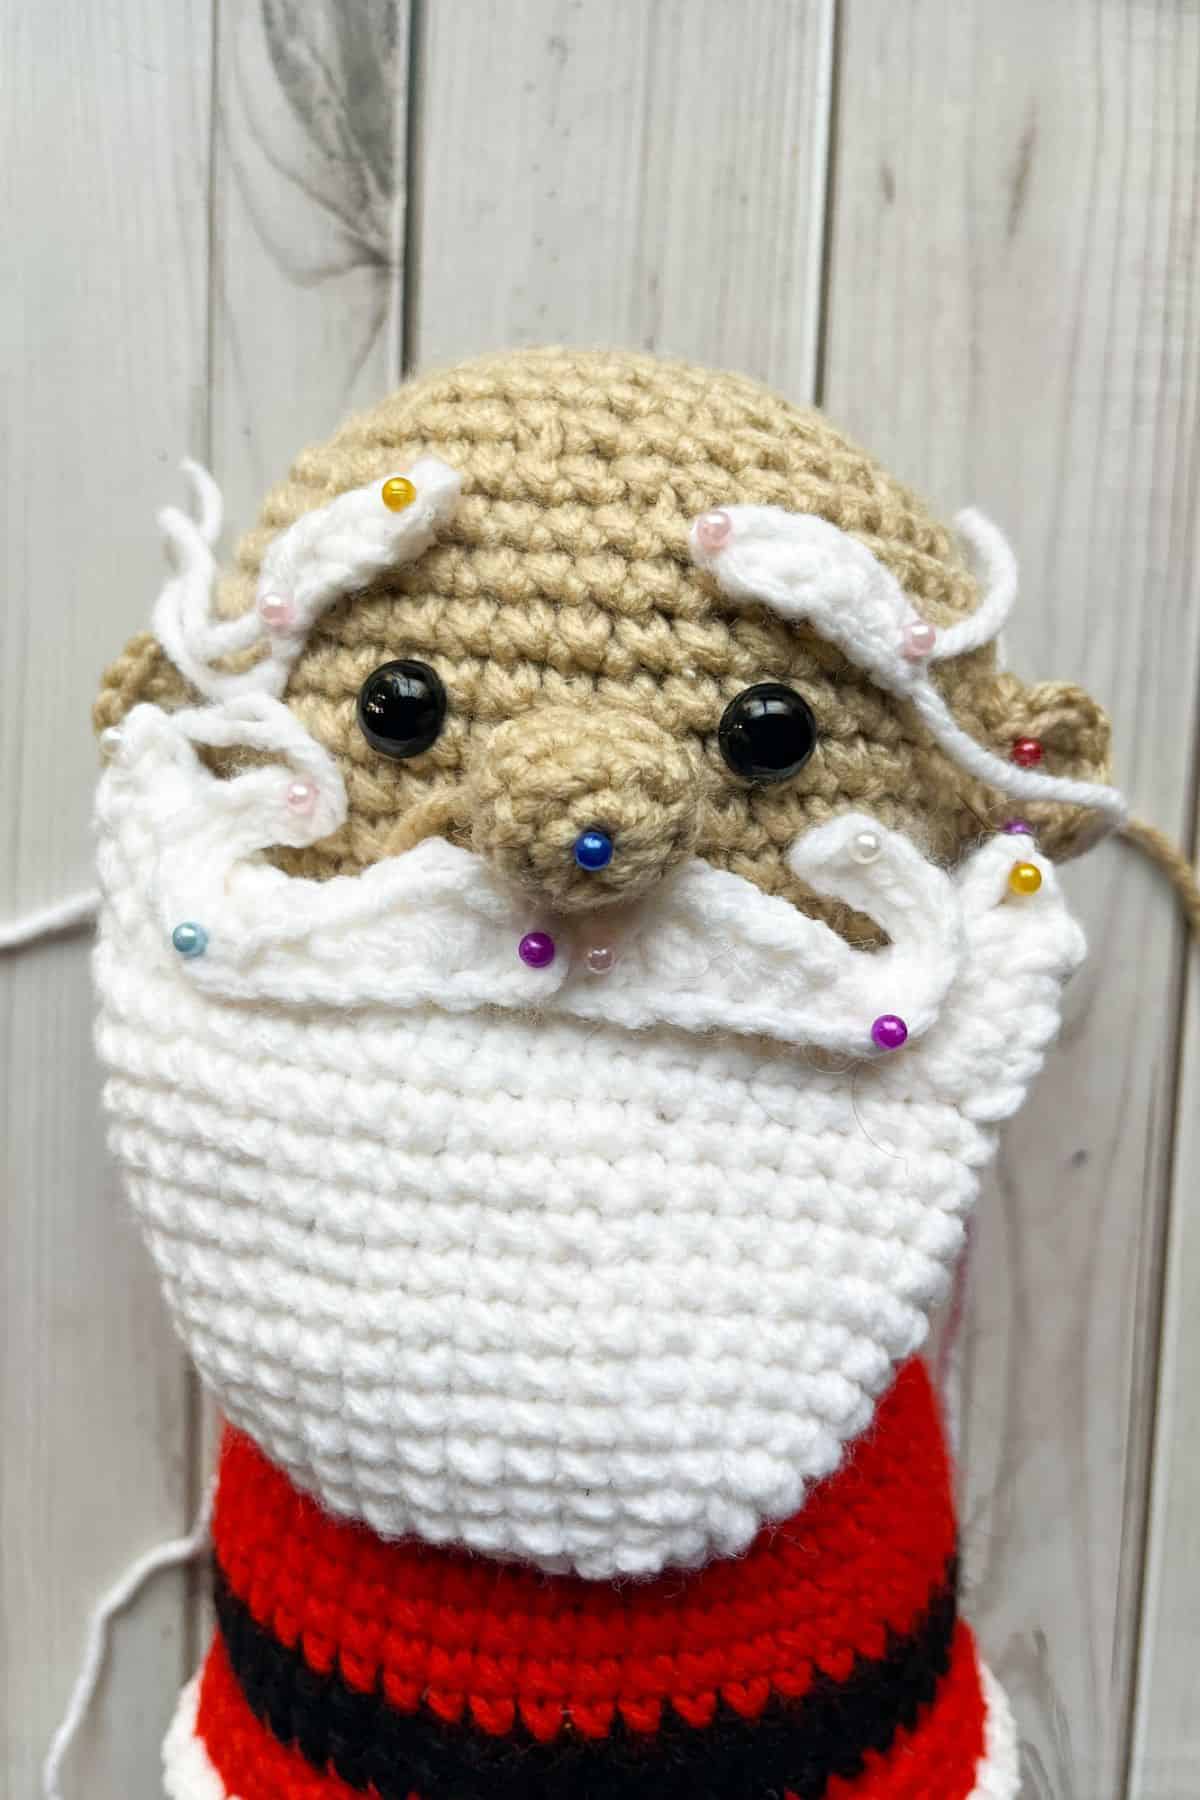
Facial Hair:
Crochet Mustache:
Make x2.
With the white worsted yarn, ch x13. Starting in the second ch from the hook: hdc, dc inc, hdc, sc x2, sl st x7. Then fasten off and leave a tail for sewing. The mustache looks straight now, but you will curl them as you sew them onto the crochet Santa Claus pattern.
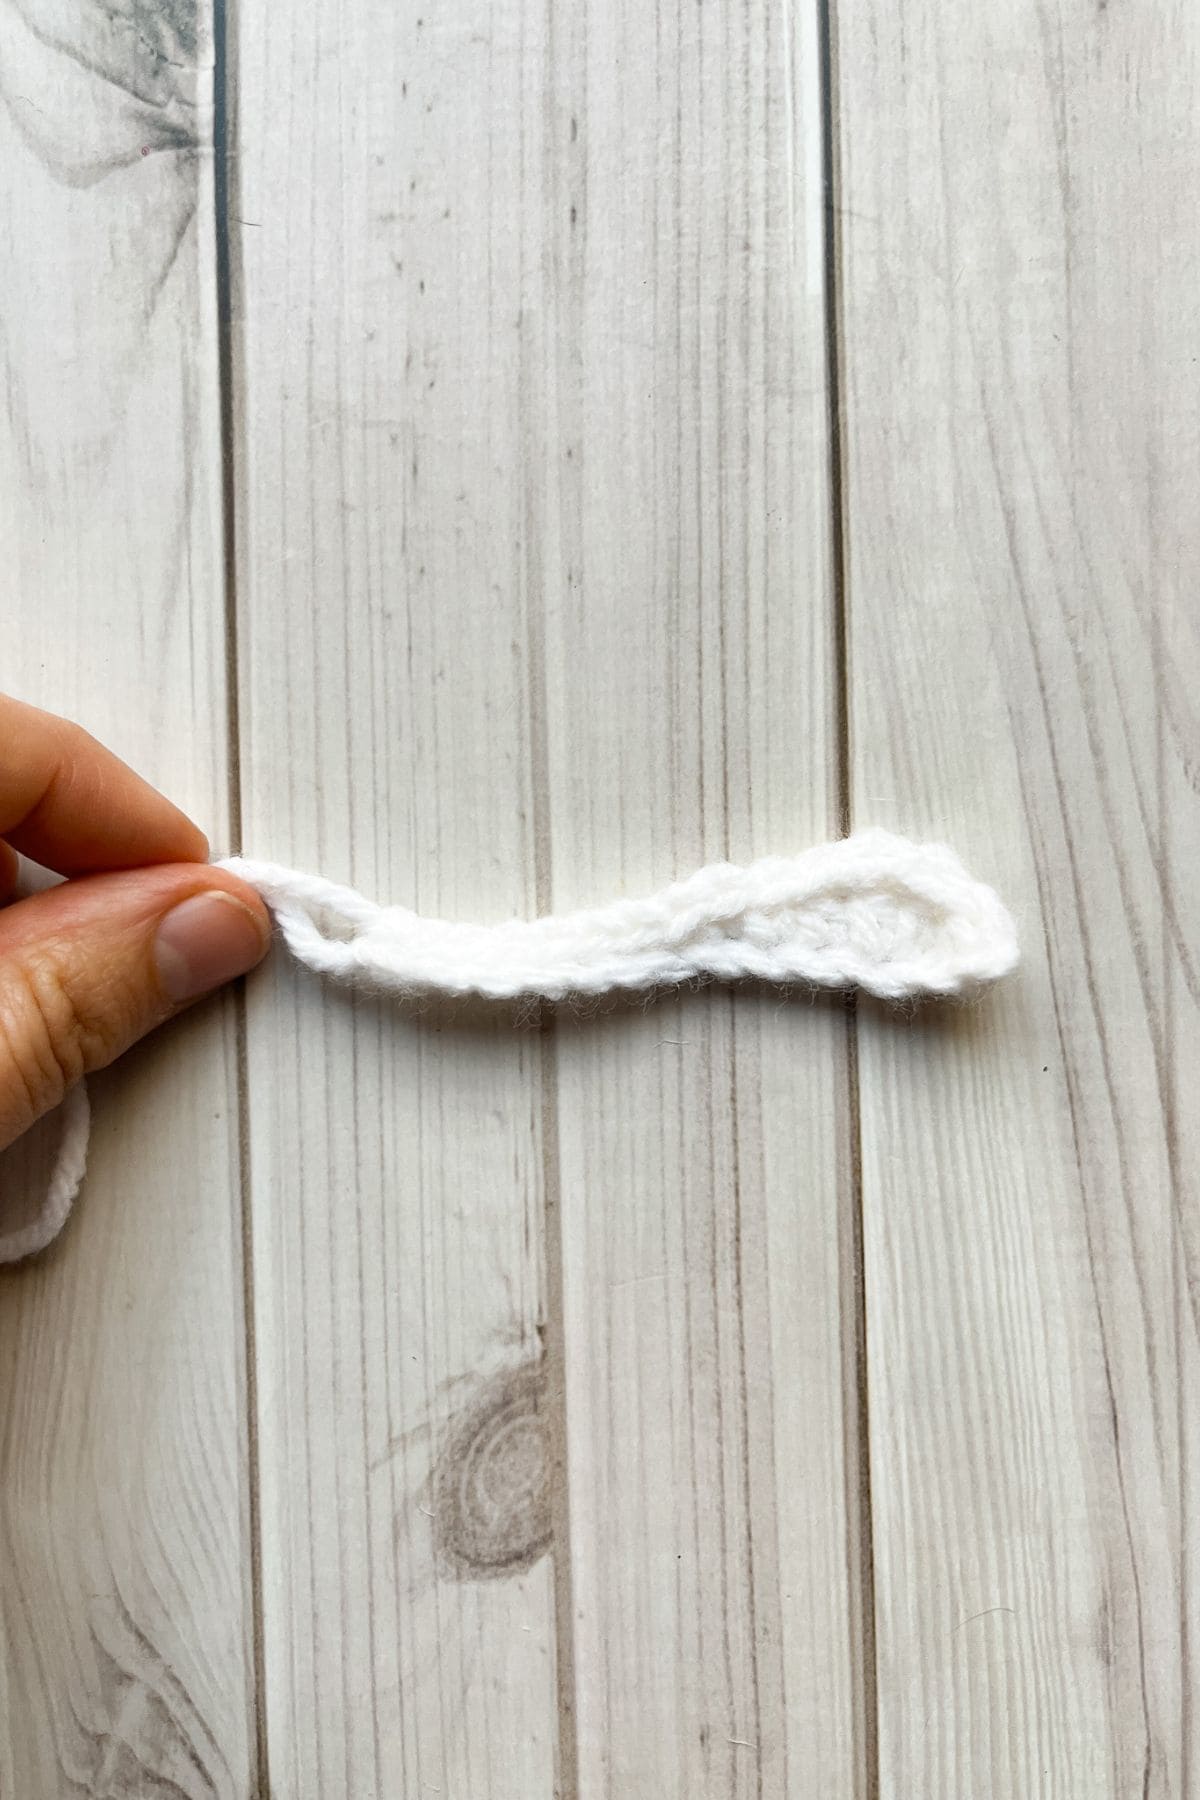
Crochet Eyebrows:
Make x2.
With the white worsted yarn, ch x6. In the second ch from the hook make a sc. Sc x3, then in the last ch make a sl st. Then fasten off the yarn and leave a tail for sewing.
Crochet Beard:
Round 1: With the white worsted weight yarn, ch x10. Then in the second ch from the hook make a sc. Sc x7, then in the last stitch make 3 sc stitches. Sc x7 and inc in the last stitch. Then sl st to the 1st sc you made. This will be the end of your current round and the only round that uses a sl st.
Round 2: Sc x7, inc x3, sc x7, inc x3 (26).
Round 3: Sc x9, inc x2, sc x11, inc x2, sc x2 (30).
Round 4: Sc in every stitch (30).
Round 5: Sc x11, inc, sc x14, inc, sc x3 (32).
Round 6: Sc in every stitch (32).
Round 7: Sc x11, inc x2, sc x14, inc x2 , sc x3 (36).
Round 8-10: Sc in every stitch (36).
Round 11: This is where the pattern starts to form the sideburns of the beard.
Flatten the beard and place a stitch marker in the middle stitch on the side, do the same to the other side. Sc until you reach the first stitch marker, for me this was 14 stitches not counting the stitch with the stitch marker.
Now sc into the stitch with the stitch marker (remove marker). *Ch x5 and in the second ch from the hook make a sc. Sc x3. Then sc to the next stitch in the last round of the beard*. Sc to the other side of the beard and repeat from* to *. Then sc x3.
Round 12: *Sc to the other side of the beard, when you get to the corner where the beard and sideburn meet, make a decrease. Then sc x2 ( up the sideburn), and then 3 sc stitches at the top of the sideburn. Sc x2 on the other side, dec the corner, and repeat from *. Sc x3.
Round 13: Do the same as the last round, but when you get to the sideburn corners single crochet 3 together, and then only add one increase at the top of the sideburn.
Once the last round is done, sc to the tip of the next sideburn. Ch x1 and sl st the beard closed by going through both sides of the beard, alternatively you can sew it closed. Lightly stuff the beard before closing, then leave a tail for sewing.
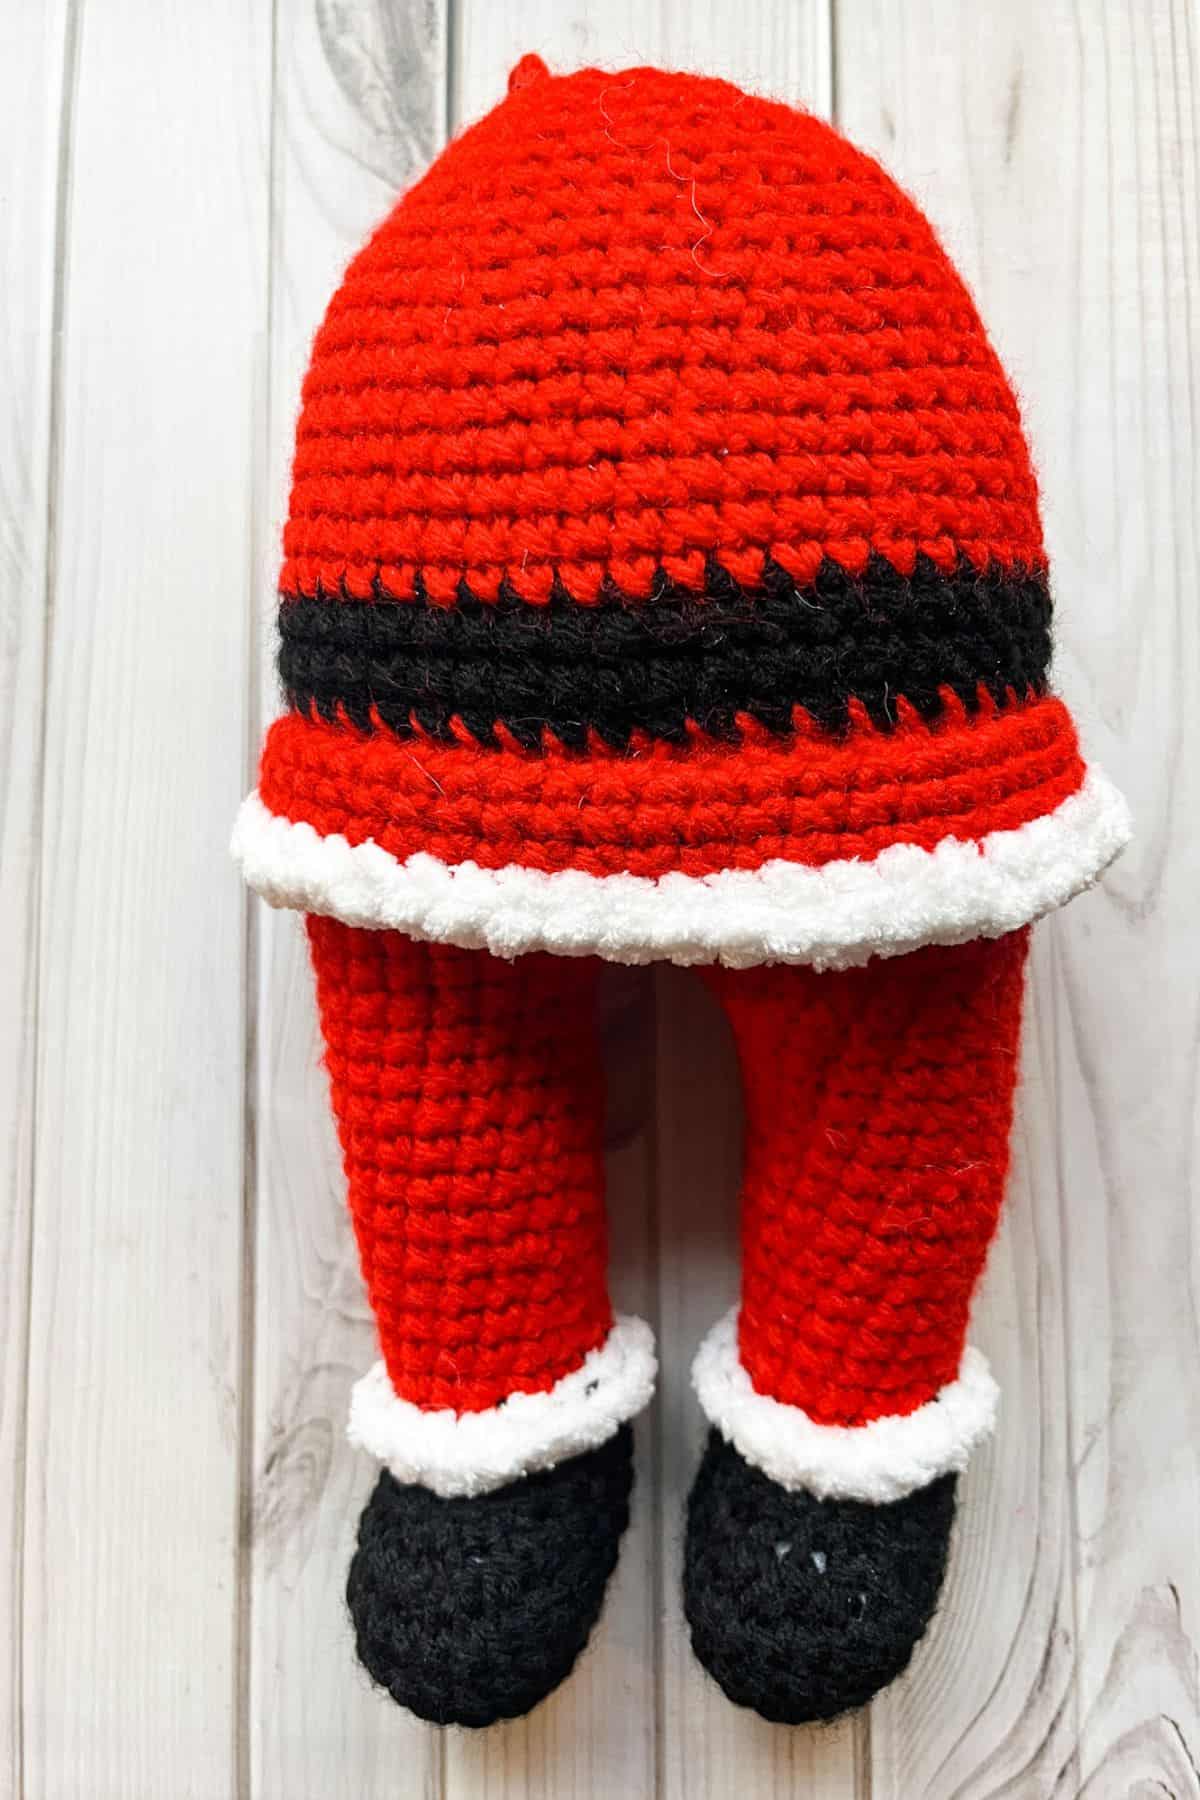
Crochet Santa Claus Hat:

Round 1: With the red yarn, make a mr —ch x3 (counts as a dc), dc x5 into the circle. Then sl st to the starting chains (6).
Round 2: Ch x3, inc (dc stitches) in every stitch (12). Then sl st to the starting chains.
Round 3: Ch x3, dc into every stitch (12). Sl st to the starting chains.
Round 4: Ch x3, *inc into the next stitch, dc. Then repeat from* for the rest of the round (18). Then sl st to the starting chains.
Round 5: Ch x3, dc into every stitch (18). Sl st to the starting chains.
Round 6: Ch x3, *inc into the next stitch, dc x2. Then repeat for the rest of the round (24). Then sl st to the starting chains.
Round 7: Ch x3, dc into every stitch (24). Sl st to the starting chains.
Round 8: Ch x3, *inc into the next stitch, dc x3. Then repeat for the rest of the round (30). Then sl st to the starting chains.
Round 9: Ch x3, dc into every stitch (30). Sl st to the starting chains.
Round 10: Ch x3, *inc into the next stitch, dc x4. Then repeat for the rest of the round (36). Then sl st to the starting chains.
Round 11: Ch x3, dc into every stitch (36). Sl st to the starting chains.
Round 12: Ch x3, *inc into the next stitch, dc x5. Then repeat for the rest of the round (42). Then sl st to the starting chains.
Round 13-14: Ch x3, dc into every stitch (42). Sl st to the starting chains. Fasten off the red yarn.
Round 15-16: Join the blanket yarn, then sc in every stitch (42). Fasten off and then weave in any ends.
Crochet Hat Pom Pom:
Round 1: Starting with the blanket yarn, make a mr. Then sc x6 into the circle and pull tight when you are done (6).
Round 2: Inc in every stitch (12).
Round 3: Inc, sc. Then repeat in every stitch (18).
Round 4: Sc in every stitch (18).
Round 5: Dec, sc. Then repeat for the rest of the round (12). Stuff the ball with polyfill.
Round 6: Dec for the entire round, then fasten off the yarn and sew the ball closed. Sew the ball to the top of the Christmas hat.
Sewing:
- Sew the belt buckle to the middle of the belt —I made my belt buckle roughly 1.5-2 inches long. I also made sure it was centered, and largely followed the outlines of the belt as my guide.
- The arms are sewn 3 rounds down from where the body and head meet.
- The ears are in line with the eyes, but are 6 stitches back. They should be aligned with the arms too.
- The nose is between and down from the eyes.
- The beard is sewn 1 round down from the bottom of the nose.
- Eyebrows are sewn on at an angle about 1-2 rounds up from the eyes.
- Mustaches go under the nose and are physically bent into shape.
And once you weave in all the ends, your new crochet Santa Claus doll is completed!
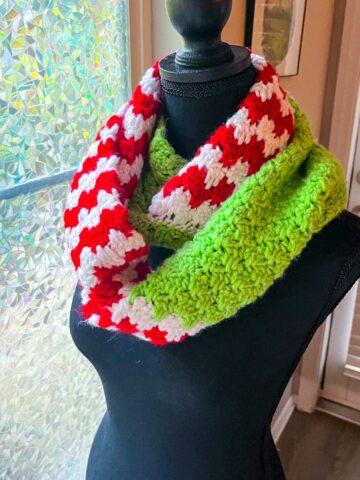
I hope you enjoyed this crochet Santa Claus tutorial, and if you are wanting to create more festive decor, try making my mini crochet stocking pattern or my crochet mini mitten ornament pattern —both can use up any leftover yarn.
If you have a LOT of red yarn and blanket yarn left, you can make my pattern for a crochet Christmas tree skirt.
🐌Expert Tips
- Since we are working in a continuous spiral for the crochet santa claus pattern it can be hard to tell where each round begins and ends. I suggest using stitch markers if you need extra help.
- The stitches for this free crochet Santa Claus pattern are fairly simple, but the construction of this pattern makes it best suited for an intermediate to advanced crocheter. If you are a beginner and want to stretch your amigurumi wings, please check out the video for further help.
- Make sure your stitches are tight and that you stuff the crochet Santa Claus well. Not enough stuffing and it can lose shape.
🧵Pattern FAQs
It took me an entire day (8hrs) to make the crochet Santa Claus, but it might take others shorter or longer depending on how fast they can crochet.
Amigurumi is the Japanese term for a crochet doll made from yarn. It has gained popularity over the years so we see more and more designers using the term “amigurumi” versus a “plush toy”.
The crochet Santa Claus pattern is not no sew, or low sew. The body is made in one piece (minus the arms). And everything else is sewn on. Although there is a lot of sewing involved, I think the crochet Santa Claus is worth it.
🧶More Crochet Christmas Patterns

If you tried this Crochet Santa Claus Pattern (or any other pattern on my website), please let me know how it went in the 📝 comments below. I'd love to hear from you!

Crochet Santa Claus Pattern
Materials
Abbreviations (US terms)
- Magic ring - mr
- Chains - ch
- Single crochet - sc
- Half double crochet - hdc
- Double crochet - dc
- Slip stitch - sl st
- Increase - inc
- Decrease - dec
- Back loop only - blo
- Front loop only (flo)
Notes
- Size: The Santa amigurumi pattern is roughly 14inches without a hat. If you use chunky yarn, realize that the finished crochet santa claus will be a few feet tall.
- Yarn under: I am starting to make my amigurumi in yarn under, the crochet Santa Claus pattern is no exception. I like the way it looks compared to traditional crochet. If you have trouble yarning under, you can make the pattern normally, but realize the proportions will be off since yarn under results in tighter rounds.
- Sewing: The legs, belly, and head of the crochet Santa Claus pattern is made in just one piece. Everything else is sewn on, make sure your amigurumi sewing skills are good, otherwise you might find it difficult.
Instructions
- The crochet Santa Claus pattern is made mostly in the round in yarn under single crochet unless specified.
Crochet Arm:
- Make x2.
- Round 1: Starting with the black yarn, make a mr. Then sc x6 into the circle and pull tight when you are done (6).
- Round 2: Inc in every stitch (12).
- Round 3: Inc, sc x3. Then repeat for the rest of the round (15).
- Round 4-8: Sc in every stitch (15). Fasten off the black yarn.
- Round 9: Join the red yarn to where you left off last round but only in blo! In blo - dec, sc x3. Then repeat for the rest of the round (12).
- Round 10-21: Sc in every stitch (12). At this point you want to stuff the arm ⅔ of the way.
- Round 22: Dec, sc x2. Then repeat for the rest of the round (9).
- Round 23: Sc in every stitch (9). Then fasten off the yarn and leave a tail for sewing.
- Round 9 FLO: In round 9 flo, join the bernat blanket yarn and sl st the entire flo round. Then sl st to the beginning and fasten off. Weave in the ends.
- If you see little black dots in the fur trimming, roll the yarn up and most of the dots disappear.
Crochet Leg:
- Make x2. Fasten off one leg, do not fasten off the other.
- Round 1: Starting with the black yarn, make a mr. Then sc x6 into the circle and pull tight when you are done (6).
- Round 2: Inc in every stitch (12).
- Round 3: Inc, sc. Then repeat in every stitch (18).
- Round 4: Inc, sc x2. Then repeat in every stitch (24).
- Round 5-6: Sc in every stitch (24).
- Round 7: Dec x6, sc x12 (18).
- Round 8: Dec x3, sc x12 (15).
- Round 9: Sc in every stitch (15). Fasten off the black yarn.
- Round 10: Join the red yarn in blo where you left off last round. Sc in blo for this round (15).
- Round 11-14: Sc in every stitch in the round (15). You should stuff the tip of the shoe at this point.
- Round 15: Inc, sc x4. Then repeat for the rest of the round (18).
- Round 16-21: Sc in every stitch (18). Fasten off one leg, do not fasten off the other. Stuff both legs.
- Round 10 FLO: In round 9 flo, join the bernat blanket yarn and sl st the entire flo round. Then sl st to the beginning and fasten off. Weave in the ends.
Joining the Legs:
- With the leg that you haven't fastened off on your left, line the legs up, feet facing you. Add 2 stitch markers to the inner middle stitches on each leg, the stitch markers do not need to be connected to both legs —just one leg. So you will use 4 stitch markers in total.
- Round 22: Sc until you reach the first stitch marker, then remove the stitch marker and sc into that stitch. Ch x3 and make a sc in the OTHER LEG’s reciprocal stitch. Sc around the second leg until you reach the chain 3 you just made. Then sc into the back bumps of the chains. Next, sc around the other leg and then sc into the chain 3 you made.
- This is the new beginning/end to your rounds (42).
- Round 23: Sc in every stitch (42).
- Round 24: Inc, sc x13. Then repeat for the rest of the round (45).
- Round 25: Sc in every stitch (45).
- Round 26: Inc, sc x14. Then repeat for the rest of the round (48).
- Round 27-29: Sc in every stitch (48). Fasten off the red yarn.
- Round 30: Join the black yarn in blo. Sc in blo for the entire round (48).
- Round 31-32: Sc in every stitch (48). Then fasten off the black yarn.
- Round 33-38: Join the red yarn. Then sc in every stitch (48).
- Round 39: Dec, sc x6. Then repeat for the rest of the round (42).
- Round 40: Sc in every stitch (42).
- Round 41: Dec, sc x5. Then repeat for the rest of the round (36).
- Round 42: Sc in every stitch (36).
- Round 43: Dec, sc x4. Then repeat for the rest of the round (30).
- Round 44: Sc in every stitch (30). Stuff the body if you haven't started.
- Round 45: Dec, sc x3. Then repeat for the rest of the round (24).
- Round 46: Sc in every stitch (24).
- Round 47: Dec, sc x2. Then repeat for the rest of the round (18). Fasten off the red yarn. We will come back to making the head in a little bit, first we will finish the coat trim.
Coat Trim:
- Flip your santa upside down, so the body is close to you and the feet are away from you.
- Round 1: Join the red yarn anywhere in the FLO ROUND under the belt and make a round of slip stitches, make sure you do not make them tight (48).
- Round 2-4: Sc in every stitch. Then fasten off the red yarn (48).
- Round 5: Join the blanket yarn and make a round of sc stitches (48).
- Okay now back to the head.
Crochet Head:
- Round 48: Join the Lace colored yarn, or another skin tone colored yarn, to the FLO OF THE TOP OF THE BODY (round 47). Inc, sc x2. Then repeat for the rest of the round (24).
- Round 49: Sc x1, inc, sc x2. Then repeat for the rest of the round (30).
- Round 50: Sc x3, inc, sc x1. Then repeat for the rest of the round (36).
- Round 51: Sc x2, inc, sc x3. Then repeat for the rest of the round (42).
- Round 52: Inc, sc x6. Then repeat for the rest of the round (48).
- Round 53-61: Sc in every stitch (48).
- Round 62: Dec, sc x6. Then repeat for the rest of the round (42).
- Round 63: Dec, sc x5. Then repeat for the rest of the round (36). Counting from the bottom of the head, add the eyes between rounds 10-11, as centered to the doll as you can, but with 6 or so stitches in between.
- Round 64: Dec, sc x4. Then repeat for the rest of the round (30).
- Round 65: Dec, sc x3. Then repeat for the rest of the round (24). Stuff the head with polyfil.
- Round 66: Dec, sc x2. Then repeat for the rest of the round (18).
- Round 67: Dec, sc. Then repeat for the rest of the round (12).
- Round 68: Dec, then repeat for the rest of the round (6). Fasten off the head and sew the top of the head closed.
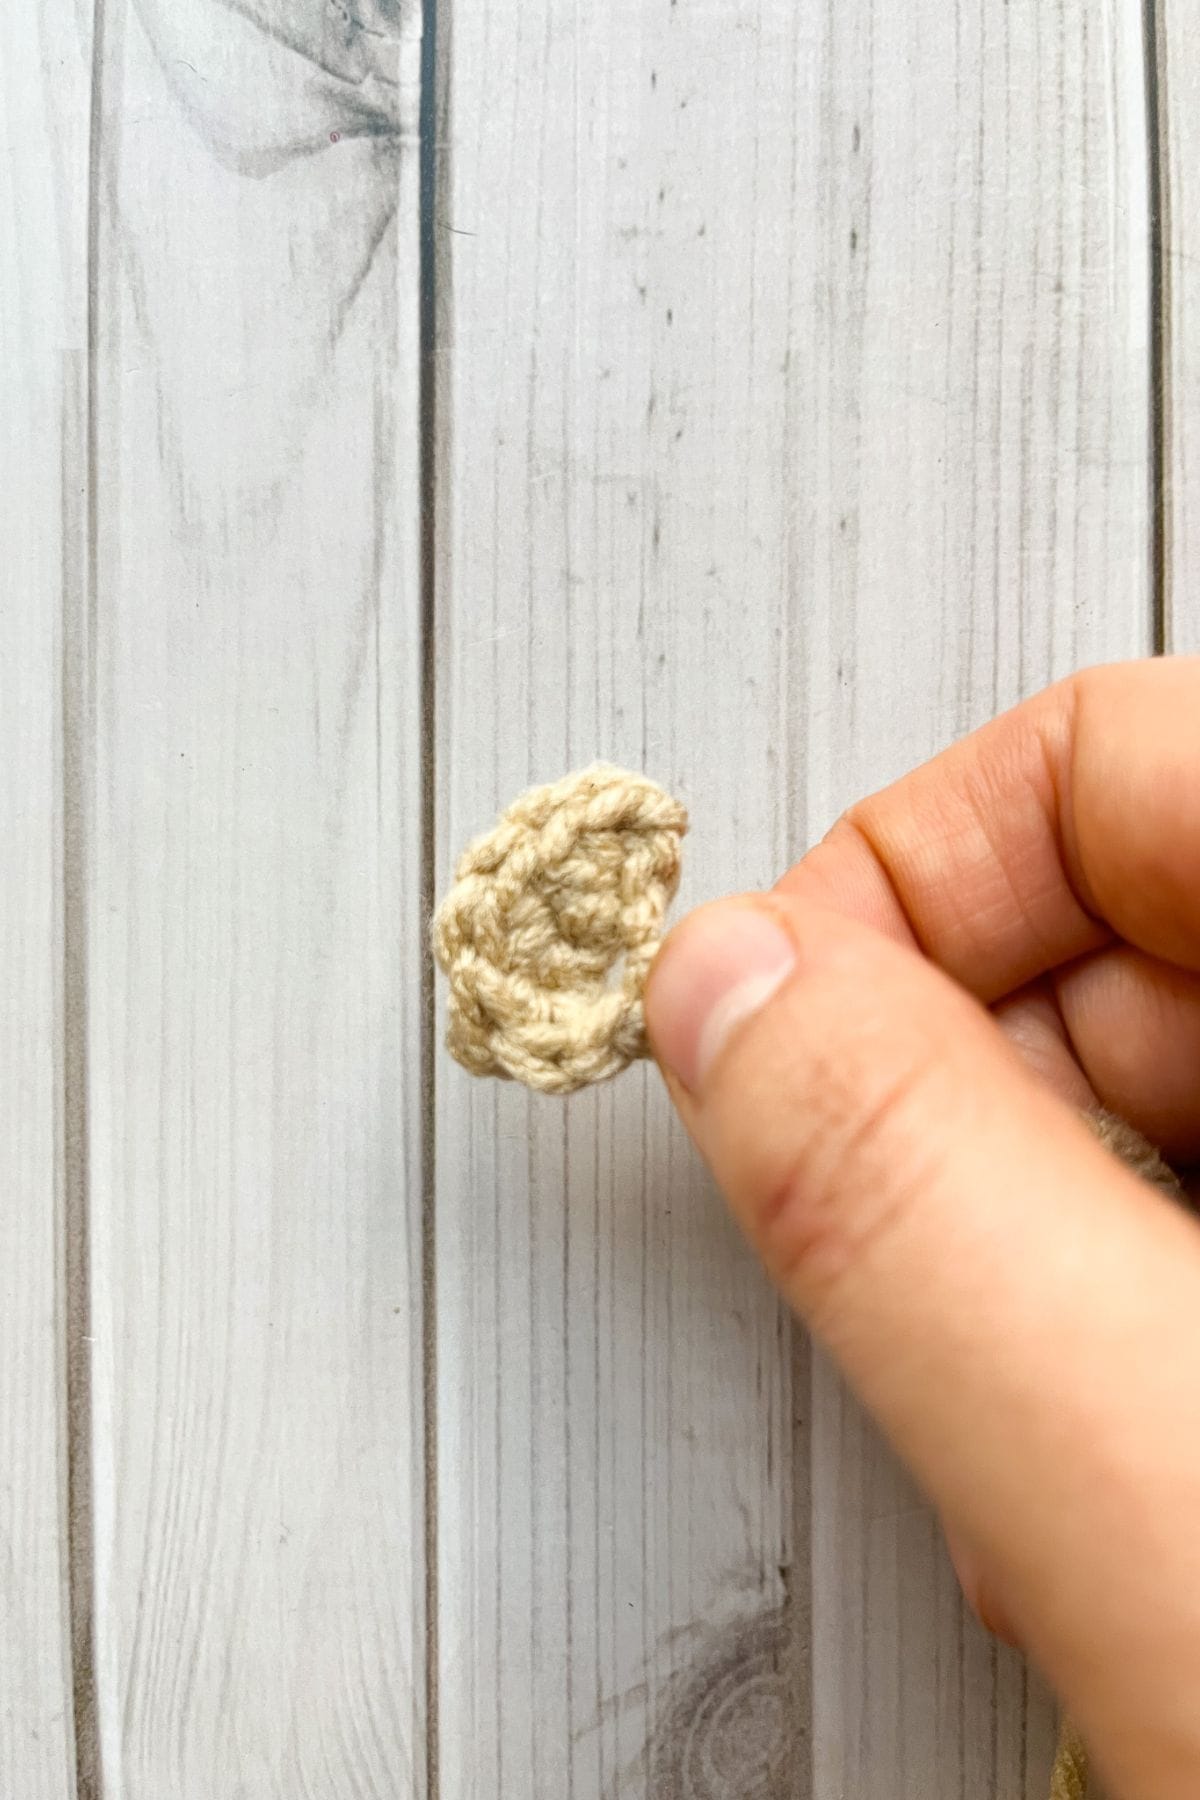
Crochet Ear:
- Make x2.
- Round 1: With the lace yarn, chain 2, then in the second ch from the hook, make 3 sc stitches. Then ch x1 and turn.
- Round 2: Inc in every stitch. Then sl st back to the ch x2 you made at the beginning. Fasten off and leave a tail for sewing.
Crochet Nose:
- Round 1: With the lace yarn, make a mr and sc x5 into the circle. Then pull tight.
- Round 2: Inc in every stitch (10).
- Round 3: Sc in every stitch (10).
- Round 4: Dec in every stitch (5). Stuff lightly. Fasten off and leave a tail for sewing.
Crochet Belt Buckle:
- With the yellow yarn, ch x21 and fasten off —leave a tail for sewing.
- Now onto the crochet santa claus facial hair.
Crochet Eyebrows:
- Make x2.
- With the white worsted yarn, ch x6. In the second ch from the hook make a sc. Sc x3, then in the last ch make a sl st. Then fasten off the yarn and leave a tail for sewing.
Crochet Mustache:
- Make x2.
- With the white worsted yarn, ch x13. Starting in the second ch from the hook: hdc, dc inc, hdc, sc x2, sl st x7. Then fasten off and leave a tail for sewing. The mustache looks straight now, but you will curl them as you sew them onto the crochet Santa Claus pattern.
Crochet Beard:
- Round 1: With the white worsted weight yarn, ch x10. Then in the second ch from the hook make a sc. Sc x7, then in the last stitch make 3 sc stitches. Sc x7 and inc in the last stitch. Then sl st to the 1st sc you made. This will be the end of your current round and the only round that uses a sl st.
- Round 2: Sc x7, inc x3, sc x7, inc x3 (26).
- Round 3: Sc x9, inc x2, sc x11, inc x2, sc x2 (30).
- Round 4: Sc in every stitch (30).
- Round 5: Sc x11, inc, sc x14, inc, sc x3 (32).
- Round 6: Sc in every stitch (32).
- Round 7: Sc x11, inc x2, sc x14, inc x2 , sc x3 (36).
- Round 8-10: Sc in every stitch (36).
- Round 11: This is where the pattern starts to form the sideburns of the beard.
- Flatten the beard and place a stitch marker in the middle stitch on the side, do the same to the other side. Sc until you reach the first stitch marker, for me this was 14 stitches not counting the stitch with the stitch marker.
- Now sc into the stitch with the stitch marker (remove marker). *Ch x5 and in the second ch from the hook make a sc. Sc x3. Then sc to the next stitch in the last round of the beard*. Sc to the other side of the beard and repeat from* to *. Then sc x3.
- Round 12: *Sc to the other side of the beard, when you get to the corner where the beard and sideburn meet, make a decrease. Then sc x2 ( up the sideburn), and then 3 sc stitches at the top of the sideburn. Sc x2 on the other side, dec the corner, and repeat from *. Sc x3.
- Round 13: Do the same as the last round, but when you get to the sideburn corners single crochet 3 together, and then only add one increase at the top of the sideburn.
- Once the last round is done, sc to the tip of the next sideburn. Ch x1 and sl st the beard closed by going through both sides of the beard, alternatively you can sew it closed. Lightly stuff the beard before closing,then leave a tail for sewing.
Crochet Santa Claus Hat:
- Round 1: With the red yarn, make a mr —ch x3 (counts as a dc), dc x5 into the circle. Then sl st to the starting chains (6).
- Round 2: Ch x3, inc (dc stitches) in every stitch (12). Then sl st to the starting chains.
- Round 3: Ch x3, dc into every stitch (12). Sl st to the starting chains.
- Round 4: Ch x3, *inc into the next stitch, dc. Then repeat from* for the rest of the round (18). Then sl st to the starting chains.
- Round 5: Ch x3, dc into every stitch (18). Sl st to the starting chains.
- Round 6: Ch x3, *inc into the next stitch, dc x2. Then repeat for the rest of the round (24). Then sl st to the starting chains.
- Round 7: Ch x3, dc into every stitch (24). Sl st to the starting chains.
- Round 8: Ch x3, *inc into the next stitch, dc x3. Then repeat for the rest of the round (30). Then sl st to the starting chains.
- Round 9: Ch x3, dc into every stitch (30). Sl st to the starting chains.
- Round 10: Ch x3, *inc into the next stitch, dc x4. Then repeat for the rest of the round (36). Then sl st to the starting chains.
- Round 11: Ch x3, dc into every stitch (36). Sl st to the starting chains.
- Round 12: Ch x3, *inc into the next stitch, dc x5. Then repeat for the rest of the round (42). Then sl st to the starting chains.
- Round 13-14: Ch x3, dc into every stitch (42). Sl st to the starting chains. Fasten off the red yarn.
- Round 15-16: Join the blanket yarn, then sc in every stitch (42). Fasten off and then weave in any ends.
Crochet Hat Pom Pom:
- Round 1: Starting with the blanket yarn, make a mr. Then sc x6 into the circle and pull tight when you are done (6).
- Round 2: Inc in every stitch (12).
- Round 3: Inc, sc. Then repeat in every stitch (18).
- Round 4: Sc in every stitch (18).
- Round 5: Dec, sc. Then repeat for the rest of the round (12). Stuff the ball with polyfill.
- Round 6: Dec for the entire round, then fasten off the yarn and sew the ball closed. Sew the ball to the top of the Christmas hat.
Sewing:
- Sew the belt buckle to the middle of the belt —I made my belt buckle roughly 1.5-2 inches long. I also made sure it was centered, and largely followed the outlines of the belt as my guide.
- The arms are sewn 3 rounds down from where the body and head meet.
- The ears are in line with the eyes, but are 6 stitches back. They should be aligned with the arms too.
- The nose is between and down from the eyes.
- The beard is sewn 1 round down from the bottom of the nose.
- Eyebrows are sewn on at an angle about 1-2 rounds up from the eyes.
- Mustaches go under the nose and are physically bent into shape.
- And once you weave in all the ends, your new crochet Santa Claus doll is completed!
- I hope you enjoyed this crochet santa claus tutorial


Kay williams says
Do you have a pattern for Mrs claus
Kimberly Arenas says
not yet 🙂 I hope to add one this year!