
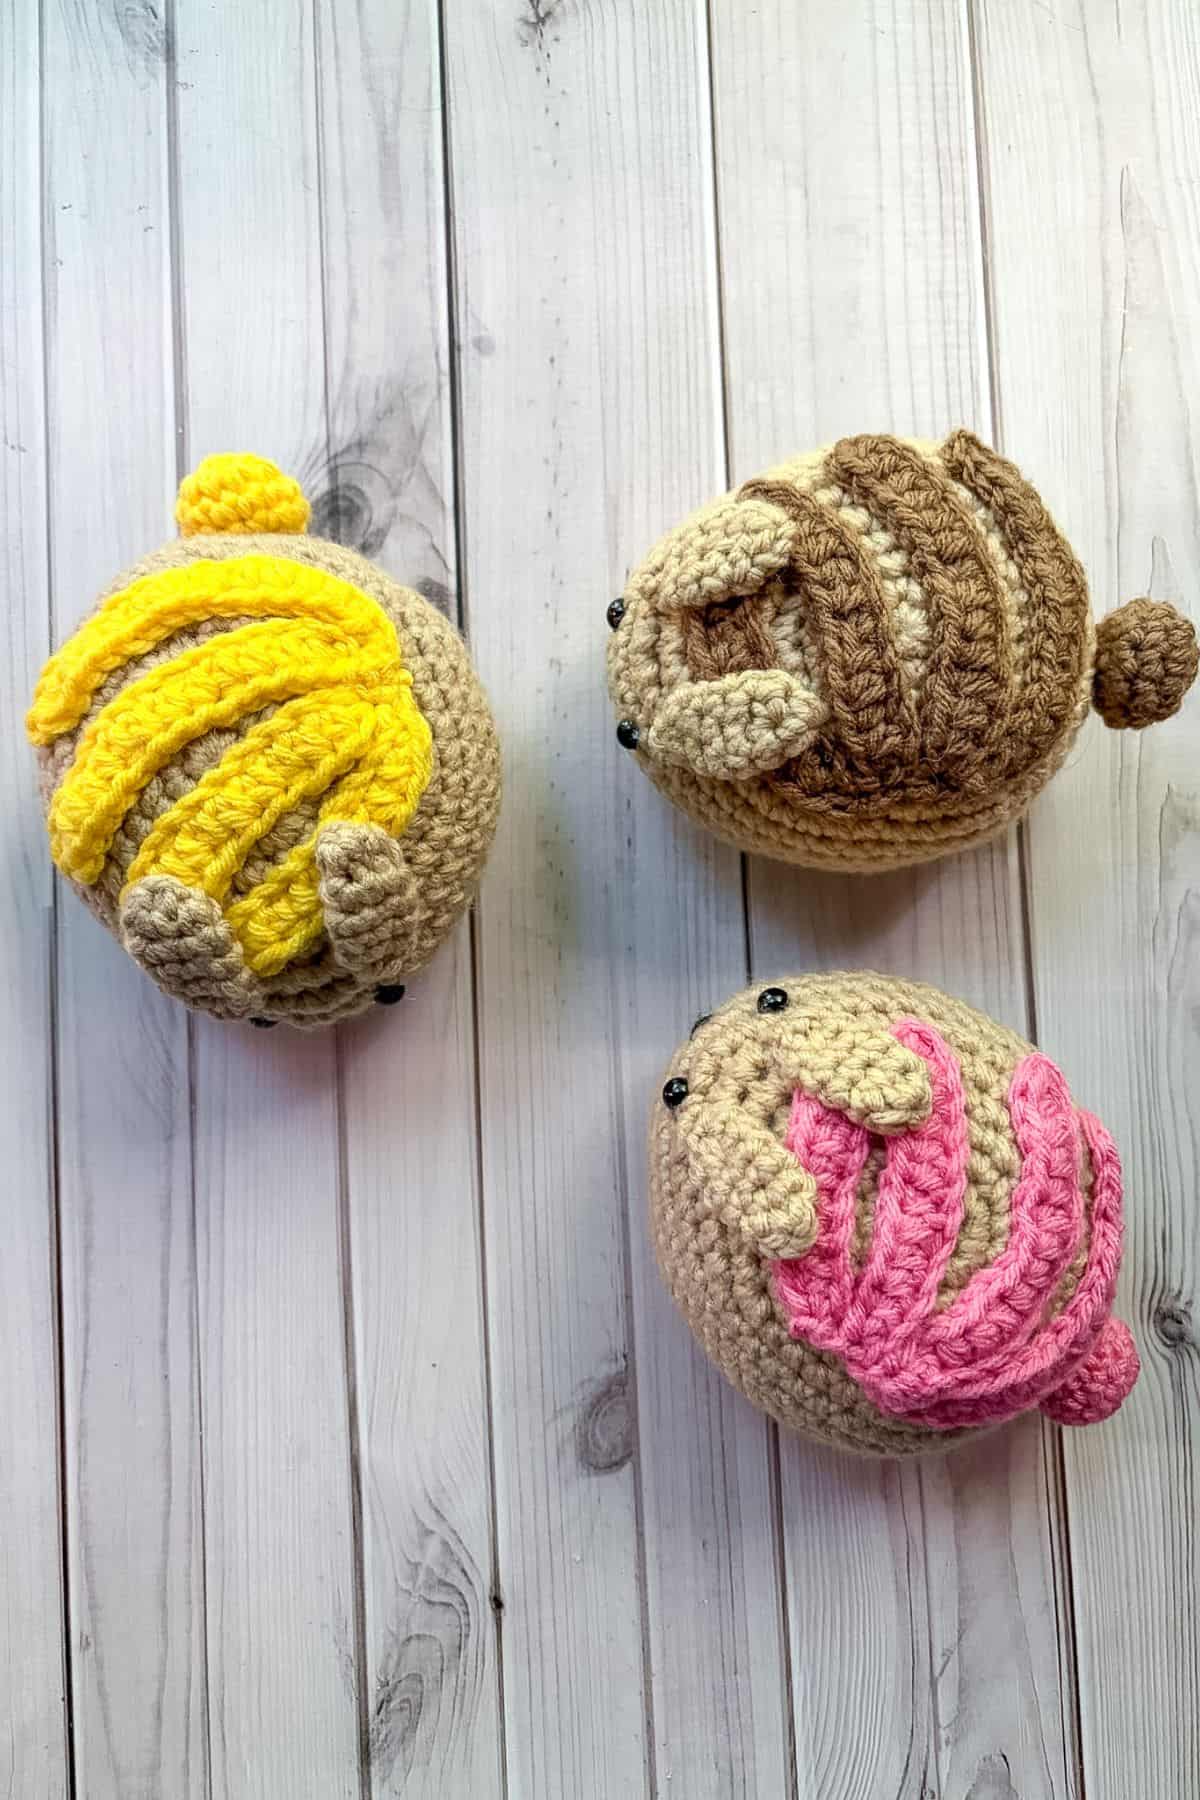
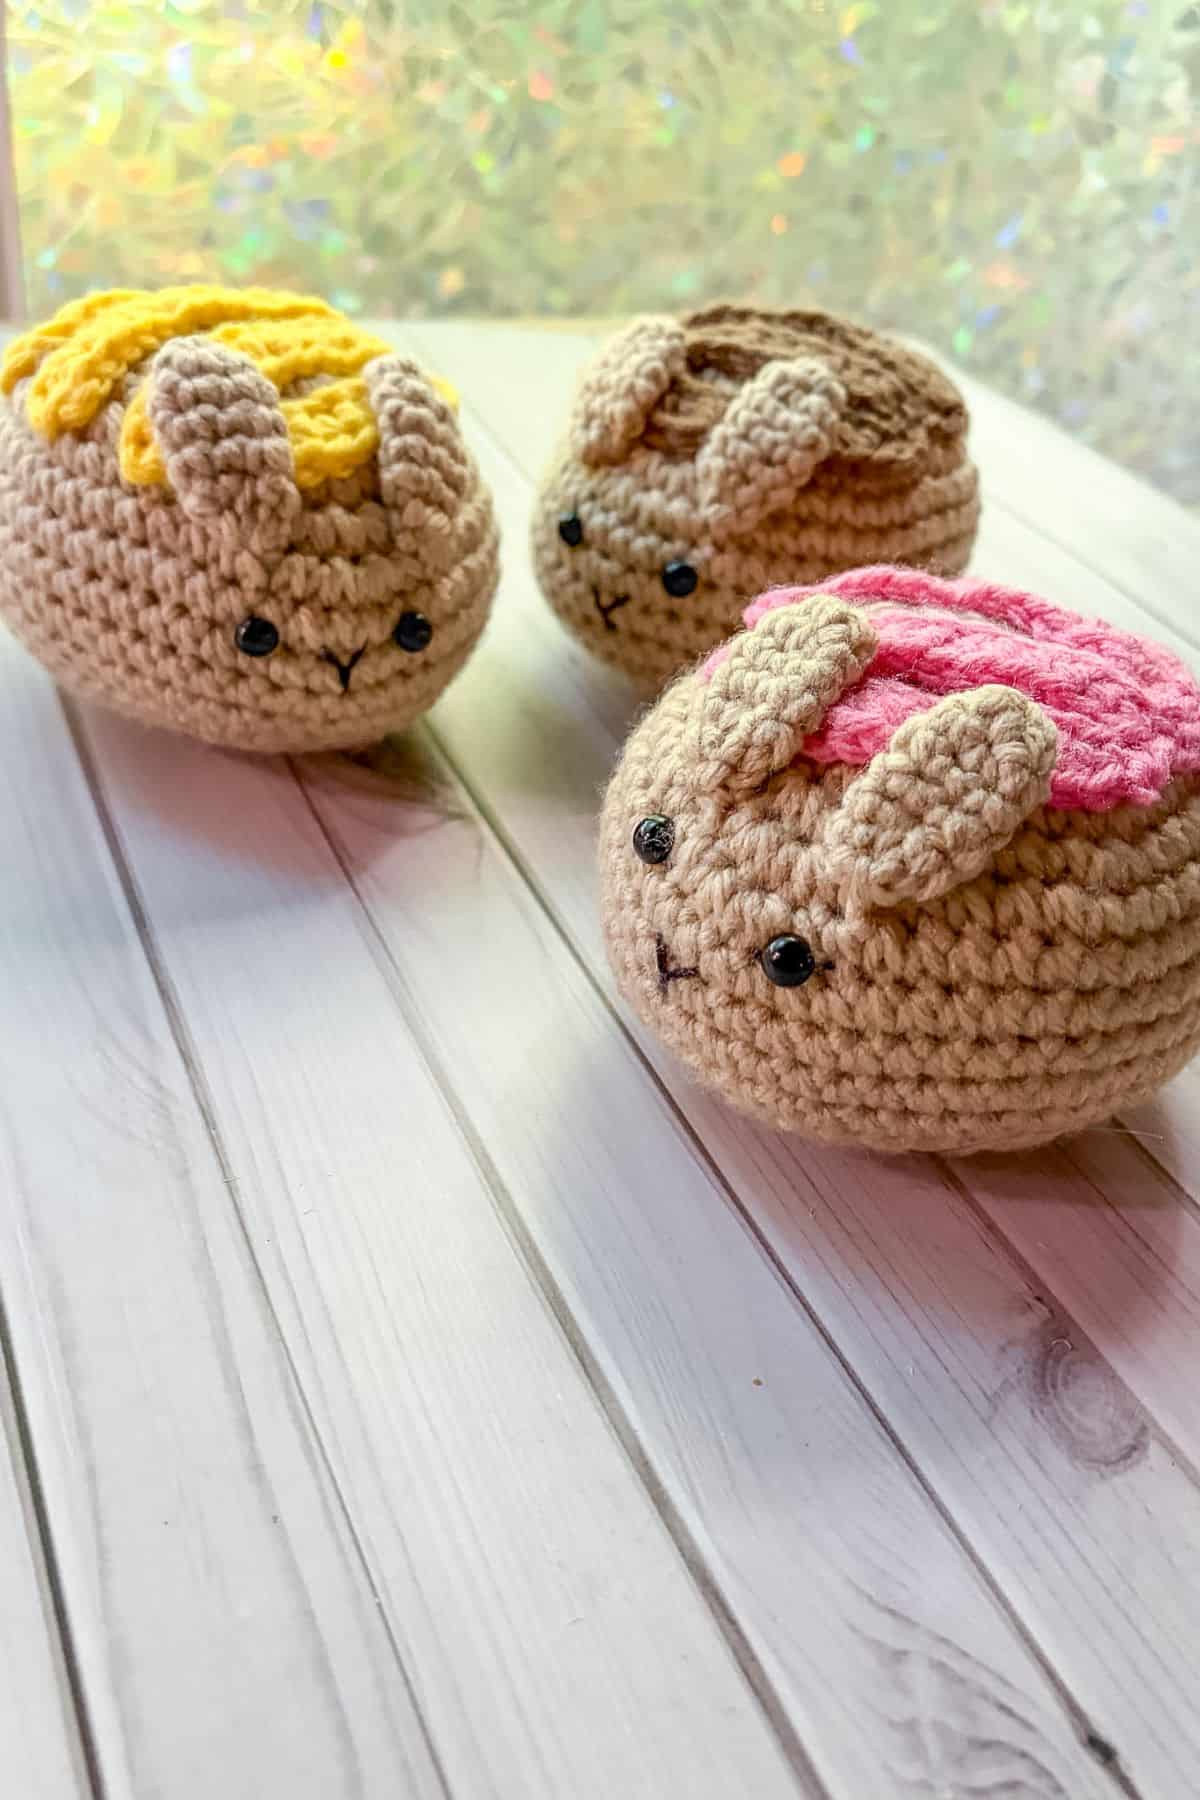
My Crochet Concha Pattern is inspired by Mexican concha bread but with a bunny twist. Concha bread always looks so beautiful to eat, but here is a version you can keep forever!
One of my favorite breakfast foods is a big cup of strong coffee paired with a concha the size of my face. There’s something truly delightful about conchas that captivates me. I love them not just for their taste but also for their beauty with the intricate shell design on top.
I've seen conchas made a few times, and while I now know the secret behind that shell design, it remains a stunning sight to behold. Regardless of my newfound knowledge, I still think these pastries are beautiful.
One day, after coming home from work, an idea struck me: why not crochet a concha? But not just any concha -this one would have a fun twist and look like a bunny! So my crochet concha pattern was born!
I can’t quite pinpoint where this idea came from, but I loved it so much that I felt compelled to bring it to life. In the end, I’m so glad I did!
So lets get started crocheting the crochet concha pattern!
Jump to:
✏️ Things To Note:
- Yarn Type: I used acrylic yarn for the crochet concha pattern, but any type of yarn will do; just pay attention to the recommended hook size. You can mega size it by using chunky yarn like my crochet strawberry pillow pattern and crochet tempura pattern.
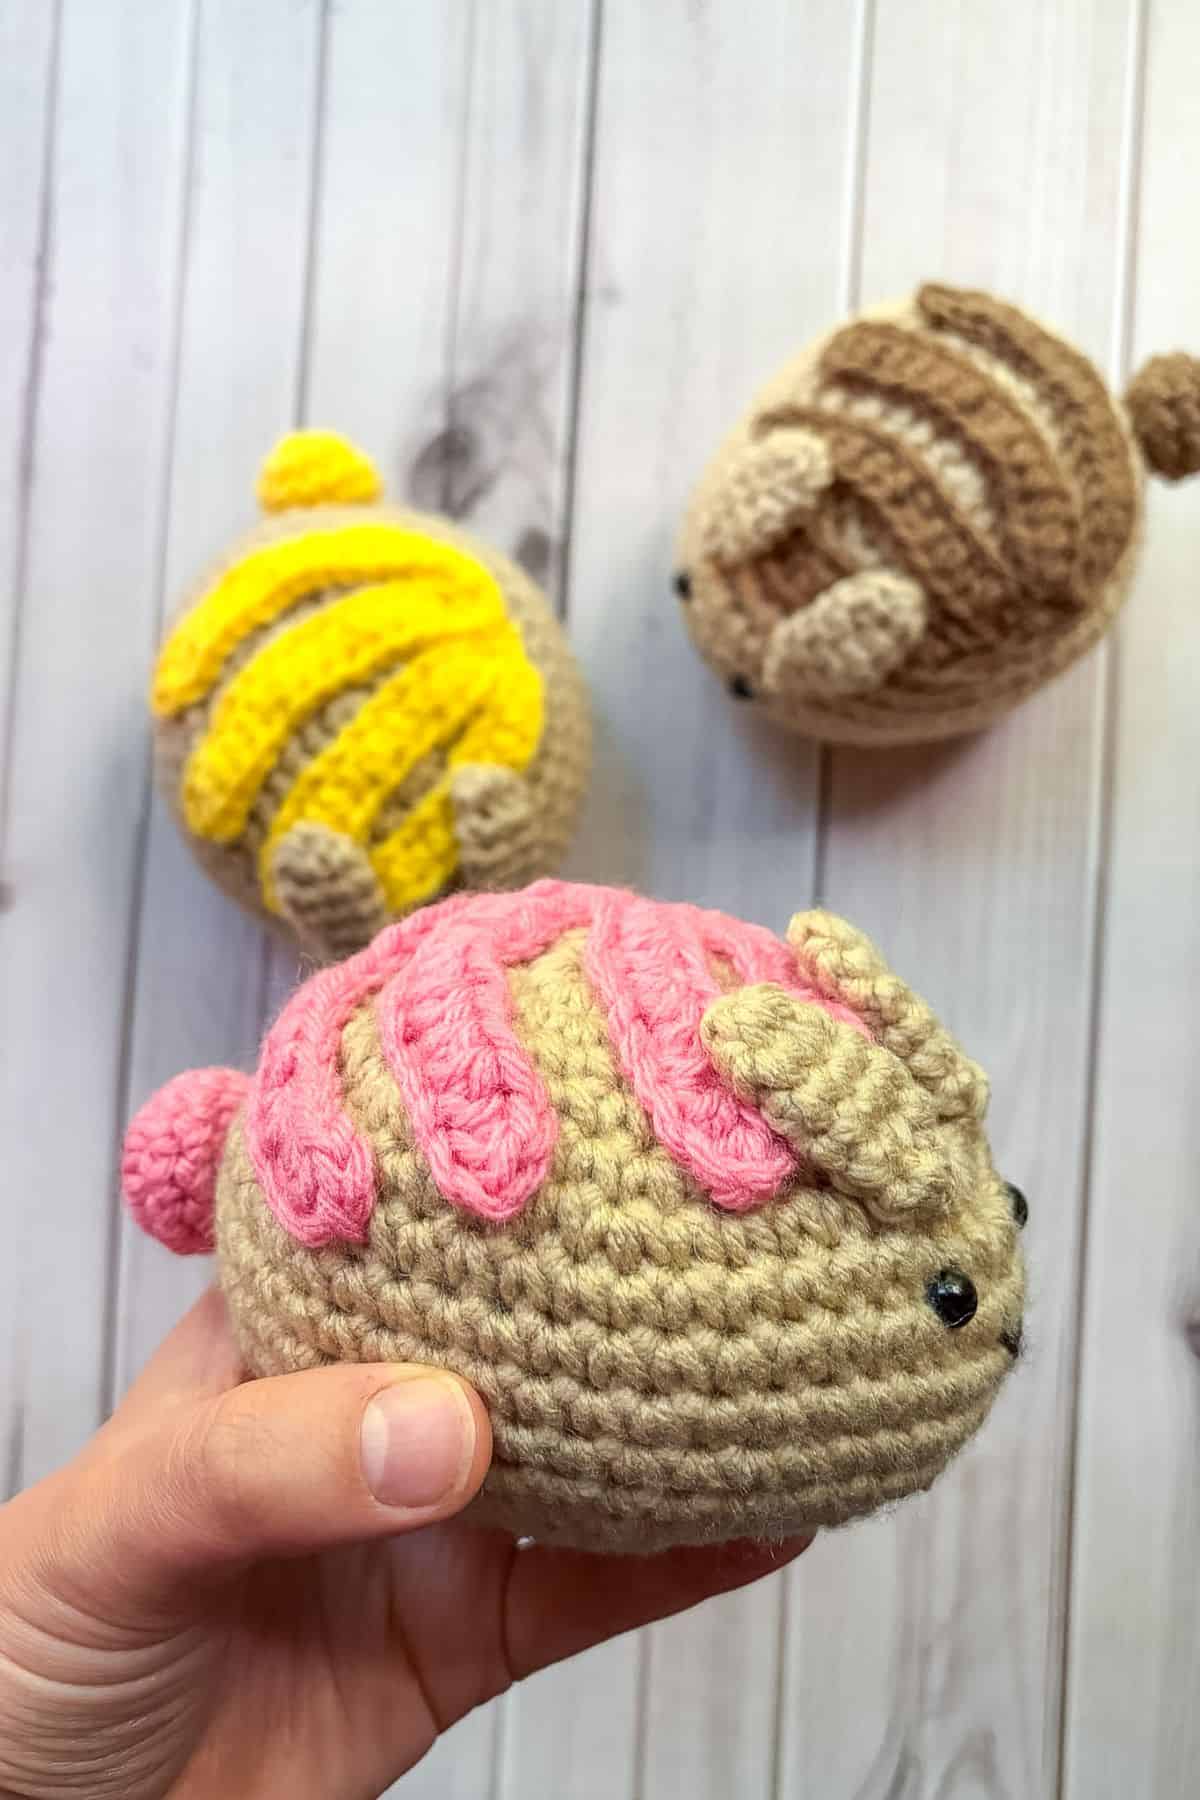
- Finished Size: The finished size of the crochet concha pattern is roughly 5 inches long and 3.5 inches high. Depending on the yarn and hook size you use, the end product may vary.
- Design: The concha icing is made in a way that can be easily adjusted to fit your bunny by curving the lines as its being sewn to the bunny. Use pins if necessary.
🪡 Materials Needed
- Caron One Pound - Lace
- 1 small ball of frosting color - pink, white, yellow, brown
- 4.5mm hook
- 8mm Safety Eyes
- Tapestry needle
- Black yarn for embroidery
- Polyfill
💭Abbreviations to Remember (US Terms)
- Magic ring - mr
- Chain - ch
- Slip stitch - sl st
- Single crochet - sc
- Increase - inc
- Decrease - dec
🧋Variations
This pattern doesn’t allow for many variations, but you can change the icing colors or transform the bunny into an entirely new baked good, like a cinnamon roll, by adding a chain swirl to the top instead.
🍵Instructions for Crochet Concha Pattern
The crochet concha pattern will be made in rounds.
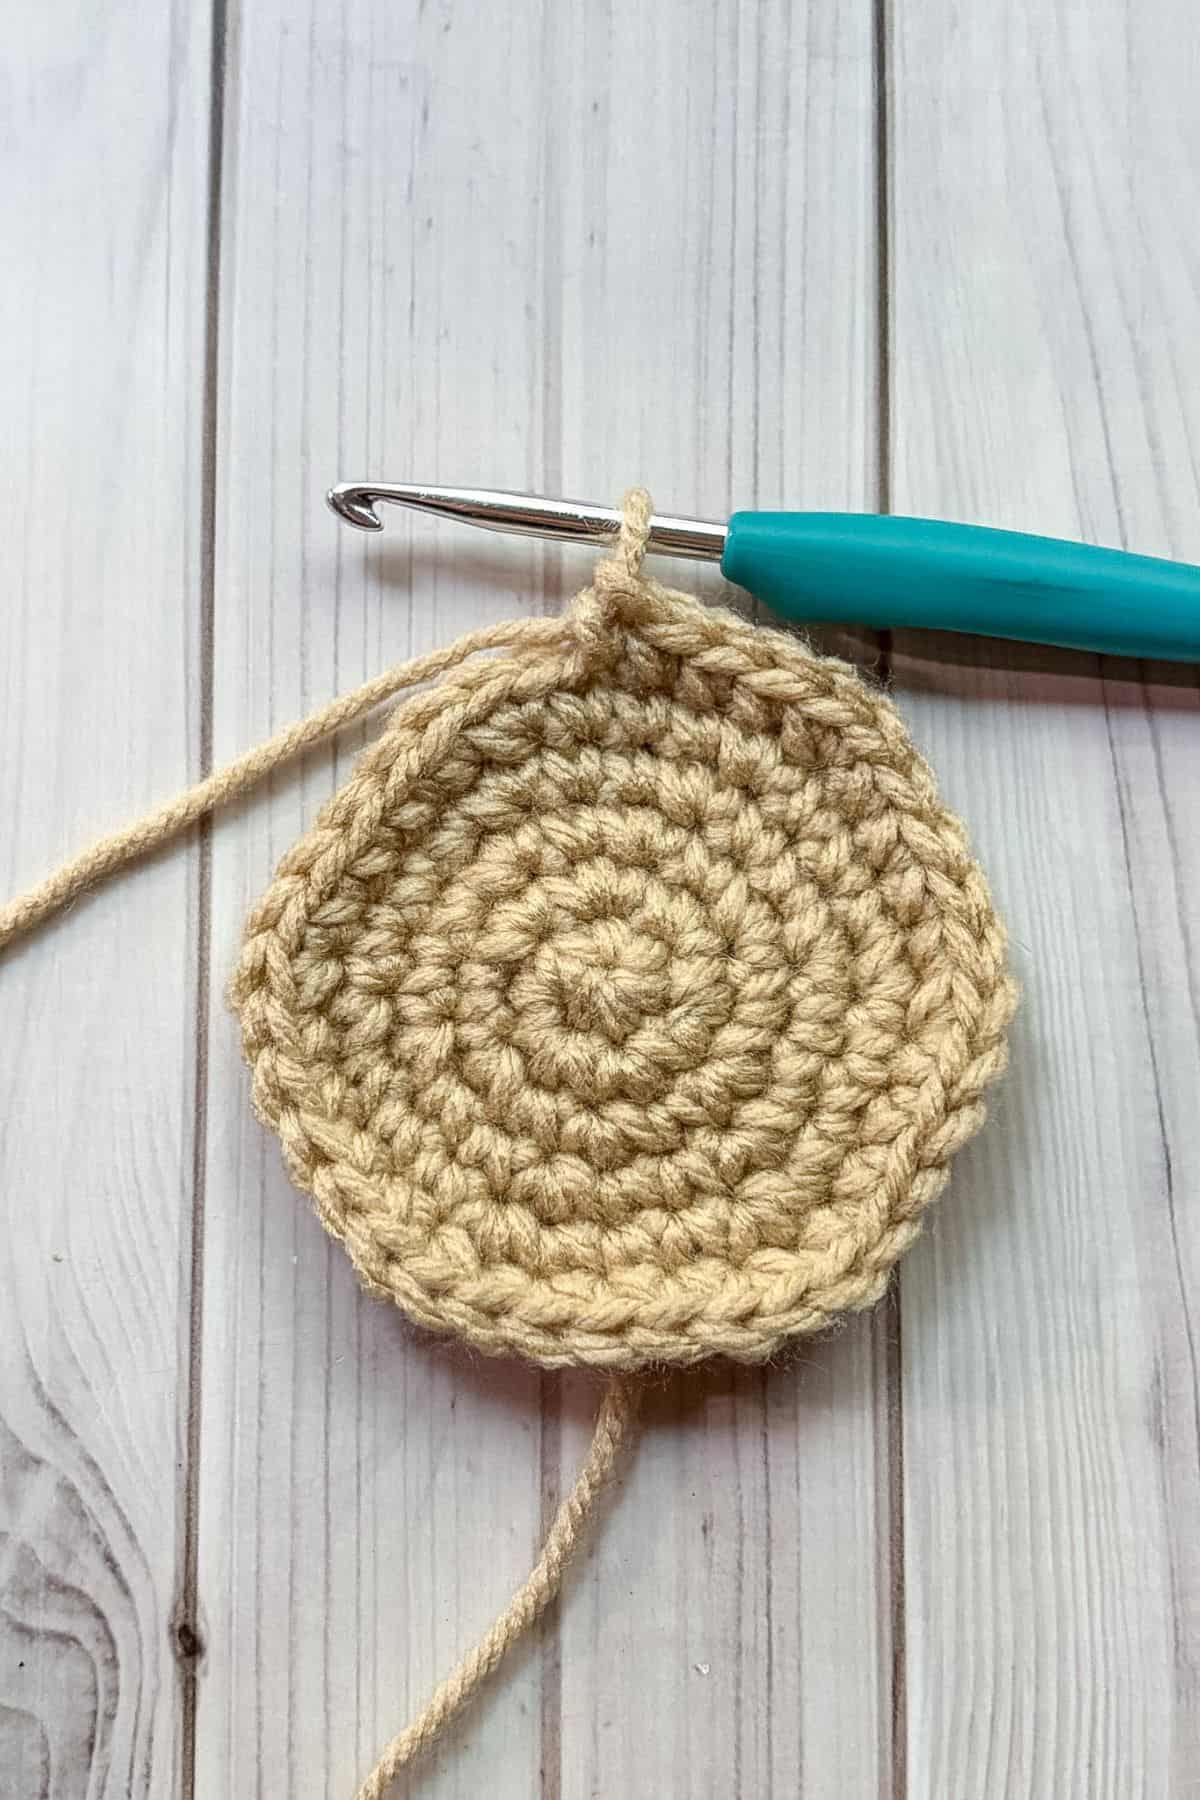
Round 1: Using light brown yarn, make a mr and make sc x6 in to the circle. If you find it difficult making a magic ring you can chain 2 and then crochet sc x6 in the second chain from the hook (6).
Round 2: Inc in every sc (12).
Round 3: Inc, sc. Then repeat until end of round (18).
Round 4: Inc, sc x2. Then repeat until end of round (24).
Round 5: Inc, sc x3. Then repeat until end of round (30).
Round 6: Inc, sc x4. Then repeat until end of round (36).
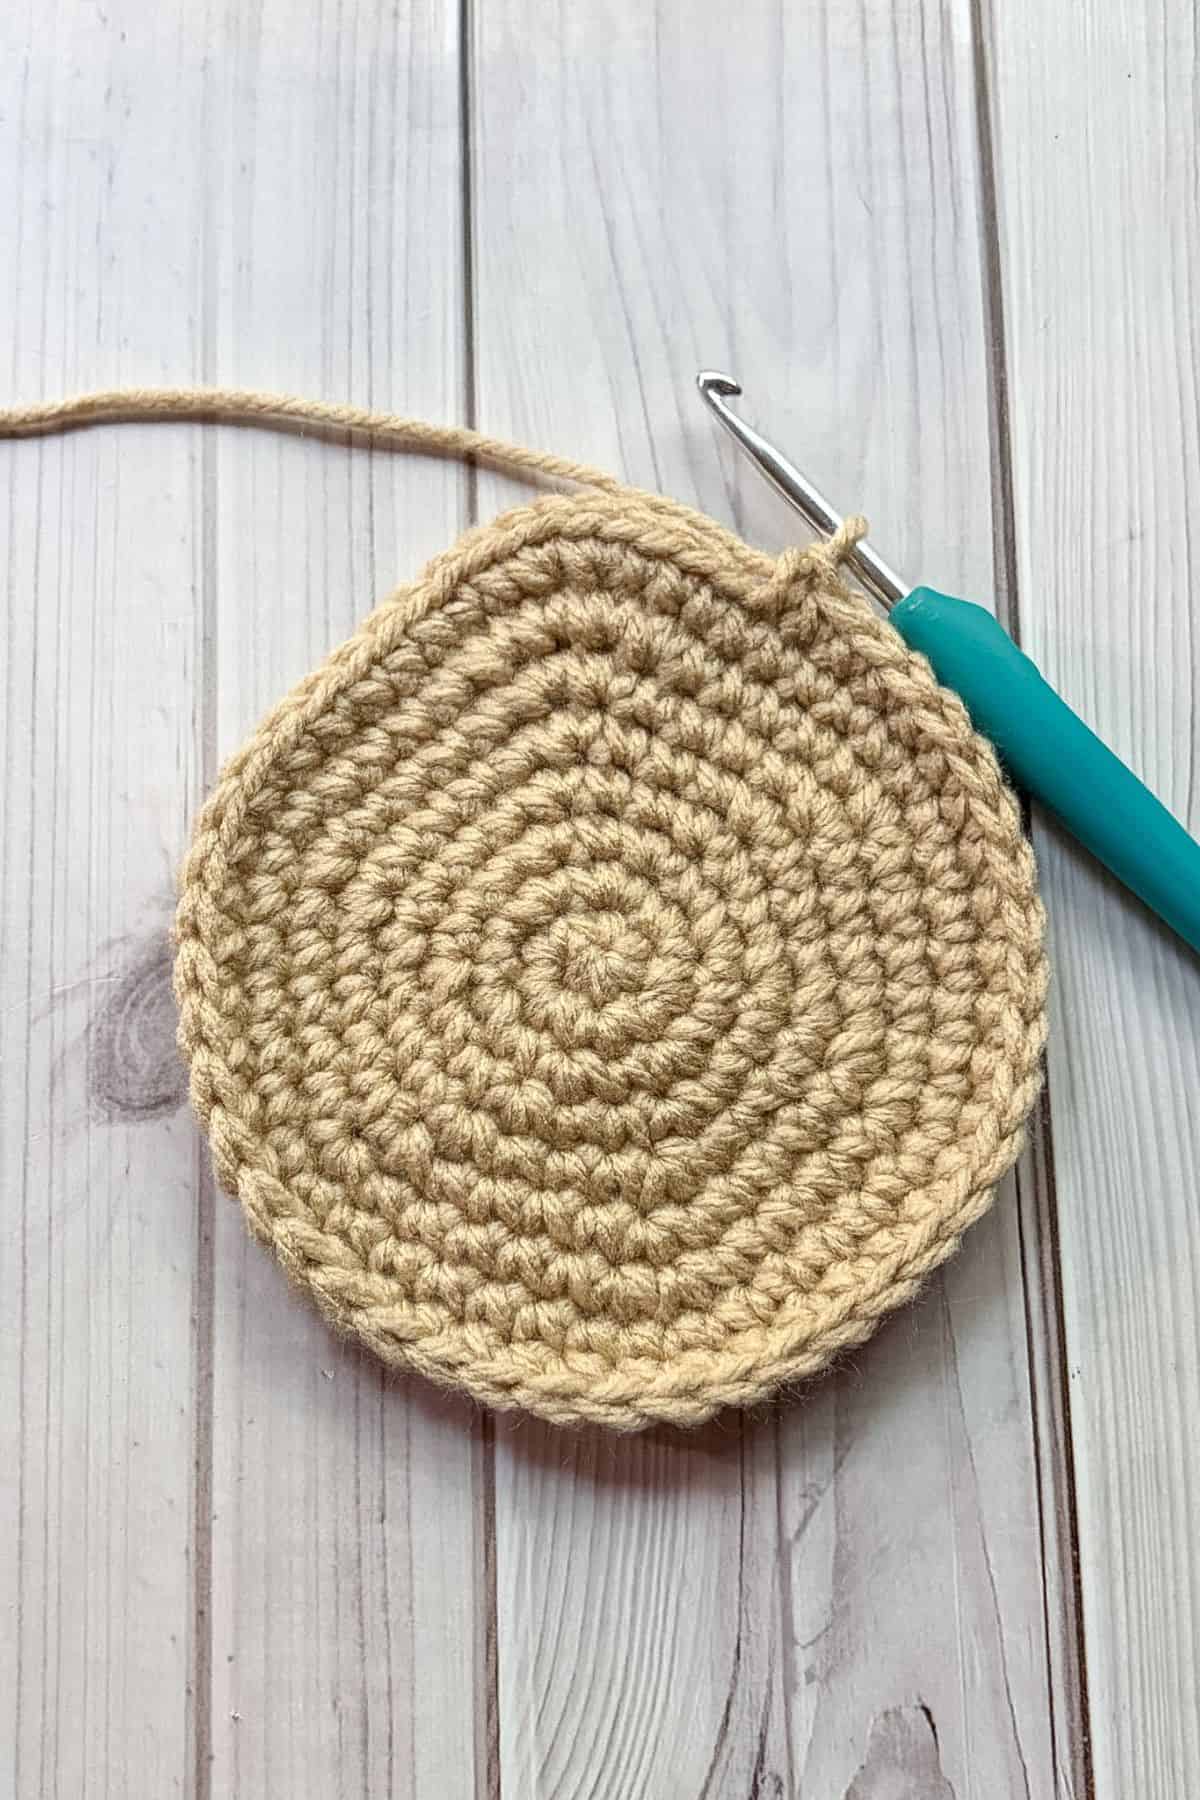
Round 7: *Inc x2, sc x4, inc, sc x5, inc, sc x5. Repeat from * for the other side of the round (44).
Round 8: Inc x4, sc x40 (48).
Round 9: Sc x3, inc x2, sc x43 (50).
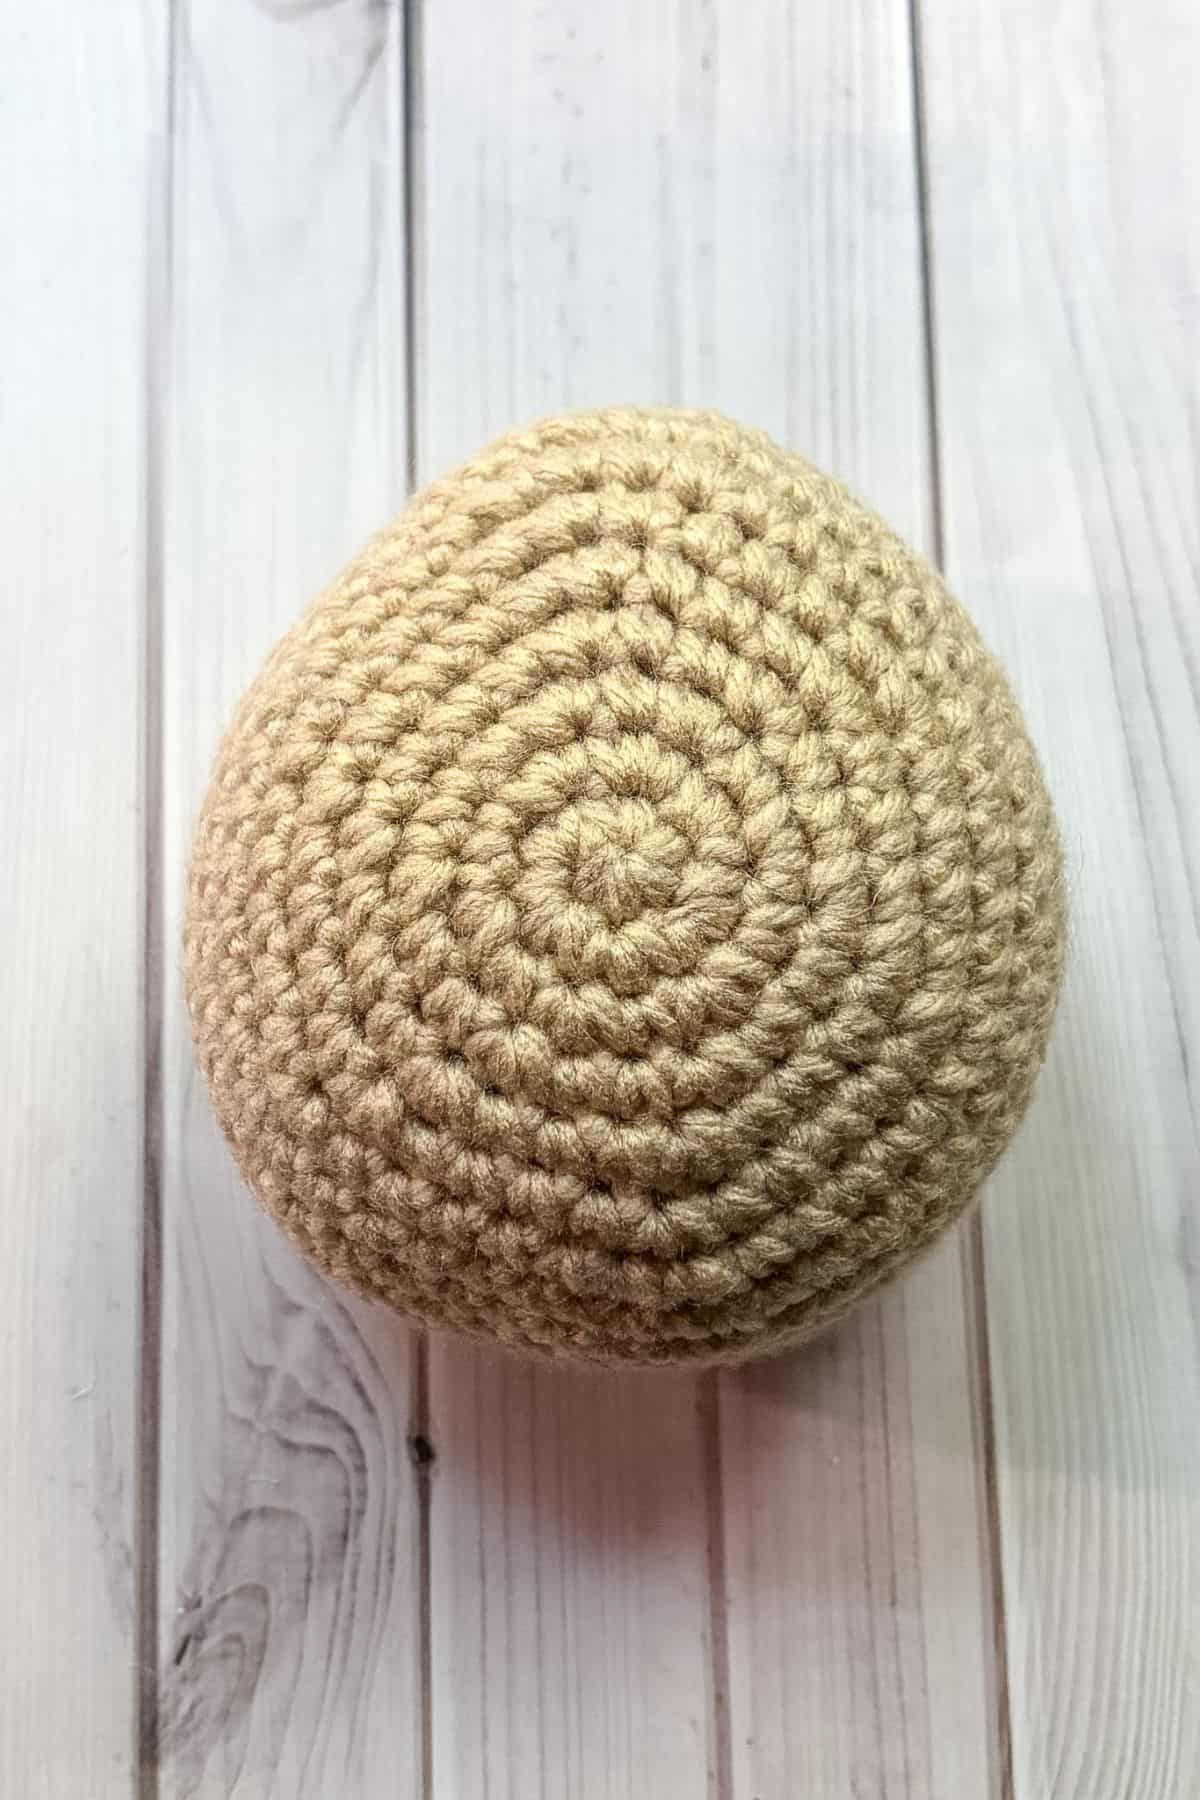
Round 10-13: Sc x50 (50).
Round 14: Sc x2, dec, sc x3, dec, sc x41 (48).
Add safety eyes between rounds 9-10 at the pointy end of the bunny. You want them roughly 4-5 stitches apart.
Round 15: Dec, sc x4. Then repeat until end of round (40).
Round 16: Dec, sc x3. Then repeat until end of round (32).
Round 17: Dec, sc x2. Then repeat until end of round (24). Begin to stuff the body.
Round 18: Dec, sc. Then repeat until end of round (16).
Round 19: Dec, then repeat until end of round (8).
Fasten off and sew shut.
Crochet Bunny Ear Pattern x2:
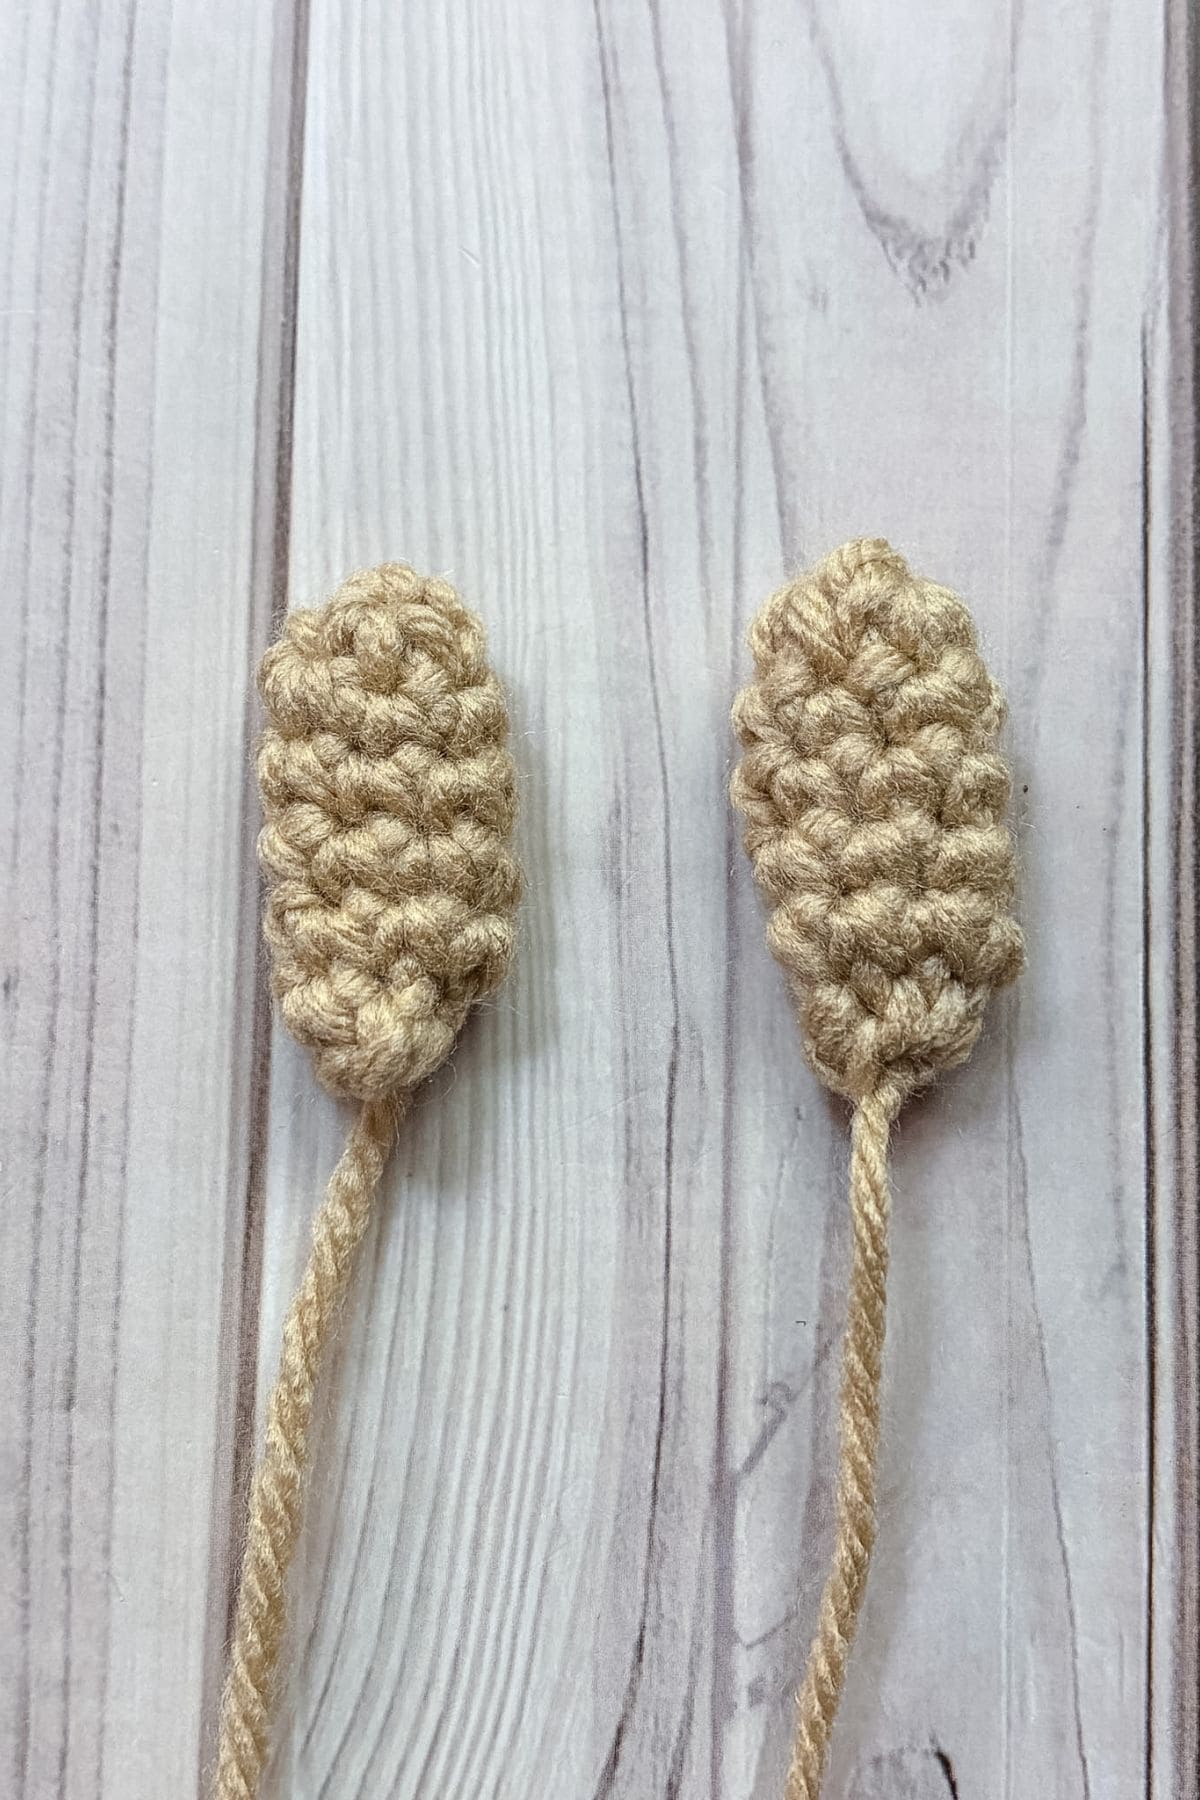
Make 2 ears. The ears will be made in rounds.
Round 1: Make a mr and then sc x4 into the circle (4).
Round 2: Inc, sc. Then repeat for the other half of the round (6).
Round 3: Sc in every stitch (6). Flip the ear out to right side out.
Round 4-6: Sc in every stitch (6). Then fasten off and leave tail for sewing.
Sew the end of the ear closed by going through all front loops from the last round and pull tight.
Icing tail:
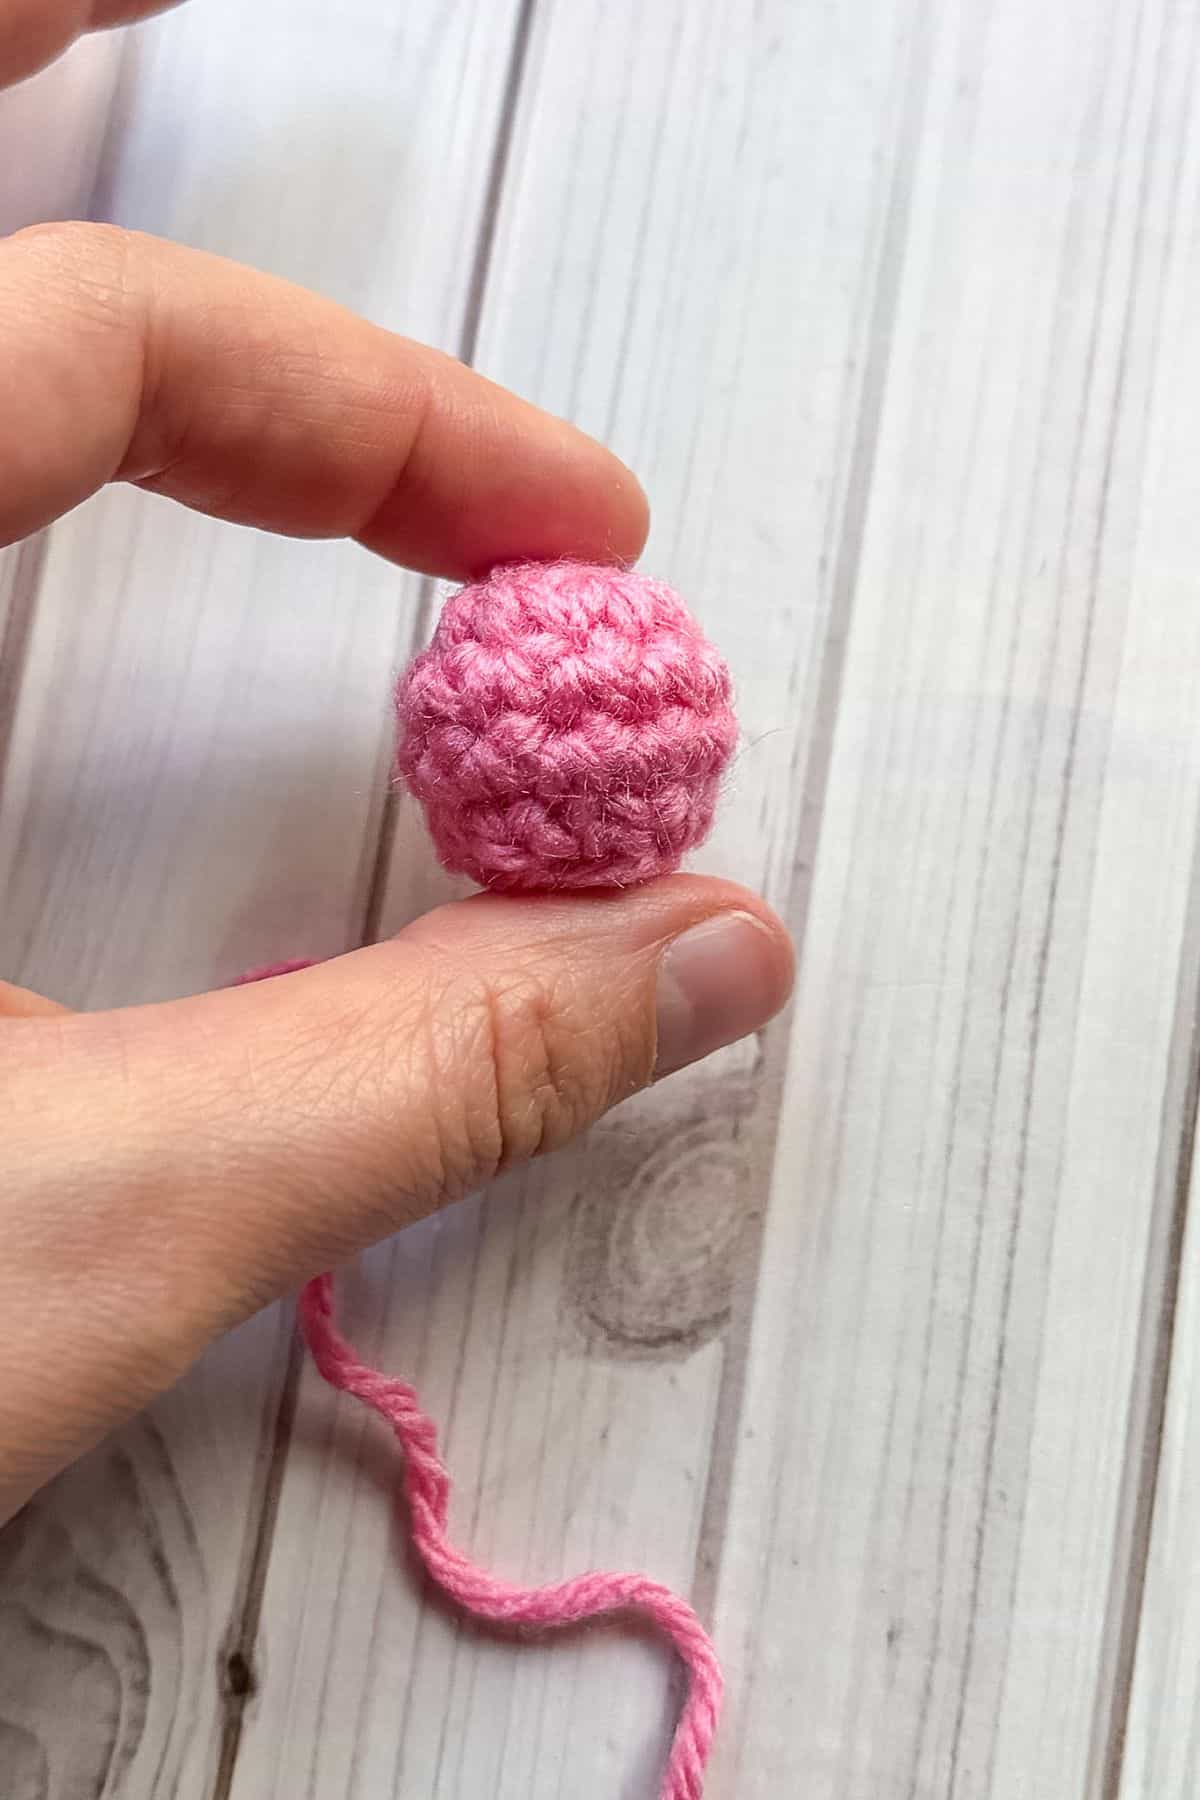
Round 1: Using pink yarn or another icing color, make a mr and then make sc x6 in the circle (6).
Round 2: Inc in every sc (12).
Round 3-4: Sc in every stitch (12).
Round 5: Dec, then repeat until end of round (6). Stuff the tail a little bit as you start the second half of the round. At the end of the round, fasten off and leave a tail for sewing.
Concha Topping:
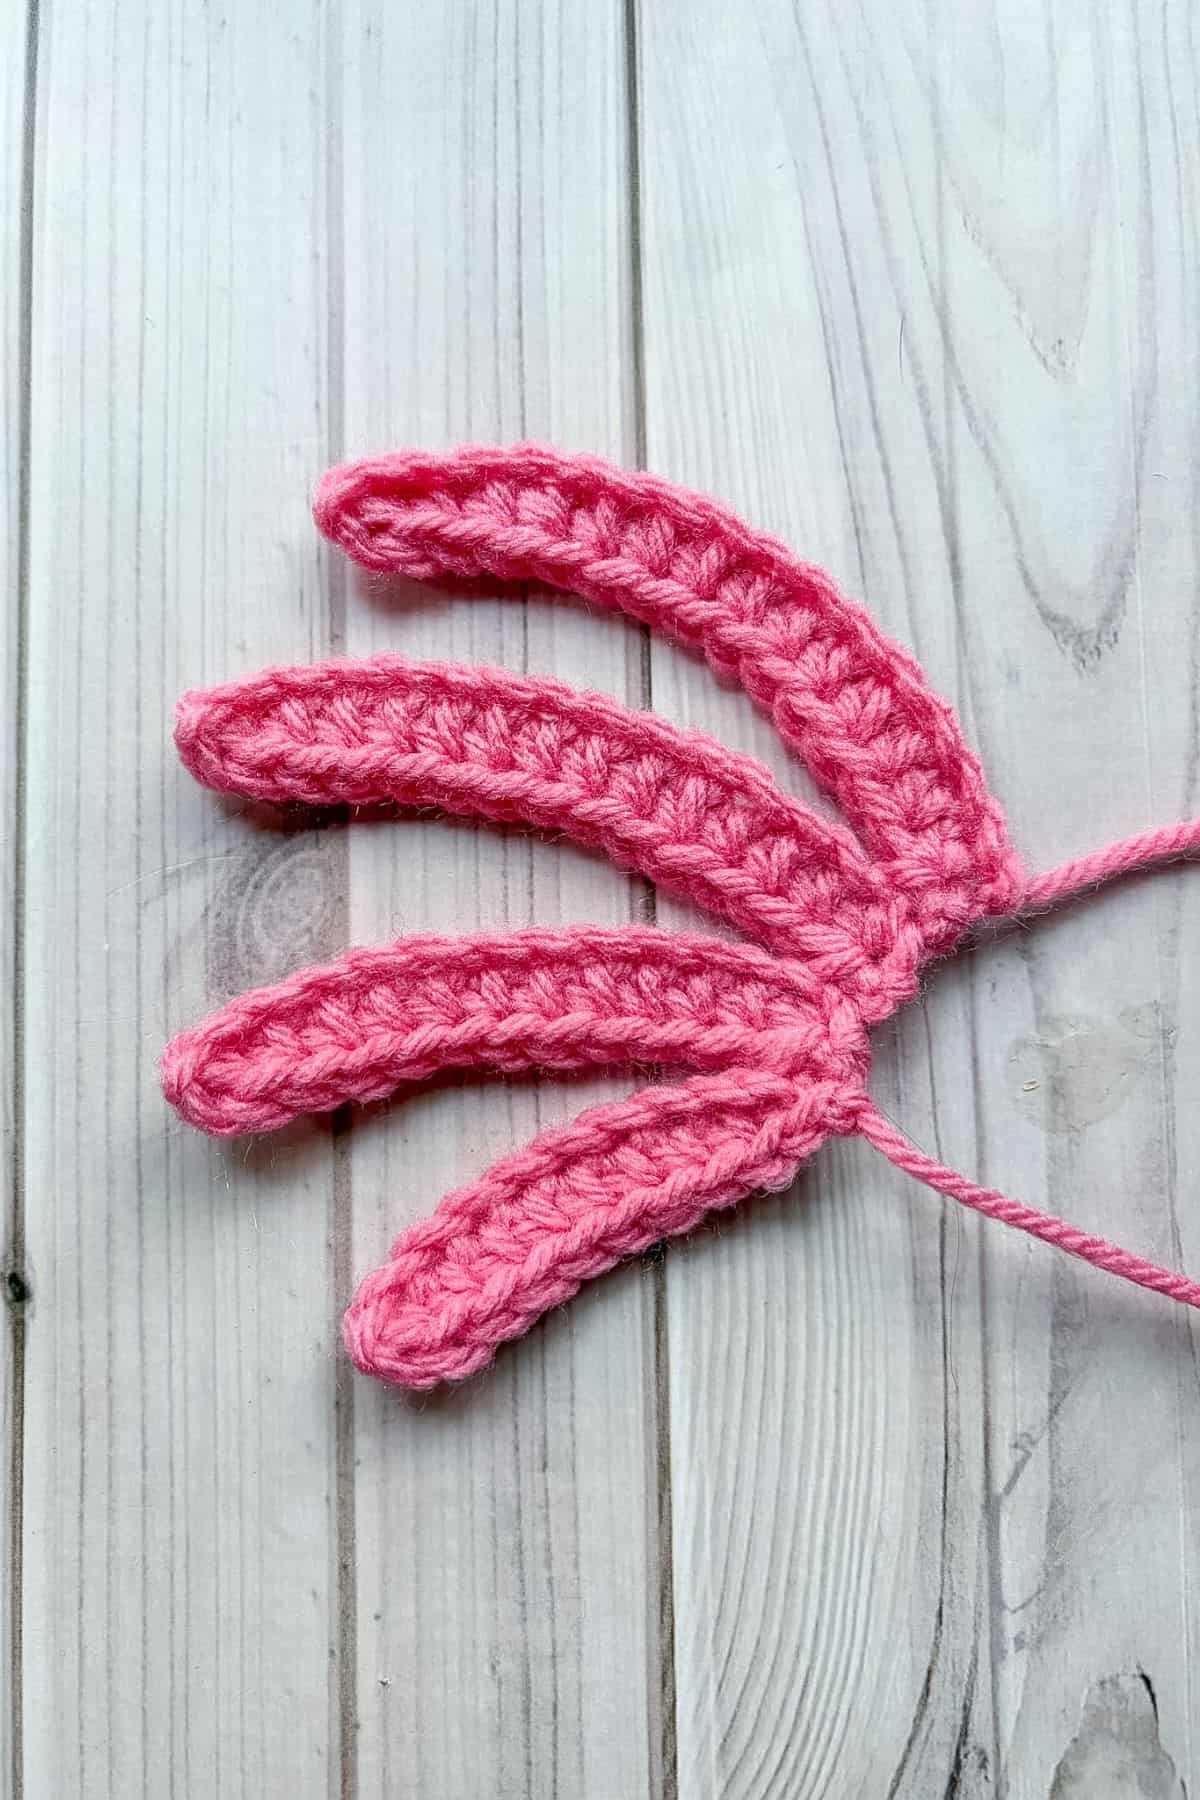
Row 1: Ch x16. Starting in the second ch from the hook hdc x14, sl st in the last ch. Then ch x1 and turn.
Row 2: Make a sl st above the last rows sl st. Then ch x15.
Row 3: Starting in the second ch from the hook hdc x14, sl st into the last rows sl st. Then ch x1 and turn.
Row 4: Make a sl st above the last rows sl st. Then ch x13.
Row 5: Starting in the second ch from the hook hdc x12, sl st into the last rows sl st. Then ch x1 and turn.
Row 6: Make a sl st above the last rows sl st. Then ch x11.
Row 7: Starting in the second ch from the hook hdc x10, sl st into the last rows sl st. Fasten off and leave a long tail for sewing.
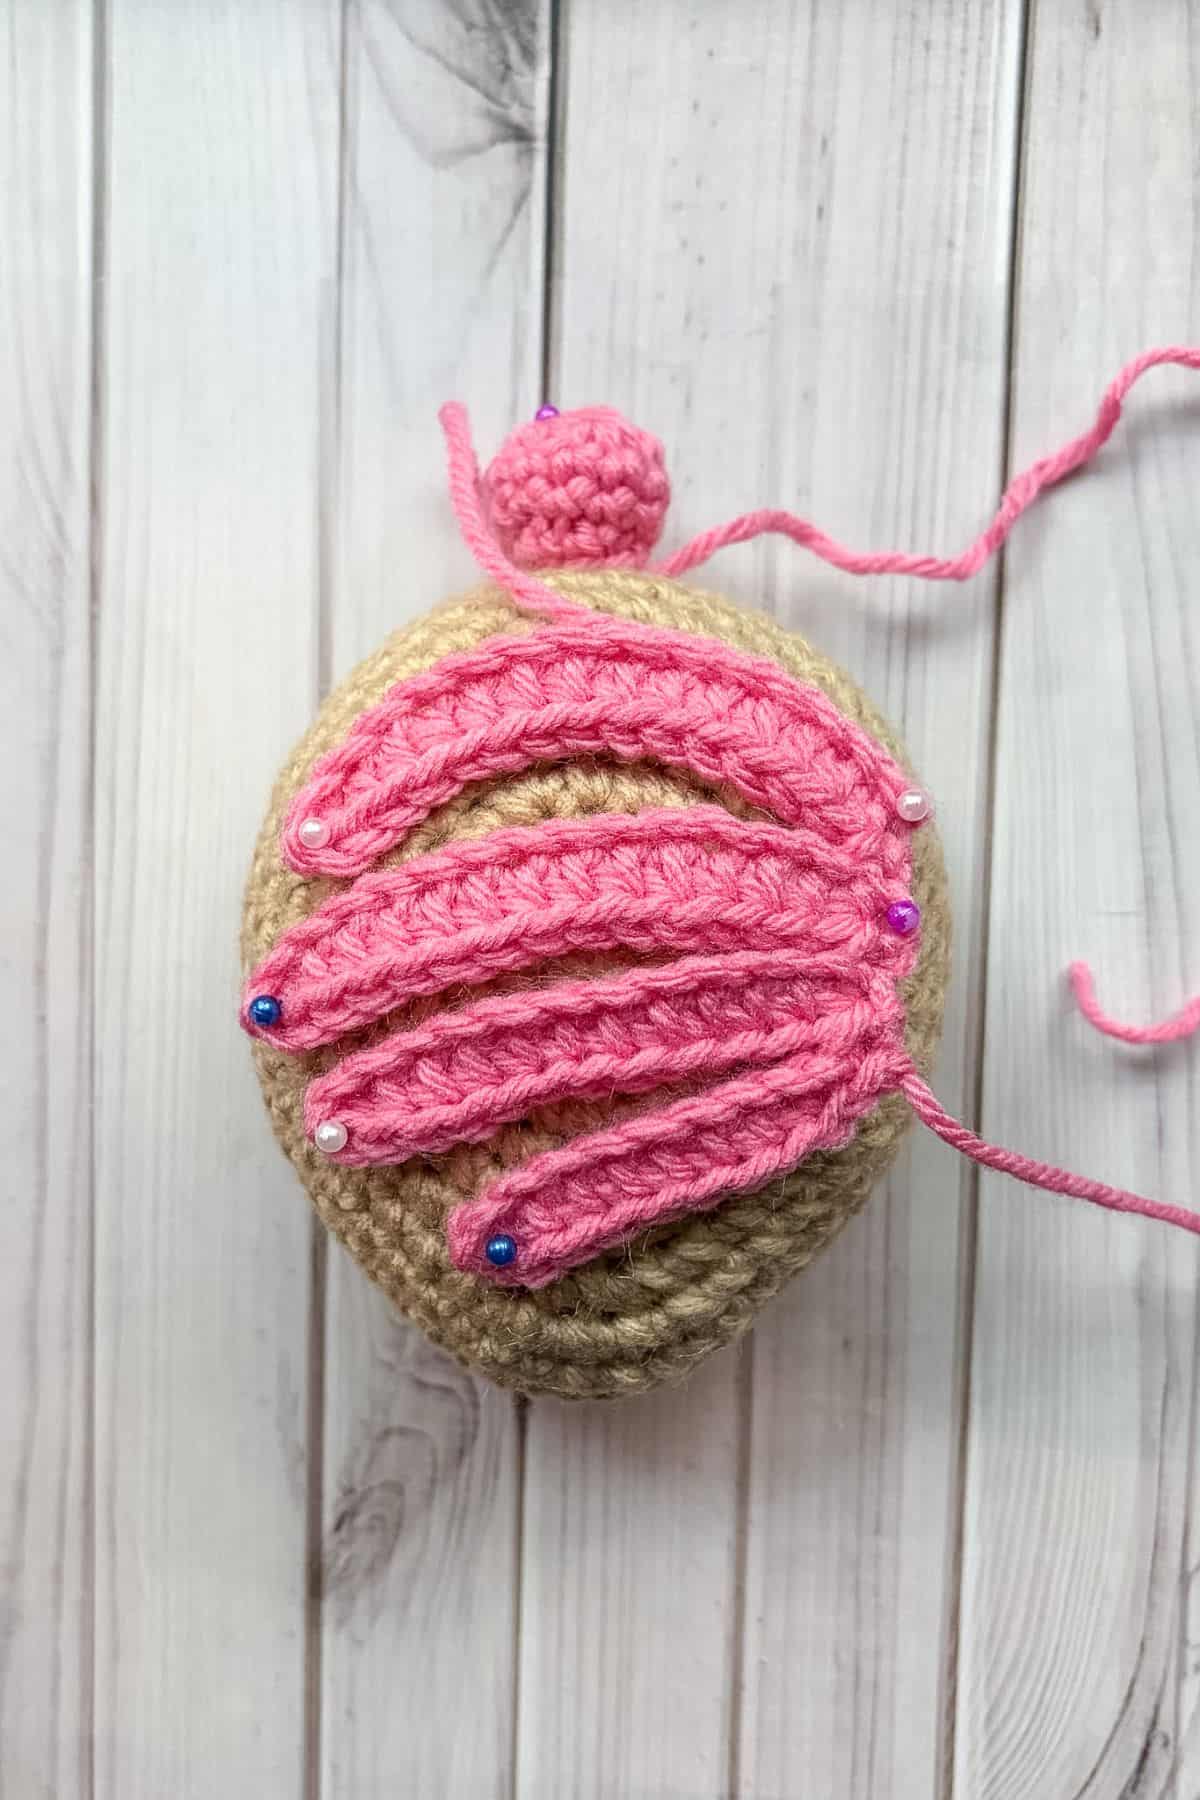
Sewing:
Arrange the icing and pin to the concha. The large lines should be near the butt of the bread. Then sew the icing to the bunny. Sew on the tail and then sew on the ears.
Embroider the eyes (if you didn't use safety eyes) and mouth if you would like.
And once everything is sewn together, you now have a crochet concha bunny made from my crochet concha pattern!
If you are looking for other breakfast goods to crochet, check my crochet coffee cup pattern and crochet croissant pattern. If you are looking for another nostalgic classic that takes no time at all to make, my crochet poptart pattern is also a good pattern to try!
If you have any extra lace colored yarn, you can use it in my crochet stingray pancake bag pattern. Or make yourself a cute scarf like with my crochet star stitch scarf pattern.
🐌Expert Tips
- Use Ample Pins: Having plenty of pins on hand for the icing makes the process much easier. Pin all the pieces in place before sewing the concha topping to visualize the final design and ensure it has that iconic shell motif.
- Consider Yarn Texture: Different yarn textures can affect the overall look of your concha bunny. Experiment with various yarns to see which gives the best results for your design.
- Stitch Tension: Keep your tension consistent throughout the project for a uniform appearance. If you notice your stitches are getting too tight or too loose, adjust your grip on the yarn as needed.
🧵Pattern FAQs
Of course! Embroidered eyes also make the amigurumi safe for little kids.
Absolutely! You can use it as a regular bunny pattern or transform it into a cinnamon roll or bread roll. The possibilities are endless!
Amigurumi might be difficult for a beginner, but if you know the basic crochet stitches and have consistent tension, you can start with basic amigurumi, like my crochet concha bunny here. 🙂
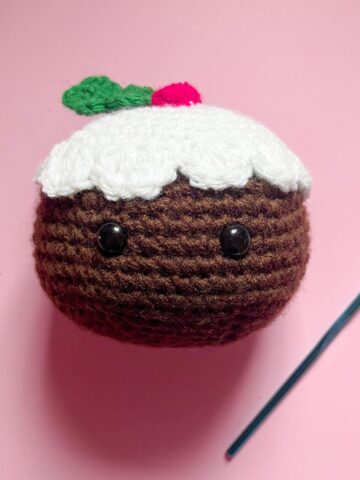
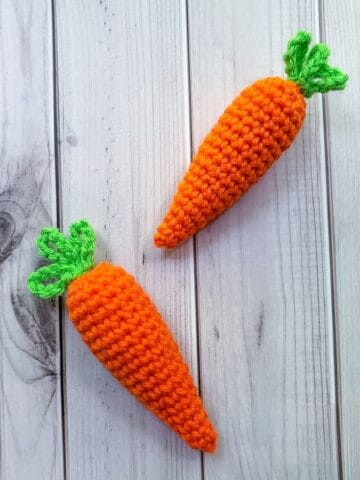
🧶More Crochet Food Patterns
If you tried this Crochet Concha Pattern (or any other pattern on my website), please let me know how it went in the 📝 comments below. I'd love to hear from you!
Crochet Concha Pattern
Materials
- Caron One Pound - Lace
- 1 small ball of frosting color - pink white, yellow, brown
- 4.5 mm hook
- 8 mm Safety Eyes
- Tapestry needle
- Black yarn for embroidery
- Polyfill
Abbreviations (US terms)
- Magic ring - mr
- Chain - ch
- Slip stitch - sl st
- Single crochet - sc
- Increase - inc
- Decrease - dec
Notes
- Yarn Type: I used acrylic yarn for the crochet concha pattern, but any type of yarn will do; just pay attention to the recommended hook size. You can mega size it by using chunky yarn like my crochet strawberry pillow pattern and crochet tempura pattern.
- Finished Size: The finished size of the crochet concha pattern is roughly 5 inches long and 3.5 inches high. Depending on the yarn and hook size you use, the end product may vary.
- Design: The concha icing is made in a way that can be easily adjusted to fit your bunny by curving the lines as its being sewn to the bunny. Use pins if necessary.
Instructions
- The crochet concha pattern will be made in rounds.
- Round 1: Using light brown yarn, make a mr and make sc x6 in to the circle. If you find it difficult making a magic ring you can chain 2 and then crochet sc x6 in the second chain from the hook (6).
- Round 2: Inc in every sc (12).
- Round 3: Inc, sc. Then repeat until end of round (18).
- Round 4: Inc, sc x2. Then repeat until end of round (24).
- Round 5: Inc, sc x3. Then repeat until end of round (30).
- Round 6: Inc, sc x4. Then repeat until end of round (36).
- Round 7: *Inc x2, sc x4, inc, sc x5, inc, sc x5. Repeat from * for the other side of the round (44).
- Round 8: Inc x4, sc x40 (48).
- Round 9: Sc x3, inc x2, sc x43 (50).
- Round 10-13: Sc x50 (50).
- Round 14: Sc x2, dec, sc x3, dec, sc x41 (48).
- Add safety eyes between rounds 9-10 at the pointy end of the bunny. You want them roughly 4-5 stitches apart.
- Round 15: Dec, sc x4. Then repeat until end of round (40).
- Round 16: Dec, sc x3. Then repeat until end of round (32).
- Round 17: Dec, sc x2. Then repeat until end of round (24). Begin to stuff the body.
- Round 18: Dec, sc. Then repeat until end of round (16).
- Round 19: Dec, then repeat until end of round (8).
- Fasten off and sew shut.
Crochet Bunny Ear Pattern x2:
- Make 2 ears. The ears will be made in rounds.
- Round 1: Make a mr and then sc x4 into the circle (4).
- Round 2: Inc, sc. Then repeat for the other half of the round (6).
- Round 3: Sc in every stitch (6). Flip the ear out to right side out.
- Round 4-6: Sc in every stitch (6). Then fasten off and leave tail for sewing.
- Sew the end of the ear closed by going through all front loops from the last round and pull tight.
Icing tail:
- Round 1: Using pink yarn or another icing color, make a mr and then make sc x6 in the circle (6).
- Round 2: Inc in every sc (12).
- Round 3-4: Sc in every stitch (12).
- Round 5: Dec, then repeat until end of round (6). Stuff the tail a little bit as you start the second half of the round. At the end of the round, fasten off and leave a tail for sewing.
Concha Topping:
- Row 1: Ch x16. Starting in the second ch from the hook hdc x14, sl st in the last ch. Then ch x1 and turn.
- Row 2: Make a sl st above the last rows sl st. Then ch x15.
- Row 3: Starting in the second ch from the hook hdc x14, sl st into the last rows sl st. Then ch x1 and turn.
- Row 4: Make a sl st above the last rows sl st. Then ch x13.
- Row 5: Starting in the second ch from the hook hdc x12, sl st into the last rows sl st. Then ch x1 and turn.
- Row 6: Make a sl st above the last rows sl st. Then ch x11.
- Row 7: Starting in the second ch from the hook hdc x10, sl st into the last rows sl st. Fasten off and leave a long tail for sewing.
Sewing:
- Arrange the icing and pin to the concha. The large lines should be near the butt of the bread. Then sew the icing to the bunny. Sew on the tail and then sew on the ears.
- Embroider the eyes (if you didn't use safety eyes) and mouth if you would like.
- And once everything is sewn together, you now have a crochet concha bunny made from my crochet concha pattern!


Cadence says
Howdy ! I think theres an issue with round 7. It says the total stitch count should be 48, but when I did it i got 44. If you look at round 8 which has four increase the total is 48, so that would line up with the 44 from the previous round.
Kimberly Arenas says
Thanks for catching my mistake! I have adjusted the total stitch numbers for that round.