
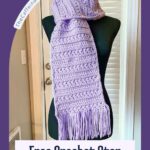
If you're looking to add a stunning yet simple design to your scarf collection, you've found the perfect pattern. The Crochet Star Stitch Scarf Pattern is here to bring a pop of texture and beauty to your crochet creations!
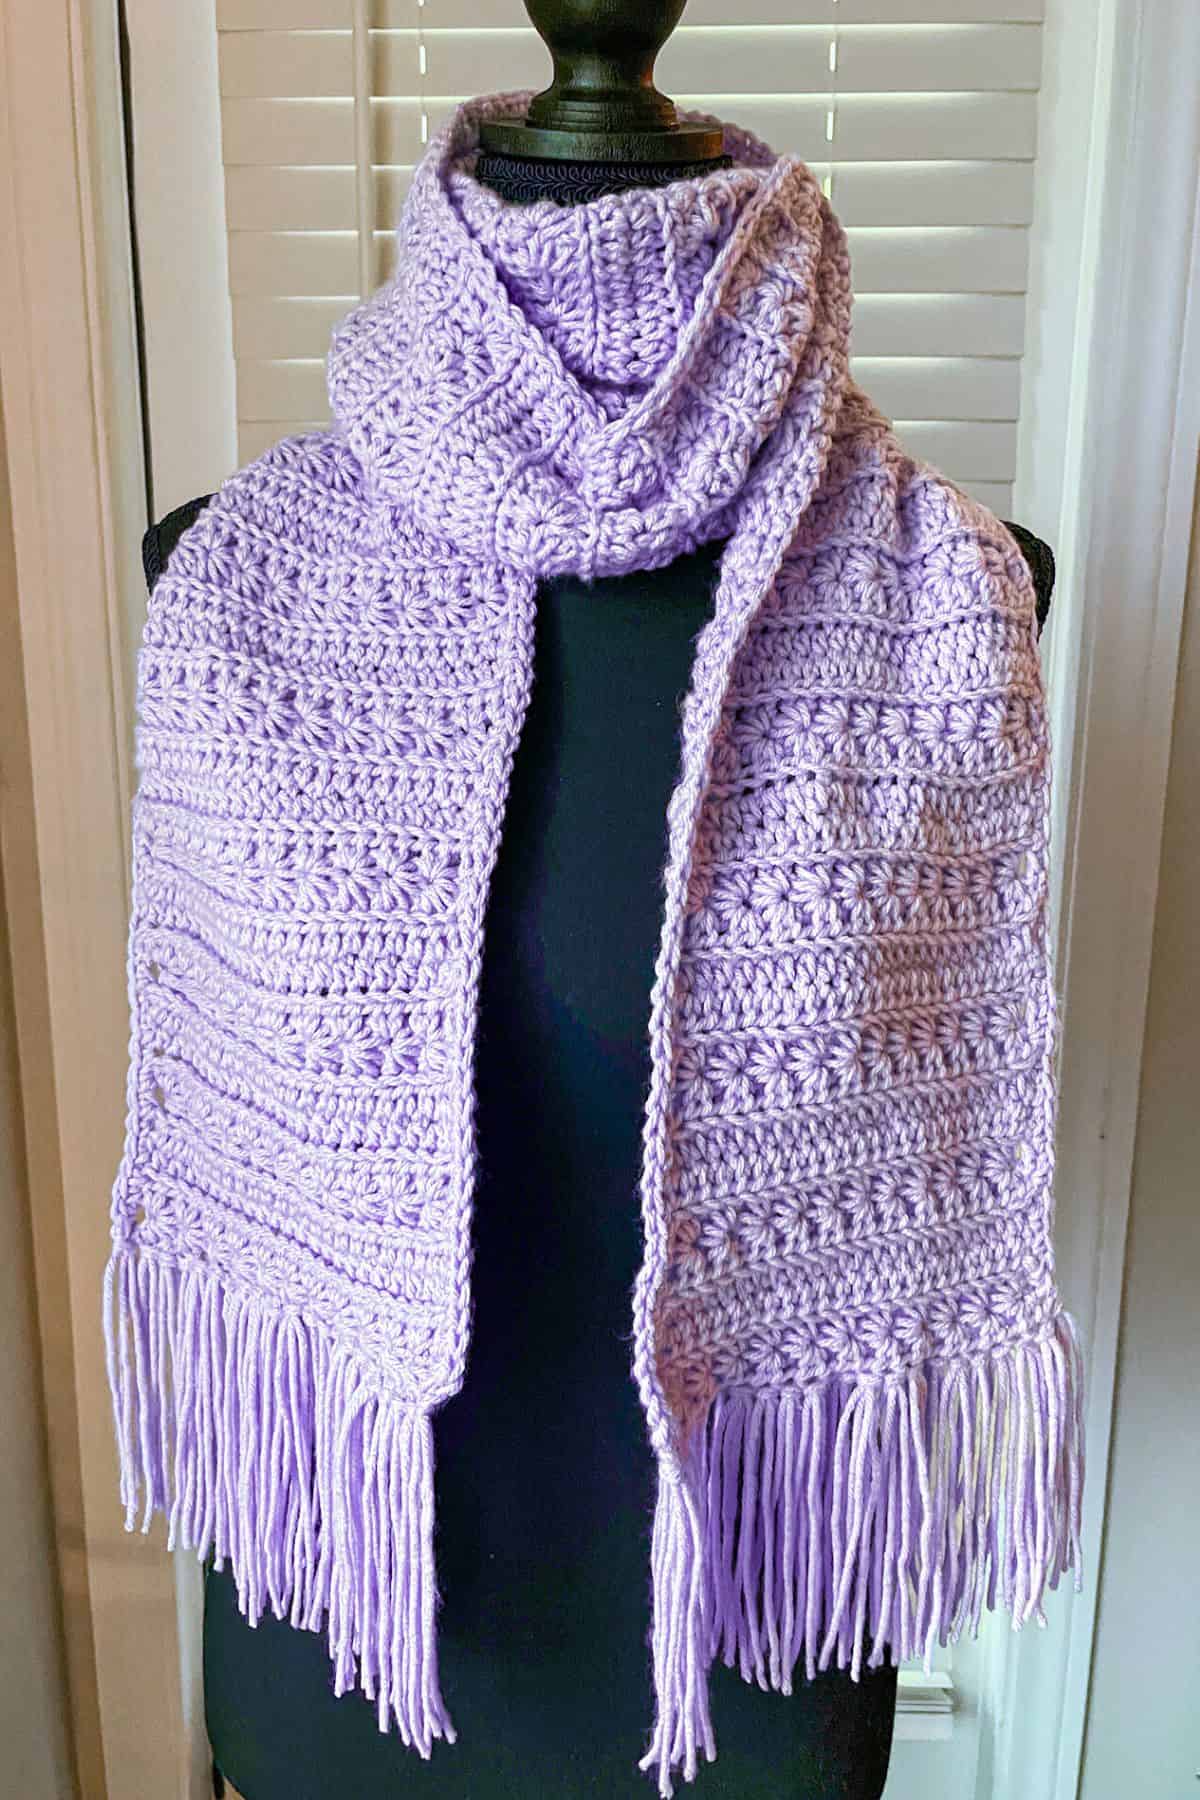
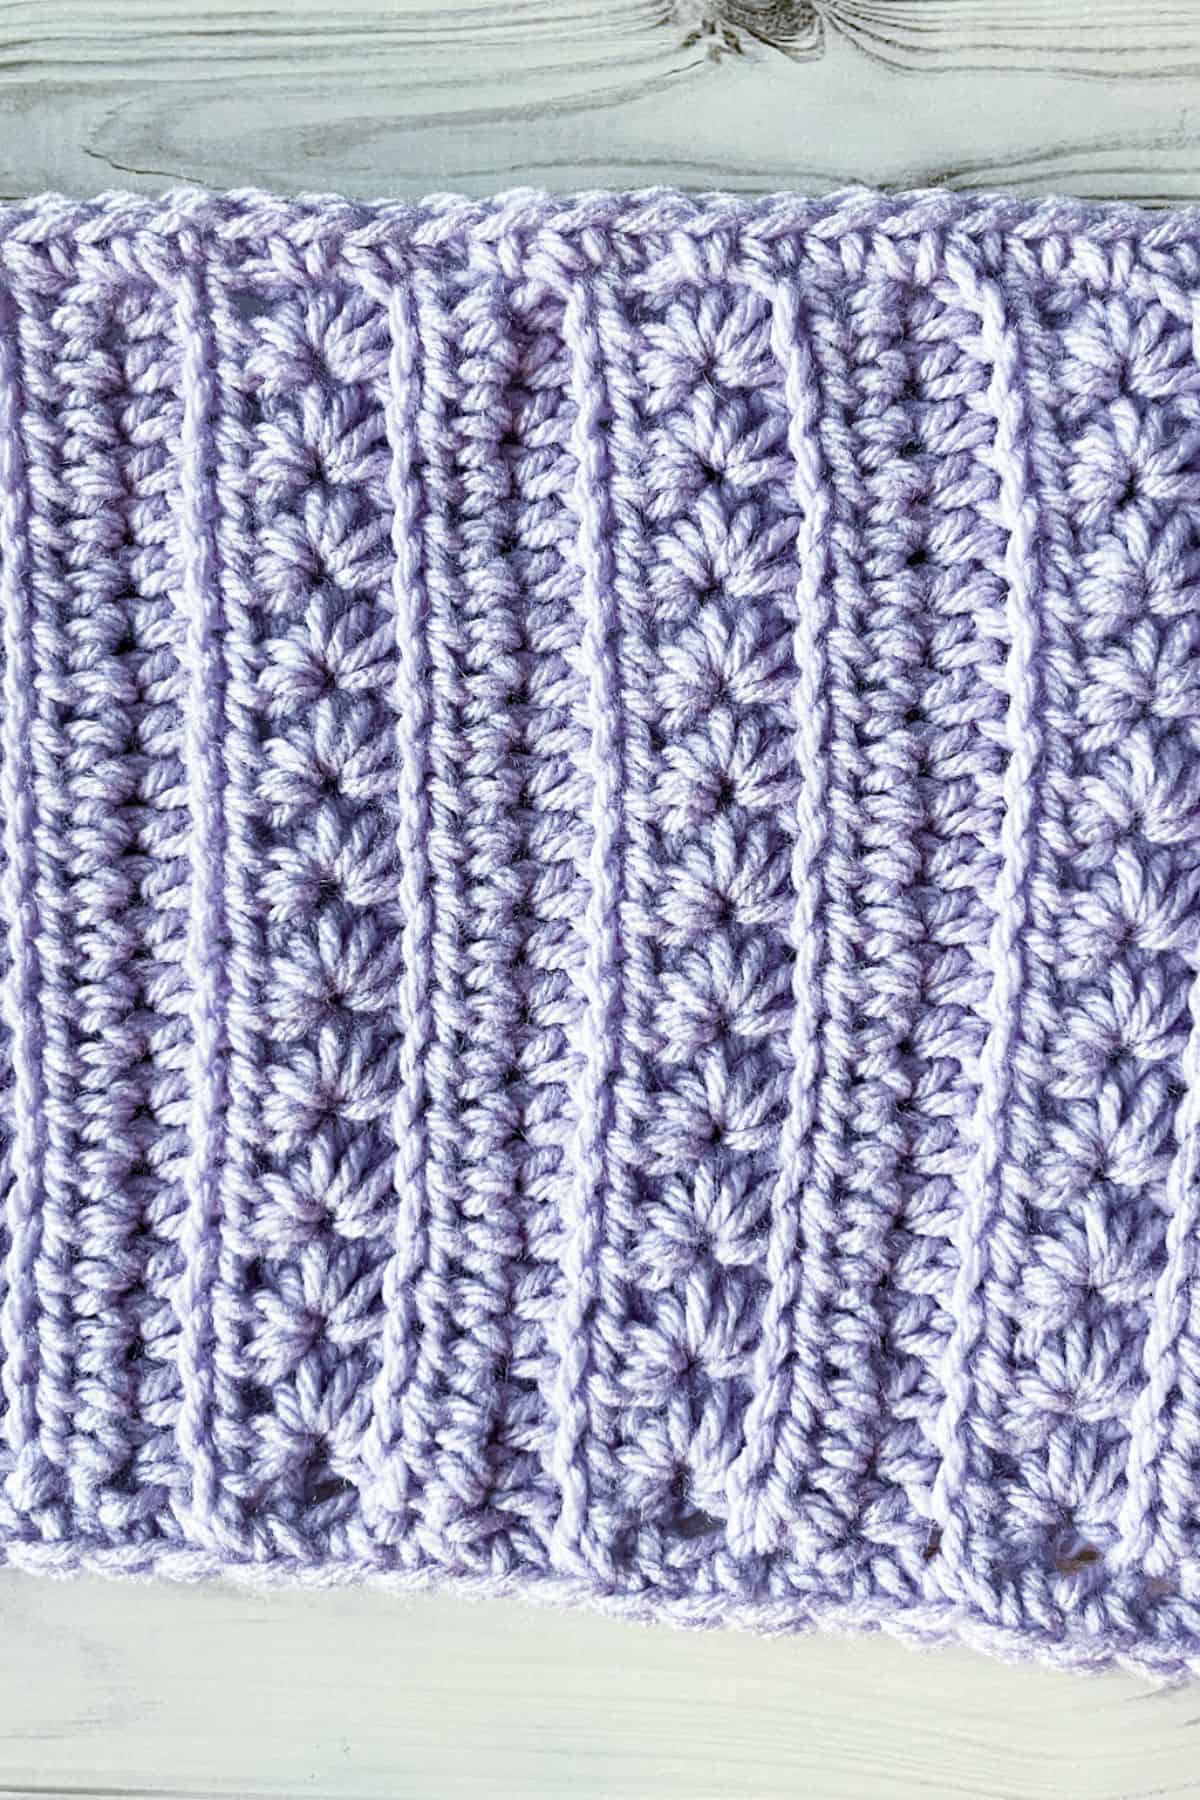
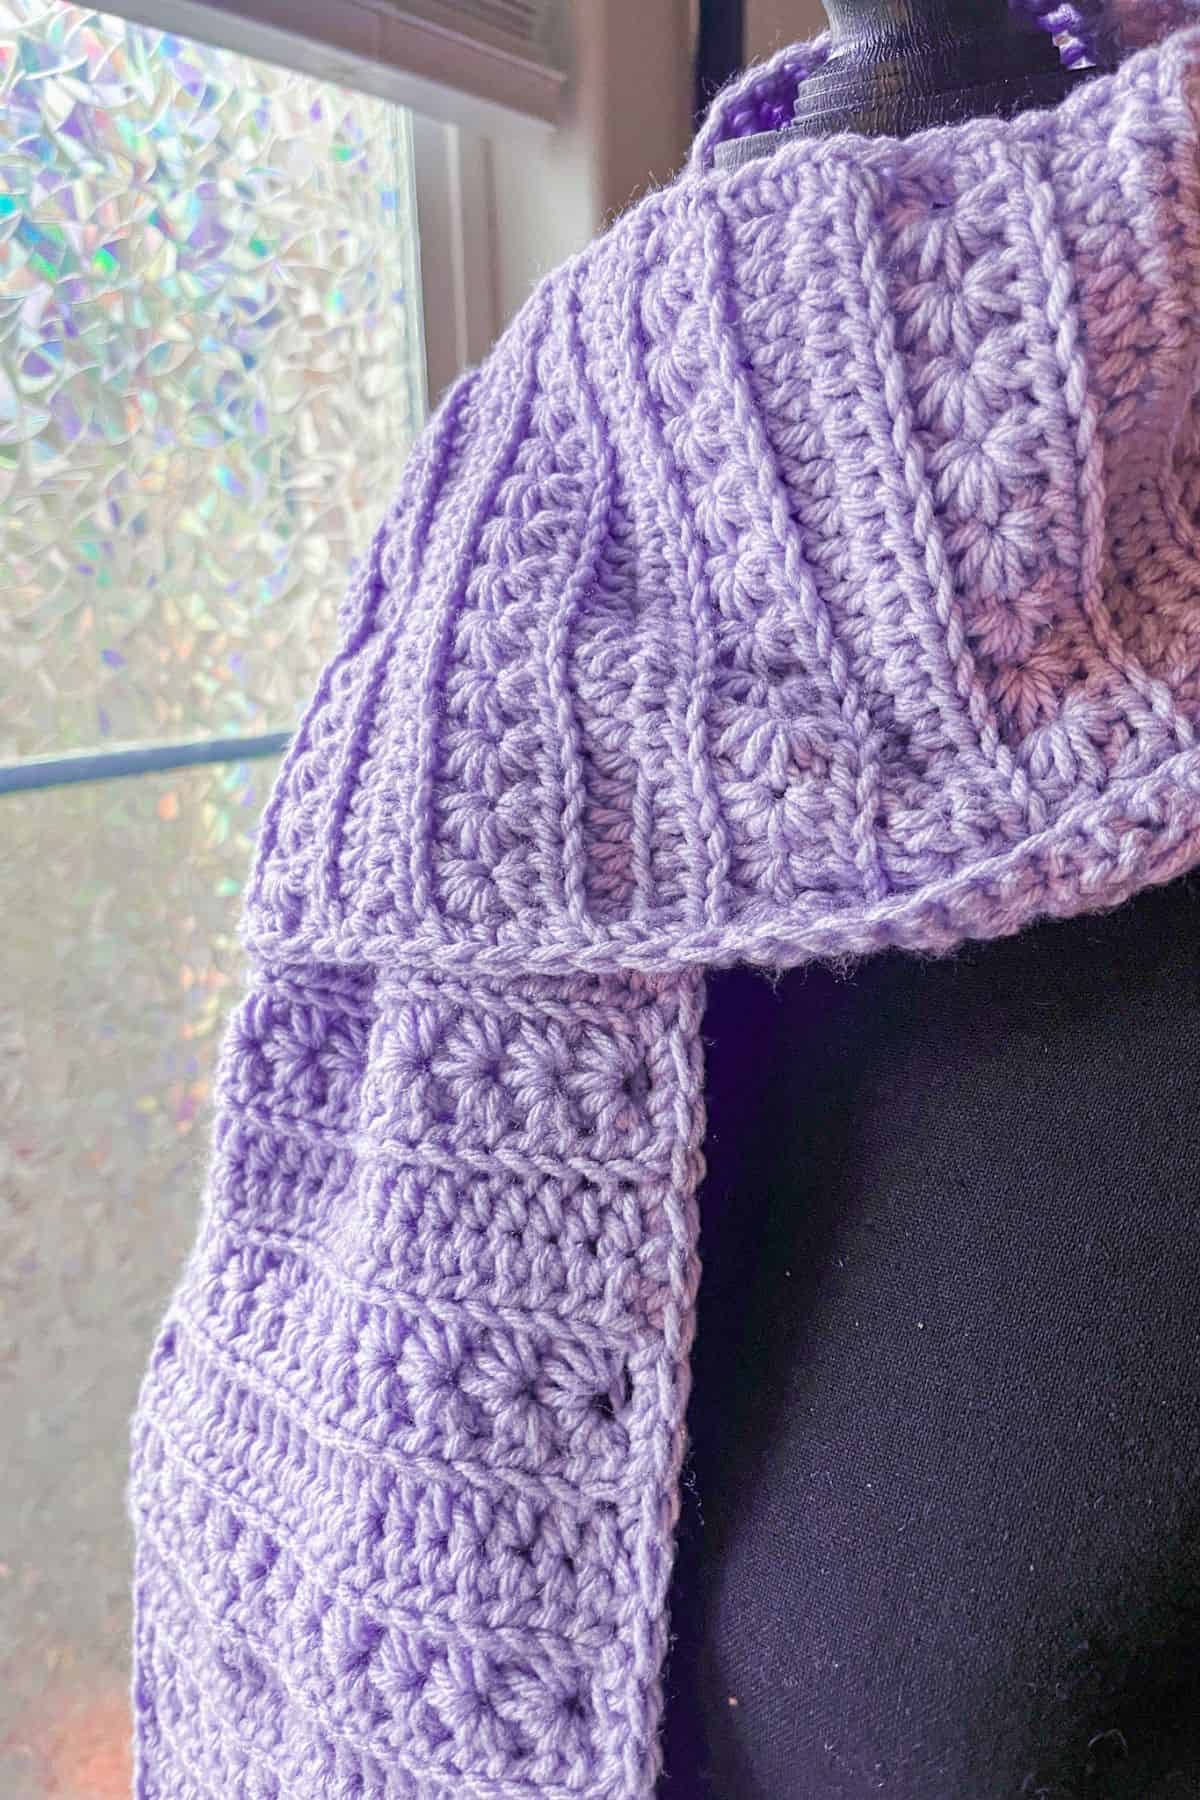
Also known as the crochet daisy stitch or the marguerite crochet stitch, the crochet star stitch scarf pattern is a delightful four-row repeat that combines the elegance of the star stitch with the simplicity of half double crochet rows.
While I’m making this crochet scarf in short rows for a unique twist, feel free to switch things up by crocheting lengthwise for a gorgeous vertical stripe effect. Plus, you can get creative with finishing touches like turning it into a cozy infinity scarf, like how I make my crochet bean stitch scarf, or adding some fun fringe at the ends!
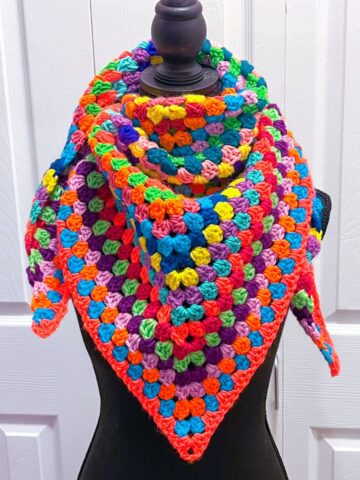
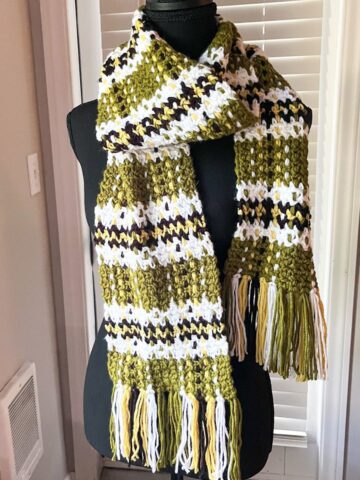
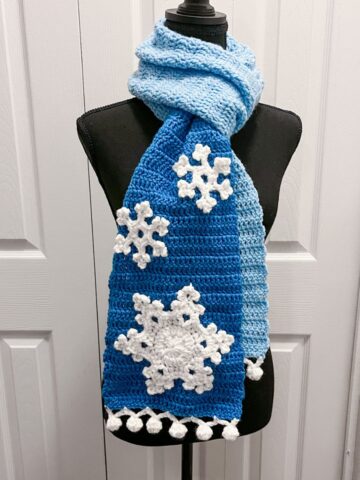
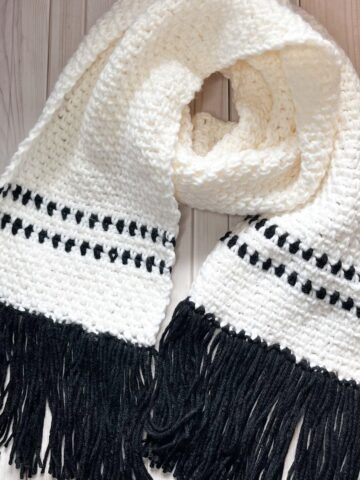
If you love this design, don’t miss out on my other crochet scarf patterns like the crochet houndstooth scarf, crochet plaid scarf, and crochet snowflake scarf—each using a different crochet technique to make them uniquely beautiful.
Ready to dive into this crochet star stitch pattern? Let’s get started and learn how to crochet the star stitch together!
Jump to:
✏️ Things To Note:
- Starting Chain: Make sure your starting chain is an odd number. This ensures that the crochet star stitch scarf pattern will align correctly and you’ll have a beautiful, symmetrical design as you crochet.
- Watch for the Slant: The crochet star stitch can sometimes create a slight slant in your project. To avoid this, double-check that you’re placing the star stitch in the correct spots as you work. Keeping track of where each stitch goes will help maintain the stitch’s neat, consistent look and prevent any unintended slanting.
- Skill Level: The Crochet Star Stitch Scarf Pattern is considered intermediate. It’s perfect for crocheters who are comfortable with basic stitches and are ready to try something a little more intricate. Don’t worry—once you get the hang of the stitch, it’ll be smooth sailing!
🪡 Materials Needed
💭Abbreviations to Remember (US terms)
- Chains (ch)
- Half double crochet (hdc)
- Back loop only (blo)
* The ch x1 at the end of each row does not count as a stitch in the row, it is a turning chain.
* If you see a stitch abbreviation with "x" after it, it means how many times you do that stitch in the following amount of stitches. For example: sc x6 would mean you make a single crochet in the next 6 stitches. Inc x2 means you make an inc in the next 2 stitches.
🧋Variations
- Change the Yarn: Experiment with different yarn weights and types to change the look and feel of the stitch. For example:
- Use lightweight yarn for a more delicate, airy feel.
- Use bulky yarn for a cozier, thicker texture that's perfect for blankets or winter scarves.
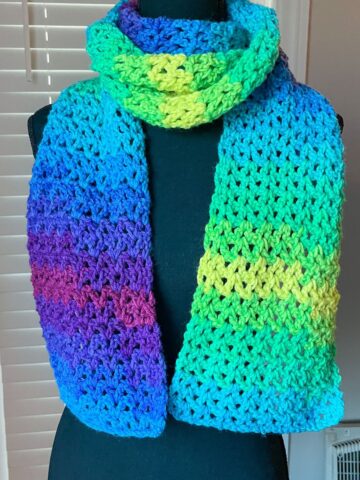
- Color Variations: Create a beautiful ombré effect or use contrasting colors to highlight each "star" in the Crochet Star Stitch. You can even try color blocking or striping for a more modern twist.
🍵Instructions for Crochet Star Stitch Scarf Pattern
For the crochet star stitch scarf pattern tutorial, we will be working in rows.

Foundation: Ch x27 (or more chains if making a wider scarf, just make sure it's an ODD amount of chains).
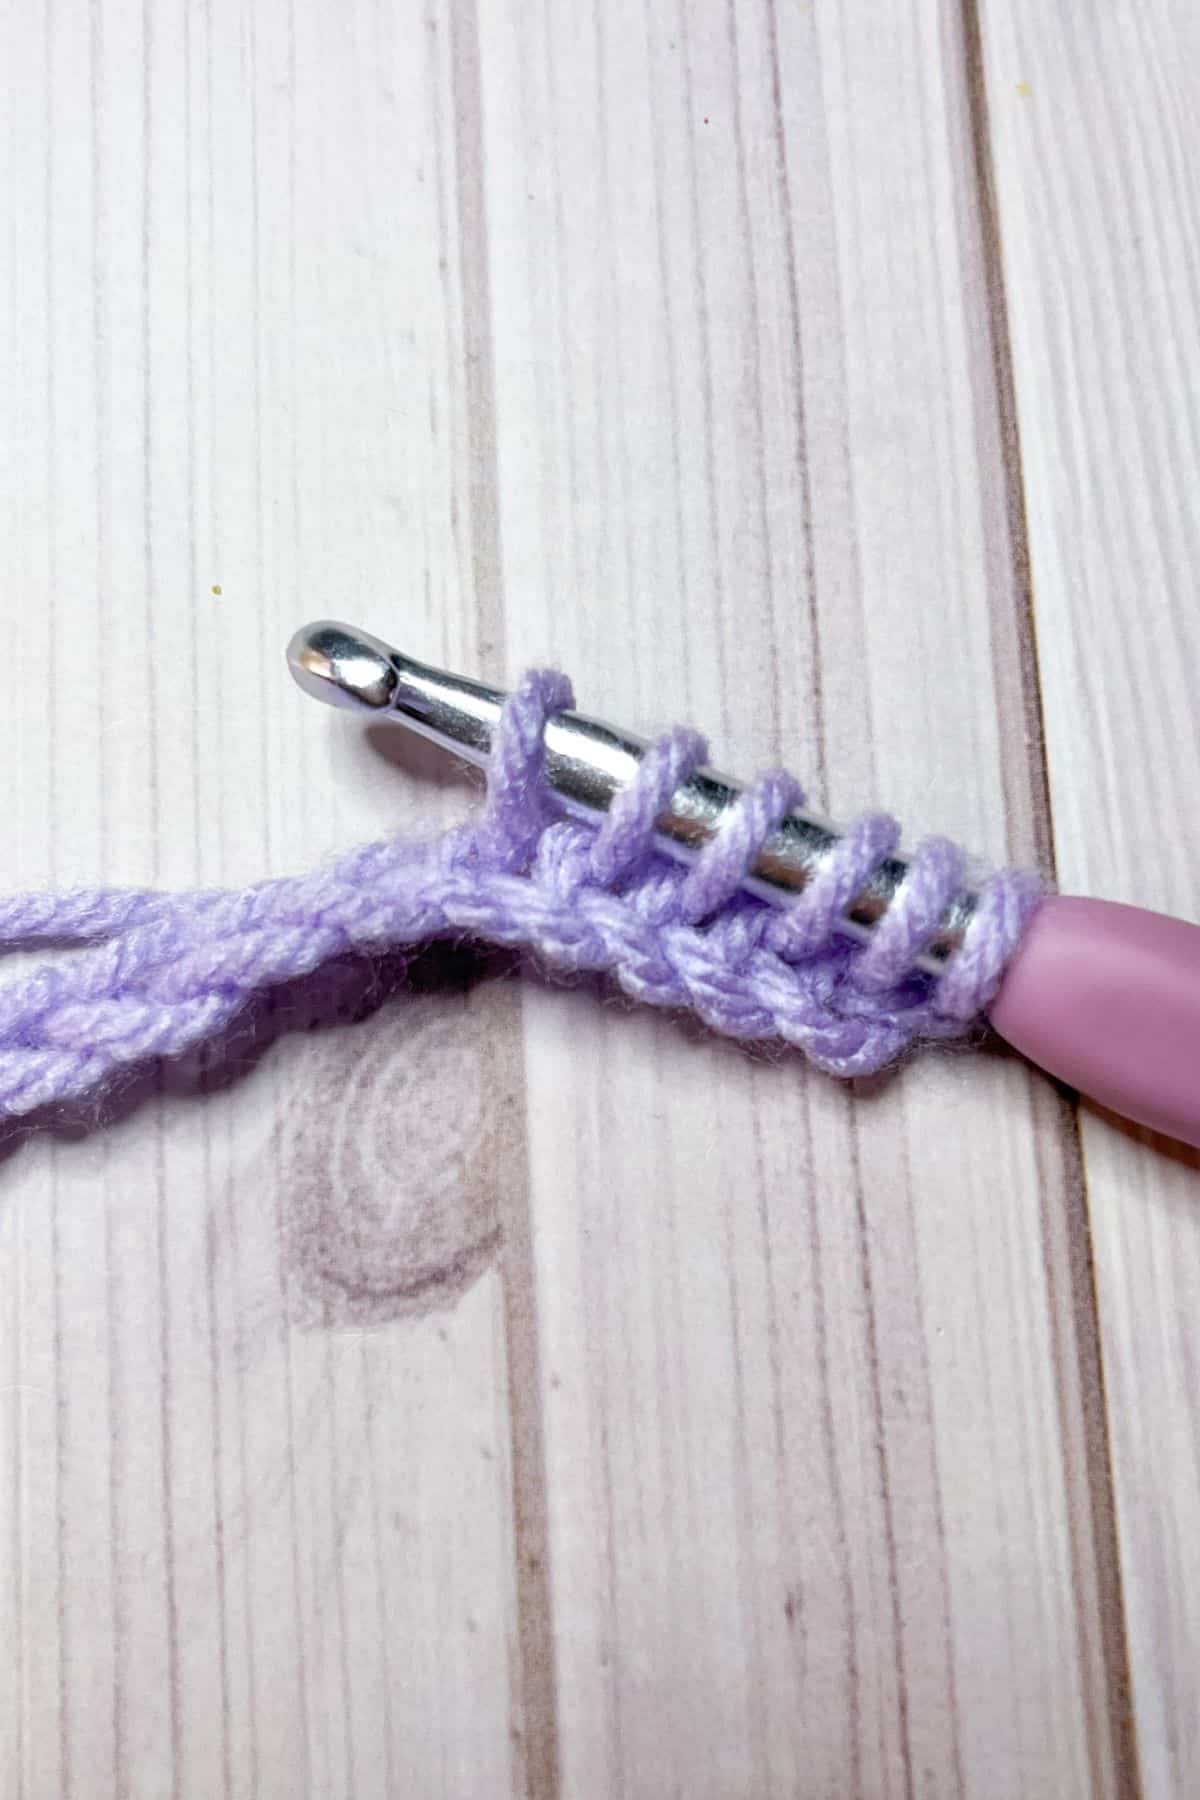
Row 1: Start by inserting your hook into the second chain from the hook. Yarn over and pull up a loop. Then, insert your hook into the next chain, yarn over, and pull through. You should now have three loops on your hook. Repeat this for the next three chains until you have six loops on the hook.
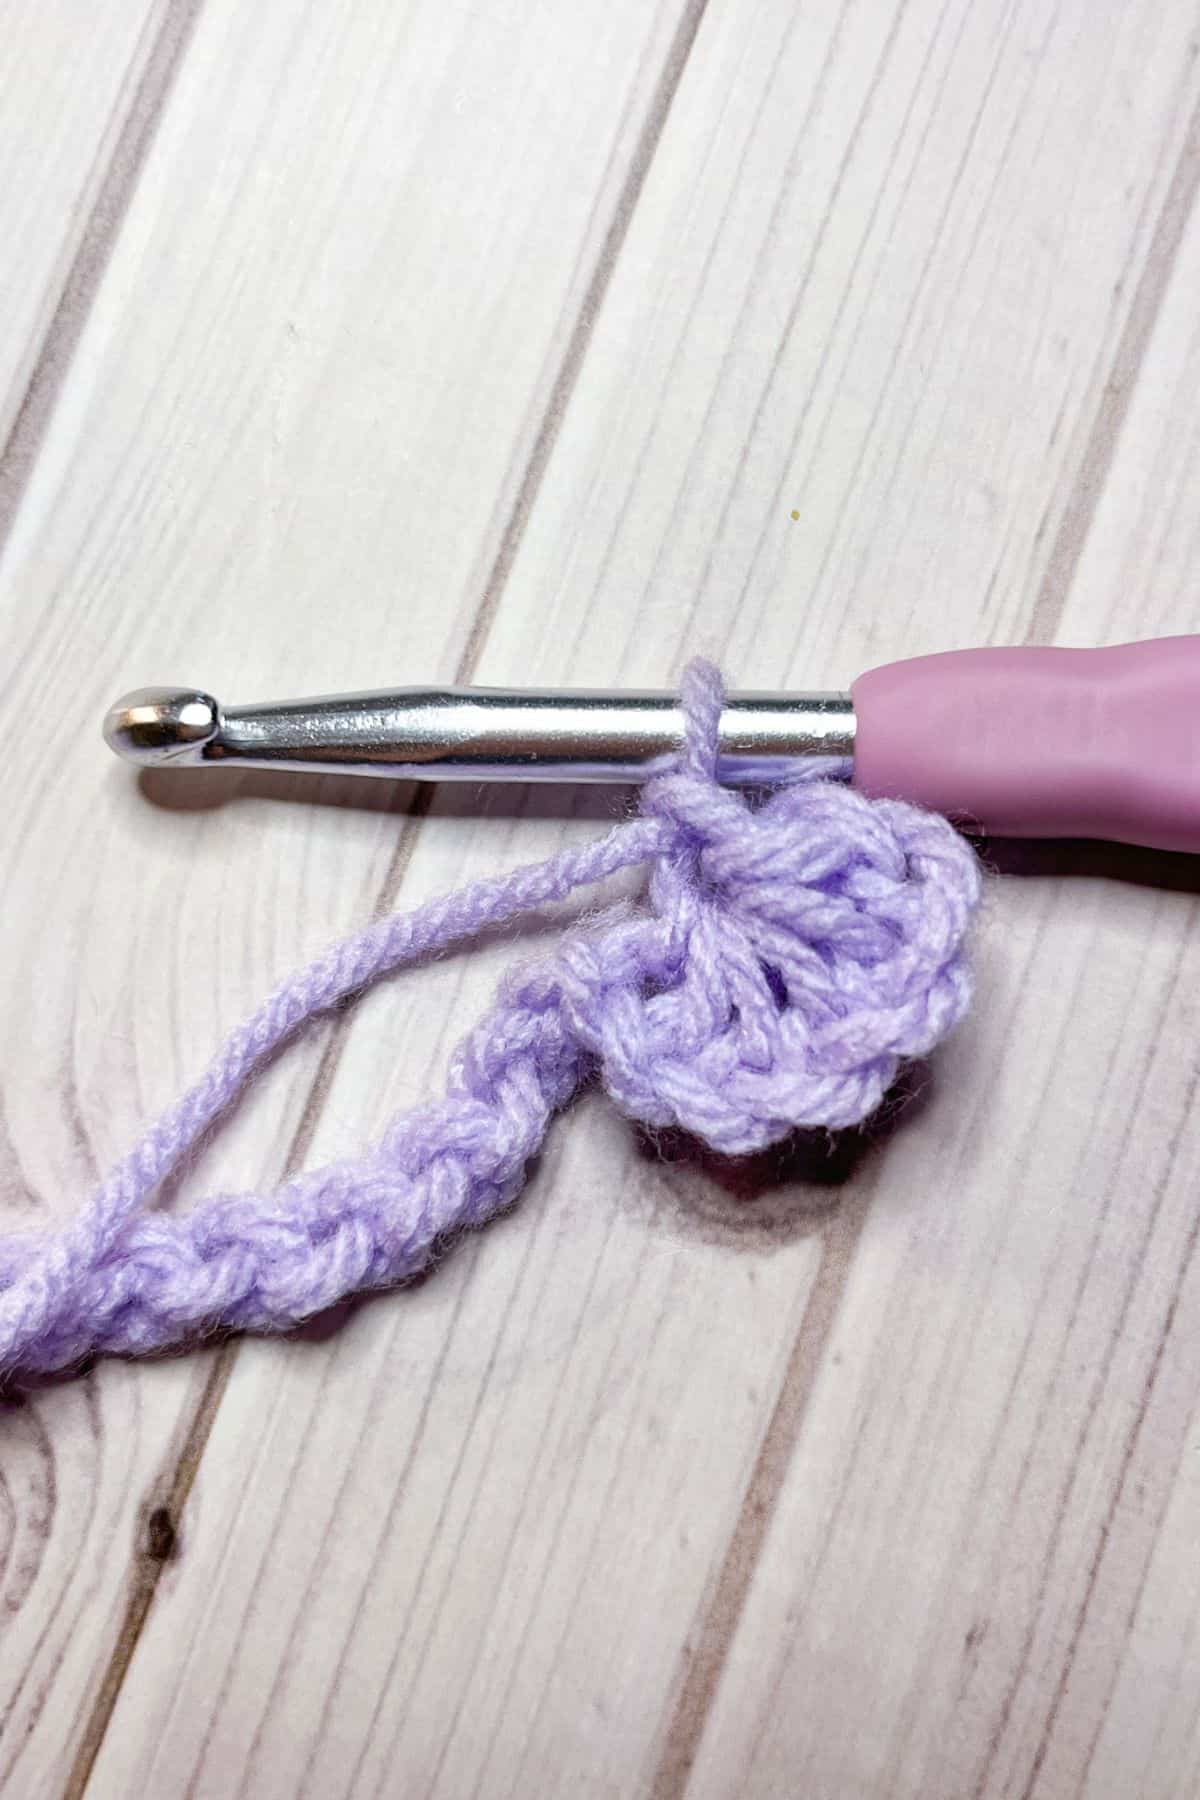
Once you have six loops on your hook, yarn over and pull through all six loops. Then, chain 1 to complete the star and create the "eye" in the center.
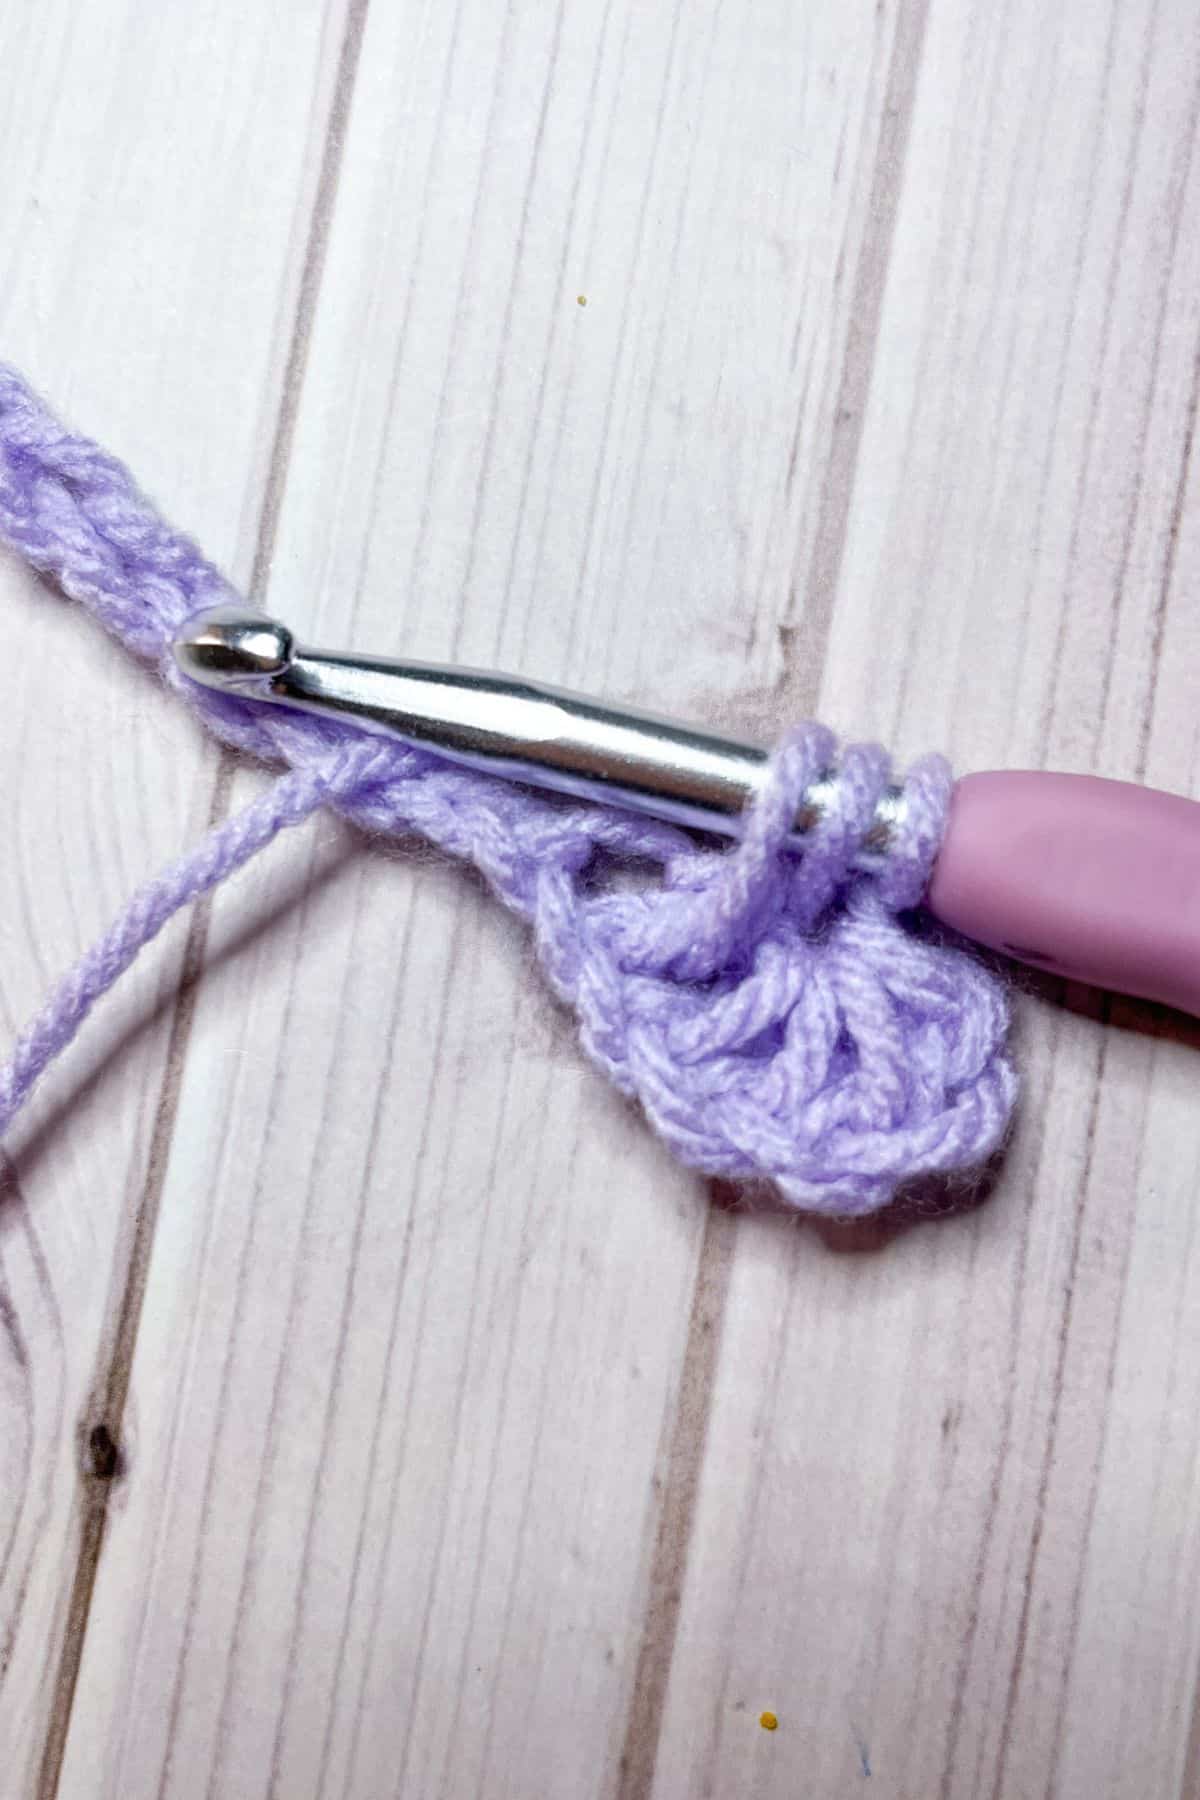
Next, insert your hook into the "eye" you just made, yarn over, and pull through, leaving two loops on your hook. Then, insert your hook into the space between the two last "spikes" of the first star, yarn over, and pull through. This will give you three loops on your hook.
Now, insert your hook into the same chain where you worked the last stitch of the previous star, yarn over, and pull through, so you have four loops on your hook. Insert your hook into the next chain, yarn over, and pull through. Repeat this in the following chain until you have six loops on your hook.
Yarn over and pull through all six loops on the hook. Chain 1 to close the second star.
Repeat these steps for the rest of the row.
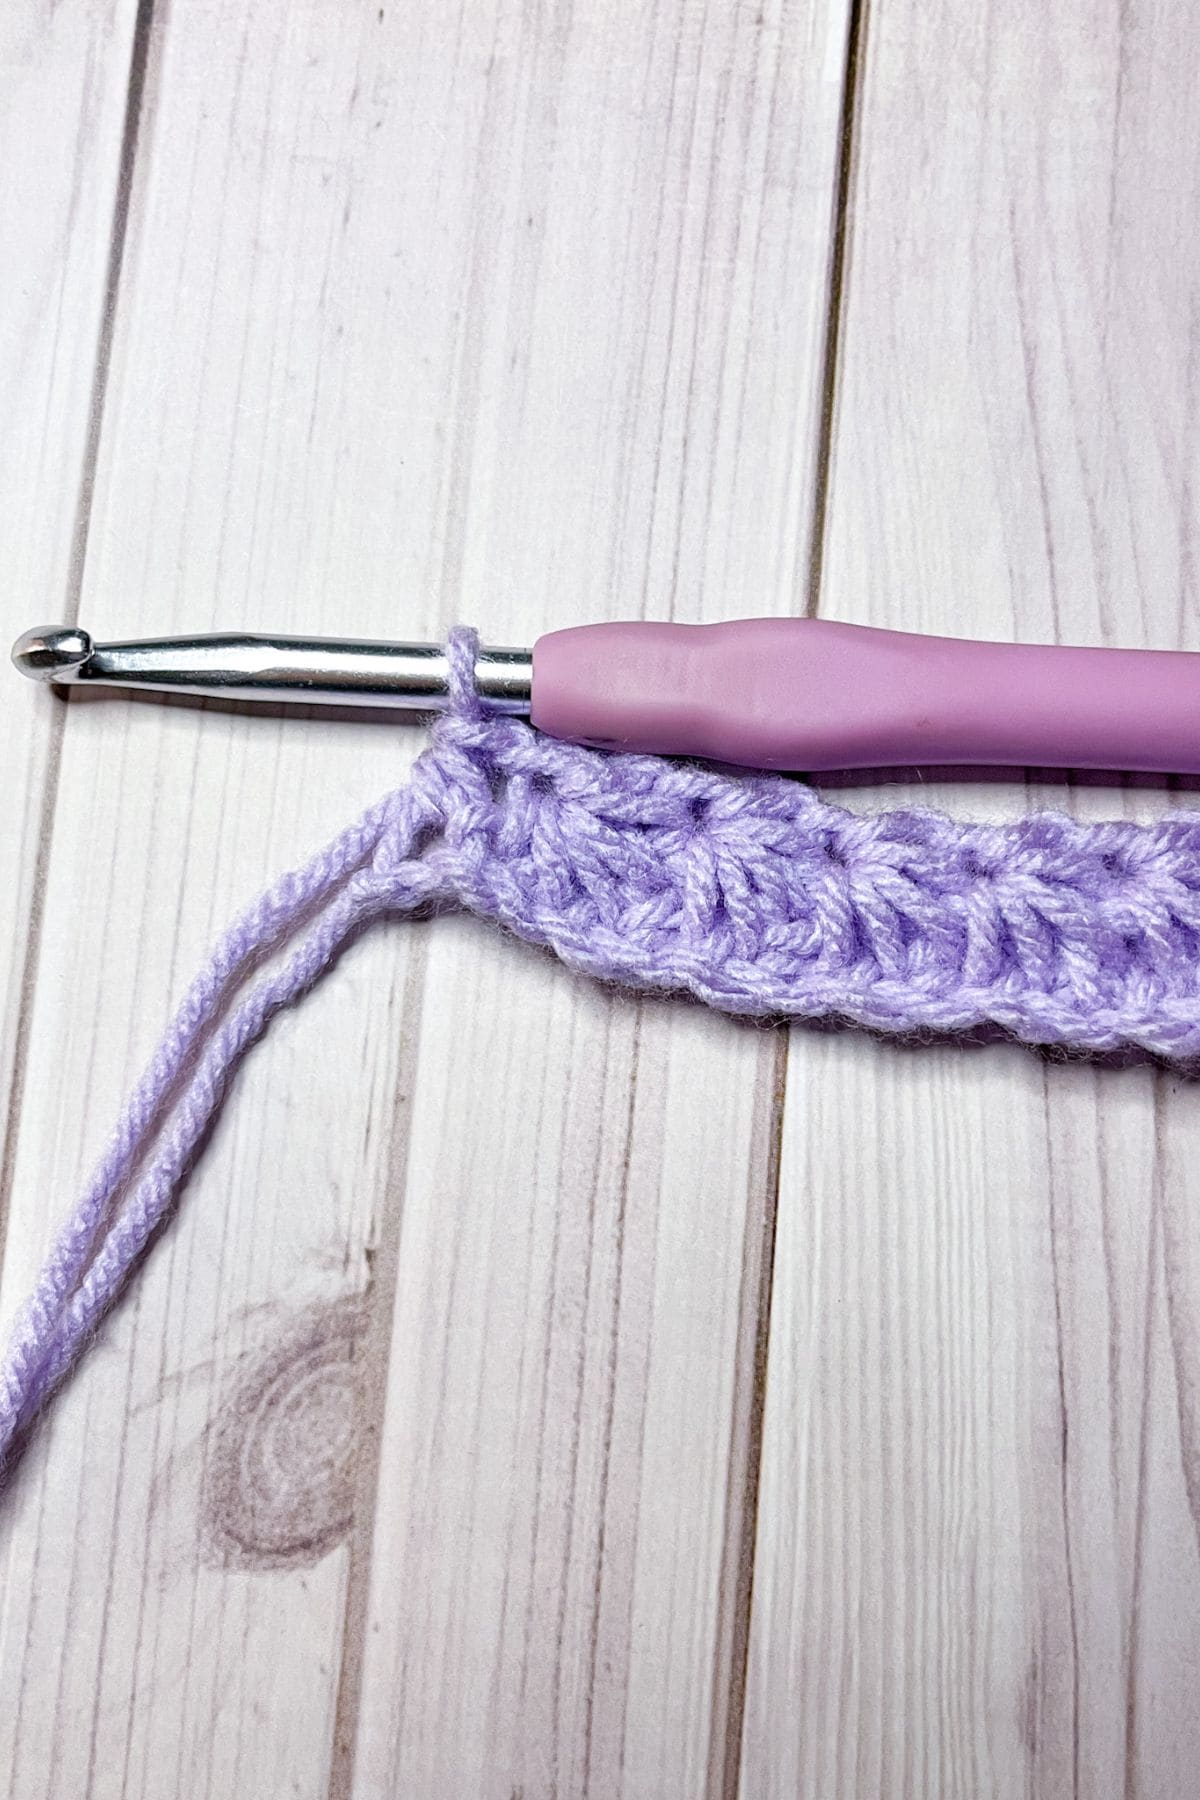
When you reach the end, finish by making 1 hdc in the last stitch. Then ch x2 and turn.
Row 2: Crochet 2 hdc in the "eye" of each star across. Finish with 1 hdc in the last stitch. Then ch x2 and turn (23).
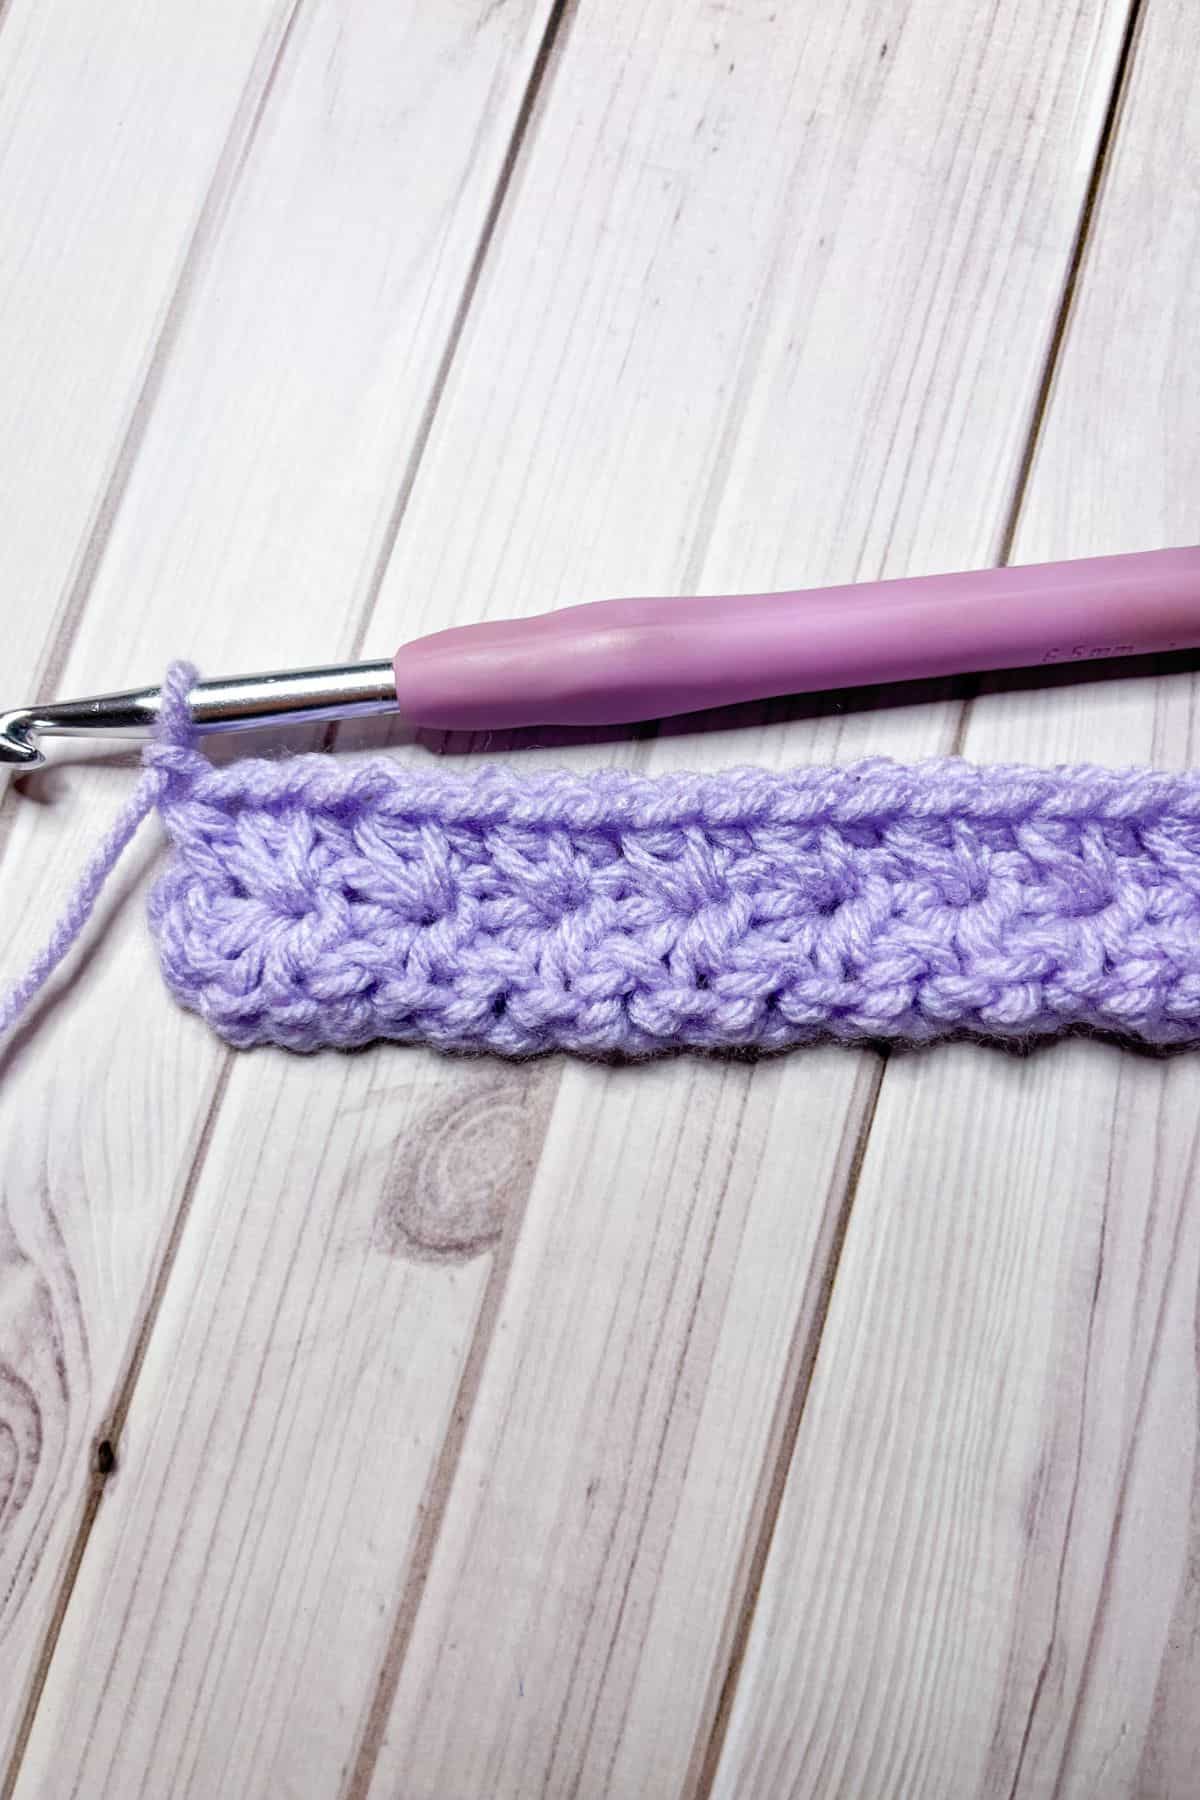
Row 3: In blo, hdc the entire row (23). Then ch x2 and turn.
Row 4: With regular hdc, hdc the entire row (23). Then ch x3 and turn.
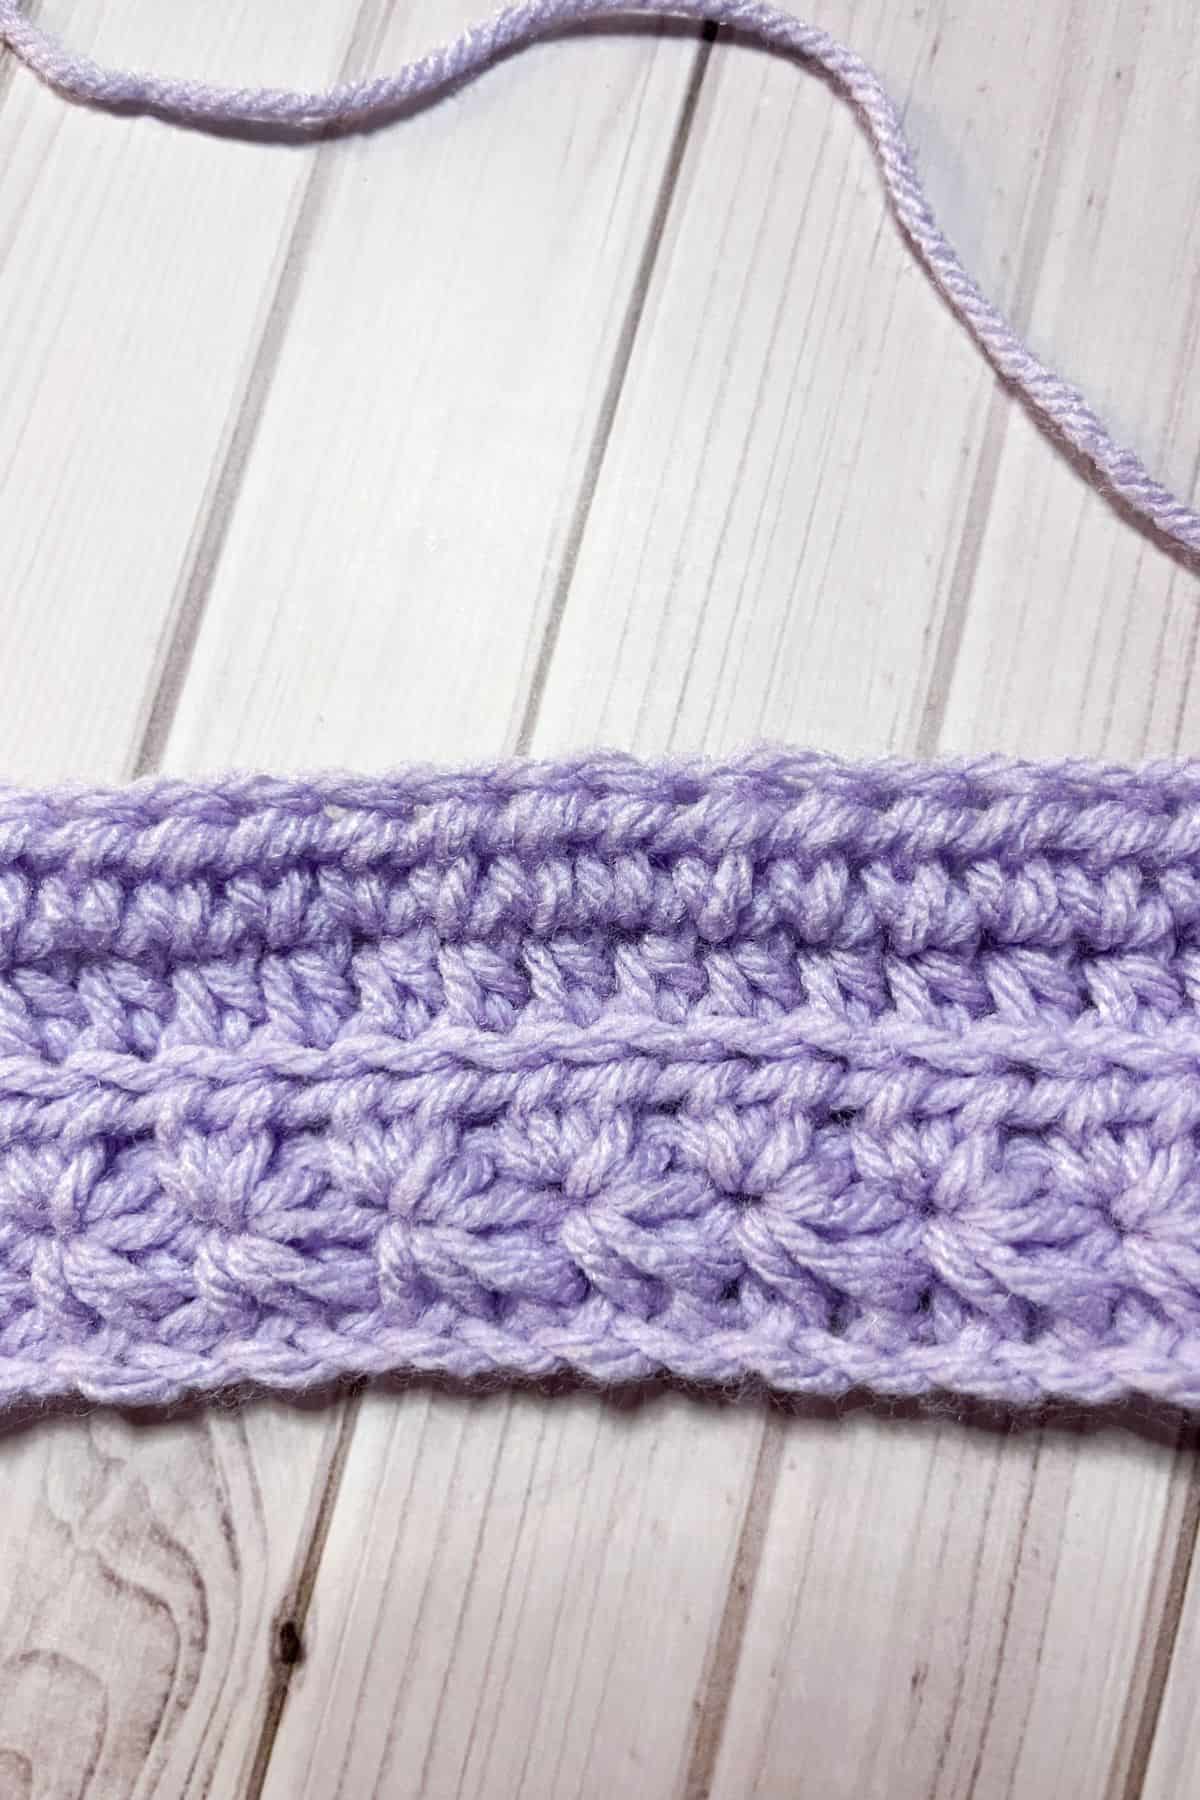
Row 5: Insert your hook into the second chain from the hook, yarn over, and pull through, repeat for the next chain, then continue to insert your hook, yarn over, and pull through in blo for the next 3 stitches until you have 6 loops on the hook. Then yarn over and pull through all 6 loops, then chain 1 to close the star. This creates the eye of the first star of this row.
Make stars for the rest of the row just like row 2, but when inserting into stitches - do it in blo. Then at the end of the row make a hdc and then ch x2.
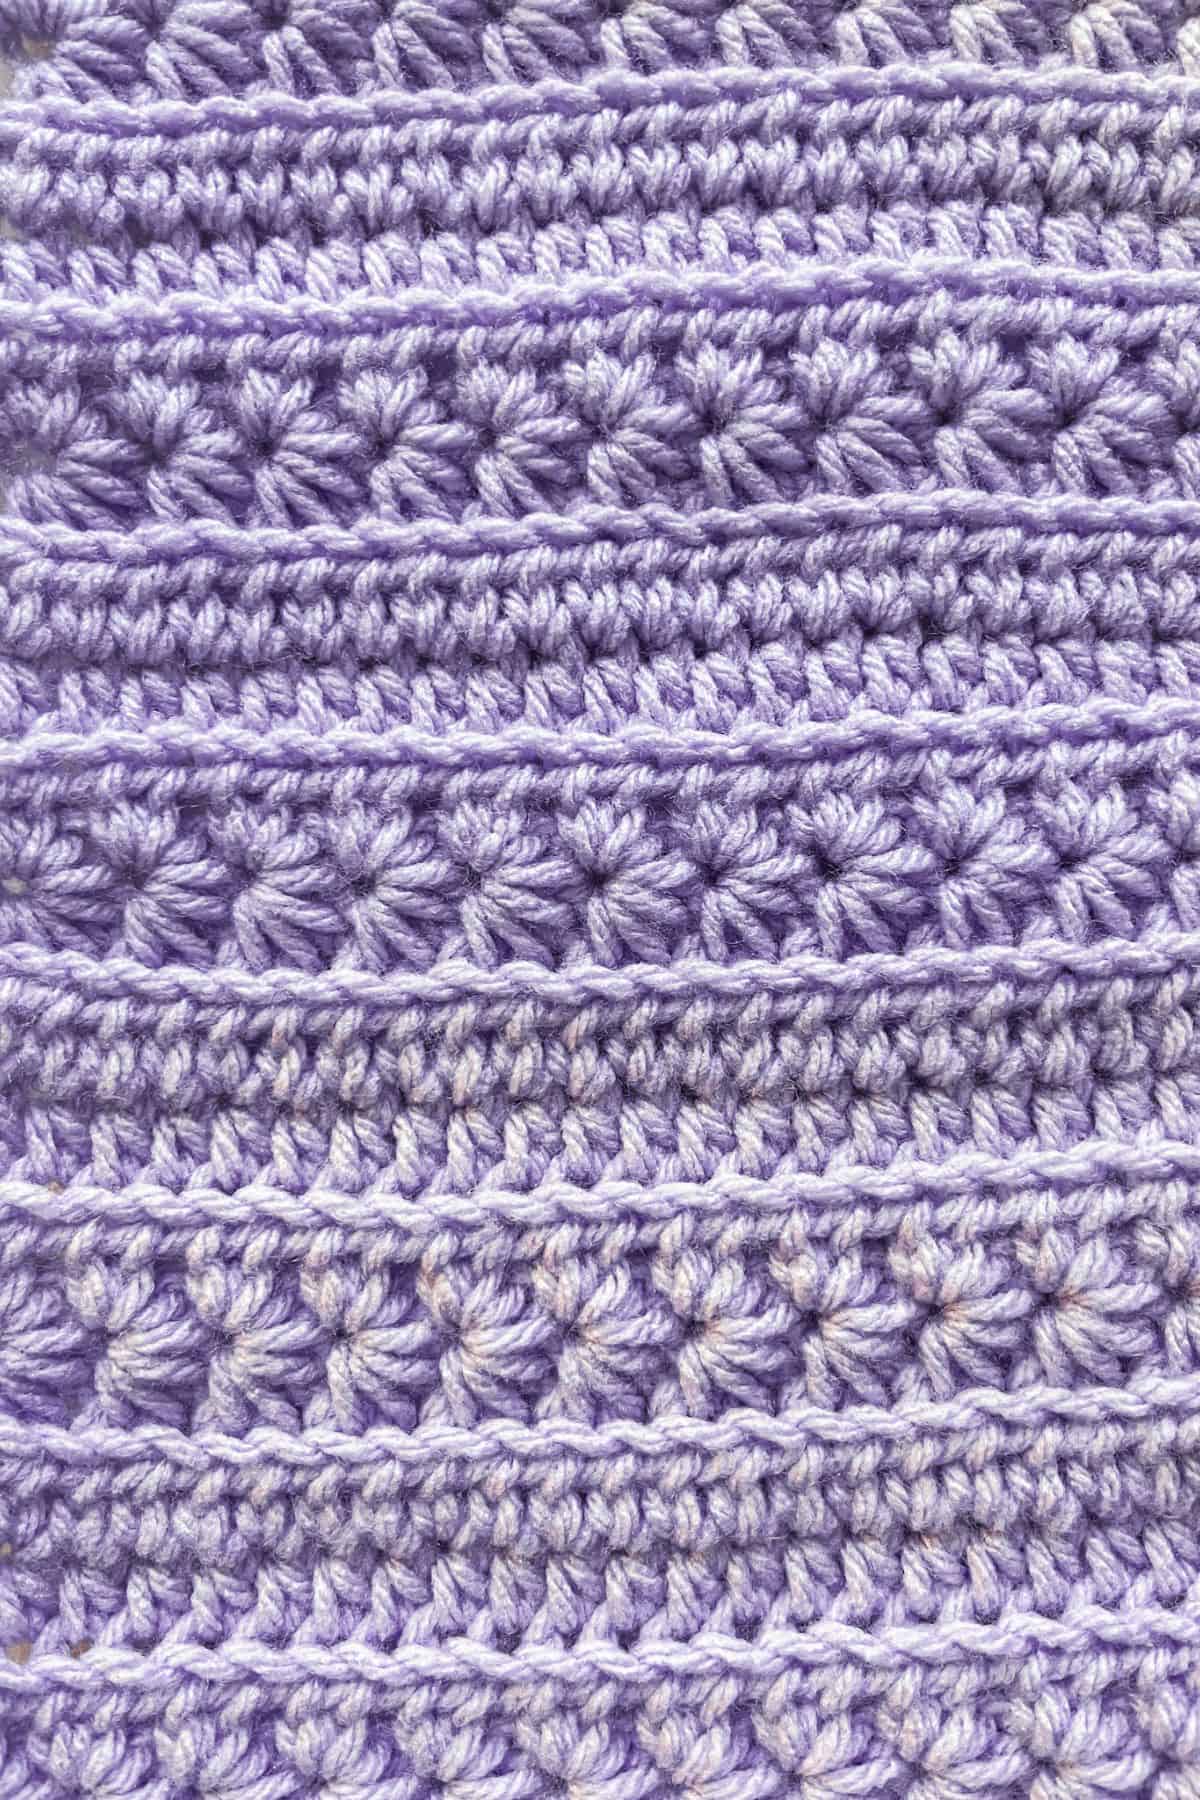
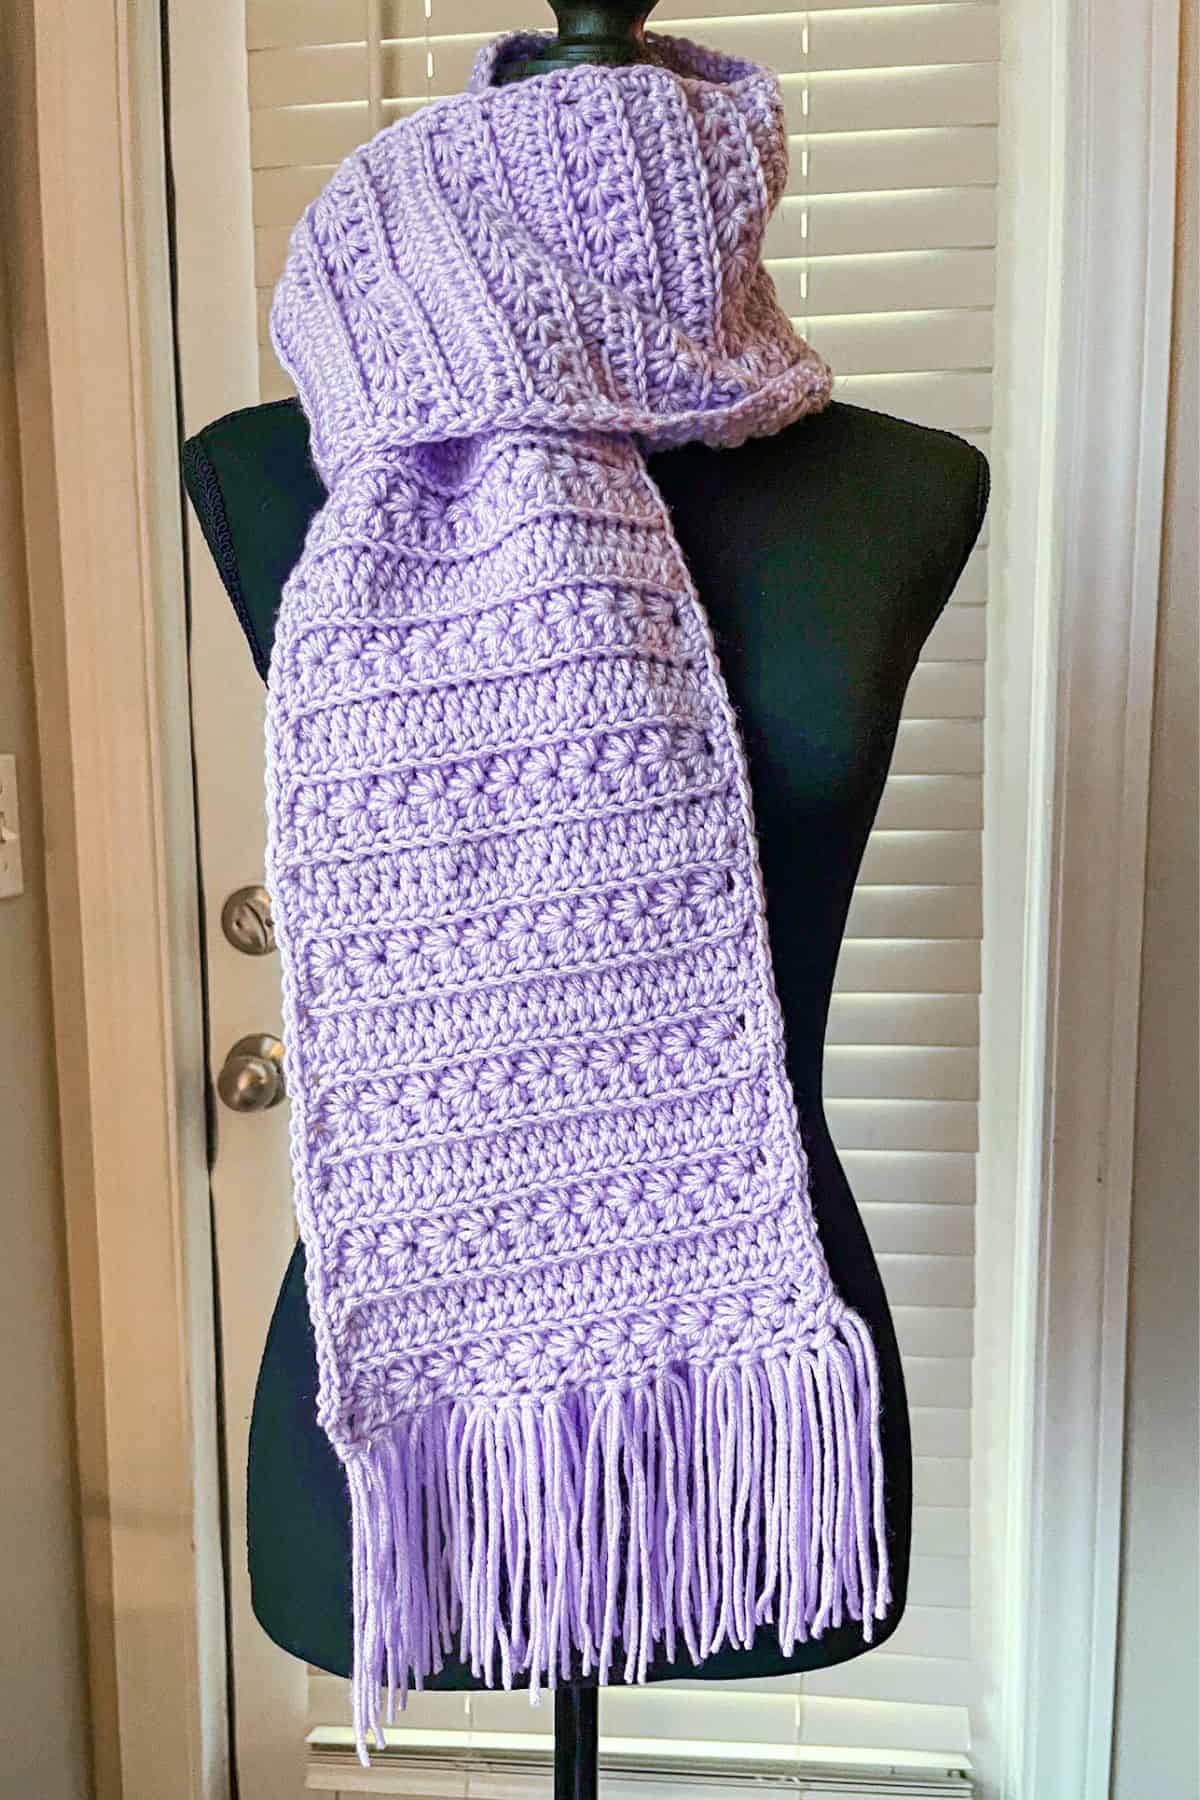
Repeat Row 2 through 5 until your project is the length you want it. I made 143 rows for my scarf for reference.
For a straight edge - feel free to crochet a sc edge along the raw edges (long side) for a cleaner finish, you can see how that looks in my finished scarf photos.
Scarf Fringe:
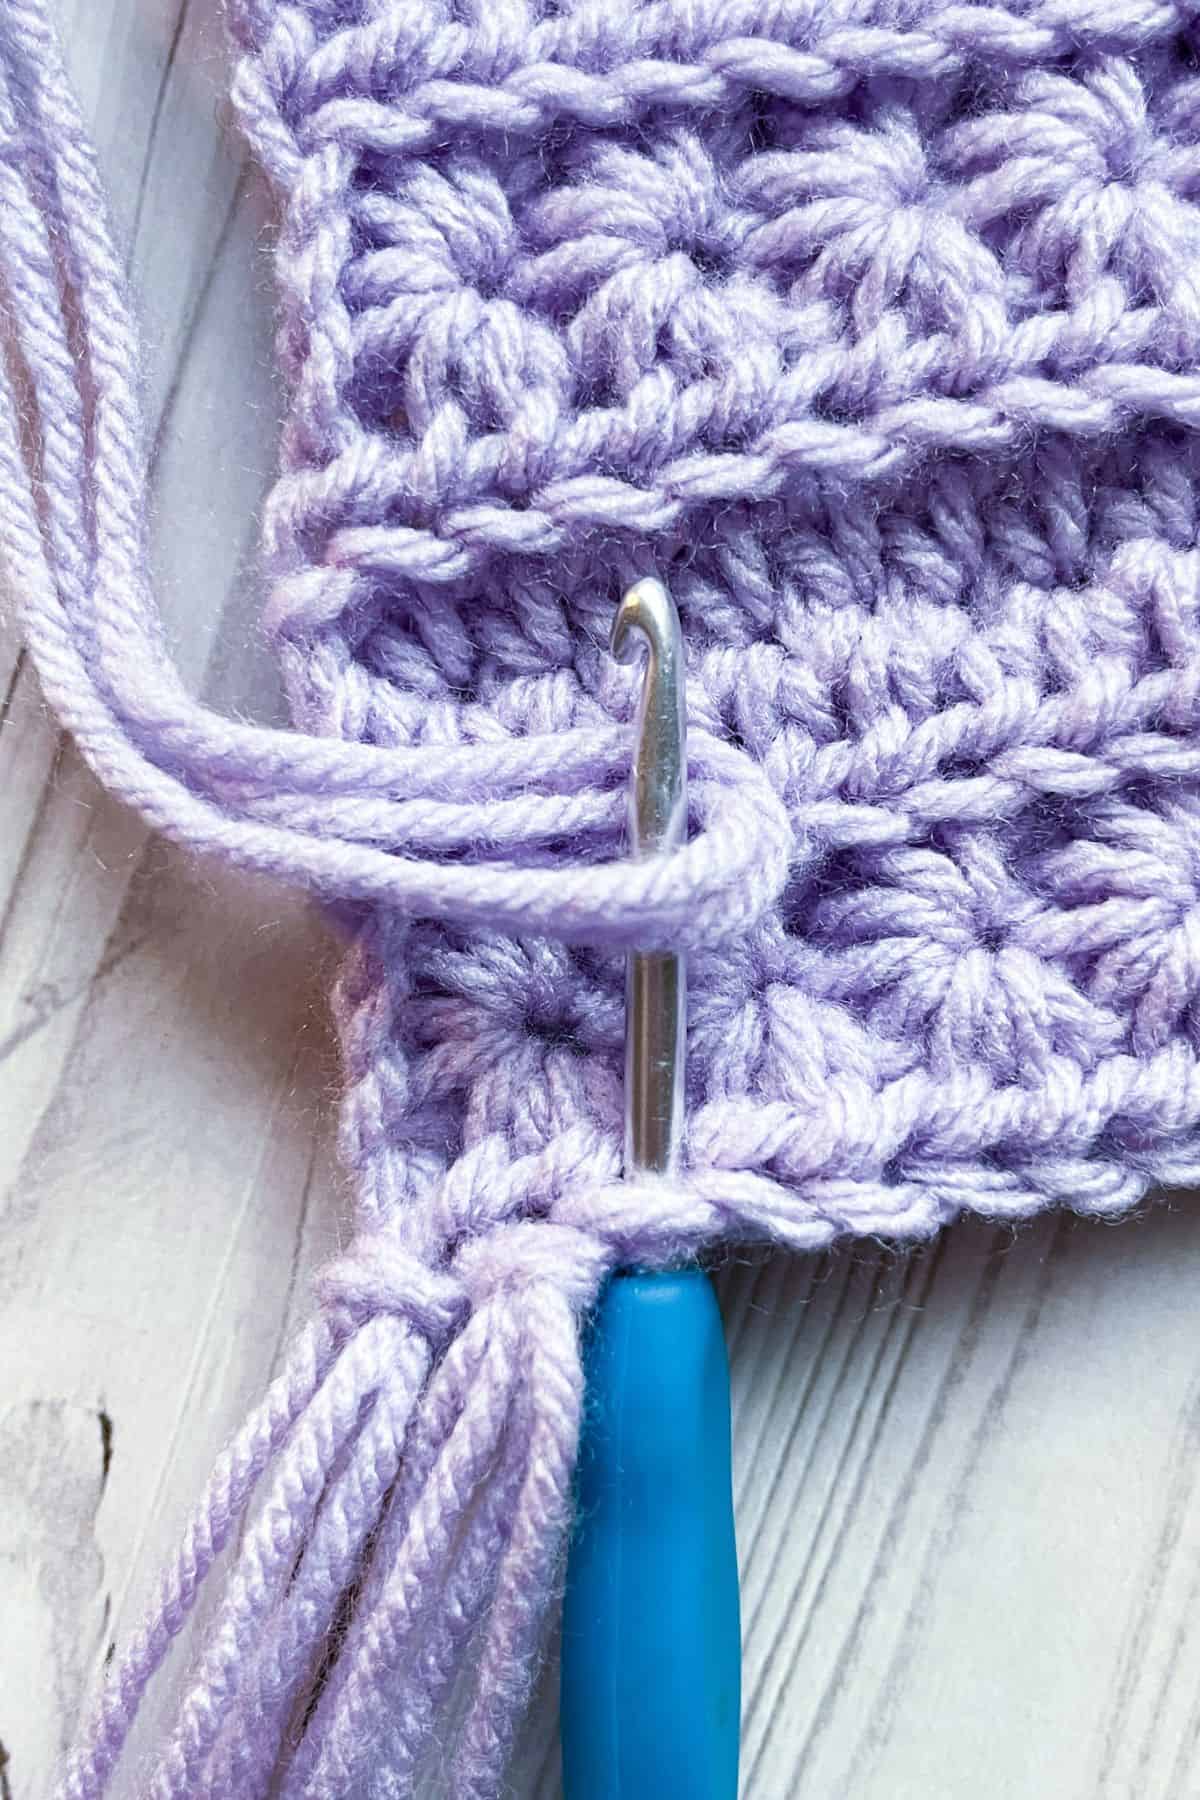
For the fringe cut 92 x12 inch pieces of yarn in the same color yarn or a contrasting color. (I got to 92 pieces because its 2 strands of yarn per stitch on the ends [23] so 23 x4 is needed)
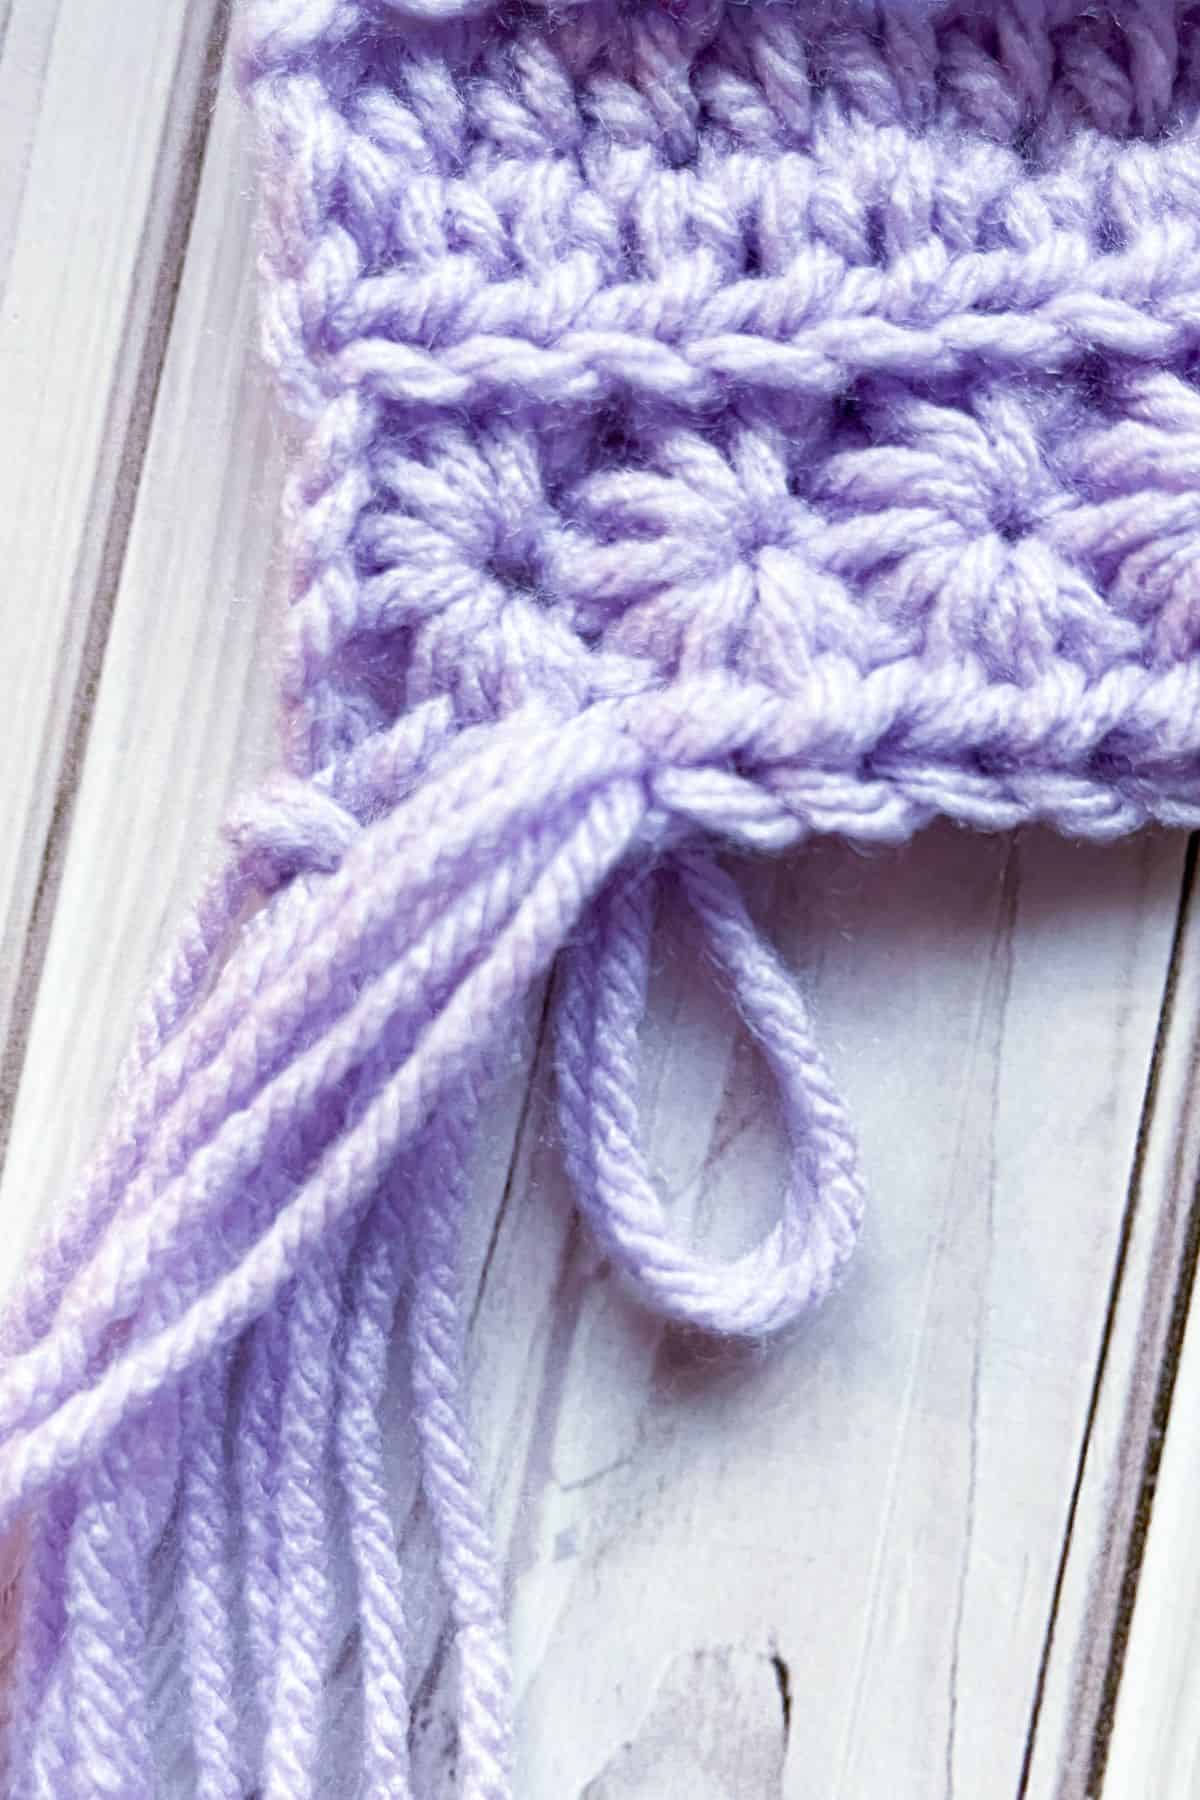
To attach the fringe to the crochet star stitch scarf, grab 2 pieces of yarn, then pinch the strands of yarn at the middle and make a loop, insert a hook into the short side of the scarf and pull the yarn through the bottom stitch.
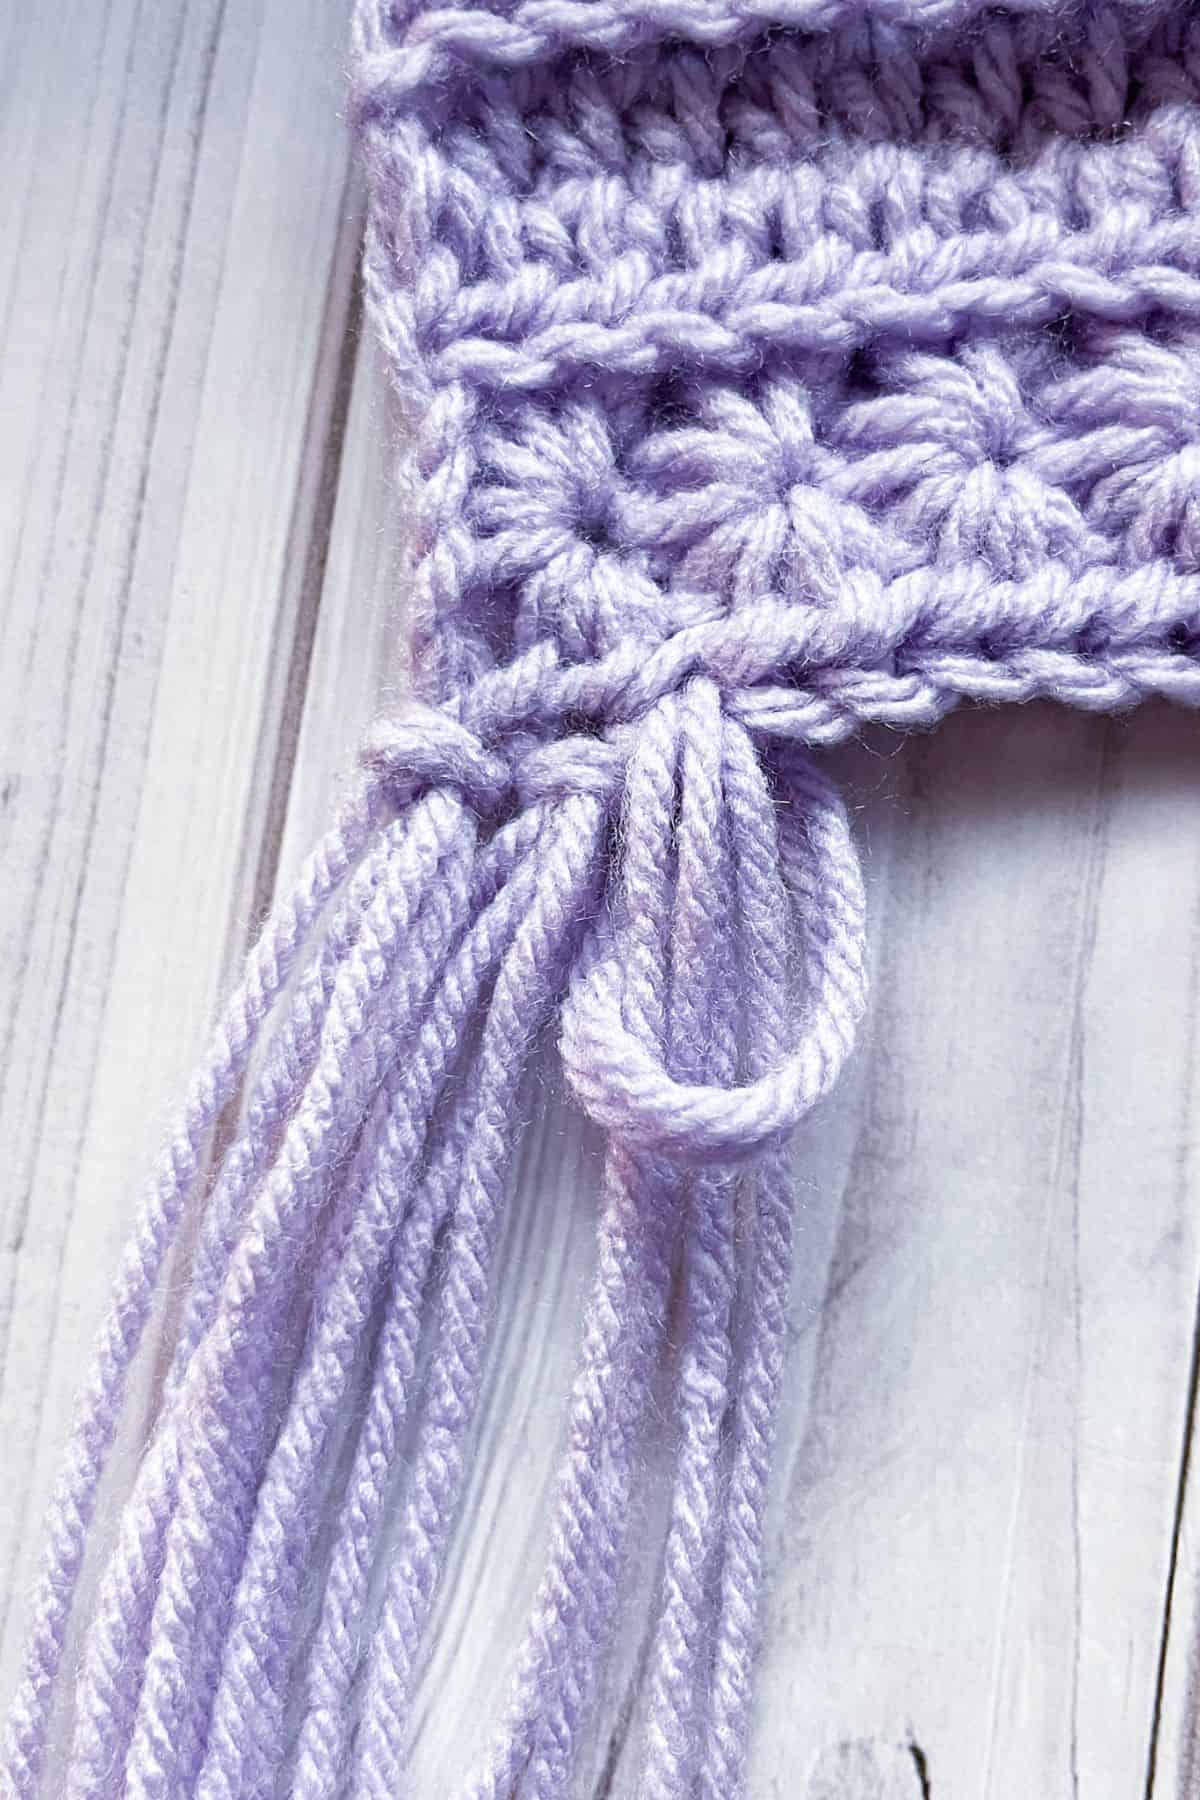
Then using your fingers take the ends of the fringe and loop them through the hole you made and pull tight.
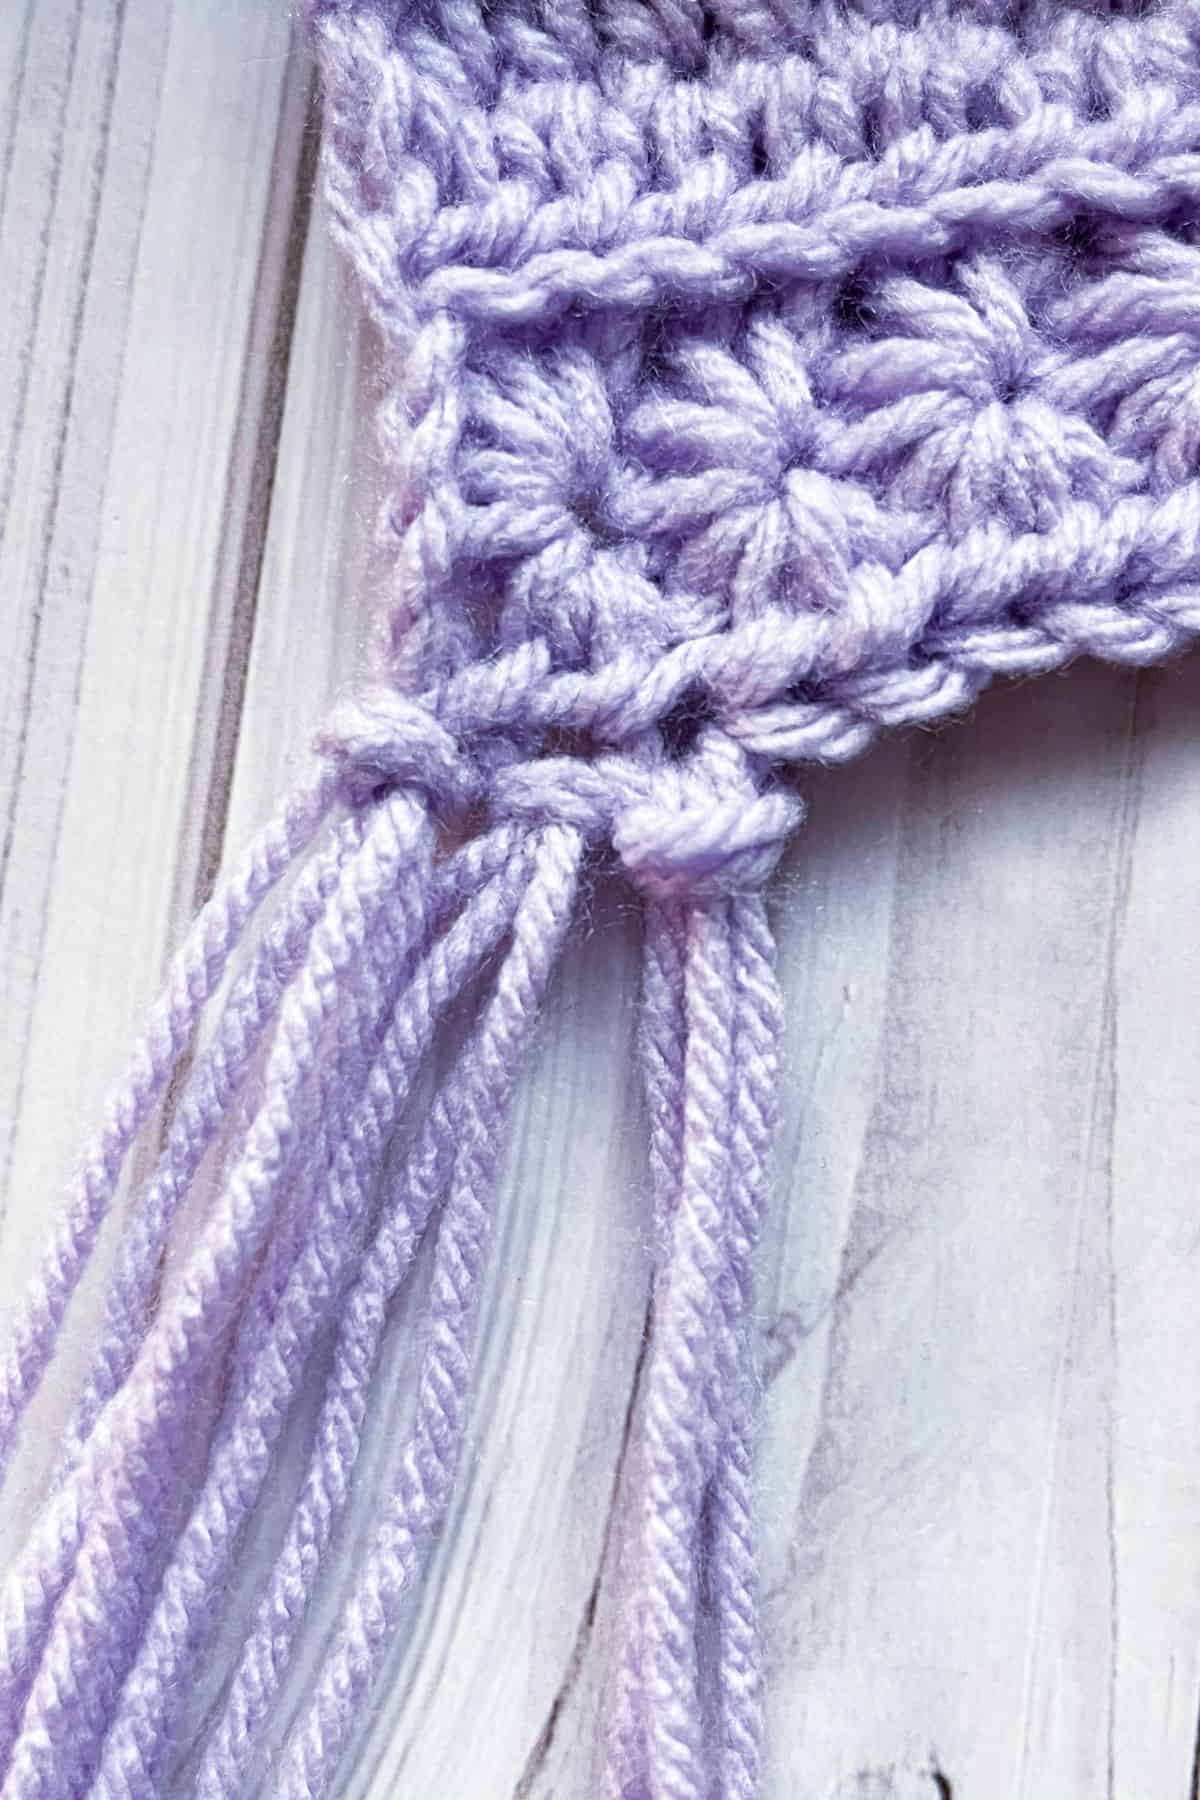
Repeat the above step for the entire width of the scarf. Repeat on the other side of the scarf. I put 1 group of fringe per stitch.
After all the fringe is attached, trim the bottom so the yarn is nice and all lined up.
And there you have it! The Crochet Star Stitch Scarf Pattern is not only a joy to make, but it’s also perfect for keeping you warm and stylish all winter long. With its unique texture and versatility, this scarf will become your go-to accessory for every occasion—whether you're dressing up for a night out or simply bundling up on a chilly day.
Don’t forget to check out my Crochet Moss Stitch Hat Pattern, which is a perfect match for this scarf, and my Easy Crochet Fingerless Glove Pattern to complete your full winter set. You'll be all set to embrace the colder months in style!
Happy crocheting, and I can't wait to see your beautiful creations!
🐌Expert Tips
- Master the Star Stitch: The star stitch can be a bit tricky for beginners, but once you get the rhythm, it’s a breeze! Practice by working on a small swatch before starting your scarf. This will help you get comfortable with the technique of working multiple stitches into the same space to form the "petals" of the star.
- Use the Right Yarn: For the best results, choose a medium-weight yarn like worsted weight. This yarn works beautifully with the star stitch, allowing the pattern to shine without being too bulky. Choose a soft yarn that will drape nicely around your neck for added comfort and style.
- Adjust the Length: While the pattern is designed with short rows, feel free to switch it up and crochet the scarf lengthwise for a vertical stripe effect. You can also adjust the length to suit your personal style—whether you prefer a shorter scarf or one that you can wrap around multiple times.
- Keep Your Tension Consistent: As you crochet the star stitch, be mindful of your tension. The stitch can sometimes cause the fabric to be a bit tighter, so try to keep your tension relaxed to avoid puckering or uneven stitches. This will ensure your scarf looks polished and beautiful.
🧵Pattern FAQs
The star stitch, also known as the daisy stitch or marguerite stitch, is a textured crochet stitch that creates a beautiful "star" shape. It involves working multiple double crochet stitches into the same stitch, which gives it a lovely, 3D effect. Once you get the hang of it, this stitch is surprisingly easy and fun to work with!
The time it takes to finish the Star Stitch Scarf depends on your skill level and how much time you spend crocheting each day. Generally, with a 4-row repeat pattern and medium-weight yarn, it can take anywhere from 4 to 6 hours to complete, though this may vary.
If your star stitch feels too tight, try relaxing your tension a bit. Conversely, if it’s too loose, you might want to try a smaller hook size. Consistency is key to keeping your stitches even, so don't be afraid to adjust as needed.
🧶More Crochet Scarf Patterns

If you tried this Crochet Star Stitch Scarf Pattern (or any other pattern on my website), please let me know how it went in the 📝 comments below. I'd love to hear from you!

Crochet Star Stitch Scarf Pattern
Materials
Abbreviations (US terms)
- Chains - ch
- Half double crochet - hdc
- Back loop only - blo
Notes
- Starting Chain: Make sure your starting chain is an odd number. This ensures that the pattern will align correctly and you’ll have a beautiful, symmetrical design as you crochet.
- Watch for the Slant: The crochet star stitch can sometimes create a slight slant in your project. To avoid this, double-check that you’re placing the star stitch in the correct spots as you work. Keeping track of where each stitch goes will help maintain the stitch’s neat, consistent look and prevent any unintended slanting.
- Skill Level: The star stitch is considered intermediate. It’s perfect for crocheters who are comfortable with basic stitches and are ready to try something a little more intricate. Don’t worry—once you get the hang of the stitch, it’ll be smooth sailing!
Instructions
- For the crochet star stitch scarf pattern, we will be working in rows.
- Foundation: Ch x27 (or more chains if making a wider scarf, just make sure it's an ODD amount of chains).
- Row 1: Start by inserting your hook into the second chain from the hook. Yarn over and pull up a loop. Then, insert your hook into the next chain, yarn over, and pull through. You should now have three loops on your hook. Repeat this for the next three chains until you have six loops on the hook.
- Once you have six loops on your hook, yarn over and pull through all six loops. Then, chain 1 to complete the star and create the "eye" in the center.
- Next, insert your hook into the "eye" you just made, yarn over, and pull through, leaving two loops on your hook. Then, insert your hook into the space between the two last "spikes" of the first star, yarn over, and pull through. This will give you three loops on your hook.
- Now, insert your hook into the same chain where you worked the last stitch of the previous star, yarn over, and pull through, so you have four loops on your hook. Insert your hook into the next chain, yarn over, and pull through. Repeat this in the following chain until you have six loops on your hook.
- Yarn over and pull through all six loops on the hook. Chain 1 to close the second star.
- Repeat these steps for the rest of the row.
- When you reach the end, finish by making 1 hdc in the last stitch. Then ch x2 and turn.
- Row 2: Crochet 2 hdc in the "eye" of each star across. Finish with 1 hdc in the last stitch. Then ch x2 and turn (23).
- Row 3: In blo, hdc the entire row (23). Then ch x2 and turn.
- Row 4: With regular hdc, hdc the entire row (23). Then ch x3 and turn.
- Row 5: Insert your hook into the second chain from the hook, yarn over, and pull through, repeat for the next chain, then continue to insert your hook, yarn over, and pull through in blo for the next 3 stitches until you have 6 loops on the hook. Then yarn over and pull through all 6 loops, then chain 1 to close the star. This creates the eye of the first star of this row.
- Make stars for the rest of the row just like row 2, but when inserting into stitches - do it in blo. Then at the end of the row make a hdc and then ch x2.
- Repeat Row 2 through 5 until your project is the length you want it. I made 143 rows for my scarf for reference.
- For a straight edge - feel free to crochet a sc edge along the raw edges (long side) for a cleaner finish, you can see how that looks in my finished scarf photos.
Scarf Fringe:
- For the fringe cut 92 x12 inch pieces of yarn in the same color yarn or a contrasting color.
- To attach the fringe to the crochet star stitch scarf, grab 2 pieces of yarn, then pinch the strands of yarn at the middle and make a loop, insert a hook into the short side of the scarf and pull the yarn through the bottom stitch.
- Then using your fingers take the ends of the fringe and loop them through the hole you made and pull tight.
- Repeat the above step for the entire width of the scarf. Repeat on the other side of the scarf. I put 1 group of fringe per stitch.
- After all the fringe is attached, trim the bottom so the yarn is nice and all lined up.
- And there you have it! The Crochet Star Stitch Scarf Pattern is not only a joy to make, but it’s also perfect for keeping you warm and stylish all winter long.


Vanessa Fletcher says
I’m a little confused on row 5 you say to do the star stitch in the back loop only but in your video you don’t say to do it in the back loop only so to achieve the look of the purple scarf which are we supposed to follow?
Kimberly Arenas says
In the video I forgot to do row 5 in back loop only, if you want the line between the rows present you will need to do blo.