
My Crochet Pumpkin Pattern with Leaves covers how to crochet a pumpkin, the stem, and leaves—a cute simple crochet decoration for fall!

Fall is here, and what better way to celebrate the season than by decorating your home with a delightful array of pumpkins? They bring warmth and cheer, making any space feel cozier and more inviting.
I absolutely love crocheting pumpkins because they work up quickly, allowing for instant gratification as you watch them come to life. Plus, you can easily adjust the size to create a variety of shapes, from tiny tabletop decor to large statement pieces! You can also make them intricate like with my patchwork pumpkin crochet pattern or play with the size of the basic pumpkin pattern and make it into a crochet jack o lantern.
This crochet pumpkin pattern is simple to make, making it perfect for both beginners and seasoned crafters alike. It’s also versatile—feel free to replicate it in any color and yarn you desire. Whether you’re going for traditional orange or something more whimsical like teal or purple, the possibilities are endless!
I honestly think this pattern would look fantastic in chunky yarn. This way, you can create a HUGE pumpkin friend to love and squish! Imagine having a collection of pumpkins in various sizes and colors, adding a personal touch to your fall decor and sparking joy every time you walk by them!
Jump to:
✏️ Things to Note:
- Color Choices and Sizing: I made the crochet pumpkin pattern with a small ball of rusty orange yarn from my scrap yarn pile. Depending on the size of the pumpkin you want to create, you may need a larger ball. While I used rusty orange, feel free to choose any color you like—yellow, orange, white, blue—just to name a few! I suggest using brown for the stem and a shade of green for the leaves.
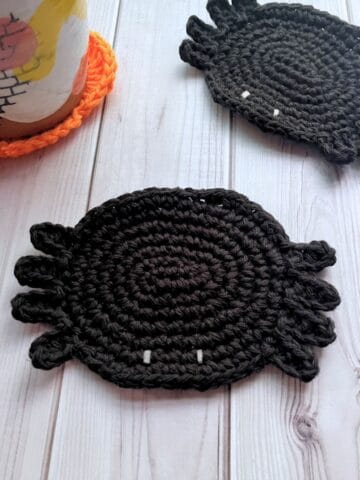
- Yarn Options: I made the crochet pumpkin pattern with acrylic yarn since it’s what I had on hand, but this project can be completed with any type of yarn. Cotton, acrylic, wool, and chunky yarn are highly recommended for this pattern. If you use cotton and have leftover yarn, you can make some crochet pumpkin coasters too!
- Finished Size: The finished size of the free crochet pumpkin pattern with pumpkin leaves is roughly 4 inches high and 5 inches wide. Keep in mind that using different yarns and hooks can cause a variance in the finished size. If you are looking for smaller crochet pumpkins, I have a mini crochet pumpkin pattern available from my crochet fall garland pattern.

🪡 Materials Needed
- Red Heart Yarn - Pumpkin
- Red Heart Yarn - Light Sage
- Red Heart Yarn - cafe latte
- H hook (5mm)
- Tapestry needle for weaving in the ends and sewing pieces together
- Polyfill
💭 Abbreviations to remember (US Terms)
- Magic ring - mr
- Single crochet - sc
- Increase - inc
- Chains - ch
- Double crochet - dc
- Half double crochet - hdc
- Slip stitch - sl st
* The ch x1 at the end of each row does not count as a stitch in the row, it is a turning chain.
* If you see a stitch abbreviation with "x" after it, it means how many times you do that stitch in the following amount of stitches. For example: sc x6 would mean you make a single crochet in the next 6 stitches. Inc x2 means you make an inc in the next 2 stitches.
🧋 Variations
- This is a very basic crochet pumpkin pattern, and you can easily alter the size by changing the number of chains at the beginning or switching the stitch entirely!
- Try using a variety of colors like oranges, yellows, and whites for a fun twist!
🍵 Instructions for Crochet Pumpkin Pattern with Leaves
For the crochet pumpkin pattern we will be working in rows, the leaves will be made in rounds.
Crochet Pumpkin:


Row 1: Ch x25 (25).
Row 2: In the second ch from hook make a hdc, continue with the rest of the round making a hdc in each ch (24). At the end of the row ch x1 and turn.
Row 3-31: Hdc in every stitch (24). Then ch x1 and turn.
After completing all the rows, fasten off and leave a tail for sewing. Sew the side of the pumpkin so it creates a tube, then sew the bottom and top of the pumpkin by weaving in between the rows on the edge, pull tight to cinch closed.
Before closing the top of the pumpkin, stuff it with polyfill.


Now that the crochet pumpkin is sewn closed, take either the tail that is long, or grab a new piece of pumpkin colored yarn and secure it to the pumpkin.
You are now going to wrap the yarn around the pumpkin 8x making 8 different segments on the pumpkin. You want to do this tightly so the pumpkin segments are shown better.
To wrap the pumpkin: Start at with either end of the pumpkin, go through the middle section where we cinched the pumpkin closed, wrap it on the outside of the pumpkin and insert the needle into the other end of the pumpkin and pull up. Make sure you do it tightly so that way the segments show better.
You will do thos 7 more times. I like to divide the pumpkin in half, then quarters, then split those quarters again to get 8 segments that are close enough to size and shape as the other sides.
Once the 8 segments of the pumpkin are done, secure the yarn to either the top and bottom of the pumpkin and weave in the yarn ends.
Crochet Pumpkin Stem:

Round 1: Create a mr then crochet 5 sc in the circle. Slip stitch to the first sc and pull the magic ring string tight (5)
Round 2-6: Sc x5 (5). Then make a slip stitch, fasten off and leave tail for sewing.
Crochet Pumpkin Leaves:

Round 1: Make a mr, ch x1 and then hdc x8 into the circle and pull the circle closed. Do not join the circle (8). Then ch x1, turn.
Round 2: Dc x3 in the first hdc stitch from the row below. Dc + sl st + dc in the next stitch. Dc x2 + sl st in the next stitch. Sc + hdc + dc in the next stitch. Dc + hdc+ sc in the next stitch. Sl st + dc x2 in the next stitch. Dc + sl st + dc in the next stitch. Dc x3 in the last stitch. To complete the leaf sl st to the first dc stitch in the round.
First leaf complete.
Second leaf:


Ch x3, turn,
Round 1: Hdc x8 inside the second chain from the hook (8). Then ch x1, turn.
Round 2: Repeat the first leaf’s round 2 for this step.
Crochet Pumpkin Vine:

Ch x20. In the second ch from the hook make an inc. Continue making increases with single crochet stitches for 9 more chains, then make a sl st in each chain for the rest of the chain length.
Fasten off but leave a tail for sewing.
Sewing:


Sew the stem to the middle of the pumpkin.
Stitch the leaves to the pumpkin making sure to wrap the vine around the pumpkin stem, but leaving the curly end unattached so it can move freely.
And now you have a crochet pumpkin made from my free crochet pumpkin pattern to decorate the home with! Experiment with making the crochet pumpkin different sizes or using different yarns!
If you are looking for some more pumpkin crochet decor, try my crochet pumpkin cup cozy pattern or my crochet pumpkin pie potholder pattern!
If you have any leftover orange yarn, try making my crochet Halloween garland pattern!

🐌Expert Tips
- Color Combinations: Experiment with different color combinations to create unique pumpkins that fit your decor style.
- Yarn Weight: Using a heavier yarn will yield a chunkier pumpkin, while lighter yarns can create delicate mini pumpkins.
- Embellishments: Consider adding embellishments like glitter or fabric paint to give your pumpkin a festive touch.
- Seasonal Variations: Create themed crochet pumpkins for different holidays or seasons by changing colors and adding decorations that reflect the time of year.
- Size Adjustments: For the crochet pumpkin pattern, play with the number of chains and rows to create pumpkins in various sizes for a fun display.
🧵 Pattern FAQs
Add more starting chains and rows! Fewer rows will make it thinner, while fewer chains at the beginning will alter its height.
Easy fix! Just make a crocheted circle slightly larger than the hole and attach it to the top and bottom. The stem and leaves should cover the top circle.
Yes! That would make it feel like a crochet pumpkin pillow!
🧶More Crochet Halloween Patterns


If you tried this Crochet Pumpkin Pattern with Leaves (or any other pattern on my website), please let me know how it went in the 📝 comments below. I'd love to hear from you!

Crochet Pumpkin Pattern with Leaves
Materials
- 1 skein Red Heart Yarn - pumpkin
- 1 small ball Red Heart Yarn - cafe latte
- 1 small ball Red Heart Yarn - light sage
- 5mm crochet hook
- Tapestry needle
- Polyfill
Abbreviations (US terms)
- mr = Magic ring
- sc = Single crochet
- inc = Increase
- dc = Double Crochet
- hdc = Half Double Crochet
- sl st = Slip Stitch
Notes
- I made this pumpkin with rusty orange yarn scraps, but a larger ball may be needed.
- Change colors for a variety of looks: yellow, orange, white, or blue; use brown for the stem and green for the leaves.
- I used acrylic yarn, but any type works; cotton, wool, and chunky yarn are recommended.
- The finished size is about 4 inches high and 5 inches wide, varying with yarn and hooks.
- It's a basic pumpkin; alter the size by adjusting chains or switching the stitch.
- Experiment with oranges, yellows, and whites!
Instructions
- For the crochet pumpkin pattern we will be working in rows, the leaves will be made in rounds.
Pumpkin:
- Row 1: Ch x25 (25).
- Row 2: In the second ch from hook make a hdc, continue with the rest of the round making a hdc in each ch (24). At the end of the row ch x1 and turn.
- Row 3-31: Hdc in every stitch (24). Then ch x1 and turn.
- After completing all the rows, fasten off and leave a tail for sewing. Sew the side of the pumpkin so it creates a tube, then sew the bottom and top of the pumpkin by weaving in between the rows on the edge, pull tight to cinch close.Before closing the top of the pumpkin, stuff it with polyfill.
- Now that the crochet pumpkin is sewn closed, take either the tail that is long, or grab a new piece of pumpkin colored yarn and secure it to the pumpkin.You are now going to wrap the yarn around the pumpkin 8x making 8 different segments on the pumpkin. You want to do this tightly so the pumpkin segments are shown better.To wrap the pumpkin: Start at with either end of the pumpkin, go through the middle section where we cinched the pumpkin closed, wrap it on the outside of the pumpkin and insert the needle into the other end of the pumpkin and pull up. Make sure you do it tightly so that way the segments show better.You will do this 7 more times. I like to divide the pumpkin in half, then quarters, then split those quarters again to get 8 segments that are close enough to size and shape as the other sides.Once the 8 segments of the pumpkin are done, secure the yarn to either the top and bottom of the pumpkin and weave in the yarn ends.
Stem:
- Round 1: Create a mr then crochet 5 sc in the circle. Slip stitch to the first sc and pull the magic ring string tight (5)
- Round 2-6: Sc x5 (5). Slip stitch, fasten off and leave tail for sewing.
Leaves:
- Round 1: Make a mr, ch x1 and then hdc x8 into the circle and pull the circle closed. Do not join the circle (8). Then ch x1, turn.
- Round 2: Dc x3 in the first hdc stitch from the row below. Dc + sl st + dc in the next stitch. Dc x2 + sl st in the next stitch. Sc + hdc + dc in the next stitch. Dc + hdc+ sc in the next stitch. Sl st + dc x2 in the next stitch. Dc + sl st + dc in the next stitch. Dc x3 in the last stitch. To complete the leaf sl st to the first dc stitch in the round.
- First leaf complete.
Second leaf:
- Ch x3, turn,
- Round 1: Hdc x8 inside the second chain from the hook (8). Then ch x1, turn.
- Round 2: Repeat the first leaf’s round 2 for this step.
Vine:
- Ch x20. In the second ch from the hook make an inc. Continue making increases with single crochet stitches for 9 more chains, then make a sl st in each chain for the rest of the chain length.Fasten off but leave a tail for sewing.
- Sewing:
- Sew the stem to the middle of the pumpkin.
- Stitch the leaves to the pumpkin making sure to wrap the vine around the pumpkin stem, but leaving the curly end unattached so it can move freely.
- And now you have a crocheted pumpkin to decorate the home with! Experiment with making the pumpkin different sizes or using different yarns!


Leave a Reply