
My bat granny square pattern is perfect for making any small Halloween purse, adding to a pillow or to a blanket! Check out my easy and fun Halloween granny square below!

I made my crochet bat granny square pattern based on my crochet bat trick-or-treat bag that I made last year. This year, I wanted to create a pattern that used some of the same elements but made into a granny square that I can use in future projects!
I am not one to back away from fun granny square patterns, but this is the first one I made specifically for Halloween. If you are curious, I do have a snowflake granny square pattern that is perfect for a winter blanket, and a lemon granny square pattern which is perfect for celebrating summer!
If you want more spooky granny squares, I do have a moon granny square pattern and a sun granny square pattern but I see those as being able to be used all year round depending on your aesthetics and preferences.
Jump to:
✏️ Things To Note:
- Size: The crochet bat granny square is roughly 7 inches on each side. You can make this bigger or smaller by adjusting your size hook and also your yarn size.
- Yarn Type: I used worsted weight acrylic, but you can use any yarn for this pattern.
- Appliques: Outside of the giant moon, all of the elements are appliques and are individually sewn onto the bat granny square. This allows the pattern to be flexible and allows you to get the appliques placed on the square according to your preferences.
🪡 Materials Needed
- 5.5mm hook
- Tapestry needle
- Red Heart - black
- Red Heart - medium purple
- Red Heart - cornmeal
- Caron One Pound - lilac
💭Abbreviations to Remember (US terms)
- Chains - ch
- Magic ring - mr
- Slip stitch - sl st
- Single crochet - sc
- Half double crochet - hdc
- Double crochet - dc
- Triple crochet - tr
- Increase - inc ( 2 stitches in the same stitch, can also be marked as a hdc inc, dc inc, or tr inc, depending on the stitch you need to make the increase with.)
* If you see a stitch abbreviation with "x" after it, it means how many times you do that stitch in the following amount of stitches. For example: sc x6 would mean you make a single crochet in the next 6 stitches. Inc x2 means you make an inc in the next 2 stitches.
🍵Instructions for Bat Granny Square Pattern
The base of the Bat Granny Square is made in the round.


Round 1: With the yellow yarn make a mr and ch x3 (counts as a dc) in it. Then dc x11 into the mr and sl st to the beginning chains (12).
Round 2: Ch x3, dc in the same stitch then dc inc in every stitch. Then sl st to the beginning chains (24).
Round 3: Ch x3, dc in the same stitch. *dc in the next stitch, then dc inc in the following stitch. Repeat from* for the rest of the round. Make a single dc in the last stitch in the round. Then sl st to the beginning chains (36).
Round 4: Ch x3, dc in the same stitch. *dc in the next 2 stitches, then dc inc in the following stitch. Repeat from* for the rest of the round. Make a single dc in the last 2 stitches in the round. Then sl st to the beginning chains (48). Then fasten off the yellow yarn and join the medium purple yarn. We will begin squaring off the crochet circle granny square in round 5.
Round 5: Ch x3, then in the same stitch make a dc, ch x2, and dc x2. This will be your starting corner. Then dc, hdc x2, sc x5, hdc x2, and dc over the next 11 stitches. This will be the length of your side.
*Dc x2, ch x2, dc x2 in the next stitch. Then dc, hdc x2, sc x5, hdc x2, and dc. Repeat from * 2 more times. Sl st to the beginning chains.
Round 6: This round is fairly easy. Ch x3, then in every stitch make a dc. When you get to a ch-2 space from the round below make: dc x2, ch x2, dc x2 into the corner space. Slip stitch to the beginning chains when you are done. And now the base of the bat granny square pattern is all done! (You can always make the square bigger by repeating round 6.)
Crochet Bat Applique:


Round 1: Ch x15.
Round 2: THIS NEXT PART WILL BE LAID OUT IN STEPS BECAUSE IT IS A BIT COMPLEX.
- Dc inc in the 3rd chain from the hook.
- Dc in the next chain.
- In the following chain, work (tr, ch 1, tr).
- Dc in each of the next 2 chains.
- In the next chain, work (dc, tr).
- In the following chain, work tr inc.
- In the next chain, work (tr, dc).
- Dc in the next 2 chains.
- In the next chain, work (tr, ch 1, tr).
- Dc in the next chain.
- Finish with a dc inc in the last chain.
*moving towards the unworked side of the chain: - Sl st into the side of the last dc you made.
- Then, sl st into the unworked side of the starting chain.
- Sl st x4 along the side.
- Work 1 dc, then sl st into the same stitch as the dc.
- Sl st into the next 2 stitches.
- Make 1 dc, then sl st back into the same stitch.
- Sl st x5.
- Ch x2, then sl st into the same stitch.
- *We will now go around the bottom edge of the bat to make the wings more pointy.
- Sl st x2.
- Ch x2, then sl st into the same stitch where you made the chains.
- Sl st x4 — you should now be at the chain space from the previous round.
- Ch x2, then sl st into the same stitch.
- Sl st x4.
- Sc x4.
- Sl st x5 — you should end in the next chain space.
- Ch x2, then sl st into the same stitch.
- Sl st x3.
- Ch x2, then sl st into the same stitch.
- Finally, sl st x2,
- Ch x2, then sl st into the same stitch, and fasten off — leaving a tail for sewing.
Make x2.
Crochet Small Cloud Applique:

In light purple, ch x9. Then in the 2nd ch from the hook make a sc. In the next stitch dc x3, skip a chain, then sl st in the next chain. Next skip the next ch, dc x6 in the next ch. Finish the row with 1 single crochet in the final chain. Fasten off and leave a tail for sewing.
Make x1. It is normal to have the cloud bend a little, you can fix that when sewing it on to the square.
Sewing:

Use pins to place where you want all the appliques to be on the square - I chose to have my small cloud in the upper right corner and then the 2 bats filling up the rest of the granny square.
Sew them on carefully to the granny square, weave in any ends.

And now your crochet bat granny square pattern is done! I hope you enjoyed making my crochet bat granny square pattern and if you are wanting to make more batty fun crochet patterns check out my crochet bat amigurumi pattern!
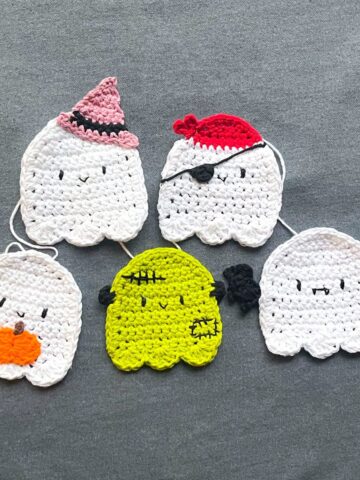
If you are looking for some more Halloween fun, check out my crochet ghost coaster pattern or crochet spider coaster pattern - both can also be used as appliques to other spooky projects!
🐌Expert Tips
- The bat applique is complex, so make sure you do it slowly and recount your stitches. If you mess up, it isn’t the end of the world and you should still be able to produce a cute bat applique if you need an extra stitch or two in there to get you to where you need to be for the following steps.
- When in doubt, use stitch markers to help your counting when using the black yarn.
- Because the granny square is made in double crochet the appliques might move around when you sewing them on because the holes from the double crochet stitches —use sewing pins to keep the appliques in place as you finish your animal granny square pattern.
🧵Pattern FAQs
You can always restart or count your stitches, but if all else fails you can absolutely use felt for any of the appliques.
I would use it as one of the centers of a pillow, then add smaller spooky granny squares along the edge like by adding pumpkin or moon granny squares.
I would add 1-2 more rounds of purple, sew the appliques, make a backside, sew the sides together and add a strap for an easy and spooky crochet Halloween bag pattern.

🧶More Halloween Crochet Patterns
If you tried this Bat Granny Square Pattern (or any other pattern on my website), please let me know how it went in the 📝 comments below. I'd love to hear from you!

Bat Granny Square Pattern
Materials
Abbreviations (US terms)
- Chains - ch
- Magic ring - mr
- Slip stitch - sl st
- Single crochet - sc
- Half double crochet - hdc
- Double crochet - dc
- Triple crochet - tr
- Increase - inc ( 2 stitches in the same stitch, can also be marked as a hdc inc, dc inc, or tr inc, depending on the stitch you need to make the increase with.)
Notes
- Size: The crochet bat granny square is roughly 7 inches on each side. You can make this bigger or smaller by adjusting your size hook and also your yarn size.
- Yarn Type: I used worsted weight acrylic, but you can use any yarn for this pattern.
- Appliques: Outside of the giant moon, all of the elements are appliques and are individually sewn onto the bat granny square. This allows the pattern to be flexible and allows you to get the appliques placed on the square according to your preferences.
Instructions
- The base of the Bat Granny Square is made in the round.
- Round 1: With the yellow yarn make a mr and ch x3 (counts as a dc) in it. Then dc x11 into the mr and sl st to the beginning chains (12).
- Round 2: Ch x3, dc in the same stitch then dc inc in every stitch. Then sl st to the beginning chains (24).
- Round 3: Ch x3, dc in the same stitch. *dc in the next stitch, then dc inc in the following stitch. Repeat from* for the rest of the round. Make a single dc in the last stitch in the round. Then sl st to the beginning chains (36).
- Round 4: Ch x3, dc in the same stitch. *dc in the next 2 stitches, then dc inc in the following stitch. Repeat from* for the rest of the round. Make a single dc in the last 2 stitches in the round. Then sl st to the beginning chains (48). Then fasten off the yellow yarn and join the medium purple yarn. We will begin squaring off the crochet circle granny square in round 5.
- Round 5: Ch x3, then in the same stitch make a dc, ch x2, and dc x2. This will be your starting corner. Then dc, hdc x2, sc x5, hdc x2, and dc over the next 11 stitches. This will be the length of your side.
- *Dc x2, ch x2, dc x2 in the next stitch. Then dc, hdc x2, sc x5, hdc x2, and dc. Repeat from * 2 more times. Sl st to the beginning chains.
- Round 6: This round is fairly easy. Ch x3, then in every stitch make a dc. When you get to a ch-2 space from the round below make: dc x2, ch x2, dc x2 into the corner space. Slip stitch to the beginning chains when you are done. And now that is the base of the bat granny square pattern all done!
Crochet Bat Applique:
- Round 1: Ch x15.
- Round 2: THIS NEXT PART WILL BE LAID OUT IN STEPS BECAUSE IT IS A BIT COMPLEX.
- Dc inc in the 3rd chain from the hook.
- Dc in the next chain.
- In the following chain, work (tr, ch 1, tr).
- Dc in each of the next 2 chains.
- In the next chain, work (dc, tr).
- In the following chain, work tr inc.
- In the next chain, work (tr, dc).
- Dc in the next 2 chains.
- In the next chain, work (tr, ch 1, tr).
- Dc in the next chain.
- Finish with a dc inc in the last chain.
*moving towards the unworked side of the chain:
- Sl st into the side of the last dc you made.
- Then, sl st into the unworked side of the starting chain.
- Sl st x4 along the side.
- Work 1 dc, then sl st into the same stitch as the dc.
- Sl st into the next 2 stitches.
- Make 1 dc, then sl st back into the same stitch.
- Sl st x5.
- Ch x2, then sl st into the same stitch.
*We will now go around the bottom edge of the bat to make the wings more pointy.
- Sl st x2.
- Ch x2, then sl st into the same stitch where you made the chains.
- Sl st x4 — you should now be at the chain space from the previous round.
- Ch x2, then sl st into the same stitch.
- Sl st x4.
- Sc x4.
- Sl st x5 — you should end in the next chain space.
- Ch x2, then sl st into the same stitch.
- Sl st x3.
- Ch x2, then sl st into the same stitch.
- Finally, sl st x2,
- Ch x2, then sl st into the same stitch, and fasten off — leaving a tail for sewing.
- Make x2.
Crochet Small Cloud Applique:
- In light purple, ch x9. Then in the 2nd ch from the hook make a sc. In the next stitch dc x3, skip a chain, then sl st in the next chain. Next skip the next ch, dc x6 in the next ch. Finish the row with 1 single crochet in the final chain. Fasten off and leave a tail for sewing.
- Make x1. It is normal to have the cloud bend a little, you can fix that when sewing it on to the square.
Sewing:
- Use pins to place where you want all the appliques to be on the square - I chose to have my small cloud in the upper right corner and then the 2 bats filling up the rest of the granny square.
- Sew them on carefully to the granny square, weave in any ends.
- And now your crochet bat granny square pattern is done! I hope you enjoyed making my crochet bat granny square pattern.

Leave a Reply