
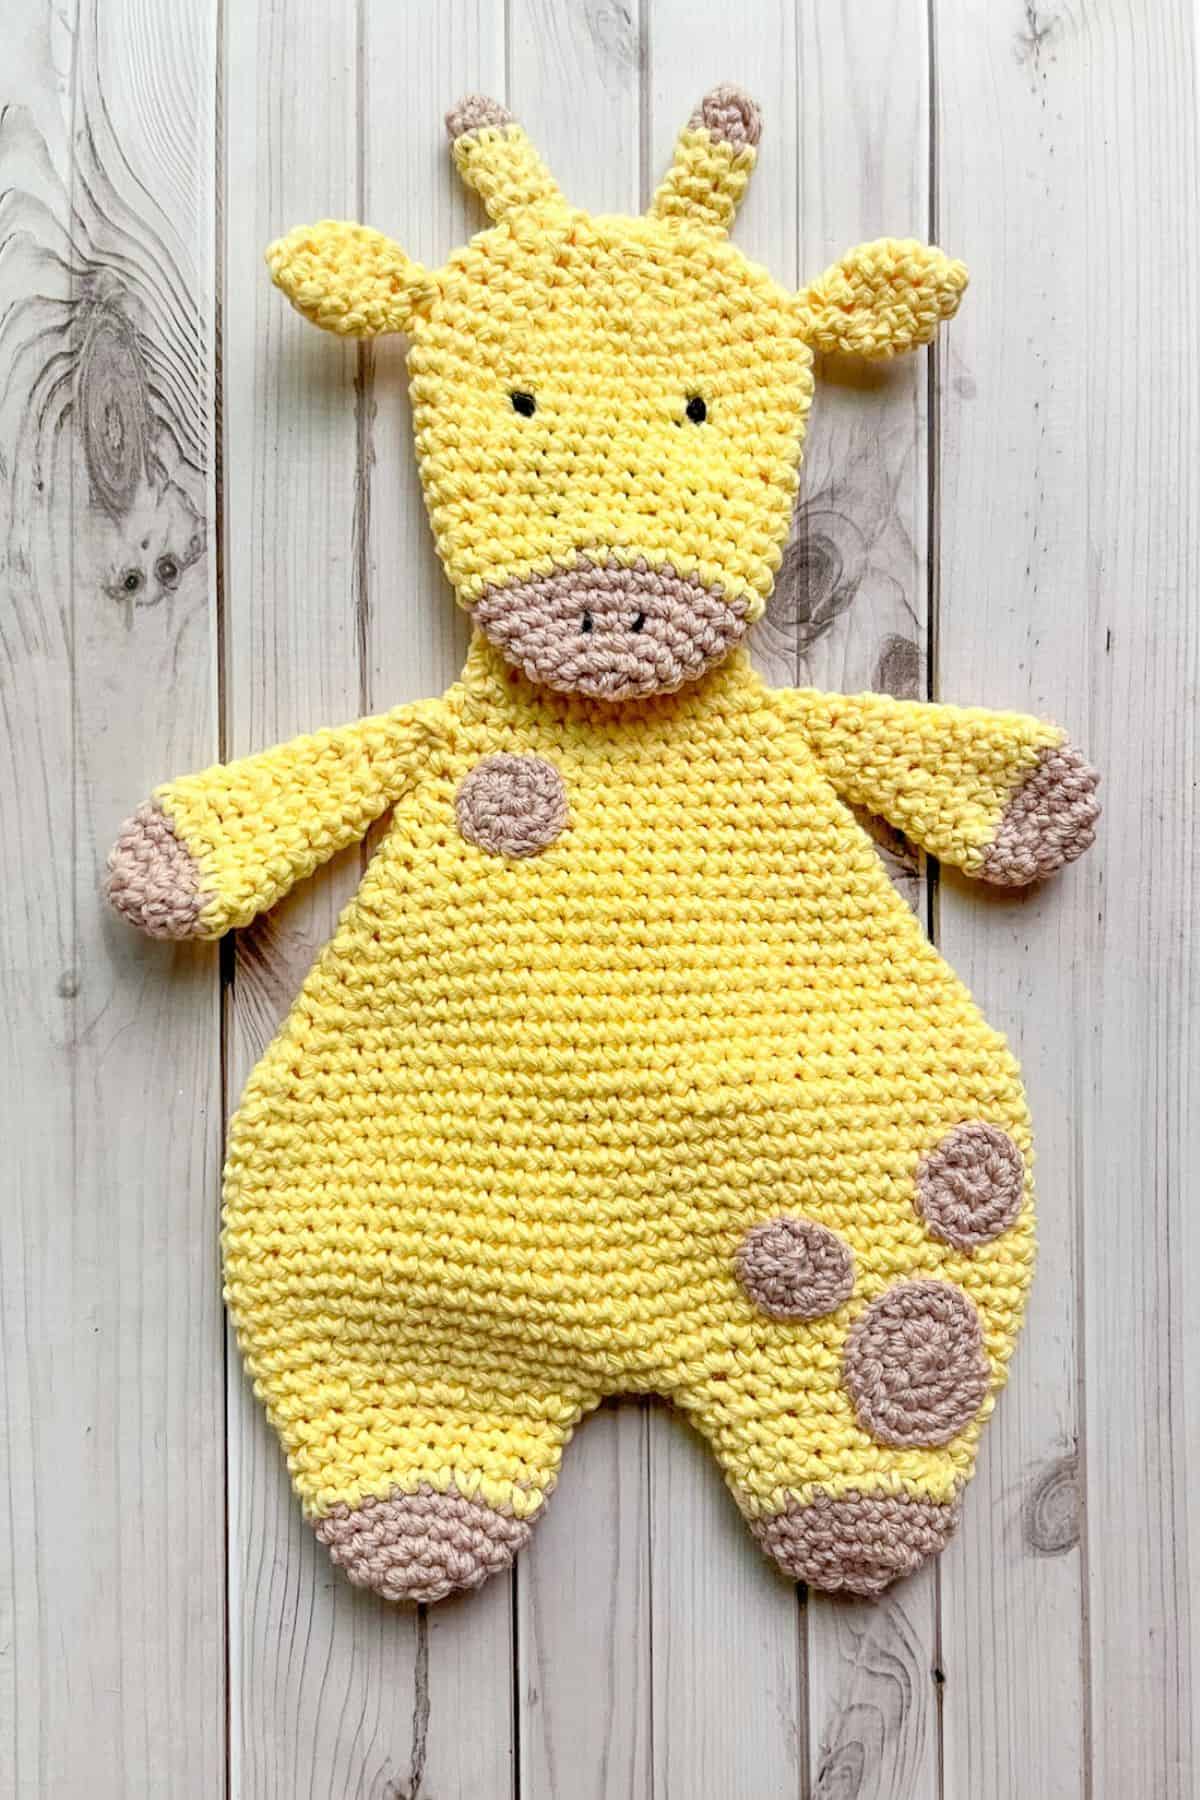
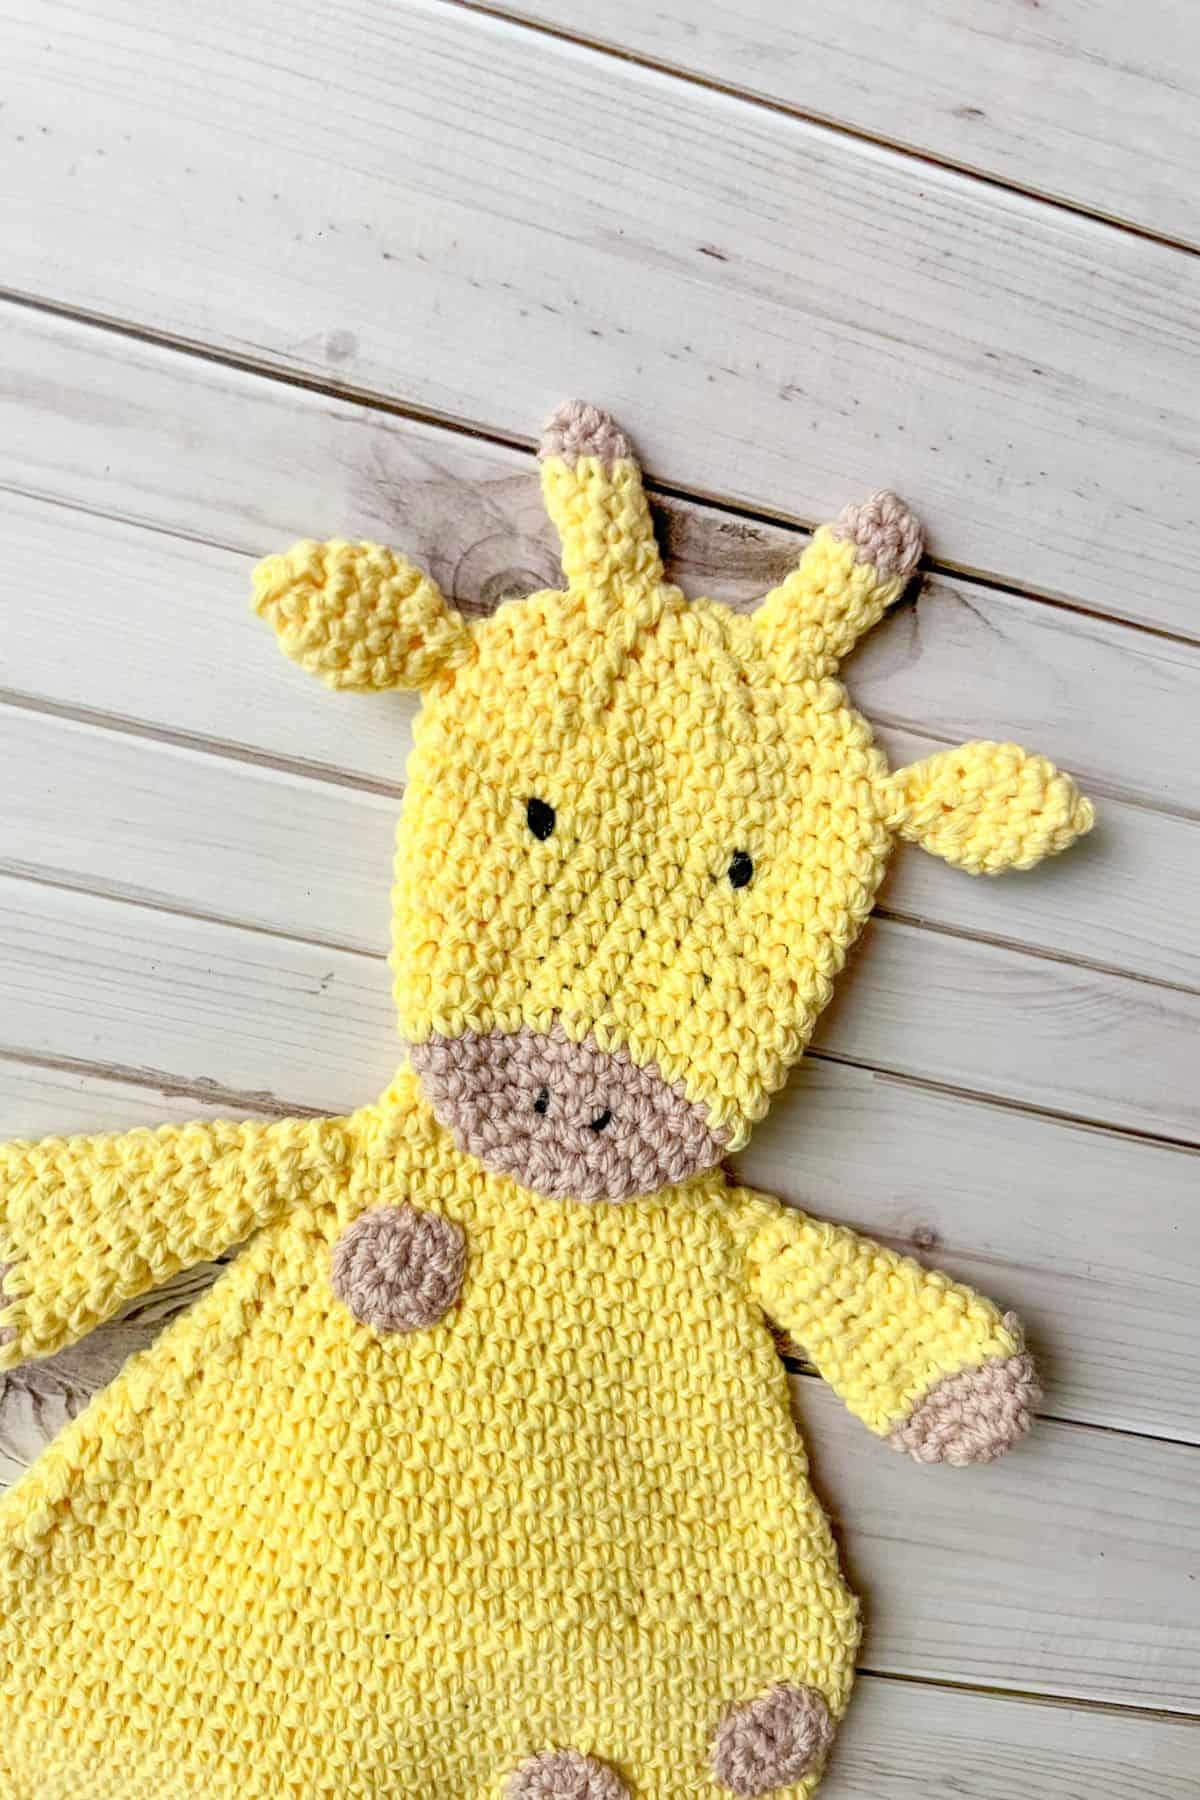
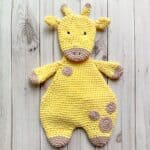
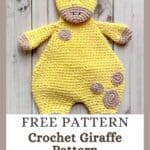
A cute Free Crochet Giraffe Pattern perfect for a crochet baby crinkle toy! This giraffe crochet pattern is very versatile and can be stuffed into an amigurumi giraffe or kept flat and stuffed with crinkle paper to make a crochet giraffe crinkle sensory toy.
Did you know that adult giraffes only need 30 minutes of sleep per day? They sleep in 5 to 10-minute increments and only get 30 minutes total each day. If I had that little sleep, I would definitely be a zombie! Hopefully, the baby or small child you are making this crochet amigurumi giraffe for sleeps more than that!
This free crochet giraffe pattern is an easy amigurumi crochet project perfect for beginners. While the crochet giraffe toy pattern is made in multiple parts, it's easy to assemble because it isn't stuffed.
Usually, when amigurumi animals are assembled, they are stuffed, which can make the process more complicated. By keeping this pattern flat, you can place and sew the pieces together with ease.
If you are looking for a no-sew amigurumi pattern, I suggest my Crochet Moon Pillow Pattern because it can be crocheted closed—no needle required!
As mentioned earlier, this small free crochet giraffe pattern is ideal for a baby and can complement a giraffe-themed nursery. Pair it with my Crochet Linen Stitch Baby Blanket with Crab Stitch Border or Crochet Grit Stitch Blanket Pattern for a perfect crochet baby shower gift.
Jump to:
✏️ Things To Note:
- Stuffing Options: You can stuff the crochet giraffe with crinkle paper for a fun texture, traditional polyfill, or even add a wrapped hair clip in an arm or ossicone to create a clicking sound, similar to my Crochet Fidget Toy Pattern. Always supervise babies when playing with any toy, stuffed or not, to ensure safety.
- Avoid Safety Eyes: For toys intended for babies or children under 3, avoid using safety eyes as they can be a choking hazard. Instead, consider embroidering the eyes with tightly secured yarn or painting them on. I always embroider eyes on baby toys, like in my Honeycomb Crochet Blanket Pattern's bee appliques.
- Yarn Recommendations: I used Lily Sugar N' Cream Cotton Yarn for free crochet giraffe pattern, but other soft yarns like Caron One Pound or acrylic blends work well too. Leftover yarn can be used in projects like my Crochet Duck Hat Pattern or Crochet Capybara Coaster patterns.
🪡 Materials Needed
💭 Abbreviations to Remember (US Terms)
- Magic ring (mr)
- Single Crochet (sc)
- Increase (inc) - 2 stitches in 1 stitch
- Decrease (dec) - 1 stitch in 2 stitches
🧋 Variations
- Try stuffing the crochet giraffe!
- Experiment with different colors for the free crochet giraffe pattern.
🍵 Instructions for Free Crochet Giraffe Pattern
For the free crochet giraffe pattern, we will mostly be working in rounds.
Crochet Giraffe Legs x2:
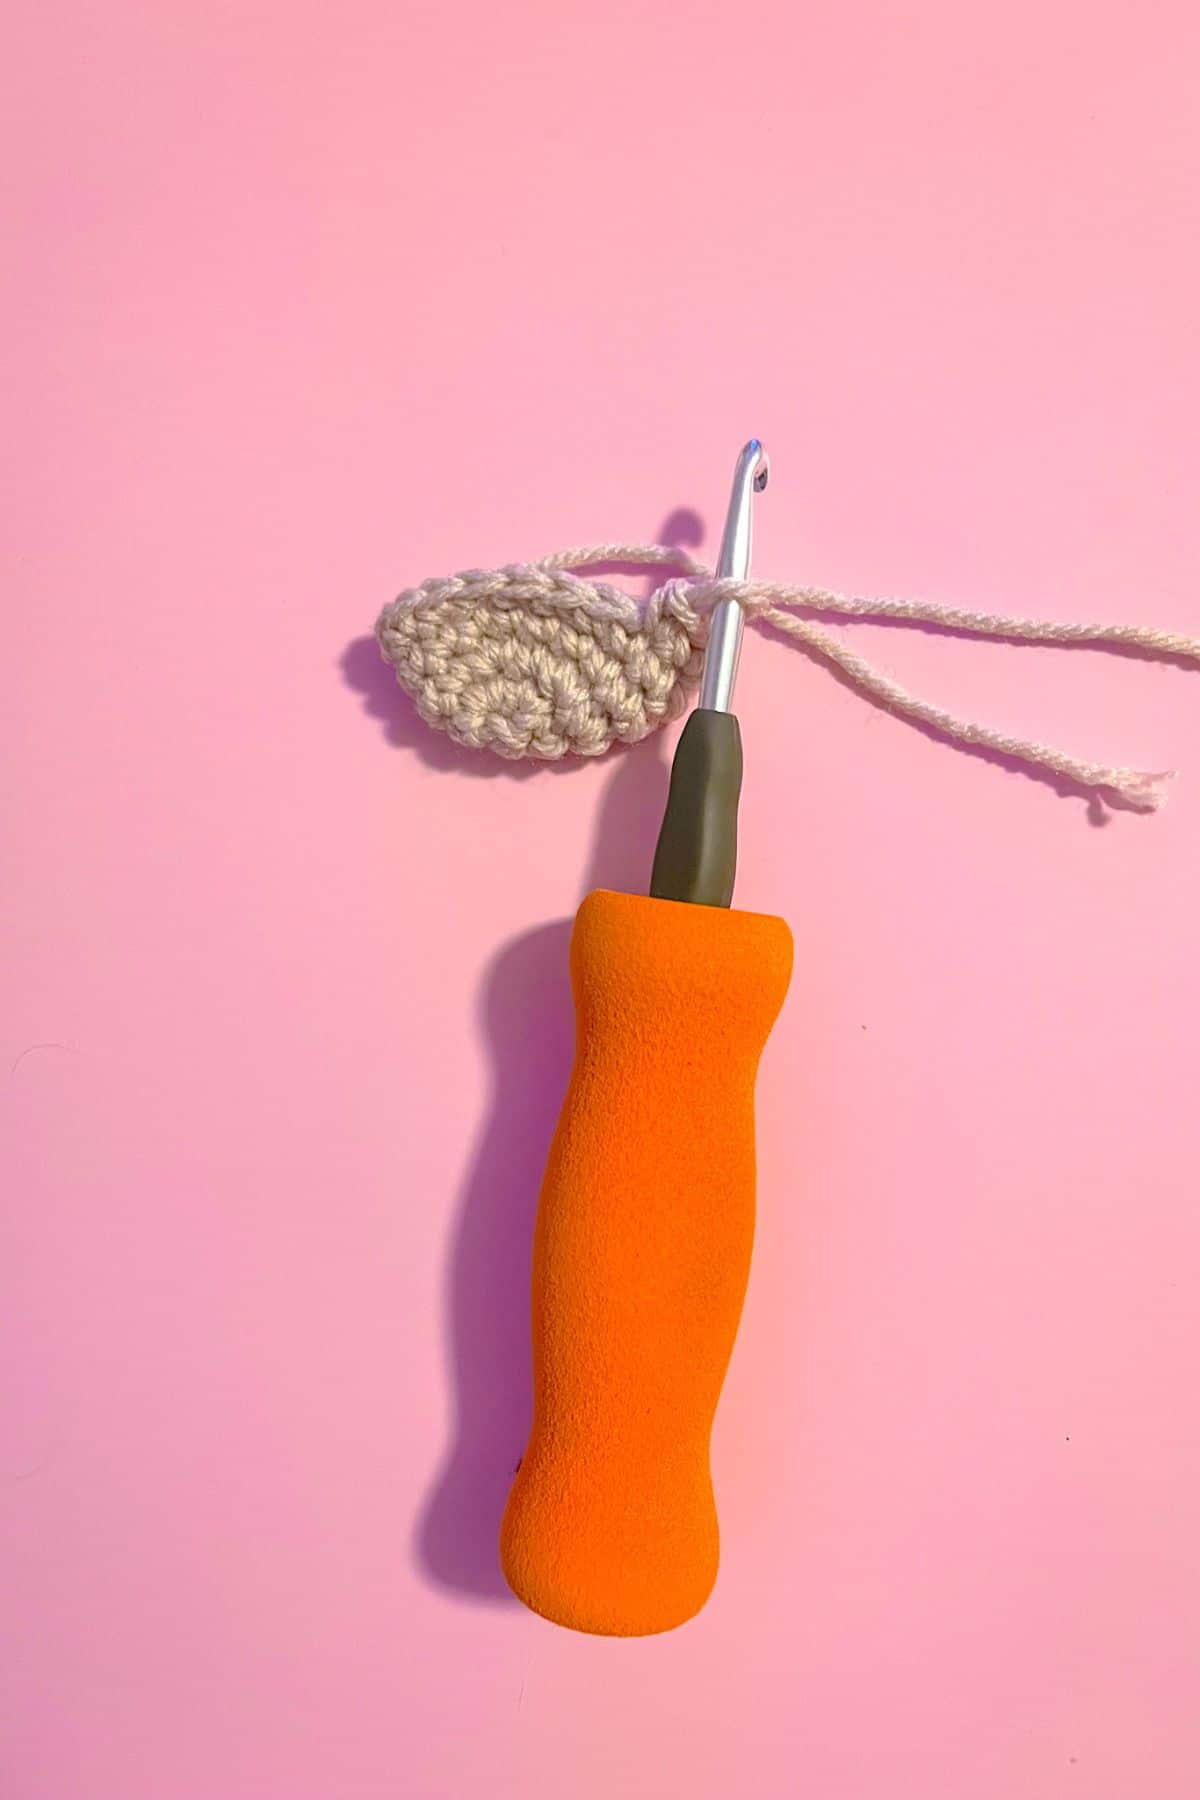

Round 1: Using light brown yarn, make a mr and sc x6 into the circle. If you find it difficult making a magic ring you can chain 2 and then sc x6 in the second chain from the hook. (6)
Round 2: Inc in every sc. (12)
Round 3: Inc, sc. Then repeat until end of round (18).
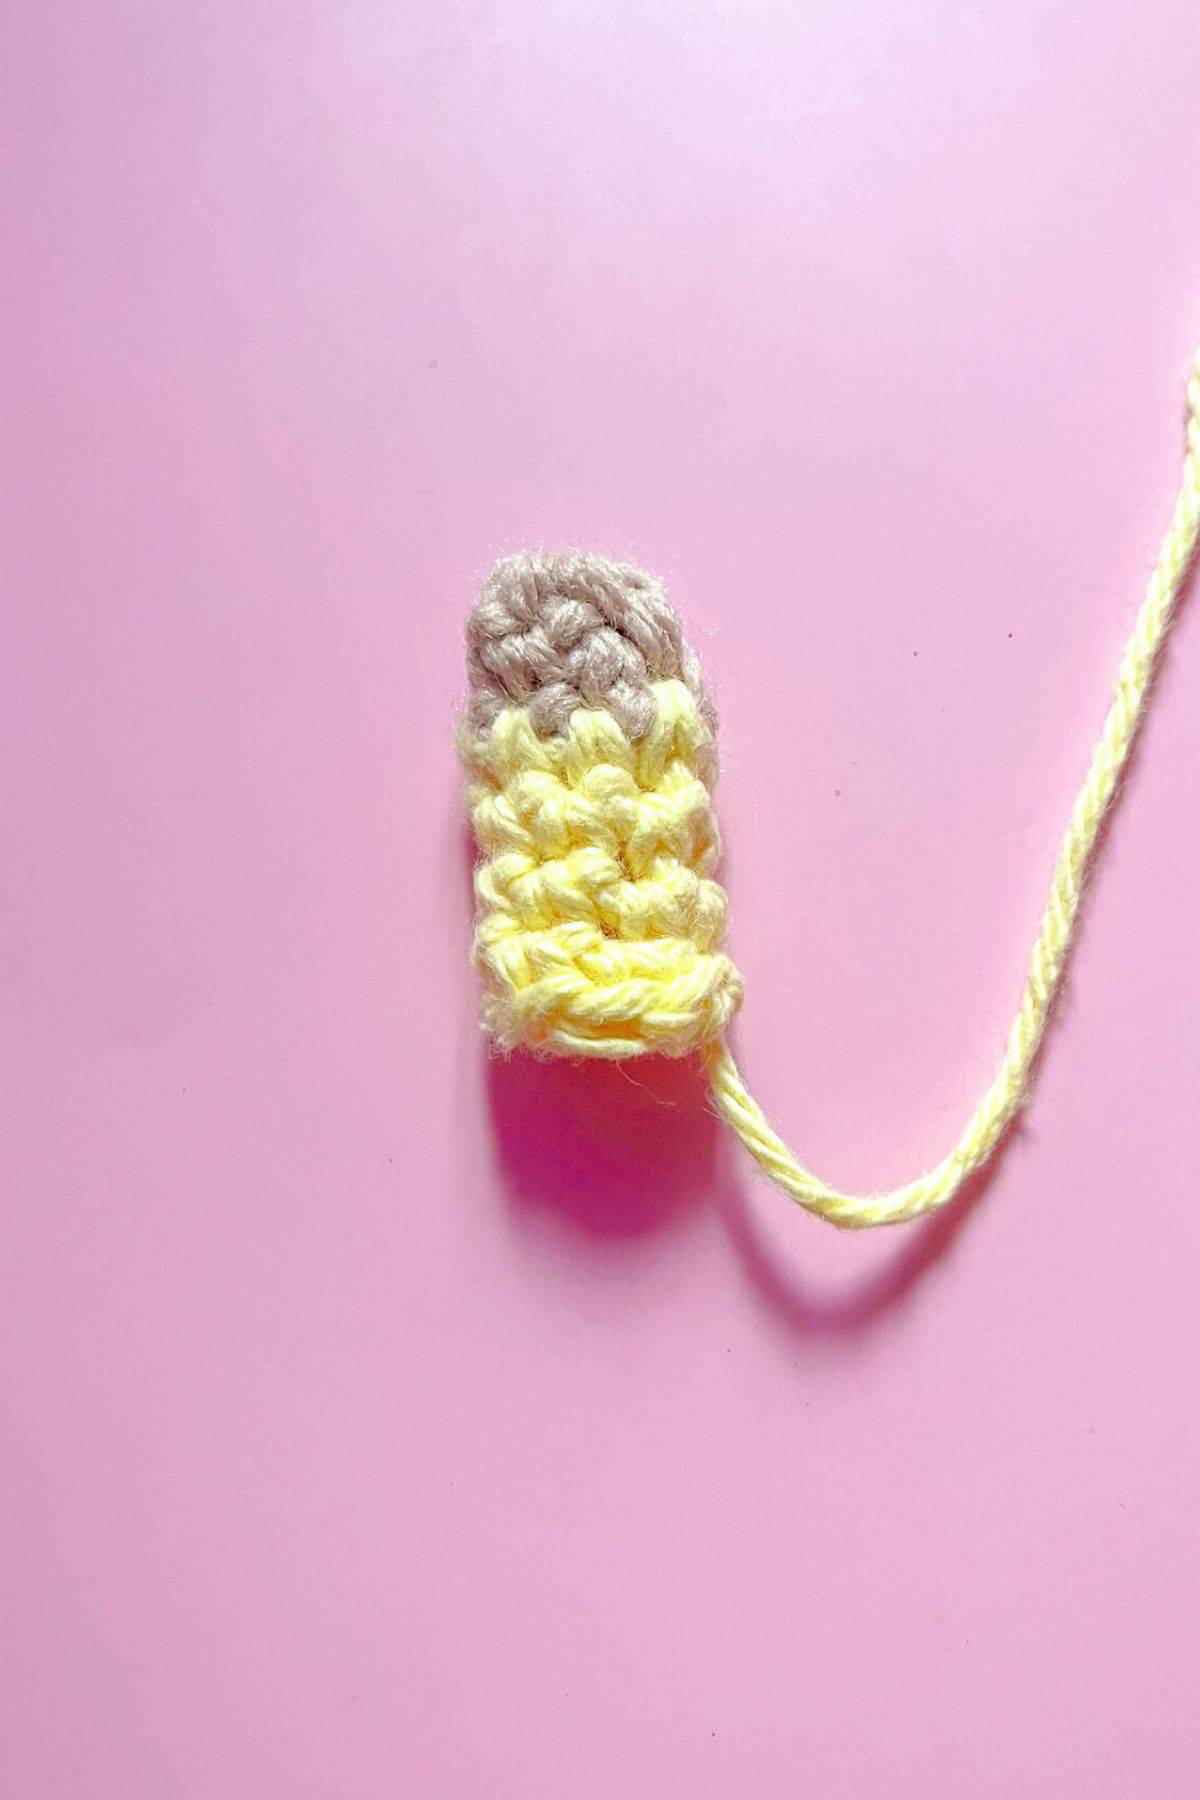
Round 4-5: Sc in every stitch (18). At the end of the 5th round change the color to light yellow.
To make a color change, in the last stitch of the row completed make a sc but instead of yarning over with light brown, yarn over with light yellow and go through the stitch and finish the stitch like normal.
Round 6-9: Sc in every stitch (18).
Round 10: Inc, sc x2. Then repeat until the end of round (24). Fasten off and weave in any ends.
Now make a second leg, but do not fasten it off.
Crochet Giraffe Body:
This part of the crochet pattern for giraffe starts off where the legs stopped.

Round 11: After both legs have been completed, ch x2 from the second leg and then attach the first leg by making a sc into one of the stitches from the last round. Then sc all around the leg. Once you get to the chain connecting the 2 pieces, make a sc in each chain (2). Then sc around the second leg, until you get to the beginning of the round (where you made the chain). Put in a stitch marker to mark the start of the rounds (52).

Round 12: Inc, sc x12. Then repeat until end of round (56).
Round 13: Inc, sc x13. Then repeat until end of round (60).
Round 14-22: Sc in every stitch (60) .
Place the other 2 stitch markers on either side right on the far edges. For the rest of the body we will aim to put the decreases on the sides of the giraffe versus on the front or back. This might mean to move your sc over one stitch or decrease one. Just try to have some wiggle room for this part depending on your tension.
Round 23: Sc x18, dec, sc x28, dec, sc x10 (58).
Round 24: Sc x18, dec, sc x27, dec, sc x9 (56).
Round 25: Sc x18, dec, sc x26, dec, sc x8 (54).
Round 26: Sc x17, dec, sc x26, dec, sc x7 (52).
Round 27: Sc x17, dec, sc x25, dec, sc x6 (50).
Round 28: Sc x17, dec, sc x23, dec, sc x6 (48).
Round 29: Sc x17, dec, sc x22, dec, sc x5 (46).
Round 30: Sc x16, dec, sc x21, dec, sc x5 (44).
Round 31: Sc x16, dec, sc x20, dec, sc x4 (42).
Round 32: Sc x15, dec, sc x19, dec, sc x4 (40).

Round 33: Sc x15, dec, sc x18, dec, sc x3 (38).
Round 34: Sc x15, dec, sc x17, dec, sc x2 (36).
Round 35: Sc x15, dec, sc x16, dec, sc x1 (34).
Round 36: Sc x14, dec, sc x15, dec, sc x1 (32).
Round 37: Sc x14, dec, sc x14, dec (30).
Round 38: Sc x13, dec, sc x13, dec (28).
Round 39: Sc x12, dec, sc x12, dec (26).
Round 40: Sc x11, dec, sc x11, dec (24).
Round 41: Sc x10, dec, sc x10, dec (22).
Round 42: Sc x9, dec, sc x9, dec (20).
Round 43-46: Sc in every stitch (20).
Round 47: Sc x8, dec, sc x8, dec (18).
Round 48: Sc in every stitch (18). Fasten off and leave tail for sewing.
Crochet Giraffe Head:

Round 1: Using light brown yarn, make a mr and sc x6 into the circle (6).
Round 2: Inc in every stitch (12).
Round 3: Inc, sc. Then repeat until end of round (18).
Round 4: Sc in every stitch (18).
Round 5: Inc, sc x2. Then repeat until end of round (24). Just like the color changes we did for the body, make a color change to light yellow at the end of this round.
Round 6-8: Sc in every stitch (24).
Round 9: Inc, sc x7. Then repeat for the entire round (27).
Round 10-12: Sc in every stitch (27).
Round 13: Inc, sc x8. Then repeat for the entire round (30).
Round 14-17: Sc in every stitch (30).
Round 18: Dec, sc x3. Then repeat for the entire round (24).
Round 19: Dec, sc x2. Then repeat for the entire round (18).
Round 20: Dec, sc. Then repeat for the entire round (12).
Round 21: Dec for the entire round (6). Fasten off, sew closed.
Crochet Giraffe Arms x2:

Round 1: Using light brown yarn, make a mr and sc x6 into the circle (6).
Round 2: Inc in every sc (12).
Round 3: Inc, sc x3. Then repeat until end of the round (15).
Round 4: Sc in every stitch (15). Then switch the yarn color like before to light yellow.
Round 5: Sc in every stitch (15).
Round 6: Dec, sc x3. Then repeat for the rest of the round (12).
Round 7-8: Sc in every stitch (12).
Round 9: Dec, sc x2. Then repeat for the rest of the round (9).
Round 10-12: Sc in every stitch (9).
Round 13: Dec, sc. Then repeat for the rest of the round (6).
Round 14: Sc in every stitch (6).
Round 15: Dec for the entire round (3). Fasten off and leave tail for sewing.
Crochet Giraffe Ossicones x2:
Round 1: Using light brown yarn, make mr and sc x6 into the circle (6).
Round 2: Sc for the entire round (6). Then change colors to light yellow at the end of the round.
Round 3-6: Sc for the entire round (6). Fasten off and leave a tail for sewing.
Crochet Giraffe Ears x2:

Round 1: Using light yellow yarn, make a mr and sc x3 into the circle (3).
Round 2: Inc in every stitch (6).
Round 3: Inc, sc. Then repeat for the rest of the round (9).
Round 4-5: Sc in every stitch (9). Flip the ear right side out.
Round 6: Dec, sc. Then repeat for the rest of the round (6).
Round 7: Dec for the entire round (3). Fasten off and leave tail for sewing.
Crochet Giraffe Spots:

Large Spots x2:
Round 1: Using light brown yarn, make a mr and sc x6 into the circle (6).
Round 2: Inc in every stitch (12).
Round 3: Inc, sc. Then repeat for the entire round (18). Fasten off and leave tail for sewing.
Small x6:
Round 1: Using light brown yarn, make a mr and sc x6 into the circle (6).
Round 2: Inc in every stitch (12). Fasten off and leave tail for sewing.
Amigurumi Giraffe Assembly:

Layout of where everything will be sewn on the giraffe.
First, sew the head, arms, ears and ossicones onto the giraffe.
Then, sew the spots onto the giraffe just like I have mine. I have the spots in the same locations on the back too. Or you can choose a different layout depending on how you would like the crochet amigurumi toy giraffe to look like at the end!
Then embroider the eyes and nostril holes with black yarn.
And now you have a beautiful crochet giraffe perfect for a baby or toddler! I hope you enjoyed my free crochet giraffe pattern!
Want to make another fun animal project for a baby shower? My Crochet Sheep Pattern is both a small pillow and an animal. It has a fun texture and can be used for many different purposes.

🐌Expert Tips
- Choosing Yarn: Opt for soft, baby-friendly yarns to ensure comfort and safety. Cotton or acrylic yarns labeled as "baby yarn" are great choices. Test a small swatch before committing to a new yarn to ensure it has the desired softness and feel.
- Avoiding Loose Ends: Weave in ends securely to prevent small parts from coming undone, especially for toys intended for babies. Consider using a yarn needle to backstitch over the ends for extra security.
- Adding Rattles or Crinkle: To make the giraffe more sensory-friendly, insert a small rattle, bell, or crinkle paper inside. Just make sure the items are securely enclosed to avoid potential hazards. Use plastic crinkle material (from empty wipes packages) for a softer, safer option.
- Customization Options: Personalize the free crochet giraffe pattern by adding a small ribbon around its neck (if it's not meant for infants) or embroidering the baby's name on the side. Experiment with different facial expressions or spot layouts to make each giraffe unique.
🧵 Pattern FAQs
Ossicones! Ossicones are bone structures enveloped in skin and fur.
Amigurumi is the Japanese craft of creating small, stuffed yarn creatures through crochet or knitting. This art form extends beyond animals to include a variety of crocheted small objects or characters, all of which can differ greatly in size and style.
You can but the shape might come out slightly different!
🧶More Crochet Amigurumi Animal Patterns


If you tried this Free Crochet Giraffe Pattern (or any other pattern on my website), please let me know how it went in the 📝 comments below. I'd love to hear from you!
Free Crochet Giraffe Pattern
Materials
- 2 Lily Sugar N' Cream yarn - country yellow
- 1 Lily Sugar N' Cream yarn - jute
- 1 Lily Sugar N' Cream yarn - black
- 5.5mm hook
- Tapestry needle
- 3 stitch markers
- optional polyfill stuffing or crinkle paper:
Abbreviations (US terms)
- Magic ring - mr
- Single crochet - sc
- Increase (inc) - 2 stitches in 1 stitch
- Decrease (dec) - 1 stitch in 2 stitches
Notes
- Stuffing Options: You can stuff the crochet giraffe with crinkle paper for a fun texture, traditional polyfill, or even add a wrapped hair clip in an arm or ossicone to create a clicking sound.
- Avoid Safety Eyes: For toys intended for babies or children under 3, avoid using safety eyes as they can be a choking hazard. Instead, consider embroidering the eyes with tightly secured yarn or painting them on.
- Yarn Recommendations: I used Lily Sugar N' Cream Cotton Yarn for free crochet giraffe pattern, but other soft yarns like Caron One Pound or acrylic blends work well too.
Instructions
- For the free crochet giraffe pattern, we will mostly be working in rounds.
- Crochet Giraffe Legs x2:
- Round 1: Using light brown yarn, make a mr and sc x6 into the circle. If you find it difficult making a magic ring you can chain 2 and then sc x6 in the second chain from the hook. (6)
- Round 2: Inc in every sc. (12)
- Round 3: Inc, sc. Then repeat until end of round (18).
- Round 4-5: Sc in every stitch (18). At the end of the 5th round change the color to light yellow.
- To make a color change, in the last stitch of the row completed make a sc but instead of yarning over with light brown, yarn over with light yellow and go through the stitch and finish the stitch like normal.
- Round 6-9: Sc in every stitch (18).
- Round 10: Inc, sc x2. Then repeat until the end of round (24). Fasten off and weave in any ends.
- Now make a second leg, but do not fasten it off.
- Crochet Giraffe Body:
- This part of the crochet pattern for giraffe starts off where the legs stopped.
- Round 11: After both legs have been completed, ch x2 from the second leg and then attach the first leg by making a sc into one of the stitches from the last round. Then sc all around the leg. Once you get to the chain connecting the 2 pieces, make a sc in each chain (2). Then sc around the second leg, until you get to the beginning of the round (where you made the chain). Put in a stitch marker to mark the start of the rounds (52).
- Round 12: Inc, sc x12. Then repeat until end of round (56).
- Round 13: Inc, sc x13. Then repeat until end of round (60).
- Round 14-22: Sc in every stitch (60).
- Place the other 2 stitch markers on either side right on the far edges. For the rest of the body we will aim to put the decreases on the sides of the giraffe versus on the front or back. This might mean to move your sc over one stitch or decrease one. Just try to have some wiggle room for this part depending on your tension.
- Round 23: Sc x18, dec, sc x28, dec, sc x10 (58).
- Round 24: Sc x18, dec, sc x27, dec, sc x9 (56).
- Round 25: Sc x18, dec, sc x26, dec, sc x8 (54).
- Round 26: Sc x17, dec, sc x26, dec, sc x7 (52).
- Round 27: Sc x17, dec, sc x25, dec, sc x6 (50).
- Round 28: Sc x17, dec, sc x23, dec, sc x6 (48).
- Round 29: Sc x17, dec, sc x22, dec, sc x5 (46).
- Round 30: Sc x16, dec, sc x21, dec, sc x5 (44).
- Round 31: Sc x16, dec, sc x20, dec, sc x4 (42).
- Round 32: Sc x15, dec, sc x19, dec, sc x4 (40).
- Round 33: Sc x15, dec, sc x18, dec, sc x3 (38).
- Round 34: Sc x15, dec, sc x17, dec, sc x2 (36).
- Round 35: Sc x15, dec, sc x16, dec, sc x1 (34).
- Round 36: Sc x14, dec, sc x15, dec, sc x1 (32).
- Round 37: Sc x14, dec, sc x14, dec (30).
- Round 38: Sc x13, dec, sc x13, dec (28).
- Round 39: Sc x12, dec, sc x12, dec (26).
- Round 40: Sc x11, dec, sc x11, dec (24).
- Round 41: Sc x10, dec, sc x10, dec (22).
- Round 42: Sc x9, dec, sc x9, dec (20).
- Round 43-46: Sc in every stitch (20).
- Round 47: Sc x8, dec, sc x8, dec (18).
- Round 48: Sc in every stitch (18). Fasten off and leave tail for sewing.
- Crochet Giraffe Head:
- Round 1: Using light brown yarn, make a mr and sc x6 into the circle (6).
- Round 2: Inc in every stitch (12).
- Round 3: Inc, sc. Then repeat until end of round (18).
- Round 4: Sc in every stitch (18).
- Round 5: Inc, sc x2. Then repeat until end of round (24). Just like the color changes we did for the body, make a color change to light yellow at the end of this round.
- Round 6-8: Sc in every stitch (24).
- Round 9: Inc, sc x7. Then repeat for the entire round (27).
- Round 10-12: Sc in every stitch (27).
- Round 13: Inc, sc x8. Then repeat for the entire round (30).
- Round 14-17: Sc in every stitch (30).
- Round 18: Dec, sc x3. Then repeat for the entire round (24).
- Round 19: Dec, sc x2. Then repeat for the entire round (18).
- Round 20: Dec, sc. Then repeat for the entire round (12).
- Round 21: Dec for the entire round (6). Fasten off, sew closed.
- Crochet Giraffe Arms x2:
- Round 1: Using light brown yarn, make a mr and sc x6 into the circle (6).
- Round 2: Inc in every sc (12).
- Round 3: Inc, sc x3. Then repeat until end of the round (15).
- Round 4: Sc in every stitch (15). Then switch the yarn color like before to light yellow.
- Round 5: Sc in every stitch (15).
- Round 6: Dec, sc x3. Then repeat for the rest of the round (12).
- Round 7-8: Sc in every stitch (12).
- Round 9: Dec, sc x2. Then repeat for the rest of the round (9).
- Round 10-12: Sc in every stitch (9).
- Round 13: Dec, sc. Then repeat for the rest of the round (6).
- Round 14: Sc in every stitch (6).
- Round 15: Dec for the entire round (3). Fasten off and leave tail for sewing.
- Crochet Giraffe Ossicones x2:
- Round 1: Using light brown yarn, make mr and sc x6 into the circle (6).
- Round 2: Sc for the entire round (6). Then change colors to light yellow at the end of the round.
- Round 3-6: Sc for the entire round (6). Fasten off and leave a tail for sewing.
- Crochet Giraffe Ears x2:
- Round 1: Using light yellow yarn, make a mr and sc x3 into the circle (3).
- Round 2: Inc in every stitch (6).
- Round 3: Inc, sc. Then repeat for the rest of the round (9).
- Round 4-5: Sc in every stitch (9). Flip the ear right side out.
- Round 6: Dec, sc. Then repeat for the rest of the round (6).
- Round 7: Dec for the entire round (3). Fasten off and leave tail for sewing.
- Crochet Giraffe Spots:
- Large Spots x2:
- Round 1: Using light brown yarn, make a mr and sc x6 into the circle (6).
- Round 2: Inc in every stitch (12).
- Round 3: Inc, sc. Then repeat for the entire round (18). Fasten off and leave tail for sewing.
- Small x6:
- Round 1: Using light brown yarn, make a mr and sc x6 into the circle (6).
- Round 2: Inc in every stitch (12). Fasten off and leave tail for sewing.
- Amigurumi Giraffe Assembly:
- Layout of where everything will be sewn on the giraffe.
- First, sew the head, arms, ears and ossicones onto the giraffe.
- Then, sew the spots onto the giraffe just like I have mine. I have the spots in the same locations on the back too. Or you can choose a different layout depending on how you would like the crochet amigurumi toy giraffe to look like at the end!
- Then embroider the eyes and nostril holes with black yarn.
- And now you have a beautiful crochet giraffe perfect for babies and young children! I hope you enjoyed making my free crochet giraffe pattern as I had designing it!

Heather says
What is the finished size of the giraffe, please.
Kimberly Arenas says
roughly 12 inches
amy says
just wondering if there is a video of how to assemble the giraffe once you are done crocheting it
Kimberly Arenas says
Hi, I currently don't have a video for assembling the giraffe, but you want to sew the head to the top of the neck by laying the bottom 1/2 of the head over the neck and sew it together. The arms are placed 2 rounds underneath the bottom base of the head. Hope this helps!