
Looking for a simple yet textured stitch to add to your crochet repertoire? The Sieve Stitch Crochet Tutorial is the perfect choice! This easy 2-row repeat stitch is perfect for crocheters of all skill levels.

For the crochet sieve stitch, all you need to know is how to make a single crochet and chain, making it an accessible option for beginners while still offering a beautiful texture that more experienced crocheters will love.
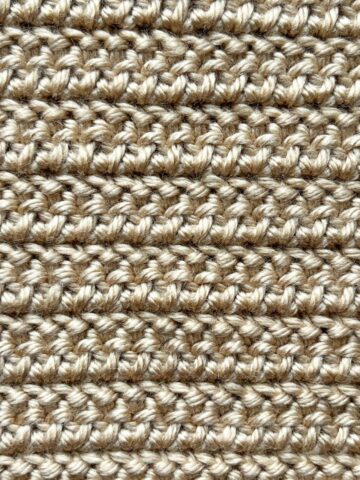
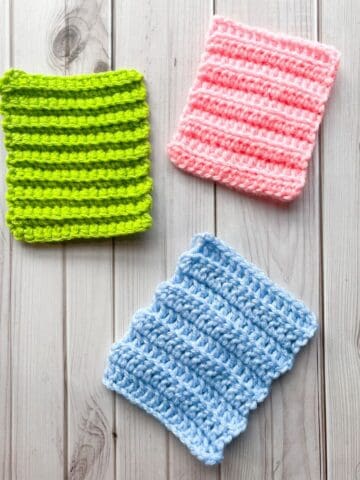
The crochet sieve stitch creates a subtle, grid-like pattern that works wonderfully in a variety of projects, from blankets and scarves to shawls and more. If you’ve tried the crochet moss stitch (another simple combination of single crochets and chains), you’ll find the sieve stitch offers a similar design aesthetic, but with a slightly different texture. I often use the moss stitch in projects like my Crochet Linen Scarf Pattern and my crochet moss stitch hat pattern, but you can easily swap the moss stitch with the crochet sieve stitch in any of my designs for a fresh take on the same look.
The beauty of the sieve stitch is that it’s versatile and can be used in a variety of yarns and projects. It’s also a great option for those who prefer a lightweight, breathable fabric with a bit of texture. So if you’re looking to add something new to your crochet collection, give this stitch a try and see how it can transform your designs!
Jump to:
✏️ Things To Note:
- Simple 2-Row Repeat: The Sieve Stitch Pattern is a simple 2-row repeat pattern, making it easy to memorize and perfect for beginners. Once you’ve got the hang of the two rows, it’s a breeze to keep going!
- Tension is Important: Because the pattern relies on chains and single crochets, it's important to maintain consistent tension throughout. If your tension is too tight, your work might feel stiff, and if it’s too loose, the pattern might not have the same grid-like effect. Aim for a relaxed but consistent tension.
- Adjusting for Different Yarns: The Crochet Sieve Stitch works well with many types of yarn, but the final look will vary depending on your yarn weight. Lighter yarns, like sport or worsted weight, will give a more delicate, drapey fabric, while heavier yarns will create a thicker, cozier texture. Consider the project you're working on when selecting your yarn.
🪡 Materials Needed
- Any yarn
- 5 mm Hook
- Tapestry needle
💭Abbreviations to Remember (US terms)
- Chains (ch)
- Single crochet (sc)
🍵Instructions for Sieve Stitch Crochet Tutorial
For the sieve stitch crochet pattern, we will be working in rows.

Chain as long as you want your project to be, just make sure it is an even amount.

Row 1: Starting in the 2nd chain from the hook, make a sc.

Repeat for the rest of the row. Ch x1 and turn.

Row 2: Skip the chain and start at the top of the first sc stitch, make a sc.

*Then ch x1, skip the next stitch from the row below, and sc in the next stitch.

You want to repeat from * for the rest of the row. You want to make sure you end the row with a sc. Then ch x1 and turn.

Row 3: You are going to sc x2 in the first ch space from the row below.
Then you want to repeat this step for the rest of the row.

Then at the end of the row, sc x1 in the last stitch. The last stitch should be a sc from the previous row. Ch x1 and turn.
Now you are going to want to repeat row 2 and 3 for the rest of your project.
And that’s a wrap on the sieve stitch crochet tutorial! I hope you had as much fun learning this simple and textured stitch as I did sharing it with you. It’s such a versatile stitch that adds a beautiful, breathable texture to your crochet projects. I can’t wait to see how you use it in your projects!
If you enjoyed this stitch, be sure to check out my other fun crochet stitch tutorials, like the Herringbone Single Crochet Pattern, the cozy Crochet Garter Stitch Pattern, and the classic Moss Stitch Granny Square Pattern. These are perfect for adding even more variety to your projects and building your crochet skills.
If you’re a fan of easy-to-memorize 2-row (or more) repeat patterns, you’ll also love my Crochet Daisy Stitch Tutorial and Crochet Larksfoot Tutorial—both are full of texture and fun to crochet!
There are endless possibilities for adding stunning textures to your work!
Happy crocheting and have fun exploring all the amazing stitch patterns I’ve got for you!

🐌Expert Tips
- Chain and Skip Stitches Carefully: The sieve stitch crochet pattern involves skipping stitches, so it's important to ensure that you're skipping the right number of stitches between your single crochet and chain. If you accidentally skip too few or too many stitches, the grid effect won’t form correctly. Double-check your stitch count as you go!
- Use a Marker for the First Chain Space: In some patterns, especially when working in rows, it can be hard to remember where your first chain space begins. Try placing a stitch marker in the first skipped stitch of each row to help you keep track and avoid confusion, especially on the first few rows
- Adjust the Foundation Chain for Project Size: The foundation chain should be a multiple of the pattern's repeat. If you’re making a project that requires a specific width, like a blanket or scarf, make sure your chain is long enough to match your desired size. You can always adjust the length by adding or removing chains at the beginning to fit your project.
- Practice on Swatches: Before jumping into a big project, like a blanket or scarf, practice the stitch on a small swatch. This will give you a feel for the pattern and help you fine-tune your tension and stitch placement.
🧵Pattern FAQs
The Sieve Stitch Crochet relies on single crochets for its structure. So it’s best to stick with single crochets for the intended texture. However, you could experiment with half double crochets or double crochets if you want a taller stitch. Keep in mind this will change the overall look and texture of the pattern.
The grid effect in the Sieve Stitch Crochet comes from alternating chains and single crochets. You chain 1, skip a stitch, and then work a single crochet in the next stitch. This creates the open grid-like texture. Make sure to skip the correct number of stitches as you go for the pattern to form correctly.
When working with the sieve stitch, you might notice the edges could become a bit uneven, especially with the chain spaces. To prevent this, always be mindful of your turning chain at the start of each row. Some crocheters add a chainless starting stitch to create a smoother edge.

🧶More Crochet Stitch Patterns
If you tried this Sieve Stitch Crochet Tutorial (or any other pattern on my website), please let me know how it went in the 📝 comments below. I'd love to hear from you!

Sieve Stitch Crochet Tutorial
Materials
- Any yarn
- 5 mm Hook
- Tapestry needle
Abbreviations (US terms)
- Chains - ch
- Single crochet - sc
Notes
- Simple 2 Row Repeat: The Sieve Stitch Crochet Pattern is a simple 2-row repeat pattern, making it easy to memorize and perfect for beginners. Once you’ve got the hang of the two rows, it’s a breeze to keep going!
- Tension is Important: Because the pattern relies on chains and single crochets, it's important to maintain consistent tension throughout. If your tension is too tight, your work might feel stiff, and if it’s too loose, the pattern might not have the same grid-like effect. Aim for a relaxed but consistent tension.
- Adjusting for Different Yarns: The Crochet Sieve Stitch works well with many types of yarn, but the final look will vary depending on your yarn weight. Lighter yarns, like sport or worsted weight, will give a more delicate, drapey fabric, while heavier yarns will create a thicker, cozier texture. Consider the project you're working on when selecting your yarn.
Instructions
- For the sieve stitch crochet pattern, we will be working in rows.
- Chain as long as you want your project to be, just make sure it is an even amount.
- Row 1: Starting in the 2nd chain from the hook, make a sc. Repeat for the rest of the row. Ch x1 and turn.
- Row 2: Skip the chain and start at the top of the first sc stitch, make a sc. *Then ch x1, skip the next stitch from the row below, and sc in the next stitch. You want to repeat from * for the rest of the row. You want to make sure you end the row with a sc. Then ch x1 and turn.
- Row 3: For this row you are going to sc x2 in the first ch space from the row below. Then you want to repeat this step for the rest of the row. Then at the end of the row, sc x1 in the last stitch (the last stitch should be a sc from the previous row). Ch x1 and turn.
- Now you are going to want to repeat row 2 and 3 for the rest of your project.
- And that’s a wrap on the sieve stitch crochet tutorial! I hope you had as much fun learning this simple and textured stitch as I did sharing it with you. It’s such a versatile stitch that adds a beautiful, breathable texture to your crochet projects, and I can’t wait to see how you use it in your projects!


Leave a Reply