
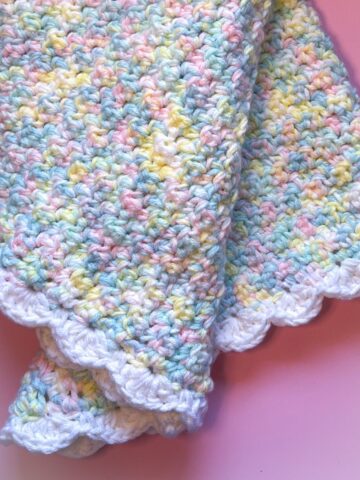
Love the look of color changes, but hate weaving in the ends? Then my Crochet Envelope Border is a perfect solution for you! It hides the ends and no weaving involved!
I’m personally not a fan of weaving in a ton of ends. I usually carry the strands under my stitches in the next row, but depending on the stitch, it can be tricky and time-consuming. The best solution to avoid this on a blanket or other flat crochet projects is the envelope border!
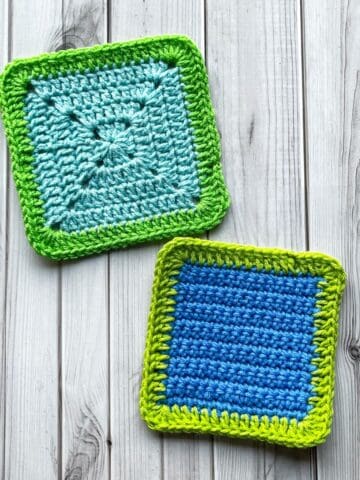
By encapsulating the edges, this technique neatly hides all those yarn ends, making your finished piece look cleaner and more professional without the hassle of constant weaving.
The envelope crochet border is quite easy, and you only need to know how to do slip stitches and double crochet to create it. Even if you're a beginner, this method can be a great way to add a polished finish to your projects while saving time and effort on weaving.
Jump to:
✏️ Things To Note:
- Loose Slip Stitches: Work the slip stitches loosely; otherwise, it will be difficult to make double crochet stitches into them. Alternatively, you can use single crochet stitches instead of slip stitches, but I prefer the slip stitch method.
- Thickness: The crochet envelope border is two layers thick, so keep this in mind if you're using blanket or chunky yarn.
- Yarn Consumption: The crochet envelope border is a yarn eater! Make sure you have enough yarn to essentially make two borders around your project, plus extra for closing the border.
🪡 Materials Needed
- Yarn for border
- H hook
- Tapestry needle
💭Abbreviations to Remember (US terms)
- Slip Stitch - sl st
- Double Crochet - dc
- Chain - Ch
🧋Variations
You can use any stitch for the envelope border as long as you start with either a row of sl st or sc, and then close the two sides of the border. You can even make the envelope border with the mosaic stitch to add more complexity to your design.
🍵Instructions for Crochet Envelope Border
The pattern is worked in rounds.
Backside of the border:

Step 1: Crochet even and loose sl st along the FRONT SIDE edges of your project. If slip stitches are too difficult for you to work with, you can do single crochet stitches instead, but sl st is my preferred method.

Step 2: Ch x2 and turn the work so you have the BACK SIDE of the project facing up and the backs of the slip stitches are facing you. Make 1 dc into each backside of the sl st. When you get to the corners dc x2, ch, dc x2 into the corner sl st. When you are done with this round, sl st to the top of the beginning dc and fasten off.
If you need to add a second round of dc stitches, feel free to do so, but make sure you do the same amount of rounds on the reverse side.
Front side of the border:

Flip your work over so the FRONT SIDE is now facing you and you can see the top of the slip stitches. Join the yarn to the beginning sl st again and repeat step 2.

Make sure to have all the yarn tails in between the dc posts. Like a sandwich.
After making the dc stitches, do not fasten off the yarn.

Step 3: Sl st the 2 dc rounds together by going through the 2 middle loops of the dc sandwich. Thus trapping the yarn ends between the 2 rounds of dc.
Sl st to the first sl st in the round and fasten off the yarn. Weave in the ends.
You have now completed the envelope border!
🐌Expert Tips
- Loosen Up Slip Stitches: If your slip stitches are too tight, use a hook one size larger when making them. When you get to the second row, switch back to your preferred hook size.
- Check Your Yarn Supply: Double-check your yarn supply before starting. The envelope border requires more yarn than typical borders, so it’s better to have extra on hand.
- Secure Loose Ends: If you’re worried about ends coming undone, tie small knots before creating the envelope border. This will help keep everything in place.
- Test with Different Stitches: Experiment with starting your border with single crochet instead of slip stitches to see which method you find easier to work with.
🧵Pattern FAQs
Yes, it should. I’ve never had issues, and even after washing, it holds up fine. If you're concerned, knot the ends before starting the envelope border.
Yes. You need to do slip stitches (or single crochet) around the edges once, then double crochet a round on each side, and finally join them up with a slip stitch. This means going around the edges a minimum of four times.
You can, but keep in mind that it will be twice as thick, making it quite heavy. I recommend against it unless you want an extra-thick edge.
🧶More Beginner Patterns


If you tried this Crochet Envelope Border (or any other pattern on my website), please let me know how it went in the 📝 comments below. I'd love to hear from you!

Crochet Envelope Border
Materials
- Yarn for border
- H hook
- Tapestry needle
Abbreviations (US terms)
- sl st = Slip Stitch
- dc = Double Crochet
- ch = Chain
- blo = Back Loop Only
- flo = Front loop only
Notes
Instructions
- The pattern is worked in rounds.
Backside of the border:
- Step 1: Crochet even and loose sl st along the FRONT SIDE edges of your project. If slip stitches are too difficult for you to work with, you can do single crochet stitches instead, but sl st is my preferred method.
- Step 2: Ch x2 and turn the work so you have the BACK SIDE of the project facing up and the backs of the slip stitches are facing you. Make 1 dc into each backside of the sl st. When you get to the corners dc x2, ch, dc x2 into the corner sl st. When you are done with this round, sl st to the top of the beginning dc and fasten off.
- If you need to add a second round of dc stitches, feel free to do so, but make sure you do the same amount of rounds on the reverse side.
Front side of the border:
- Flip your work over so the FRONT SIDE is now facing you and you can see the top of the slip stitches. Join the yarn to the beginning sl st again and repeat step 2.
- Make sure to have all the yarn tails in between the dc posts. Like a sandwich.
- After making the dc stitches, do not fasten off the yarn.
- Step 3: Sl st the 2 dc rounds together by going through the 2 middle loops of the dc sandwich. Thus trapping the yarn ends between the 2 rounds of dc.
- Sl st to the first sl st in the round and fasten off the yarn. Weave in the ends.
- You have now completed the envelope border!


Mary says
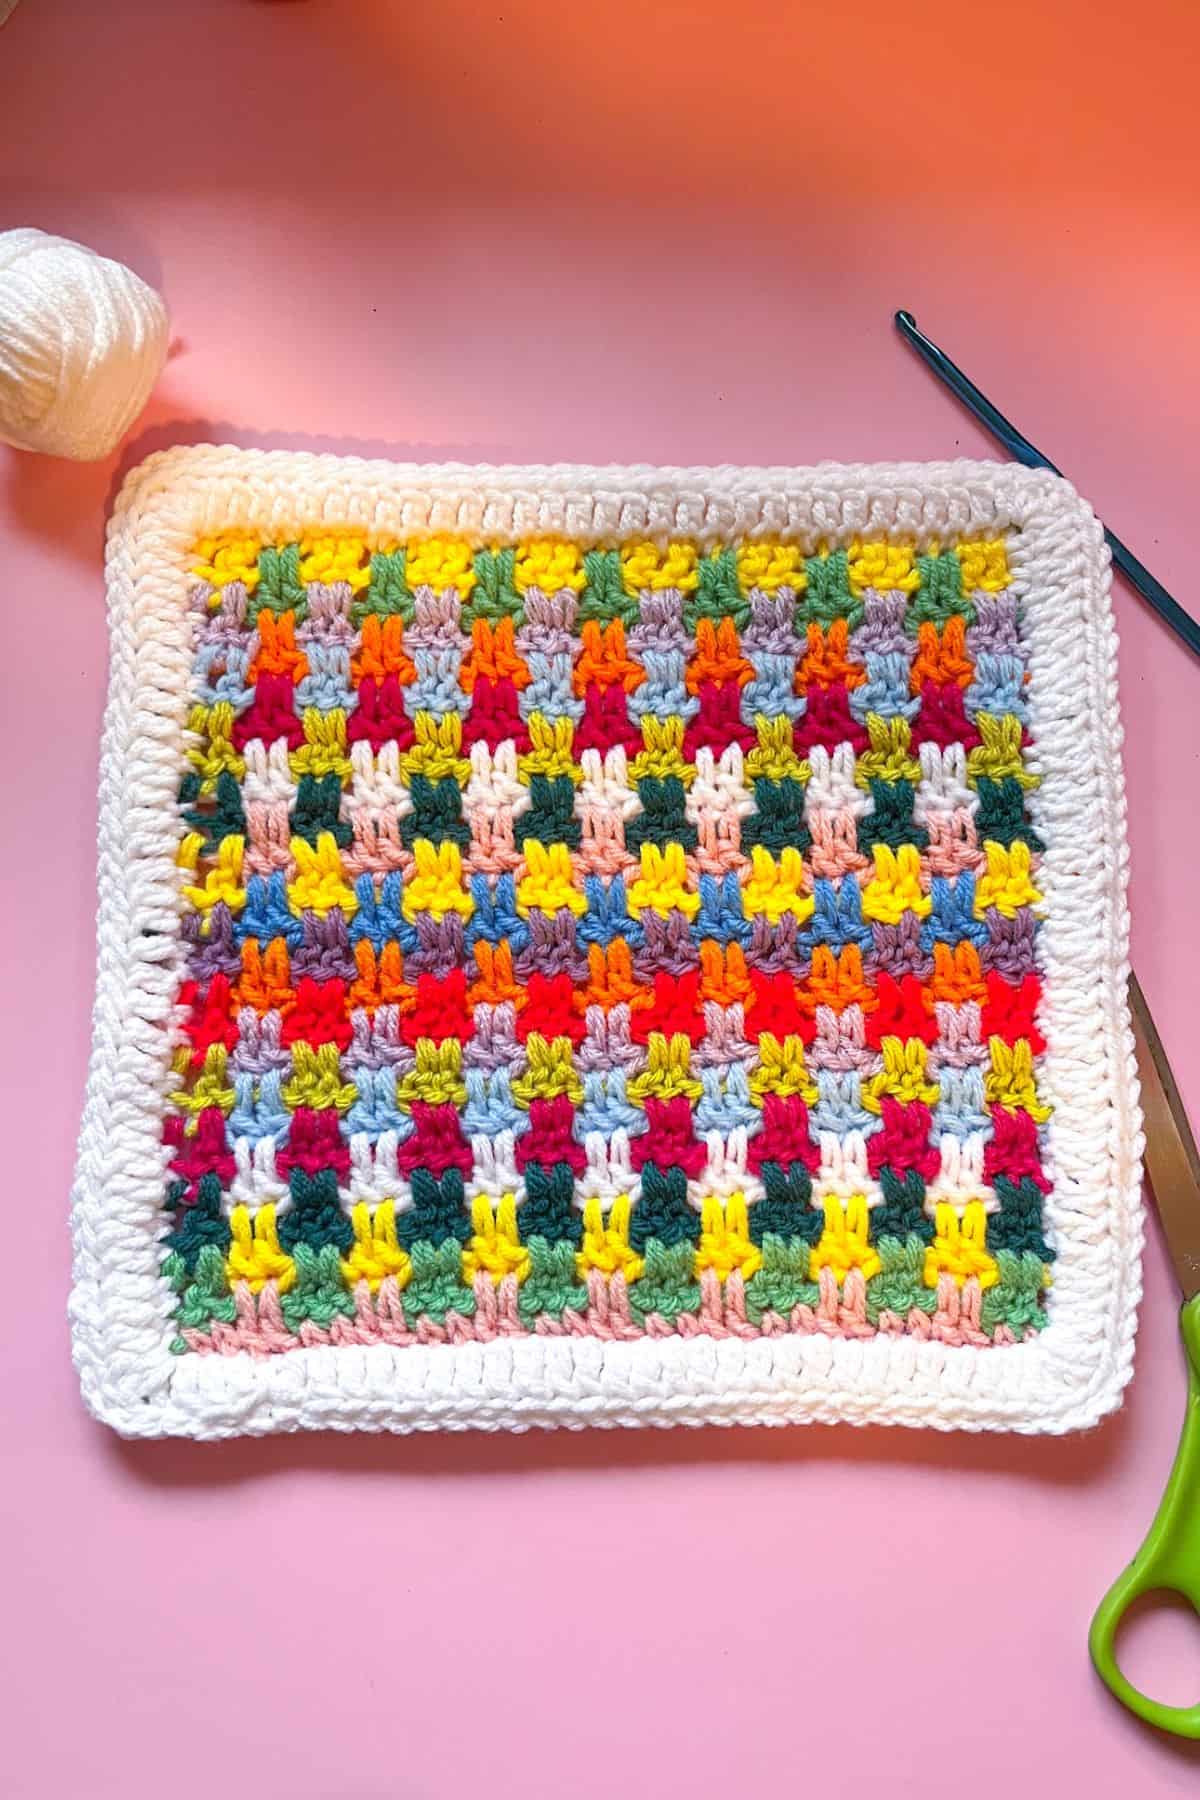
What is the stitch or pattern you used for the colorful part of the square? I’d love to try it.
Kimberly Arenas says
Hi, I have another pattern called "the snuggle stitch" that is the stitch used as the base. Perfect for scrap projects!Crochet Snuggle Stitch
Kathie Hollingshead says
Have you ever used an envelope stitch to join panels? I'm making a temperature bag that has one panel per season and lots of ends to tuck in!
Kimberly Arenas says
I have not tried this, but you can always test it out on a smaller version and see if it works 🙂