
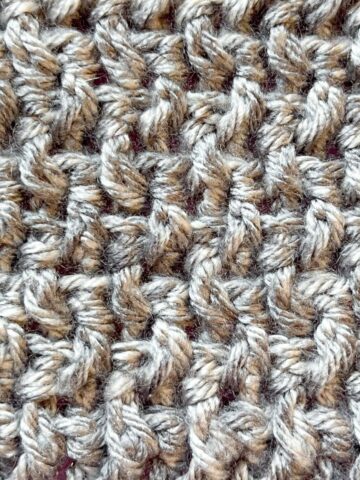
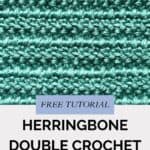
If you’re already familiar with the double crochet stitch, you’re just a step away from mastering the Herringbone Double Crochet Stitch! This twist on the classic double crochet creates a beautiful, textured look that’s perfect for all kinds of projects like blankets, scarves, sweaters, and cardigans.
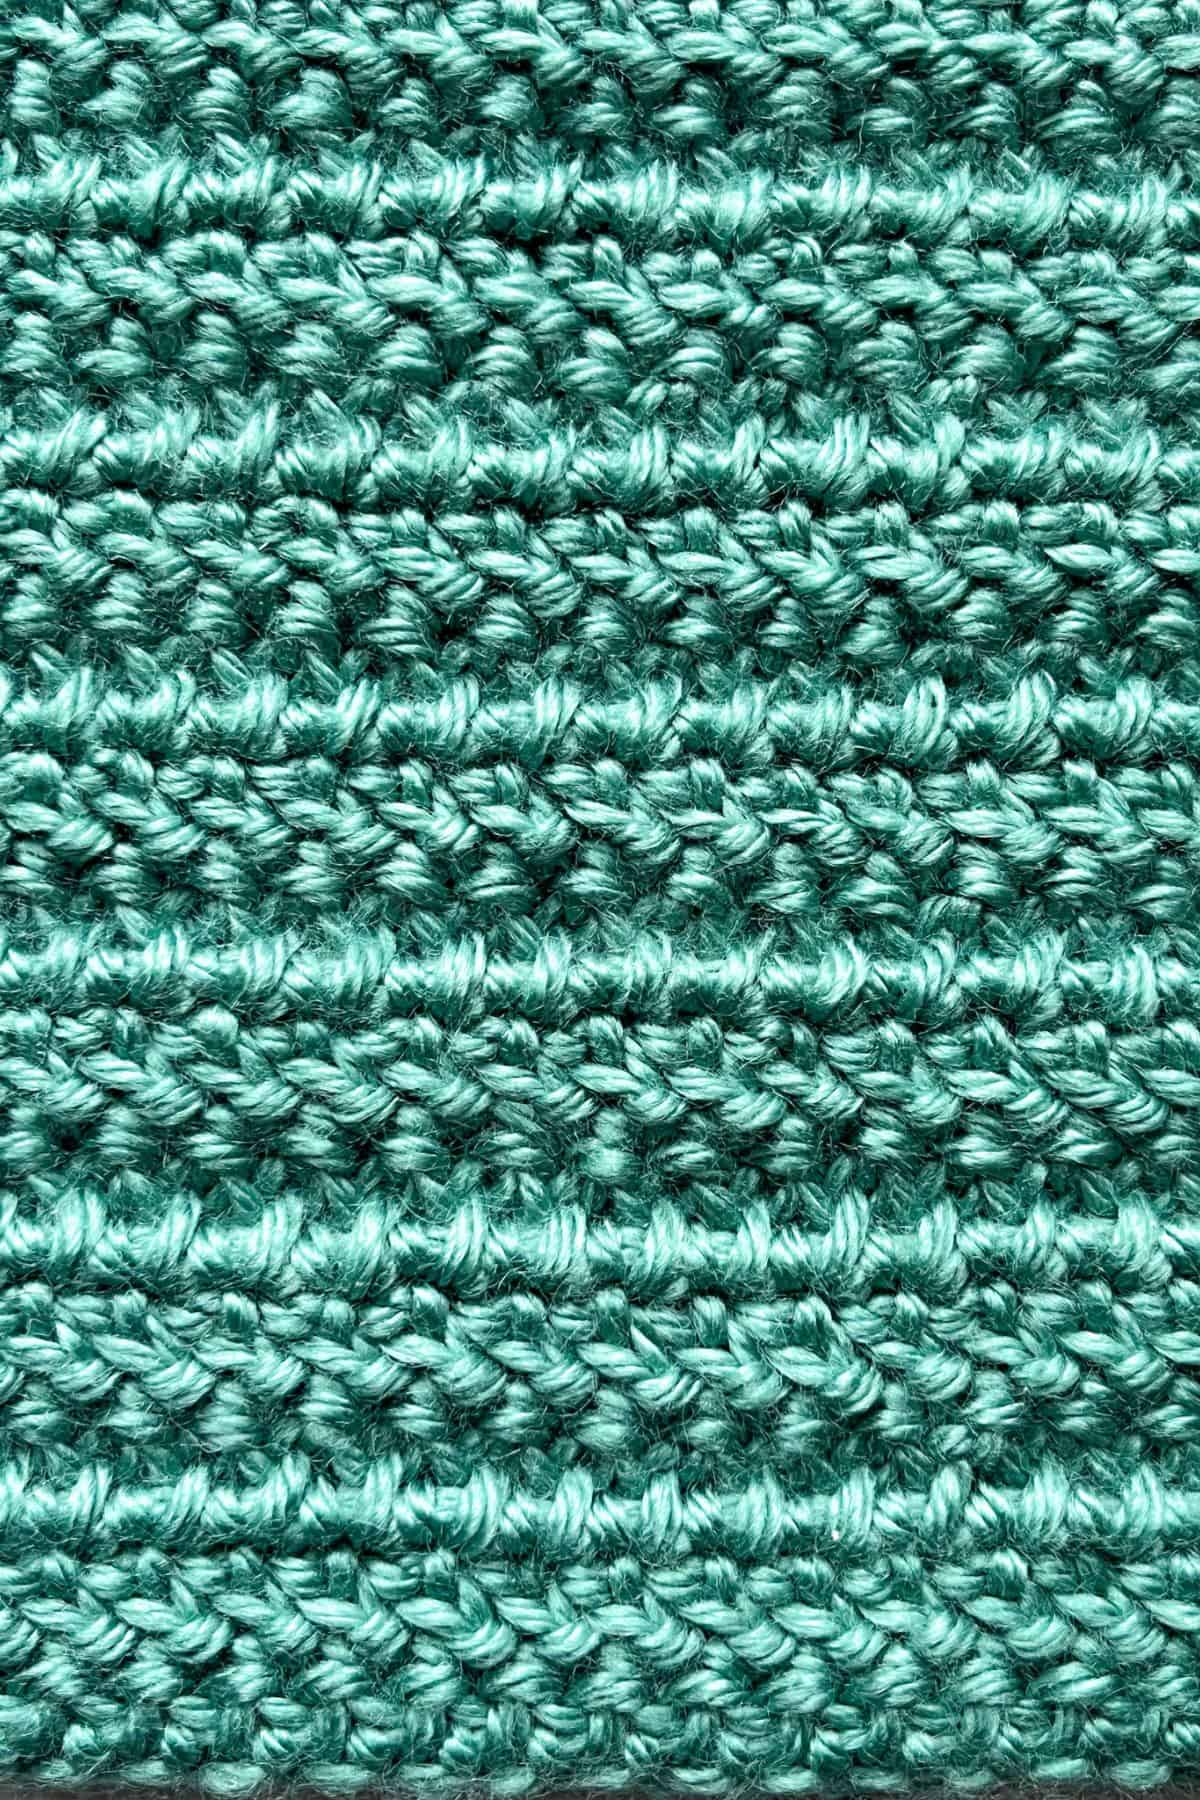
The herringbone double crochet stitch itself gets its name from the herringbone pattern you often see in fish skeletons—where the lines of the bones create a V-shaped design that’s mirrored and offset. The herringbone crochet stitch loosely mimics this with its slanted, diagonal stitches that form a unique, woven effect.
The double crochet herringbone stitch offers a distinct, smooth texture, giving your projects an extra touch of elegance. It’s easy to learn and adds a little flair to your crochet repertoire.
But wait—if you’re a fan of the herringbone crochet stitch, there are other cool variations to explore! Check out the herringbone half double crochet pattern for a slightly shorter stitch that still gives that lovely diagonal look. Or the herringbone single crochet pattern for a more traditional herringbone pattern.
If you’re looking for even more fun stitches, don’t miss out on my Daisy Stitch Crochet tutorial (also known as the Star Stitch), the Crochet Iris Stitch that uses double crochets, and the gorgeous Wattle Crochet Stitch that creates a beautiful, textured fabric.
Happy stitching!
Jump to:
✏️ Things To Note:
- Slanted Look: The herringbone double crochet stitch creates a unique slanted effect, so your fabric will have a beautiful, diagonal texture. It’s perfect for adding visual interest to your projects!
- Tension Matters: Since the herringbone double crochet stitch requires a little more yarn manipulation than the standard double crochet, be mindful of your tension. Try to keep it consistent throughout to avoid uneven rows.
- Slip-Stitch Transition: Each Herringbone crochet stitch involves a slip stitch, which may feel a little different at first. But once you get used to it, the flow of the stitch becomes easy and fun!
🪡 Materials Needed
- Any yarn
- 5 mm Hook
- Tapestry needle
💭Abbreviations to Remember (US terms)
- Chains (ch)
- Herringbone Double Crochet (hbdc)
🧋Variations
- Herringbone Double Crochet VARIATION: IF YOU WANT A MORE PRONOUNCED SLANT, after the 1st row of HBDC: ch x2 turn, skip the chains plus the 1st dc. Make a HBDC in the 2nd stitch from the previous row. Continue making the hbdc stitches in every stitch, when you get to the end of the row make a HBDC in the top loop of the ch space. Make sure you have the same number of stitches in the row as you did in the last row, ch x2 and repeat.
🍵Instructions for Herringbone Double Crochet Stitch
For this double crochet herringbone stitch pattern, we will be working in rows.
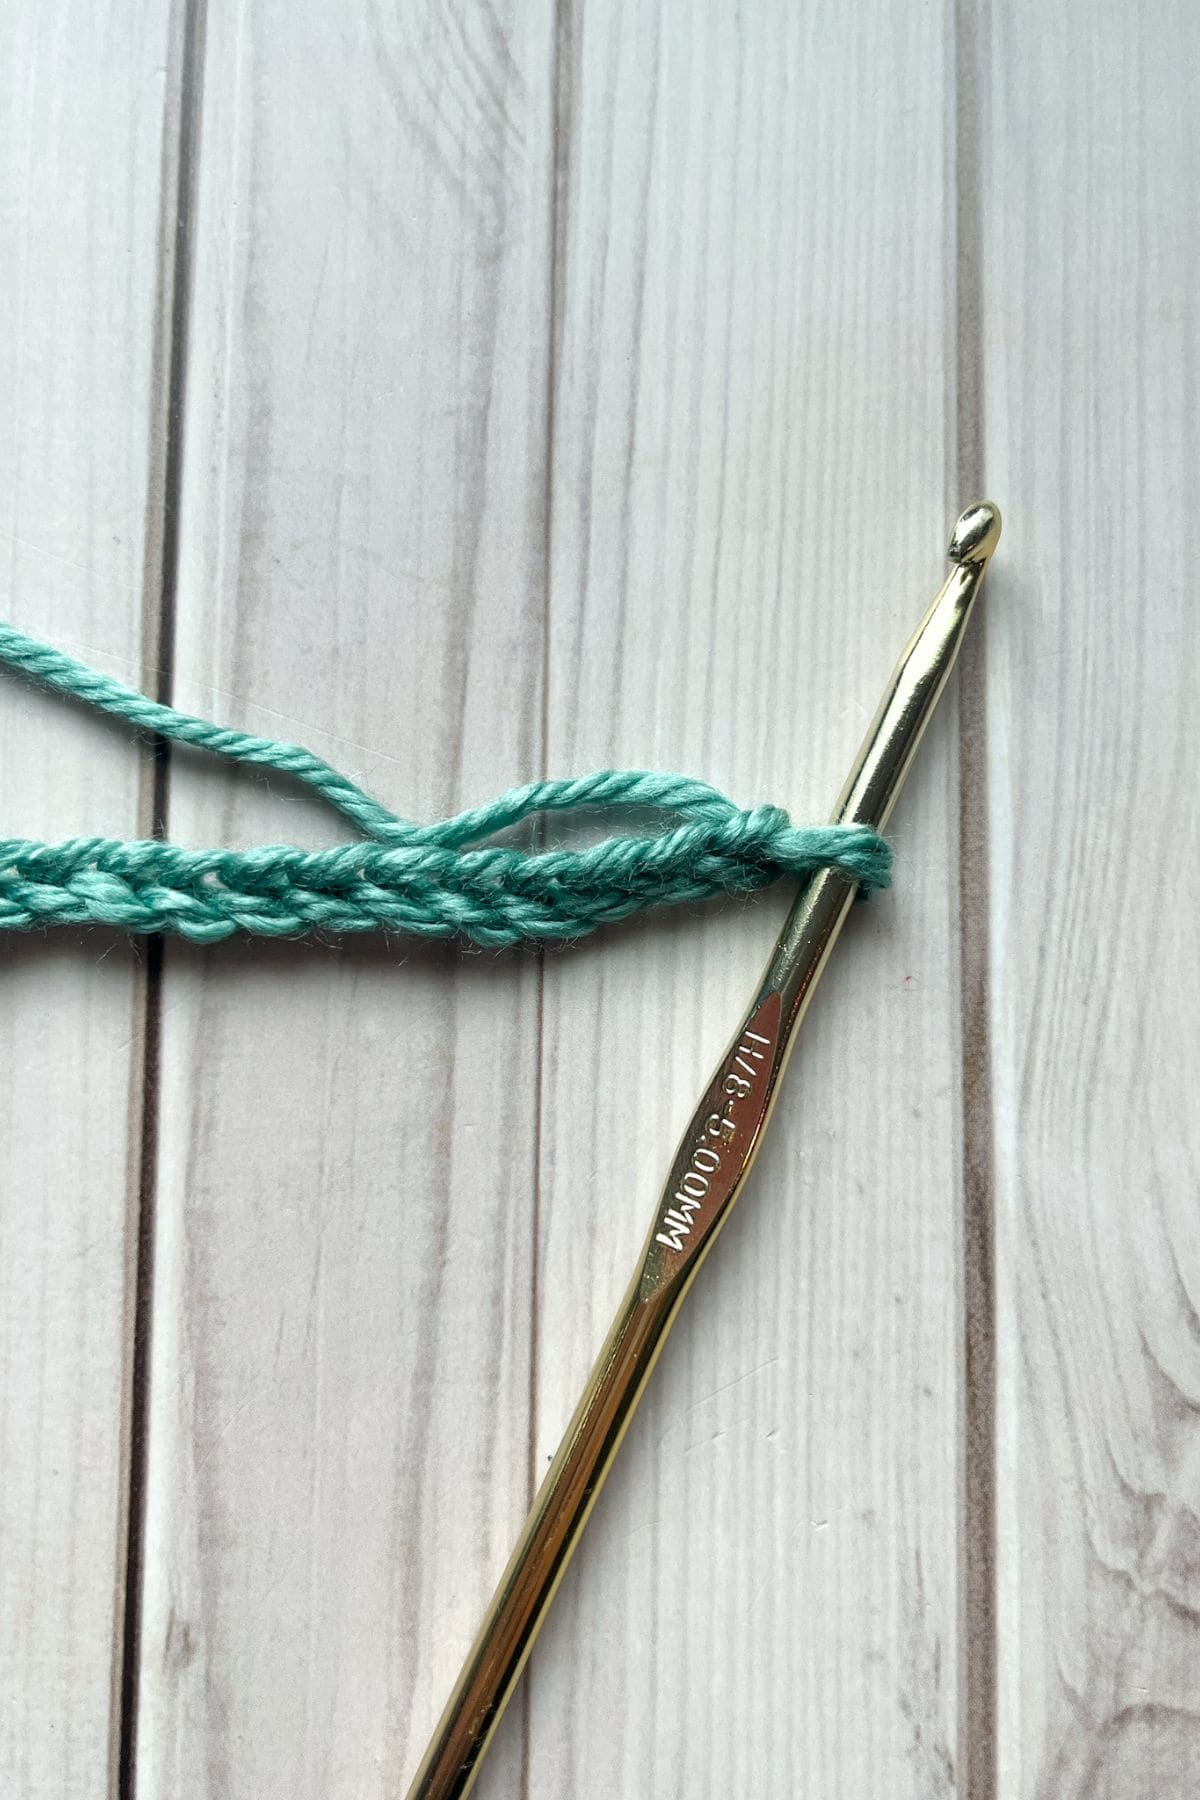
Chain as long as you want your project to be.
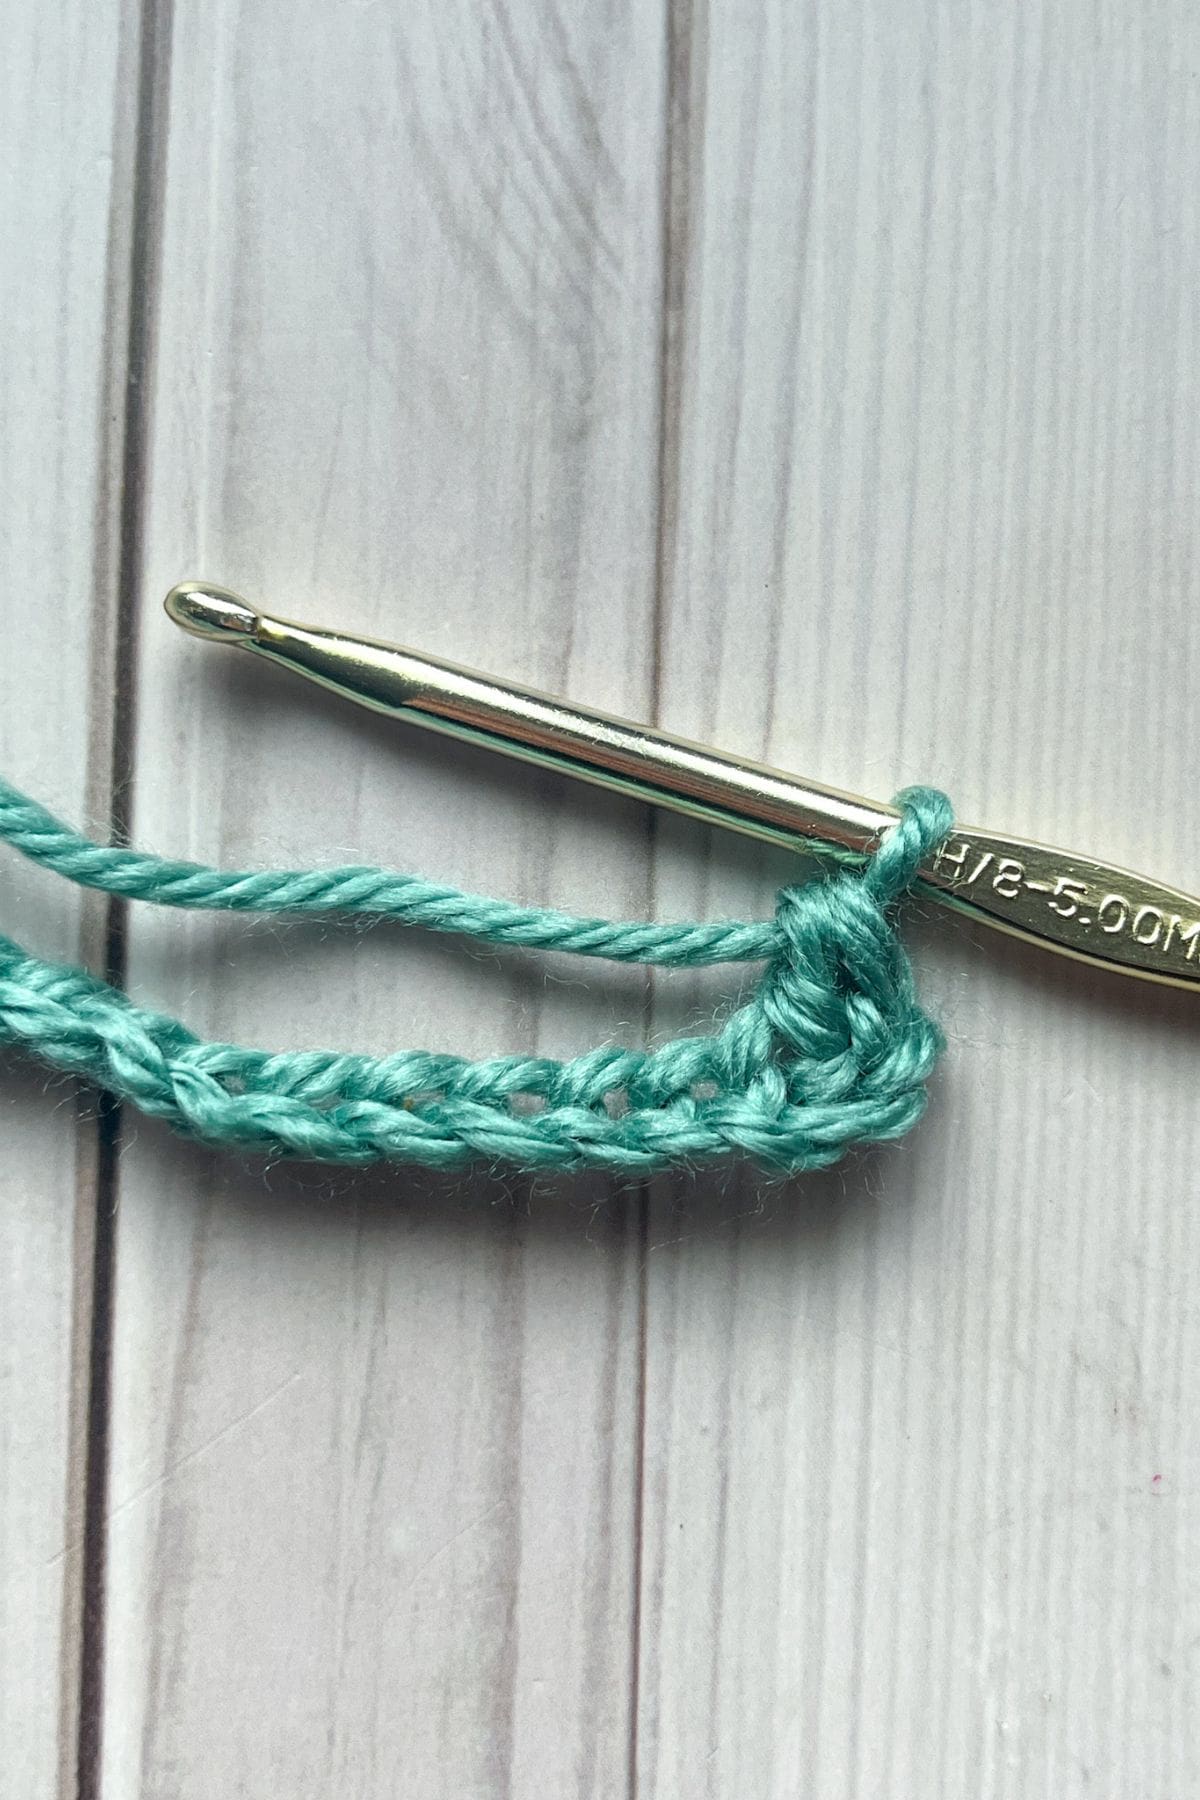
Row 1: Starting in the 3rd chain from the hook, make a *hbdc.
To make a double crochet herringbone stitch:
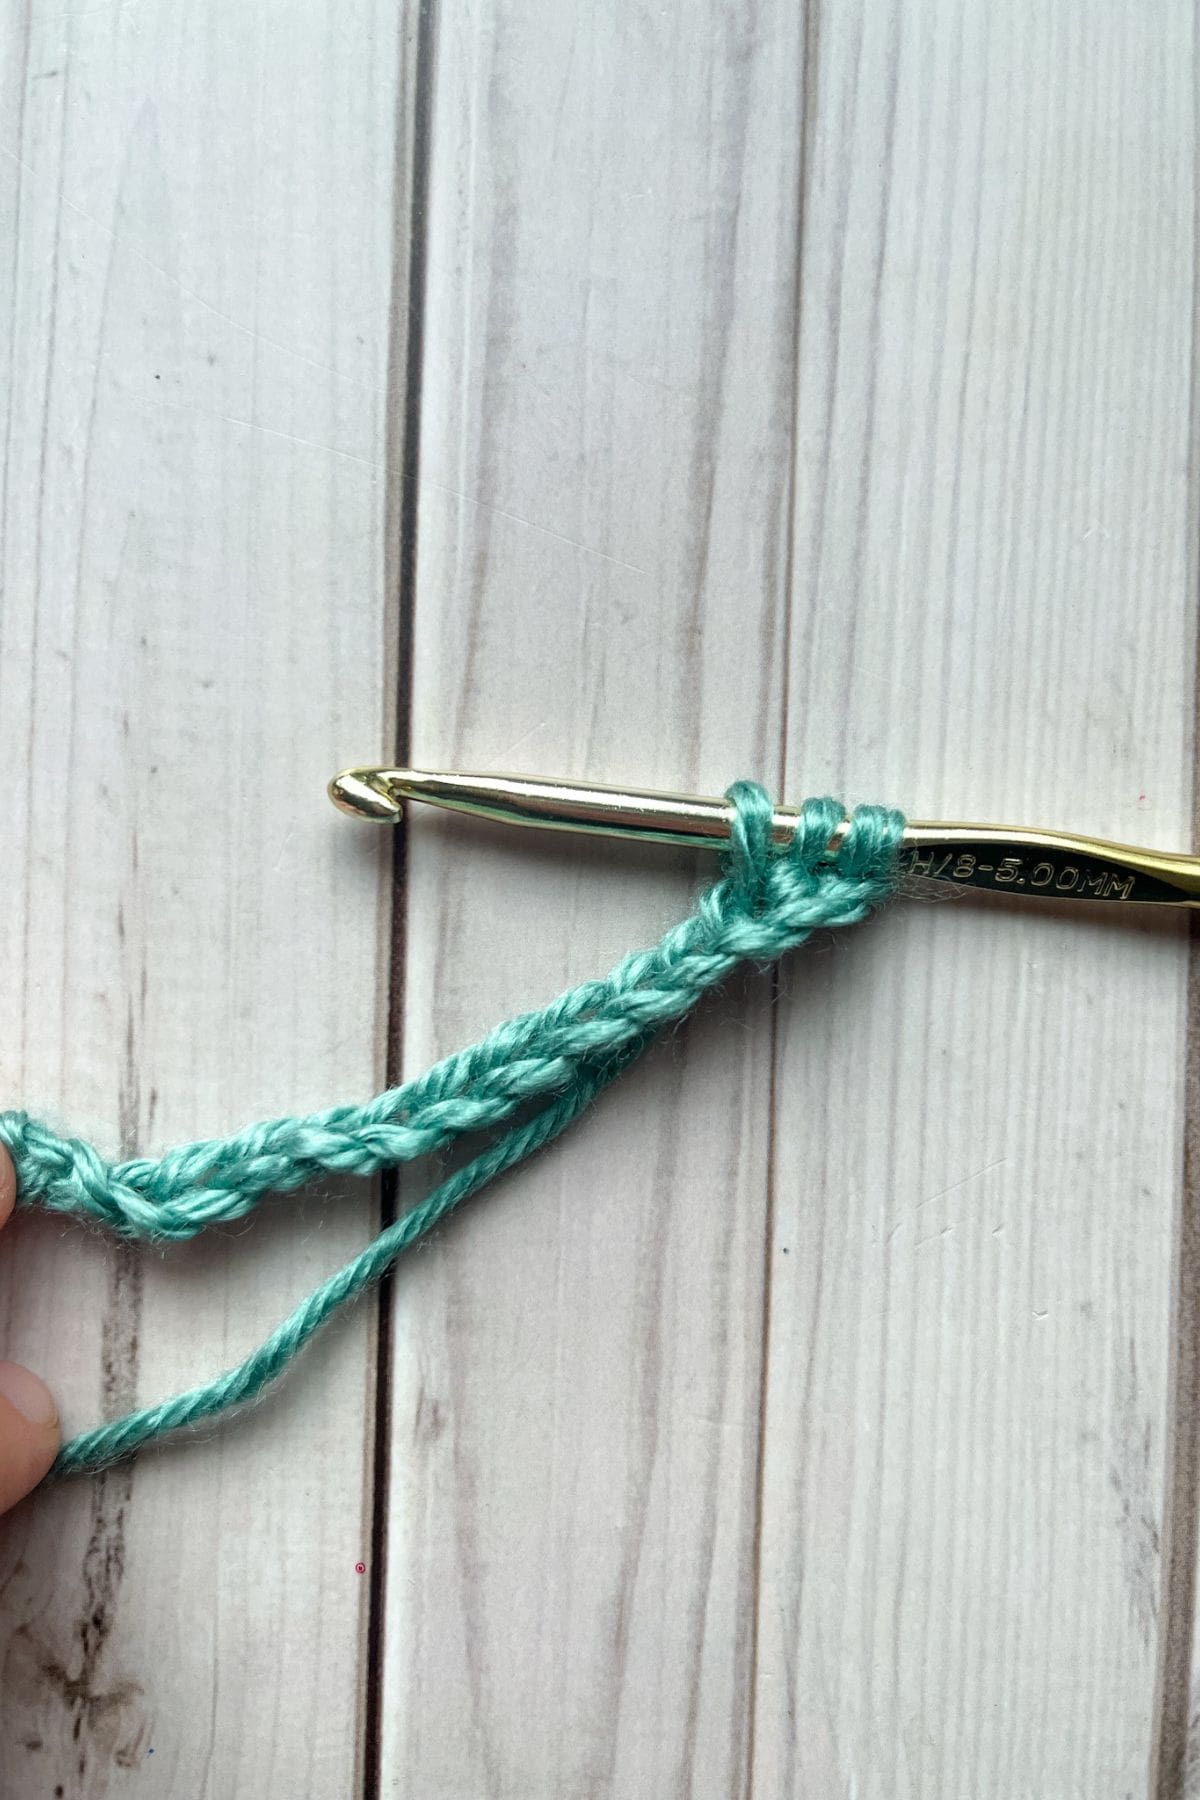
Yarn over, insert your hook into the chain, yarn over and pull up a loop like you normally would if you were making a normal double crochet.
Then, this is where the stitch differs from a double crochet stitch. After pulling up a loop and you now have 3 loops on your hook, pull directly through the first loop on the hook like you would a slip stitch.
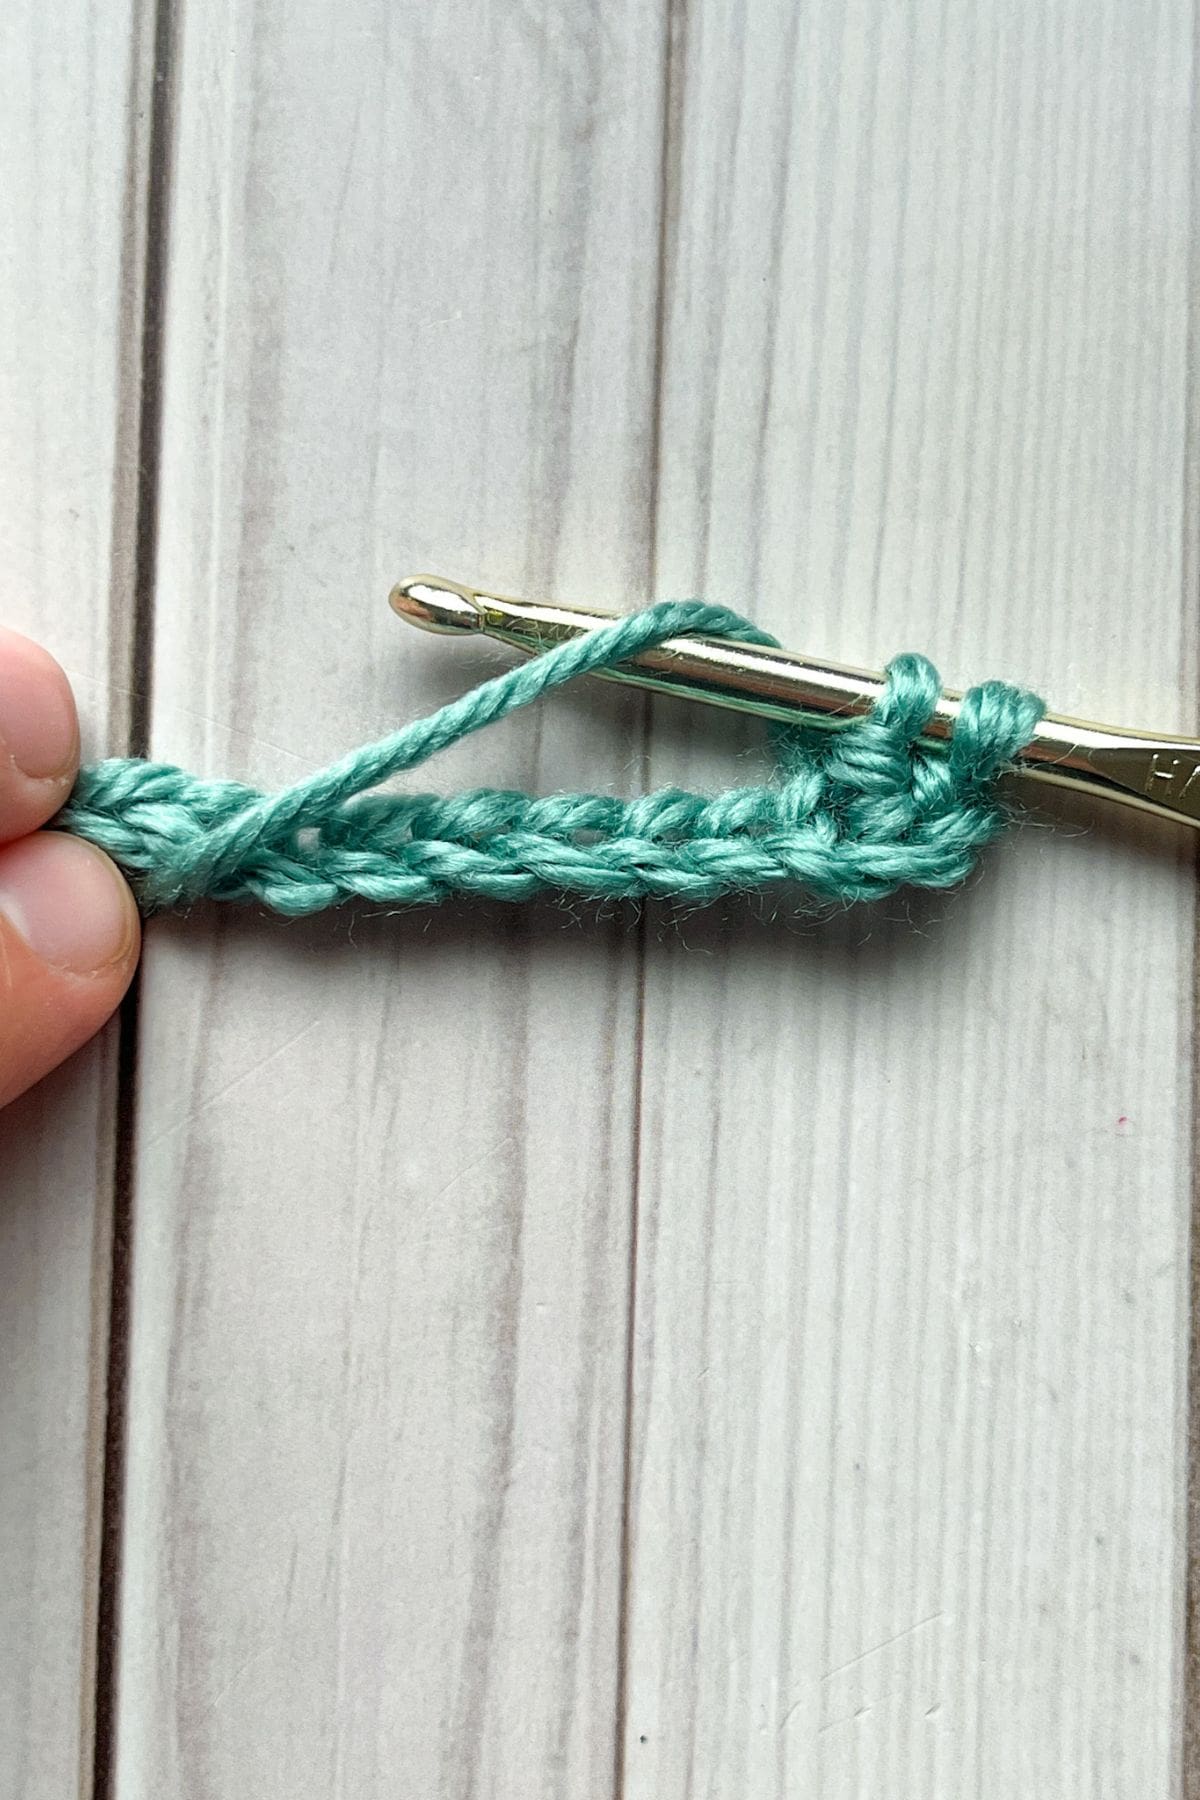
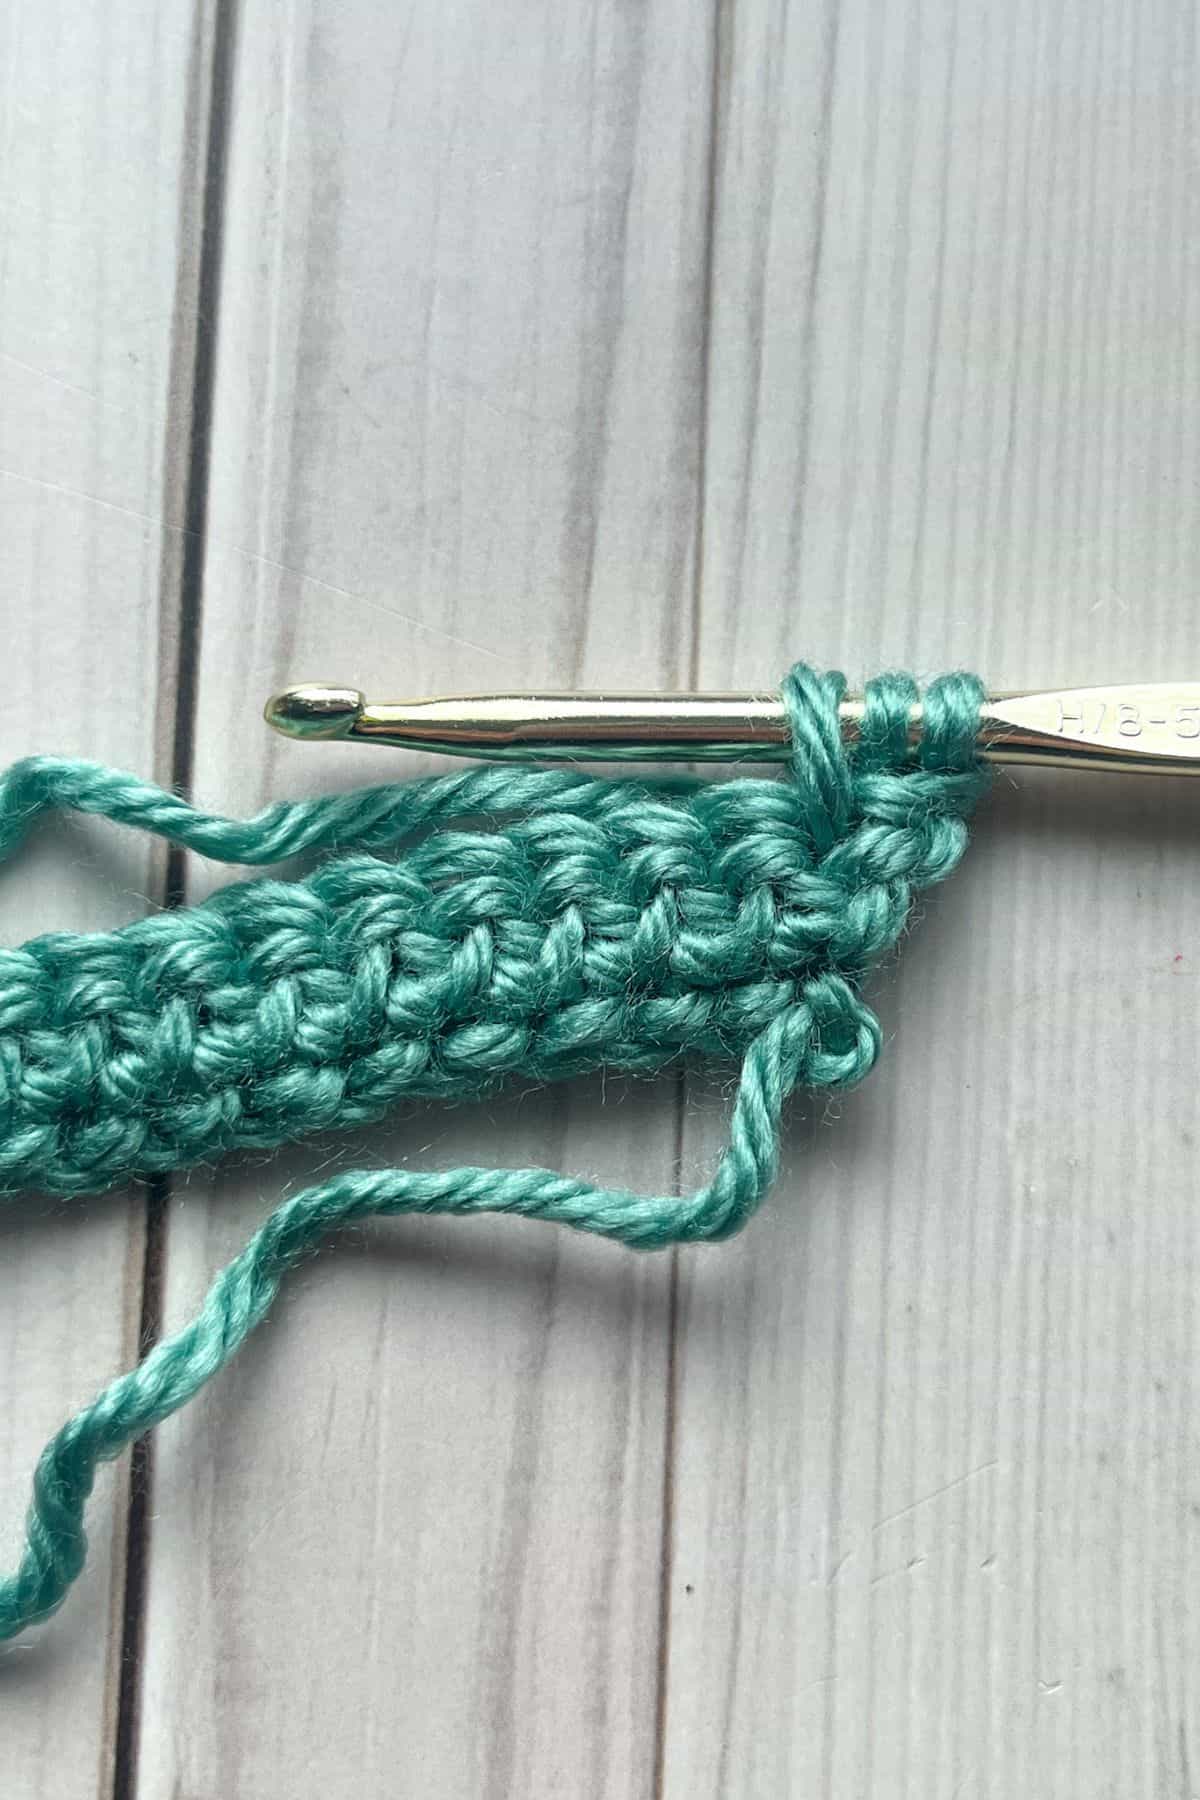
Then yarn over and pull through only 1 loop.
After, yarn over and pull through the remaining 2 loops on your hook.

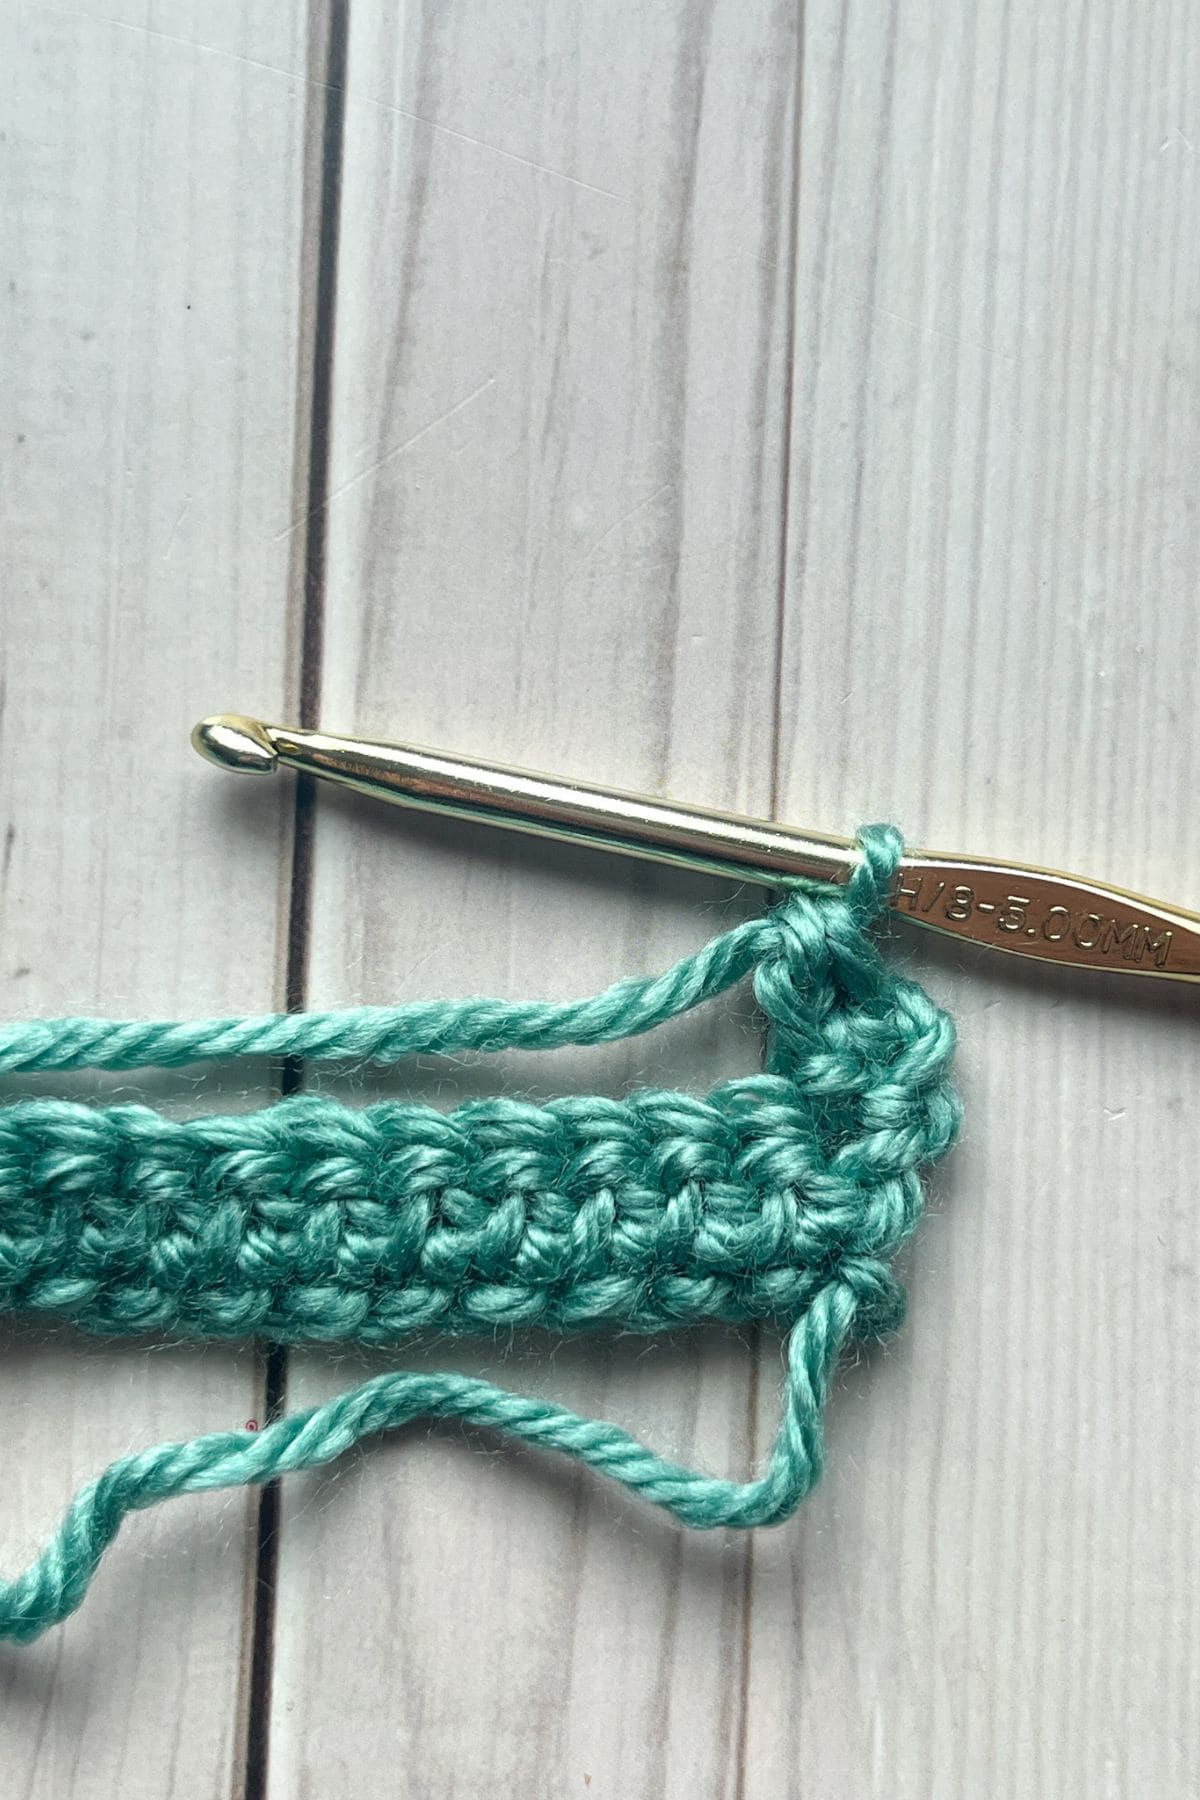
Repeat * for the rest of the row. Ch x2 and turn.
Row 2: Starting in the first stitch, make a hbdc. Repeat for the rest of the row, then ch x2 and turn.
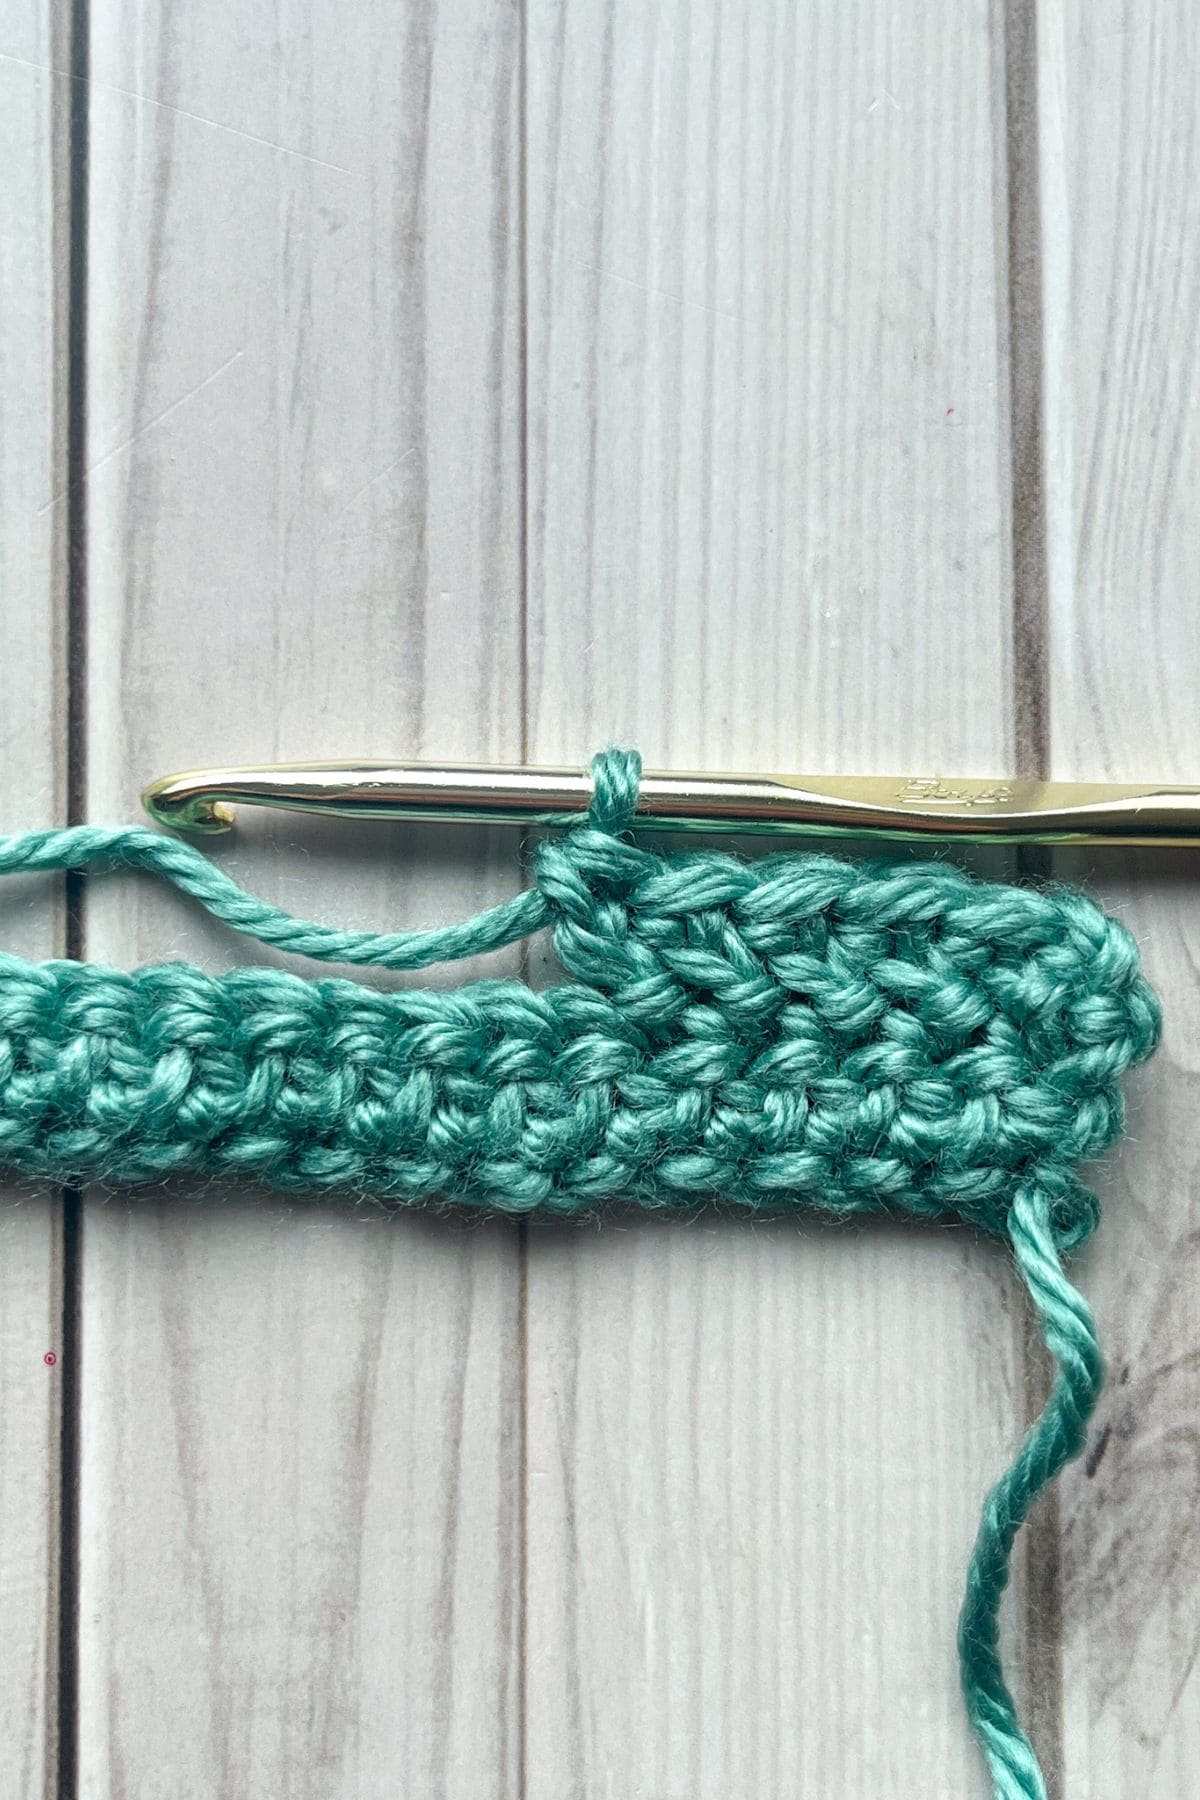
Repeat row 2 for as long as you want your project.
That’s it for the Double Crochet Herringbone Stitch—a simple yet stunning way to add texture and elegance to your crochet projects!
Now that you've mastered this beautiful stitch, why not keep the creative momentum going? Check out my other crochet tutorials, like the Cross Treble Crochet Stitch for an intricate, textured pattern, the Larksfoot Crochet Stitch for a modern and stylish look, or the Crochet Garter Stitch for a cozy, woven feel.
There’s always a new stitch to explore, so keep experimenting and have fun with your crochet journey! Happy stitching!

🐌Expert Tips
- Consistent Tension: One of the keys to getting a clean, smooth fabric with the Double Crochet Herringbone Stitch is keeping your tension consistent. This stitch involves a bit more yarn manipulation than regular double crochet, so be mindful of how tight or loose you pull your loops. Too tight, and it could be difficult to work; too loose, and your stitches may lose their definition.
- Use a Larger Hook: To keep the stitches from becoming too tight and to allow for smoother movement, try using a hook that’s one size larger than what you would normally use for double crochet. This can help maintain a more relaxed feel and prevent the fabric from becoming stiff.
- Don't Skip the Slip Stitch: When you’re working this stitch, remember that the Double Crochet Herringbone Stitch requires a slip stitch to complete each stitch. This gives it that signature slanted, woven texture. If you skip the slip stitch, the pattern won’t have the same look or structure.
- Keep Your Foundation Row Loose: When starting, make sure your foundation chain and the first few stitches are not too tight. If the base is too tight, it can make the first few rows tricky to work into and can result in an uneven edge.
🧵Pattern FAQs
The Double Crochet Herringbone Stitch is a variation of the classic double crochet but with a twist! It creates a more textured, slanted fabric by adding a slip stitch between the yarn overs, giving it a distinctive woven look. Regular double crochet, on the other hand, is taller and creates a more open, less textured fabric.
Yes! The Double Crochet Herringbone Stitch works well for a variety of projects, from cozy blankets and scarves to sweaters and cardigans. The stitch adds texture and structure, making it perfect for any project that benefits from a bit of visual interest.
Not at all! If you're comfortable with double crochet, you’ll find the Herringbone Double Crochet easy to pick up. It might take a few tries to get used to the slip stitch part, but once you get the hang of it, it’s a smooth and satisfying stitch to work.

🧶More Crochet Stitch Patterns

If you tried this Herringbone Double Crochet Stitch (or any other pattern on my website), please let me know how it went in the 📝 comments below. I'd love to hear from you!

Herringbone Double Crochet Stitch
Materials
- yarn of your choice
- 5 mm Hook
- Tapestry needle
Abbreviations (US terms)
- Chains - ch
- Herringbone Double Crochet (hbdc)
Notes
- Slanted Look: This stitch creates a unique slanted effect, so your fabric will have a beautiful, diagonal texture. It’s perfect for adding visual interest to your projects!
- Tension Matters: Since the stitch requires a little more yarn manipulation than the standard double crochet, be mindful of your tension. Try to keep it consistent throughout to avoid uneven rows.
- Slip-Stitch Transition: Each Herringbone crochet stitch involves a slip stitch, which may feel a little different at first. But once you get used to it, the flow of the stitch becomes easy and fun!
Instructions
- For this double crochet herringbone stitch pattern, we will be working in rows.
- Chain as long as you want your project to be.
- Row 1: Starting in the 3rd chain from the hook, make a *hbdc.
- To make a double crochet herringbone stitch: Yarn over, insert your hook into the chain, yarn over and pull up a loop like you normally would if you were making a normal double crochet. Then, this is where the stitch differs from a double crochet stitch. After pulling up a loop and you now have 3 loops on your hook, pull directly through the first loop on the hook like you would a slip stitch. Then yarn over and pull through only 1 loop. After, yarn over and pull through the remaining 2 loops on your hook.
- Repeat * for the rest of the row. Ch x2 and turn.
- Row 2: Starting in the first stitch, make a hbdc. Repeat for the rest of the row, then ch x2 and turn.
- Repeat row 2 for as long as you want your project.
- That’s it for the Herringbone Double Crochet Stitch—a simple yet stunning way to add texture and elegance to your crochet projects!


Leave a Reply