
For those who love to read and are fascinated by fungi, look no further than my crochet mushroom bookmark pattern to bring both your favorite things together. Whimsical and practicality never looked better.

As someone who loves to take long walks in nature, I’m constantly captivated by the variety of mushrooms that peek through the forest floor. Their vibrant colors and unique shapes inspire my creativity, leading me to craft a delightful crochet mushroom bookmark pattern.
The crochet mushroom bookmark pattern is perfect for anyone who shares a love for these charming fungi and wants to add a touch of whimsy to their reading experience.
Using embroidery thread for this bookmark is a fantastic choice because it’s lightweight and not too thick, ensuring that your book closes easily without any awkward bulges. The fine thread allows for detailed crochet mushroom bookmark designs, making it perfect for this crochet miniature pattern.
With a 2.00mm crochet hook, you can create adorable mini crochet mushrooms that are both functional and decorative.
So grab your materials, and let’s get started on this fun crochet mushroom bookmark pattern!
Jump to:
✏️ Things To Note:
- Yarn Choice: I use embroidery thread for the crochet mushroom bookmark pattern, but lace weight yarn works well too. I don't recommend using worsted weight yarn if you plan to make a bookmark, as it will make it difficult for the book to close. If you do use worsted weight, consider making a crochet mushroom keychain instead.
- Customizable Ends: While the end of the crochet bookmark features leaves, you can customize it with other designs—another mushroom, or even a small tag, like I do for my crochet tea bag bookmarks.
- Finished Size: The crochet mushroom measures roughly half an inch tall, not including the length of the bookmark.
💭Abbreviations to Remember (US terms)
- Magic ring - mr
- Single crochet - sc
- Half double crochet - hdc
- Double crochet - dc
- Triple crochet - tr
- Increase - inc
- Decrease - dec
- Slip stitch - sl st
* If you see a stitch abbreviation with "x" after it, it means how many times you do that stitch in the following amount of stitches. For example: sc x6 would mean you make a single crochet in the next 6 stitches. Inc x2 means you make an inc in the next 2 stitches.
🧋Variations
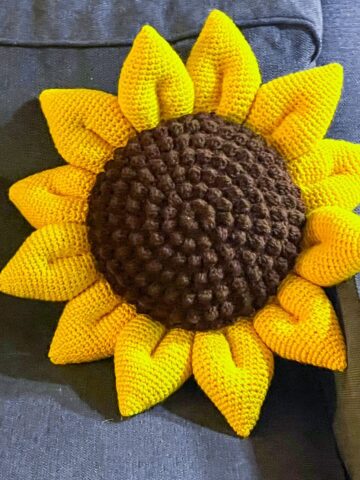
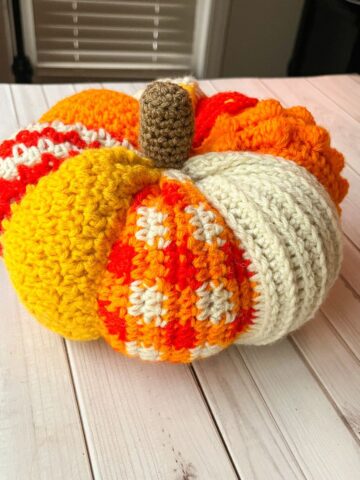
- Color Combinations: Experiment with different colors for the mushroom cap and stem. Consider earthy tones or vibrant hues for a whimsical effect. You can crochet a pumpkin or acorn instead of a mushroom from my crochet fall garland pattern.
- Accessory Add-Ons: Attach beads, charms, or small flowers to the bookmark for added flair and decoration.
🍵Instructions for Crochet Mushroom Bookmark Pattern
Mini Crochet Mushroom:
The crochet mushroom bookmark pattern is made in the round for the most part.

Round 1: With the red thread, make a mr and scx6 inside of it. Pull the mr tight and slip stitch to the first stitch in the mr to complete the circle (6).
Round 2: Inc in every stitch (12).
Round 3: Inc, and then sc. Repeat for the rest of the round (18).
Round 4: Inc, and then sc x2. Repeat for the rest of the round (24).
Round 5: Sc in every stitch (24). Fasten off the red thread and switch to white.

Round 6: With the white thread, dec and then sc. Repeat for the rest of the round (16).
Round 7: Dec in every stitch (8). Add polyfill, but do not over stuff the cap.

Round 8-10: Sc in every stitch (8). After the last round fasten off the thread but leave a very long tail for embroidery work. Add more polyfill to the base.
Finishing the Mushroom:

Using the thread and needle, thread through the center of the mushroom cap and pull tight. Then, secure the thread back to the top by threading it through nearby stitches in round 1.
Next, pull the thread down through the bottom of the mushroom stem and secure it there. Reinsert the needle into the stem and pull it through the second round of white thread near the middle of the mushroom (the first round of 8 stitches). Weave your thread in and out of the stitches in that round, pulling tight to define the mushroom stem further. Again, secure the thread.
Now you can use your thread and needle to embroider the white spots on top of the mushroom. Once you're finished, secure your thread and fasten off any leftover ends.
Crochet Bookmark:


Now that the mushroom has been completed, attach the green yarn to the bottom of the mushroom, then ch x75 or until you get the length of the bookmark you want.
Once you like the length of the crochet bookmark, make the leaves.
Crochet Leaves:
Step 1: Ch x9
Step 2: Starting in the second chain from the hook make the following sequence of stitches, 1 stitch per chain:
Sc, hdc, dc, tr, tr, dc, hdc, sc.
Once you get to the end of the chain, ch x1 and turn to the other side of the chain.
Step 3: Do not work in the turning chain. Instead skip it and make the following sequence of stitches.
Sc, hdc, dc, tr, tr, dc, hdc, sc.
Fasten off the thread and weave in the ends.
And now you have a finished crochet mushroom bookmark! If you are looking to make any other crochet mushroom projects, check out my crochet mushroom coaster pattern, perfect for using when reading and sipping tea on those cold fall days!
If you have any red yarn leftover, you can also make my crochet heart keychain, crochet tulip keychain, or crochet strawberry keychain and turn them into bookmarks by making the object and adding a chain to be the bookmark and adding something else to the other end of the bookmark - whether it be leaves, another heart or strawberry or even beads!

🐌Expert Tips
- Select the Right Hook Size: Match your crochet hook size to the yarn weight. A smaller hook can create tighter stitches, which is ideal for a sturdy bookmark.
- Maintain Consistent Tension: Keep your tension even throughout the project to ensure a uniform look. If you notice any tight or loose spots, adjust your grip.
- Personalize Your Design: Feel free to experiment with different colors, sizes, and patterns to make your mushroom bookmark uniquely yours.
🧵Pattern FAQs
A standard bookmark length is typically around 6 to 8 inches, but you can adjust this based on personal preference. Make it longer for larger books or shorter for smaller ones.
Absolutely! Experimenting with different stitches can add texture and visual interest to your bookmark. Just keep in mind that some stitches may make the bookmark thicker.
If your bookmark is too thick, consider using a smaller hook size or lighter yarn. Alternatively, you can adjust your tension to create a looser gauge.

🧶More Crochet Fall Patterns


If you tried this Crochet Mushroom Bookmark Pattern (or any other pattern on my website), please let me know how it went in the 📝 comments below. I'd love to hear from you!

Crochet Mushroom Bookmark Pattern
Materials
Abbreviations (US terms)
- Magic ring - mr
- Single crochet - sc
- Half double crochet - hdc
- Double crochet - dc
- Triple crochet - tr
- Increase - inc
- Decrease - dec
- Slip stitch - sl st
Notes
- I use embroidery thread for this project, you can use lace weight yarn too. I highly suggest not using worsted if you were wanting to make a bookmark since it will make it hard for the book to close. If you do make a worsted weight mushroom, make it a crochet mushroom keychain instead.
- While the little end of the crochet bookmark are leaves, you can crochet anything for the other end - another mushroom, or even a small little tag like I do for my crochet tea bag bookmarks.
- The finished size of the mushroom is roughly half an inch tall, not including the length of the bookmark.
Instructions
Mini Crochet Mushroom Pattern:
- The crochet bookmark pattern is made in the round for the most part.
- Round 1: With the red thread, make a mr and scx6 inside of it. Pull the mr tight and slip stitch to the first stitch in the mr to complete the circle (6).
- Round 2: Inc in every stitch (12).
- Round 3: Inc, and then sc. Repeat for the rest of the round (18).
- Round 4: Inc, and then sc x2. Repeat for the rest of the round (24).
- Round 5: Sc in every stitch (24). Fasten off the red thread and switch to white.
- Round 6: With the white thread, dec and then sc. Repeat for the rest of the round (16).
- Round 7: Dec in every stitch (8). Add polyfill, but do not over stuff the cap.
- Round 8-10: Sc in every stitch (8). After the last round fasten off the thread but leave a very long tail for embroidery work. Add more polyfill to the base.
Finishing the Mushroom:
- Using the thread and needle, thread through the center of the mushroom cap and pull tight. Then, secure the thread back to the top by threading it through nearby stitches in round 1.
- Next, pull the thread down through the bottom of the mushroom stem and secure it there. Reinsert the needle into the stem and pull it through the second round of white thread near the middle of the mushroom (the first round of 8 stitches). Weave your thread in and out of the stitches in that round, pulling tight to define the mushroom stem further. Again, secure the thread.
- Now you can use your thread and needle to embroider the white spots on top of the mushroom. Once you're finished, secure your thread and fasten off any leftover ends.
Crochet Bookmark:
- Now that the mushroom has been completed, attach the green yarn to the bottom of the mushroom, then ch x75 or until you get the length of the bookmark you want.
- Once you like the length of the crochet bookmark, make the leaves.
Crochet Leaves:
- Step 1: Ch x9
- Step 2: Starting in the second chain from the hook make the following sequence of stitches, 1 stitch per chain:
- Sc, hdc, dc, tr, tr, dc, hdc, sc.
- Once you get to the end of the chain, ch x1 and turn to the other side of the chain.
- Step 3: Do not work in the turning chain. Instead skip it and make the following sequence of stitches.
- Sc, hdc, dc, tr, tr, dc, hdc, sc.
- Fasten off the thread and weave in the ends.


Leave a Reply