
Bring fall into your home with my Crochet Mushroom Coaster Pattern. Perfect for the autumnal season as well as those who like to imagine they are living amongst the fairies and gnomes.

As the leaves turn and the air gets crisp, it’s the perfect time to add a touch of seasonal charm to your home with a delightful mushroom coaster.
On my walks foraging for chanterelles this time of year, I always happen to see so many different mushrooms growing but one of my favorites to look at are the amanita muscaria mushrooms - not edible but pretty to look at.
Not only does this cute coaster bring a whimsical flair to your coffee table, but it also makes for a fantastic crochet fall coaster that captures the essence of the autumn season and cottage-core vibes.
But the fun doesn’t stop there! By crocheting two coasters together, you can easily transform your creation into a charming crochet mushroom pouch—a unique crochet bag charm that’s perfect for carrying small treasures or simply adding a playful touch to your bag.
Whether you’re looking for cozy decor or a fun accessory, this project is a fantastic way to explore various crochet coaster patterns. So, grab your yarn, and let’s get started on this cozy crochet mushroom coaster pattern.
Jump to:
✏️ Things To Note:
- Yarn Selection: I chose cotton yarn for this crochet mushroom coaster patternbecause it’s heat resistant and absorbent, making it ideal for a crochet mushroom coaster. I recommend sticking with cotton, as acrylic yarn isn’t absorbent and is better suited for projects like a crochet mushroom pouch or applique.
- Material for Circles: For the circles, I used felt, which provides a flat, water-absorbent surface. It’s important for coasters to be flat to support cups or mugs without tipping. Crochet circles can sometimes create an uneven texture, leading to wobbly cups.
- Coaster Size: The finished crochet mushroom coaster measures about 4 inches in diameter, making it perfect for both large and small mugs!
💭Abbreviations to Remember (US terms)
- Chain - ch
- Single crochet - sc
- Increase - inc
- Decrease - dec
- Slip Stitch - sl st
* The ch x1 at the end of each row does not count as a stitch in the row, it is a turning chain.
* If you see a stitch abbreviation with "x" after it, it means how many times you do that stitch in the following amount of stitches. For example: sc x6 would mean you make a single crochet in the next 6 stitches. Inc x2 means you make an inc in the next 2 stitches.
🧋Variations
- Themed Sets: Make a set of coasters featuring various mushroom types or other fall-themed designs, like leaves or crochet pumpkin coasters, for a cohesive look.
- Functional Features: For a fun twist, consider adding a pocket or loop to one side, allowing you to transform the coaster into a crochet mushroom pouch for small items. Many of my crochet coaster designs can be made into crochet pouches, in fact I have been tagged in many social media posts of people turning my crochet frog coasters and capybara coasters into pouches!
- Embellishments: Add decorative elements like tiny crochet flowers, leaves, or even beads to enhance the design and make it more unique.
🍵Instructions for Crochet Mushroom Coaster Pattern
The crochet mushroom coaster pattern is made in rows.

Row 1: With the red yarn, ch x7.
Row 2: In the second ch from the hook make a sc. Continue making sc for the rest of the row (6).
Row 3: Inc, sc x4, inc. Then ch x1 and turn (8).
Row 4: Inc, sc x6, inc. Then ch x1 and turn (10).
Row 5: Sc in every stitch. Then ch x1 and turn (10).
Row 6: Inc, sc x8, inc. Then ch x1 and turn (12).
Row 7: Sc in every stitch. Then ch x1 and turn (12).
Row 8: Inc, sc x10, inc. Then ch x1 and turn (14).
Row 9-11: Sc in every stitch. Then ch x1 and turn (14).
Row 12: Dec, sc x10, dec. Then ch x1 and turn (12).

Now we want to crochet around the edge of the top of the mushroom. You want to crochet around the raw edges of the mushroom and top of the mushroom.
The guide is to crochet 1 sc per row that we made and 1 in every stitch at the top. Once you reach the bottom edge of the mushroom, fasten off and weave in any ends.

Row 13: Skip 1 stitch on the bottom of the mushroom cap and join the white yarn. Sc x10 and then ch x1. (10)
Row 14-16: Sc x10 and then ch x1. At the end of the last row fasten off and weave in any ends.
Rejoin the white yarn in one of the corners of the first white row that we made. Now sc around the edge of the white part, make 2 sc stitches in the corners.
Finishing:

Your crochet mushroom base is now complete!
You have a couple of options:
You can crochet three small circles and one slightly larger circle and sew them onto the mushroom. This is an option if making it an applique or a charm pouch.
Alternatively, you can turn it into a functional coaster by cutting out felt circles—three that are about half an inch wide and one that’s an inch wide. Once you have the felt pieces, simply hot glue them onto the front of your coaster in your desired arrangement.
And now your crochet mushroom coaster is complete! I hope you enjoyed making my crochet mushroom coaster pattern!
If you have any leftover red and white cotton yarn, you can make my crochet apple coasters or my crochet peppermint coasters since they both use red and white cotton.
If you want to make more mushroom themed projects, check out my crochet mushroom bookmark pattern and my crochet mushroom keychain pattern!

🐌Expert Tips
- Flat Base: Keep the base of your coaster flat by using even stitches. This helps prevent wobbling when placing mugs or cups on it.
- Stitch Consistency: Maintain consistent tension in your stitches for a neat and uniform look. If you notice tight or loose stitches, adjust your grip accordingly.
- Finish Edges Neatly: Use a slip stitch or a decorative edging to finish the edges of your coaster, giving it a polished look.
- Blocking: After completing your coaster, consider blocking it to ensure it lays flat. This can help even out any uneven edges.
🧵Pattern FAQs
Cotton yarn is the best choice for crochet coasters because it is absorbent and heat-resistant. It helps prevent moisture damage and can withstand hot mugs without warping. While acrylic yarn is versatile, it isn't absorbent, so it's not ideal for coasters unless you're making them for decorative purposes.
To prevent curling, make sure you're using even tension in your stitches and that your foundation chain is not too tight. Additionally, consider using a slightly larger hook to create a looser gauge, which can help keep the coaster flat. Blocking the finished coaster can also help it lay flat.
Yes, you can wash crochet coasters, especially if they are made from cotton yarn. Hand wash them gently in cold water with mild soap, then lay them flat to dry. Avoid wringing or twisting them, as this can distort their shape. If using embellishments, check their washability as well.

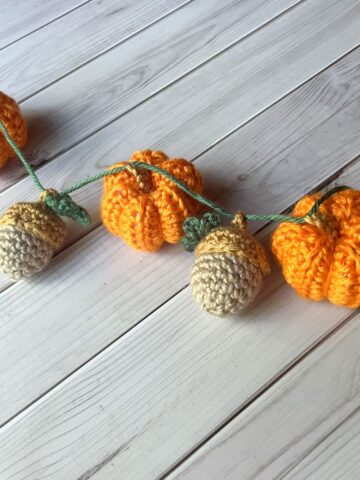
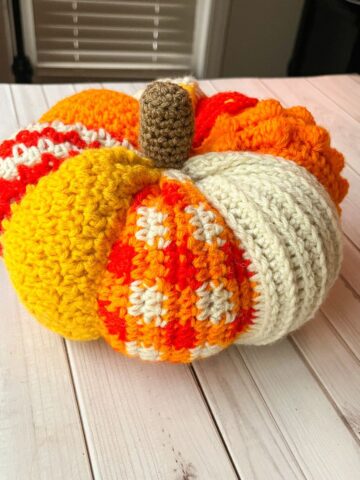
🧶More Crochet Fall Patterns

If you tried this Crochet Mushroom Coaster Pattern (or any other pattern on my website), please let me know how it went in the 📝 comments below. I'd love to hear from you!

Crochet Mushroom Coaster Pattern
Materials
Abbreviations (US terms)
- Chain - ch
- Single crochet - sc
- Increase - inc
- Decrease - dec
- Slip stitch - sl st
Notes
- I chose cotton yarn for this coaster because it’s heat resistant and absorbent, making it an ideal choice for a crochet mushroom coaster. I recommend sticking with cotton, as acrylic yarn isn’t absorbent—best reserved for projects like a crochet mushroom pouch or an applique.
- For the circles, I used felt since it provides a flat, water-absorbent surface. It’s important for coasters to be flat to support cups or mugs without tipping. Crochet circles can create an uneven texture, leading to wobbly cups.
- The finished coaster measures about 4 inches in diameter, making it perfect for both large and small mugs!
Instructions
- The crochet mushroom coaster pattern is made in rows.
- Row 1: With the red yarn, ch x7.
- Row 2: In the second ch from the hook make a sc. Continue making sc for the rest of the row (6).
- Row 3: Inc, sc x4, inc. Then ch x1 and turn (8).
- Row 4: Inc, sc x6, inc. Then ch x1 and turn (10).
- Row 5: Sc in every stitch. Then ch x1 and turn (10).
- Row 6: Inc, sc x8, inc. Then ch x1 and turn (12).
- Row 7: Sc in every stitch. Then ch x1 and turn (12).
- Row 8: Inc, sc x10, inc. Then ch x1 and turn (14).
- Row 9-11: Sc in every stitch. Then ch x1 and turn (14).
- Row 12: Dec, sc x10, dec. Then ch x1 and turn (12).
- Now we want to crochet around the edge of the top of the mushroom. You want to crochet around the raw edges of the mushroom and top of the mushroom. The guide is to crochet 1 sc per row that we made and 1 in every stitch at the top. Once you reach the bottom edge of the mushroom, fasten off and weave in any ends.
- Row 13: Skip 1 stitch on the bottom of the mushroom cap and join the white yarn. Sc x10 and then ch x1. (10)
- Row 14-16: Sc x10 and then ch x1. At the end of the last row fasten off and weave in any ends.
- Rejoin the white yarn in one of the corners of the first white row that we made. Now sc around the edge of the white part, make 2 sc stitches in the corners.
- Your crochet mushroom base is now complete!
- You have a couple of options:
- You can crochet three small circles and one slightly larger circle and sew them onto the mushroom. This is an option if making it an applique or a charm pouch.
- Alternatively, you can turn it into a functional coaster by cutting out felt circles—three that are about half an inch wide and one that’s an inch wide. Once you have the felt pieces, simply hot glue them onto the front of your coaster in your desired arrangement.
- And now your crochet mushroom coaster is complete! I hope you enjoyed making my crochet mushroom coaster pattern!


Leave a Reply