

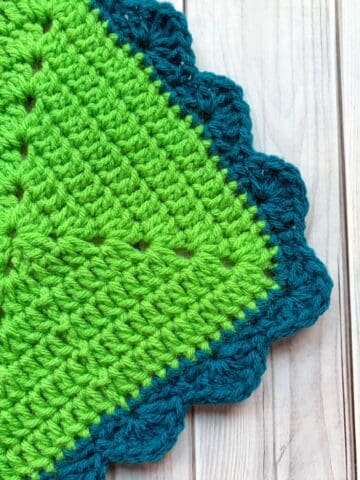
The Crochet Wave Border Pattern is a lovely crochet edge that is perfect for any blanket. The result will give your projects a unique finish that will have people mesmerized.

The Crochet Wave Border Pattern is a beautiful and versatile edging technique that adds a unique touch to any blanket. With its flowing, wave-like design, this border creates an eye-catching finish that is sure to leave a lasting impression. Whether you’re working on a cozy baby blanket or a vibrant crochet sunflower granny square blanket, this border can elevate the look of your project.
The technique behind the Crochet Wave Border is simple yet effective, following a “2 steps forward, 1 step back” approach. This method results in graceful waves that are both subtle and striking. While it may take a little practice to perfect the pattern, the effort is truly worthwhile, offering a polished and professional look to your finished piece.
What makes the Crochet Wave Border so appealing is its versatility. It works wonderfully for all types of blankets, including gender-neutral options like baby boy blankets. The waves add just the right amount of texture without being too frilly or feminine like how the crochet ruffle border can sometimes be, making it a great choice for both masculine and neutral projects. The crochet picot stitch pattern or crochet bobble stitch border are also a great neutral border pattern.
If you’re looking for a way to finish your blanket with a bit of flair and style, this unique crochet border pattern is the perfect solution. It’s simple enough for beginners but has enough charm to impress seasoned crocheters as well.
So grab your yarn and hook, and let’s dive into this stunning crochet technique! I promise you won't be disappointed with this border!
Jump to:
✏️ Things To Note:
- Yarn Choice: For this crochet swatch, I used acrylic worsted weight yarn, but feel free to experiment with any yarn type you prefer. The design is adaptable, so you can choose a yarn that suits your project’s needs and texture.
- Stitch Variation: The crochet wave border pattern is created using double crochet stitches, which give it a gentle, flowing effect. However, if you want a more dramatic wave, you can try using triple crochet stitches for a more pronounced look. This allows for some creativity and customization to achieve the desired effect for your border.
- Beginner-Friendly Design: This crochet wave edge pattern is perfect for beginners, as it’s constructed using simple chains and double crochets. These are fundamental stitches in crochet, making the pattern easy to learn and follow. Even if you're new to crochet, you’ll quickly get the hang of it and be able to complete the border with ease. The simplicity of the stitches combined with the beautiful wave effect makes it a great project for those just starting out while still offering a charming and polished finish for experienced crafters.
🪡 Materials Needed
- Yarn for the border
- Tapestry needle
- 5mm hook or whatever size hook you were using for your project.
💭Abbreviations to Remember (US terms)
- Slip stitch - sl st
- Double crochet - dc
- Chains - ch
🍵Instructions for Crochet Wave Border Pattern
This is 2 steps forward 1 step back type of edging.

Step 1: Join the color yarn you want for the border to the edge in any stitch. Then ch x3.

Step 2: Going BACKWARDS, skip 2 and then sl st into the 3rd stitch.

Step 3: Ch x3.

Step 4: Then dc x6 in the chain space you just created going FORWARD.

Step 5: Then counting FORWARDS skip 2 and sl st into the 3rd stitch. You now created the first wave in the border.

Repeat steps 1-5 until you reach the end of the row. NOTE: when you go backwards, you want to go BEHIND the previous wave, not in front of it to make the next wave stitch.


I hope you enjoyed learning how to create this beautiful Crochet Wave Border! It’s such a charming and versatile edging that can truly elevate any blanket or project you’re working on.
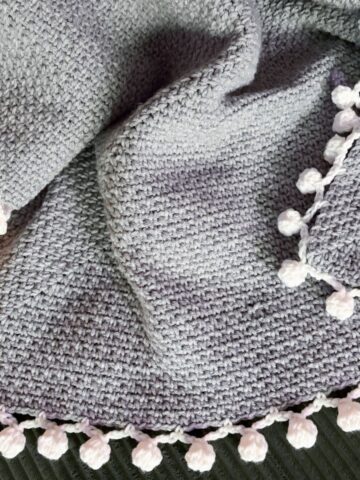
If you loved this crochet wave edge pattern and are looking for more unique ways to add personality and flair to your crochet projects, be sure to check out my other crochet border patterns! I have a Crochet Pom Pom Border that I use for my crochet daisy blanket pattern and my crochet snowflake scarf pattern!
If you are looking for all my crochet border patterns in one place, check out Crochet Borders for Blankets round up post!

🐌Expert Tips
- Smooth Wave Formation: When going backwards, ensure you sl st in the same stitch where you anchored your previous wave. This helps maintain smooth, even waves.
- Adjusting Wave Size: If you want larger or smaller waves, experiment with the number of double crochets. Adding more double crochets will make the waves bigger, while using fewer will create smaller, subtler waves.
- Consistent Tension: Make sure your chain stitches have consistent tension. Uneven chains can cause the waves to look irregular or loose.
🧵Pattern FAQs
Yes! You can swap the double crochets for triple crochets if you want larger, more dramatic waves, you just may want to increase the amount of stitches you do per wave. Instead of doing 6 double crochets, you might want to do 8-9 for triple crochets.
After you finish each wave (ch 3, secure the loop to the last wave), switch colors. Then, ch 3 and dc 6 in the new color for the next wave. Repeat as desired for a multicolored effect. Otherwise, you can try planned pooling with variegated yarn.
Absolutely! Chunky yarn works great for this border and will create bold, pronounced waves. Just make sure it is the same yarn type as your main project. You don't want to use worsted weight yarn for the main part of the project and chunky yarn for the edge.

🧶More Crochet Border Patterns

If you tried this Crochet Wave Border Pattern (or any other pattern on my website), please let me know how it went in the 📝 comments below. I'd love to hear from you!

Crochet Wave Border Pattern
Materials
- Yarn for the border
- Tapestry needle
- 5mm crochet hook (or same size hook you were using for your project)
Abbreviations (US terms)
- ch = Chain
- dc = Double Crochet
- sl st = Slip Stitch
Notes
-
- Yarn Choice: For this crochet swatch, I used acrylic worsted weight yarn, but feel free to experiment with any yarn type you prefer. The design is adaptable, so you can choose a yarn that suits your project’s needs and texture.
- Stitch Variation: The crochet wave border is created using double crochet stitches, which give it a gentle, flowing effect. However, if you want a more dramatic wave, you can try using triple crochet stitches for a more pronounced look.
- Beginner-Friendly Design: This crochet wave edge pattern is perfect for beginners, as it’s constructed using simple chains and double crochets.
Instructions
- This is a 2 steps forward 1 step back type of edging.
- Step 1: Join the color yarn you want for the border to the edge in any stitch. Then ch x3.
- Step 2: Going BACKWARDS, skip 2 and sl st into the 3rd stitch.
- Step 3: Ch x3.
- Step 4: Dc x6 in the chain space you just created going FORWARD.
- Step 5: Then counting FORWARDS skip 2 and sl st into the 3rd stitch. You now created the first wave in the border.
- Repeat steps 1-5 until you reach the end of the row. NOTE: when you go backwards, you want to go BEHIND the previous wave, not in front of it to make the next wave stitch.
- When you are finished, fasten off and weave in the end.


Leave a Reply