

Strawberries create a lovely aesthetic. So why not make a giant crochet strawberry pillow to cuddle up to using my Crochet Strawberry Pillow Pattern! The pattern works up quickly so you can enjoy your strawberry pillow in no time.

Strawberries are everywhere right now. They have become a significant part of mainstream style, no longer only associated with thoughts of summer but also with cottagecore, fairycore, and other simpler aesthetics inspired by nature and food.
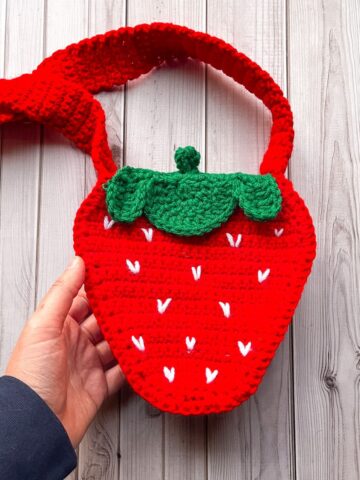
I personally love strawberries; they are my favorite food! If I could, I would decorate everything with them. Last year, I even made a crochet strawberry bag that I could use throughout the year to hold my phone and wallet.
With Valentine's Day, spring, and summer approaching, I decided to create more strawberry patterns, starting with this crochet strawberry pillow pattern and my crochet strawberry cardigan pattern. It has quickly become one of my favorites, and my child has already claimed the pink one for themselves.
Now let's crochet a strawberry pillow!
Jump to:
✏️ Things To Note:
- Yarn Choice: You can use any type and weight of yarn for this crochet strawberry pillow pattern.
- Stuffing: I use polyfill, but you can use any type of filling you want.
- Double Stranded: You can always double strand the yarn when working on the pillow to achieve a larger-than-life crochet strawberry pillow!
💭Abbreviations to Remember (US terms)
- Magic ring - mr
- Chains - ch
- Single crochet - sc
- Increase - inc
- Decrease - dec
- Half Double Crochet - hdc
- Double Crochet - dc
🧋Variations
You can change the yarn to whatever you like! I double strand my entire project, but if you prefer a smaller project, you can use one strand of yarn and a smaller hook (like a 4.5mm or 5mm).
🍵Instructions for Crochet Strawberry Pillow Pattern
This pattern is made in rounds.

Round 1: Using 2 strands of your main strawberry yarn, make a mr and make sc x6 in the circle. If you find it difficult making a magic ring you can chain 2 and then crochet sc x6 in the second chain from the hook. (6)
Round 2: Inc in every sc. (12)
Round 3: Sc in every stitch. (12)
Round 4: Inc, sc, and then repeat until end of round (18)
Round 5: Sc in every stitch. (18)
Round 6: Inc, sc x2, and then repeat until end of round (24)
Round 7: Sc in every stitch. (24)
Round 8: Inc, sc x3, and then repeat until end of round (30)
Round 9: Sc in every stitch. (30)
Round 10: Inc, sc x4, and then repeat until end of round (36)

Round 11: Sc in every stitch. (36)
Round 12: Inc, sc x5, and then repeat until end of round (42)
Round 13: Sc in every stitch. (42)
Round 14: Inc, sc x6, and then repeat until end of round (48)
Round 15: Sc in every stitch. (48)
Round 16: Inc, sc x7, and then repeat until end of round (54)
Round 17: Sc in every stitch. (54)
Round 18: Inc, sc x8, and then repeat until end of round (60)
Round 19: Inc, sc x9, and then repeat until end of round (66)
Round 20: Inc, sc x10, and then repeat until end of round (72)

Round 21-31: Sc in every stitch. (72)
Round 32: Dec, sc x10, and then repeat until end of round (66)
Round 33: Dec, sc x9, and then repeat until end of round (60)
Round 34: Dec, sc x8, and then repeat until end of round (54)
Round 35: Dec, sc x7, and then repeat until end of round (48)

Round 36: Dec, sc x6, and then repeat until end of round (42)
Round 37: Dec, sc x5, and then repeat until end of round (36)
Round 38: Dec, sc x4, and then repeat until end of round (30)
Round 39: Dec, sc x3, and then repeat until end of round (24)
Round 40: Dec, sc x2, and then repeat until end of round (18)
Round 41: Dec, sc, and then repeat until end of round (12)
Round 42: Dec and then repeat until end of round (6)
Crochet Strawberry Stem and Leaves:
This part of the pattern is made in rounds.

Round 1: Using 2 strands of green yarn, make a magic ring, then sc x6 into the center of it and pull the mr tight. (6)
Round 2: Inc, sc x2 and then repeat once more. (8)
Round 3-5: Sc in every stitch (8)
Round 6: Inc, sc x3 and then repeat once more. (10)

Round 7: (Ch x11. In the second chain from the hook make a sc, then sc x8 for the remainder of the ch.

You should have 1 chain spot left. Make a sc in that chain but also go through the next sc on the stem, the sc that is next to where you started making the chains. This process is similar to a decrease.

Sc in the next stitch available),

then repeat what is in the parentheses for the rest of the round.

Round 8: For this next round you are going to continue around the leaves you just created to make them bigger.
(Dc x4, hdc x2, sc x3, ch x2 on one side of the leaves, then turn and sc x3, hsc x2, dc x4 on the other side of the leaf. After that dec 3 together.)
Repeat what is in the parentheses for the rest of the round.
Finishing:

Sew Leaves to the top of the strawberry.

Embroider seeds onto the strawberry. I used 2 strands to make bigger seeds, but you can do one or two strands.
And now you have a giant crochet strawberry pillow, made from my crochet strawberry pillow pattern!

🐌Expert Tips
- Stuffing: When you're stuffing the strawberry, don't stuff it too hard, or you might cause holes in the berry.
- Color Variations: Feel free to experiment with colors to create unique versions of your strawberry pillow.
- Yarn Substitution: If you want to use a different yarn, make sure to adjust your hook size accordingly for the best results.
🧵Pattern FAQs
Chunky yarn in a single strand is perfect for this pattern.
It will be half the size, roughly 9-10 inches.
You can either use felt and sew or glue them on, or you can crochet them in while you work on the strawberry by carrying the white yarn under the stitches and then switching colors for the seeds.

🧶More Crochet Food Patterns
If you tried this Crochet Strawberry Pillow Pattern (or any other pattern on my website), please let me know how it went in the 📝 comments below. I'd love to hear from you!

Crochet Strawberry Pillow Pattern
Materials
Abbreviations (US terms)
- mr = Magic ring
- ch = Chain
- sc = Single crochet
- inc = Increase
- dec = Decrease
- hdc = Half Double Crochet
- dc = Double Crochet
Notes
Instructions
Crochet Strawberry Pillow:
- This pattern is made in rounds.
- Round 1: Using 2 strands of your main strawberry yarn, make a mr and make sc x6 in the circle. If you find it difficult making a magic ring you can chain 2 and then crochet sc x6 in the second chain from the hook. (6)
- Round 2: Inc in every sc. (12)
- Round 3: Sc in every stitch. (12)
- Round 4: Inc, sc, and then repeat until end of round (18)
- Round 5: Sc in every stitch. (18)
- Round 6: Inc, sc x2, and then repeat until end of round (24)
- Round 7: Sc in every stitch. (24)
- Round 8: Inc, sc x3, and then repeat until end of round (30)
- Round 9: Sc in every stitch. (30)
- Round 10: Inc, sc x4, and then repeat until end of round (36)
- Round 11: Sc in every stitch. (36)
- Round 12: Inc, sc x5, and then repeat until end of round (42)
- Round 13: Sc in every stitch. (42)
- Round 14: Inc, sc x6, and then repeat until end of round (48)
- Round 15: Sc in every stitch. (48)
- Round 16: Inc, sc x7, and then repeat until end of round (54)
- Round 17: Sc in every stitch. (54)
- Round 18: Inc, sc x8, and then repeat until end of round (60)
- Round 19: Inc, sc x9, and then repeat until end of round (66)
- Round 20: Inc, sc x10, and then repeat until end of round (72)
- Round 21-31: Sc in every stitch. (72)
- Round 32: Dec, sc x10, and then repeat until end of round (66)
- Round 33: Dec, sc x9, and then repeat until end of round (60)
- Round 34: Dec, sc x8, and then repeat until end of round (54)
- Round 35: Dec, sc x7, and then repeat until end of round (48)
- Round 36: Dec, sc x6, and then repeat until end of round (42)
- Round 37: Dec, sc x5, and then repeat until end of round (36)
- Round 38: Dec, sc x4, and then repeat until end of round (30)
- Round 39: Dec, sc x3, and then repeat until end of round (24)
- Round 40: Dec, sc x2, and then repeat until end of round (18)
- Round 41: Dec, sc, and then repeat until end of round (12)
- Round 42: Dec and then repeat until end of round (6)
Crochet Stem and Leaves:
- This part of the pattern is made in rounds.
- Round 1: Make a magic ring, then sc x6 into the center of it and pull the mr tight. (6)
- Round 2: Inc, sc x2 and then repeat once more. (8)
- Round 3-5: Sc in every stitch (8)
- Round 6: Inc, sc x3 and then repeat once more. (10)
- Round 7: (Ch x11. In the second chain from the hook make a sc, then sc x8 for the remainder of the ch.
- You should have 1 chain spot left. Make a sc in that chain but also go through the next sc on the stem, the sc that is next to where you started making the chains. This process is similar to a decrease.
- Sc in the next stitch available),
- then repeat what is in the parentheses for the rest of the round.
- Round 8: For this next round you are going to continue around the leaves you just created to make them bigger.
- (Dc x4, hdc x2, sc x3, ch x2 on one side of the leaves, then turn and sc x3, hsc x2, dc x4 on the other side of the leaf. After that dec 3 together.)
- Repeat what is in the parentheses for the rest of the round.
Finishing:
- Sew Leaves to the top of the strawberry.
- Embroider seeds onto the strawberry. I used 2 strands to make bigger seeds, but you can do one or two strands.
- And now you have a giant crochet strawberry pillow, made from my crochet strawberry pillow pattern!



tlc says
I just ordered yarn to try this out! I'm going to double up DK yarn. Will that work ok?
Kimberly Arenas says
It should be fine 🙂 The sizing might end up slightly different.
Sara says
Hi! Can you share how much yarn did this project take? I have only 100g of a thicker chenille yarn and was wondering if I will be able to make the whole strawberry or if I should do some sizing down. Thank you if you'll reply, I really want to make this!
Kimberly Arenas says
For this project I double stranded a thin yarn (causing it to be similar to chenille in yarn weight and texture). So, the amount I used is more than what someone with chenille is using. Roughly 200 yards should be enough to make the strawberry, if you have less than that you may need to size down the pattern.
Tania A says
Thank you so much for this pattern! It was so easy to follow. The pattern is so wonderful! I loved how it came out. I changed the "seeds" a bit but overall it looks great! Thank you so so much!
Kimberly Arenas says
I am glad you liked it 🙂
Rhea says
Very easy to follow and adjust. I did a single strand of yarn and a 4.75mm hook for a smaller pillow. I’m excited to try a double strand next time!
KimberlyArenas says
I'm glad you liked it!