
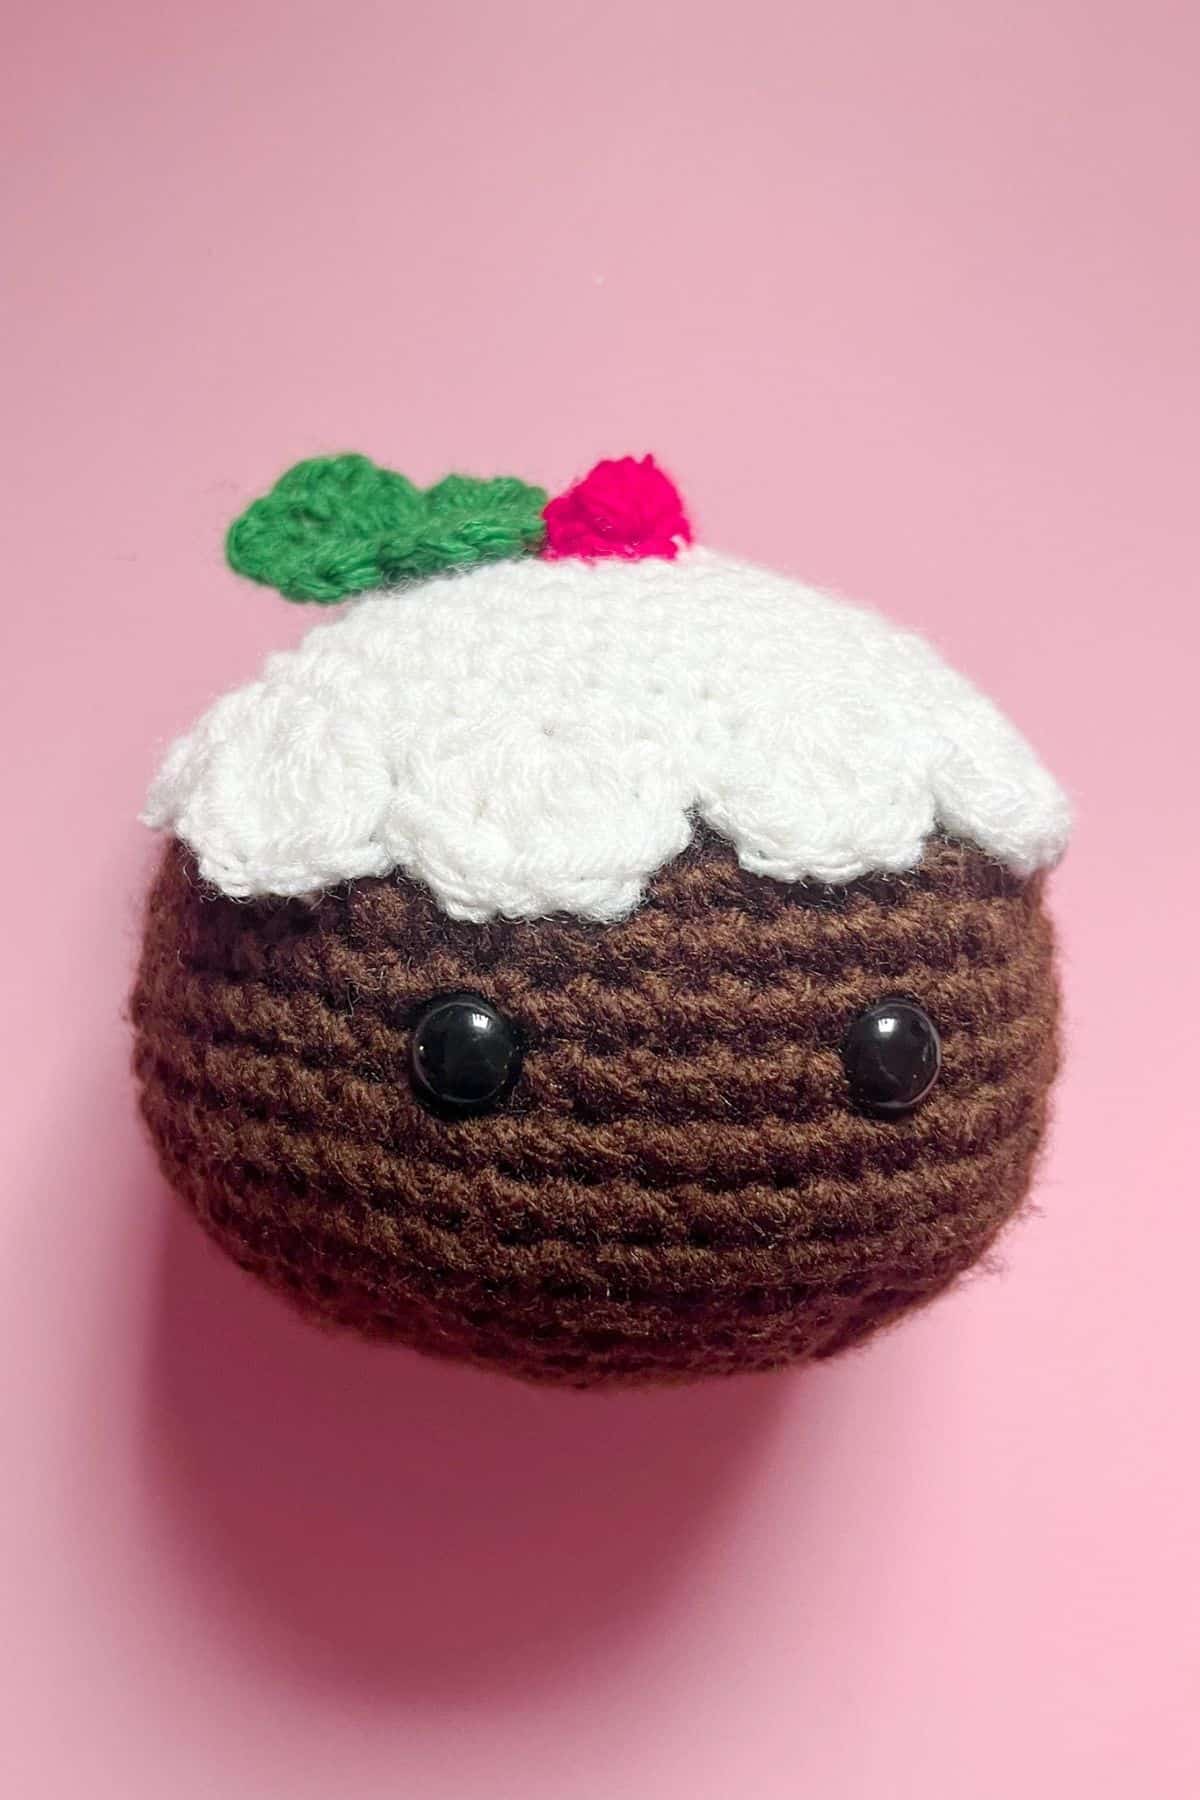
Start the holiday festivities off with my Crochet Christmas Pudding Pattern! Perfect for stocking stuffers, presents, or ornaments.

As someone who lives in the U.S., Christmas puddings were never a significant part of my holiday traditions. Growing up, I rarely saw them sold in shops during the festive season.
It wasn’t until I spent a few years living in Europe that I truly discovered the charm of Christmas puddings. I always thought they looked so adorable and festive!
Now that I’m back in the U.S. and don’t have access to them for enjoying, I realized I could create my own version. Crocheting these delightful treats allows me to have a cute Christmas pudding buddy to enjoy during the holiday season. Another pattern I based on my travels is the crochet lemon bag pattern, it reminds me of Southern Italy and all the fresh citrus available and the pretty blue Mediterranean sea!
If you want to make your own, then let's get started on my crochet Christmas pudding pattern!
Jump to:
✏️ Things To Note:
- Yarn Choice: I used acrylic yarn for this crochet Christmas pudding pattern, but you can also opt for cotton or even chunky yarn if you want to create a Christmas pudding pillow.
- Stitch Simplicity: The base of the crochet Christmas pudding pattern only calls for single crochet (sc). If you can single crochet, you can make this pattern! For the leaf, berries, and icing shells, there are a few special stitches to learn.
- Stitch Tension: My stitches are tight when I single crochet. If you struggle to keep your stitches tight, try yarning under during a sc or move down a hook size for a tighter stitch. While it might take a bit to get used to this method, many amigurumi makers recommend yarning under, I have a few patterns where I yarn under like with my crochet gingerbread man pattern and crochet santa pattern!

🪡 Materials Needed
- 1 partial skein of brown yarn from Red Heart
- 1 partial skein of white yarn from Red Heart
- A small amount of green yarn from Red Heart
- A small amount of red yarn from Red Heart
- Safety eyes
- H hook (5mm)
- Tapestry needle
💭Abbreviations to Remember (US Terms)
- Magic ring (mr)
- single crochet (sc)
- Increase (inc) - 2 stitches in the same stitch
- chains (ch)
- Decrease (dec) - 1 stitch combining 2 stitches
- Double crochet (dc)
- Bobble Stitch - no abbreviations.
🧋Variations
If you’re a fan of those famous chocolate oranges that appear on store shelves during the holiday season, you can modify this pattern into a crochet Christmas pudding chocolate orange cover. Just crochet the Christmas pudding pattern but only go as far as one row of decreases. Test it over the orange before fastening off to ensure it’s long enough to cover it, then add the icing and toppings.
You can also attach a string to the top to turn it into a crochet Christmas pudding ornament.
🍵Instructions for Crochet Christmas Pudding Pattern
For the crochet Christmas pudding pattern, we will mostly be working in rounds.


Round 1: Using brown yarn, make a mr and sc x6 into the circle. If you find it difficult making a magic ring you can chain 2 and then sc x6 into the second chain from the hook (6).
Round 2: Inc in every sc (12).
Round 3: Inc, sc. Then repeat until end of round (18).
Round 4: Inc, sc x2. Then repeat until end of round (24).
Round 5: Inc, sc x3. Then repeat until end of round (30).
Round 6: Inc, sc x4. Then repeat until end of round (36).
Round 7: Inc, sc x5. Then repeat until end of round (42).
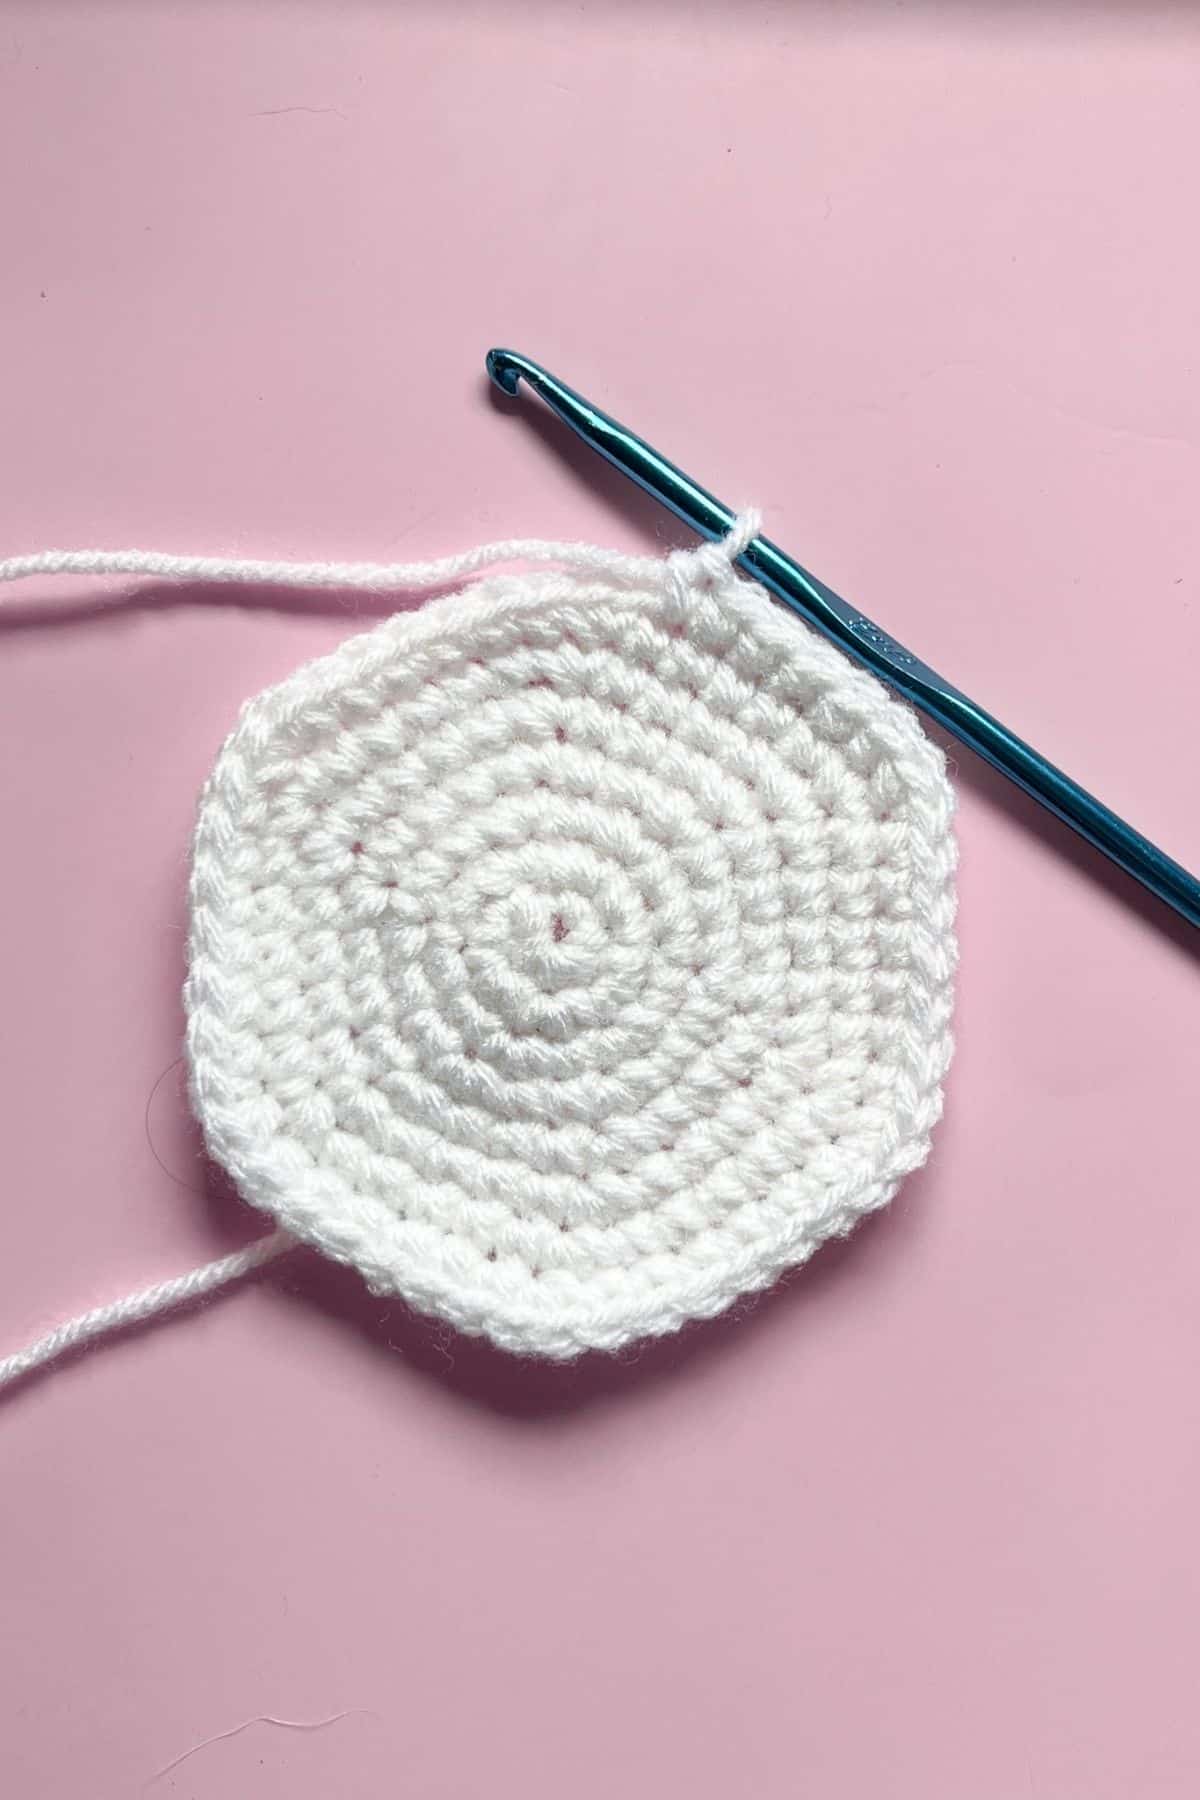
Round 8-9: Sc x42 (42).
Round 10: Inc, sc x6. Then repeat until end of round (48).
Round 11-12: Sc x48 (48).
Round 13: Inc, sc x7. Then repeat until end of round (54).
Round 14-15: Sc x54 (54).


Round 16: Dec, sc x7. Then repeat until end of round (48).
Round 17: Dec, sc x6. Then repeat until end of round (42).
Round 18: Dec, sc x5. Then repeat until end of round (36).
Round 19: Dec, sc x4. Then repeat until end of round (30).
Round 20: Dec, sc x3. Then repeat until end of round (24). Insert eyes between rounds 11 and 12, 7 stitches apart.
Round 21: Dec, sc x2. Then repeat until end of round (18).
Round 22: Dec, sc. Then repeat until end of round (12).
Round 23: Dec and repeat until end of round (6). Fasten off and sew the pudding shut.
Crochet Icing:

Round 1: Using white yarn, make a mr and sc x6 in the circle (6).
Round 2: Inc in every sc (12).
Round 3: Inc, sc. Then repeat until end of round (18).
Round 4: Inc, sc x2. Then repeat until end of round (24).
Round 5: Inc, sc x3. Then repeat until end of round (30).
Round 6: Inc, sc x4. Then repeat until end of round (36).
Round 7: Inc, sc x5. Then repeat until end of round (42).
Round 8: Inc, sc x6. Then repeat until end of round (48).
Round 9: Shell stitch round- Skip a stitch and then make 6 dcs in one stitch. Next skip a stitch and then make a sc. You just made a shell stitch. Repeat for the rest of the round. Fasten off and leave a tail for sewing.
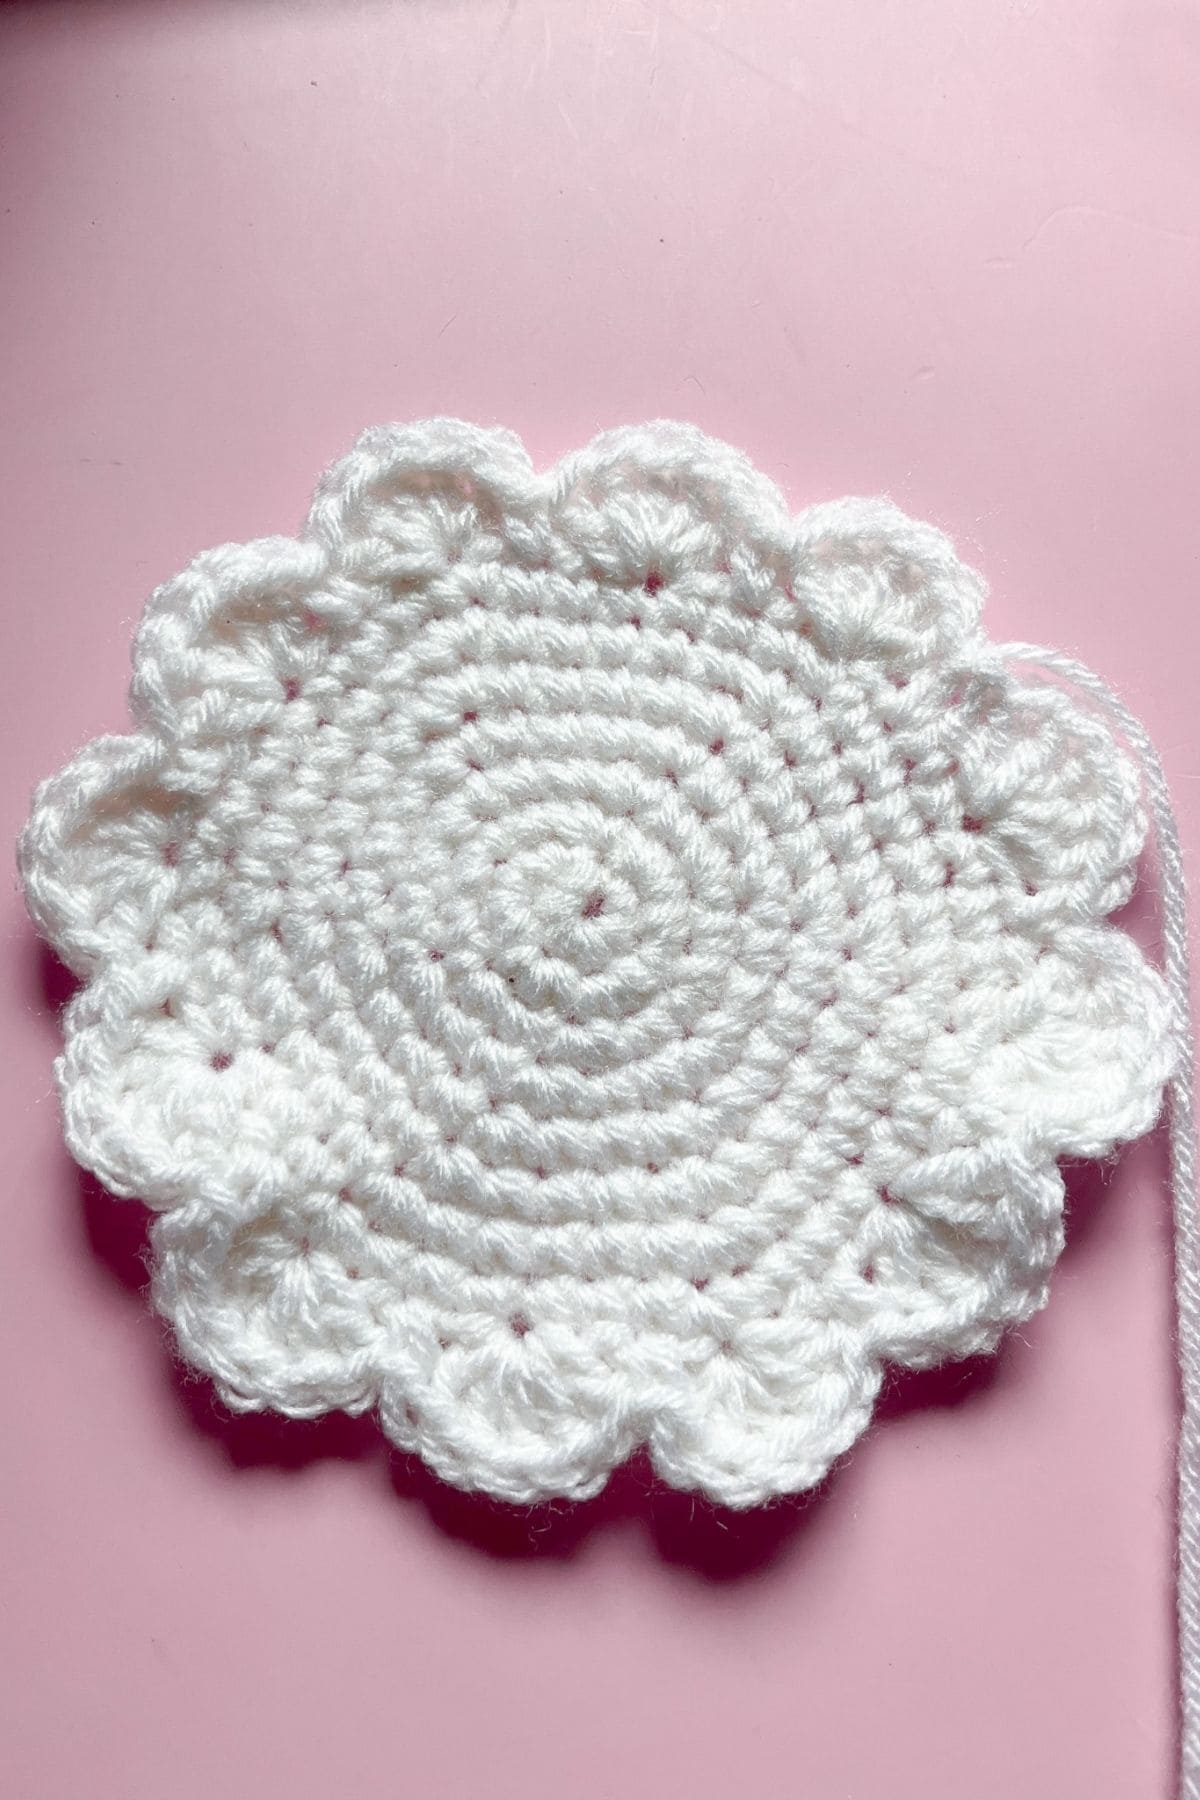
Finished icing.
Crochet Holly and Berries:
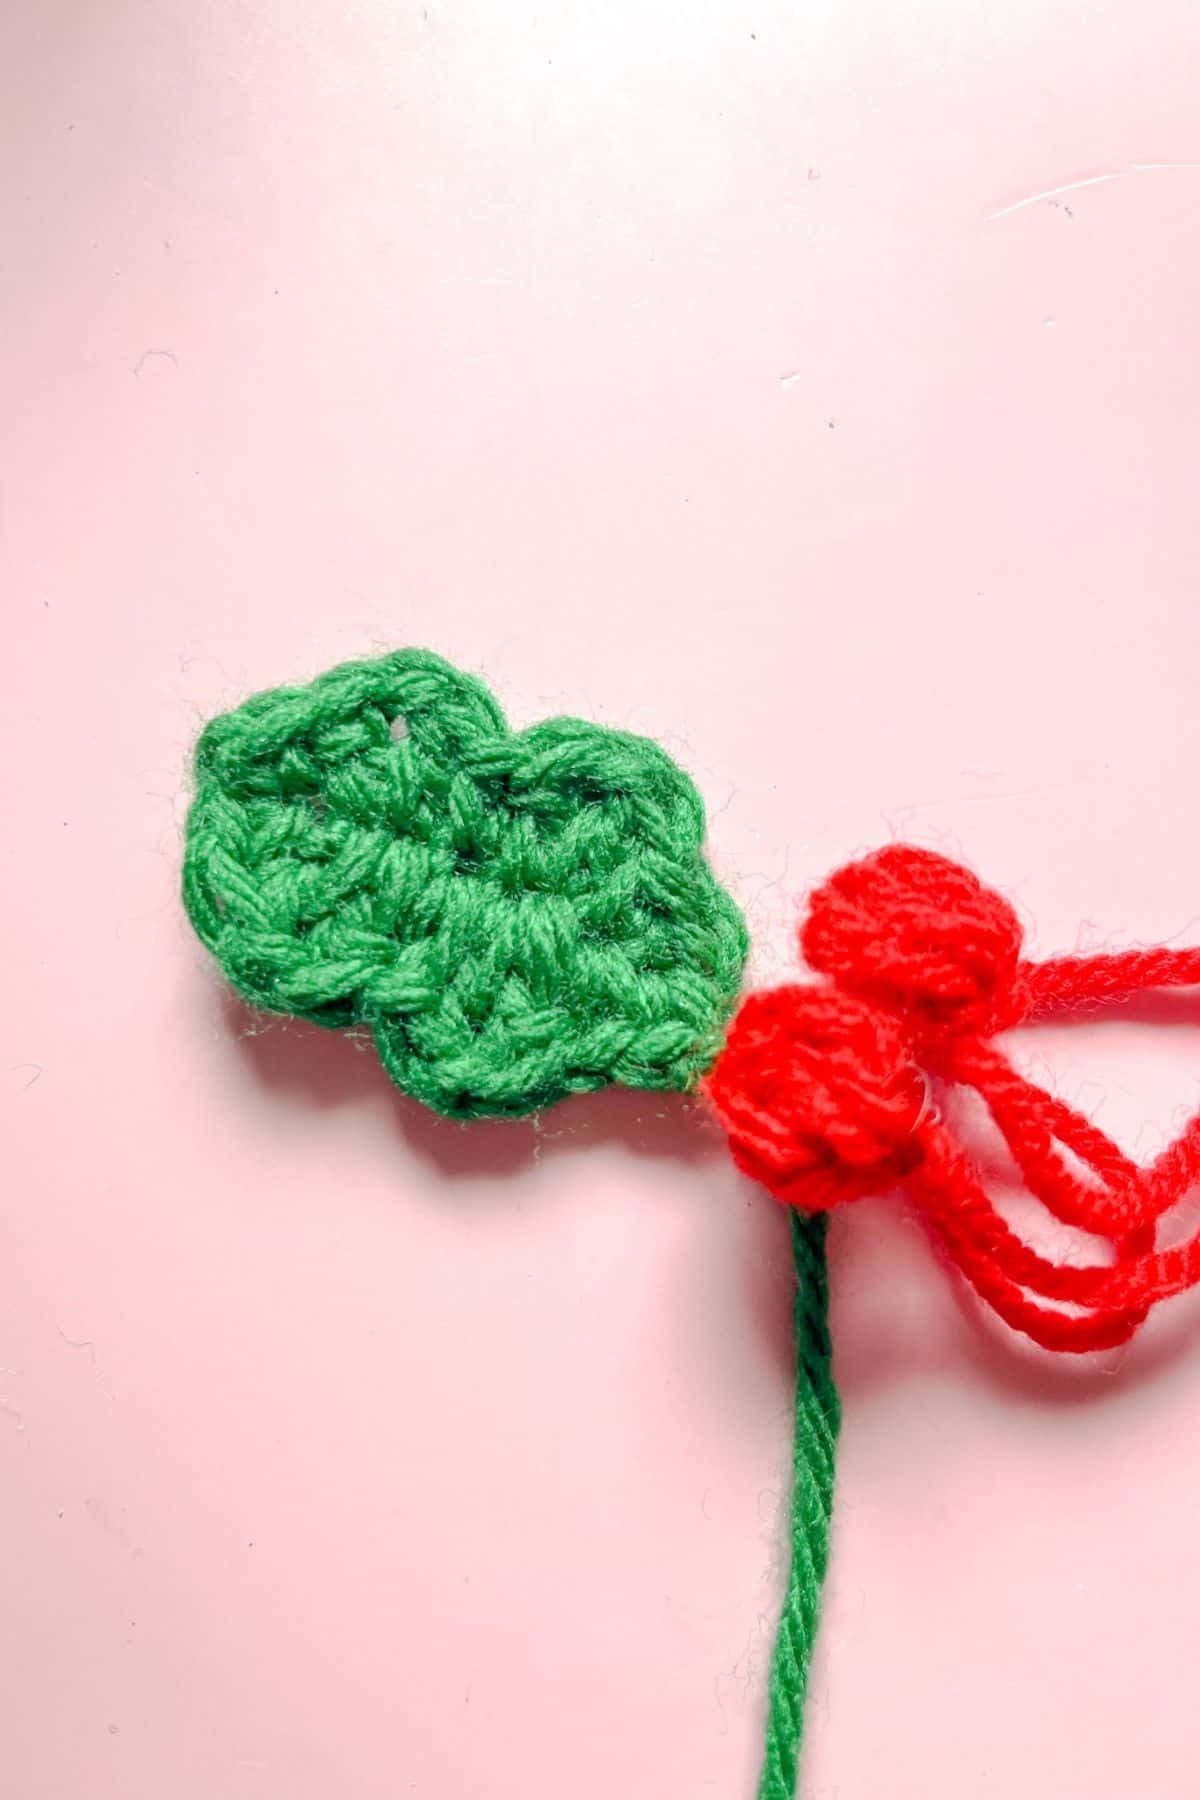
Holly Leaf:
I made 1 for my Christmas Pudding but 1-2 leaves would work.
For the mini holly leaf, ch x7. Then in the second ch from the hook make a sc. (dc, ch, dc) in the next stitch, sc, (dc, ch, dc) in the next stitch, sc x2. Ch x1 and then turn your work to the other side of the chain. Sc x2, (dc, ch,dc) in the next stitch, sc, (dc, ch, dc), in the next stitch, sc and then fasten off, leave a tail for sewing.
Berries:
I made 2 but you can make 2-3 for the top.
Ch x2, then in the second ch from the hook make a bobble stitch.
A bobble stitch is made by yarning over, insert hook into stitch, yarn over, draw loop back through stitch, yarn over pull through 2 loops then STOP. You will have a half completed dc hanging from your hook. Repeat the steps 4 more times until you have 5 half completed dc stitches hanging from your hook and 6 loops ON your hook. Then yarn over and pull through all 6 loops.
Make a chain to secure the bobble and fasten off. Leave a tail for sewing.
Sewing:

Sew icing to top of the pudding, then the leaf and berries.

Once all the sewing is done you now have a finished Crochet Christmas Pudding Pal made from my crochet Christmas pudding pattern!
If you have any more red yarn, try making my crochet mini stocking pattern. It uses both red and white yarn.
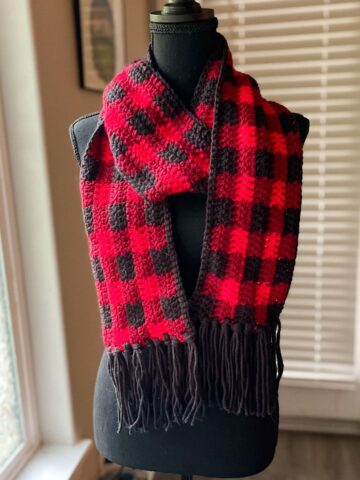
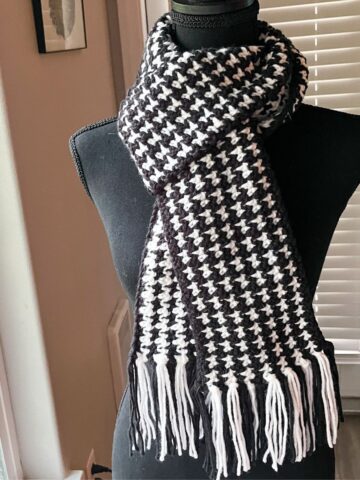
My Crochet Christmas beanie pattern and crochet Christmas scarf pattern also use red and white but you do need a good chunk of green yarn for them too.
If you do end up making the hat, pair it with the crochet striped gloves, then you can have a matching set!
🐌Expert Tips
- Using Alternative Materials: If crocheting the berries and holly leaf proves too difficult, consider using felt or embroidery instead for those pieces.
- Adjusting Size: If you're using a thicker yarn, expect the final size of the Christmas pudding to be 2-4 times larger, depending on your hook and yarn size.
🧵Pattern FAQs
You can attach a string or crochet chain at the top of the icing, just move over the berries and holly leaves a tad so the hanging loop is at the center.
Medium brown is probably the best brown but a darker brown can work too. I think light browns might be too light in color for a more accurate Christmas pudding decoration.
It all depends on the hook size and yarn size you are using, but you can expect anywhere between 2-4x times bigger.
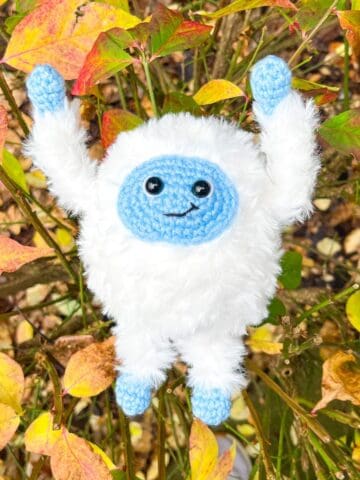
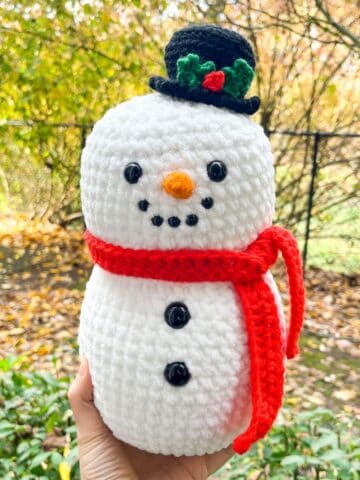
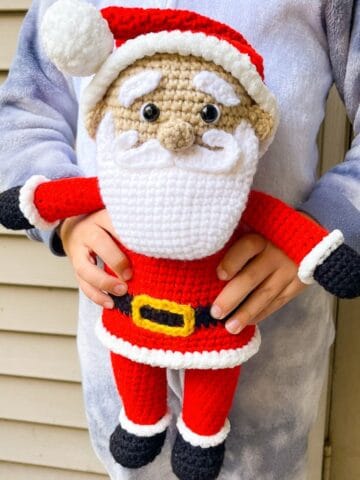
🧶More Winter Crochet Patterns
If you tried this Crochet Christmas Pudding Pattern, (or any other pattern on my website), please let me know how it went in the 📝 comments below. I'd love to hear from you!

Crochet Christmas Pudding Pattern
Materials
- 1 partial skein of brown yarn from Red Heart
- 1 partial skein of white yarn from Red Heart
- A small amount of green yarn from Red Heart
- A small amount of red yarn from Red Heart
- Safety eyes
- H hook 5mm
- Tapestry needle
Abbreviations (US terms)
- Magic ring - mr
- Single crochet - sc
- Increase (inc) - 2 stitches in the same stitch
- Chains - ch
- Decrease (dec) - 1 stitch combining 2 stitches
- Double crochet - dc
- Bobble Stitch - no abbreviations.
Notes
- Yarn Choice: I used acrylic yarn for this crochet Christmas pudding pattern, but you can also opt for cotton or even chunky yarn if you want to create a Christmas pudding pillow.
- Stitch Simplicity: The base of the crochet Christmas pudding pattern only calls for single crochet (sc). If you can single crochet, you can make this pattern! For the leaf, berries, and icing shells, there are a few special stitches to learn.
- Stitch Tension: My stitches are tight when I single crochet. If you struggle to keep your stitches tight, try yarning under during a sc or move down a hook size for a tighter stitch. While it might take a bit to get used to this method, many amigurumi makers recommend yarning under.
Instructions
- Round 1: Using brown yarn, make a mr and sc x6 into the circle. If you find it difficult making a magic ring you can chain 2 and then sc x6 into the second chain from the hook (6).
- Round 2: Inc in every sc (12).
- Round 3: Inc, sc. Then repeat until end of round (18).
- Round 4: Inc, sc x2. Then repeat until end of round (24).
- Round 5: Inc, sc x3. Then repeat until end of round (30).
- Round 6: Inc, sc x4. Then repeat until end of round (36).
- Round 7: Inc, sc x5. Then repeat until end of round (42).
- Round 8-9: Sc x42 (42).
- Round 10: Inc, sc x6. Then repeat until end of round (48).
- Round 11-12: Sc x48 (48).
- Round 13: Inc, sc x7. Then repeat until end of round (54).
- Round 14-15: Sc x54 (54).
- Round 16: Dec, sc x7. Then repeat until end of round (48).
- Round 17: Dec, sc x6. Then repeat until end of round (42).
- Round 18: Dec, sc x5. Then repeat until end of round (36).
- Round 19: Dec, sc x4. Then repeat until end of round (30).
- Round 20: Dec, sc x3. Then repeat until end of round (24). Insert eyes between rounds 11 and 12, 7 stitches apart.
- Round 21: Dec, sc x2. Then repeat until end of round (18).
- Round 22: Dec, sc. Then repeat until end of round (12).
- Round 23: Dec and repeat until end of round (6). Fasten off and sew the pudding shut.
Crochet Icing:
- Round 1: Using white yarn, make a mr and sc x6 in the circle (6).
- Round 2: Inc in every sc (12).
- Round 3: Inc, sc. Then repeat until end of round (18).
- Round 4: Inc, sc x2. Then repeat until end of round (24).
- Round 5: Inc, sc x3. Then repeat until end of round (30).
- Round 6: Inc, sc x4. Then repeat until end of round (36).
- Round 7: Inc, sc x5. Then repeat until end of round (42).
- Round 8: Inc, sc x6. Then repeat until end of round (48).
- Round 9: Shell stitch round- Skip a stitch and then make 6 dcs in one stitch. Next skip a stitch and then make a sc. You just made a shell stitch. Repeat for the rest of the round. Fasten off and leave a tail for sewing.
- Finished icing.
Crochet Holly and Berries:
Holly Leaf:
- I made 1 for my Christmas Pudding but 1-2 leaves would work.
- For the mini holly leaf, ch x7. Then in the second ch from the hook make a sc. (dc, ch, dc) in the next stitch, sc, (dc, ch, dc) in the next stitch, sc x2. Ch x1 and then turn your work to the other side of the chain. Sc x2, (dc, ch,dc) in the next stitch, sc, (dc, ch, dc), in the next stitch, sc and then fasten off, leave a tail for sewing.
Berries:
- I made 2 but you can make 2-3 for the top.
- Ch x2, then in the second ch from the hook make a bobble stitch.
- A bobble stitch is made by yarning over, insert hook into stitch, yarn over, draw loop back through stitch, yarn over pull through 2 loops then STOP. You will have a half completed dc hanging from your hook. Repeat the steps 4 more times until you have 5 half completed dc stitches hanging from your hook and 6 loops ON your hook. Then yarn over and pull through all 6 loops.
- Make a chain to secure the bobble and fasten off. Leave a tail for sewing.
Sewing:
- Sew icing to top of the pudding, then the leaf and berries.
- Once all the sewing is done you now have a finished Crochet Christmas Pudding Pal made from my crochet Christmas pudding pattern!


Leave a Reply