
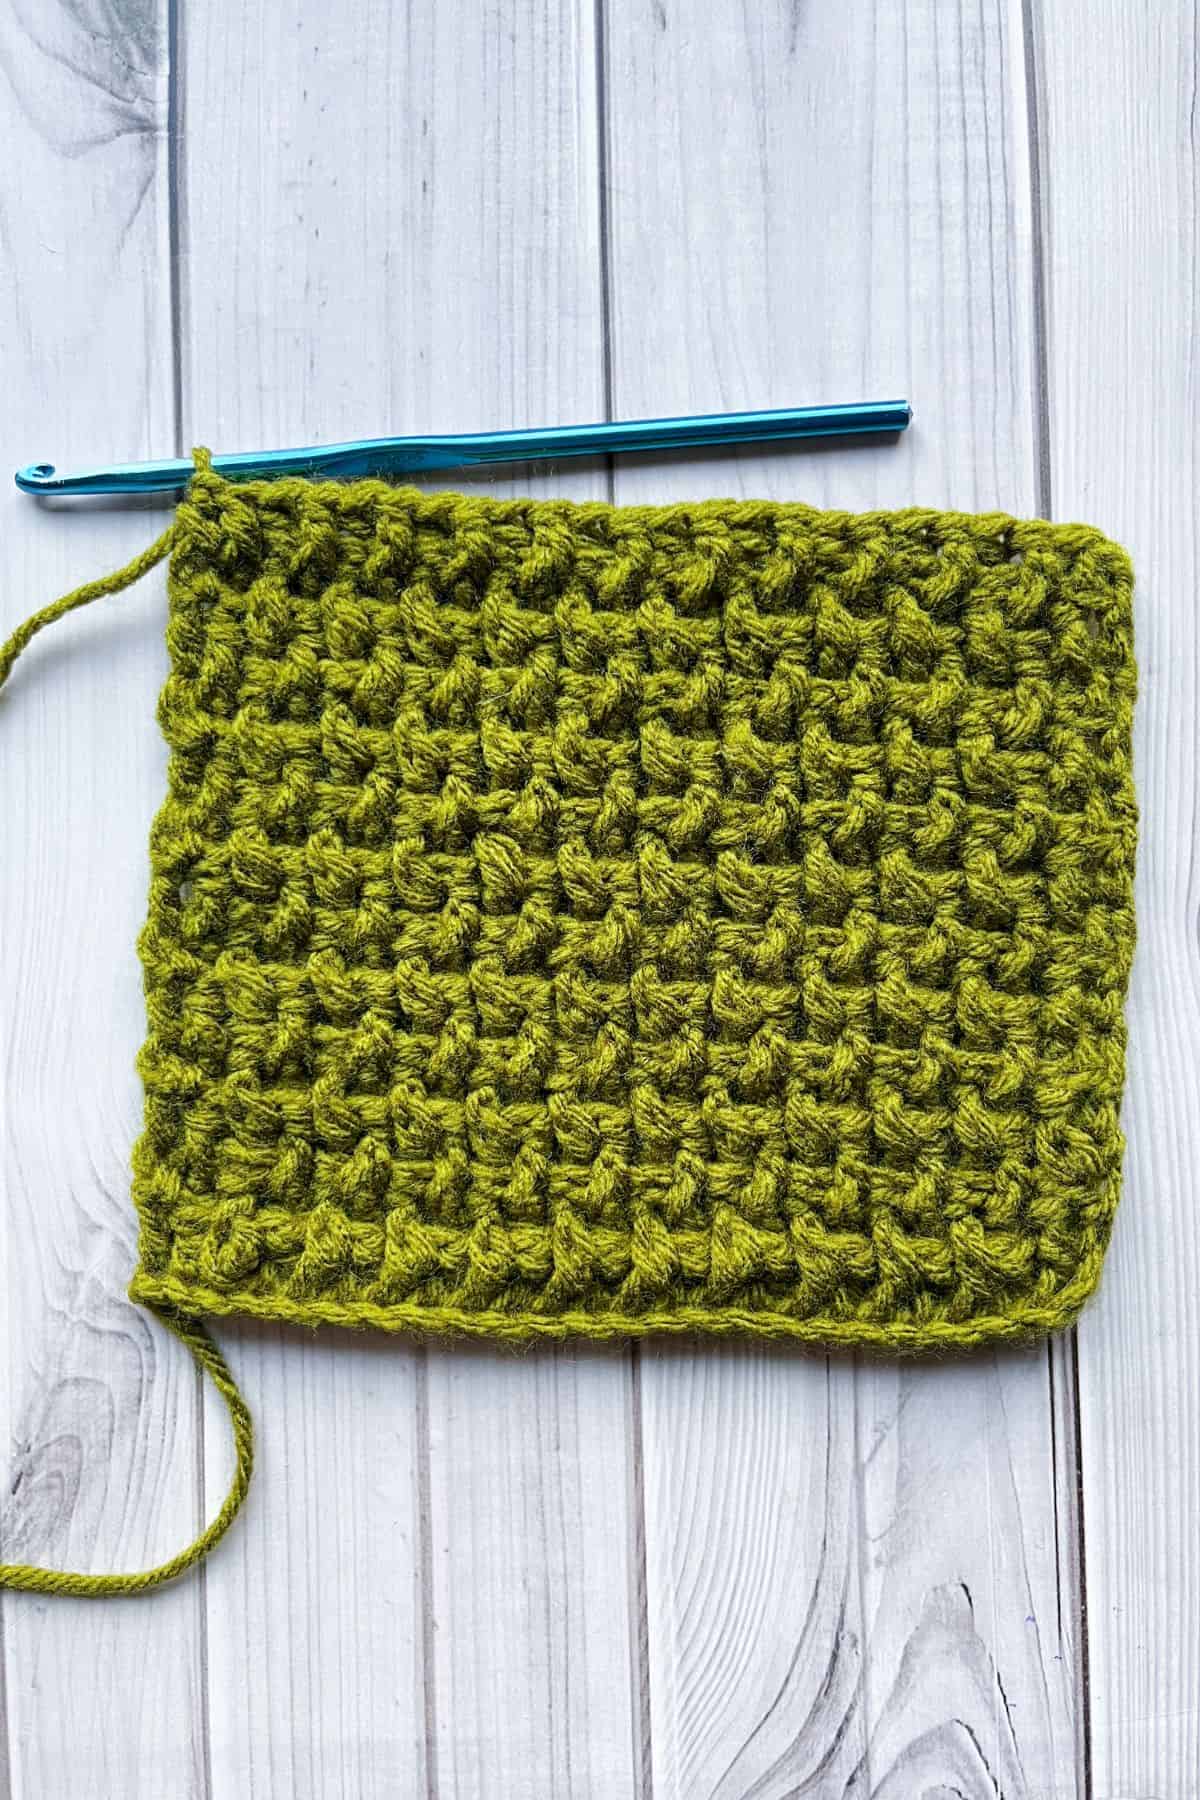
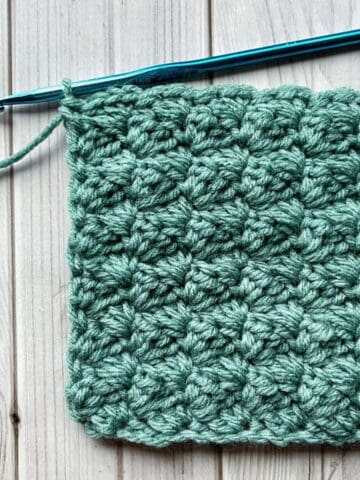
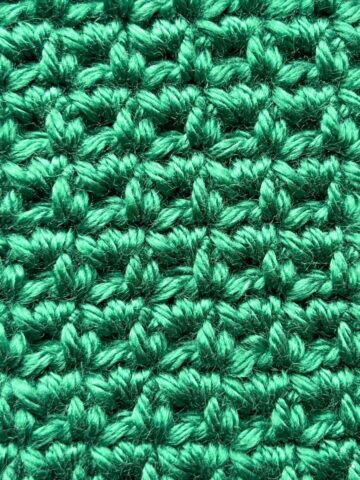
My Crochet Rice Stitch Pattern tutorial is easy to follow for any skill level. The crochet rice stitch, or mini basketweave crochet stitch, is a beautiful crochet stitch that resembles woven fabric.

The rice stitch is achieved by alternating front post and back post double crochets, creating a tightly interlocked texture. Some believe it’s called the rice stitch because the small, raised stitches resemble grains of rice. My sister, however, says it reminds her of chainmail, and now that she’s pointed it out, I can’t unsee the resemblance! It is also called the mini basketweave crochet stitch because it creates a woven pattern.
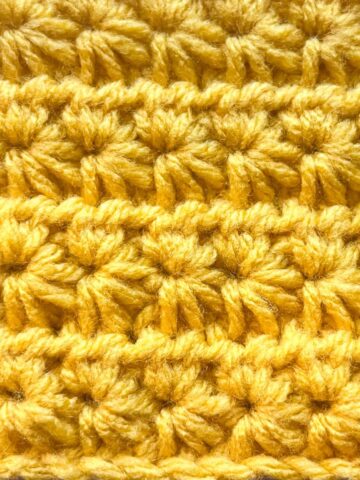
The rice stitch is a fantastic technique to learn because it opens up endless possibilities. You can use it to make a wide variety of items, including blankets, cardigans, sweaters, pillows, and scarves. Its sturdy texture makes it perfect for cozy, warm pieces, while the pattern's refined look adds a touch of elegance to any project.
Just by knowing how to do fpdc and bpdc will make it easier creating certain effects in patterns. Like ribbing! I love using fpdc, bpdc for ribbing and use it in my Bead Stitch Crochet Hat, Crochet Strawberry Cardigan Pattern, and my Sunflower Granny Square Fingerless Gloves Pattern. Thouh ribbing is made just a little bit differently than the crochet rice stitch pattern.
Whether you're crafting a simple scarf or an intricate throw blanket, the rice stitch can elevate your work and give it a polished, professional finish. It's a versatile stitch that can adapt to almost any project, making it a great go-to for both practical and decorative pieces.
Jump to:
✏️ Things To Note:
- Adjusting Chains: When working with the rice stitch, the starting chains may need to be adjusted depending on the project you're making. For example, if you're creating a full washcloth, scarf, or other item, you'll want to tailor the number of chains to fit the desired size. This is just a basic swatch, and for larger projects, a more specific chain count might be required.
- Yarn Weight: In terms of yarn selection, the crochet rice stitch pattern works well with a variety of yarn weights, so you can choose the yarn that best suits your project. However, it's advisable to steer clear of specialty textured yarns. The unique pattern of the rice stitch may be difficult to see or get lost if used with yarns that have strong textures or intricate designs. Stick to smoother yarns to ensure the stitch pattern stands out clearly.
- Number of Chains: The number of chains doesn't matter too much, just as long as you remember to alternatively stack the fpdc and bpdc in the pattern.
🪡 Materials Needed
- Scrap yarn or yarn of choice
- Tapestry needle
- 5mm hook, or a hook size recommended for your yarn size.
💭Abbreviations to Remember (US terms)
- Chain - ch
- Double Crochet - dc
- Back Post Double Crochet - bpdc
- Front Post Double Crochet - fpdc
- Half Double Crochet - hdc
🍵Instructions for Crochet Rice Stitch Pattern
The crochet rice stitch pattern is made in rows.
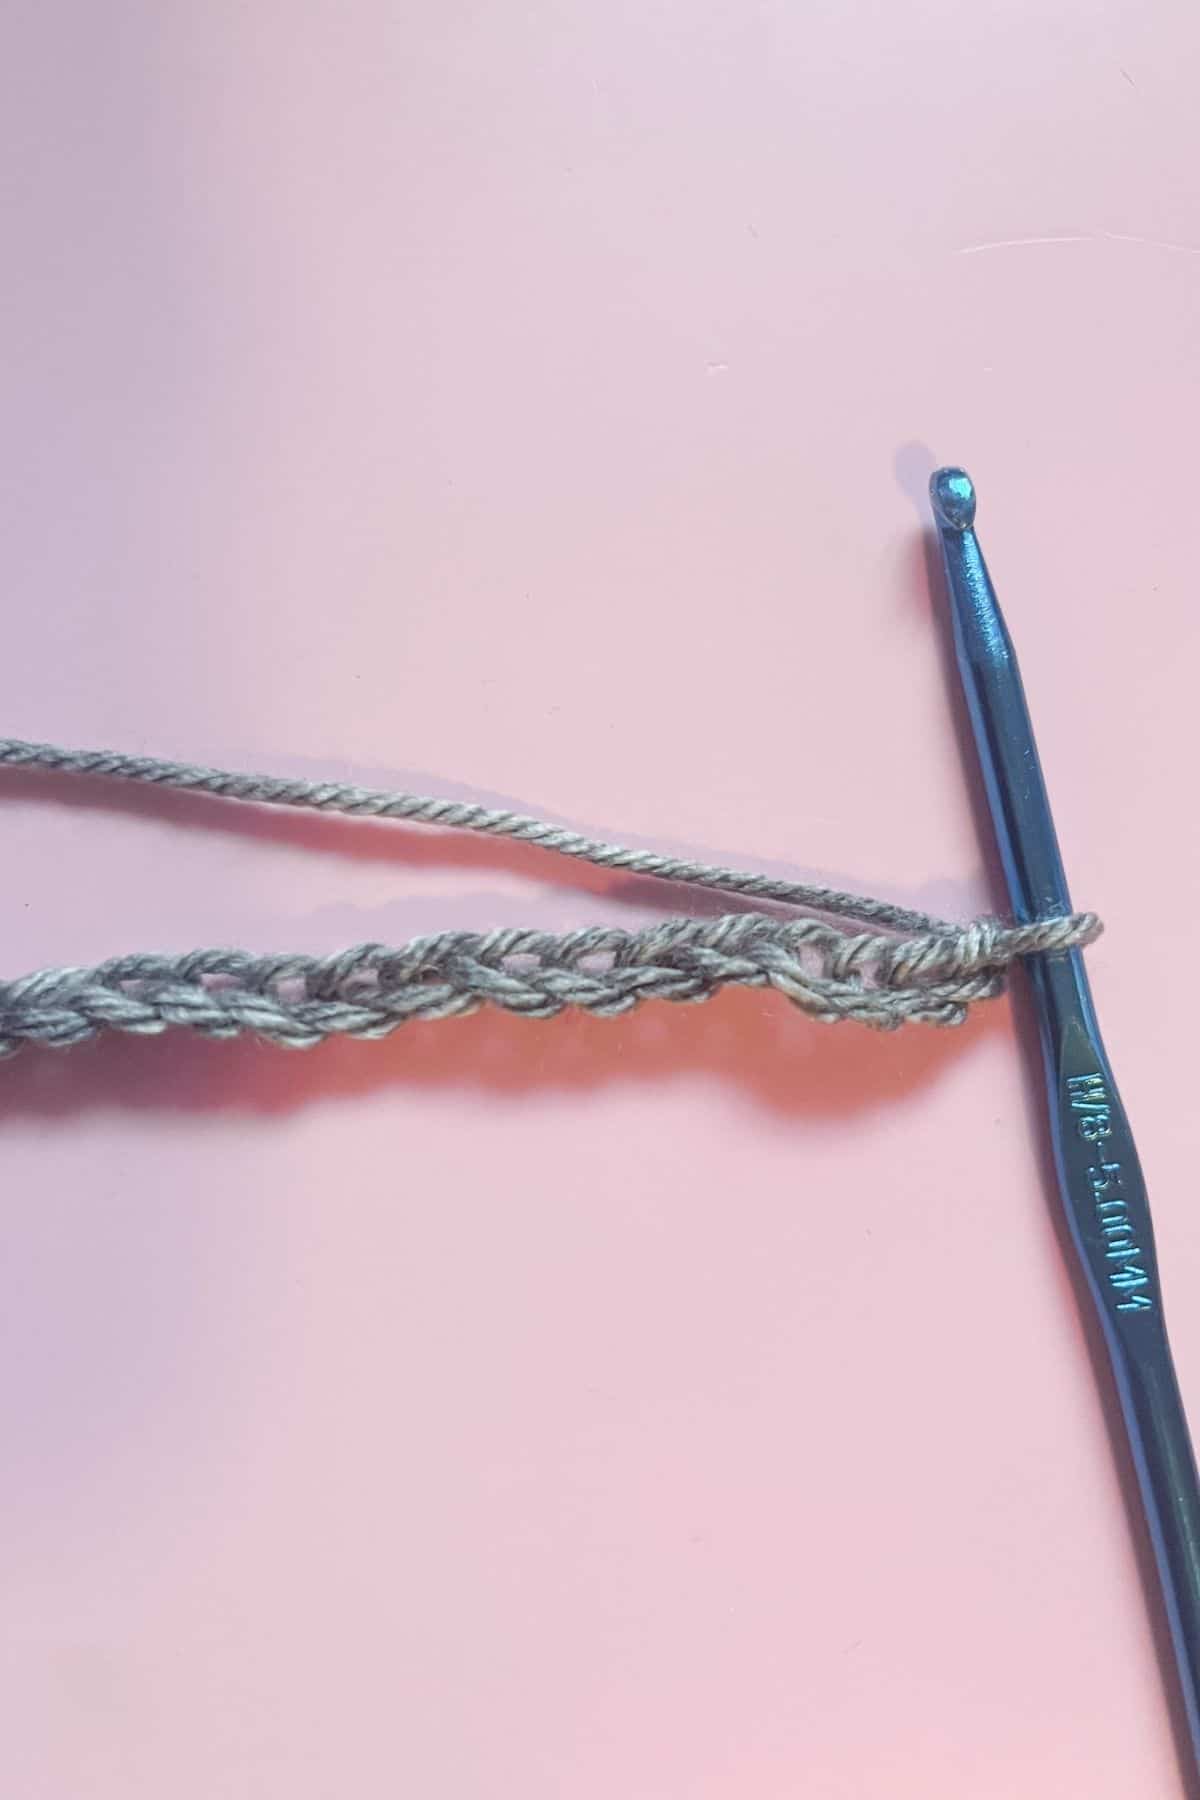
Ch x26 and turn (or any number of chains).
Row 1: Then in the 4th chain from the hook make a dc (the first 3 chains DOES count as a dc in the next row)
Then dc in each ch for the rest of the row. Then ch x1 and turn (23).
Do not work in the turning chain. The turning chain helps us turn our work, never work in it.

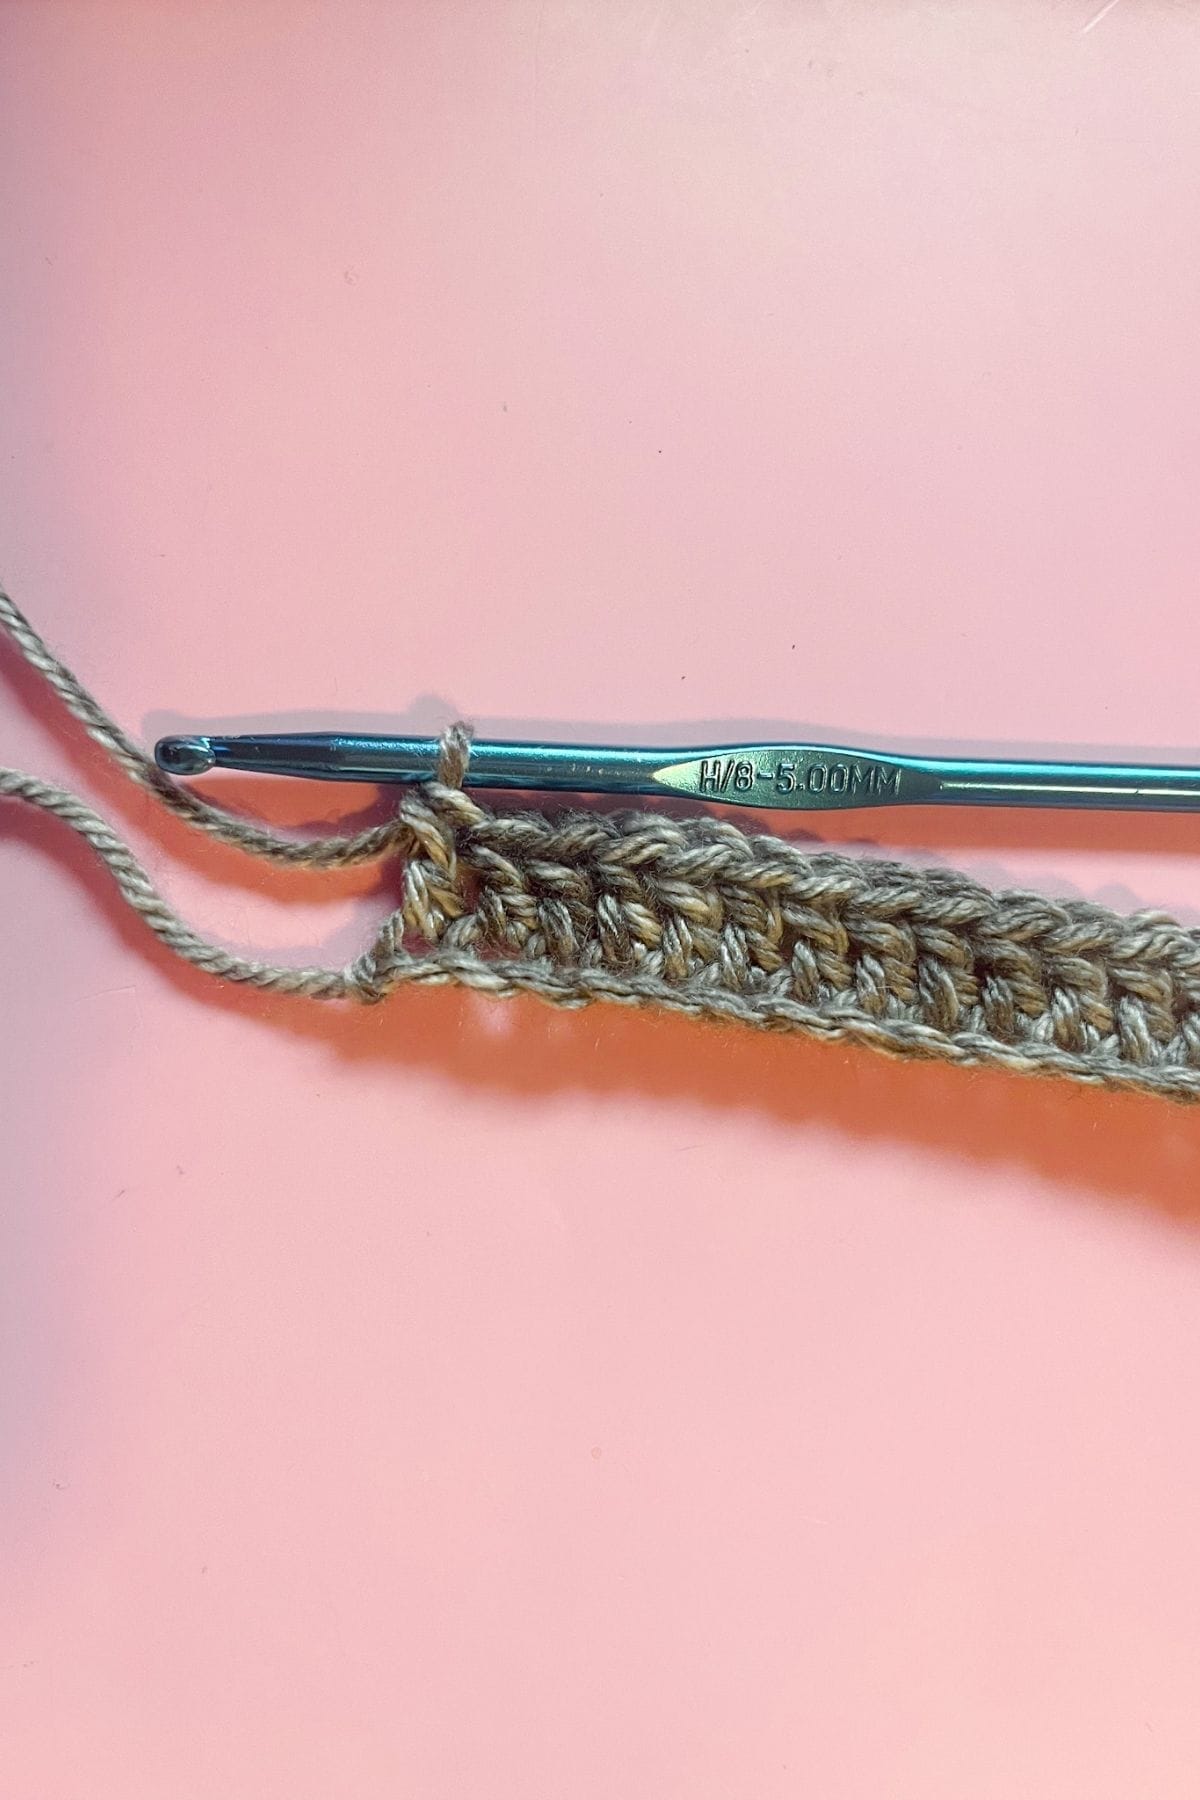
Row 2: In the first stitch, make a hdc.
Then make a fpdc in the next dc post
*to make a fpdc, yo, go under the next stitches dc post in row 1, yo, and then pull up a loop. Complete the stitch like you would a normal dc (yo go through 2 loops on the hook, yo go through last 2 loops on the hook). The finished fpdc should look like it is being pulled forwards a little bit from the rest of the row.*
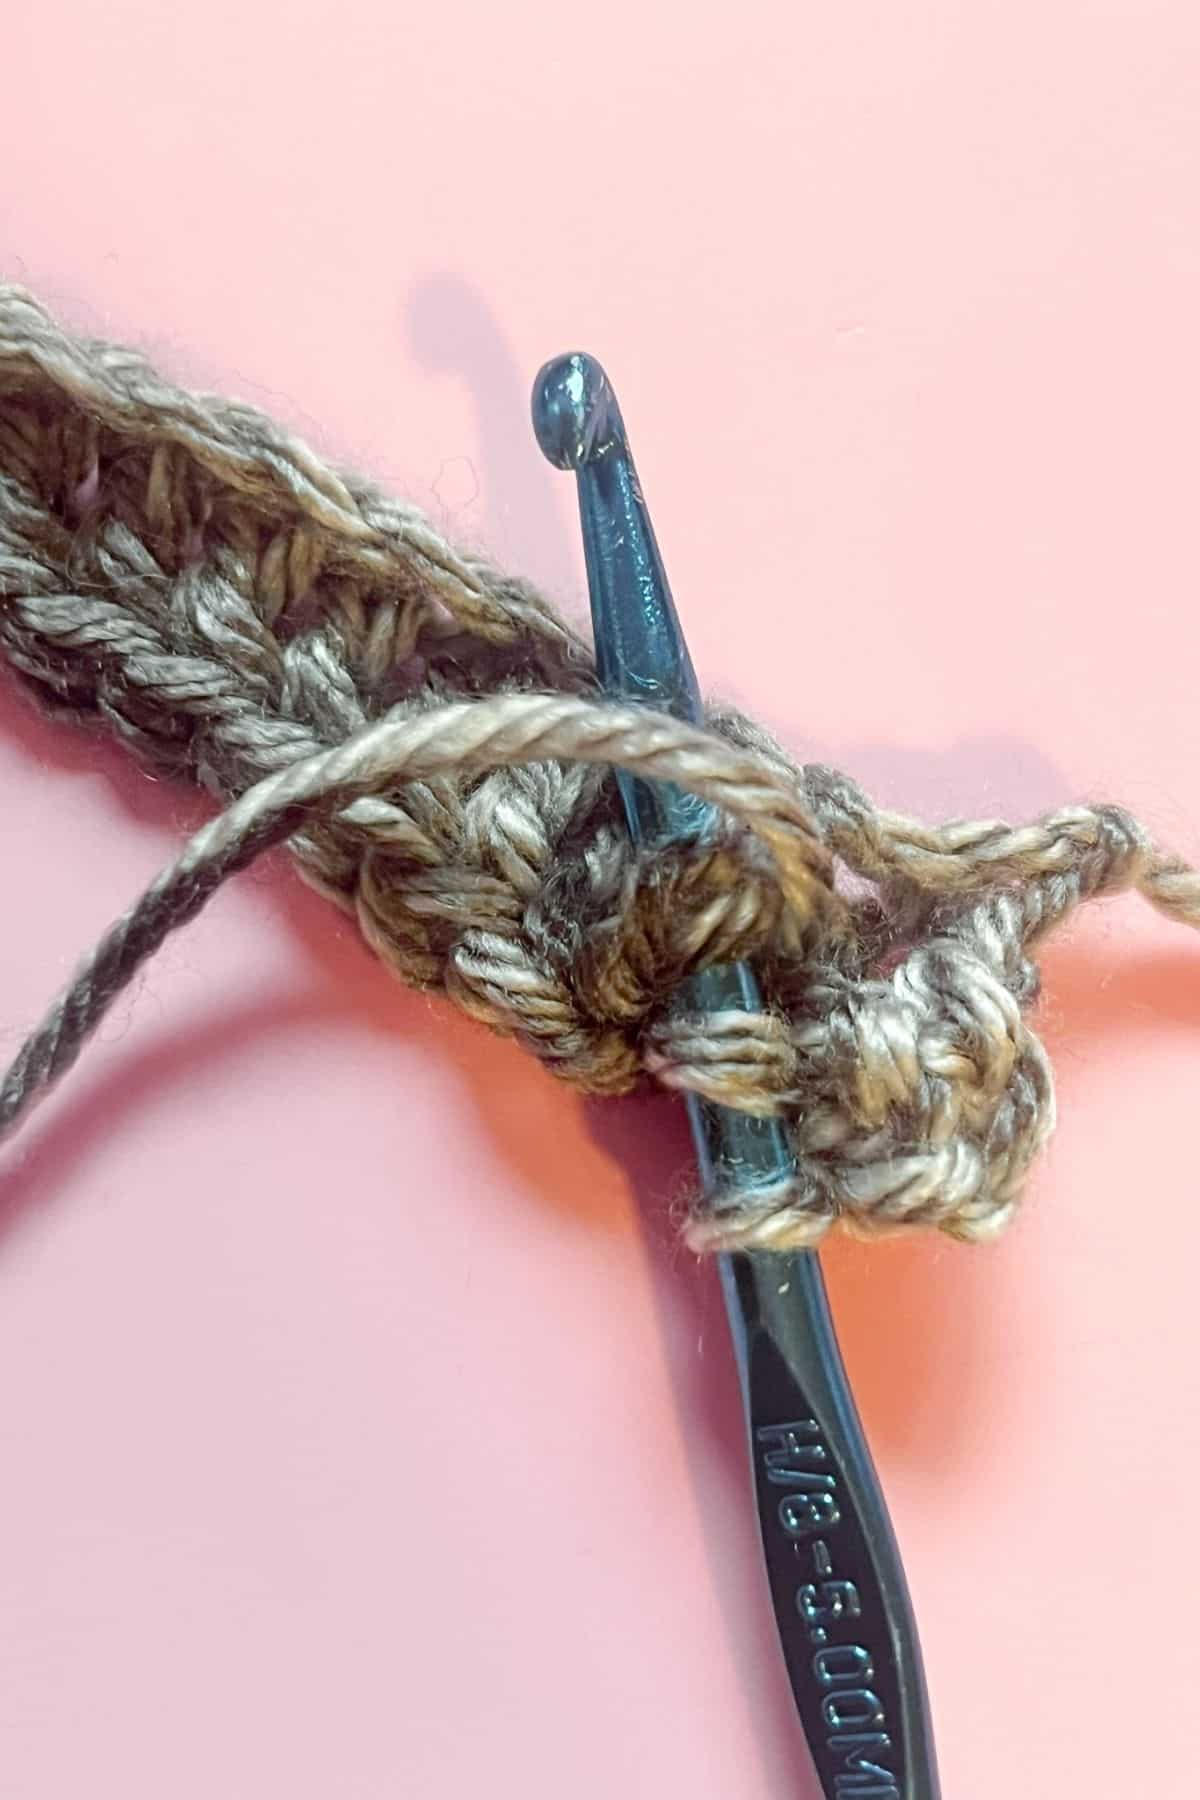
Then make a bpdc right next to it.
*Making a bpdc is similar to the fpdc, but you will fold over your work (don't turn it) and from the backside of your work, you will then go under the next dc post and complete the stitch just like above. When the bpdc is done it should look like its being pulled backwards slightly.*
Then continue alternating fpdc and bpdc for the rest of the row.

In the last stitch of the row make a hdc. Your rows should always start and end with hdc. Then ch x1 and turn (23).
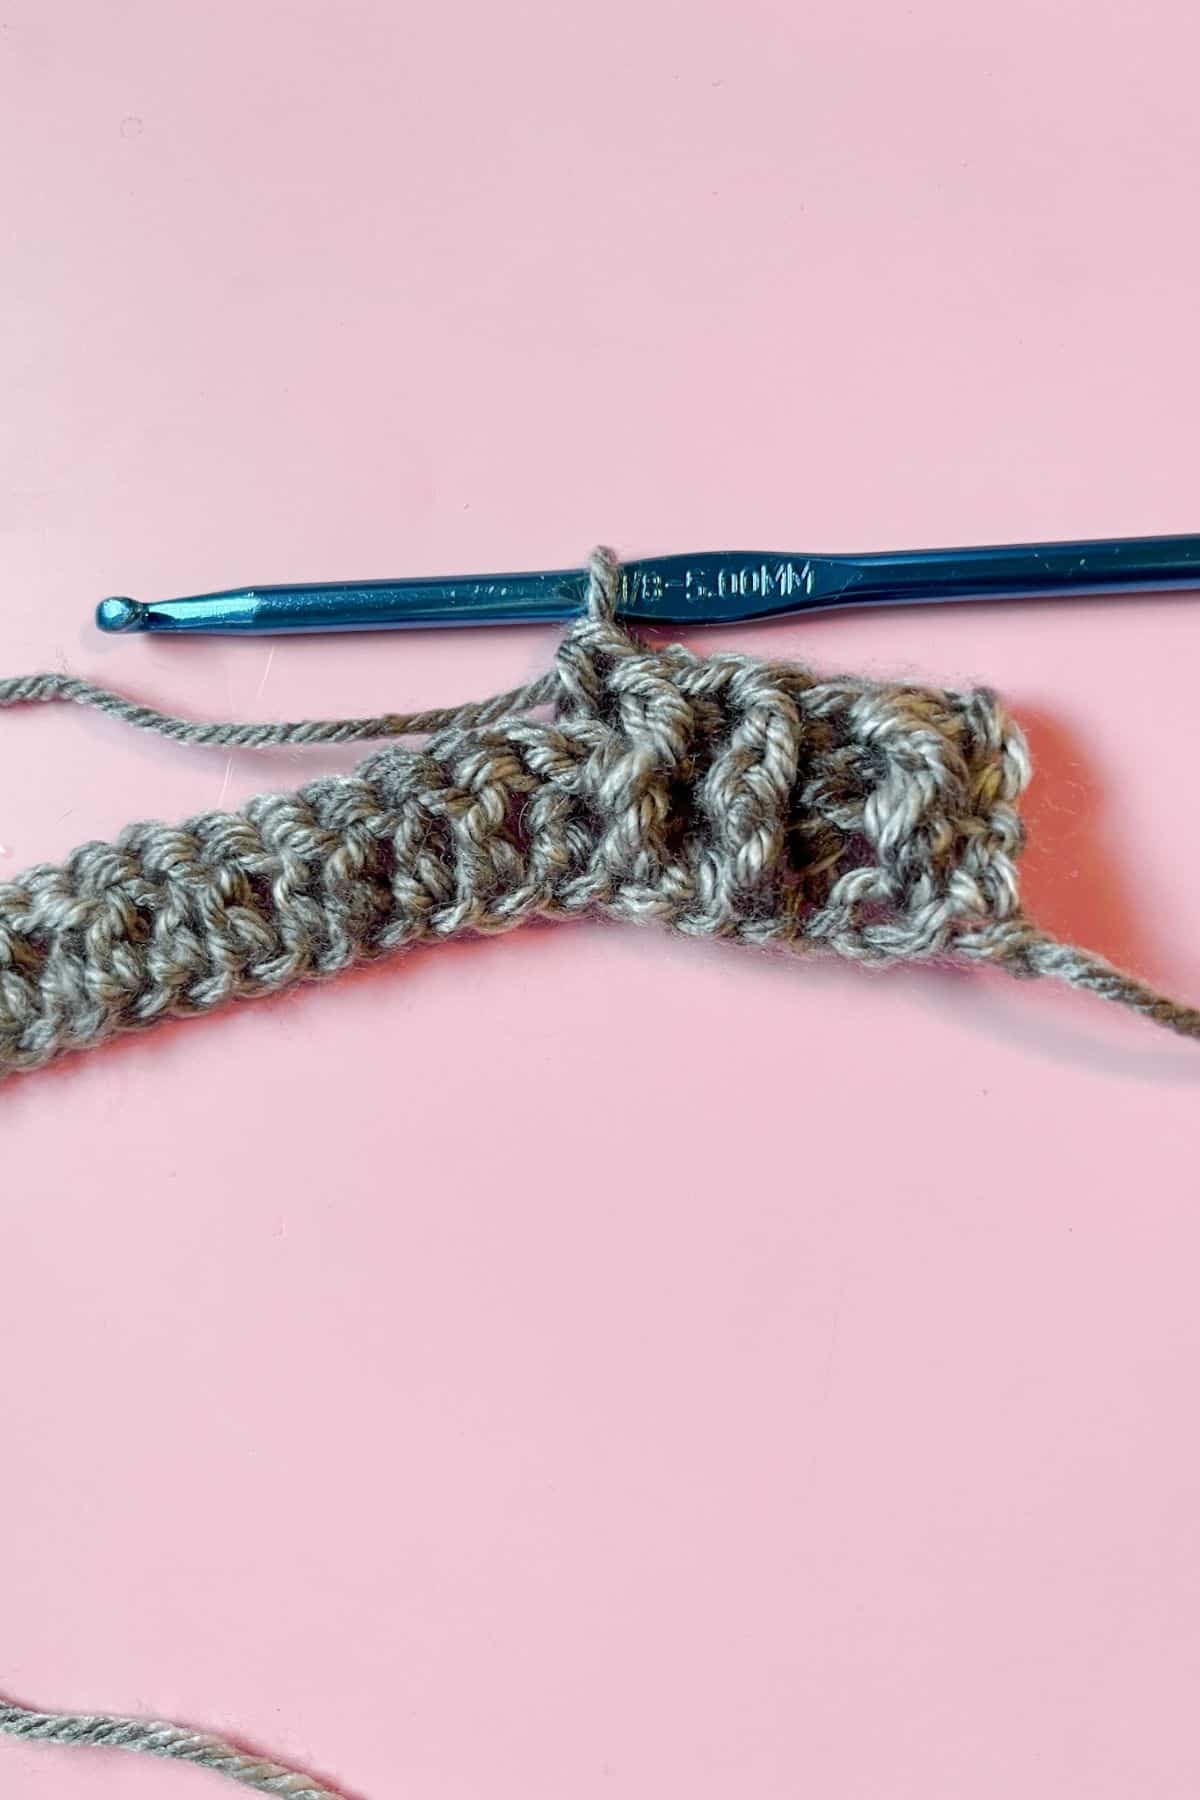
Row 3 and onwards: You are basically repeating row 2, but you want to alternate the stacking of the bpdc and fpdc from the previous row. If you have a fpdc on top of a fpdc, and vice versa for the bpdc - you create ribbing, not the rice stitch pattern that should look like a woven pattern.
Now you know how to create the crochet rice stitch, also known as the mini basket weave stitch!
This versatile technique creates a textured pattern that resembles woven fabric, giving your projects a unique look.
If you are looking for other textured stitches to make, check out the Crochet V-Stitch Scarf Pattern which creates a nice lacey effect. Or if you want to stick to something a bit more simpler, learn How to Crochet in Back Loop Only for a slight variation on the normal double crochet stitch.
If you want to challenge yourself with filet crochet, try the Crochet Dragonfly Stitch, which uses double crochets and chains to create a dragonfly motif. Or for an elegant herringbone pattern, try the crochet Herringbone Double Crochet Stitch.
Enjoy experimenting with this beautiful stitch in your next crochet creation!

🐌Expert Tips
- Comfortable Positioning: Sometimes it can be challenging to grab dc posts. Don’t hesitate to turn your work to find a more comfortable and natural position.
- Stitch Consistency: To maintain a uniform appearance, be mindful of the tension in your stitches. If you find your work is too tight, consider using a larger hook size.
- Use a Stitch Marker: If you’re new to the rice stitch, use a stitch marker at the beginning of each row to help keep track of your stitches.
🧵Pattern FAQs
If your stitches aren't creating the woven pattern, you are most likely stacking your front and back double crochets from the current and previous row, you want to make sure that the stitch under your current stitch is the opposite of each other.
It probably is called the crochet rice stitch because the individual stitches look like grains of rice.
Absolutely! Any yarn can be used for this stitch.
🧶More Crochet Stitch Patterns


If you tried this Crochet Rice Stitch Pattern (or any other pattern on my website), please let me know how it went in the 📝 comments below. I'd love to hear from you!

Crochet Rice Stitch Pattern
Materials
- Scrap yarn or yarn of choice
- Tapestry needle
- 5 mm hook or a hook size recommended for your yarn size.
Abbreviations (US terms)
- Chain - ch
- Double crochet - dc
- Back post double crochet (bpdc)
- Front post double crochet (fpdc)
- Half double crochet - hdc
Notes
- Adjusting Chains: When working with the rice stitch, the starting chains may need to be adjusted depending on the project you're making. For example, if you're creating a full washcloth, scarf, or other item, you'll want to tailor the number of chains to fit the desired size. This is just a basic swatch, and for larger projects, a more specific chain count might be required.
- Yarn Weight: In terms of yarn selection, the rice stitch works well with a variety of yarn weights, so you can choose the yarn that best suits your project. However, it's advisable to steer clear of specialty textured yarns. The unique pattern of the rice stitch may be difficult to see or get lost if used with yarns that have strong textures or intricate designs. Stick to smoother yarns to ensure the stitch pattern stands out clearly.
- Number of Chains: The number of chains doesn't matter too much, just as long as you remember to alternatively stack the fpdc and bpdc in the pattern.
Instructions
- The crochet rice stitch pattern is made in rows.Ch x26 and turn (or any number of chains).
- Row 1: Then in the 4th chain from the hook make a dc (the first 3 chains DOES count as a dc in the next row)
- Then dc in each ch for the rest of the row. Then ch x1 and turn (23).
- Do not work in the turning chain. The turning chain helps us turn our work, never work in it.
- Row 2: In the first stitch, make a hdc.
- Then make a fpdc in the next dc post
- *to make a fpdc, yo, go under the next stitches dc post in row 1, yo, and then pull up a loop. Complete the stitch like you would a normal dc (yo go through 2 loops on the hook, yo go through last 2 loops on the hook). The finished fpdc should look like it is being pulled forwards a little bit from the rest of the row.*
- Then make a bpdc right next to it.
- *Making a bpdc is similar to the fpdc, but you will fold over your work (don't turn it) and from the backside of your work, you will then go under the next dc post and complete the stitch just like above. When the bpdc is done it should look like its being pulled backwards slightly.*
- Then continue alternating fpdc and bpdc for the rest of the row.
- In the last stitch of the row make a hdc. Your rows should always start and end with hdc. Then ch x1 and turn (23).
- Row 3 and onwards: You are basically repeating row 2, but you want to alternate the stacking of the bpdc and fpdc from the previous row. If you have a fpdc on top of a fpdc, and vice versa for the bpdc - you create ribbing, not the rice stitch pattern that should look like a woven pattern.
- Now you know how to create the crochet rice stitch, also known as the mini basket weave stitch!


Leave a Reply