
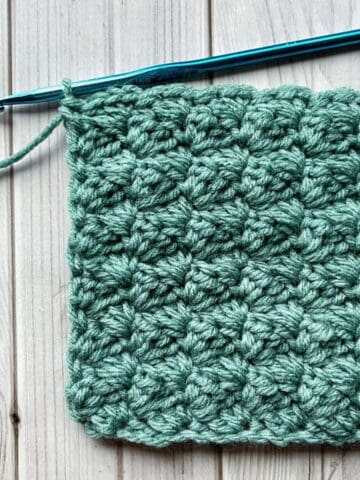
The Crochet Wattle Stitch Pattern is a beautiful texture perfect for any blanket, scarf, or cardigan. And the best part? It only uses single and double crochets.

When I say the wattle crochet stitch is easy, I really mean it! All you need to know are chains, single crochets, and double crochets. The stitch itself is straightforward, and once you get the hang of it, it’s smooth sailing. The only tricky part is the first row, where you need to be careful to work into the turning chain from the previous row.
That’s correct—the crochet wattle stitch involves working into the turning chain, which can be a bit tricky at first. However, with practice, it becomes easier as your brain gets used to the motion and technique. This small challenge is well worth it, as it helps create beautifully straight edges, something that can be harder to achieve with other stitches. By learning to work into the turning chain, you ensure a clean, neat finish to your project, making the wattle stitch an even more rewarding stitch to use.
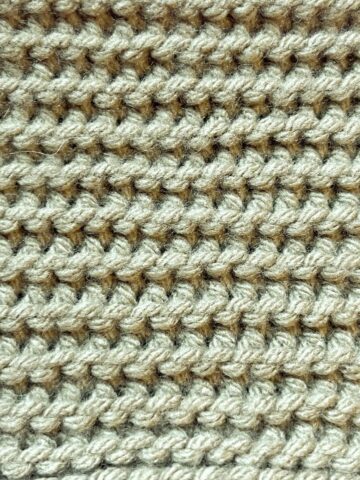
Once you’ve mastered the technique, you’ll be able to create stunning textured designs with smooth edges every time. Don’t let the initial difficulty discourage you—it’s all part of the learning process! Some other stitches that uses chains, single crochet, and double crochet and LOOK complicated but aren't are: the sieve stitch pattern, the crochet suzette stitch and the crochet iris stitch pattern. Both are some of my favorites to use for when I want a little texture.
Now that you have a solid understanding, let’s dive in and get started on your crochet journey with the wattle stitch!
Jump to:
✏️ Things To Note:
- Yarn Choice. When choosing yarn for your project, feel free to use any yarn that suits your preference, especially if you're working with scrap yarn for your swatch, like I do with my crochet snuggle stitch. However, it’s best to avoid using fuzzy or specialty yarns, as these types of yarns may obscure the stitch pattern, making it harder to see the intricate details of the design. Opting for a smooth, medium-weight yarn will help the wattle stitch stand out more clearly.
- Starting Chain. If you're planning to create a larger project, it’s important to note that your starting chain should be a multiple of 3. This will ensure the stitch pattern aligns correctly as you continue with your work, maintaining the integrity of the design.
- Visibility. For those who find it difficult to see their turning chains from previous rows, using stitch markers can be a helpful solution. By placing a stitch marker in the first or last stitch of the row, you can easily identify where to turn at the end of each row, preventing any confusion and helping maintain consistent stitch placement. Stitch markers are a simple yet effective tool to make the crocheting process smoother and more enjoyable, especially when working with stitch patterns that involve turning at the end of each row.
🪡 Materials Needed
- Yarn for the wattle stitch project of your choice
- 6mm hook or hook that corresponds with the yarn size you are using
- Tapestry needles
💭Abbreviations to Remember (US terms)
- Chain - ch
- Single crochet - sc
- Double crochet - dc
- Slip stitch - sl st
🍵Instructions for Crochet Wattle Stitch Pattern
The crochet wattle stitch pattern is made in rows not rounds.

Row 1: Ch x27

Row 2: In the 3rd ch from the hook, make a sc, ch, and dc in 1 stitch.

*Skip 2 chain stitches from the previous row and make a sc, ch, and dc in the next chain.*

Repeat what is in the asterisks until the end of the row.
To finish the row, skip 2 chain stitches and work a sc into the last ch.
Ch x1 and turn your work.

Row 3: Find the 1st group of stitches from the previous row, skip them, and in the chain space make a sc, ch, and dc.
Find the next chain space and make another group of stitches - sc, ch, and dc. Repeat until the end of the row.

To complete this row, make a sc into the turning chain. You want to pull the sc to the level of the current row so it does not bow on the edges.

Row 4 and onwards: Repeat row 3 until the length of the project is achieved.
Once the project is done, make a sl st into the turning chain, fasten off and weave in the end.
Now you know how to crochet the wattle stitch! With its unique texture, this stitch adds depth and interest to any project.
Remember to choose a smooth yarn to ensure the pattern stands out clearly, and if you’re making a larger piece, start with a chain that’s a multiple of 3 for proper stitch alignment. Using stitch markers can also help if you struggle to see turning chains from previous rows. These simple tips will help you create beautiful, well-structured projects.
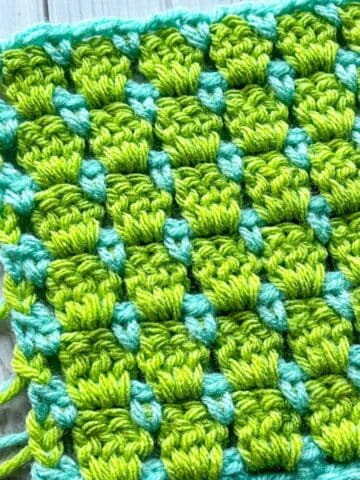
If you are looking for some more intricate stitch patterns, check out the crochet larksfoot pattern, cross treble crochet pattern, or the crochet rice stitch pattern.
Whether you're making a scarf, blanket, or any other crochet item, the wattle stitch is a great choice for adding a fun, textured look. Happy crocheting!

🐌Expert Tips
- Improve Edge Stability. When making the final single crochet of each row, pull the single crochet up to the level of the current row to prevent bowing on the edges.
- Experiment with Yarn. While I recommend worsted weight yarn, feel free to try different types as long as they aren’t too fuzzy or bulky, which can obscure the stitch definition.
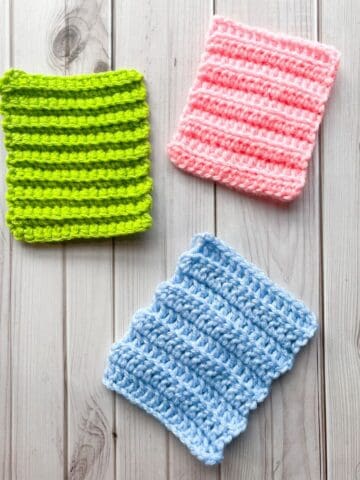
- Color Play. Use different colors to create fun patterns or stripes in your project. Changing yarn colors every few rows can add visual interest!
- Practice with Swatches. If you’re new to the wattle stitch, practice on a smaller swatch first. This will help you become comfortable with the technique before starting a larger project.
🧵Pattern FAQs
Absolutely! Just make sure it's not velvet or blanket fuzzy yarns.
You can make blankets, scarves, balaclavas, gloves - the projects are endless.
To prevent bending, make sure to pull the final single crochet of each row to the level of the current row.
🧶More Crochet Stitch Patterns

If you tried this Crochet Wattle Stitch Pattern (or any other pattern on my website), please let me know how it went in the 📝 comments below. I'd love to hear from you!

Crochet Wattle Stitch Pattern
Materials
- Yarn for the wattle stitch project of your choice
- Tapestry needle
- 6mm hook (Or hook that matches your yarn size)
Abbreviations (US terms)
- ch = Chain
- sc = Single crochet
- dc = Double Crochet
- sl st = Slip Stitch
Notes
- Use any yarn for the wattle stitch swatch; avoid fuzzy or specialty yarns.
- For larger projects, start with a multiple of 3 chains.
- If turning chains are hard to see, use stitch markers.
Instructions
- The crochet wattle stitch pattern is made in rows not rounds.
- Row 1: Ch x27
- Row 2: In the 3rd ch from the hook, make a sc, ch, and dc in 1 stitch.
- *Skip 2 chain stitches from the previous row and make a sc, ch, and dc in the next chain.*
- Repeat what is in the asterisks until the end of the row.
- To Finish the row, skip 2 chain stitches and work a sc into the last ch.
- Ch x1 and turn your work.
- Row 3: Find the 1st group of stitches from the previous row, skip them, and in the chain space make a sc, ch, and dc.
- Find the next chain space and make another group of stitches - sc, ch, and dc. Repeat until the end of the row.
- To complete this row, make a sc into the turning chain. You want to pull the sc to the level of the current row so it does not bow on the edges.
- Row 4 and onwards: Repeat row 3 until the length of the project is achieved.
- Once the project is done, make a sl st into the turning chain, fasten off and weave in the end.
- And now you know how to make the crochet wattle stitch! Happy projects!


Leave a Reply