
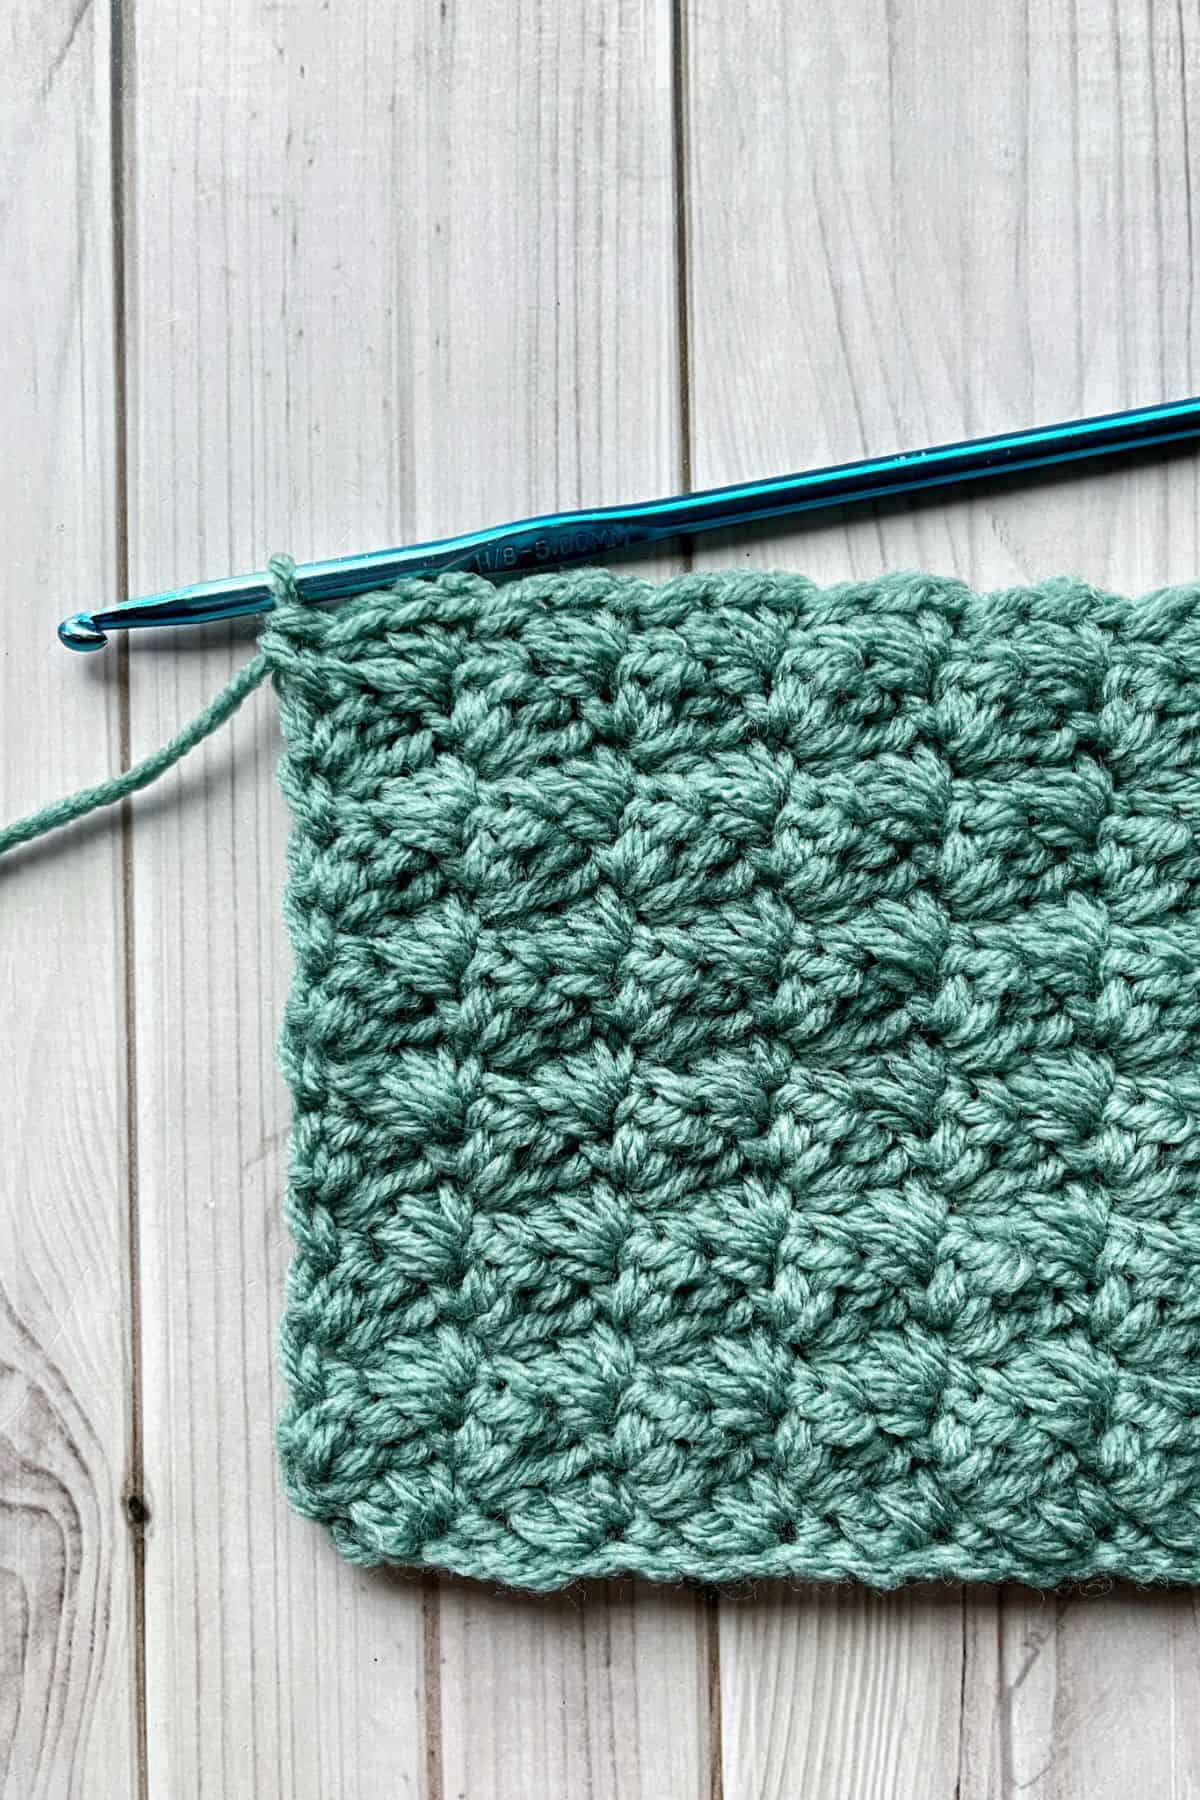
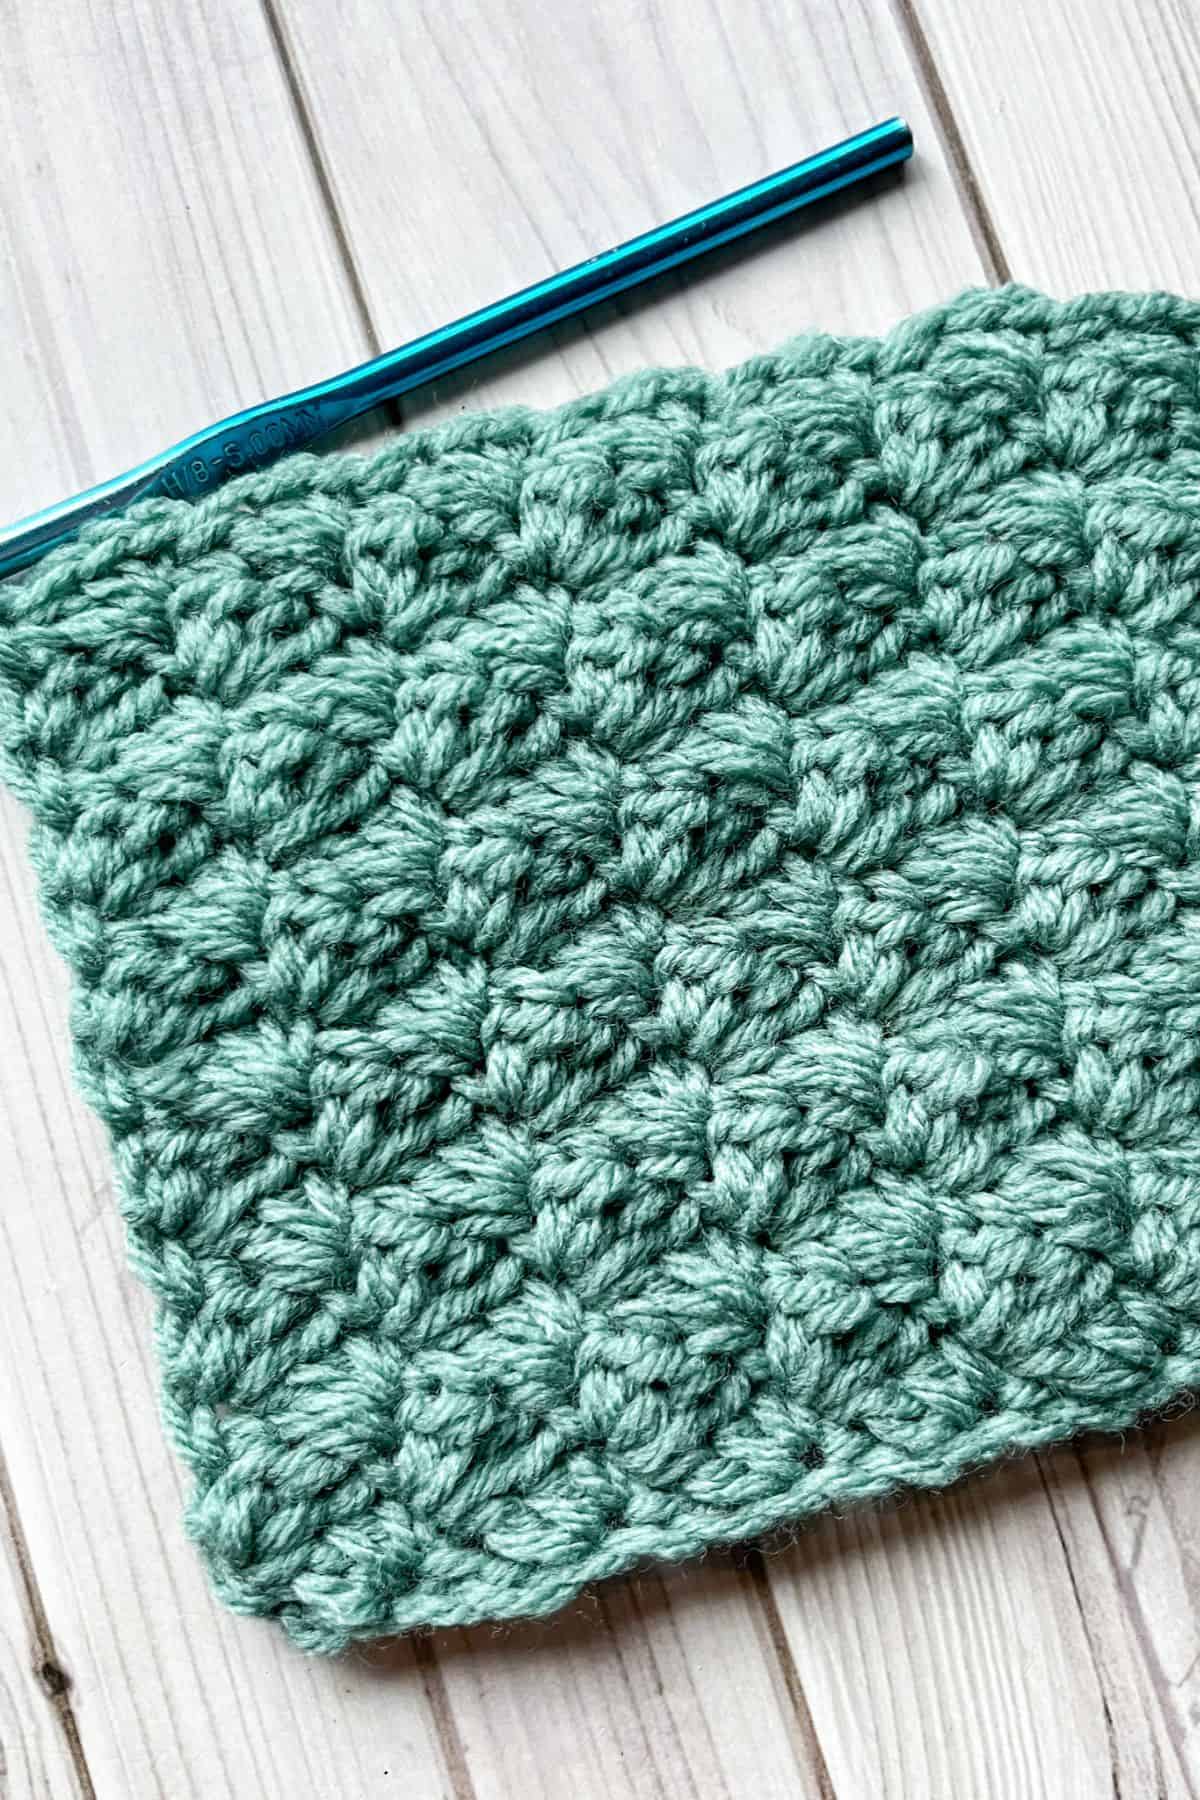
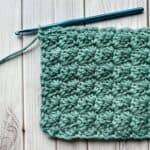
The Sedge Stitch Crochet Pattern is a beautiful, textured stitch that resembles quarter shells with a subtle, puffy look. It adds a delicate, yet eye-catching texture to your projects.
If you’re comfortable with basic stitches like single, half double, and double crochet, you’ll find this pattern easy to learn and work with.
While the sedge stitch may look intricate, it’s actually quite simple and straightforward. A few stitch patterns I have made over the years are like this, like the iris crochet stitch pattern and the crochet daisy stitch pattern. With just a few basic stitches, you can create a sophisticated design that appears more complex than it actually is. This makes it an excellent choice for both beginners and experienced crocheters who want to try something new.
I personally love the crochet sedge stitch because of its versatility. It’s perfect for scarves, cowls, hats, and even blankets, making it ideal for gifts.
Plus, because it works up quickly and easily, you can create beautiful, handmade pieces without spending too much time or effort.
Jump to:
✏️ Things To Note:
- Swatch Tutorial: This tutorial focuses on creating a stitch swatch. If you're looking to make a full project such as a washcloth, scarf, or other items, you may need to adjust your starting chain length accordingly. I make my crochet grit stitch tutorial into a washcloth.
- Yarn Weight: This pattern works with any yarn weight. However, it's recommended to avoid using specialty textured yarns, as they may obscure the stitch definition and details.
- Stitch Technique: The stitch technique requires you to crochet multiple stitches into one stitch and skip certain stitches as part of the pattern. This creates a textured and visually appealing design. If you decide to adjust the starting chain for a larger project, be sure to use a multiple of 3 stitches. This ensures the pattern works correctly and maintains its structure.
🪡 Materials Needed
- Scrap yarn or yarn of choice, I used size 4 yarn.
- Tapestry needle
- 5mm hook, or a hook size recommended for your yarn size.
💭Abbreviations to Remember (US terms)
- Chain - ch
- Half Double Crochet - hdc
- Single Crochet - sc
- Double Crochet - dc
🍵Instructions for Sedge Stitch Crochet Pattern
The sedge stitch crochet pattern is made in rows.

Row 1: Ch x21 and turn (or any multiple of 3).

Row 2: In the second chain from the hook, work 1 hdc and 1 dc into one stitch.

*Then skip 2 chains. In the next chain, work a sc, hdc, and dc into one stitch.

Repeat from * for the rest of the row. When there is only 1 ch left, work a sc into the final ch and then ch x1 and turn. The ch x1 at the end is the turning chain to help turn your work, do not work in this chain).

Row 3: Repeat row 2 but in the tops of stitches instead of the beginning chains.
Then ch x1 and turn.

Row 4 and onwards: Repeat row 3 until the desired length for the project has been reached.
Now you know how to create the crochet sedge stitch! It’s a versatile and beautiful technique that can be used in various projects. Whether you’re making a cozy scarf, a soft washcloth, or something entirely different, the sedge stitch adds texture and interest to any design. I’m excited to see what you create with this stitch!
Remember, it works with any yarn weight, though it's best to avoid specialty textured yarns to keep the stitch definition clear. If you’re adjusting the size of your project, be sure to use a foundation chain that’s a multiple of 3 to keep the pattern in balance.
Whether you’re a beginner or experienced crocheter, the sedge stitch is an excellent addition to your skill set. Enjoy your crochet journey and feel free to experiment with different yarns and projects! Happy crocheting!
If you are looking for more crochet stitch tutorials I suggest my crochet wattle stitch pattern or my crochet suzette stitch pattern.

🐌Expert Tips
- Use Lighter Colors: To make the stitch texture stand out, use lighter colors and avoid dark shades like navy or black, as they can make the stitches harder to see.
- Adding a Border: A simple single crochet border or double crochet stitch border works well with this stitch, giving a neat finish to your project.
- Keeping Edges Straight: When starting and ending rows, be consistent with your stitch placements to maintain even edges. This will make it easier to add a border later if desired.
🧵Pattern FAQs
Because we are adding extra stitches (hdc and dc) into one stitch, we need to balance it out by skipping 2 stitches. This keeps the stitch count consistent across each row.
While this pattern is typically worked in flat panels, you can achieve a similar effect by working it in the round. It may require slight adjustments, but it’s definitely possible.
The possibilities are endless! Consider using this stitch for sweaters, cardigans, scarves, shawls, cowls, hats, and more. Its textured design adds a beautiful touch to any project.
🧶More Crochet Stitch Patterns

If you tried this Sedge Stitch Crochet Pattern (or any other pattern on my website), please let me know how it went in the 📝 comments below. I'd love to hear from you!
Sedge Stitch Crochet Pattern
Materials
- Scrap yarn or yarn of choice I used size 4 yarn.
- Tapestry needle
- 5 mm hook or a hook size recommended for your yarn size.
Abbreviations (US terms)
- Chain - ch
- Half double crochet - hdc
- Single crochet - sc
- Double crochet - dc
Notes
- Swatch Tutorial: This tutorial focuses on creating a stitch swatch. If you're looking to make a full project such as a washcloth, scarf, or other items, you may need to adjust your starting chain length accordingly. I make my crochet grit stitch tutorial into a washcloth.
- Yarn Weight: This pattern works with any yarn weight. However, it's recommended to avoid using specialty textured yarns, as they may obscure the stitch definition and details.
- Stitch Technique: The stitch technique requires you to crochet multiple stitches into one stitch and skip certain stitches as part of the pattern. This creates a textured and visually appealing design. If you decide to adjust the starting chain for a larger project, be sure to use a multiple of 3 stitches. This ensures the pattern works correctly and maintains its structure.
Instructions
- This pattern is made in rows.
- Row 1: Ch x21 and turn (or any multiple of 3).
- Row 2: In the second chain from the hook, work 1 hdc and 1 dc into one stitch.
- *Then skip 2 chains. In the next chain, work a sc, hdc, and dc into one stitch.
- Repeat from * for the rest of the row. When there is only 1 ch left, work a sc into the final ch and then ch x1 and turn. The ch x1 at the end is the turning chain to help turn your work, do not work in this chain).
- Row 3: Repeat row 2 but in the tops of stitches instead of the beginning chains.
- Then ch x1 and turn.
- Row 4 and onwards: Repeat row 3 until the desired length for the project has been reached.
- Now you know how to create the crochet sedge stitch! It’s a versatile and beautiful technique that can be used in various projects. Whether you’re making a cozy scarf, a soft washcloth, or something entirely different, the sedge stitch adds texture and interest to any design. I’m excited to see what you create with this stitch!


Leave a Reply