
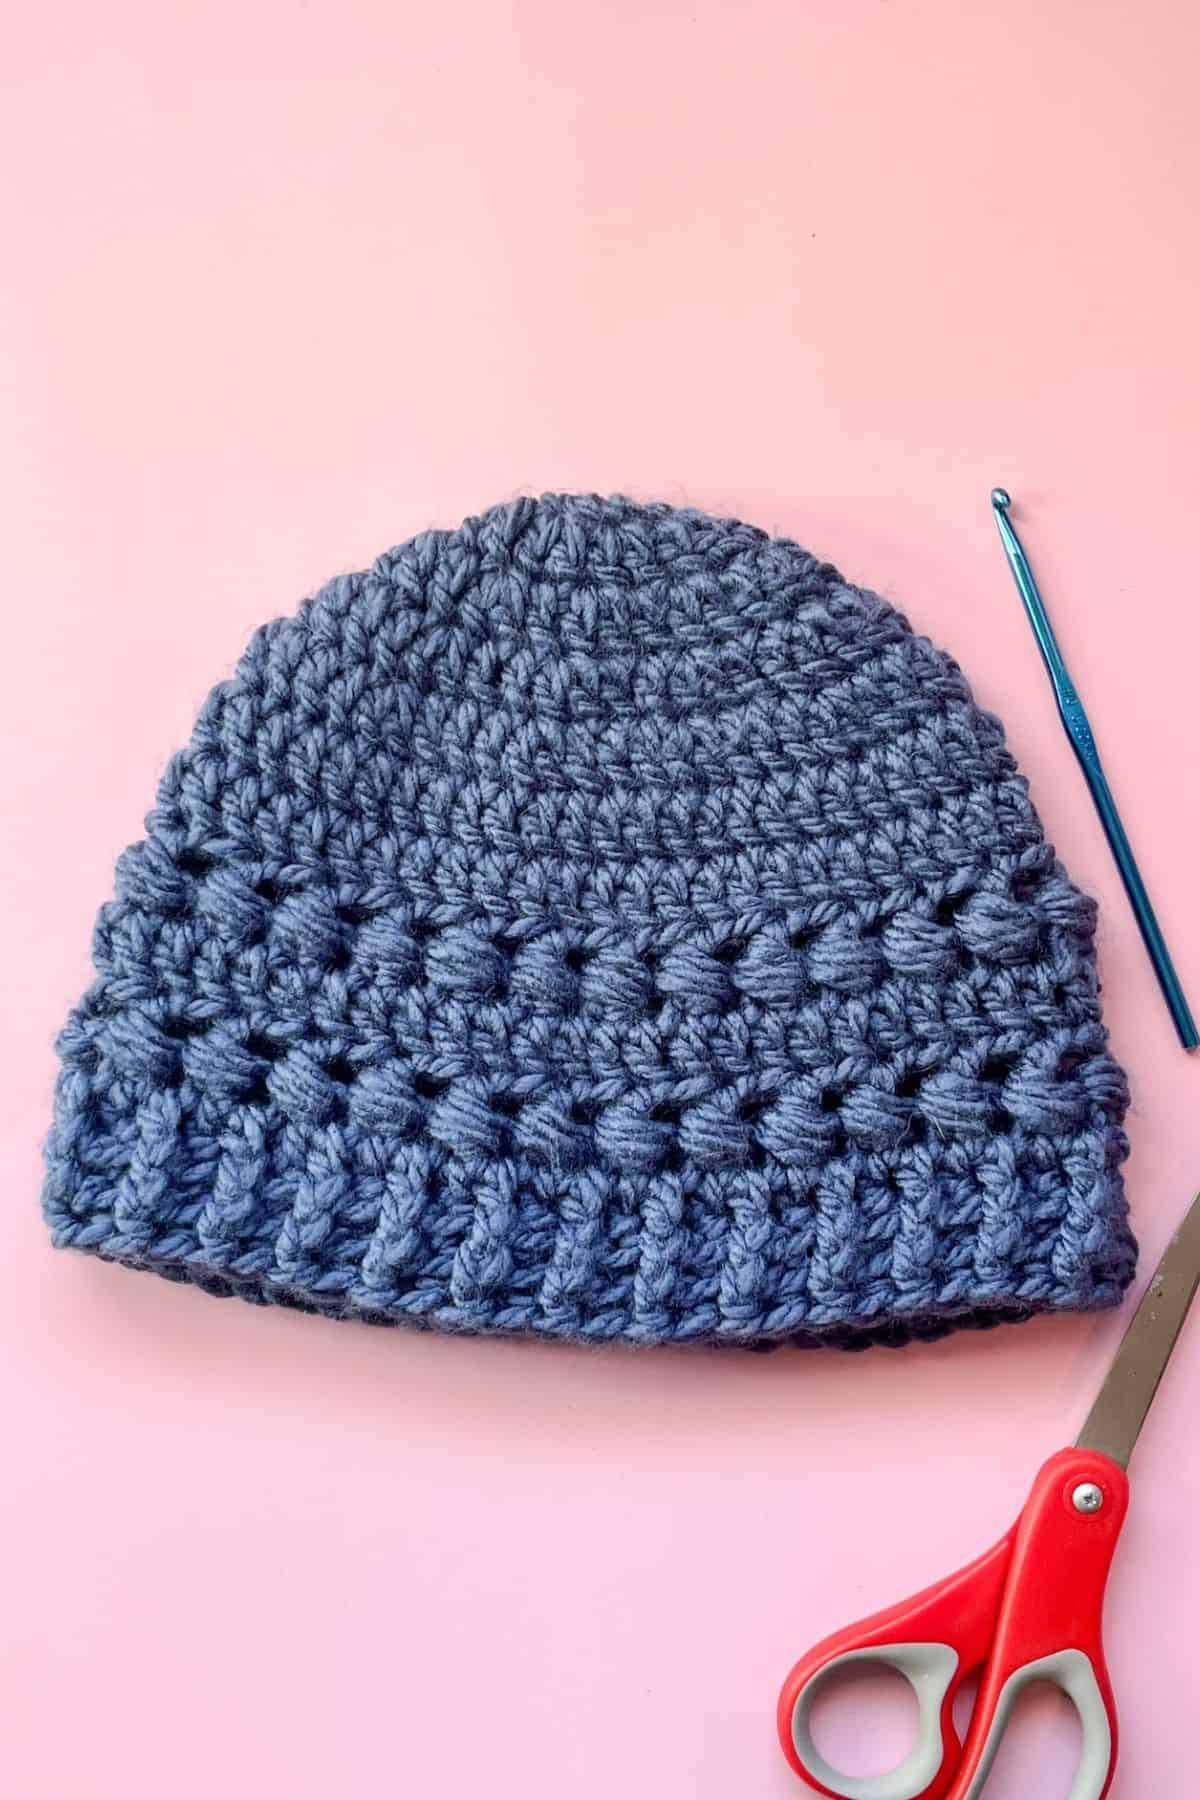
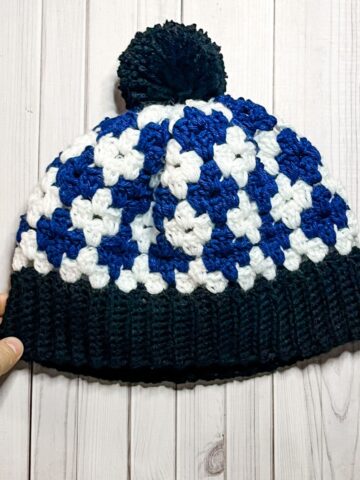
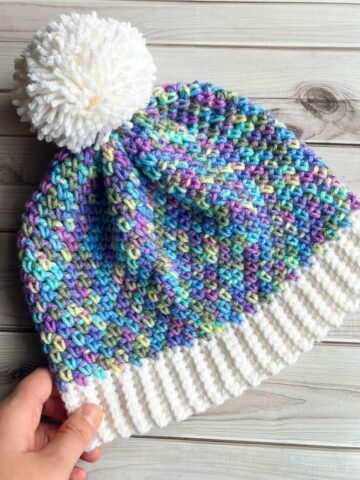
I love making hats with subtle embellishments to give them a WOW! factor and this Bead Stitch Crochet Hat does exactly that. Easy to make, this hat will have everyone turning their heads in awe.
Crochet hats are my favorite type of projects to make right now. They can be made in less than an hour which is quick for last minute gifts, or if you wanted to make yourself a different crochet winter hat for every day of the week -or month. Personally, I have been favoring my crochet frog hat and crochet bear hat most days.
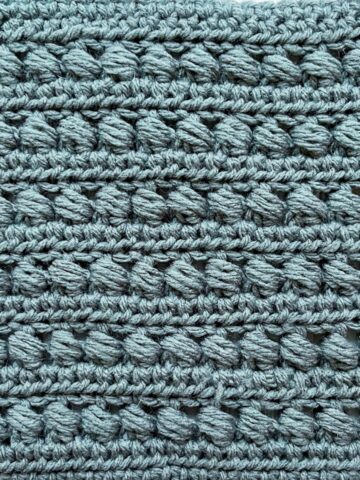
I personally love the bead stitch. It’s a great stitch to learn and is actually quite simple if you know how to crochet around a double crochet post.
If you haven’t crocheted around a double crochet post before, that is okay because all you have to really do is make a double crochet, then grab the stitch and crochet around the vertical part of the stitch instead of the top.
Jump to:
✏️ Things To Note:
- Yarn Consumption: The bead stitch is a yarn eater, so make sure you have more yarn than you initially thought you would need for a hat. I used 1 skein of Homestyle chunky yarn (81 yards) and had only a few yards left over.
- Yarn Weight Flexibility: You can make the bead stitch crochet hat with any weight of yarn, as long as you can comfortably adjust the number of rows needed. The hat size you create will differ from mine, so pay attention to your hook size and use the one recommended for your yarn type.
- Size Adjustments: This crochet hat is an adult medium size. If making for a child, use fewer rounds (30-40 stitches depending on the size you need). Add one extra round for an adult large hat.
🪡 Materials Needed
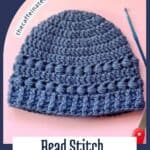
- Any size 6 yarn. I used the Lion Brand Homestyle Navy Blue chunky yarn.
- 6mm hook
- Tapestry needle for weaving in the ends
💭Abbreviations to Remember (US terms)
- Magic ring -mr
- Chain - ch
- Increase double crochet - inc dc
- Double crochet - dc
- Bead stitch - no abbreviation
- Front post double crochet - fpdc
- Back post double crochet - bpdc
- Slip stitch - sl st
- Yarn over- yo
🍵Instructions for Bead Stitch Crochet Hat
This pattern is made in rounds, not in rows.
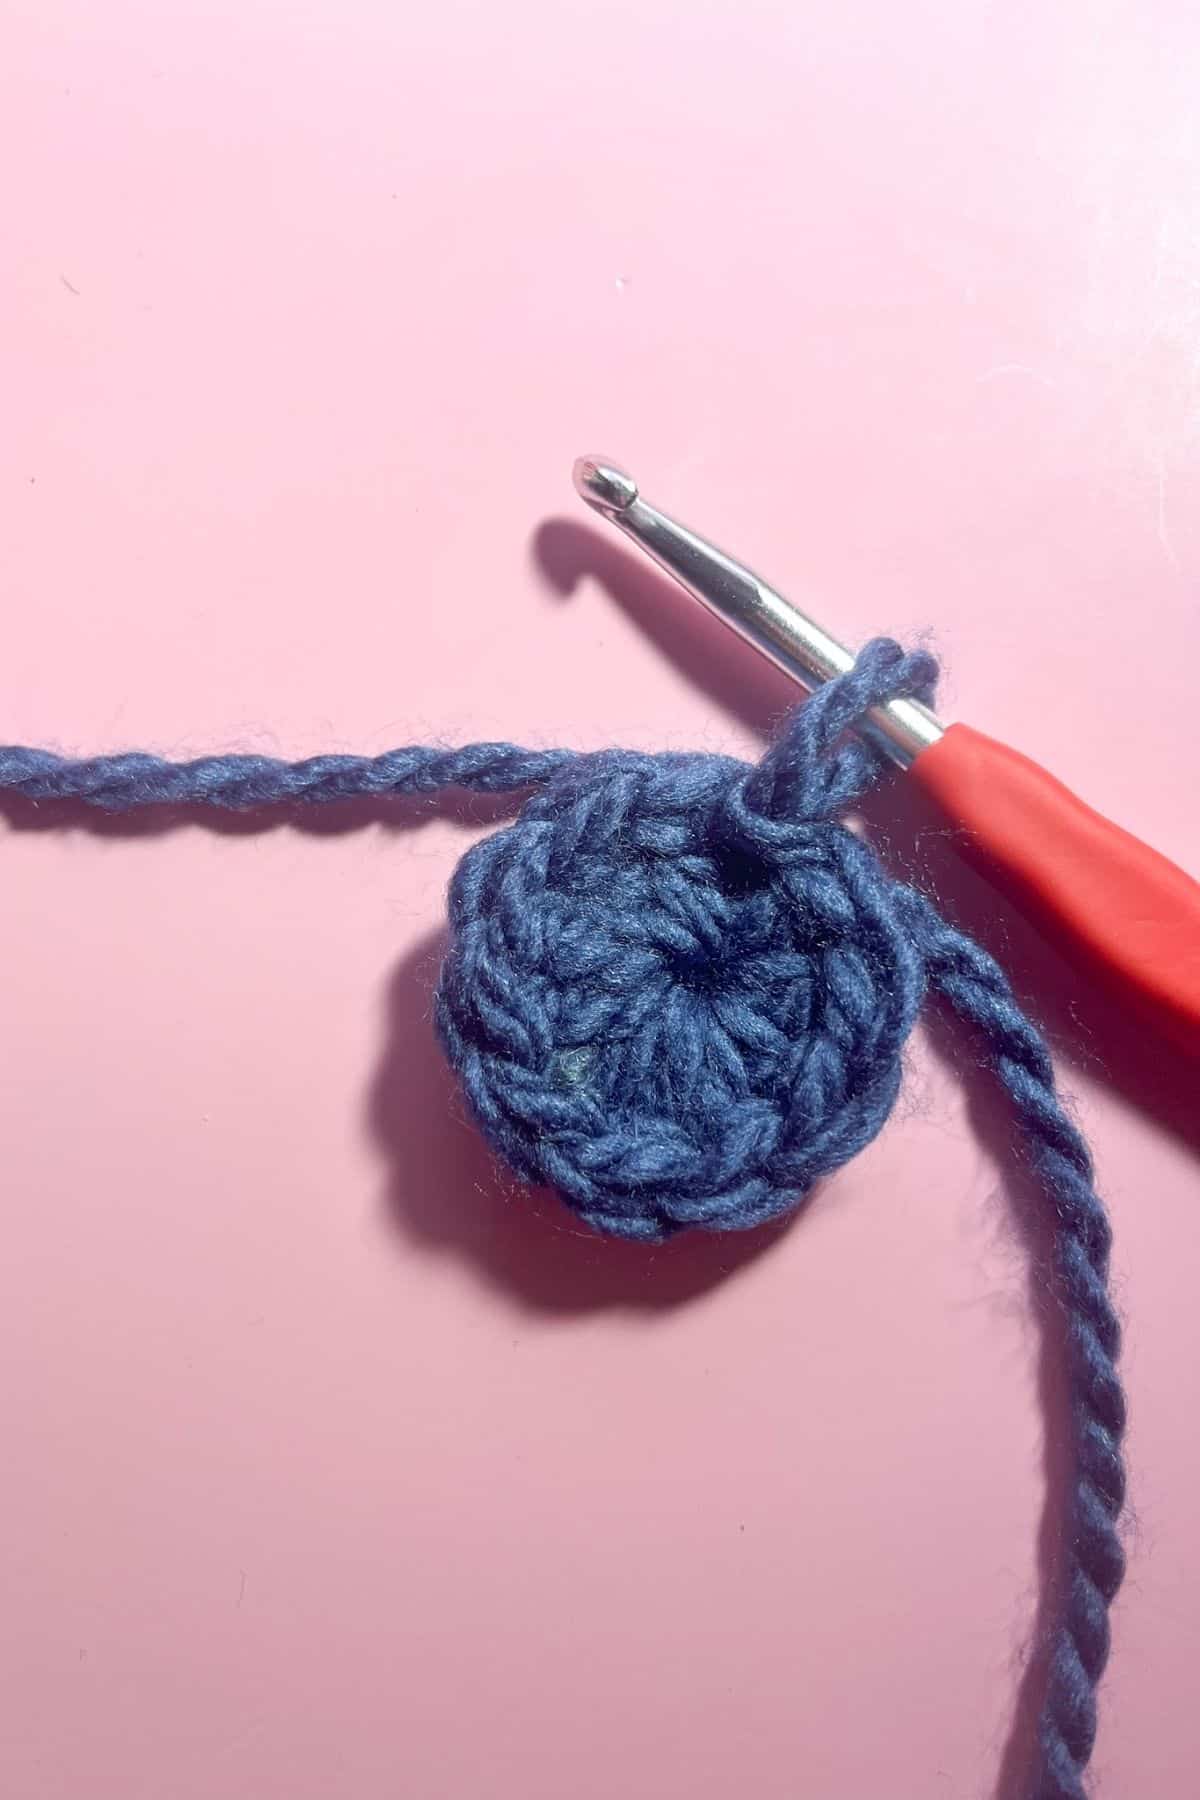
Round 1: Make a mr, next ch x2 and then dc x10 into the mr, sl st to first dc (10).
If you find it difficult making a magic ring you can chain 2 and then in the second chain from hook, slip stitch then ch x2 and crochet dc x10 in the second chain from the hook, then sl st to first dc. (10)
Every round you will begin with a ch x2 but that does not count as a stitch, that is for you to get the height necessary to make the next dc.
Round 2: Ch x2, inc in every dc, sl st to first dc. (20)
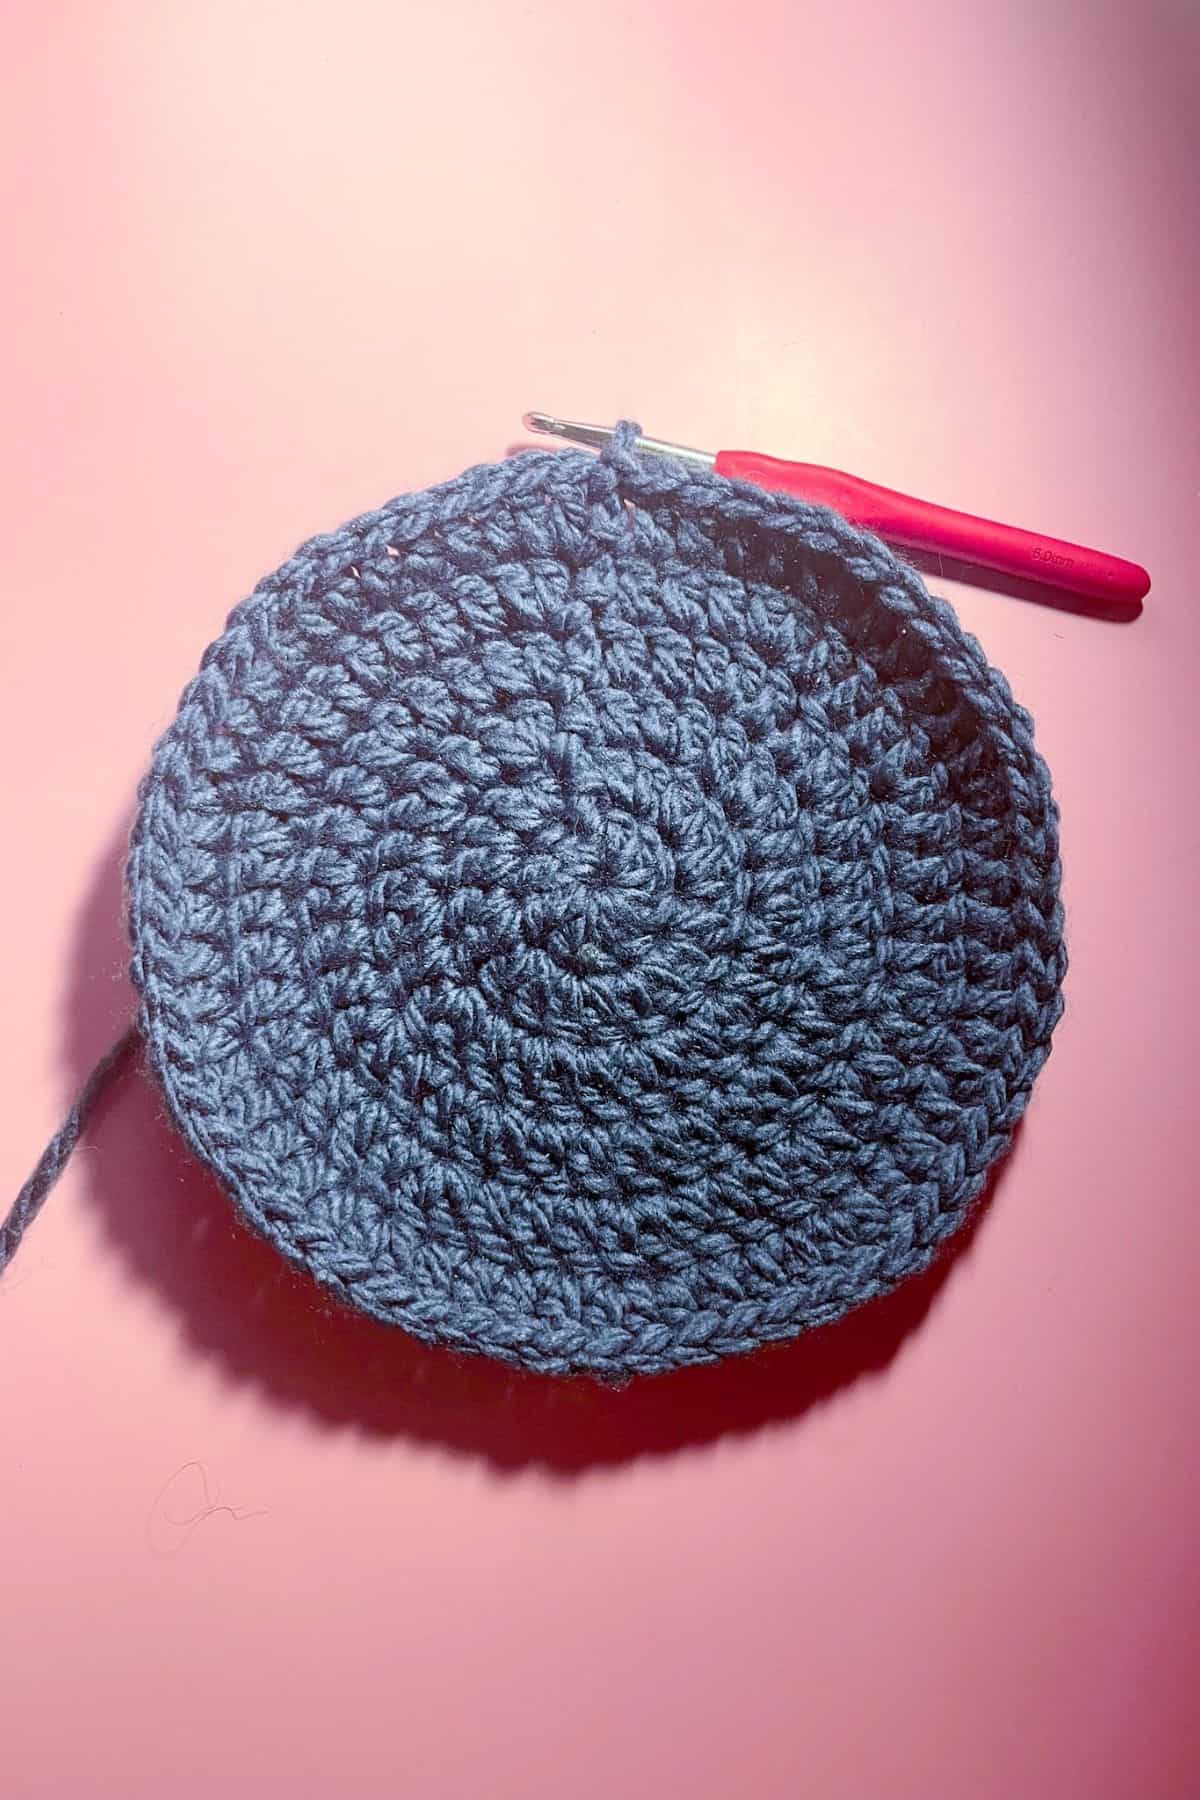
Round 3: Ch x2, (inc dc, dc) repeat what's in the brackets for the rest of the round, sl st to first dc. (30)
Round 4: Ch x2, (inc dc, dc x2) repeat what's in the brackets for the rest of the round, sl st to first dc. (40)
Round 5: Ch x2, (inc dc, dc x3) repeat what's in the brackets for the rest of the round, sl st to first dc. (50)
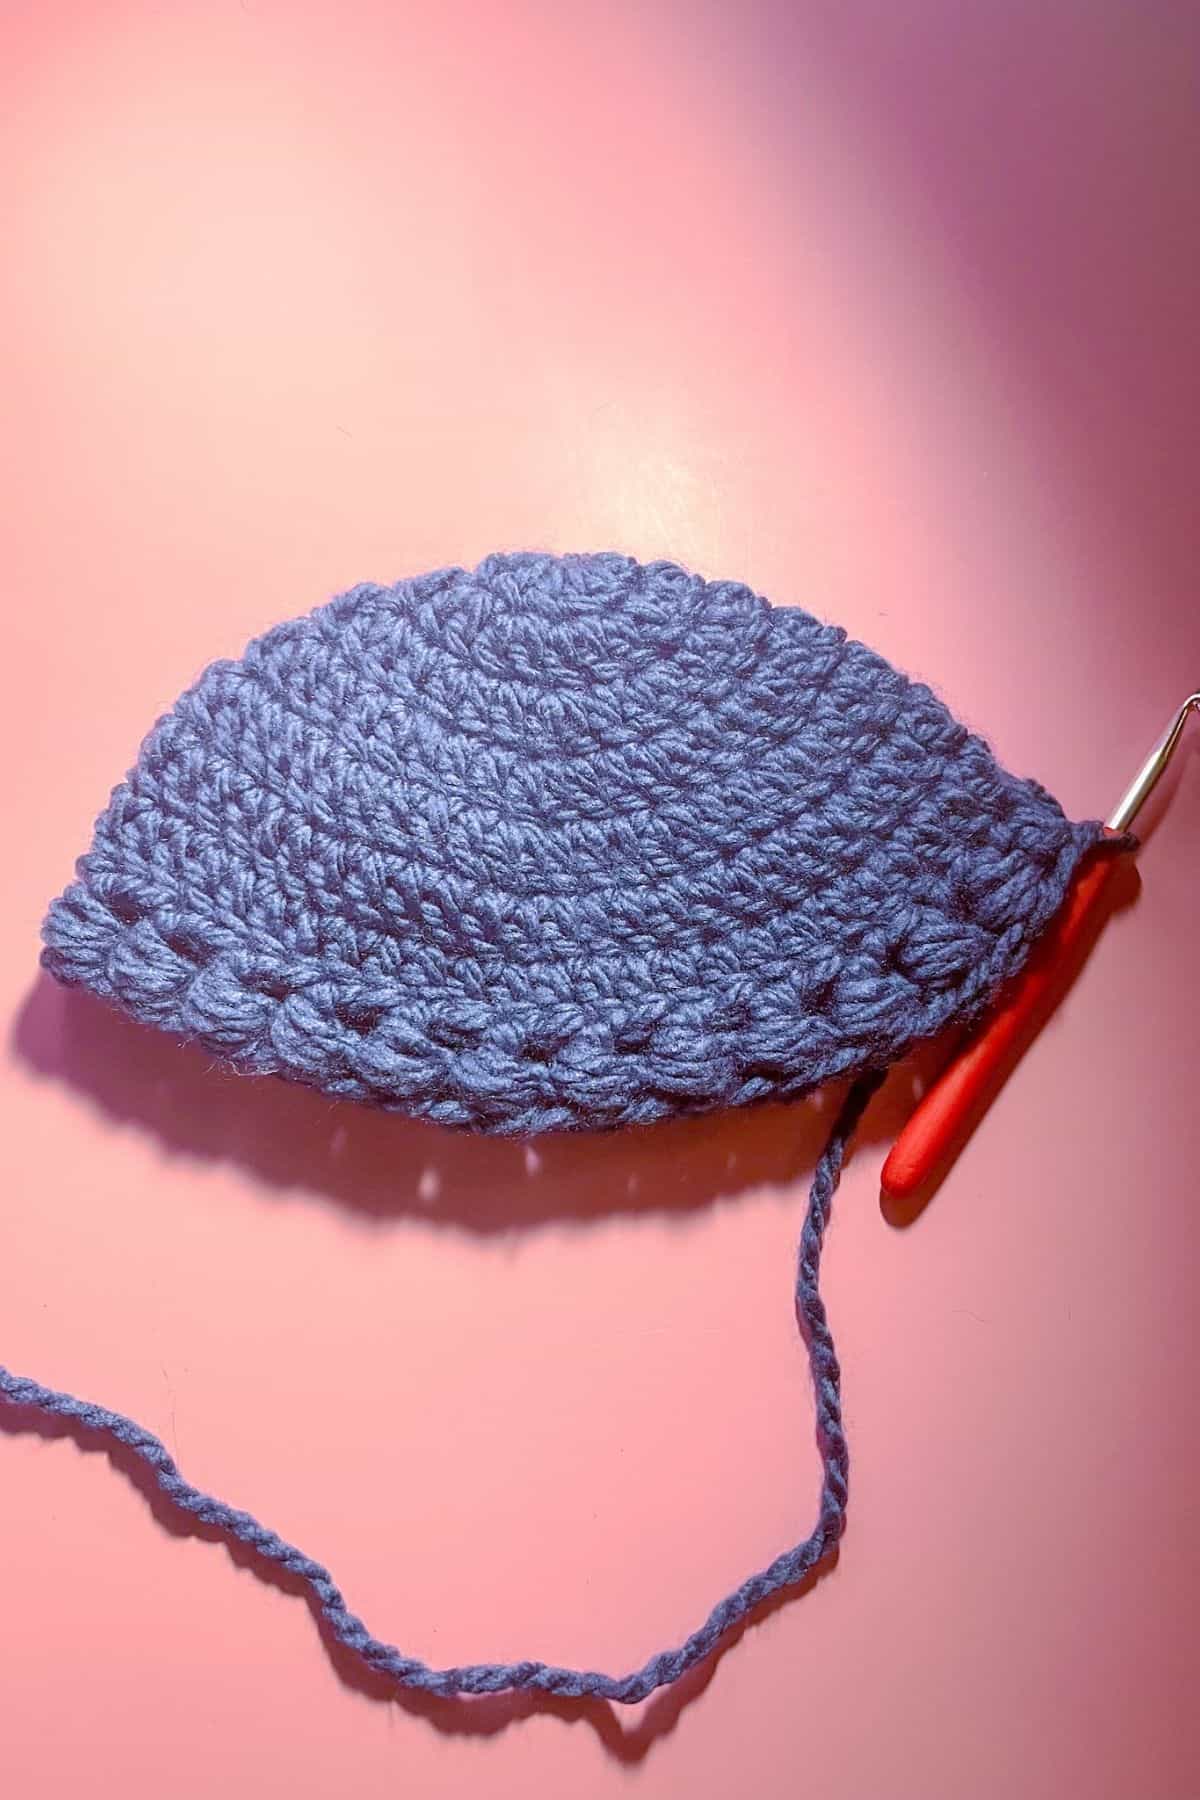
Round 6: Ch x2, dc in every stitch then sl st to first dc. (50)
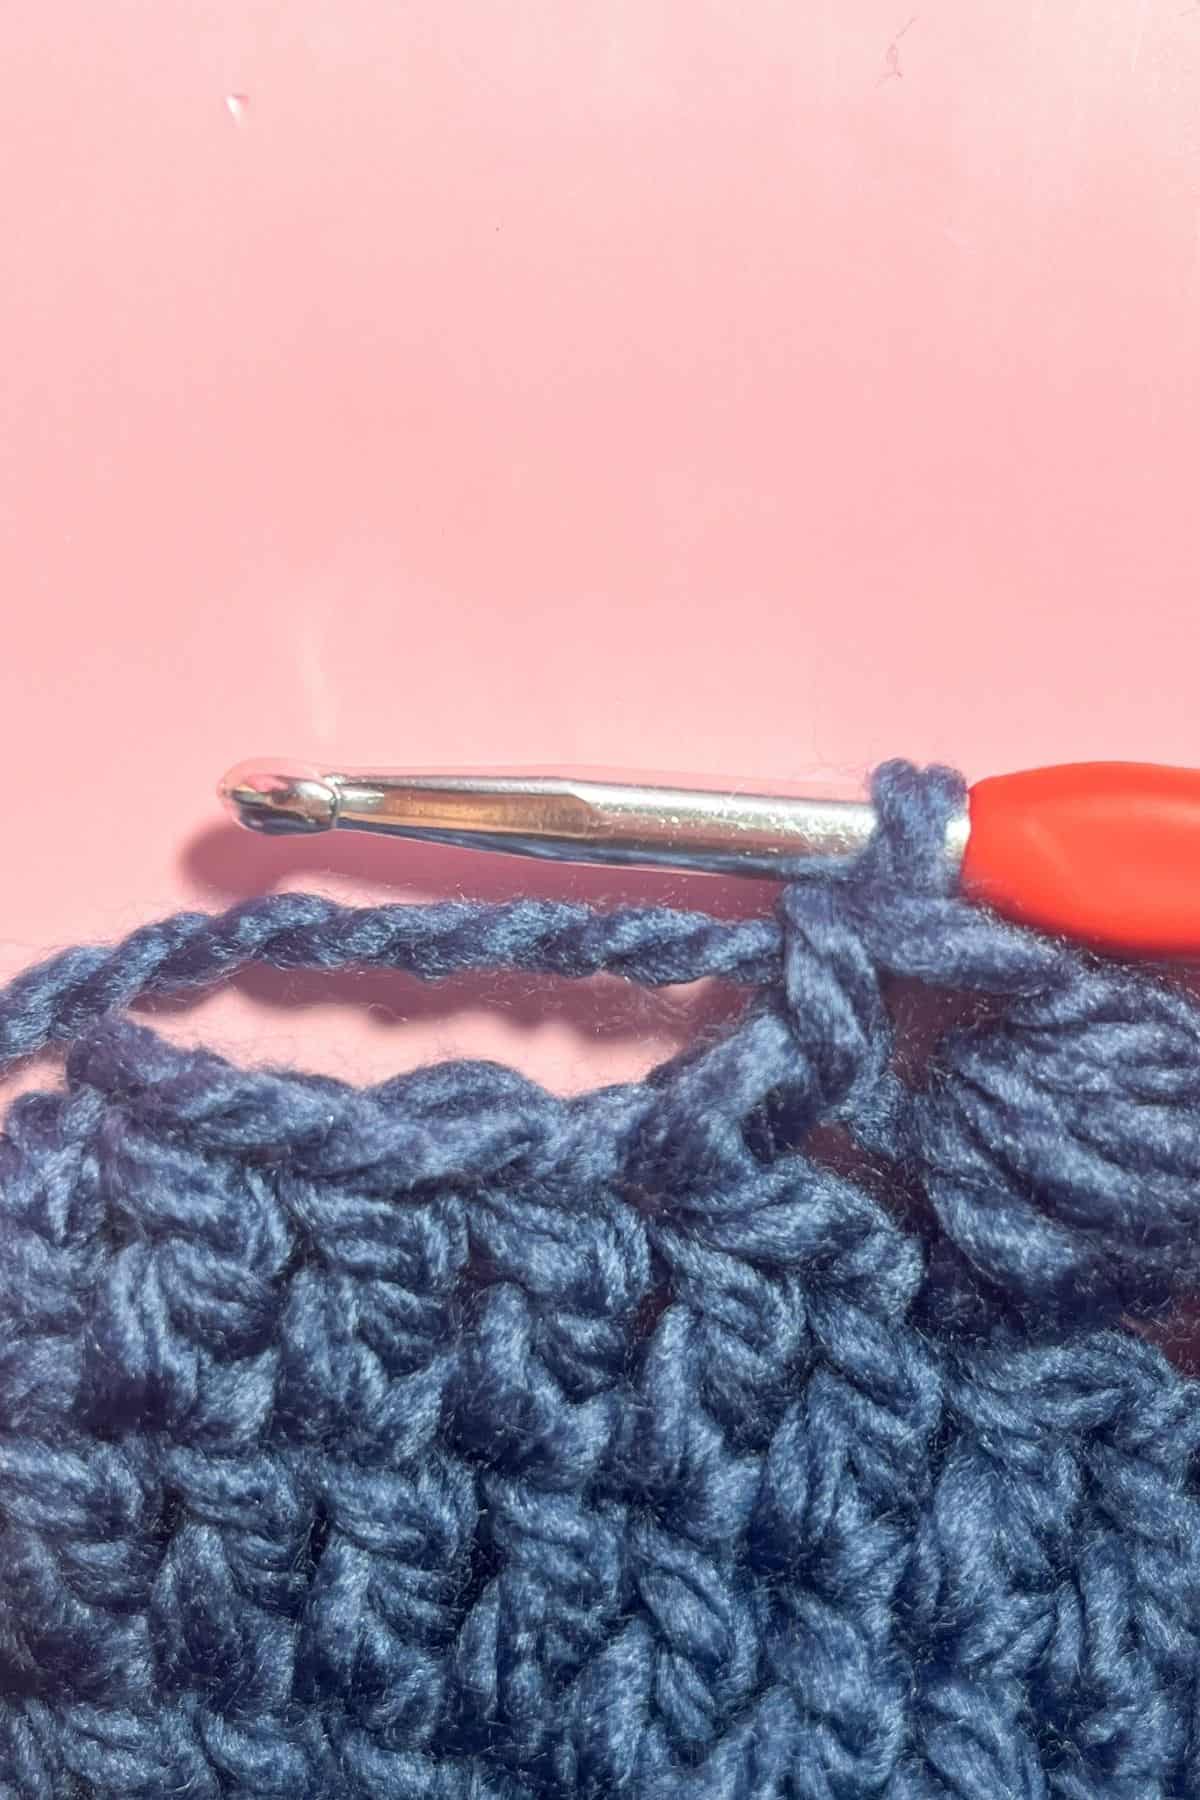
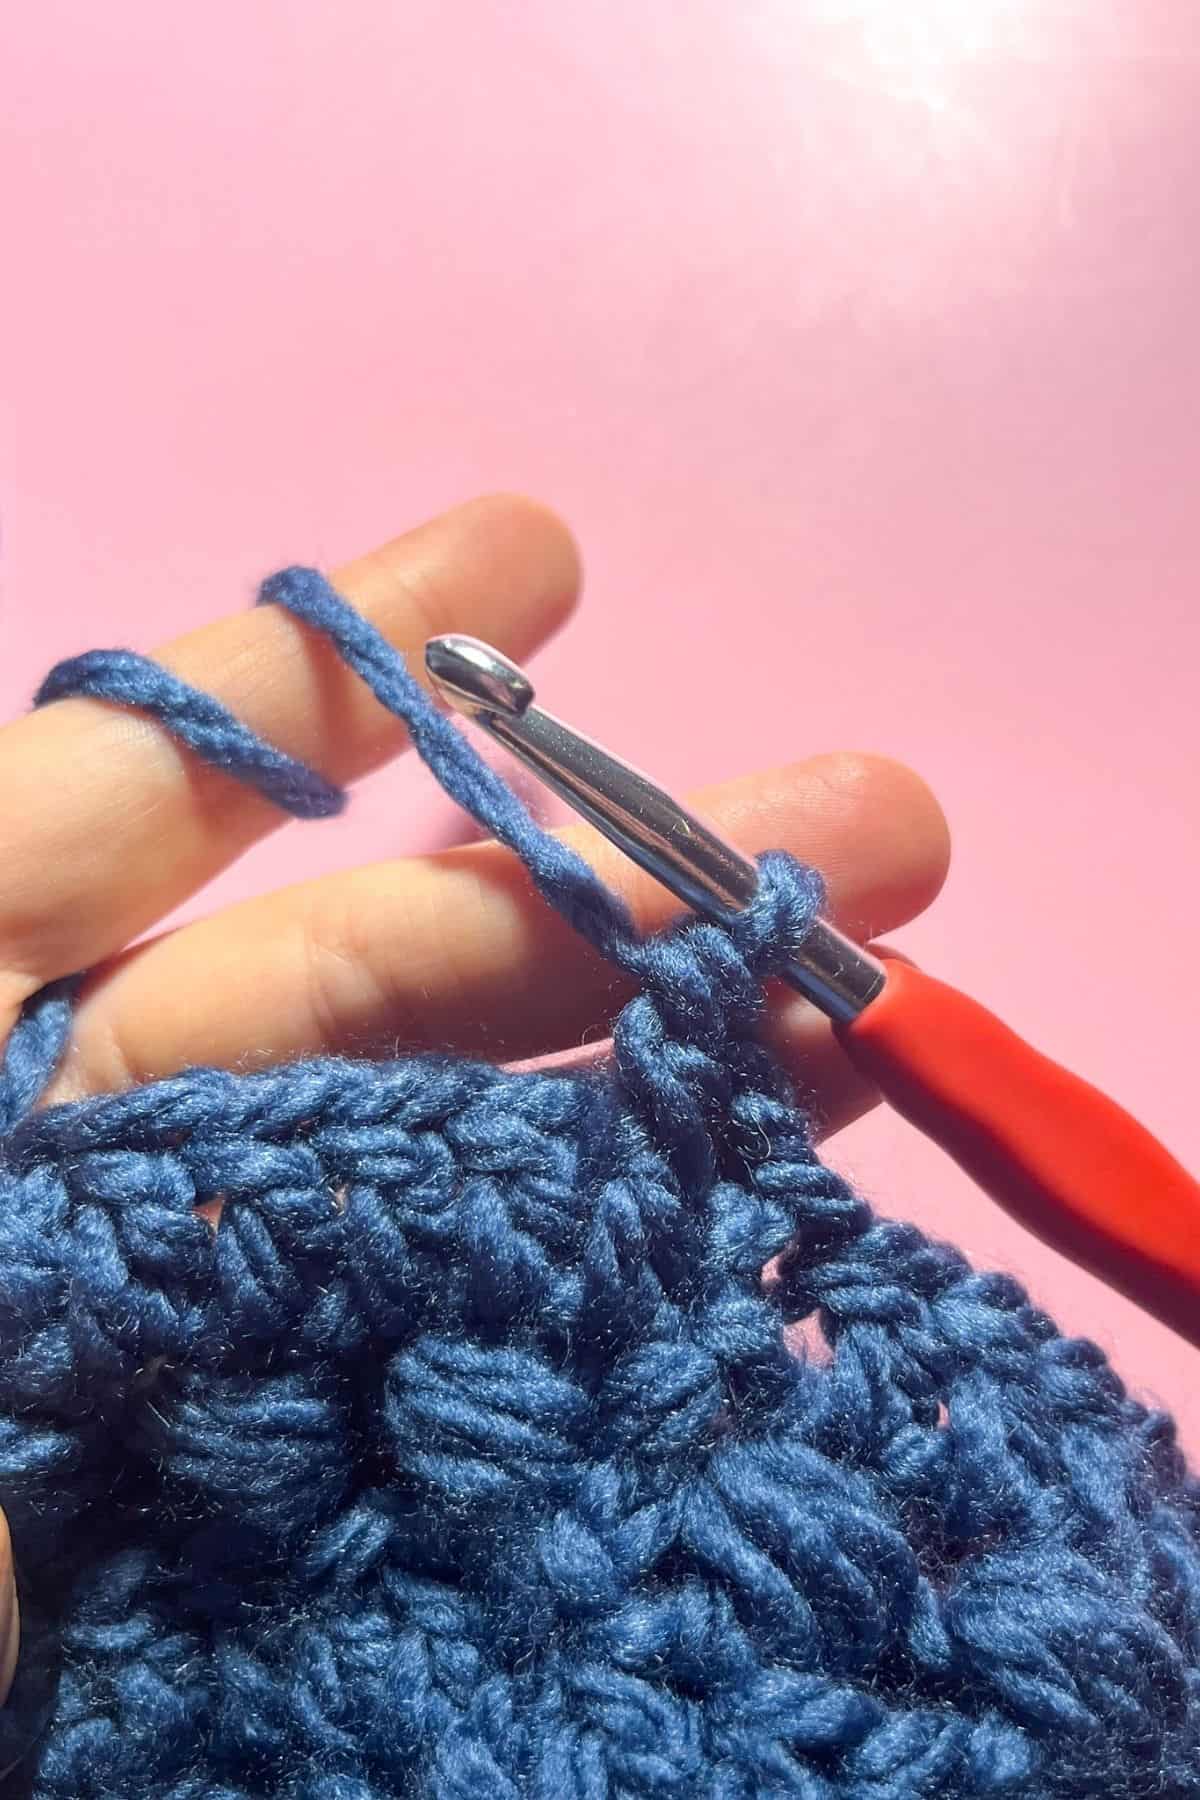
Round 7: Ch x2, dc in the next stitch, and then make a bead stitch (see paragraph below) over that dc stitch.
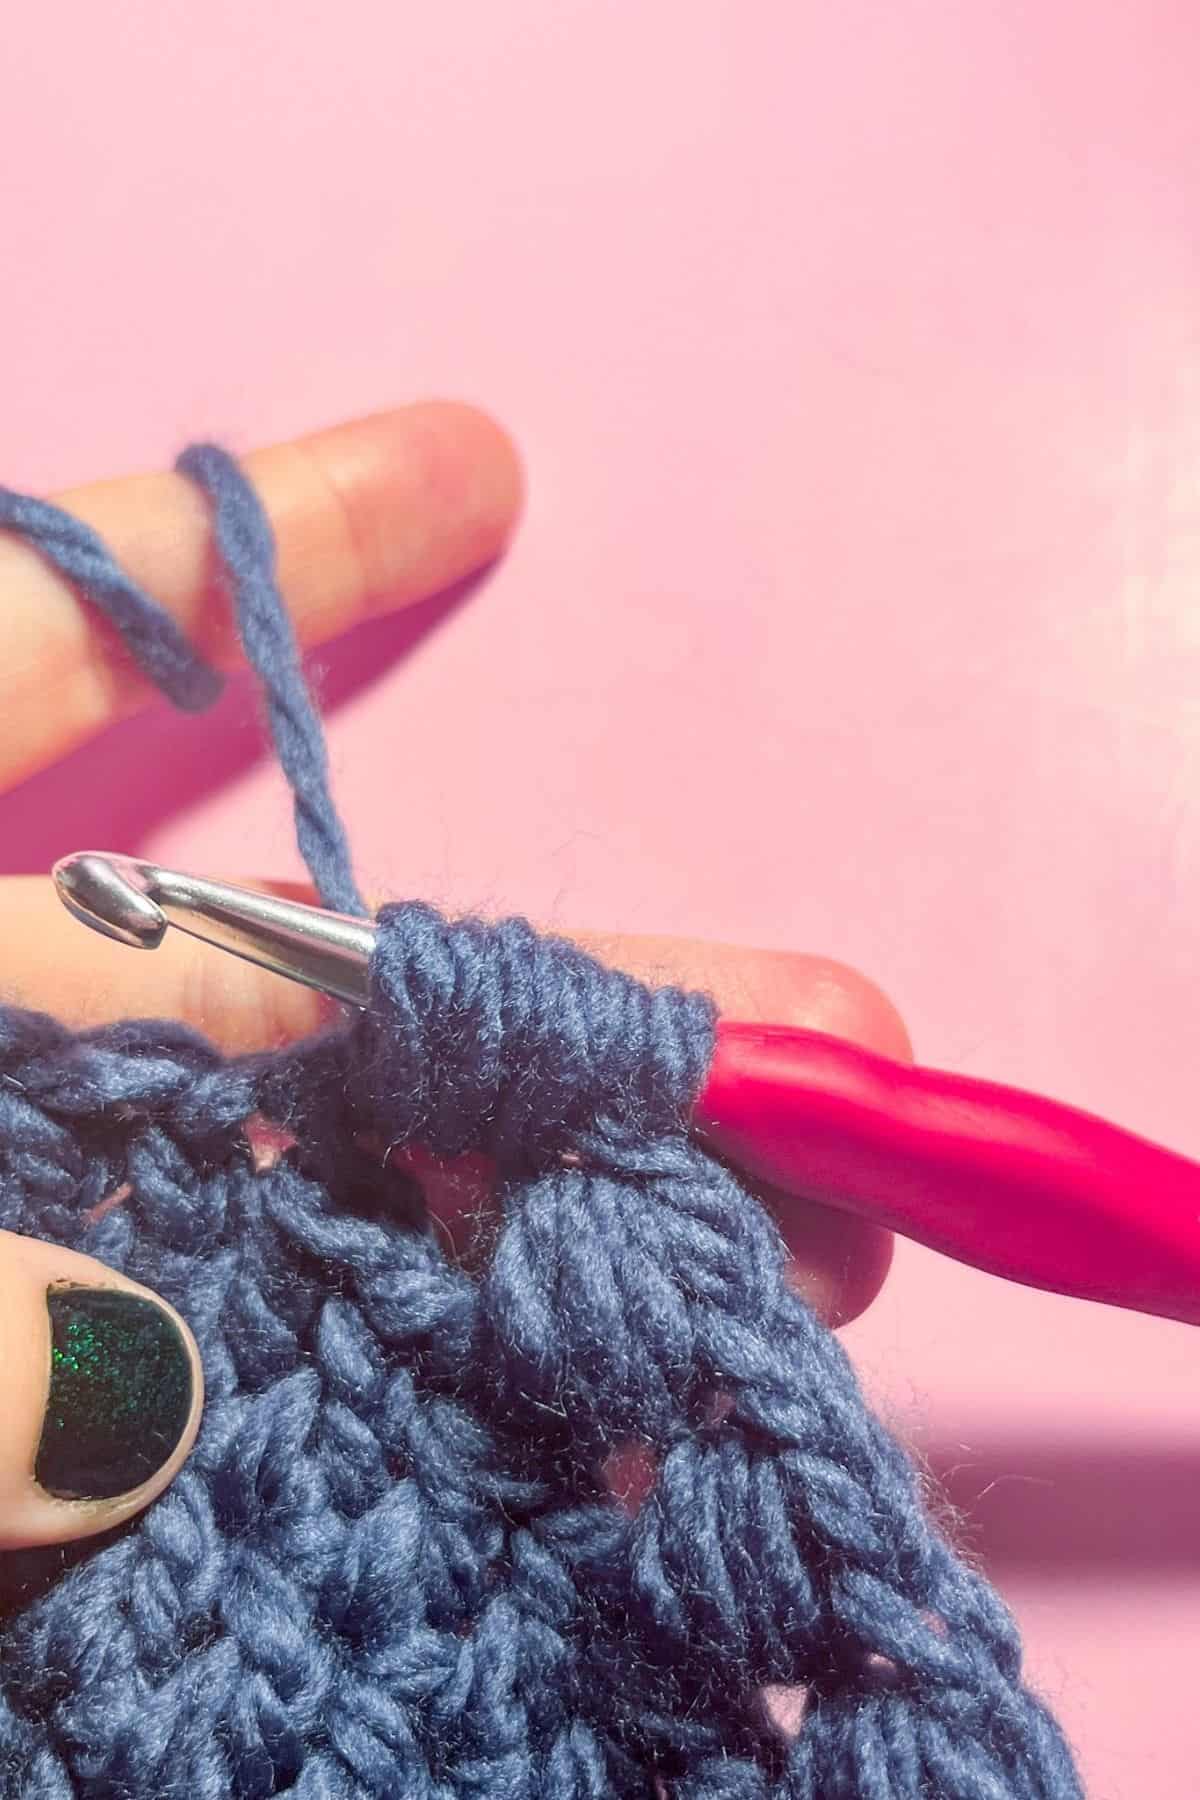
How to crochet the bead stitch: The first step is to make sure a dc was made previously. Then yo, insert hook around the dc POST then pull a loop up, yo, pull up loop like before, yo and pull up another loop. There should be 7 loops on your hook.
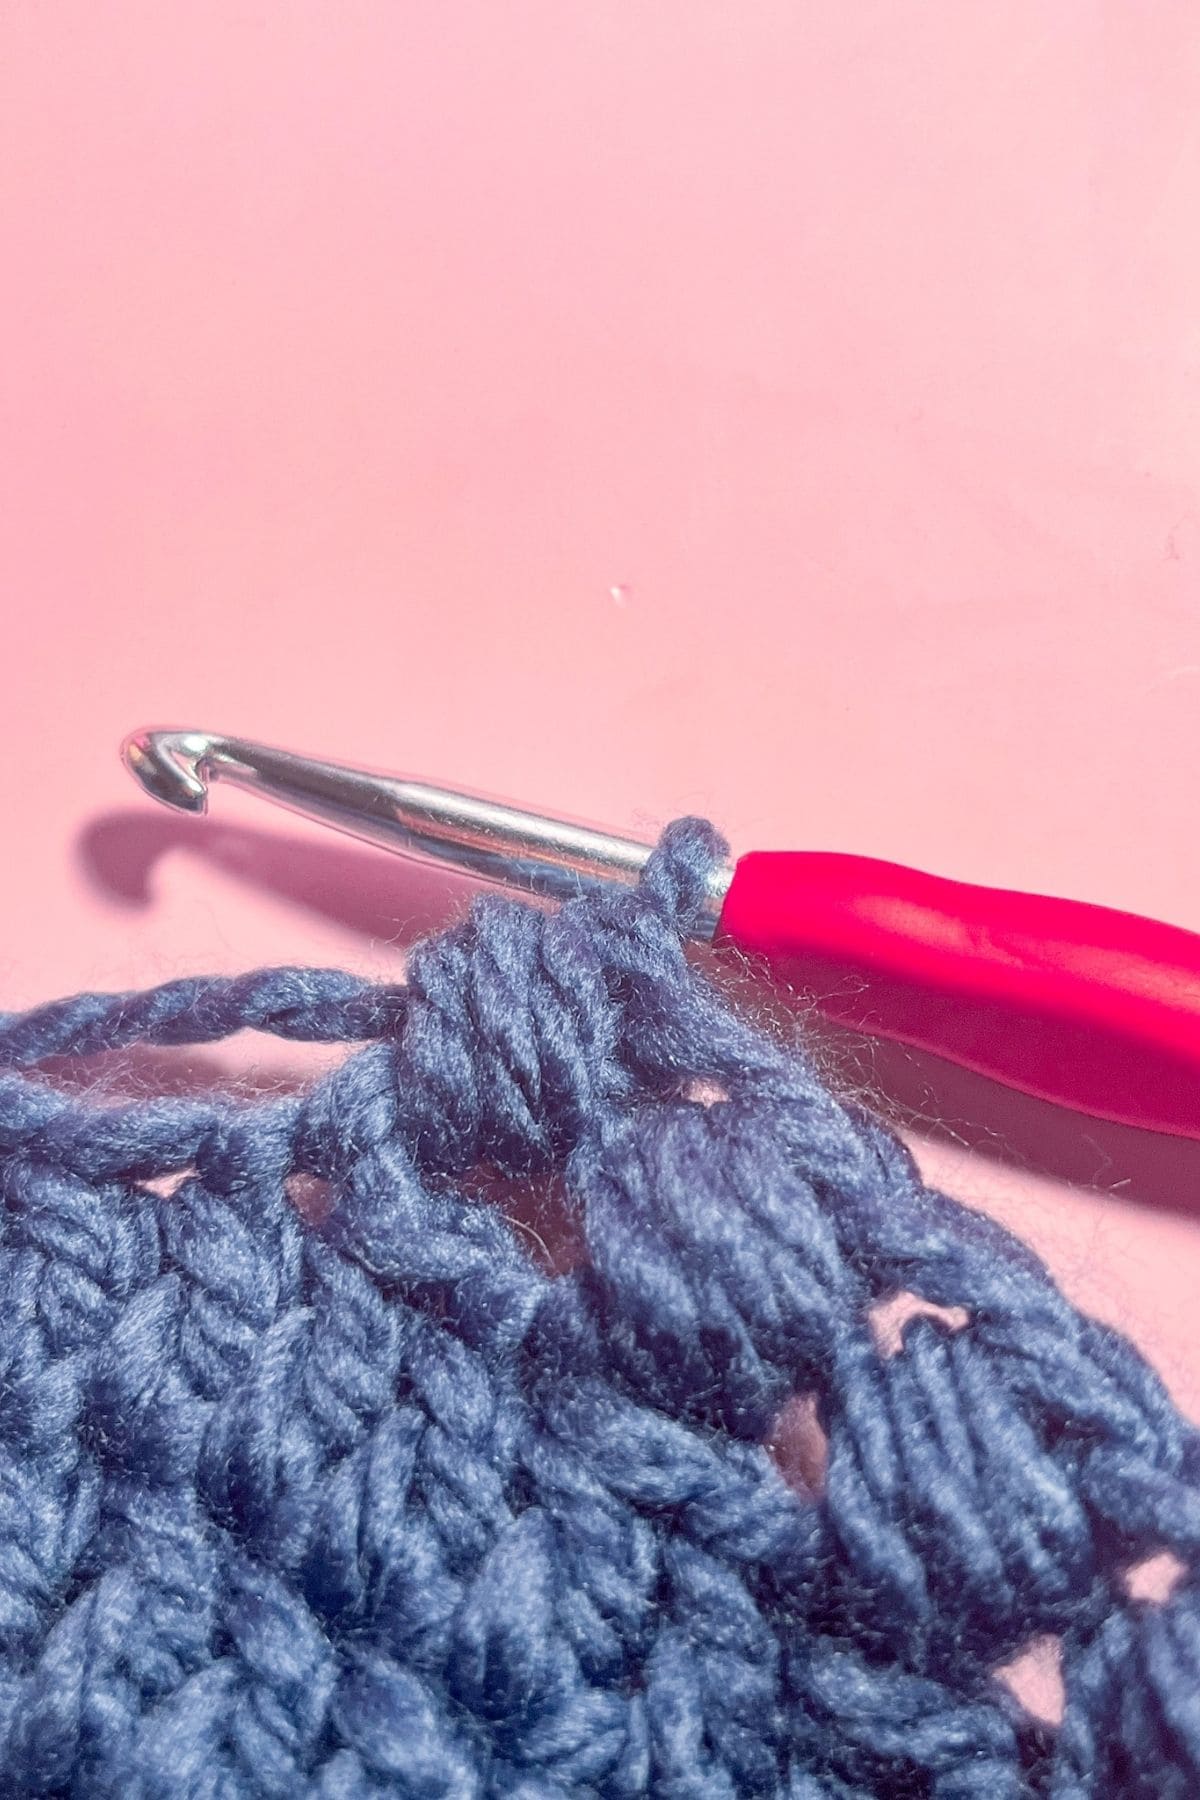
Pull through all 7 loops on your hook.
Skip the following stitch and then dc and follow the steps to make another bead stitch. Then repeat until the row is done. Sl st to the first dc/bead stitch in the round.

Round 8: Ch x2, dc in every stitch then sl st to first dc. (50)
Round 9: Ch x2, dc in the next stitch, and then make a bead stitch.
Skip the following stitch and then dc and follow the steps to make another bead stitch. Then repeat until the row is done. Sl st to the first dc/bead stitch in the round.
Round 10: Ch x2, dc in every stitch then sl st to first dc. (50)
Round 11 - 12: Ch x2, then fpdc in the next stitch and bpdc in the following dc. Repeat fpdc, bpdc for the entire row. Then sl st to the first dc in the round. (50)
*To make a fpdc, grab the dc post from the stitch in the previous row and make a dc. To make it bpdc, you do the same, except instead of grabbing it through the front, you grab it through the back.
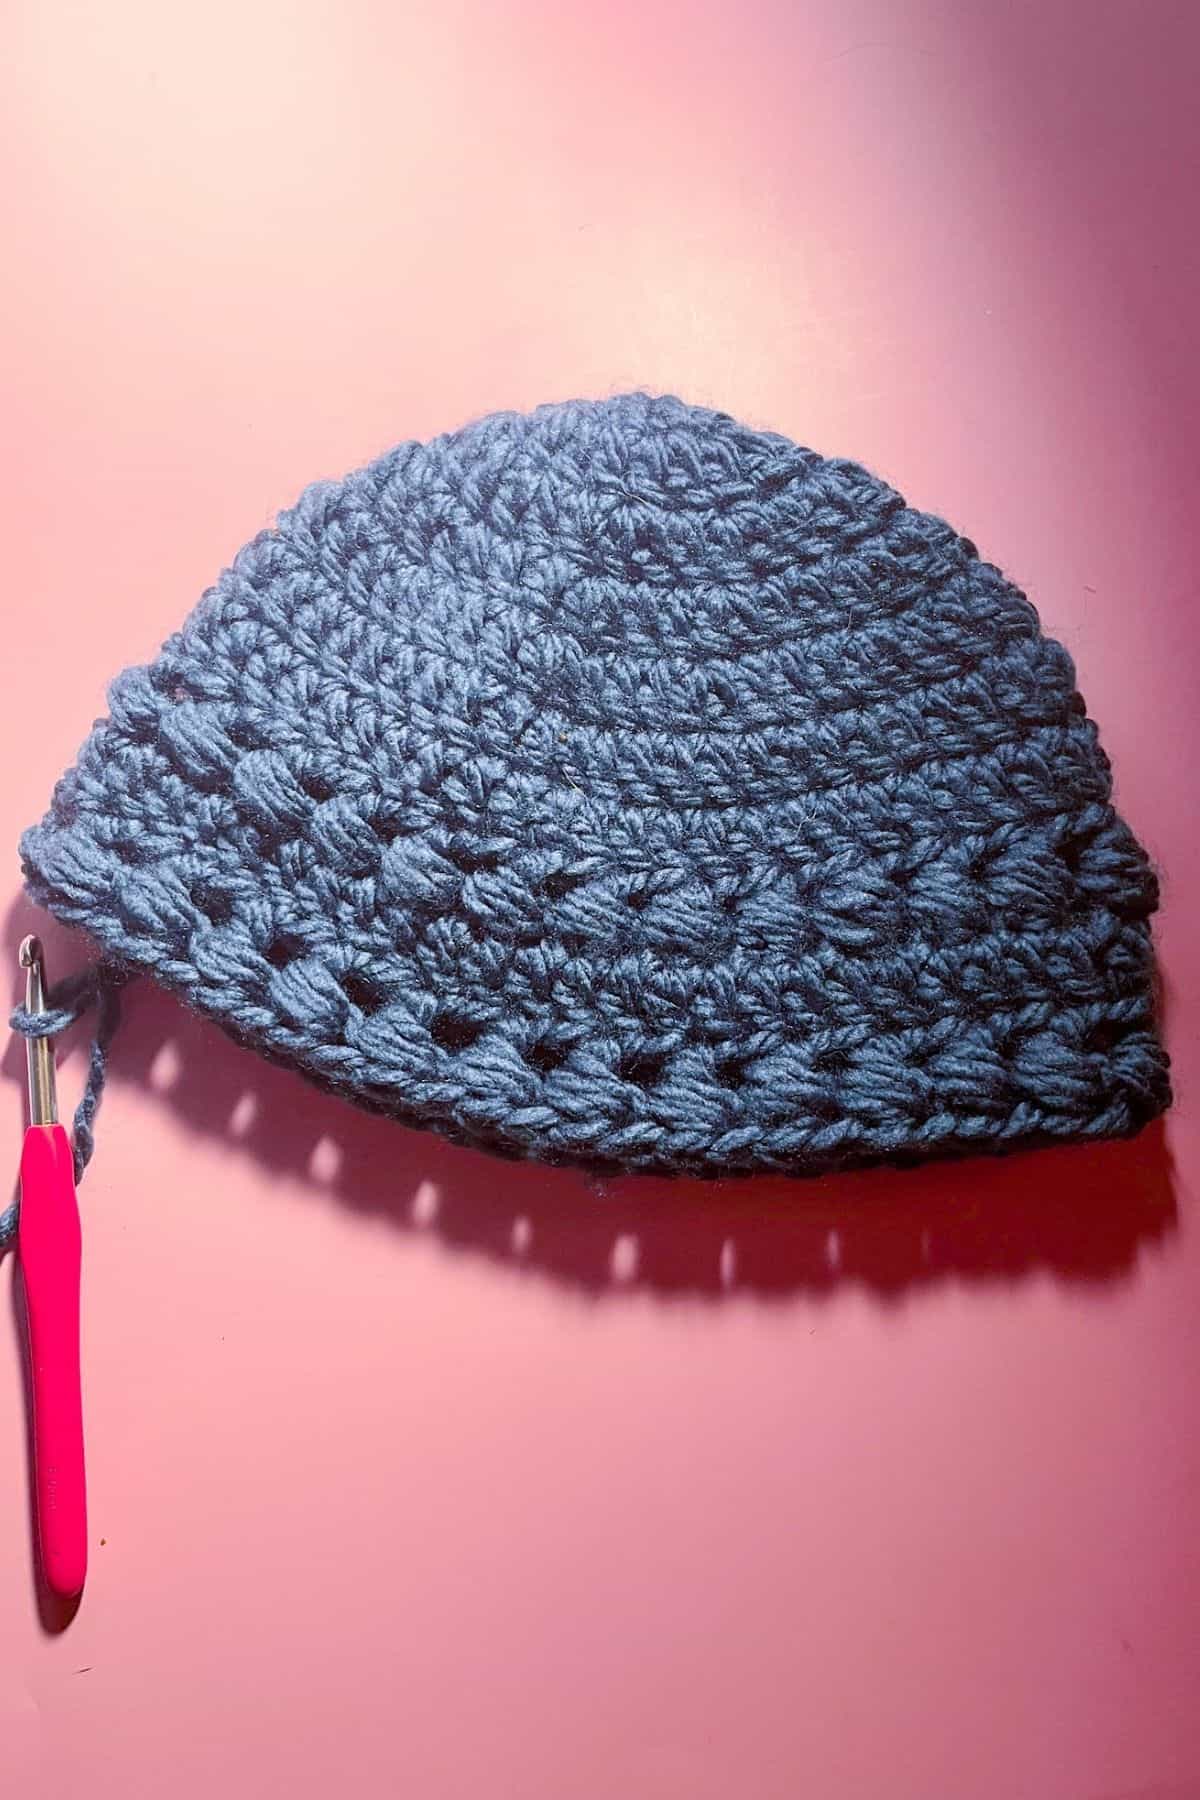
After the last row fasten off and weave in the yarn ends.
Now you have a very warm and trendy crochet hat perfect for those winter walks.
Now you can pair it with a sophisticated scarf like my crochet linen stitch scarf and easy crochet fingerless gloves for a full winter ensemble.
🐌Expert Tips
- Post Positioning: If going under or behind dc posts feels awkward, try angling your work for better access.
- Yarn Substitutes: Feel free to use any size 6 yarn, including cotton or acrylic blends, to suit your preference.
- Adjusting Size: If losing a row or two makes the hat too small, you can add a row of half double crochets (hdc), which will give you extra width without making it too large.
🧵Pattern FAQs
You can do a row of half double crochets, it is about half the size of a dc row, so you will get some extra width to that without it becoming too much.
Yes! I used acrylic chunky yarn so it should work perfectly. Any size 6 yarn regardless of type of fiber should work.
You can but be warned you will have 14 loops on your hook to make a bead stitch which can be quite a lot for some to manage.
🧶More Crochet Stitch Patterns


If you tried this Bead Stitch Crochet Hat (or any other pattern on my website), please let me know how it went in the 📝 comments below. I'd love to hear from you!
Bead Stitch Crochet Hat
Materials
Abbreviations (US terms)
- mr = Magic ring
- ch = Chain
- inc dc = Double Crochet Increase
- dc = Double Crochet
- Bead Stitch no abbreviation
- fpdc = Front Post Double Crochet
- bpdc = Back Post Double Crochet
- sl st = Slip Stitch
- yo = Yarn Over
Notes
Instructions
- This pattern is made in rounds, not in rows.
- Round 1: Make a mr, next ch x2 and then dc x10 into the mr, sl st to first dc (10).
- If you find it difficult making a magic ring you can chain 2 and then in the second chain from hook, slip stitch then ch x2 and crochet dc x10 in the second chain from the hook, then sl st to first dc. (10)
- Every round you will begin with a ch x2 but that does not count as a stitch, that is for you to get the height necessary to make the next dc.
- Round 2: Ch x2, inc in every dc, sl st to first dc. (20)
- Round 3: Ch x2, (inc dc, dc) repeat what's in the brackets for the rest of the round, sl st to first dc. (30)
- Round 4: Ch x2, (inc dc, dc x2) repeat what's in the brackets for the rest of the round, sl st to first dc. (40)
- Round 5: Ch x2, (inc dc, dc x3) repeat what's in the brackets for the rest of the round, sl st to first dc. (50)
- Round 6: Ch x2, dc in every stitch then sl st to first dc. (50)
- Round 7: Ch x2, dc in the next stitch, and then make a bead stitch (see paragraph below) over that dc stitch.
- *How to crochet the bead stitch: The first step is to make sure a dc was made previously. Then yo, insert hook around the dc POST then pull a loop up, yo, pull up loop like before, yo and pull up another loop. There should be 7 loops on your hook. Pull through all 7 loops on your hook.
- Skip the following stitch and then dc and follow the steps to make another bead stitch. Then repeat until the row is done. Sl st to the first dc/bead stitch in the round.
- Round 8: Ch x2, dc in every stitch then sl st to first dc. (50)
- Round 9: Ch x2, dc in the next stitch, and then make a bead stitch over that dc stitch.
- Skip the following stitch and then dc and follow the steps to make another bead stitch. Then repeat until the row is done. Sl st to the first dc/bead stitch in the round.
- Round 10: Ch x2, dc in every stitch then sl st to first dc. (50)
- Round 11 - 12: Ch x2, then fpdc in the next stitch and bpdc in the following dc. Repeat fpdc, bpdc for the entire row. Then sl st to the first dc in the round. (50)
- *To make a fpdc, grab the dc post from the stitch in the previous row and make a dc. To make it bpdc, you do the same, except instead of grabbing it through the front, you grab it through the back.
- After the last row fasten off and weave in the yarn ends.
- Now you have a very warm and trendy bead stitch crochet hat perfect for those winter walks.


Kim Didion says
I made one hat using hobbii's Umami yarn and it looks lovely. However I didn't like the look of the chain 2 once it got to the bead stitches so I made the last bead stitch over the last double crochet and the chain two. For the first row of alternating fpdc and bpdc I skipped the last stitch to make it look like the chain 2 was a bpdc.