
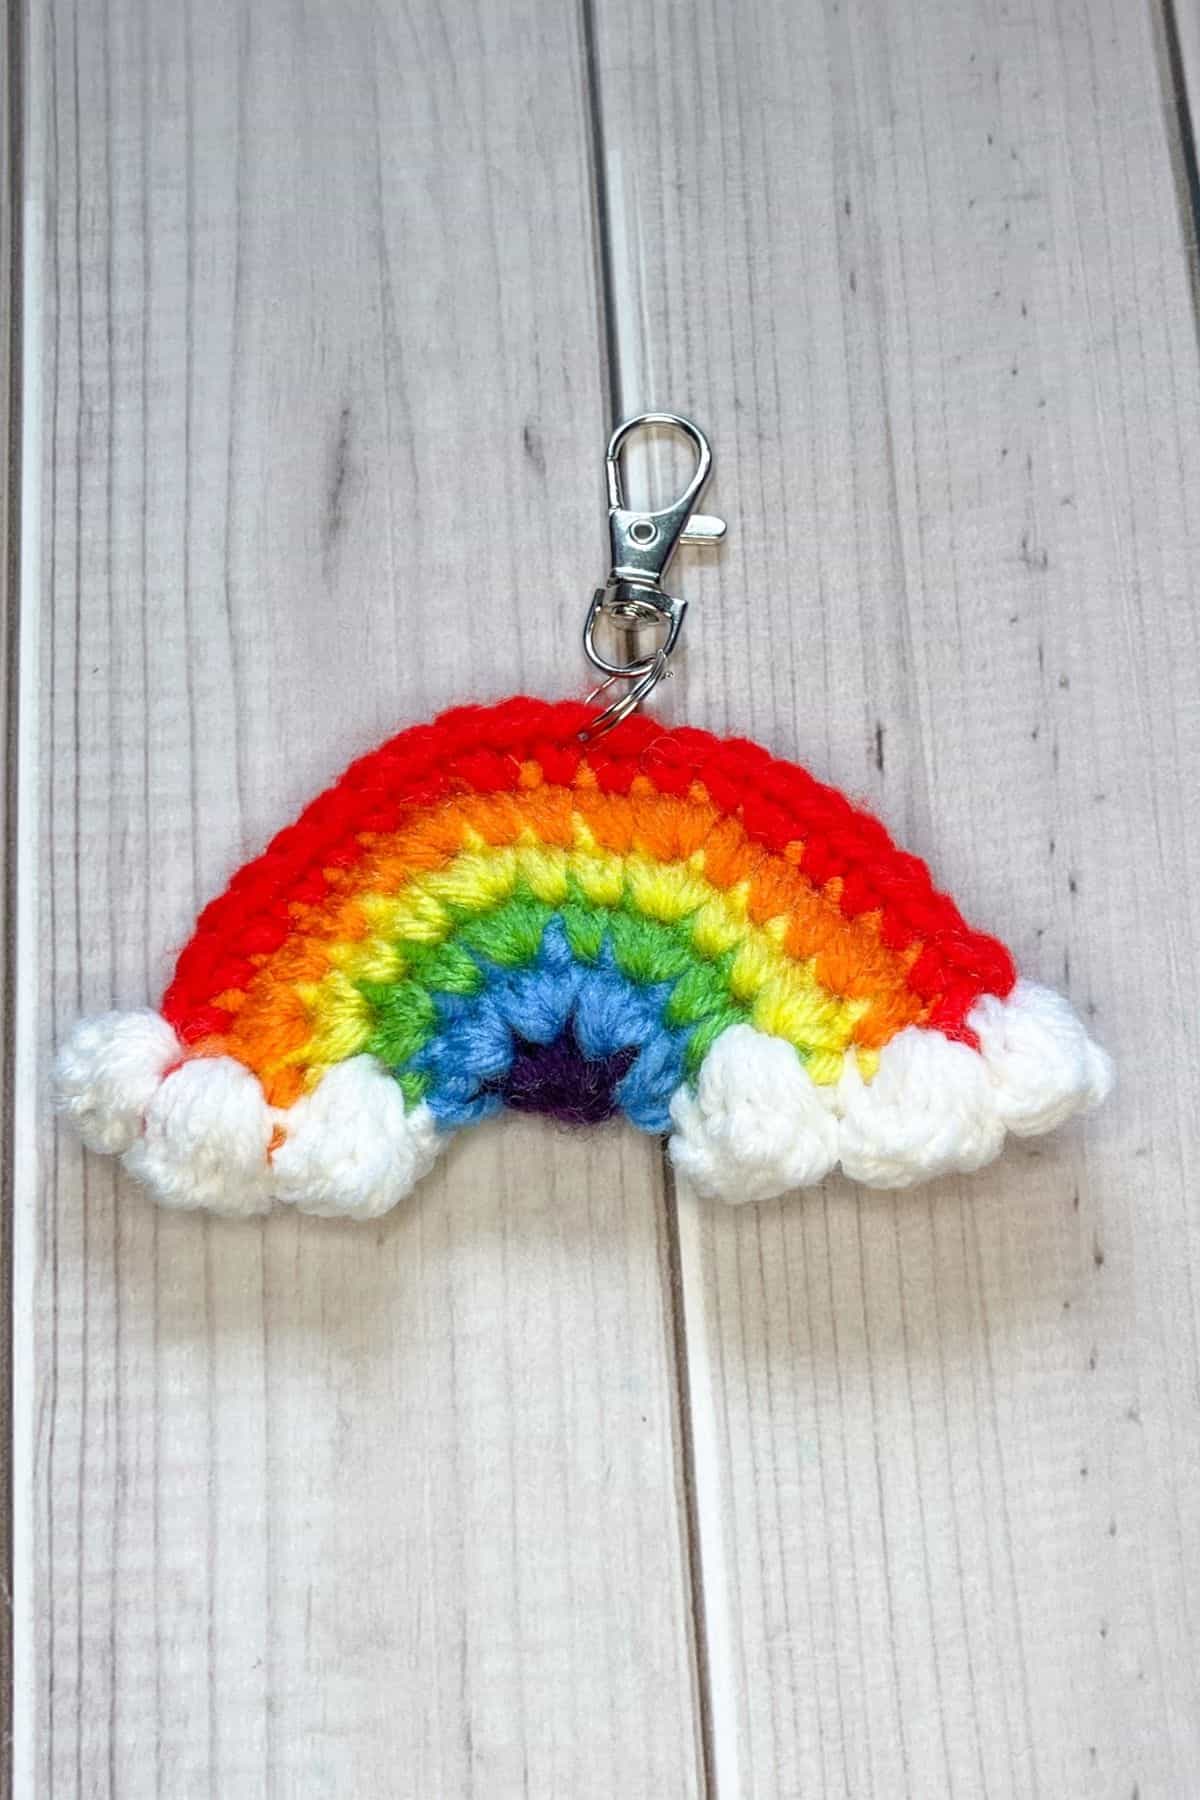
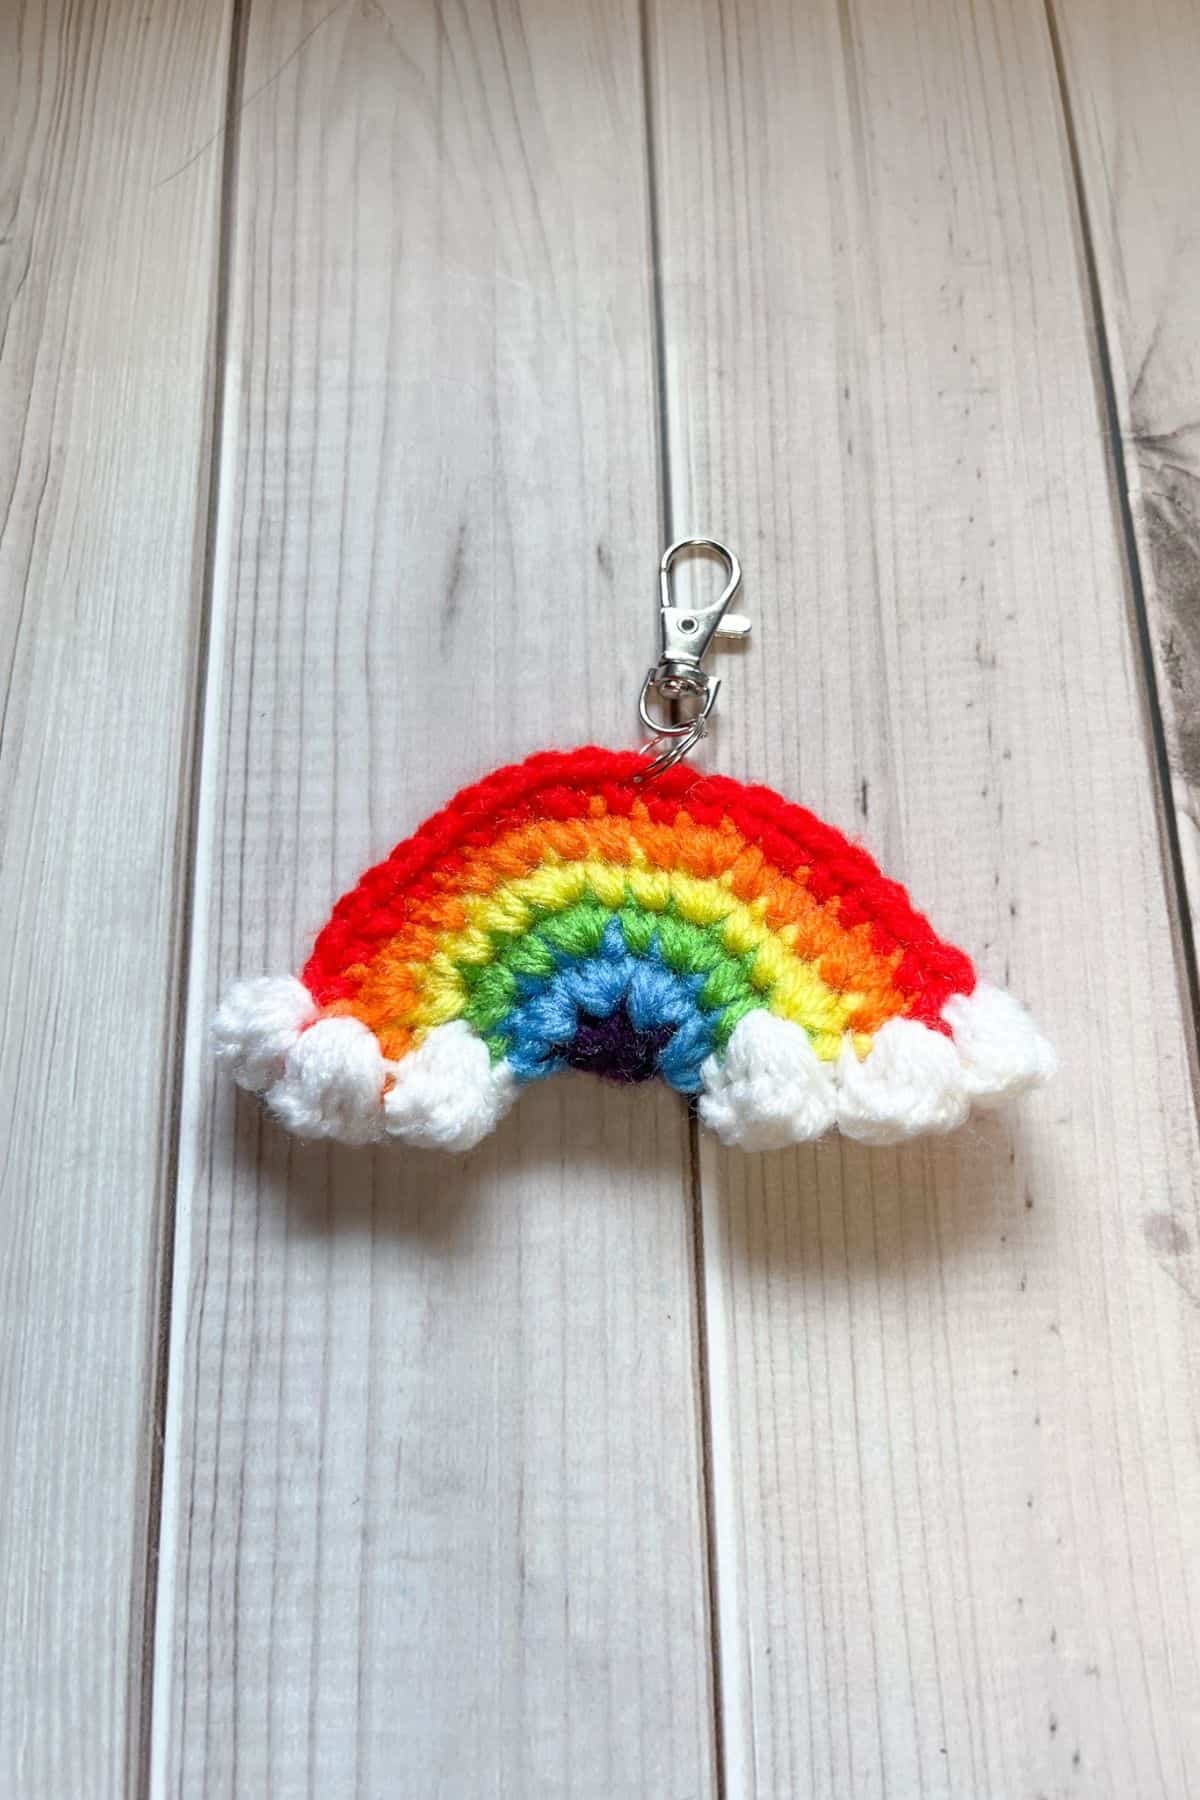
With the many rainy and gloomy days ahead, sit down and whip up a quick colorful crochet rainbow keychain! My Crochet Rainbow Keychain Pattern is sure to brighten up your life and keyring!
I live in a place where it is especially rainy and gloomy. Most people aren’t fans of this weather, but I love it. Rainy days mean I can snuggle under copious blankets, drink tea, and crochet the day away. At least that's my dream way of spending a rainy day, but reality tends to get in the way.
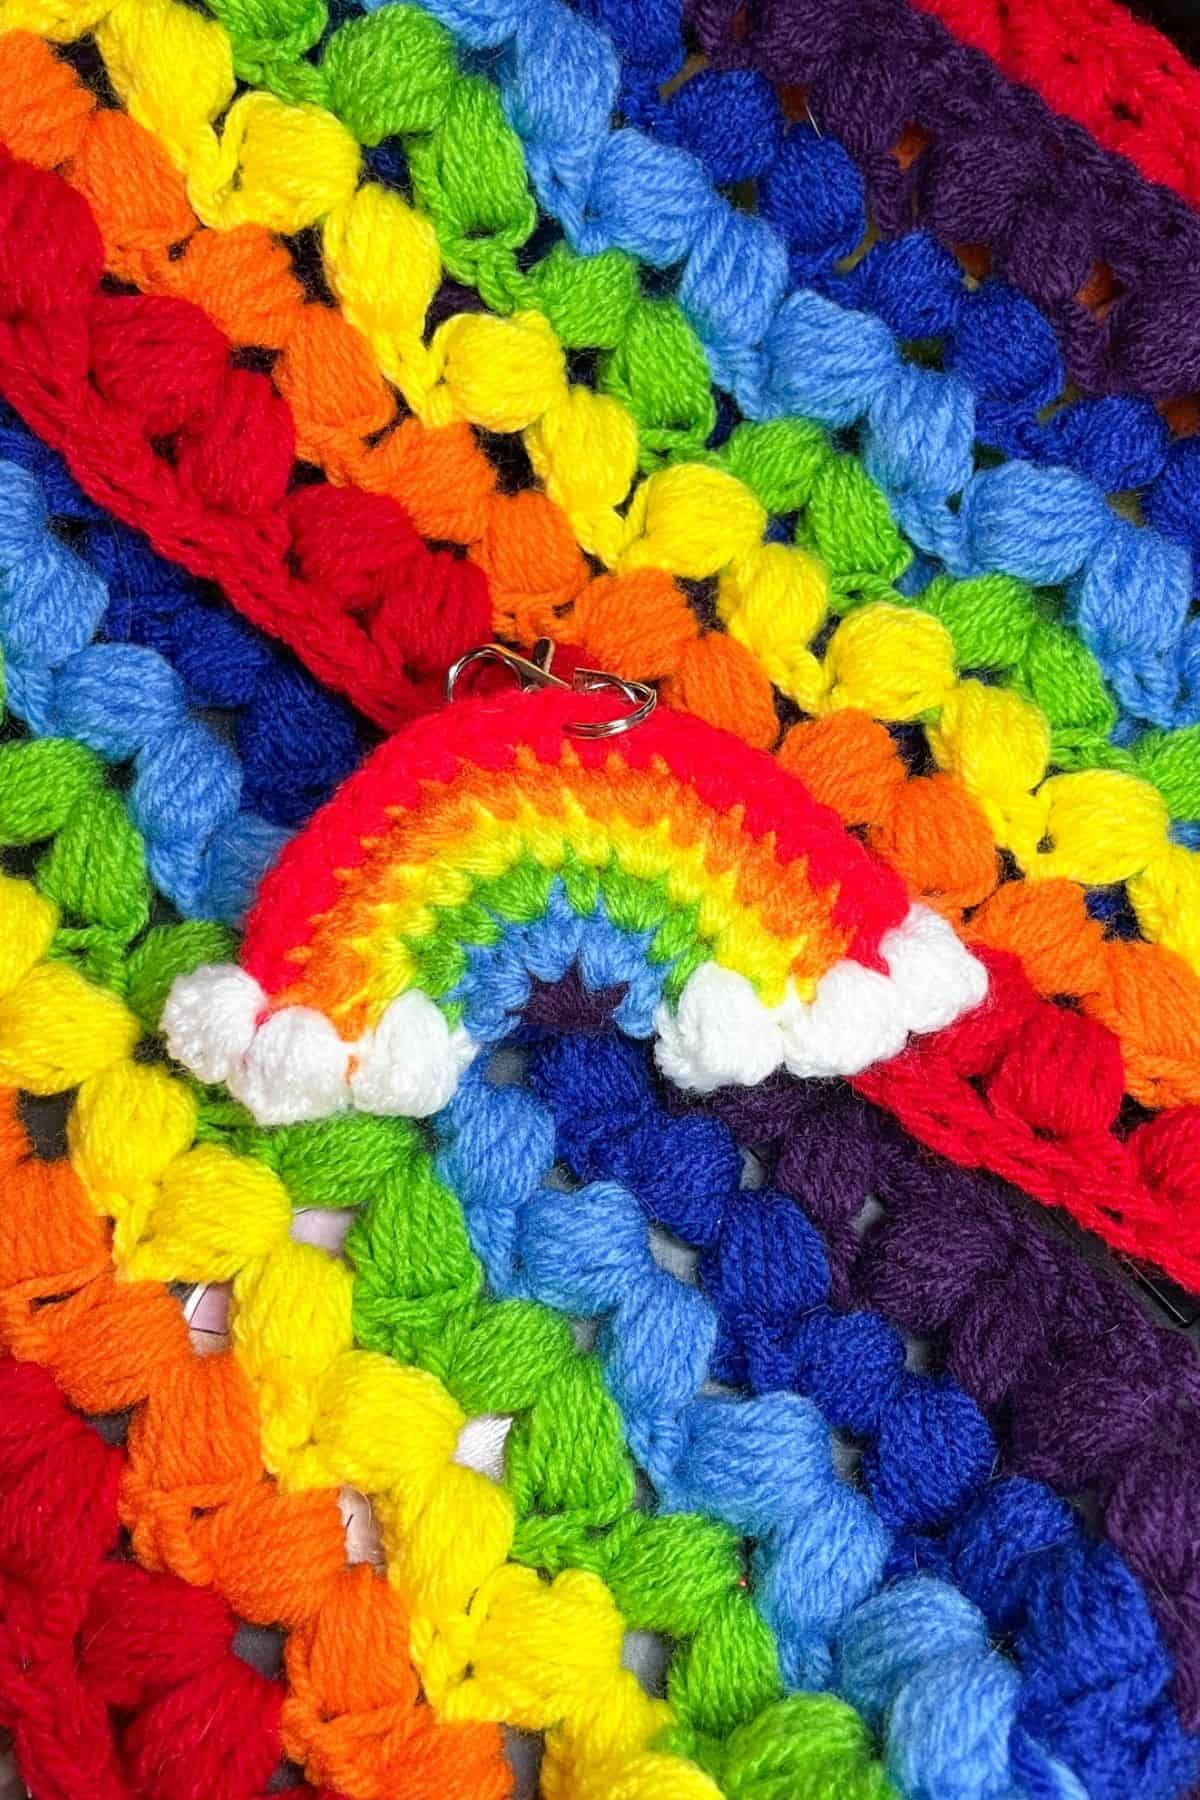
Rainbows bring a burst of color and happiness, whether in nature or seen on clothing and buildings. They stand out beautifully against gray skies, offering a refreshing spark of joy wherever they appear. If you love rainbows, be sure to check out my other crochet patterns, like the crochet hexagon blanket pattern, crochet rainbow baby blanket, and crochet rainbow scarf. Each one brings vibrant color and warmth into any space or outfit.
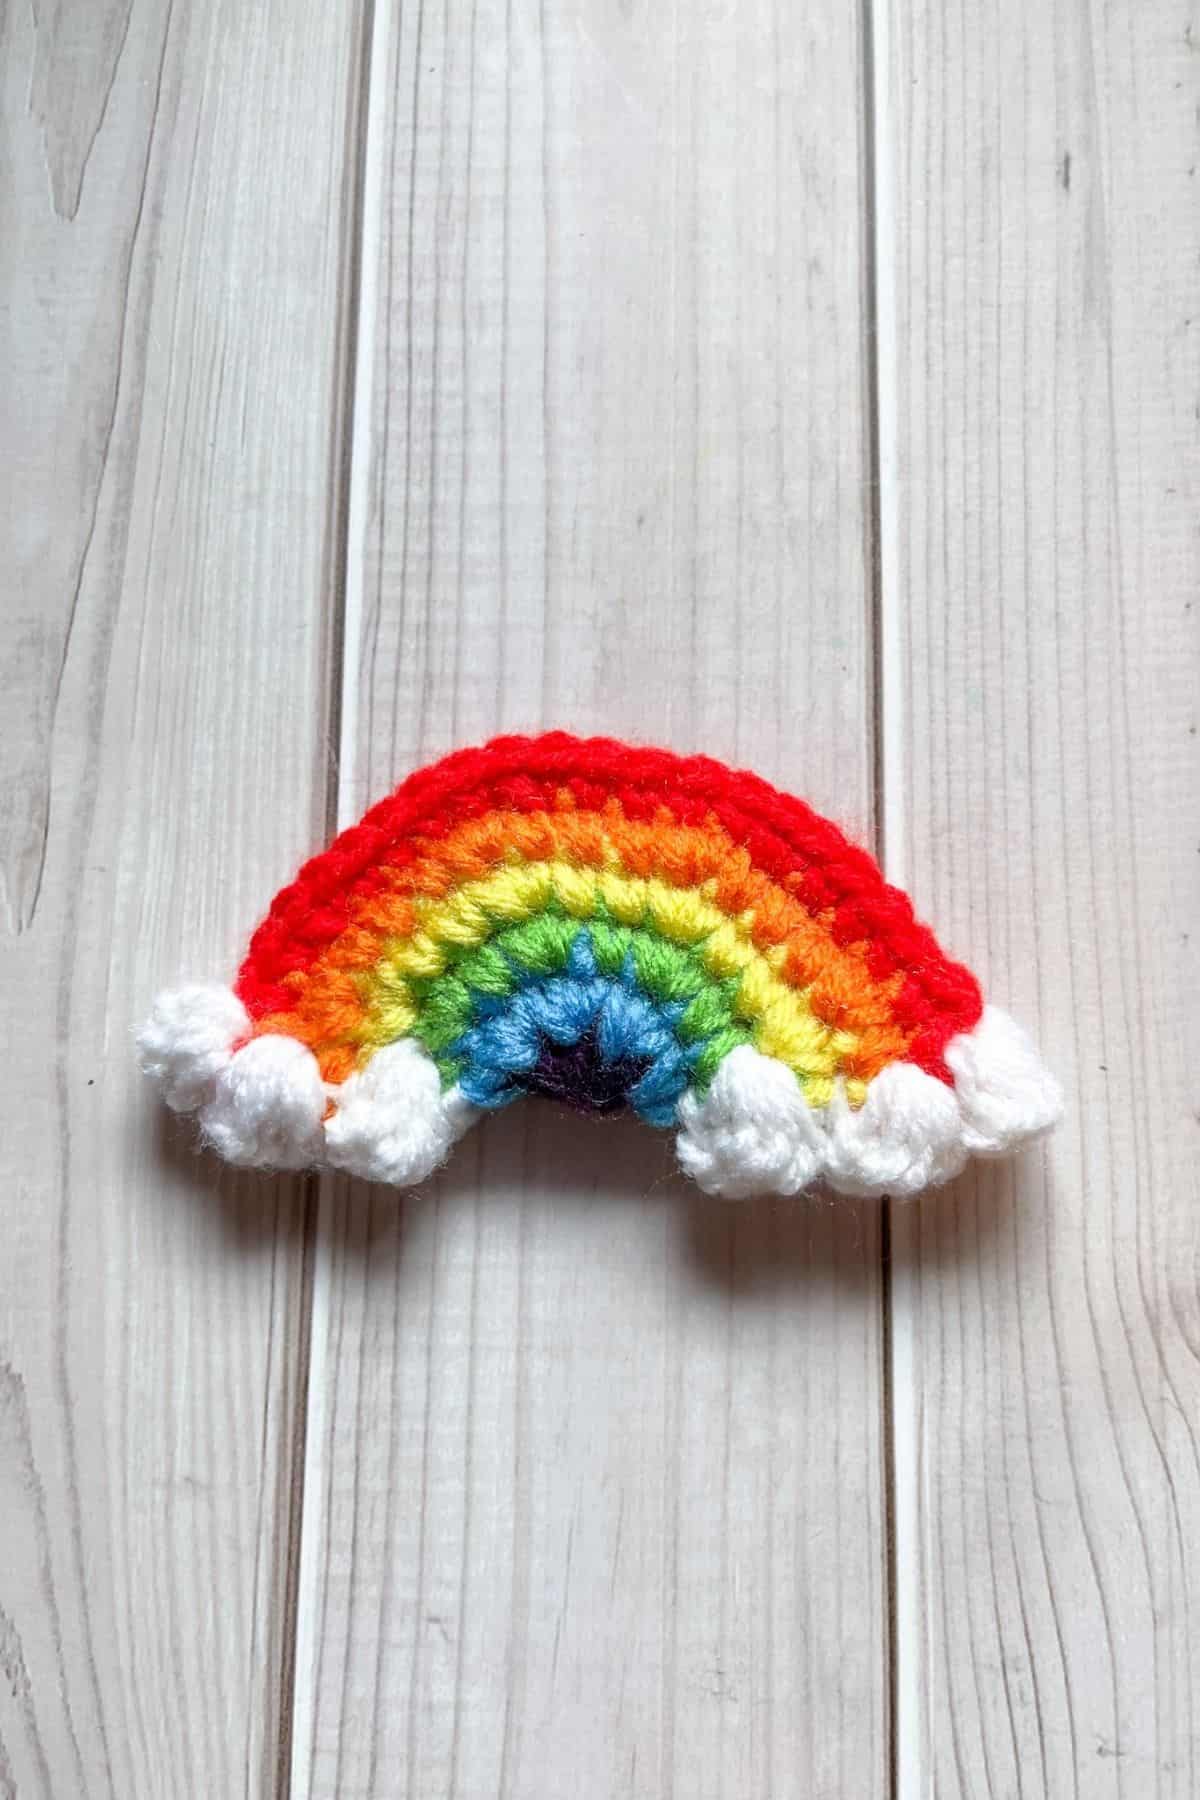
The crochet rainbow keychain is a delightful addition to your collection—a small yet powerful pop of joy! This pattern is ideal for creating keyrings, bag charms, or adding a cheerful touch to backpack zippers. It’s a fun and easy way to carry a bit of happiness wherever you go.
Let’s dive into creating this adorable rainbow keychain! Whether you're a crochet expert or just getting started, this pattern will bring a smile to your face and brighten up your day. Enjoy the process and let the colors spark your creativity!
Jump to:
✏️ Things To Note:
- Yarn Options: I used acrylic worsted weight yarn for the crochet rainbow keychain pattern, but feel free to experiment with other yarn types to achieve different textures and looks.
- Project Variation: If you'd like to create something larger with this pattern, you can easily adapt it to make a cute crochet rainbow plush. Simply use a chunkier yarn to add more size and depth, transforming it into a soft, colorful piece for your home or as a gift.
- Size: The keychain version of this crochet rainbow measures approximately 3 inches in width when finished. However, depending on the yarn and hook size you choose, the dimensions can vary. The small size makes it perfect for keychains or bag charms, while a larger version can make an adorable plush for cuddling or decorating.
🪡 Materials Needed
💭Abbreviations to Remember (US terms)
- Magic ring - mr
- Single crochet - sc
- Increase - inc
- Bobble - bobble
🧋Variations
Color Schemes: Change out the colors for pastel, dark, or monochrome rainbows.
Bag Charm Option: Instead of fastening off the red yarn after finishing the rainbow, make a chain of about 20-25 stitches, then slip stitch to the stitch you started from to create a loop for a bag charm.
🍵Instructions for Crochet Rainbow Keychain Pattern
The rainbow crochet keychain pattern is made in rounds and then folded for the last round.
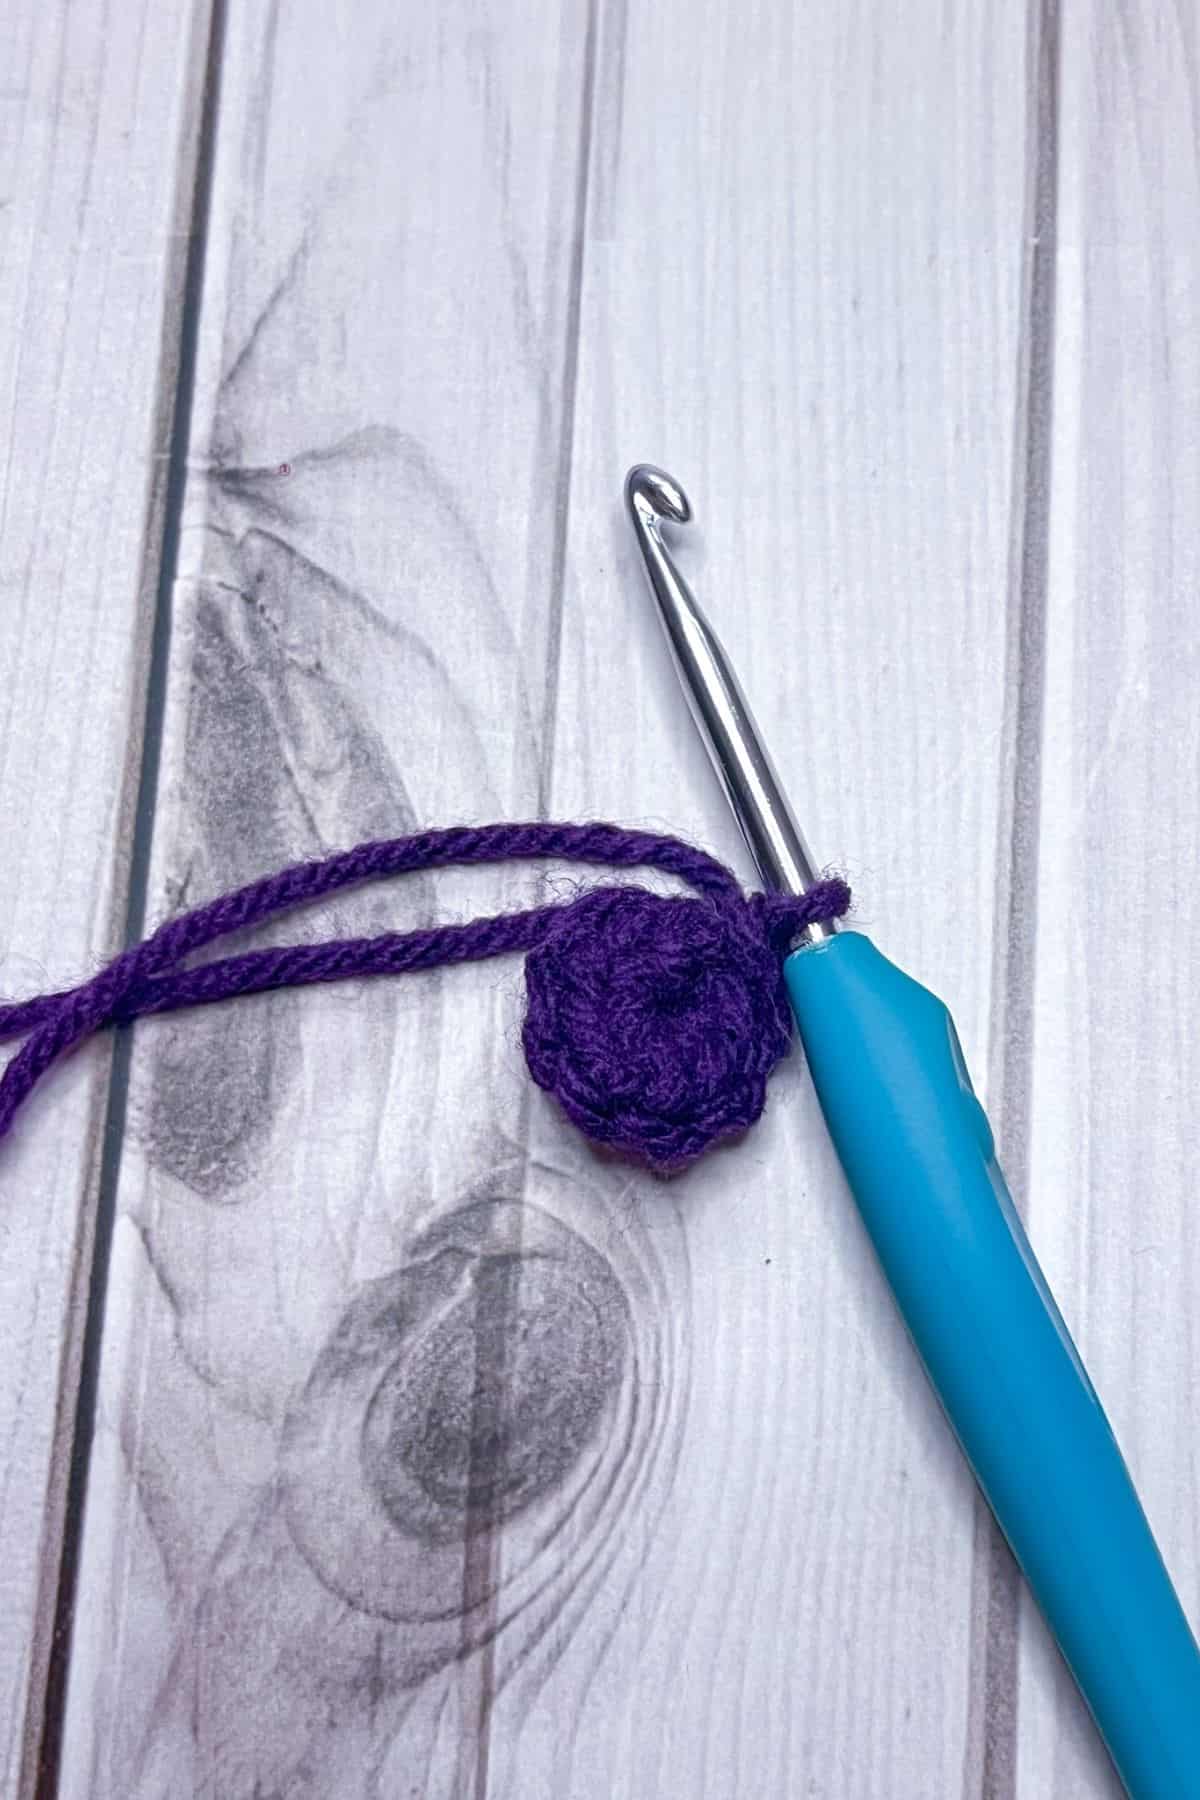
Round 1: With the purple yarn, make a mr loop then sc x8 into it (8). Then fasten off the purple yarn and switch it to blue.
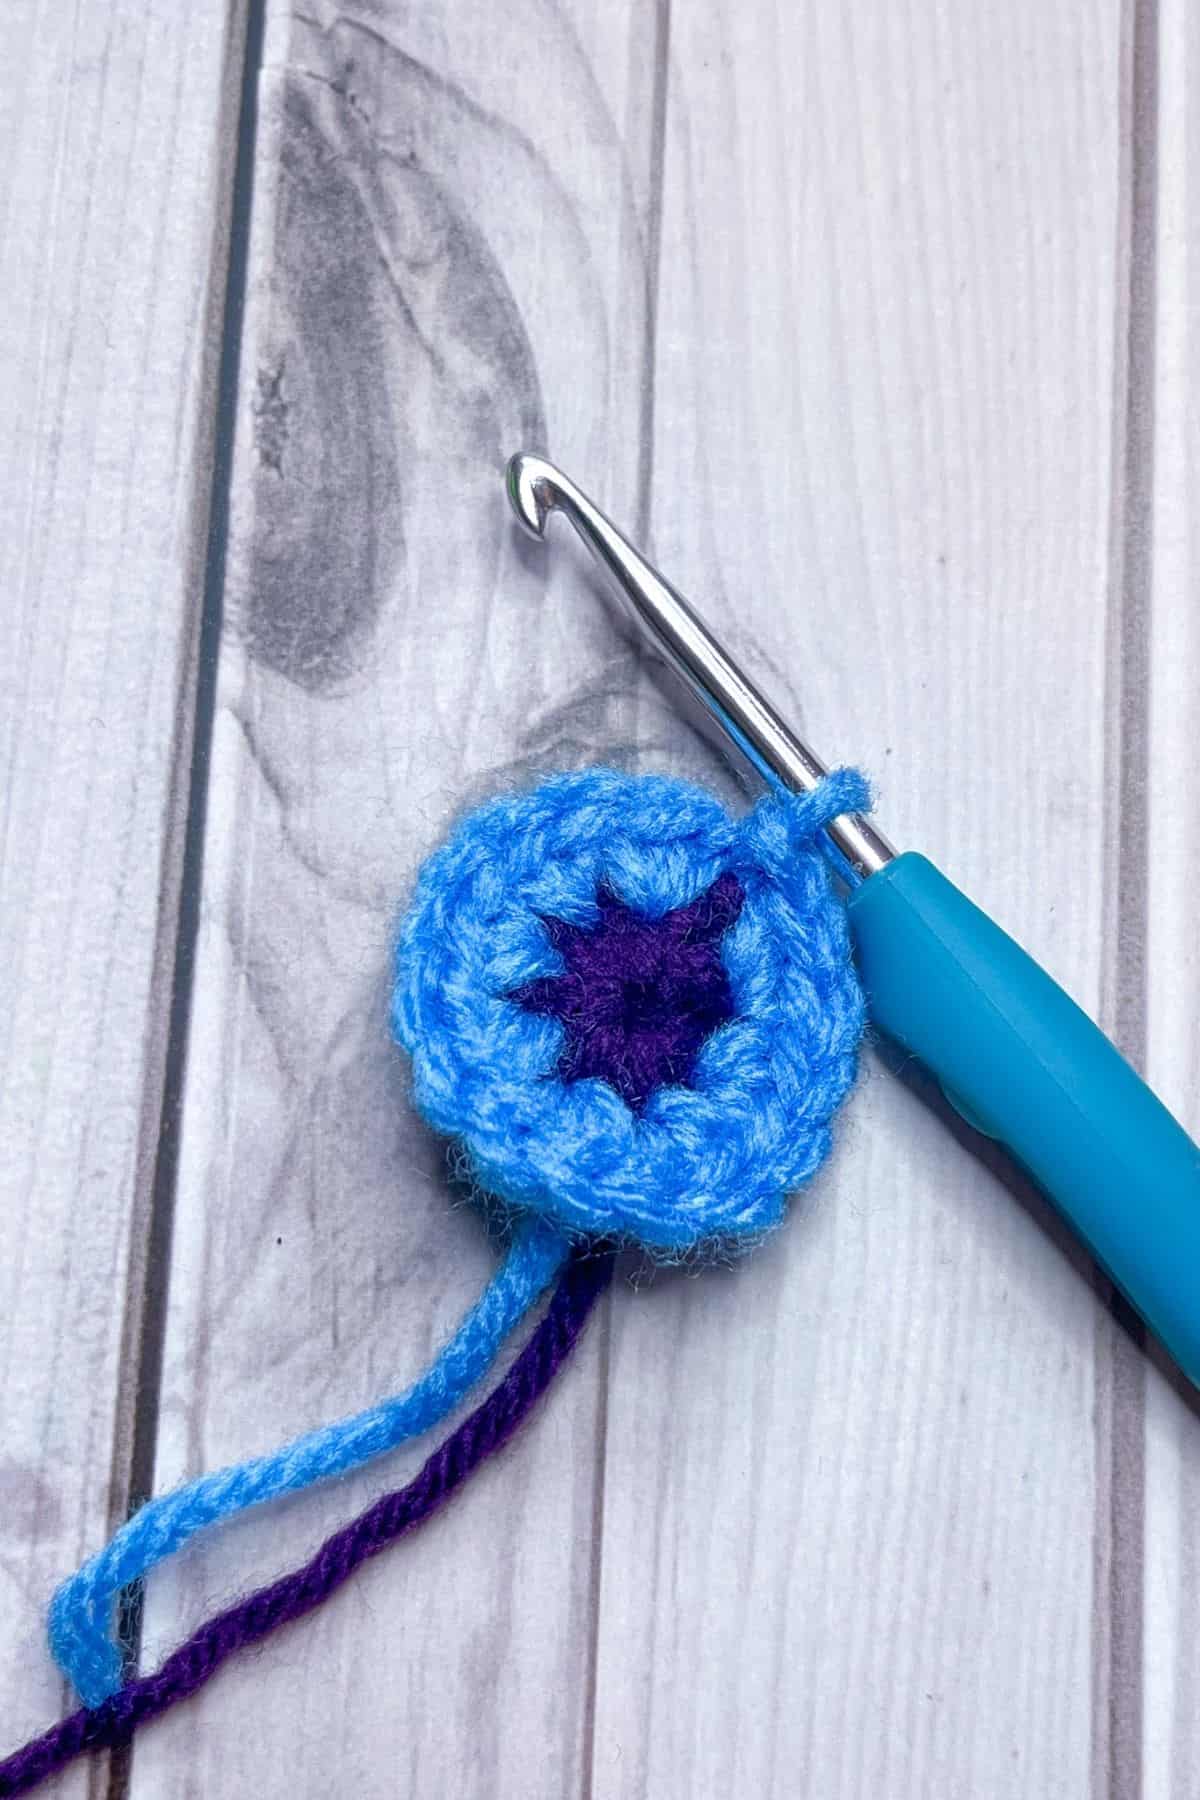
Round 2: With the blue yarn, inc in every stitch from the previous round (16). Then fasten off the purple yarn and switch it to green.
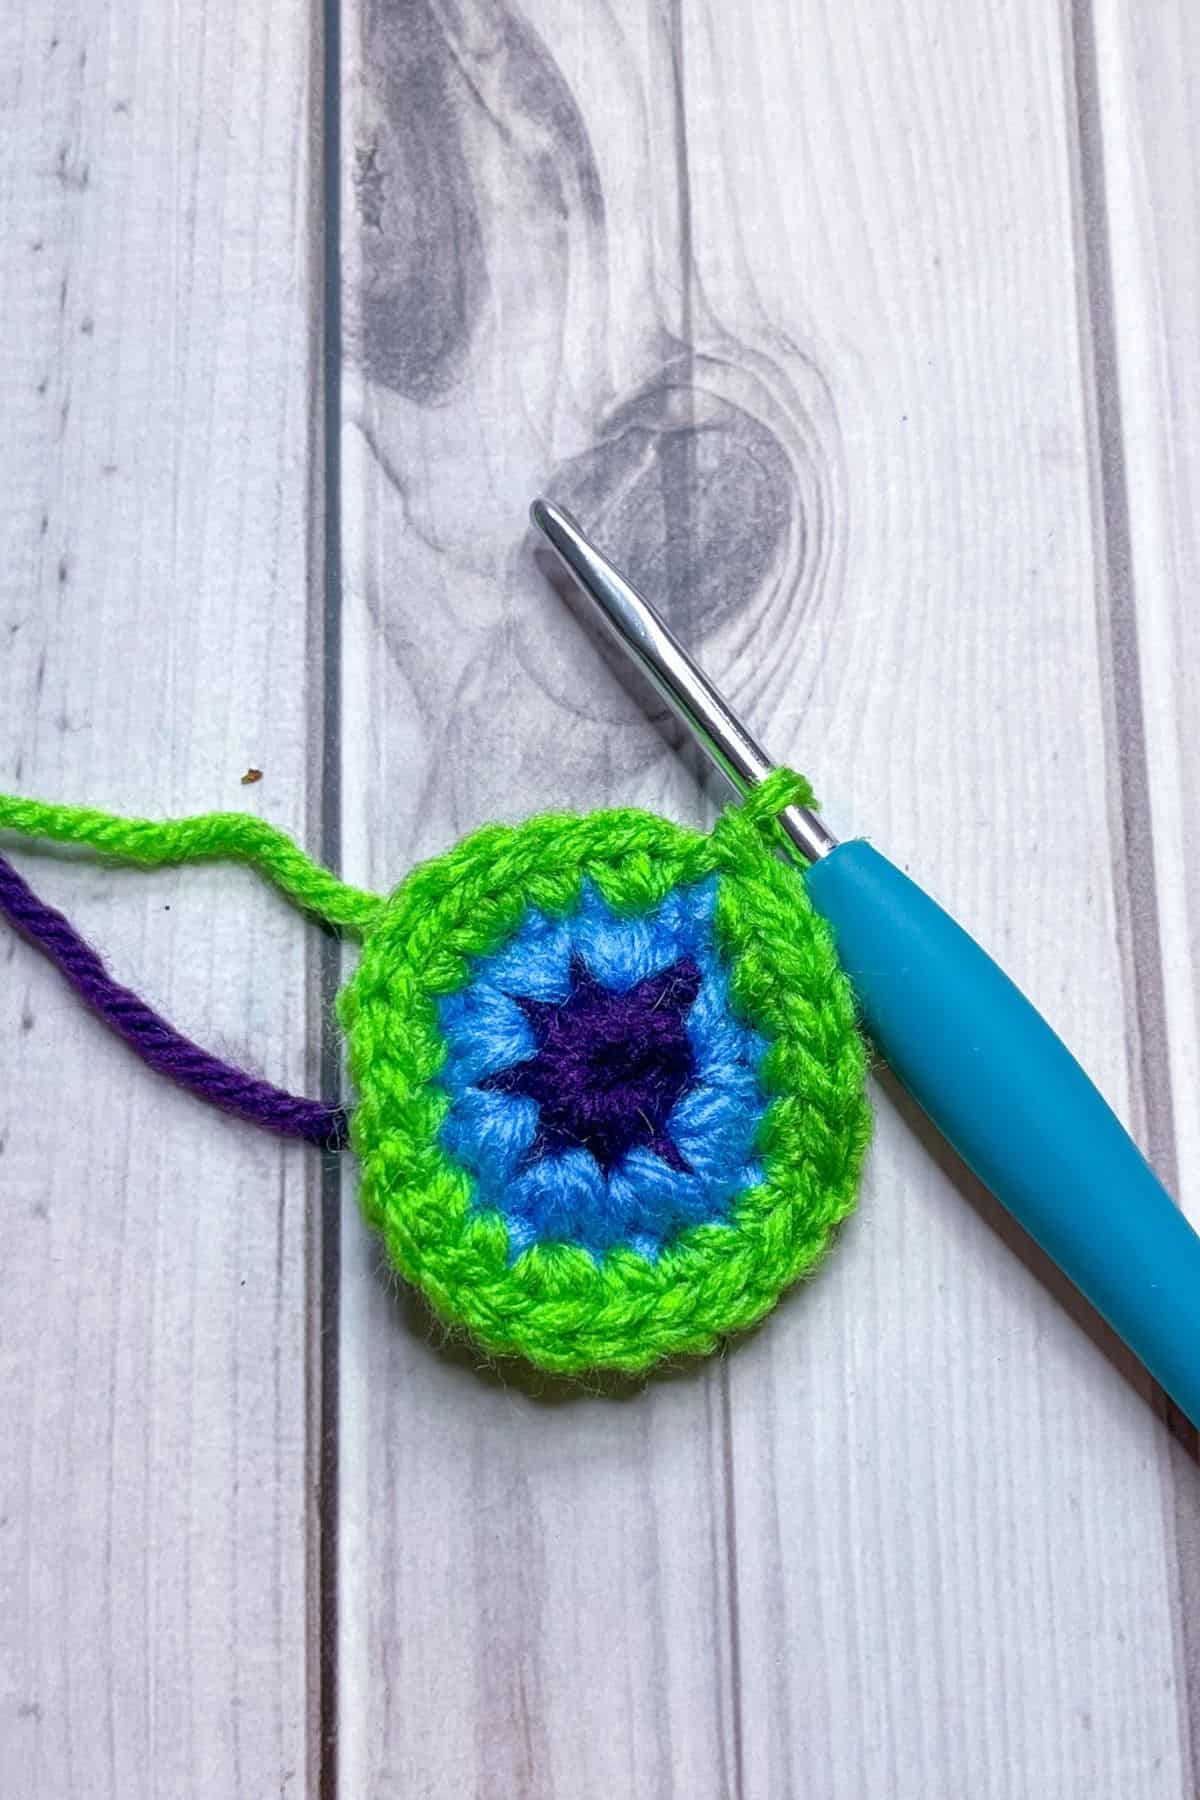
Round 3: With the green yarn, sc, inc, then repeat for the rest of the round (24). Then fasten off the green yarn and join the yellow yarn.

Round 4: With the yellow yarn, sc x2, inc, then repeat for the rest of the round (32). Then fasten off the yellow yarn and join the orange yarn.
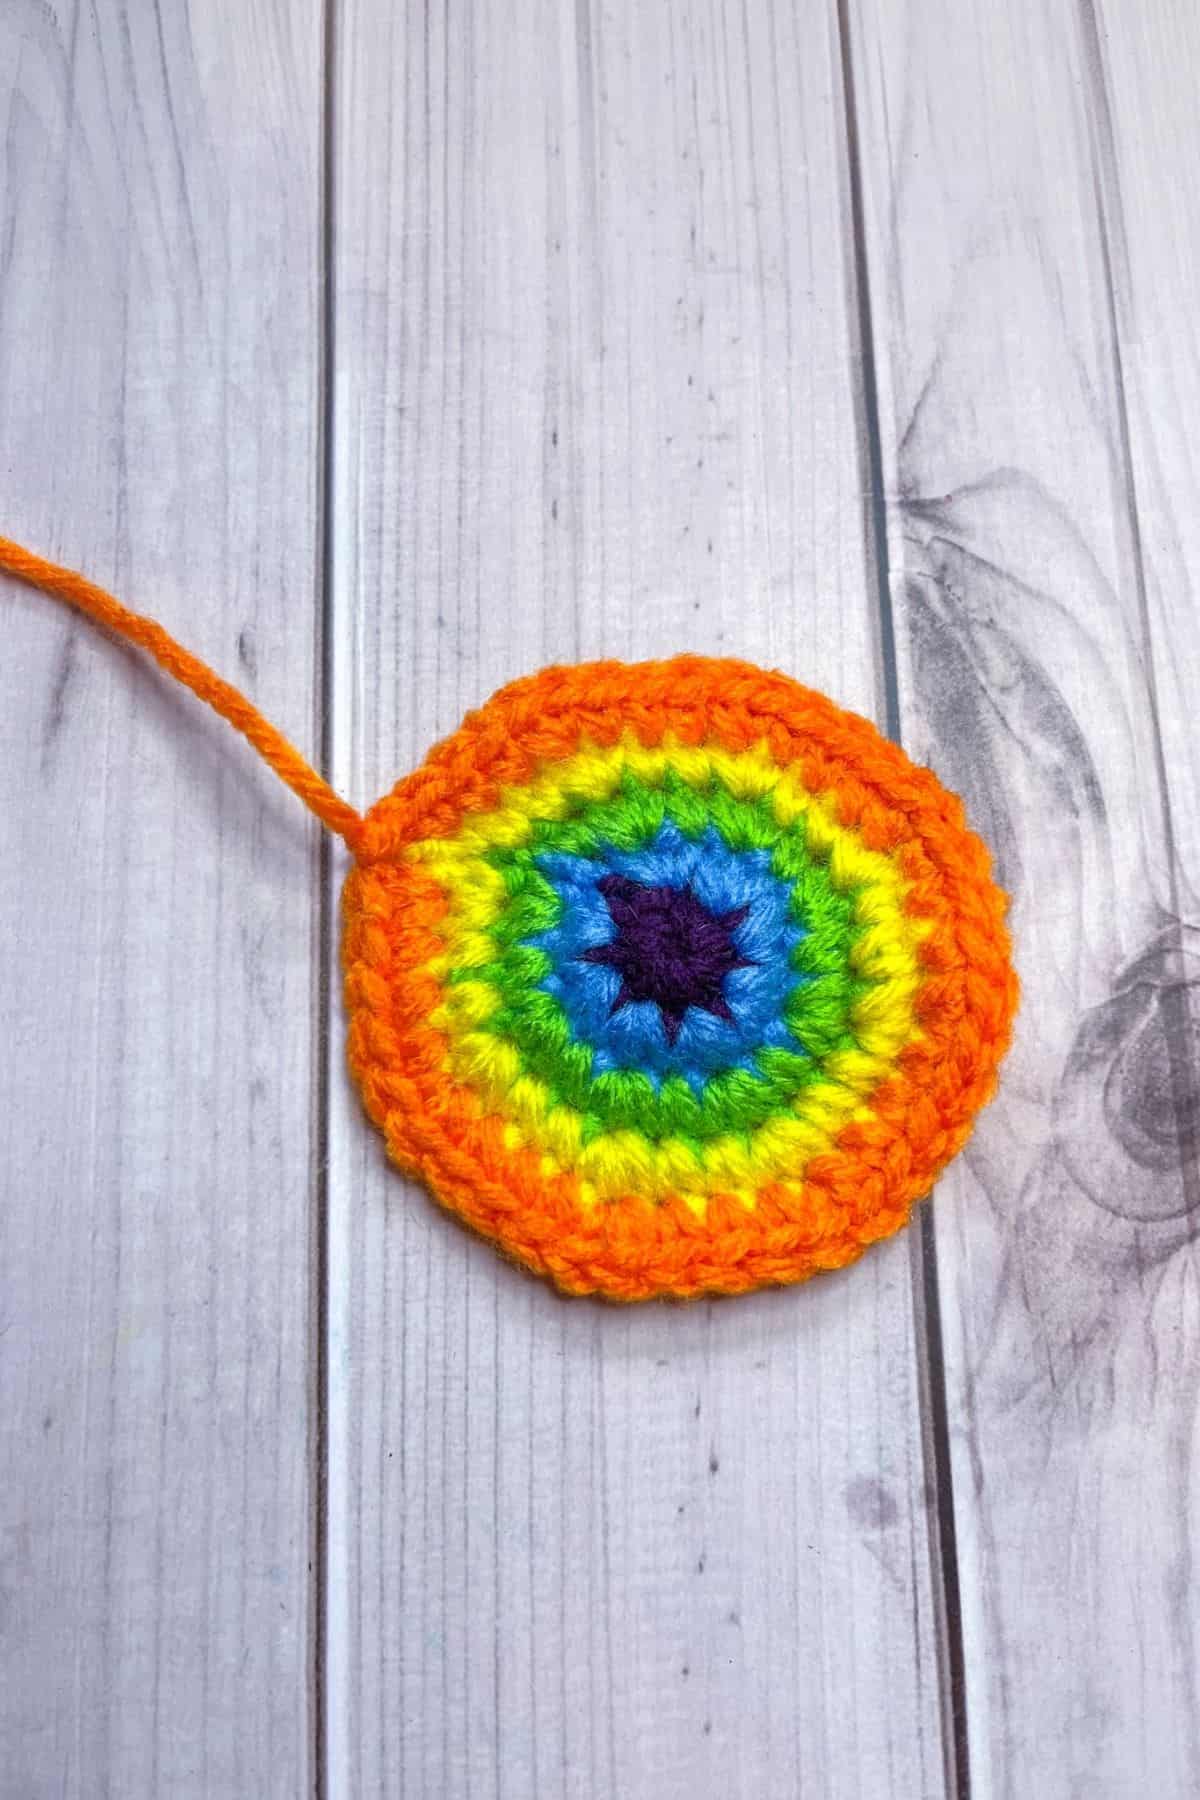
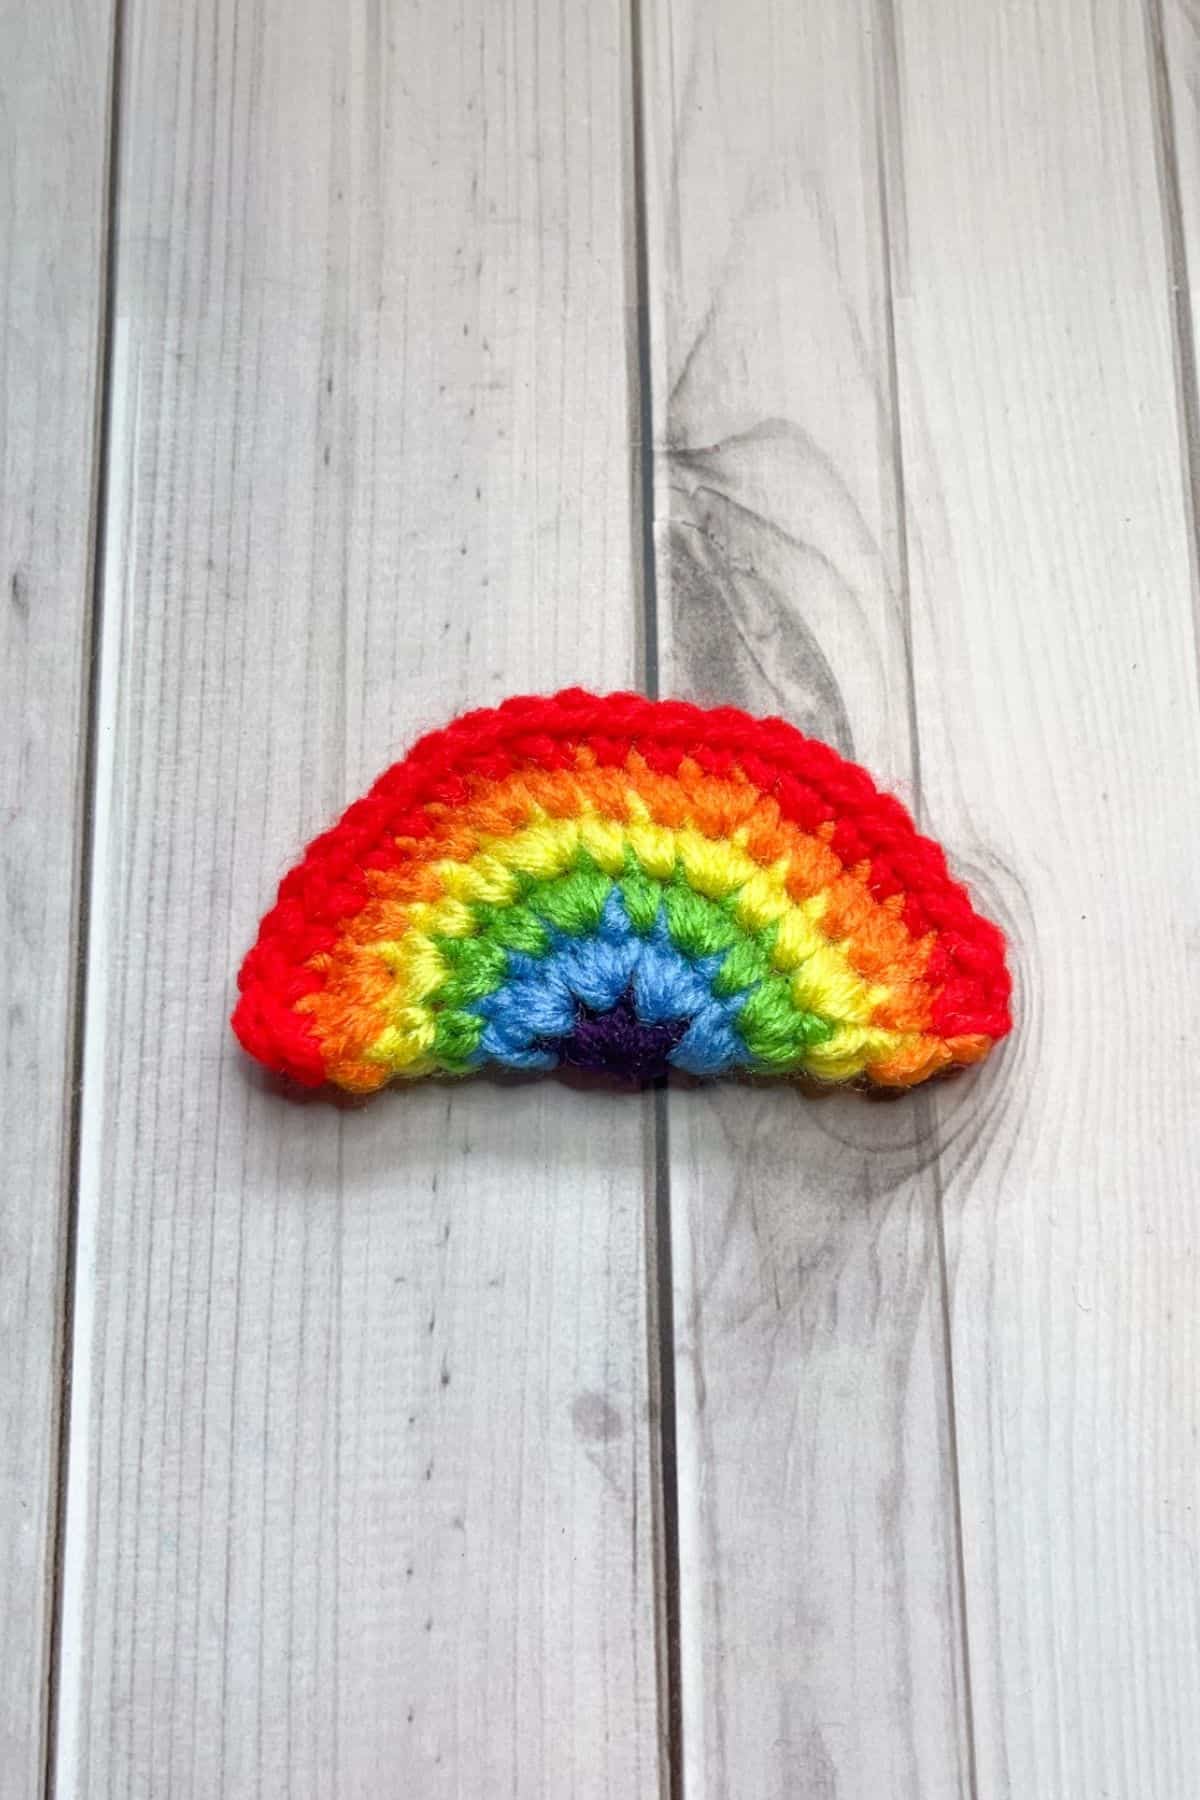
Round 5: With the orange yarn, sc x3, inc, then repeat for the rest of the round (40). Then fasten off the orange yarn and join the red yarn.
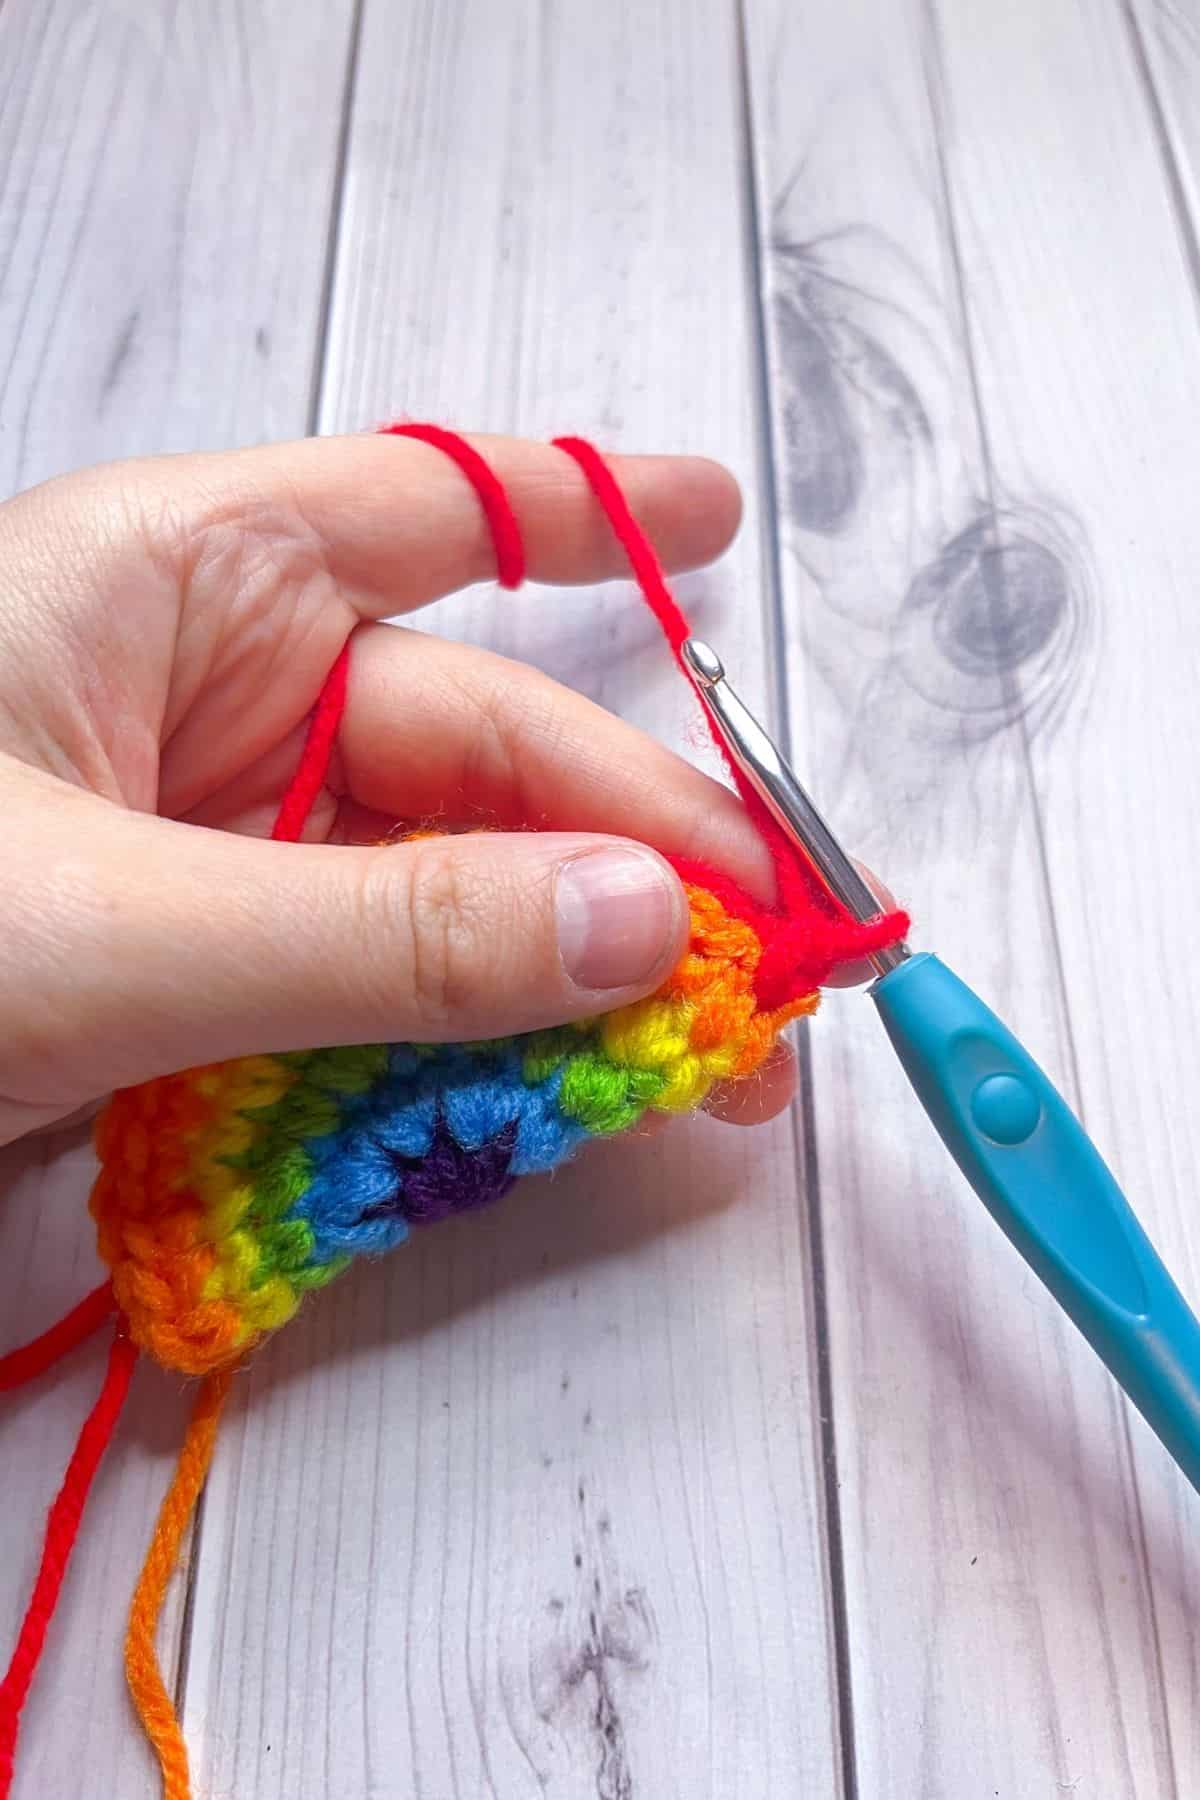
Fold the rainbow in half with the newly joined red yarn on the bottom right.
Round 6: Now you are going to crochet the rainbow shut with the red by going through both sides of the circle.
Note: Because the circle is now cut in half you will have 20 stitches at the beginning of this round and will have 24 at the end.
For this round sc x4, inc, then repeat for the rest of the round (24). When you get to the end, fasten off the yarn and weave in the tails.

Crochet Clouds:
Flip your rainbow over to the backside. Join the white yarn into the right side of the rainbow in the last sc available in red.

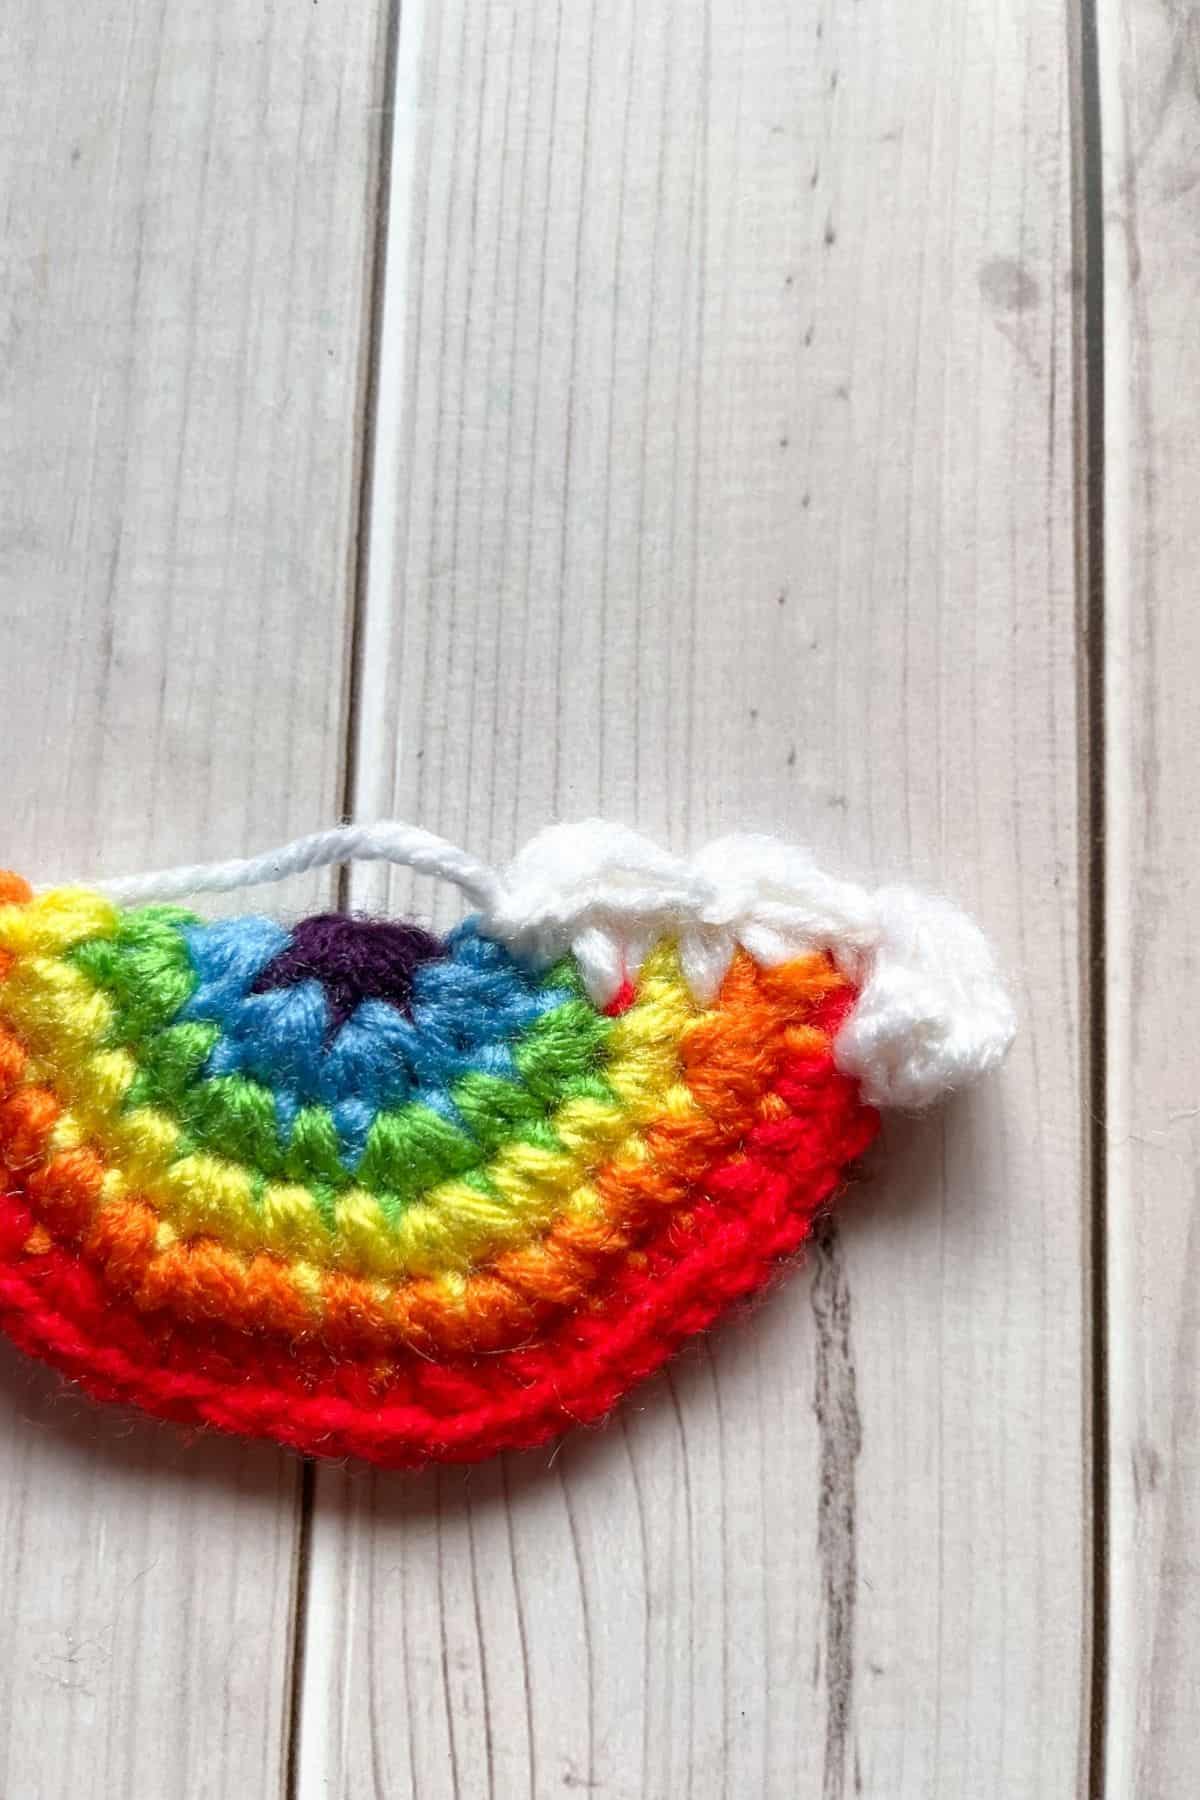
Ch x2, then make a bobble stitch in the red round (more details on how to make the bobble stitch is below), then sc between the red and orange, make a bobble between the orange and yellow, sc between the yellow and green, make a bobble between the green and blue and a sc between the blue and purple.
Then fasten off the yarn. The one side of the clouds should have 3 sc and 3 bobble stitches.
*A bobble stitch is made by yarning over, inserting the hook into the stitch, yarn over, draw loop back through stitch, yarn over pull through 2 loops then STOP. You will have a half completed dc hanging from your hook. Repeat the steps 4 more times in the same stitch until you have 5 half completed dc stitches hanging from your hook and 6 loops ON your hook. Then yarn over and pull through all 6 loops.*

Rejoin the white yarn to the blue part on the other side of the rainbow (do not flip over, just skip making a bobble stitch in the purple part of the rainbow) And repeat what you did on the other side. Then Fasten off the yarn and weave in any ends.
Once all is done, just slip a keyring through one of the crochet red rainbow stitches to attach the keychain and keyring.
And now you have a finished rainbow crochet keychain! I hope you enjoy the crochet rainbow keychain pattern!
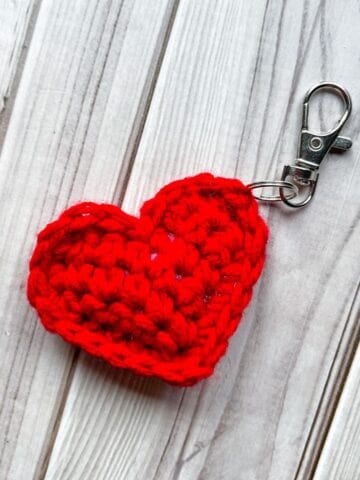
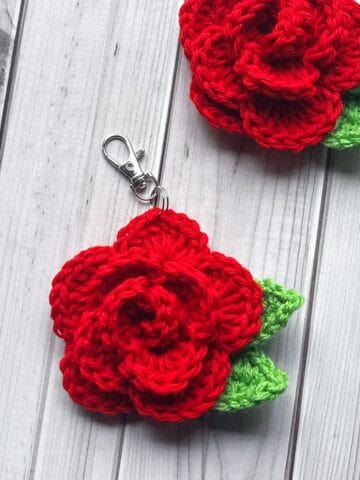
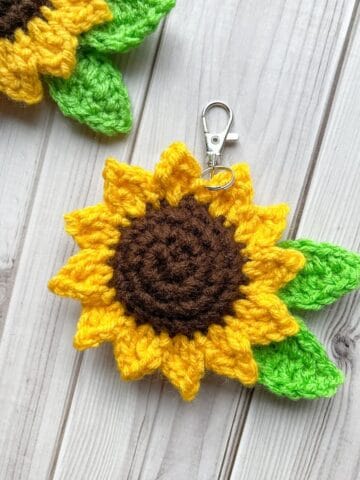
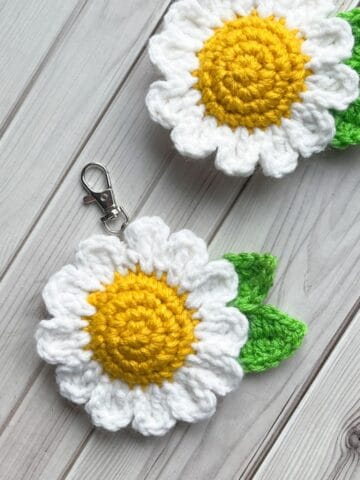
If you are looking for some other cute and adorable keychain patterns check out my animal keychain patterns the crochet cat keychain pattern and the crochet bear keychain pattern. If you want to continue a nature theme, my crochet flower keychain pattern fits the bill! And if you have more scrap yarn than you know what to do with, create an army of mushroom keychains made from my crochet mushroom keychain pattern!
🐌Expert Tips
- Bobble Visibility: The bobble stitch is only visible from one side, so make sure you are working it from the backside of the rainbow since the stitch pops out on the front side.
- Stitch Tension: Keep your tension consistent for a smoother appearance, especially when transitioning between colors.
- Personalization: Consider adding a small charm or bead to the keychain for a personalized touch.
🧵Pattern FAQs
No, you don't have to, but it adds some extra pizzazz to your piece.
Yes, you can, but be aware that the purple round might be hidden under the bobble stitches.
You can crochet cloud appliqués and sew them on or create fringe at the bottom by adding white fringe.
🧶More Crochet Keychain Patterns


If you tried this Crochet Rainbow Keychain Pattern (or any other pattern on my website), please let me know how it went in the 📝 comments below. I'd love to hear from you!

Crochet Rainbow Keychain Pattern
Materials
- 1 small ball Purple yarn
- 1 small ball Blue yarn
- 1 small ball Green yarn
- 1 small ball Yellow yarn
- 1 small ball Orange yarn
- 1 small ball Red yarn
- 1 small ball White yarn
- 4.5mm hook
- Tapestry needle
- Keychain
Abbreviations (US terms)
- mr = Magic ring
- sc = Single crochet
- inc = Increase
- bobble = Bobble
Notes
- The crochet rainbow keychain pattern is made with acrylic worsted weight yarn; and is adaptable to other yarn types.
- Use chunky yarn for larger projects to create a small crochet rainbow plush.
- Finished size is 3 inches wide.
- Experiment with colors: pastel, dark, or monochrome.
- Transform into a crochet rainbow bag charm by extending a red chain (20-25 chains) and forming a loop with a slip stitch instead of a keychain.
Instructions
- The rainbow crochet keychain pattern is made in rounds and then folded for the last round.
- Round 1: With the purple yarn, make a mr loop then sc x8 into it (8). Then fasten off the purple yarn and switch it to blue.
- Round 2: With the blue yarn, inc in every stitch from the previous round (16). Then fasten off the purple yarn and switch it to green.
- Round 3: With the green yarn, sc, inc, then repeat for the rest of the round (24). Then fasten off the green yarn and join the yellow yarn.
- Round 4: With the yellow yarn, sc x2, inc, then repeat for the rest of the round (32). Then fasten off the yellow yarn and join the orange yarn.
- Round 5: With the orange yarn, sc x3, inc, then repeat for the rest of the round (40). Then fasten off the orange yarn and join the red yarn.
- Fold the rainbow in half with the newly joined red yarn on the bottom right.
- Round 6: Now you are going to crochet the rainbow shut with the red by going through both sides of the circle.
- Note: Because the circle is now cut in half you will have 20 stitches at the beginning of this round and will have 24 at the end.
- For this round sc x4, inc, then repeat for the rest of the round (24). When you get to the end, fasten off the yarn and weave in the tails.
Clouds:
- Flip your rainbow over to the backside. Join the white yarn into the right side of the rainbow in the last sc available in red.
- Ch x2, then make a bobble stitch in the red round (more details on how to make the bobble stitch is below), then sc between the red and orange, make a bobble between the orange and yellow, sc between the yellow and green, make a bobble between the green and blue and a sc between the blue and purple.Then fasten off the yarn. The one side of the clouds should have 3 sc and 3 bobble stitches.*A bobble stitch is made by yarning over, inserting the hook into the stitch, yarn over, draw loop back through stitch, yarn over pull through 2 loops then STOP. You will have a half completed dc hanging from your hook. Repeat the steps 4 more times in the same stitch until you have 5 half completed dc stitches hanging from your hook and 6 loops ON your hook. Then yarn over and pull through all 6 loops.*
- Rejoin the white yarn to the blue part on the other side of the rainbow (do not flip over, just skip making a bobble stitch in the purple part of the rainbow) And repeat what you did on the other side. Then Fasten off the yarn and weave in any ends.
- Once all is done, just slip a keyring through one of the crochet red rainbow stitches to attach the keychain and keyring.
- I hope you enjoy the crochet rainbow keychain pattern!


Leave a Reply