
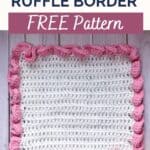
Add a bit of flair to your next crochet project with my Crochet Ruffle Border Pattern. It’s fun, easy, and perfect for beginner crocheters!

I'm always looking for exciting crochet borders to enhance my projects, and this ruffle crochet border fits the bill perfectly. The crochet ruffle border works well for busy or simple blankets, adding flair and serving as a point of interest.
The crochet ruffle border is highly customizable. Want more ruffles? Add more stitches to each stitch; want fewer ruffles? Add less.
It would even be perfect for a crochet ruffle border baby blanket! I think it would look great with my crochet strawberry blanket pattern or my crochet rainbow baby blanket pattern.
Whatever the final use of the ruffle crochet border might be, it is sure to make a statement!
Jump to:
✏️ Things To Note:
- Yarn Flexibility. This blanket edge can be used with any type of yarn, including chunky, fuzzy, and more.
- Customization. The crochet ruffle border is versatile. I typically use 4 double crochets in each space, but you can adjust the number according to your preferences. Another versatile border is the crochet envelope border if you have a lot of ends that you don't want to weave in.
- Round or Multi-Round. I recommend a one-round border, but you can easily create a multi-round border by adding more rows.
🪡 Materials Needed
- Yarn for the border
- 5mm hook or whatever sized hook was used for the project.
- Tapestry needle
💭Abbreviations to Remember (US terms)
- Chain- ch
- Double crochet - dc
- Slip stitch - sl st
🧋Variations
Depending on how wavy you want your border to be, you can add more or fewer double crochets in each stitch. This wavy border can also be made using any base stitch, including single, double, half double, triple, or a combination of these.
🍵Instructions for Crochet Ruffle Border Pattern
This pattern is made in rounds, but can be used in rows if desired, depending on the project.
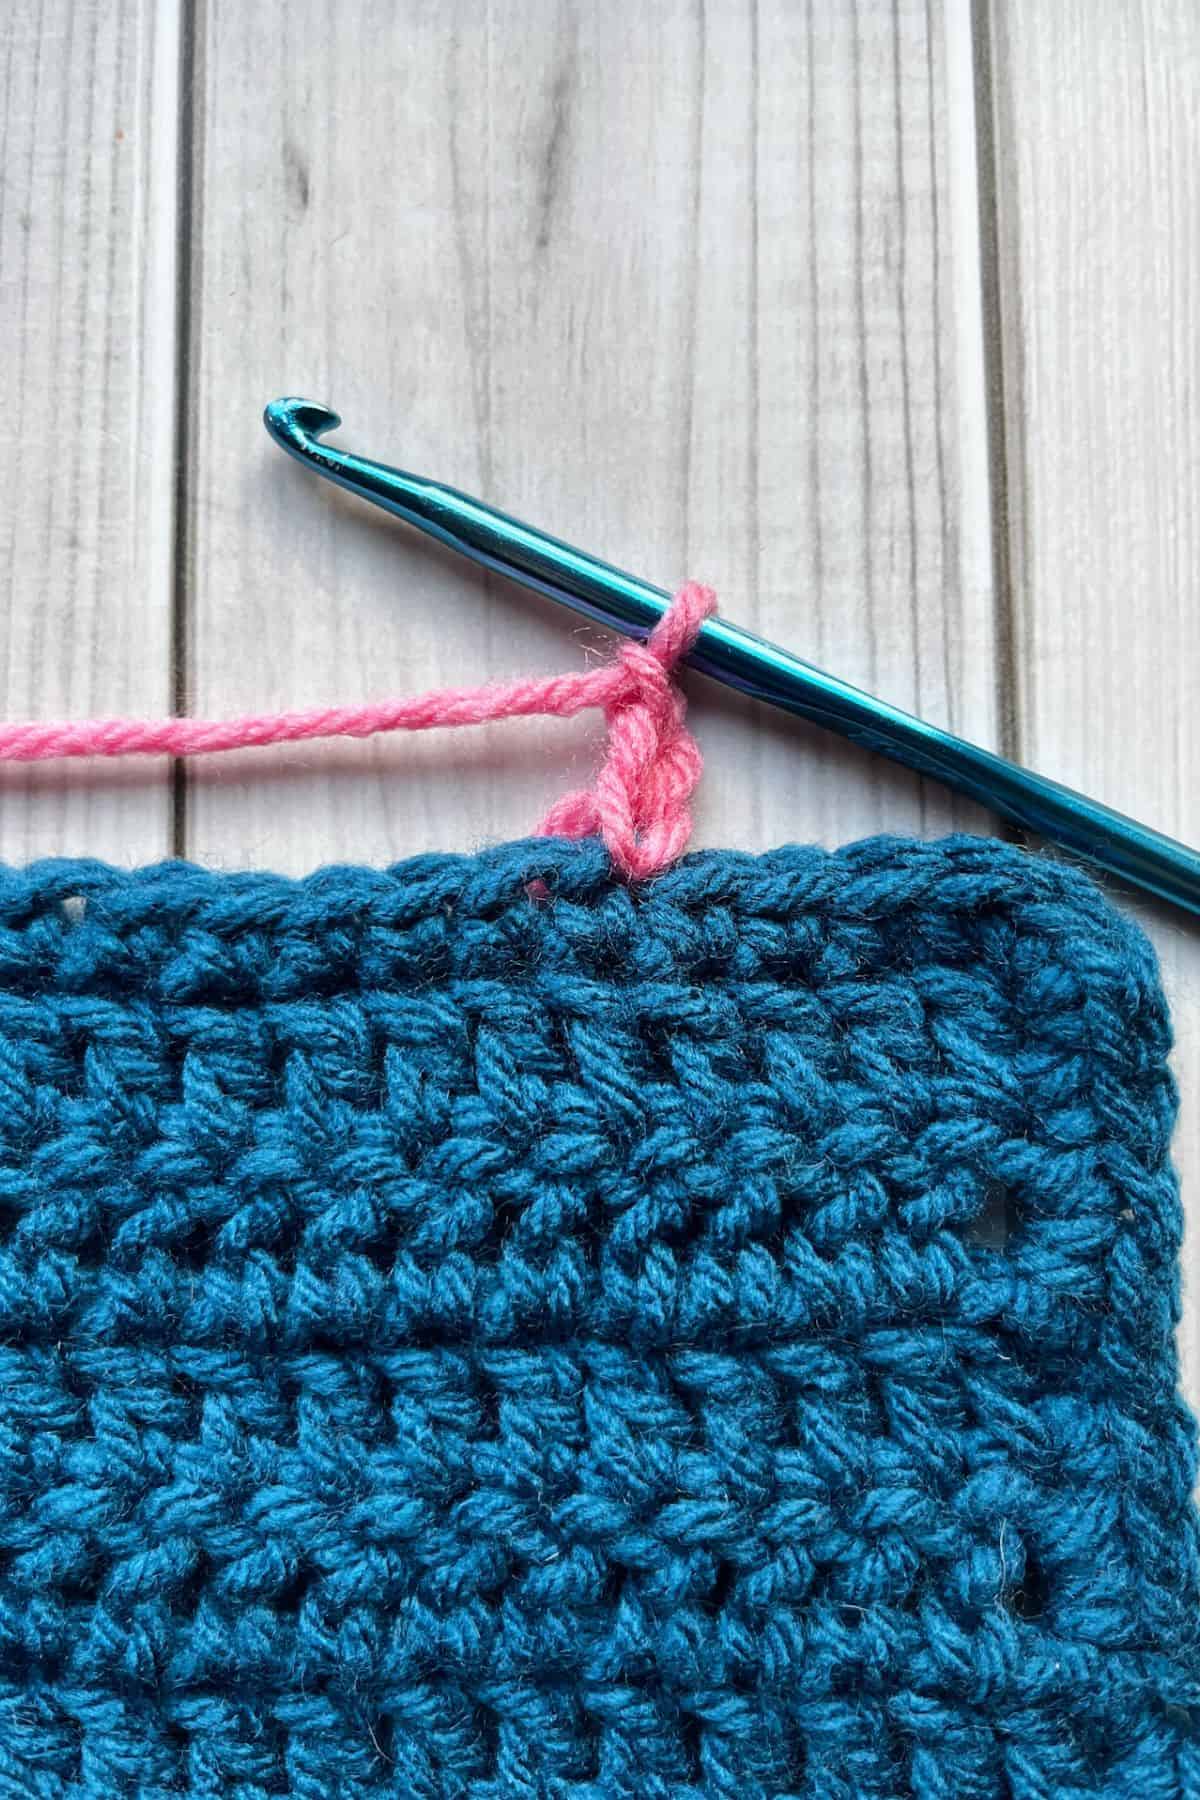
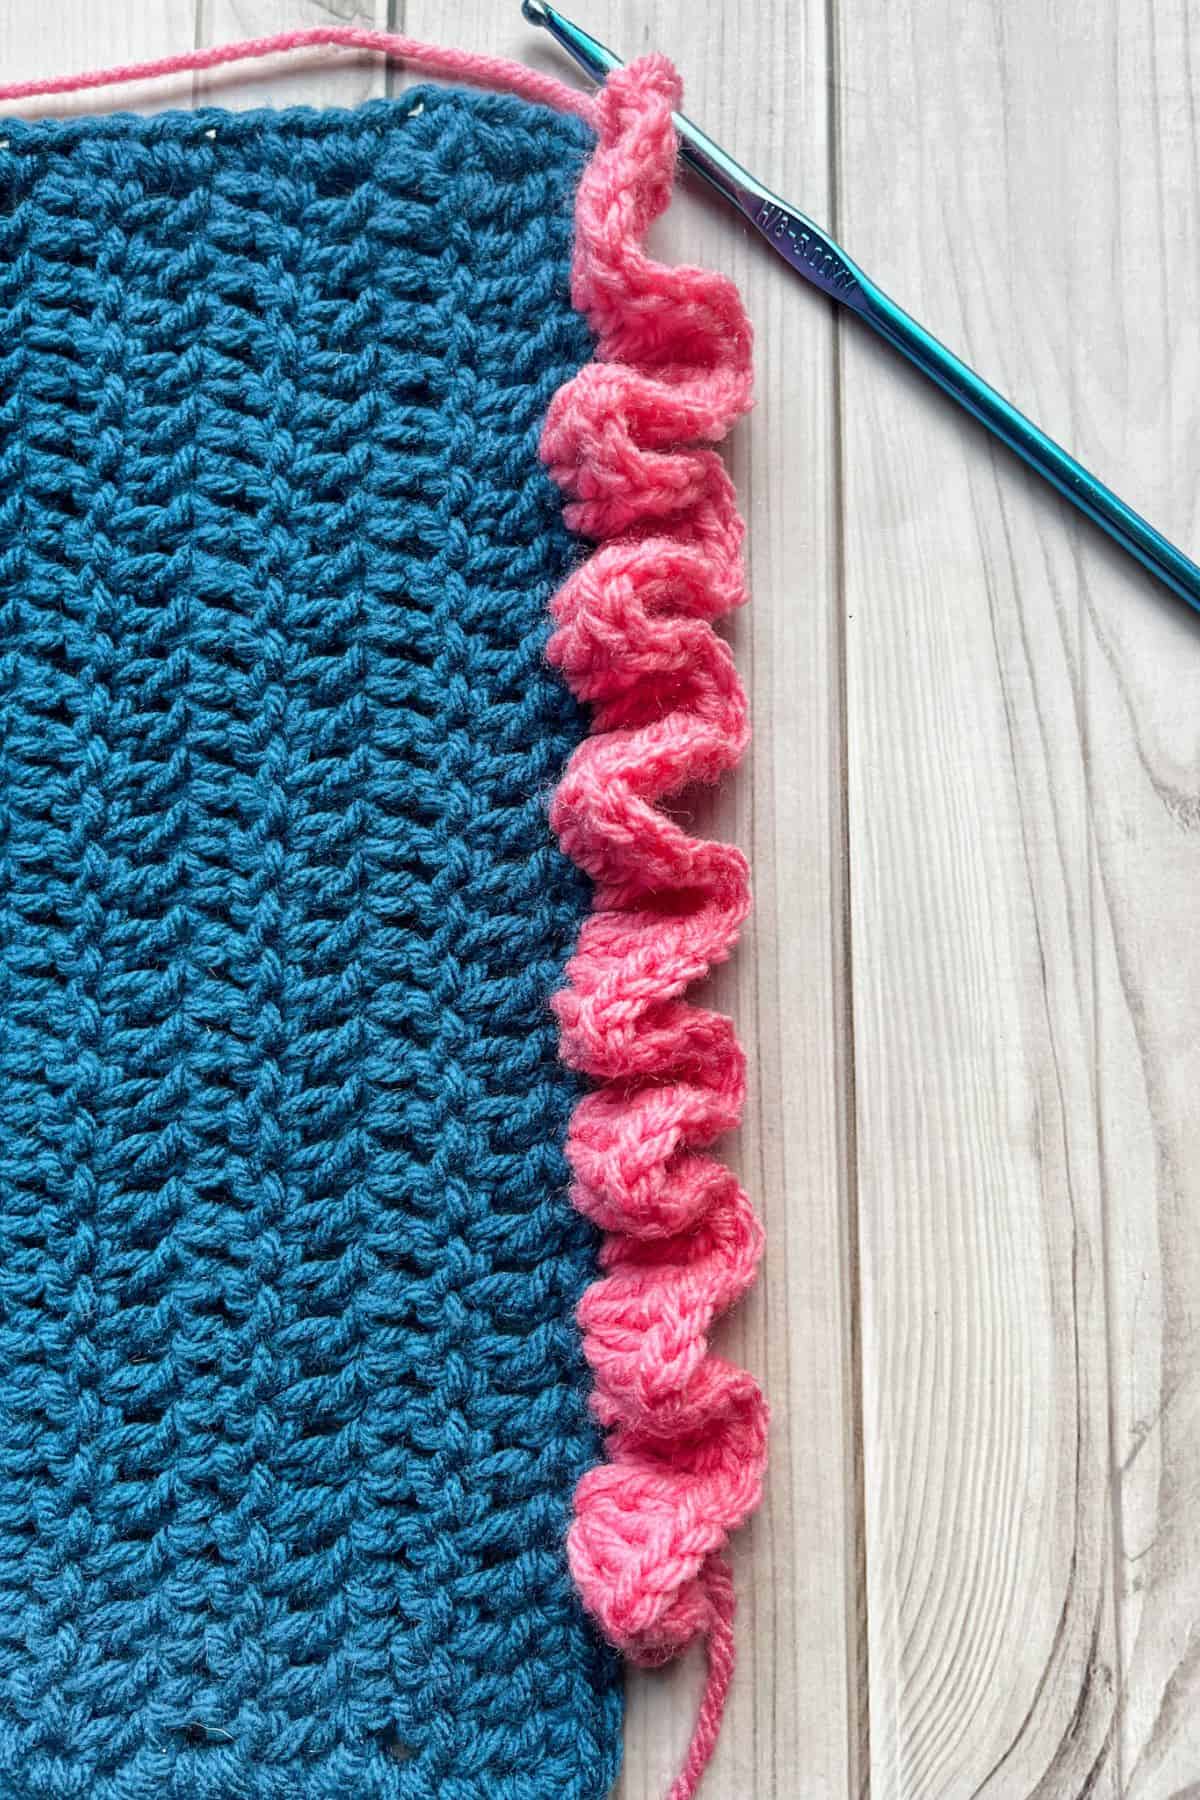
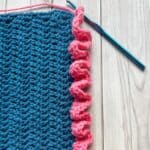
Round 1: If you need to join a new yarn color for the edge now is the time to do it. Join your yarn (anywhere is fine) and ch x3.
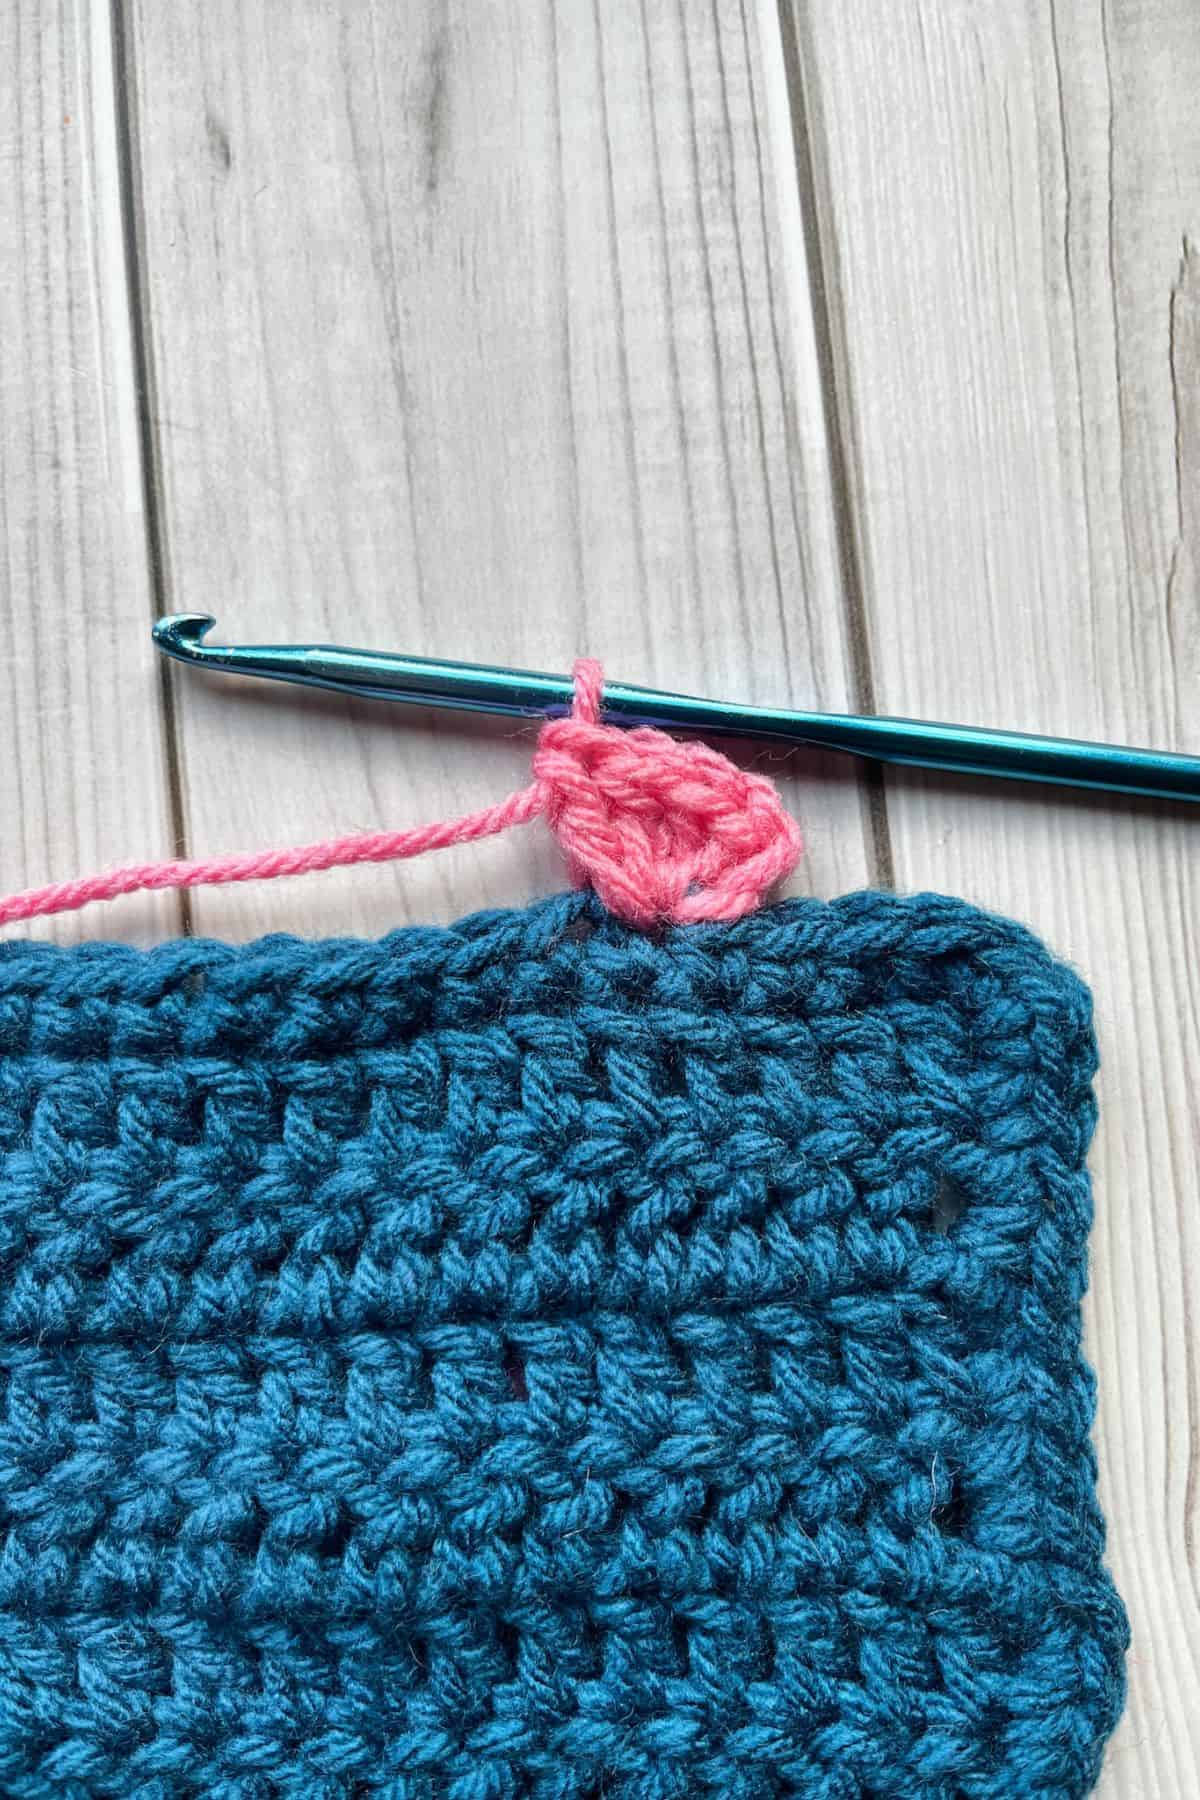
Then dc x3 into the same stitch you joined the yarn.
In the next stitch dc x4. Repeat dc x4 for the rest of the border, even for the stitches in the corners.
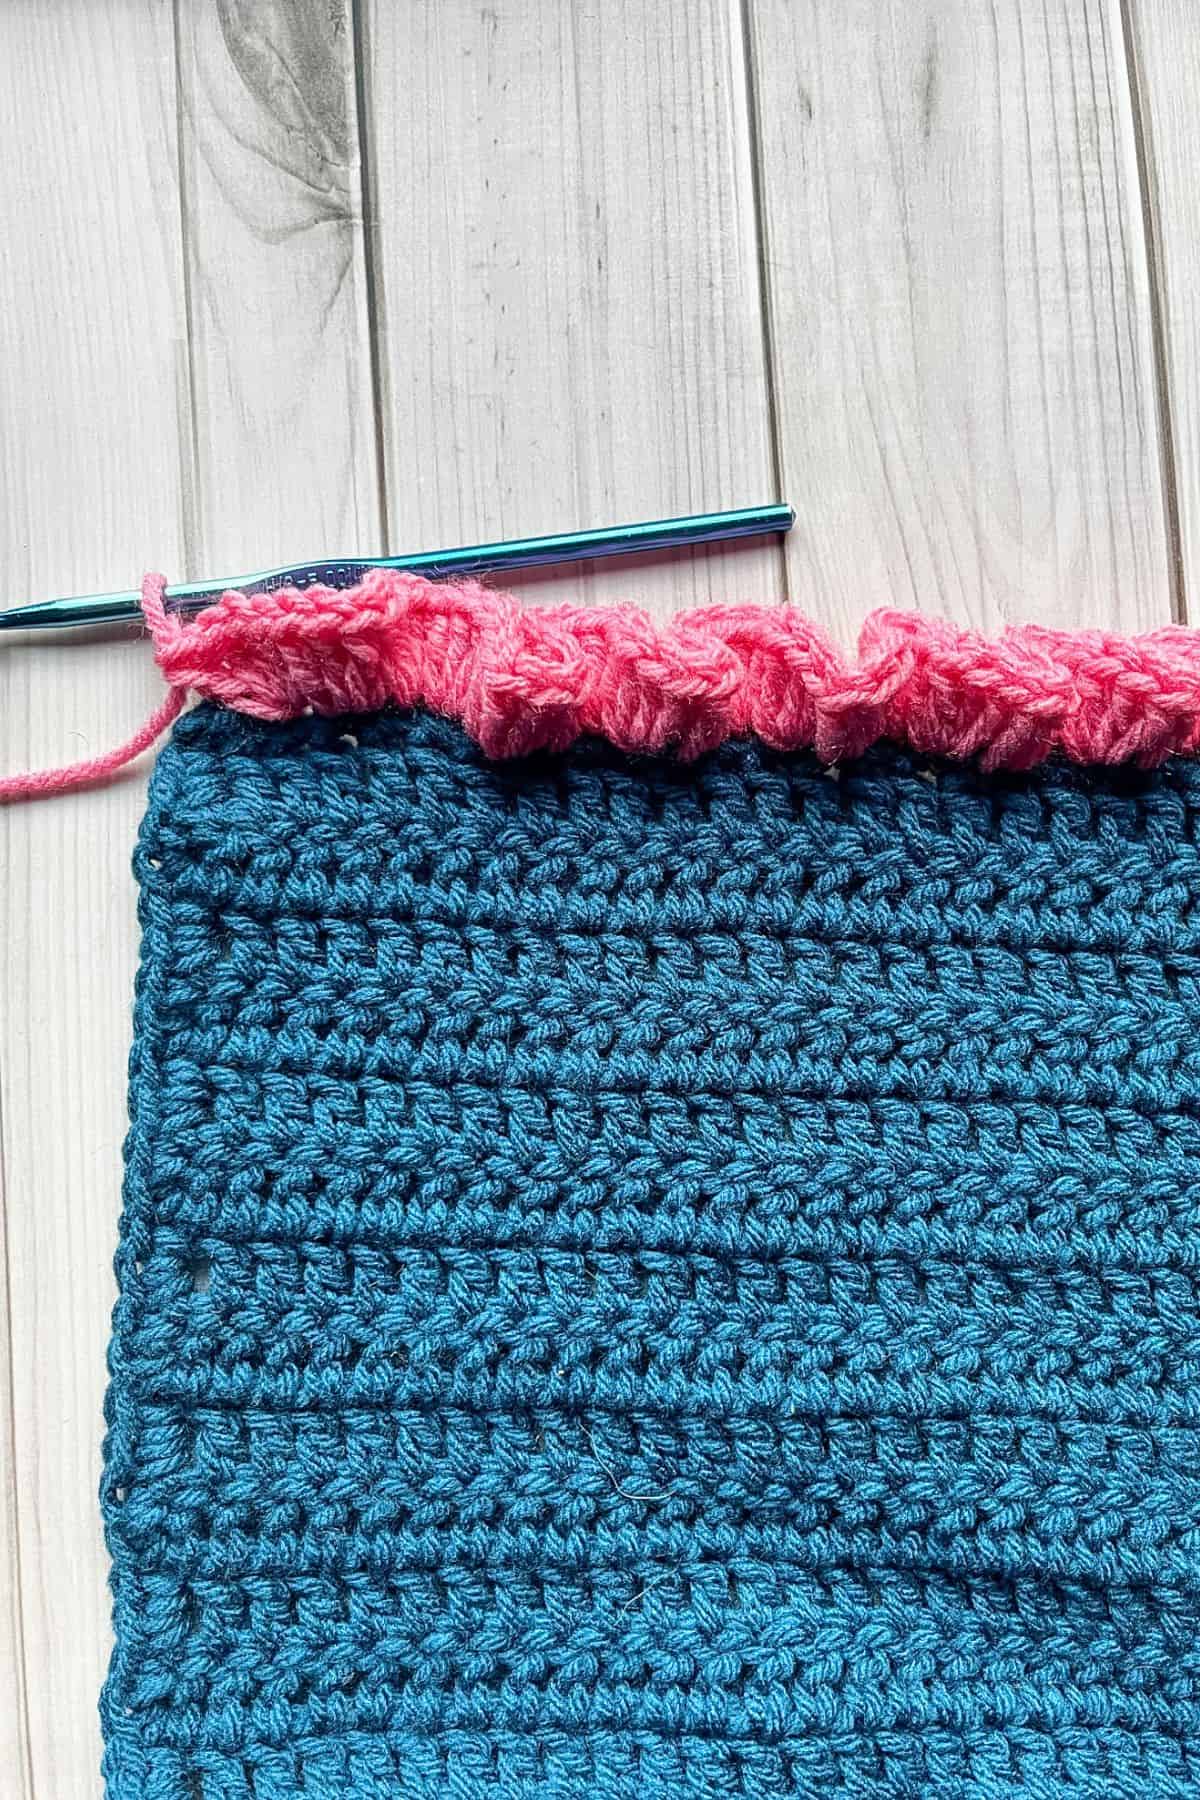
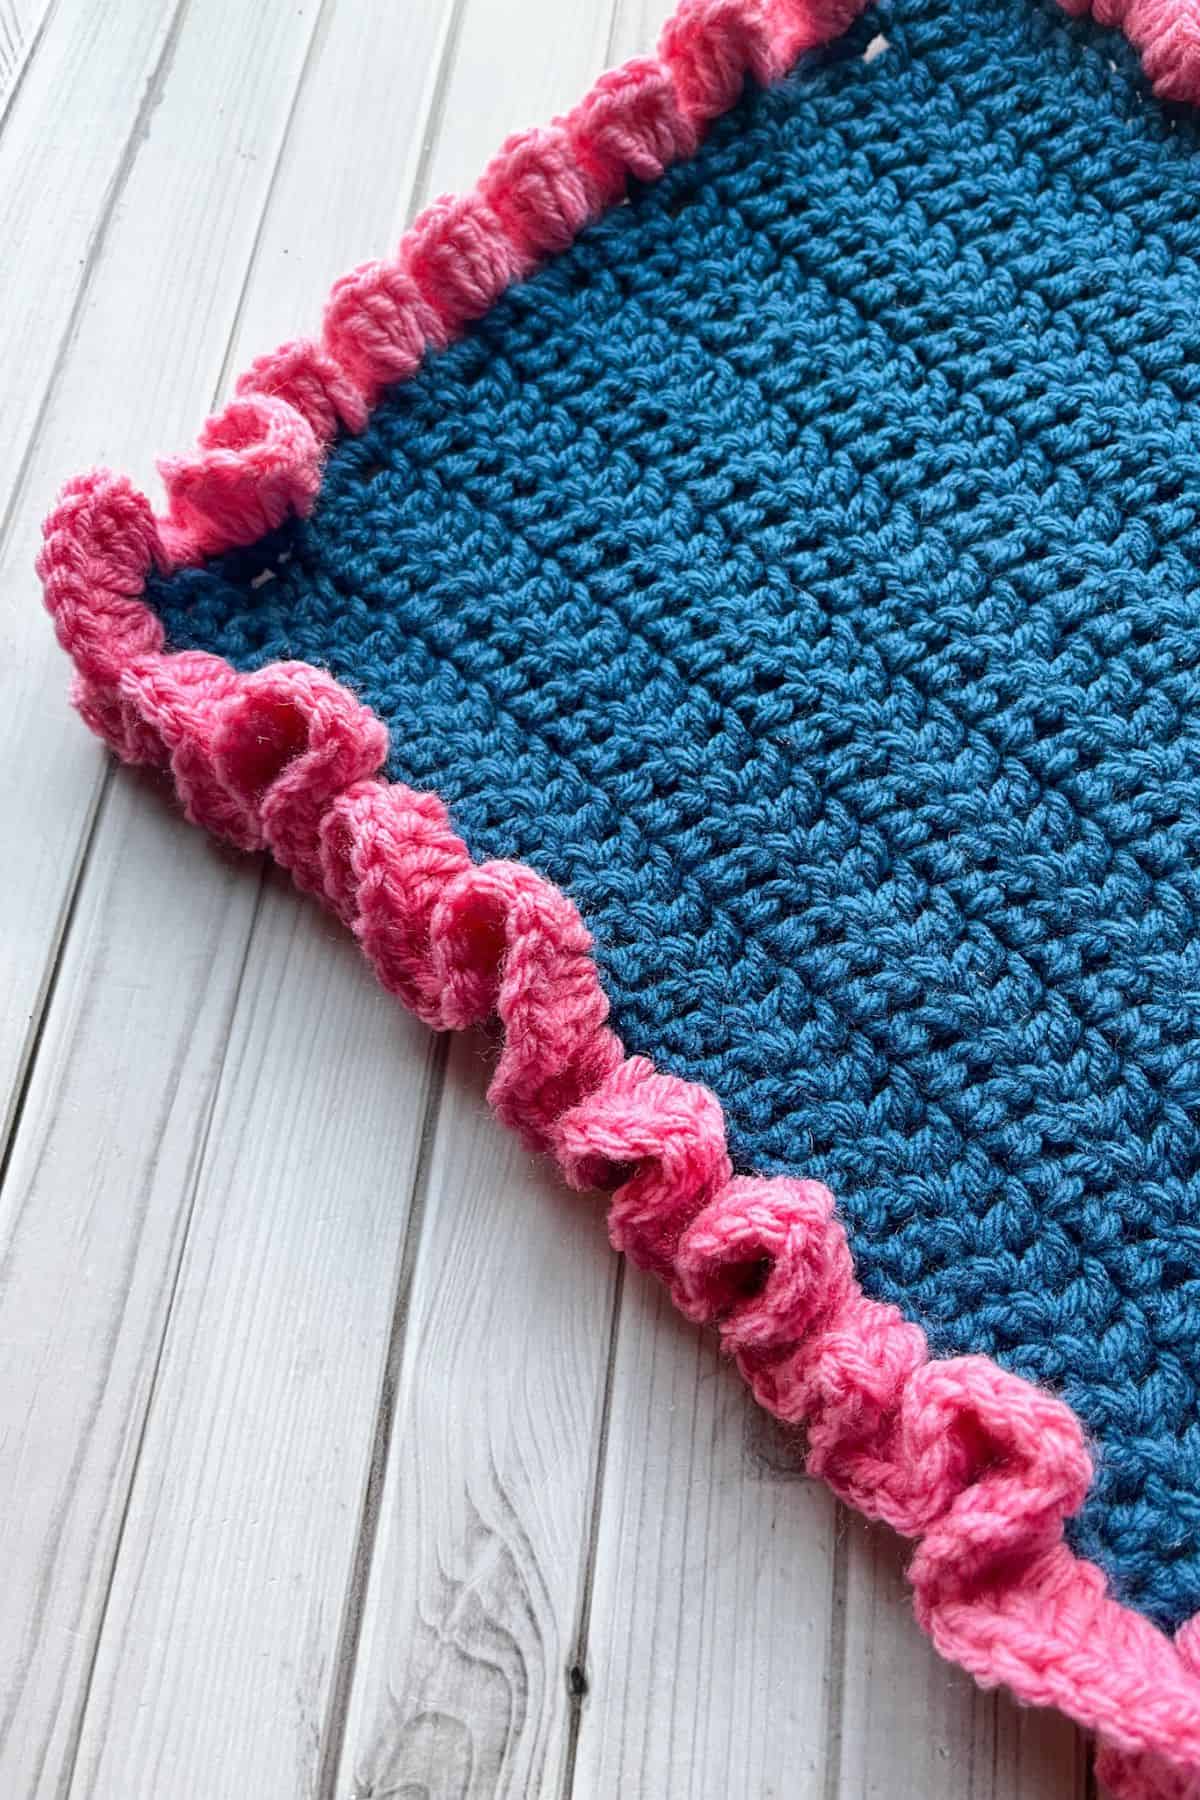
When you finish the border and are back at the beginning, sl st to the 3rd chain and fasten off the yarn. Then weave in any ends.
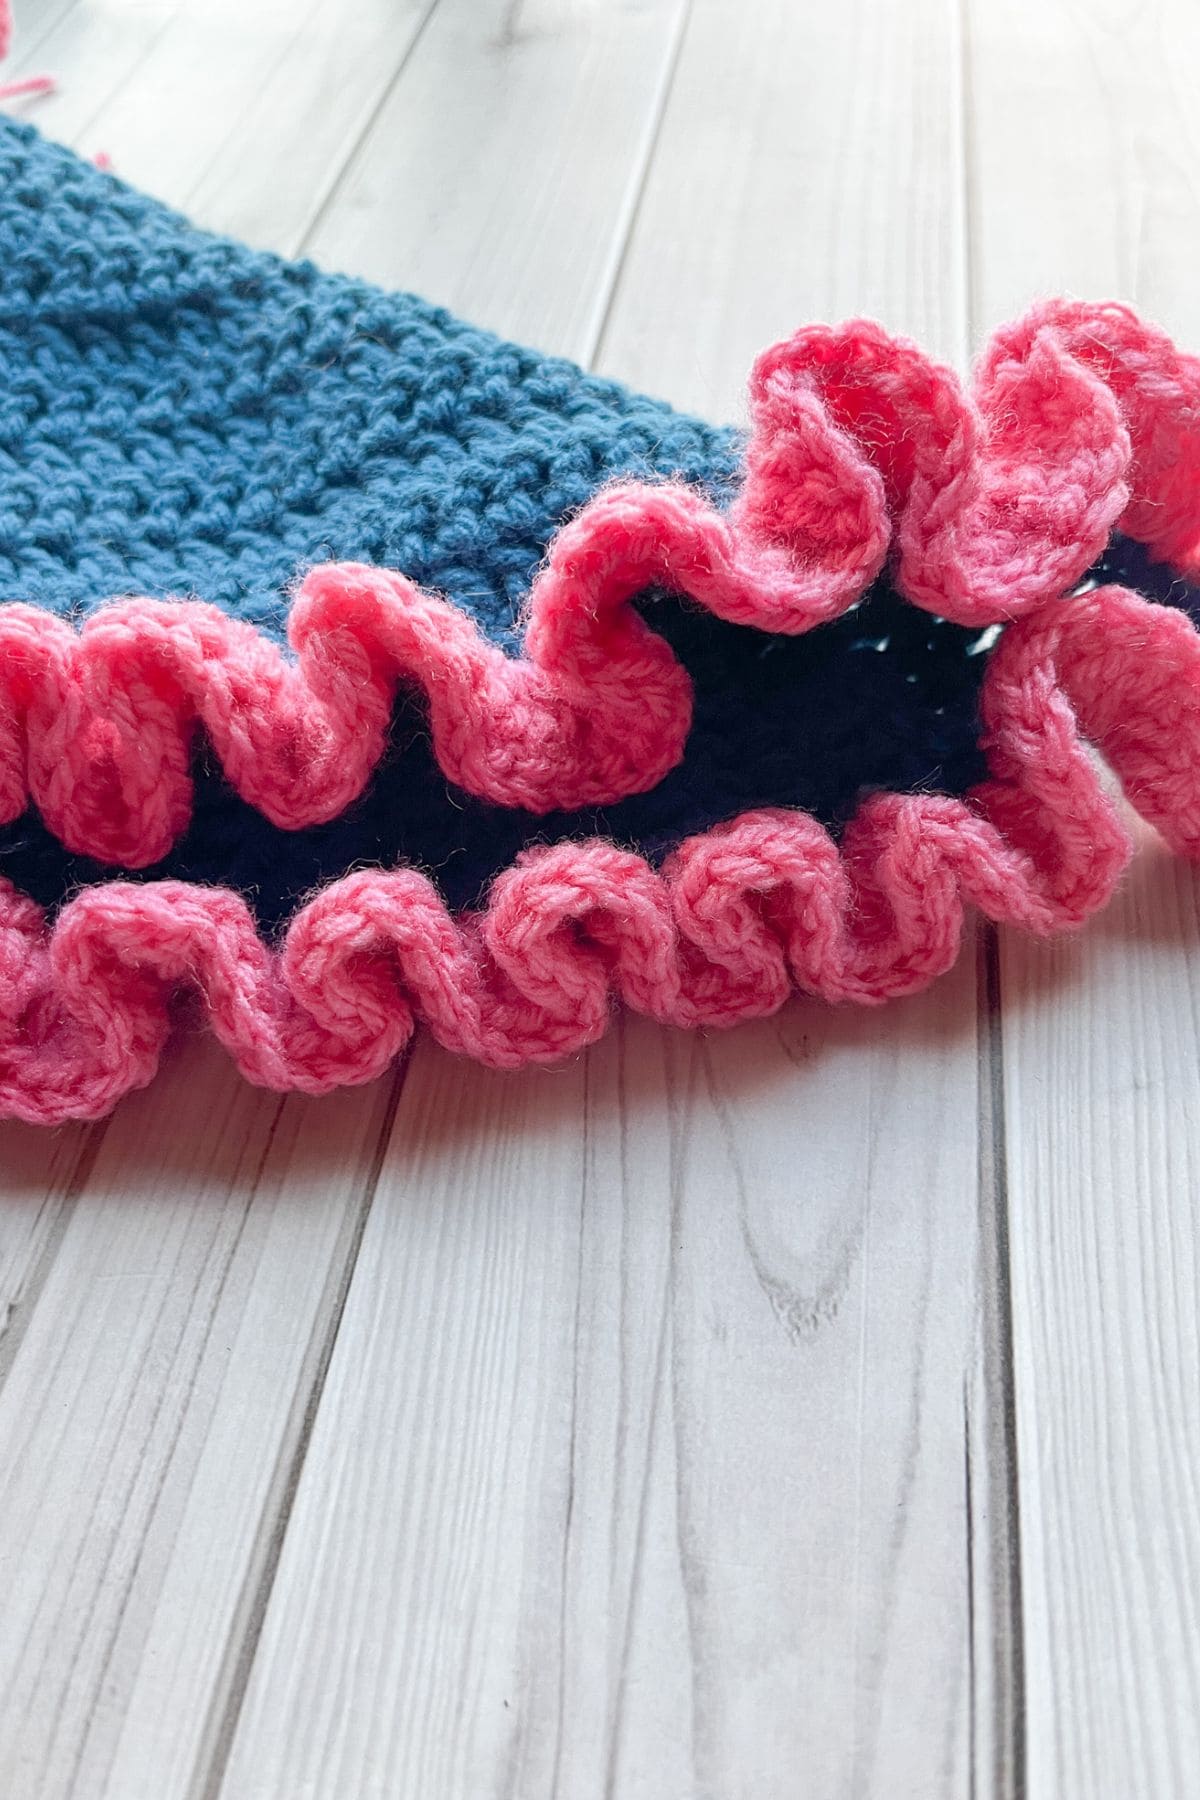
You may have to fix your ruffles to have them bend like mine, but once they are in place they maintain their ruffle texture.
You have now completed the crochet ruffle border tutorial! Didn’t I tell you it was easy to do!
If you are looking for other easy crochet border patterns check out the crochet picot border which uses single crochets and slip stitches to create it. Want to try something a bit trickier? Try the crochet crab border, also known as the reverse crochet border, this is where you work backwards when making single crochets and it leaves a rope like texture.
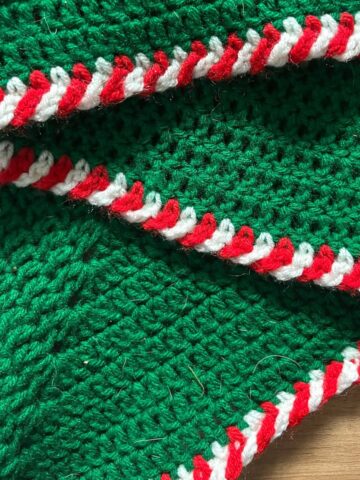
Or leave a statement by making the crochet bobble stitch border, which has a fantastic texture, or the crochet candy cane border that creates eye catching stripes.
🐌Expert Tips
- Front Loop Only. If you work the border in the front loop only, you can create a double ruffle border by adding a 2-round ruffle border to the back loop.
- Experiment with Stitches. Feel free to experiment with different base stitches for the ruffle. Combining various stitches can create unique textures and effects.
- Color Combinations. Consider using multiple colors for your ruffles to add more visual interest. You can alternate colors for each ruffle or create a gradient effect.
- Test Different Yarns. Test the ruffle border with different yarn types. Specialty yarns, such as fuzzy or metallic, can produce stunning results.
🧵Pattern FAQs
For the second round, you can choose to include more increases or keep it the same. It’s all up to your preference.
Absolutely! Try a small section of the border with fuzzy yarn. If you like the result, go for it!
To achieve a more lace-like appearance or a fancier finish, consider adding a picot border at the edge of the ruffle border.
🧶More Crochet Border Patterns


If you tried this Crochet Ruffle Border Pattern (or any other pattern on my website), please let me know how it went in the 📝 comments below. I'd love to hear from you!
Crochet Ruffle Border Pattern
Materials
- Yarn for the border
- 5mm crochet hook (or size of choice)
- Tapestry needle
Abbreviations (US terms)
- sc = Single crochet
- sl st = Slip Stitch
- dc = Double Crochet
Notes
- Versatile for any yarn type—chunky, fuzzy, etc.
- Features 4 double crochets in each space, adjustable to preferences.
- Choose between a one-round or multi-round border by adding rows.
- Vary the wavy effect with different double crochets per stitch.
- Experiment with single, double, half double, triple, or combinations for the base stitch.
Instructions
- This pattern is made in rounds, but can be used in rows if desired, depending on the project.
- Round 1: If you need to join a new yarn color for the edge now is the time to do it. Join your yarn (anywhere is fine) and ch x3.
- Then dc x3 into the same stitch you joined the yarn. In the next stitch dc x4. Repeat dc x4 for the rest of the border, even for the stitches in the corners. When you finish the border and are back at the beginning, sl st to the 3rd chain and fasten off the yarn. Then weave in any ends.You may have to fix your ruffles to have them bend like mine, but once they are in place they maintain their ruffle texture.
- You have now completed the crochet ruffle border tutorial!


Leave a Reply