
This fall, bring a touch of whimsy to your home with my Crochet Crow Pattern, a delightful project that you can whip up in just an hour! These charming little crows are not only perfect for seasonal decor, but they also make wonderful gifts for friends and family.

Whether you're leaving them as random acts of crochet kindness or adding them to your Halloween decorations, these crows are sure to spread some cheer!
One of the best things about crochet crow pattern is how quick and easy it is to make. With just a small amount of yarn, you can create a whole flock of these adorable birds in no time.
Imagine surprising someone with a handmade crow as a Halloween treat, or using them to embellish your crochet pumpkins for an extra festive touch. I've even attached my crow to a crochet jack-o'-lantern for a fun combination. You could also add them to the crochet patchwork pumpkin. You can easily customize the colors and expressions of your crows, allowing you to showcase your creativity and personal style. The possibilities are endless!
So grab your yarn and hook, and let’s get started on this spooky crochet crow pattern! Your home will soon be filled with charming crows that bring the spirit of fall to life!
Jump to:
✏️ Things To Note:
- Yarn Choice: I made the crochet crow with a small ball of black yarn; you really don't need much yarn to complete this project, so check your scrap pile before buying more!
- Yarn Types: I used acrylic yarn since it’s what I had on hand, but the crochet crow pattern can be completed with any type of yarn. Cotton, acrylic, wool, and chunky yarn are great options, but note that anything above worsted weight will make it significantly larger.
- Size: The finished size of the crochet crow pattern is roughly 2 inches high and 2 inches wide.
🪡 Materials Needed
- Yarn colors: 1 small ball of black and gray.
- 5mm hook
- Tapestry needle
- Polyfill
- 8mm safety eyes
💭 Abbreviations to Remember (US Terms)
- Magic ring (mr)
- Single crochet (sc)
- Increase (inc) - 2 stitches in the same stitch
- Chains (ch)
- Decrease (dec)
- Slip stitch (sl st)
🧋 Variations
You can use different colored yarn to create various crochet birds! They don't necessarily have to be crows.
🍵 Instructions for Crochet Crow Pattern
Crow Body:
For this pattern we will be working in rounds.


Round 1: Using black yarn, make a mr and make sc x6 in the circle. If you find it difficult making a magic ring you can chain 2 and then crochet sc x6 in the second chain from the hook (6).
Round 2: Inc in every sc (12).
Round 3: Inc, sc. Then repeat until end of round (18).
Round 4-6: Sc in every stitch (18).
Round 7: Inc x6, then sc x12 (24). The increase will be the back end of the bird.
Round 8-10: Sc in every stitch (24). Place safety eyes on the crow on the sides of the head, this is best between rounds 4-5, but adjust as you need.
Round 11: Dec, sc x2. Then repeat the rest of the round (18).
Round 12: Dec, sc. Then repeat the rest of the round (12).
Round 13: Dec the entire round (6). Fasten off and sew closed. If you would like the body of the crow to be more pronounced, before weaving in the ends, stick the needle to the exact place you made the increases in round 7( by going through the bird body), then reinsert the needle at the end of those increases and slightly pull to make the indent more pronounced. Then tie, fasten off and weave in the ends.
Wings:

Round 1: Using black yarn, make a mr and make sc x5 in the circle (5).
Round 2: Inc in every stitch (10).
Round 3: Sc in every stitch (10). Fold over and crochet the wing shut by going through both sides of the wing's stitches. Then fasten off and leave the tail for sewing.
Make x2 wings.
Feet:

With gray yarn ch x3, then sl st into the second ch from the hook. Sl st in the last remaining ch.
*Then ch x2, and in the second ch from the hook make another sl st, then sl st into the next spot which should already have a sl st in it.
Repeat from * one more time. Fasten off and leave the tail for sewing.
Once everything is completed you can sew the crochet crow together! Sew one wing to each side of the bird and the feet down by the bottom front of the body. Then you can take gray yarn and create a nice little beak by embroidering over the same stitch between the eyes until a small little bird beak forms.
And now you have a cute crochet crow made from my crochet crow pattern! I hope you enjoyed this pattern and if you are looking for some other spooky crochet patterns, check out my crochet potion pillow pattern and crochet Halloween blanket pattern.
If you are using the crochet crows as Halloween treats and need a variety of other treats, try making my crochet candy corn pattern.
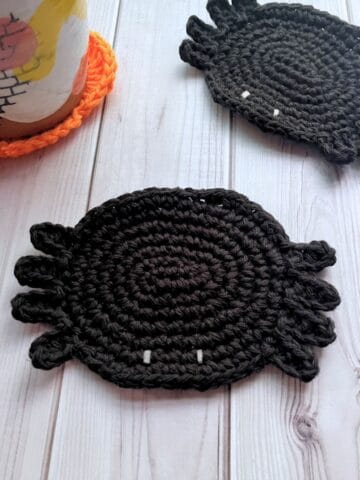
If you have leftover black yarn, try making my crochet ladybug pattern or crochet spider coaster pattern (if you have black cotton yarn).

🐌Expert Tips
- Use Safety Eyes Wisely: Position the safety eyes for the crochet crow pattern before closing the body to ensure they are secure.
- Stuff Firmly: Make sure to stuff the body firmly to maintain its shape, but be careful not to overstuff, as it could stretch the stitches.
- Color Combinations: Experiment with colors! Try using different shades for a unique look or seasonal variations, like orange for Halloween or white for winter.
🧵 Pattern FAQs
Absolutely!
Absolutely! While this pattern is designed for a crow, you can experiment with various colors to create different birds. Let your imagination soar!
You can use any type of yarn you have on hand, but I recommend using worsted-weight yarn for the best results. Acrylic, cotton, or wool will all work well for this project.
Simply place the safety eyes on the crow's body during Round 8 of the pattern, making sure they are evenly spaced. Then, secure them tightly to ensure they stay in place!

🧶More Crochet Halloween Patterns

If you tried this Crochet Crow Pattern (or any other pattern on my website), please let me know how it went in the 📝 comments below. I'd love to hear from you!

Crochet Crow Pattern
Materials
- Yarn colors: 1 small ball of black and gray.
- 5 mm hook
- Tapestry needle
- Polyfill
- 8 mm safety eyes
Abbreviations (US terms)
- Magic ring - mr
- Single crochet - sc
- Increase (inc) - 2 stitches in the same stitch
- Chains - ch
- Decrease - dec
- Slip stitch - sl st
Notes
- Yarn Choice: I made the crochet crow with a small ball of black yarn; you really don't need much yarn to complete this project, so check your scrap pile before buying more!
- Yarn Types: I used acrylic yarn since it’s what I had on hand, but the crochet crow pattern can be completed with any type of yarn. Cotton, acrylic, wool, and chunky yarn are great options, but note that anything above worsted weight will make it significantly larger.
- Size: The finished size of the crochet crow pattern is roughly 2 inches high and 2 inches wide.
Instructions
Crow Body:
- For this pattern we will be working in rounds.
- Round 1: Using black yarn, make a mr and make sc x6 in the circle. If you find it difficult making a magic ring you can chain 2 and then crochet sc x6 in the second chain from the hook (6).
- Round 2: Inc in every sc (12).
- Round 3: Inc, sc. Then repeat until end of round (18).
- Round 4-6: Sc in every stitch (18).
- Round 7: Inc x6, then sc x12 (24). The increase will be the back end of the bird.
- Round 8-10: Sc in every stitch (24). Place safety eyes on the crow on the sides of the head, this is best between rounds 4-5, but adjust as you need.
- Round 11: Dec, sc x2. Then repeat the rest of the round (18).
- Round 12: Dec, sc. Then repeat the rest of the round (12).
- Round 13: Dec the entire round (6). Fasten off and sew closed. If you would like the body of the crow to be more pronounced, before weaving in the ends, stick the needle to the exact place you made the increases in round 7( by going through the bird body), then reinsert the needle at the end of those increases and slightly pull to make the indent more pronounced. Then tie, fasten off and weave in the ends.
Wings:
- Round 1: Using black yarn, make a mr and make sc x5 in the circle (5).
- Round 2: Inc in every stitch (10).
- Round 3: Sc in every stitch (10). Fold over and crochet the wing shut by going through both sides of the wing's stitches. Then fasten off and leave the tail for sewing.
- Make x2 wings.
Feet:
- With gray yarn ch x3, then sl st into the second ch from the hook. Sl st in the last remaining ch.
- *Then ch x2, and in the second ch from the hook make another sl st, then sl st into the next spot which should already have a sl st in it.
- Repeat from * one more time. Fasten off and leave the tail for sewing.
- Once everything is completed you can sew the crochet crow together! Sew one wing to each side of the bird and the feet down by the bottom front of the body. Then you can take gray yarn and create a nice little beak by embroidering over the same stitch between the eyes until a small little bird beak forms.
- And now you have a cute crochet crow made from my crochet crow pattern!


Katy says
I love this little guy! I'm almost done with my first, and then I'm going to keep making them until I run out of yarn. After that, I'm going to hang them all over my sister's tree when she's away this weekend. She'll love it!!
Brandy M says
Love this pattern! Thank you!
Karina says
What size are the safety eyes?
KimberlyArenas says
I believe I used 6mm for the eyes, but if you want the eyes bigger you can use a different size 🙂