

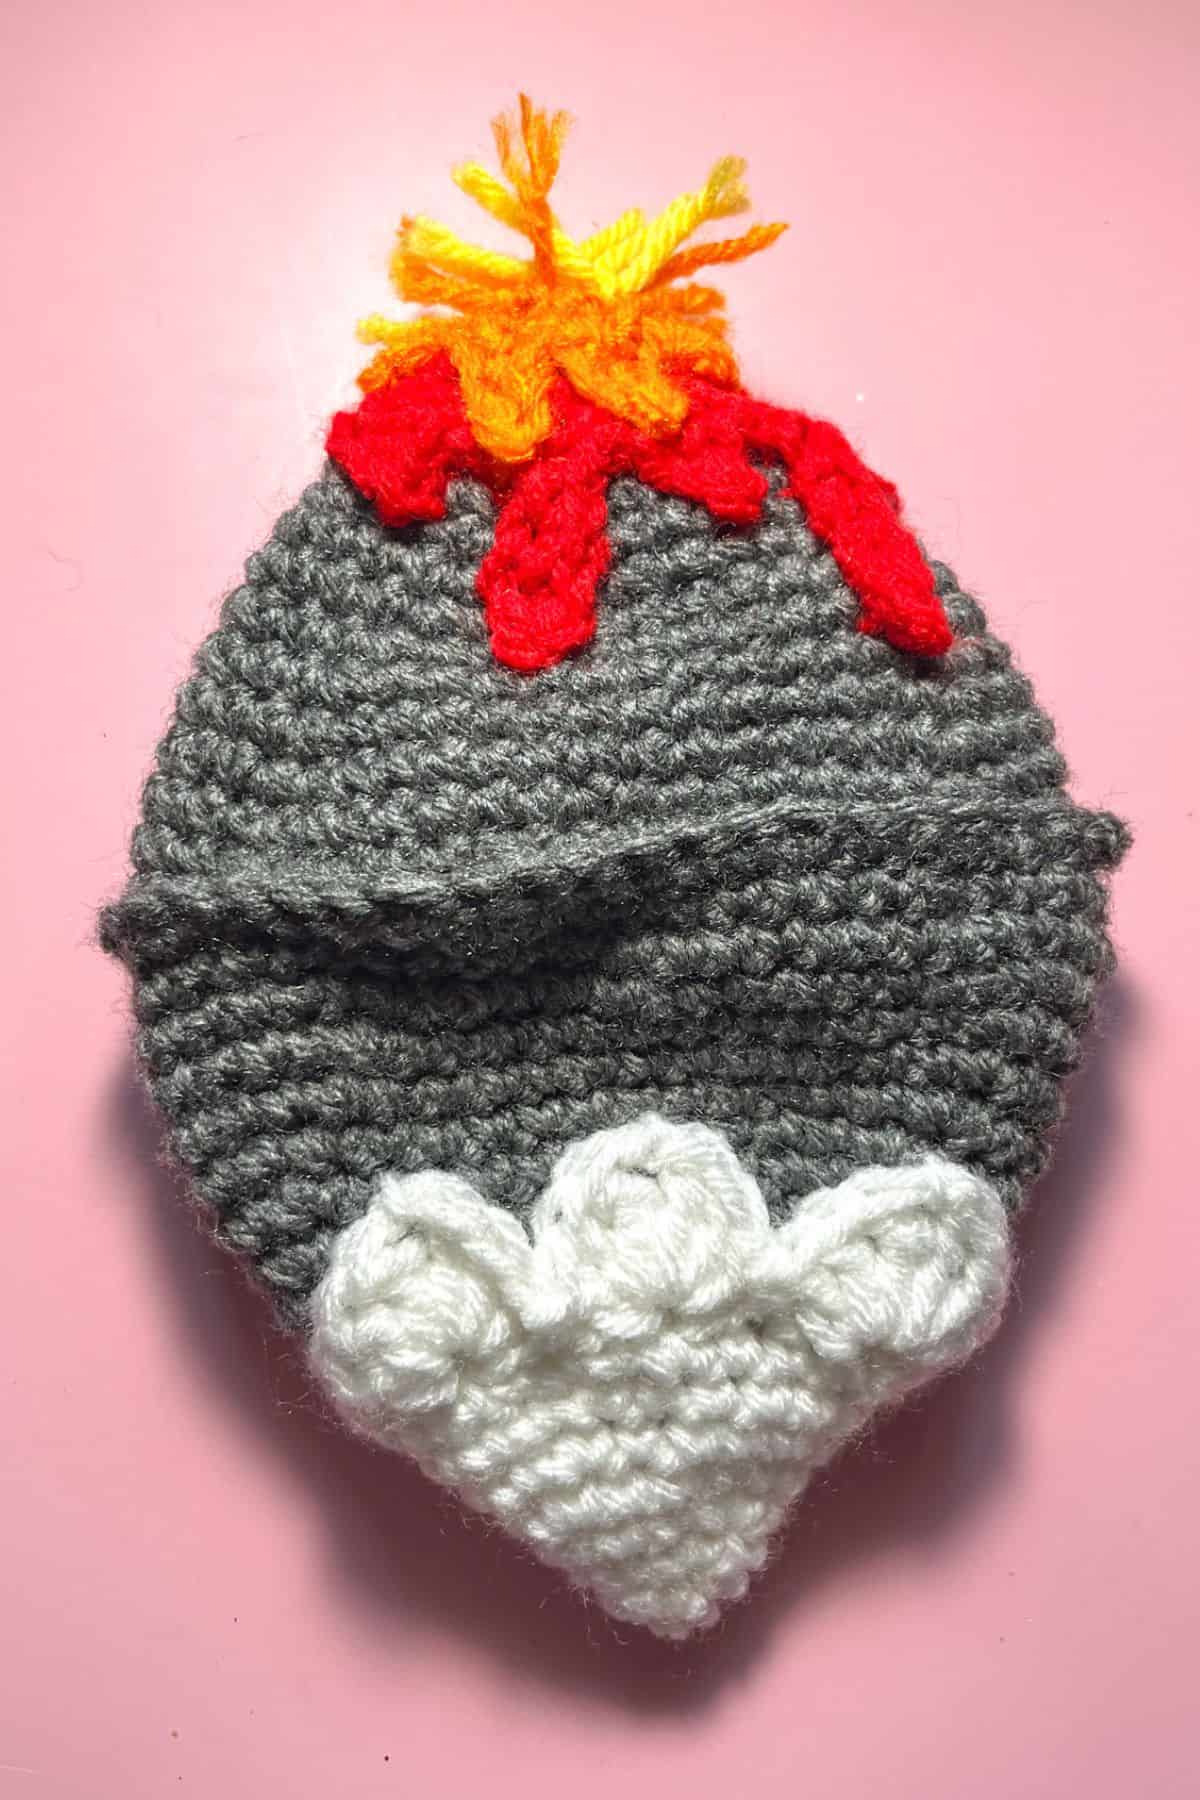
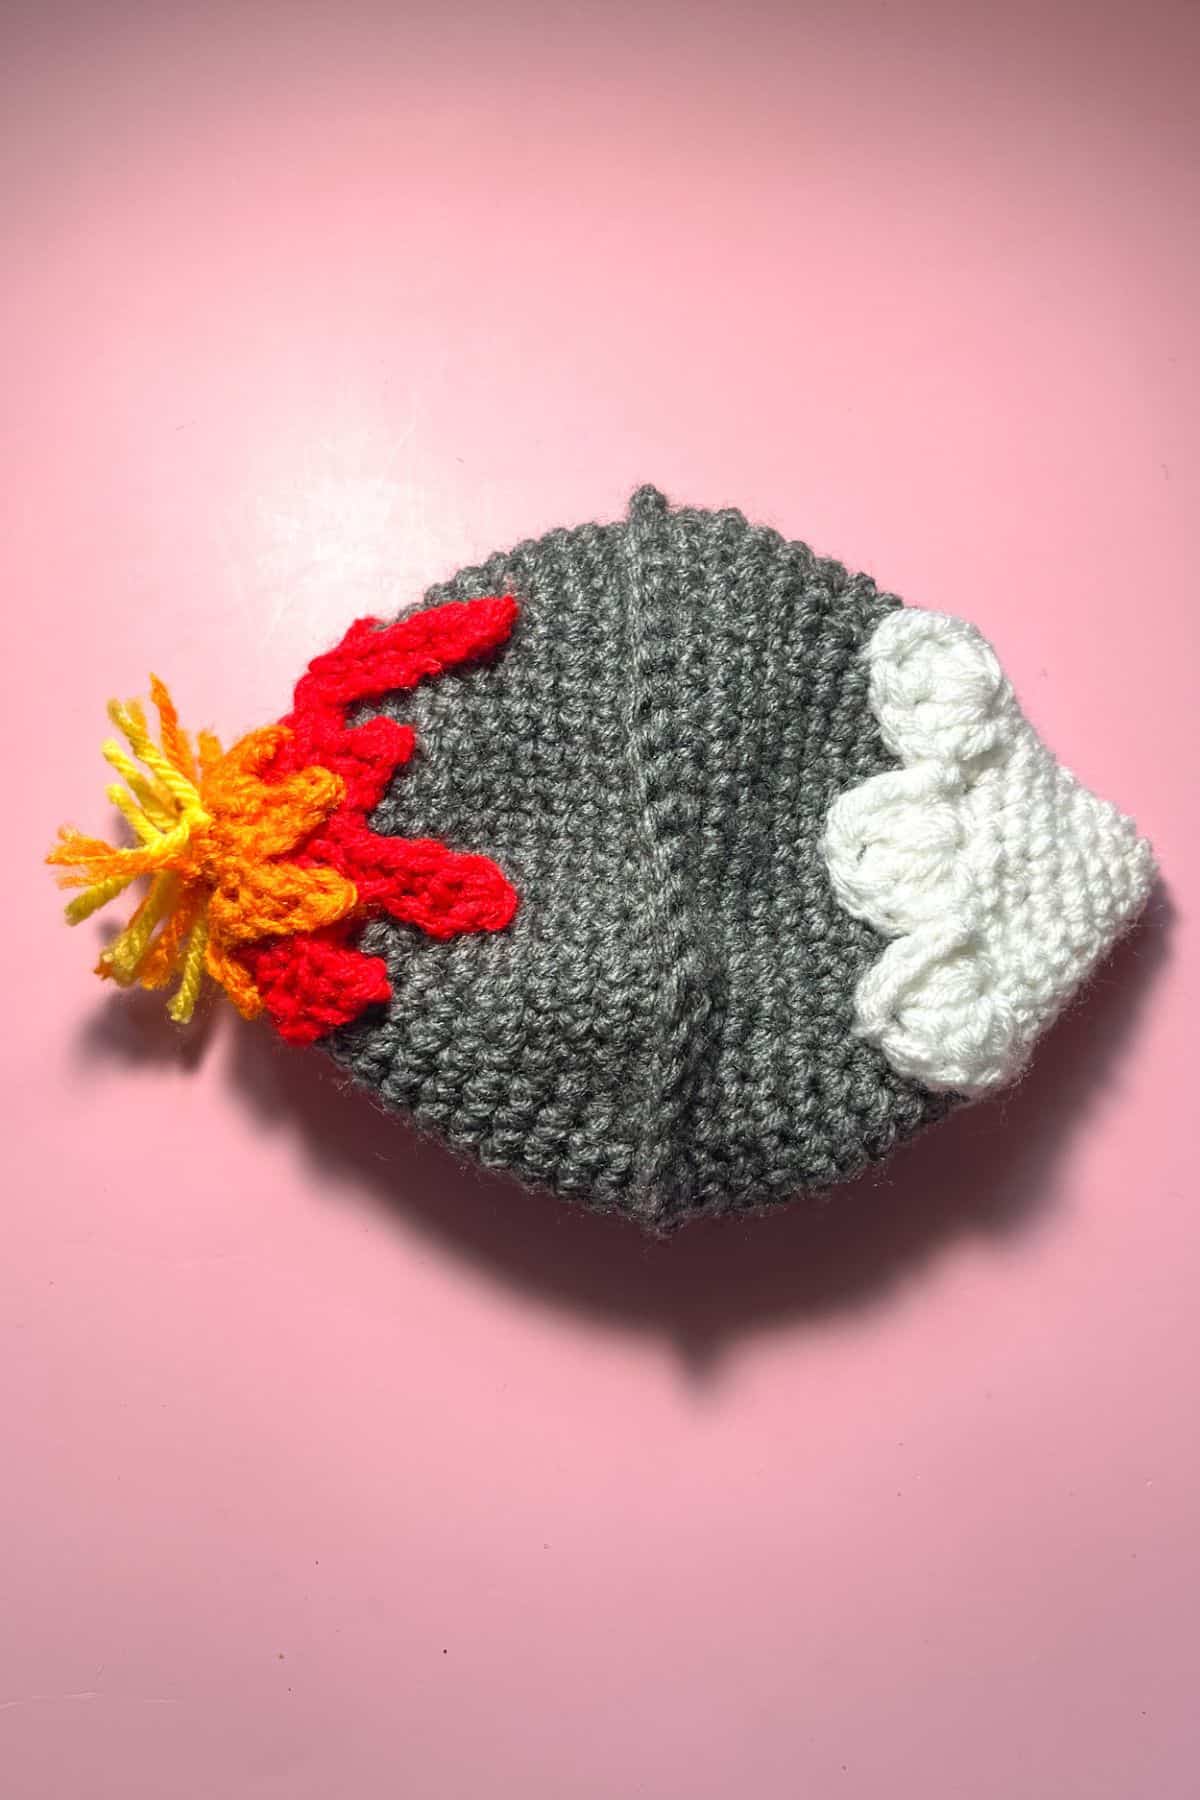
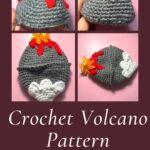
My reversible Crochet Volcano Pattern is easy and a great way to make kids understand how volcanoes erupt. As a bonus, it can also be used to show how emotions work for younger kids.

My toddler is currently obsessed with volcanoes. I think what excites him the most is the different colors of the magma and how it pours down over mountains and land.
Personally, I find volcanoes so fascinating that I almost went to school to become a volcanologist. Instead, I chose my other passion: fine art and art history.
So, this crochet volcano pattern is for both him and me—if we’re being honest, haha. It also came into fruition because of the recent Icelandic volcano eruptions. Although we live in the PNW, we are surrounded by many sleeping giants and this helped me explain to my child what might happen to our neck of the woods one day (although it would be more like hot mud and ash vs magma but this gets the idea through better).
My reversible crochet volcano pattern is honestly one of my favorite patterns to date. It is easy to make, works up extremely quickly, and would make great last-minute gifts, stocking stuffers during the holiday season, or items to sell at markets!
Jump to:
✏️ Things To Note:
- Reversible Toy: I made the crochet volcano pattern as a reversible toy, but you could easily separate them by closing and stuffing them instead of attaching them. My crochet cloud pattern is also reversible.
- Yarn Choice: I used acrylic worsted yarn for the crochet volcano pattern, but you can use any yarn type and size. Blanket yarn would make it big enough to become a small pillow.
- Dimensions: The size of either the mountain or the volcano is roughly 4 inches tall and 4 inches wide.
🪡 Materials Needed
- H hook
- Tapestry needle
- 1 ball of heather gray yarn from Red Heart
- 1 ball of white yarn from Red Heart
- 1 ball of red yarn from Red Heart
- 1 ball of orange yarn from Red Heart
- 1 ball of yellow yarn from Red Heart
💭Abbreviations to Remember (US terms)
- Magic ring - mr
- Chain - ch
- Single crochet - sc
- Front loop only - flo
- Back loop only - blo
- Slip stitch - sl st
- Double crochet - dc
- Treble crochet - tr
- Increase - inc
- Decrease - dc
🧋Variations
- You can make the volcano and mountain as separate pieces instead of attaching them together.
- Use different yarn sizes for varying effects.
🍵Instructions for Crochet Volcano Pattern
Crochet Mountain Pattern Side:
The crochet mountain pattern is made in rounds.
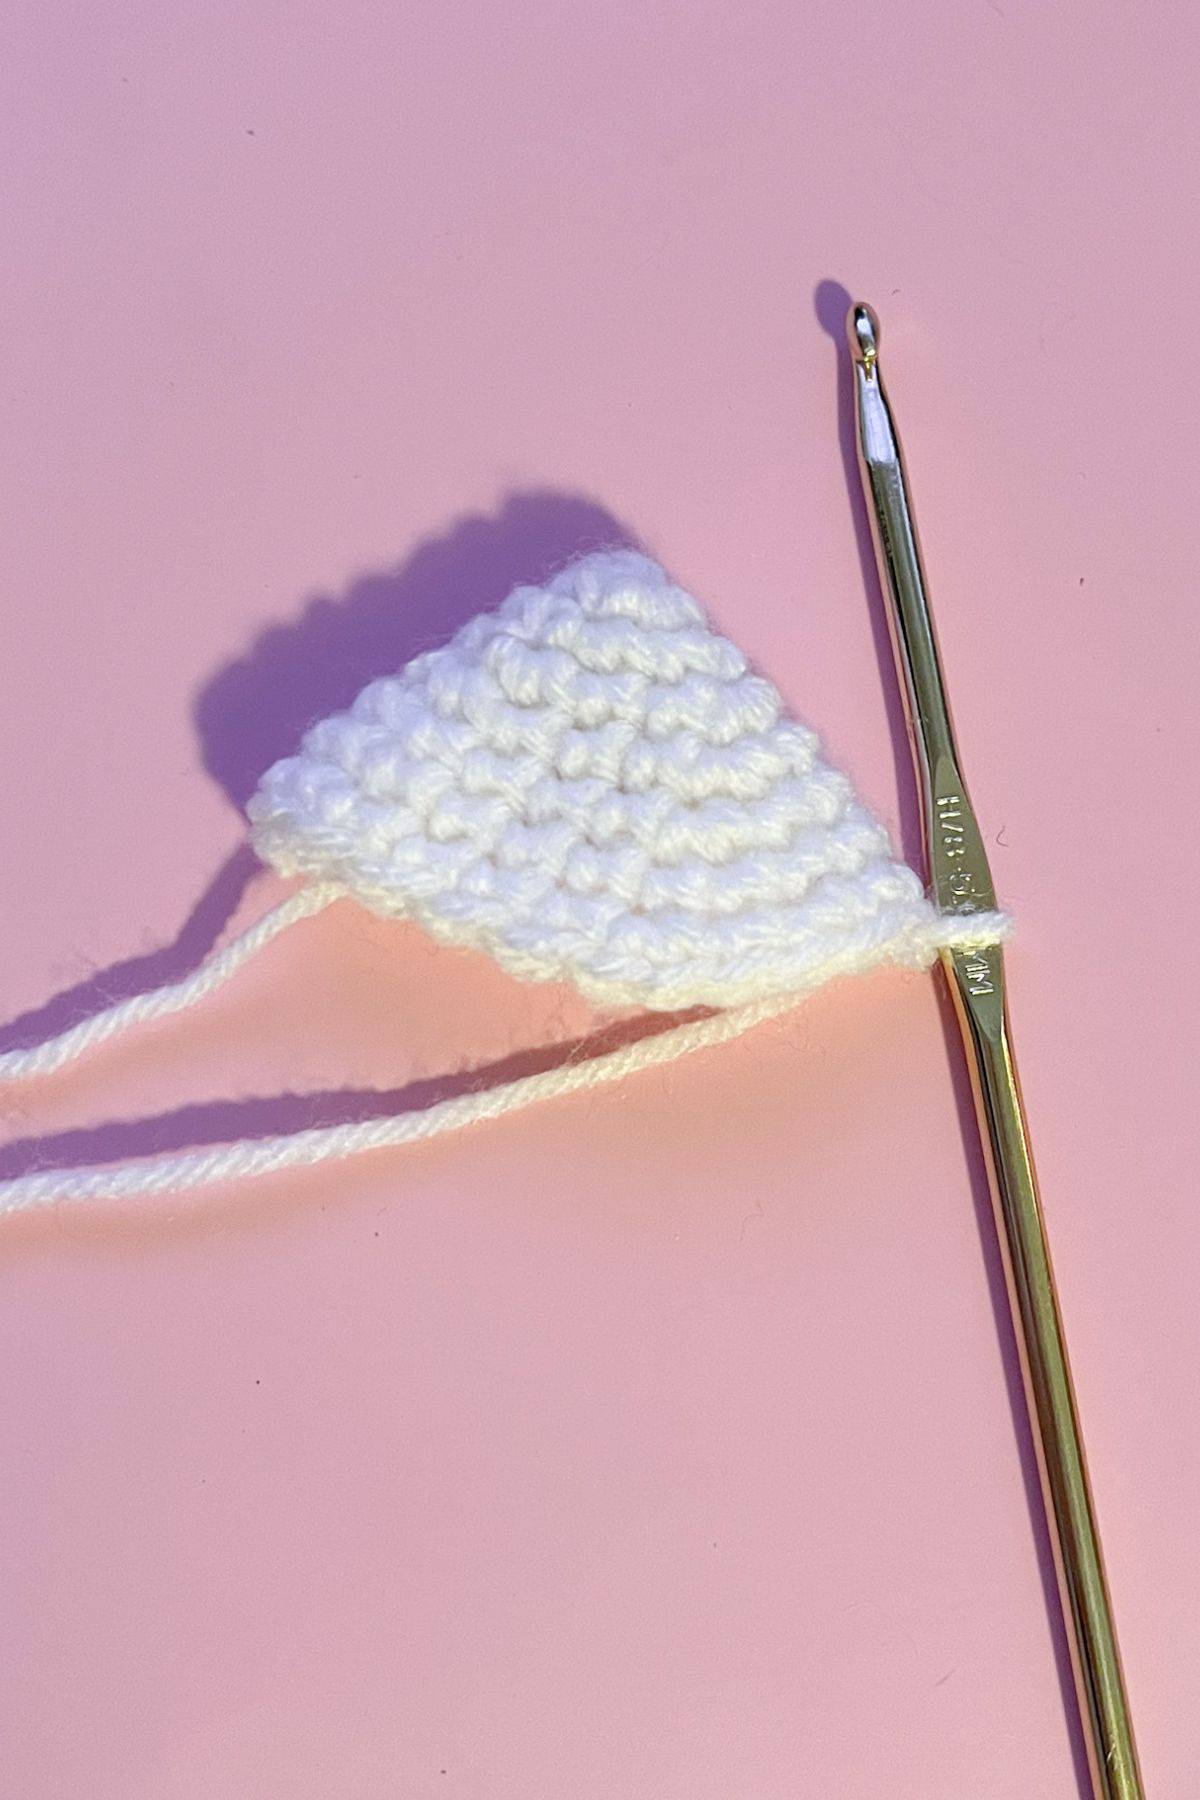
Round 1: With white yarn, make a magic ring and sc x3 into the circle. If you cannot make a mr, you can ch x2 and then sc x3 into the second ch from the hook. (3)
Round 2: Inc, and repeat for the rest of the round (6).
Round 3: Inc, then sc x1. Then repeat for the rest of the round (9).
Round 4: Inc, then sc x2. Then repeat for the rest of the round (12).
Round 5: Inc, then sc x3. Then repeat for the rest of the round (15).
Round 6: Inc, then sc x4. Then repeat for the rest of the round (18).
Round 7: Inc, then sc x5. Then repeat for the rest of the round (21).
Round 8: Inc, then sc x6. Then repeat for the rest of the round (24).
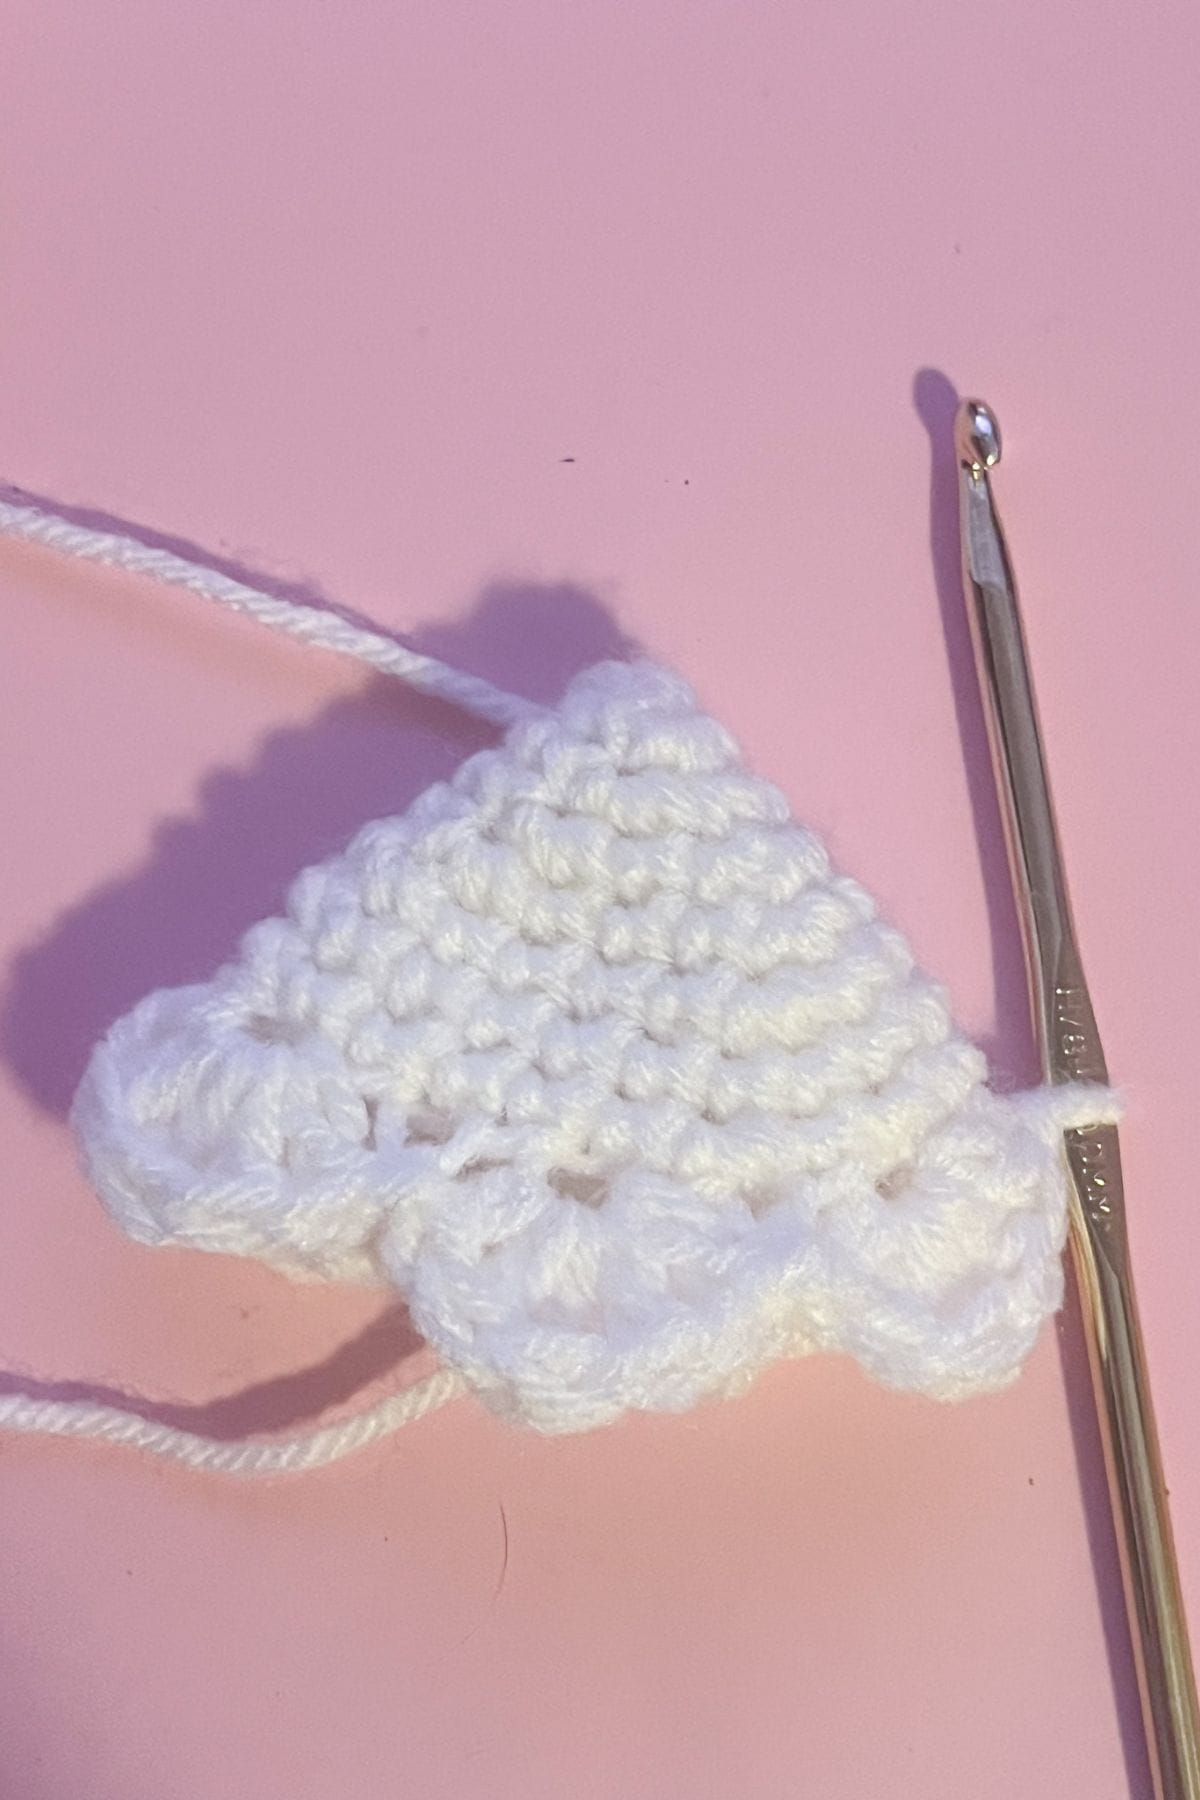
Round 9: This row is for making the shells at the base of the snowy part of the mountain. In flo, make a shell by yarning over, skipping the next stitch and then inserting the hook into the following stitch and make a dc stitch like normal. Make another dc stitch, then make a tr, ch, tr, 2dc in the same stitch. Skip the next stitch and anchor the shell to the following stitch with a sl st. Repeat making shells like that for the rest of the round. Remember to only do the flo.
Round 10: Now in the blo, crochet a sc in every back loop (24). Then fasten off the white yarn and change the color to heather gray.
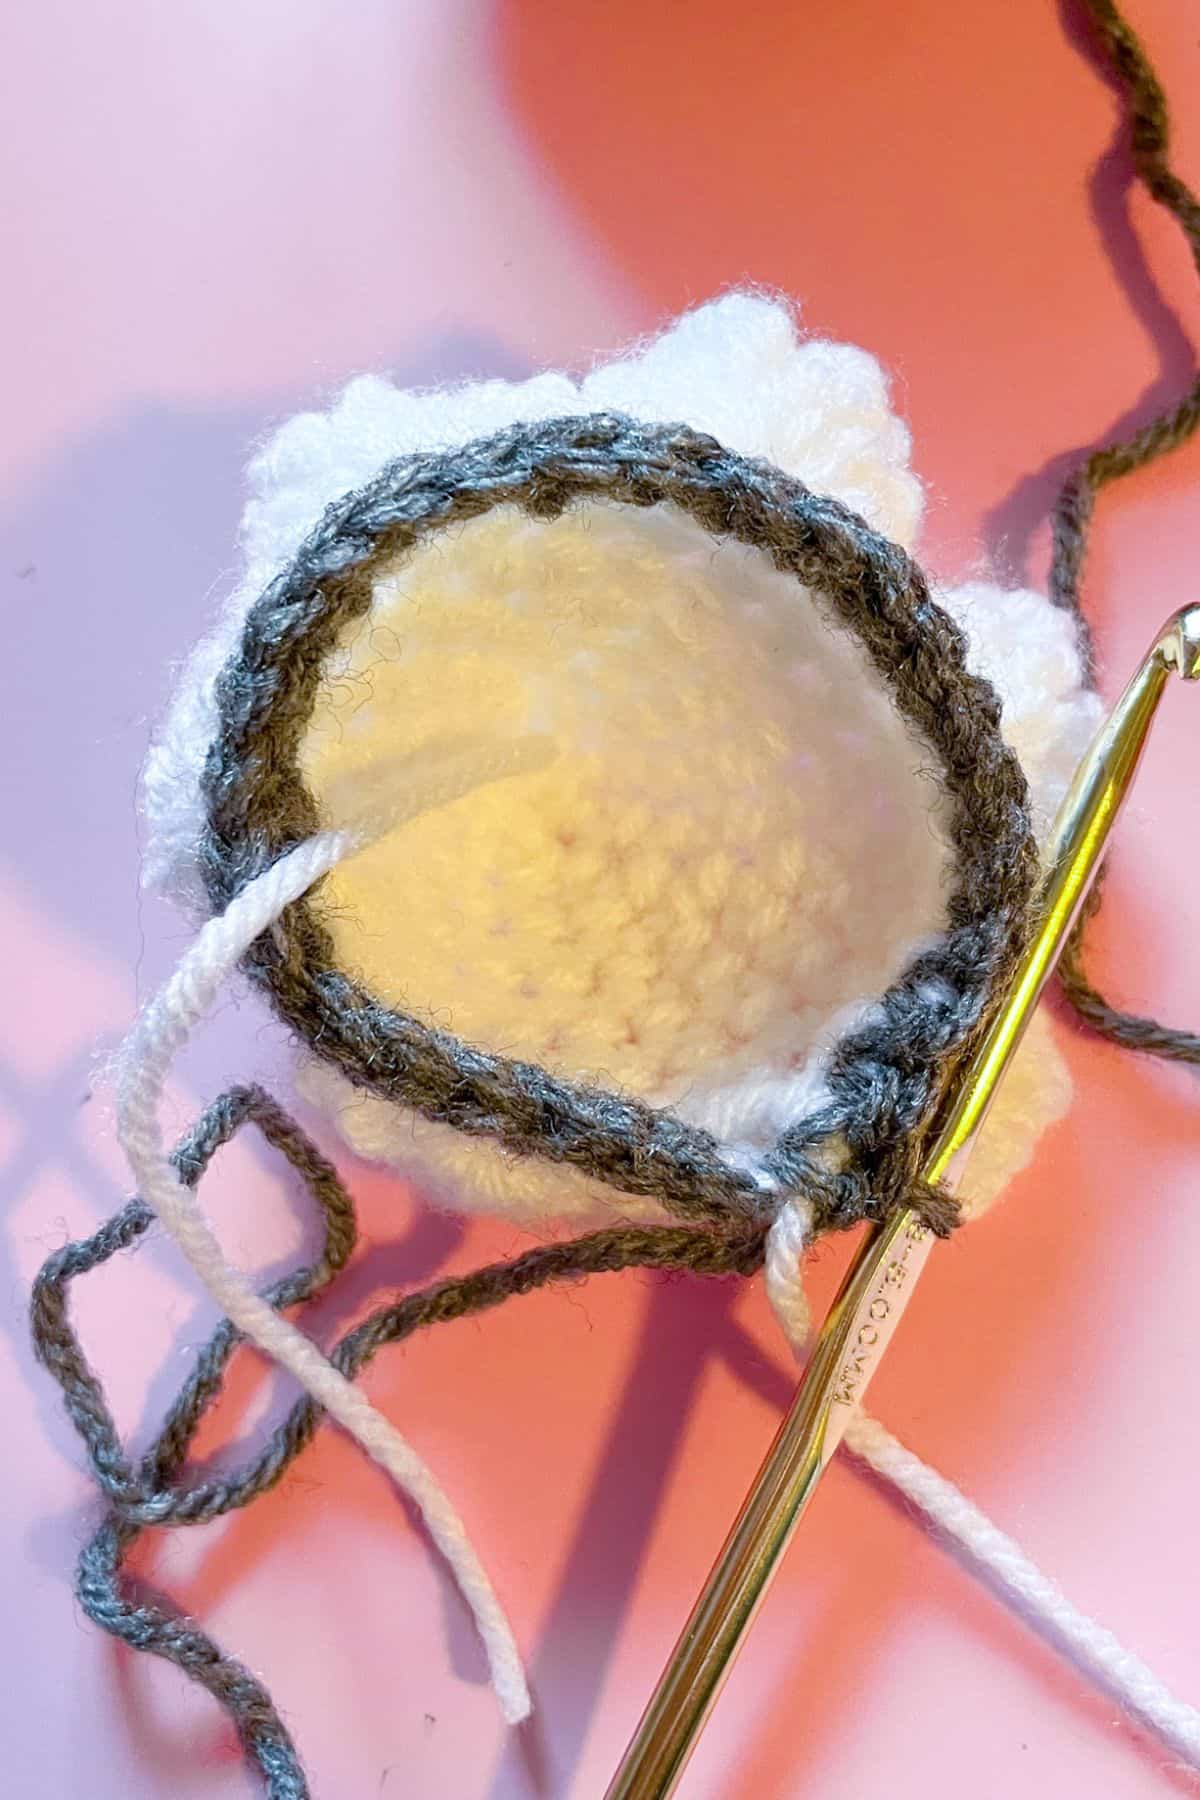
Round 11: In the newly attached heather gray yarn, inc, then sc x7. Then repeat for the rest of the round (27).
Round 12: Inc, then sc x8. Then repeat for the rest of the round (30).
Round 13: Inc, then sc x9. Then repeat for the rest of the round (33).
Round 14: Inc, then sc x10. Then repeat for the rest of the round (36).

Round 15: Inc, then sc x11. Then repeat for the rest of the round (39).
Round 16: Inc, then sc x12. Then repeat for the rest of the round (42).
Round 17: Inc, then sc x13. Then repeat for the rest of the round (45).
Round 18: Inc, then sc x14. Then repeat for the rest of the round (48).
Round 19: Dec, then sc x4 and repeat for the rest of the round (40). Fasten off the yarn.
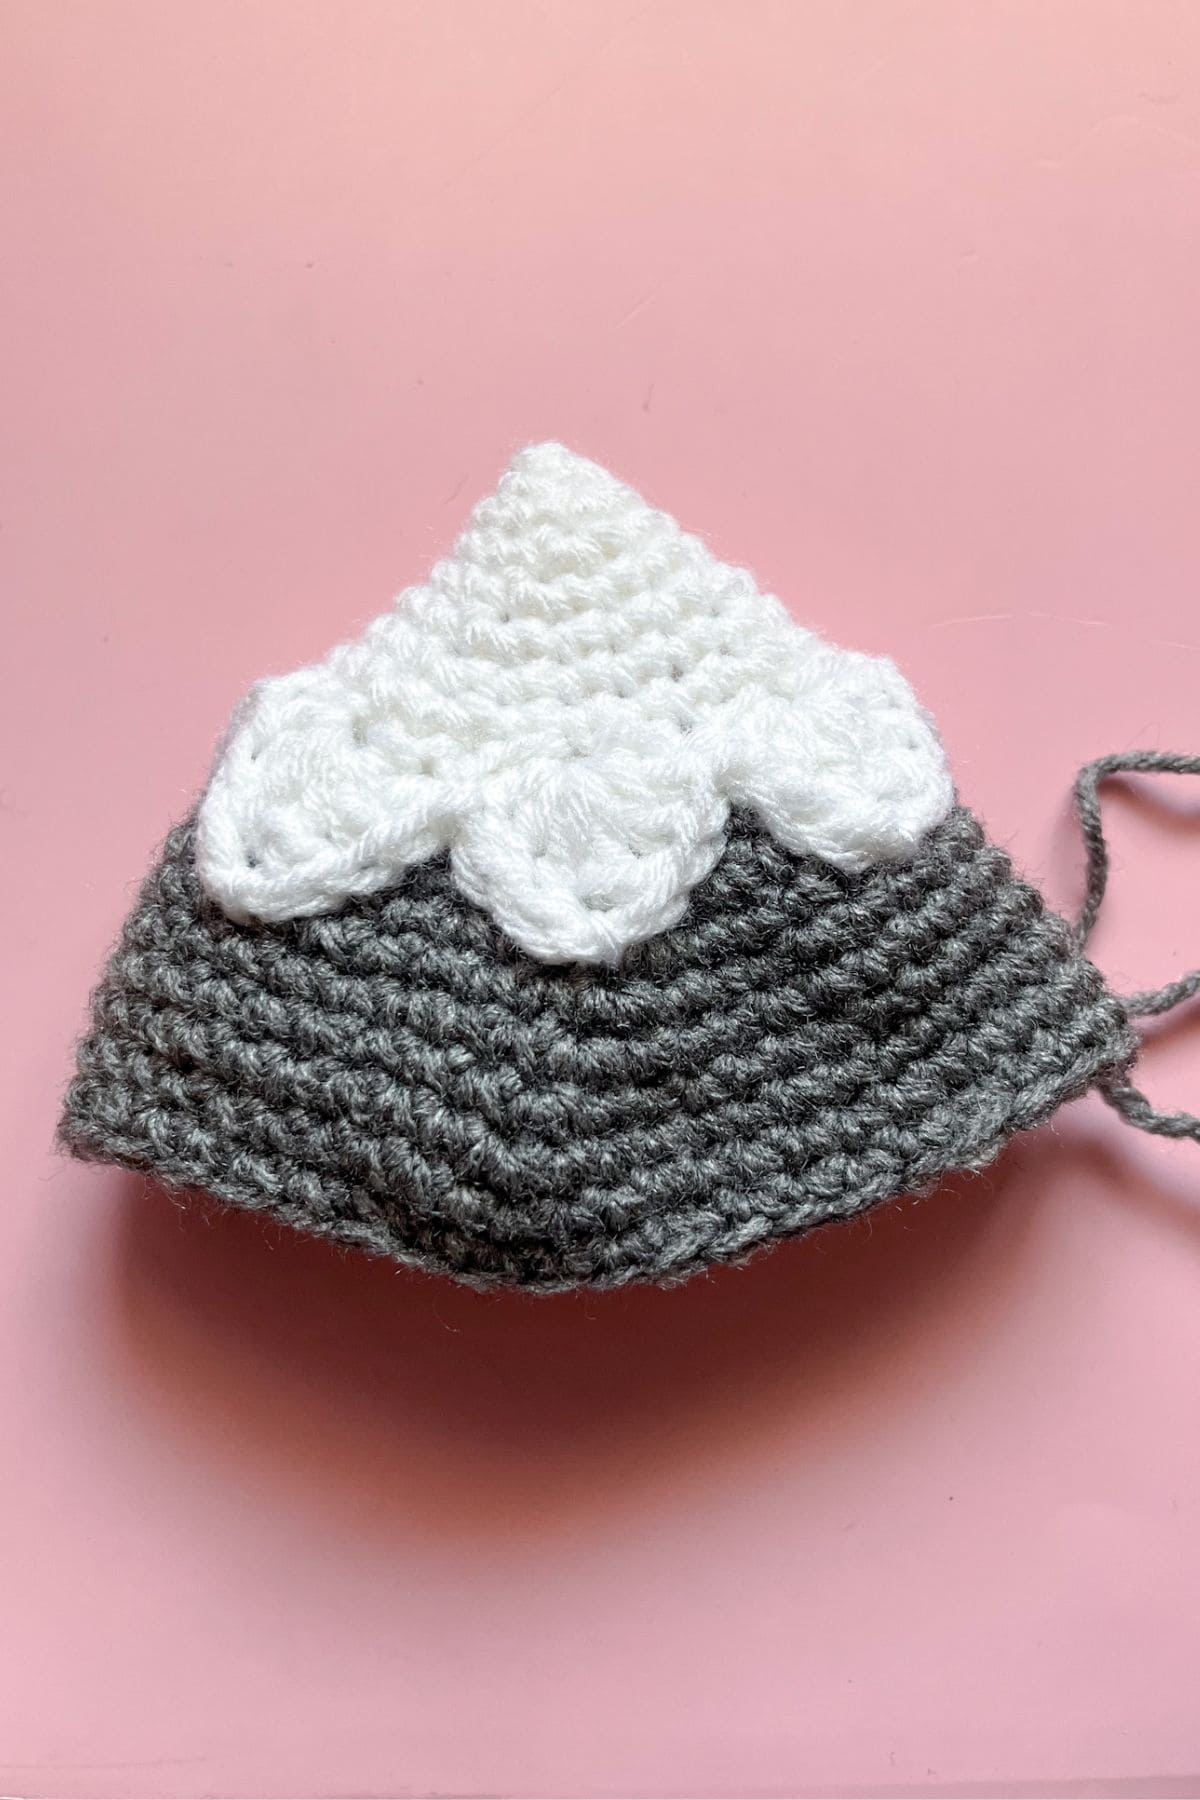
Sew the mountain edges down with white yarn.
Crochet Volcano Pattern Side:
The crochet volcano pattern is made in rounds.
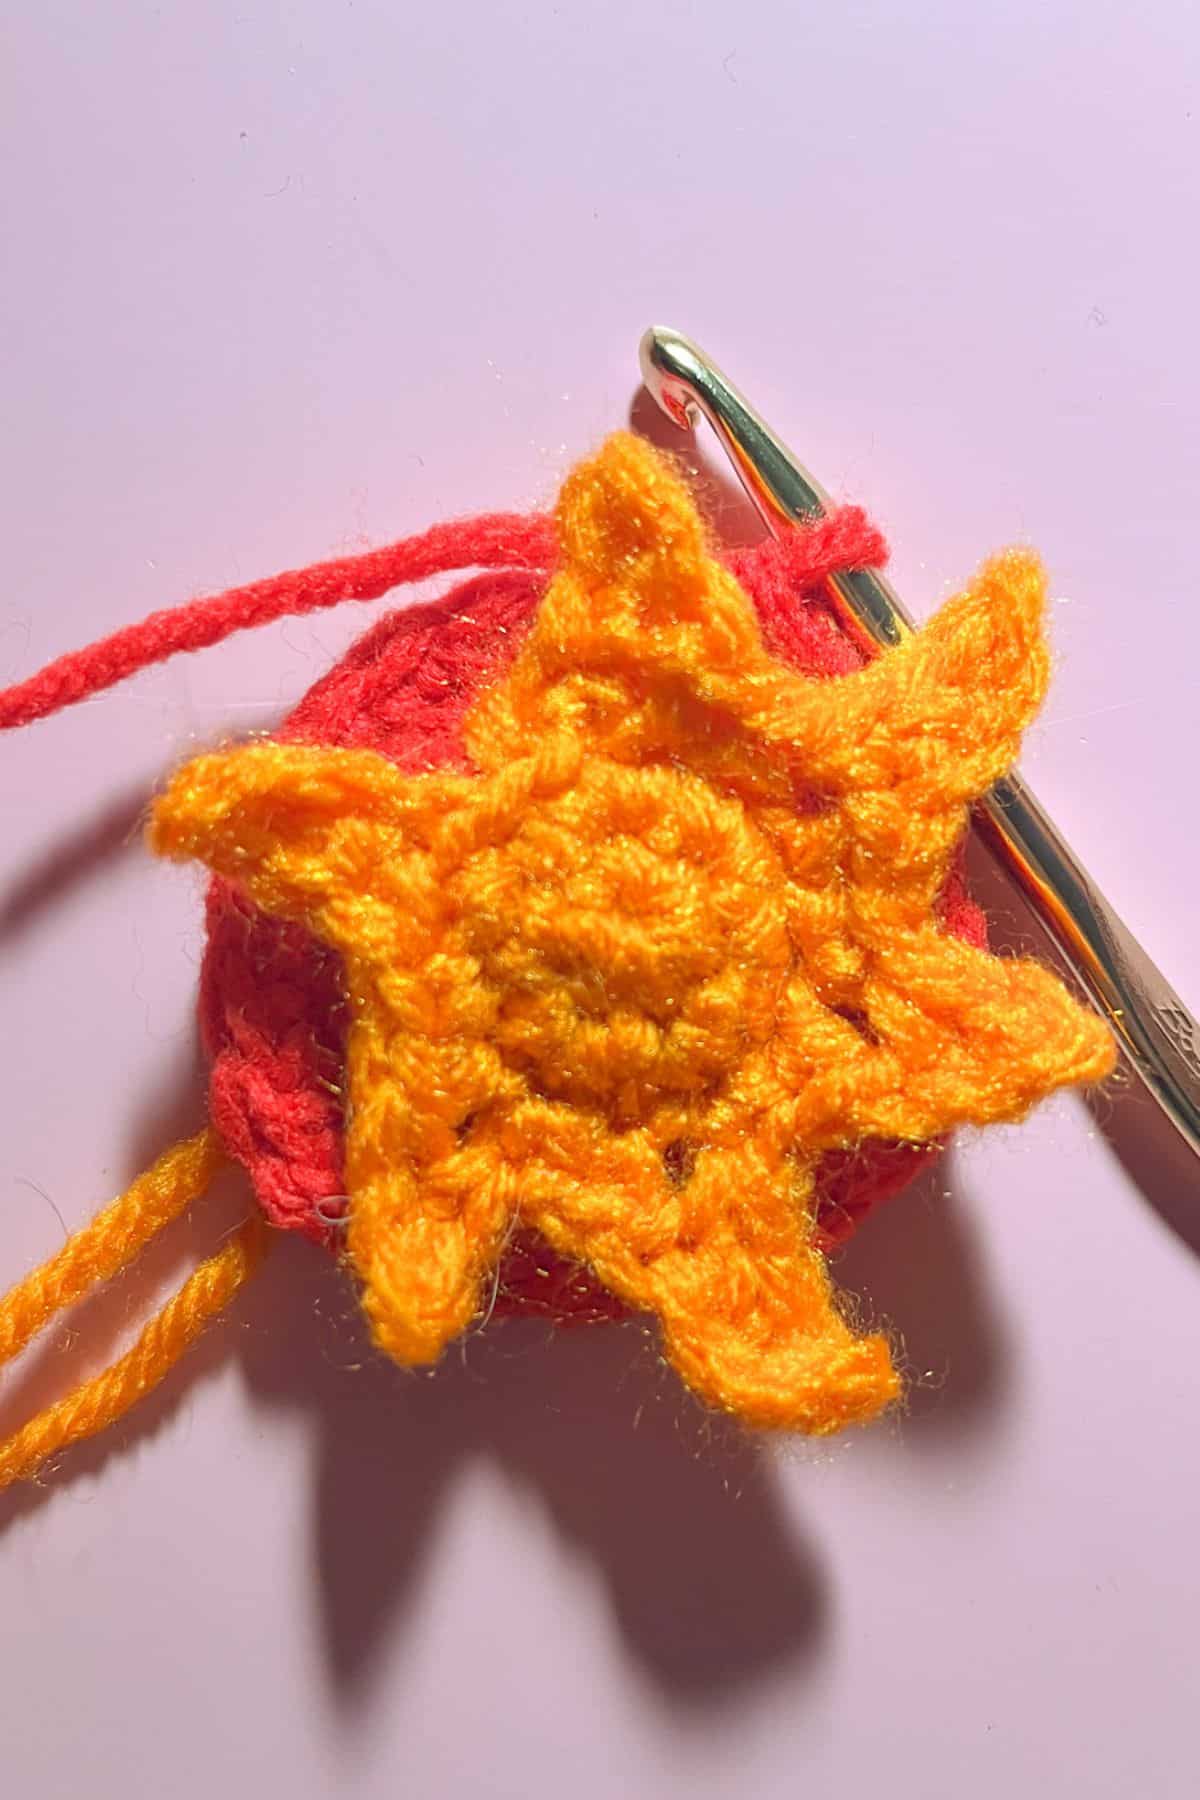
Round 1: With orange yarn, make a magic ring and sc x6 into the circle. If you cannot make a mr, you can ch x2 and then sc x6 into the second ch from the hook. (6)
Round 2: Inc, and repeat for the rest of the round (12).
Round 3: In flo for the entire round, *sc x2, then ch x4. In the second ch from hook make a sc, then sc x2 more times. Sc into the next available stitch on the main volcano part, then sc again. Then ch x3 and in the second hook make a sc and then another sc next to it. Reattach with a sc to the next available stitch on the main part of the volcano.* Repeat between * until the end of the round.
Round 4: In blo, sc into every back loop on the main volcano (12). Fasten off the orange yarn and join the red yarn.
Round 5: With the newly attached red yarn, inc, then sc x3. Then repeat for the rest of the round (15).
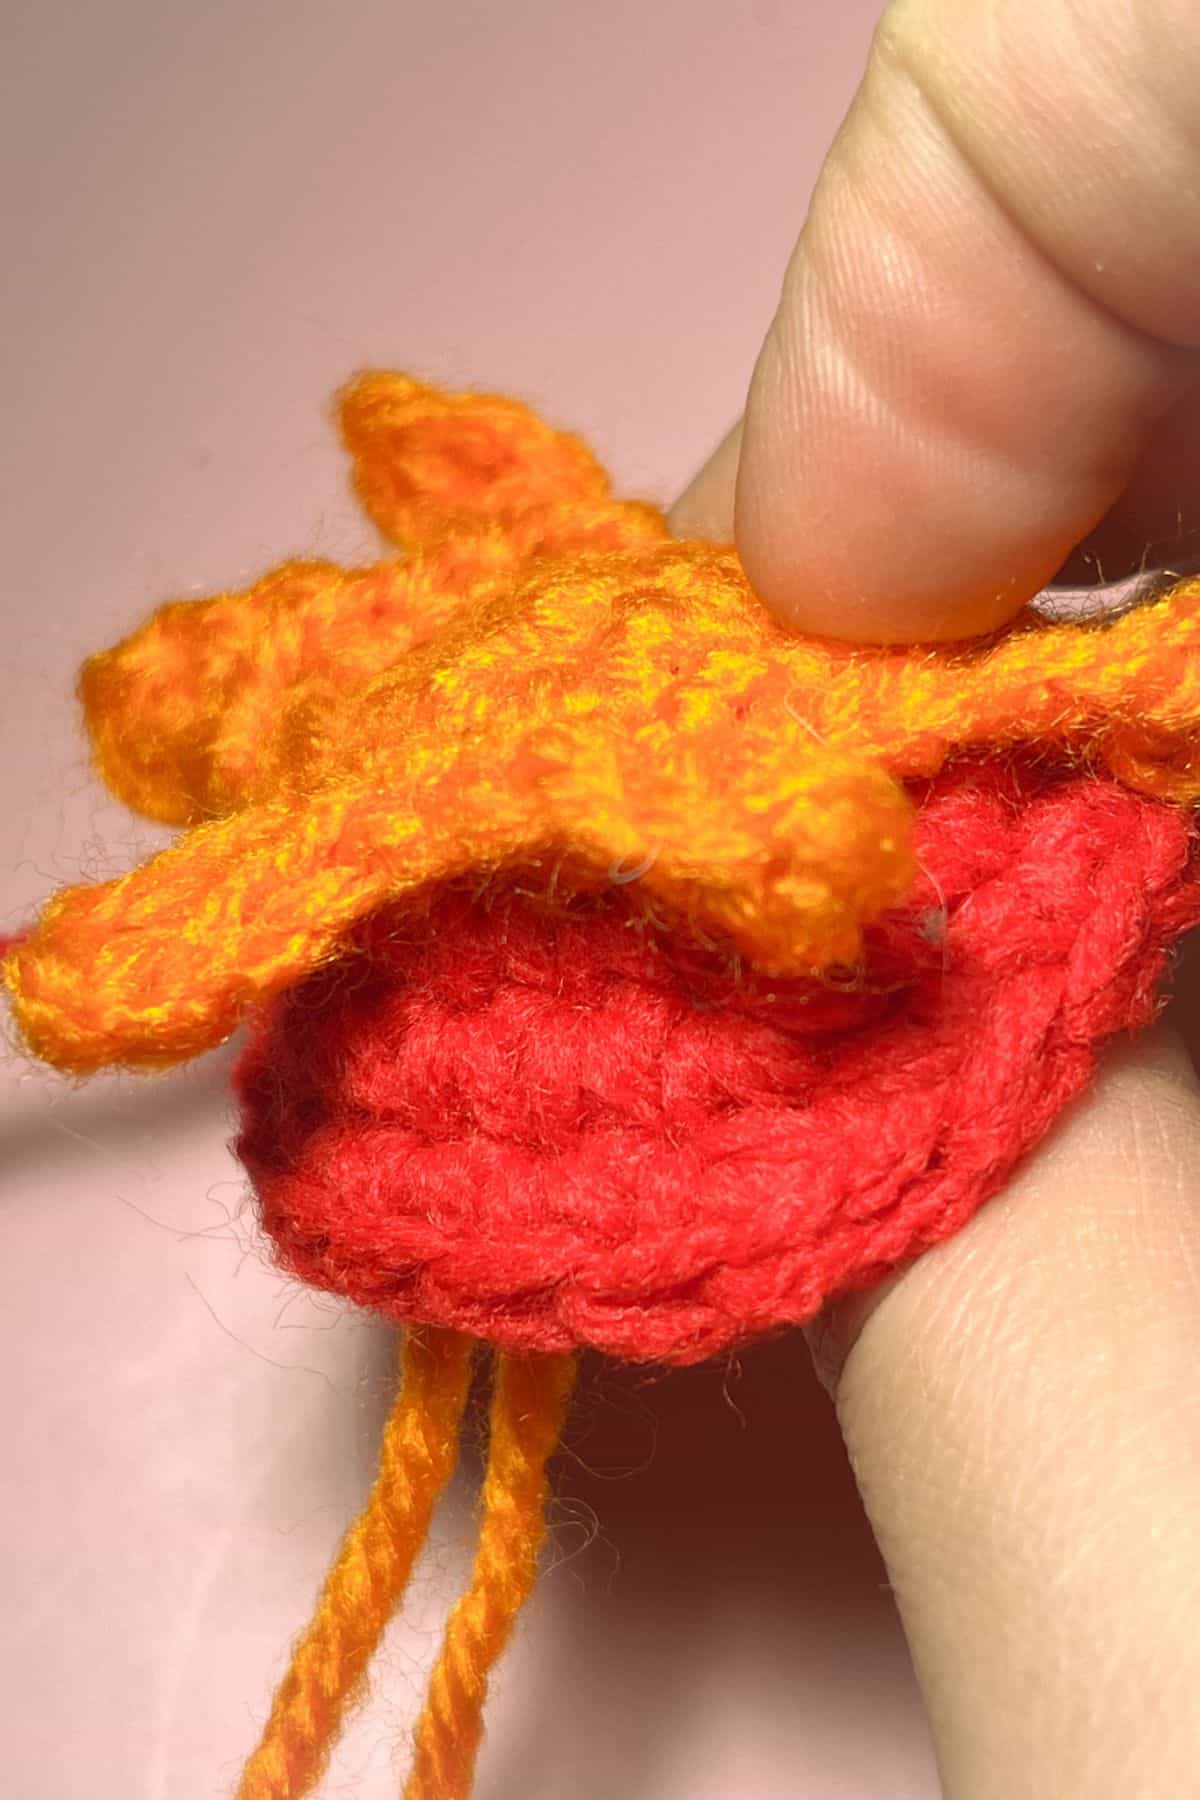
Round 6: Inc, then sc x4. Then repeat for the rest of the round (18).
Round 7: Inc, then sc x5. Then repeat for the rest of the round (21).
Round 8: Just like we did previously, this round we will be making red lava drips.
In flo for the entire round, *sc then ch x6, skip the first ch and sc x5 down the ch. Then reattach to the main volcano by making sc in the next 2 stitches. Then ch x3. In the second ch make a sc followed by another sc in the next ch. Sc (remember to do this part in flo) in the next 3 stitches on the main volcano. Ch x7, then skip the first ch and sc x6 down the ch. Then reattach to the main volcano by making sc in the next stitch. Ch x5, skip the first ch and sc x4 down the ch. Then reattach to the main volcano by making sc in the next 3 stitches. * Repeat once more what is between the *.
With the last little bit of the round left: Ch x3, sc x2 in the chains and then secure back to the main part of the volcano.
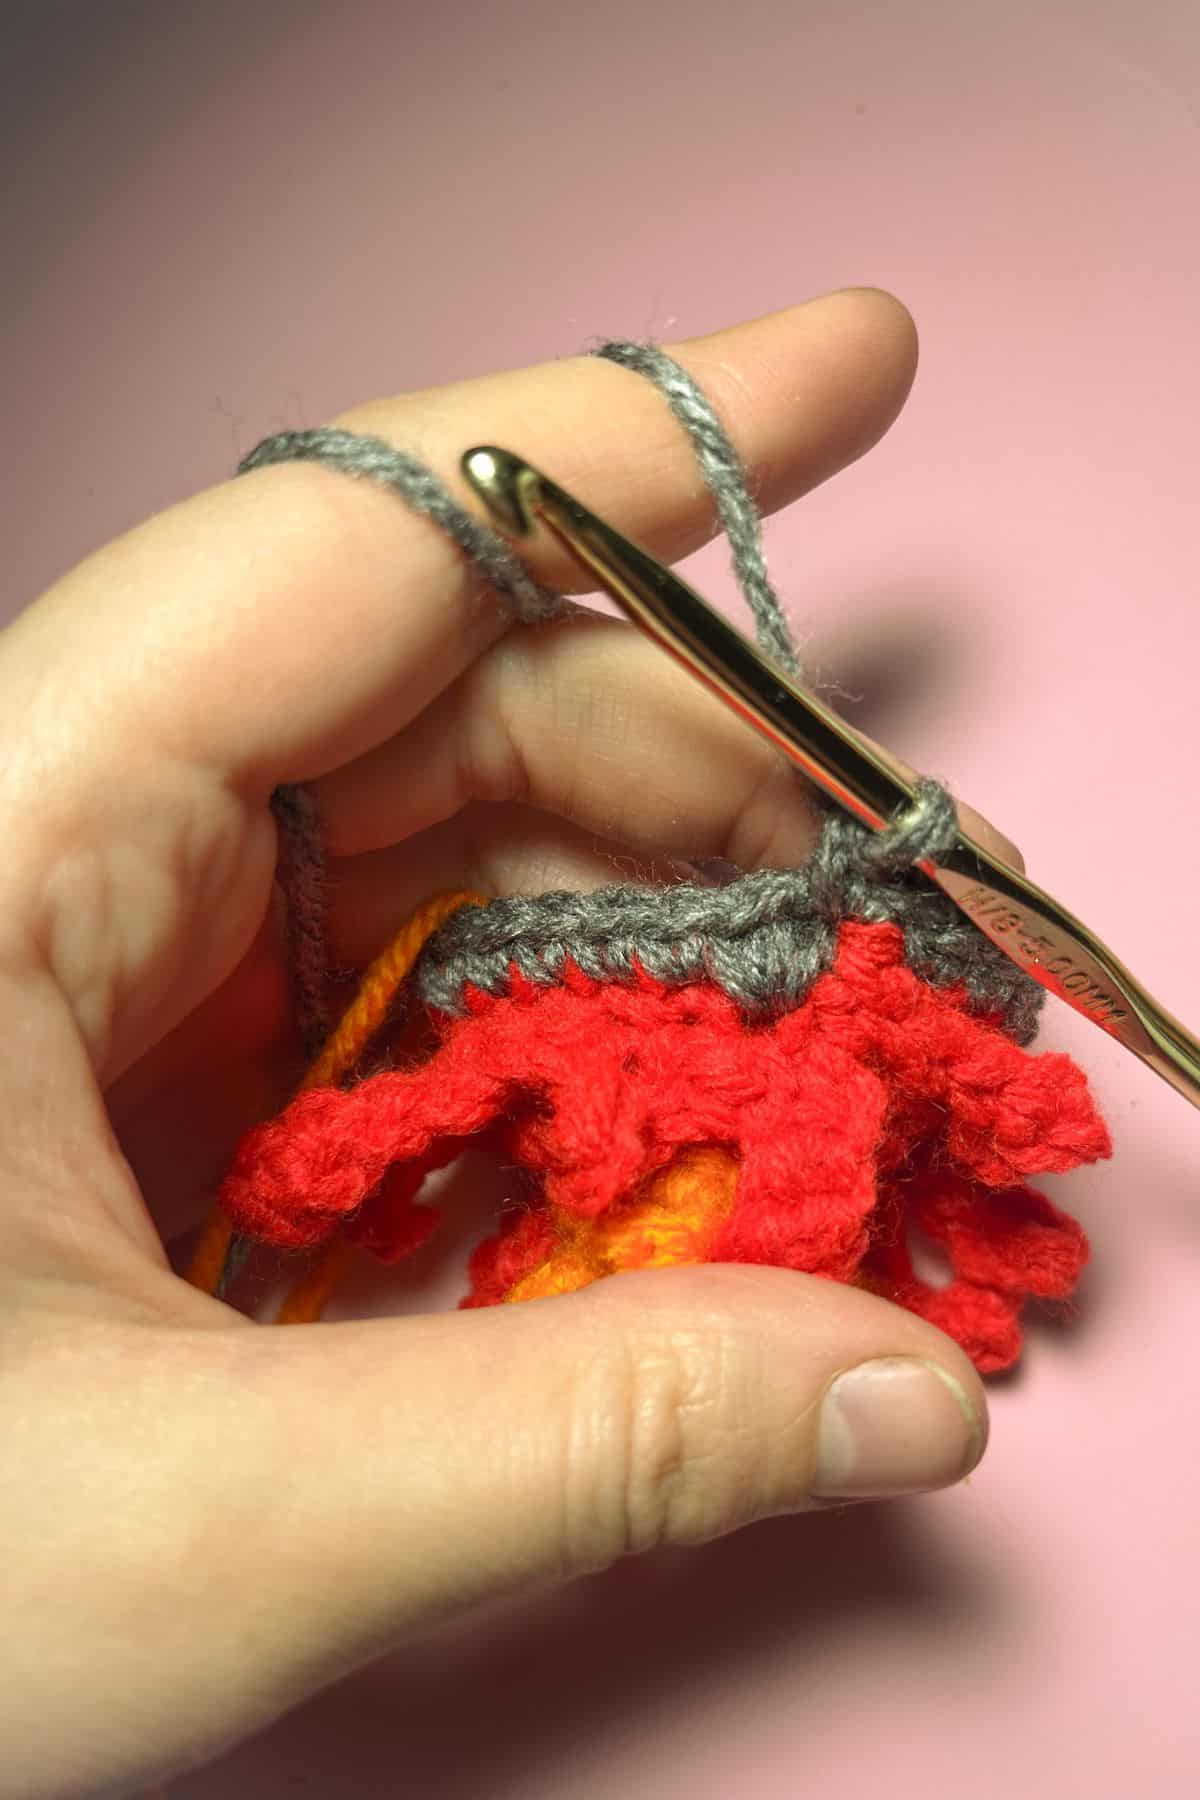
Round 9: In blo, make a sc around the entire circle of the volcano (21). Then fasten off the red and join heather gray yarn to where you left off.
Round 10: In the newly attached heather gray yarn, inc, then sc x6. Then repeat for the rest of the round (24).
Round 11: Inc, then sc x7. Then repeat for the rest of the round (27).
Round 12: Inc, then sc x8. Then repeat for the rest of the round (30).
Round 13: Inc, then sc x9. Then repeat for the rest of the round (33).

Round 14: Inc, then sc x10. Then repeat for the rest of the round (36).
Round 15: Inc, then sc x11. Then repeat for the rest of the round (39).
Round 16: Inc, then sc x12. Then repeat for the rest of the round (42).
Round 17: Inc, then sc x13. Then repeat for the rest of the round (45).
Round 18: Inc, then sc x14. Then repeat for the rest of the round (48).
Round 19: Dec, then sc x4. Then repeat for the rest of the round (40). Fasten off the yarn.
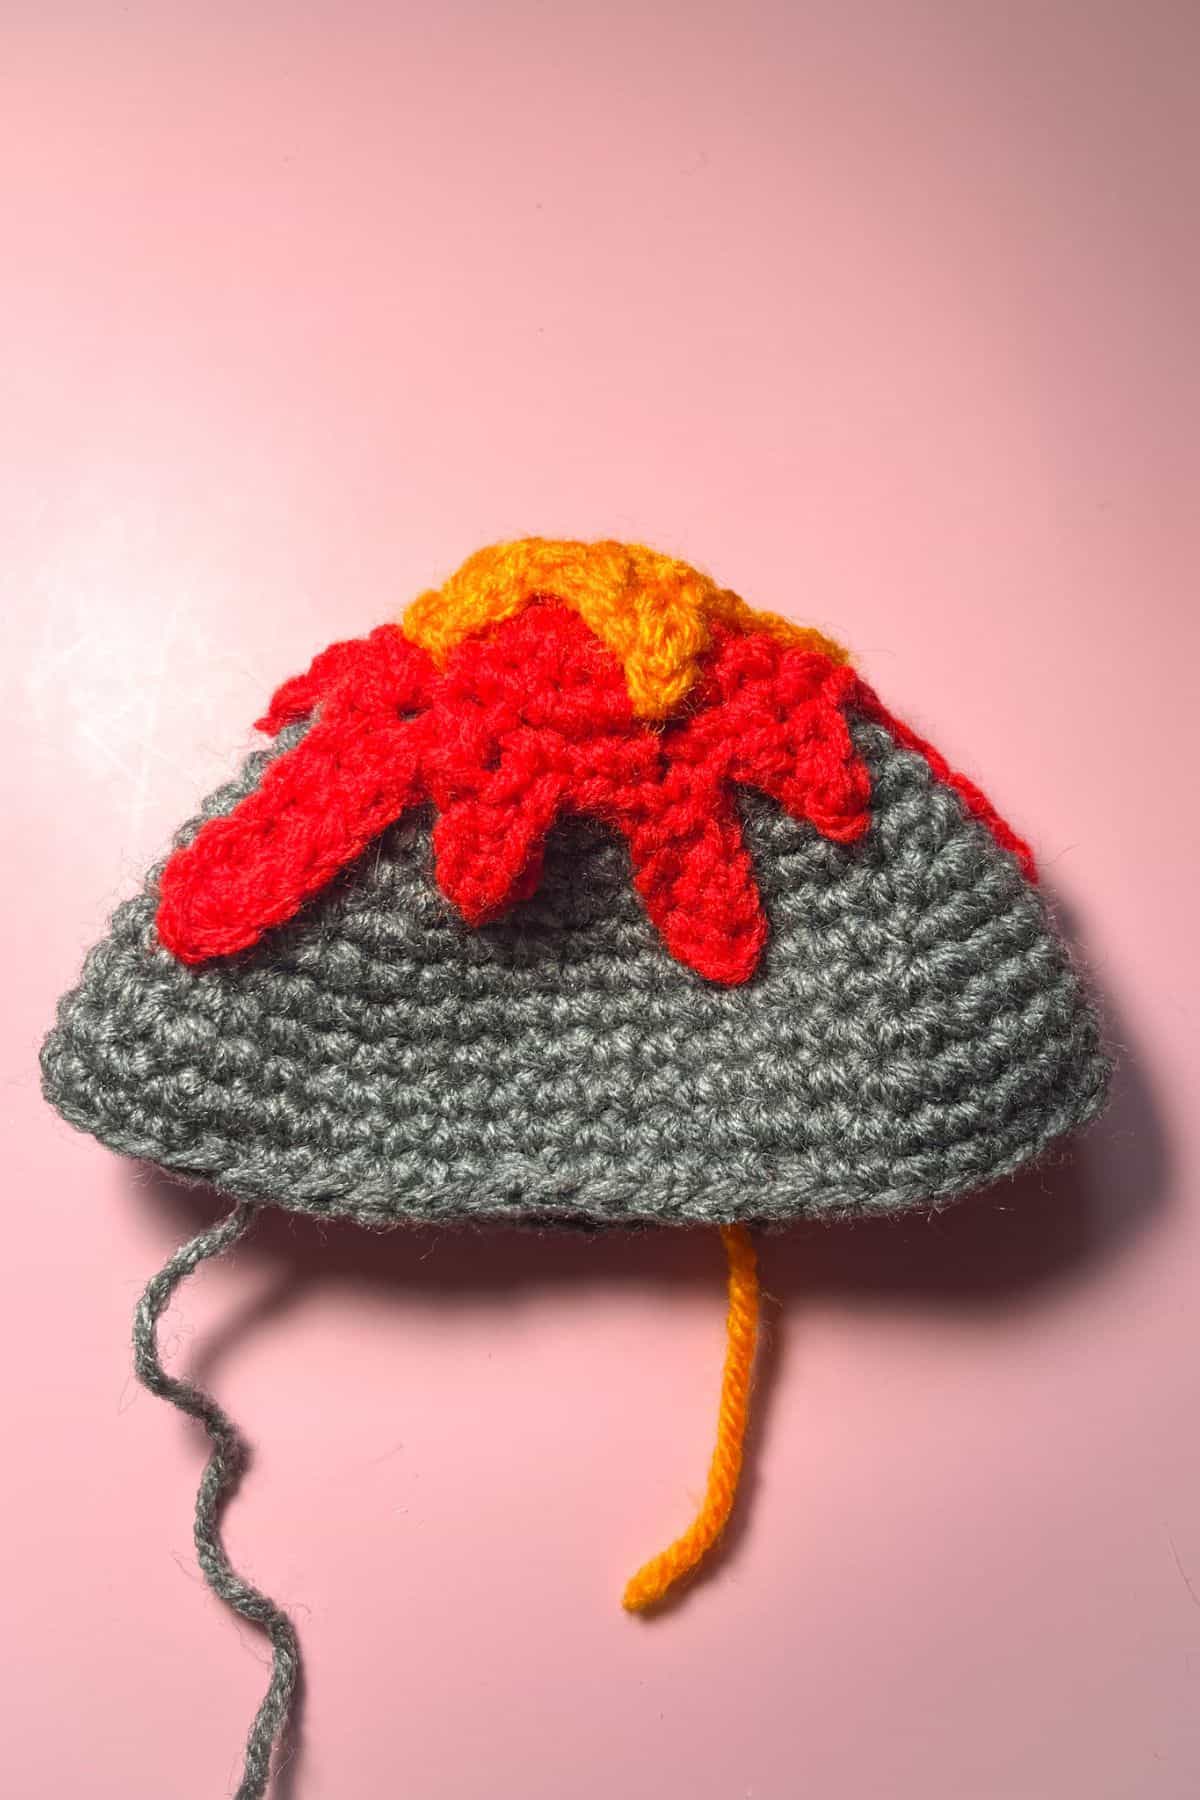
Sew the lava down using orange and red yarn respectively.
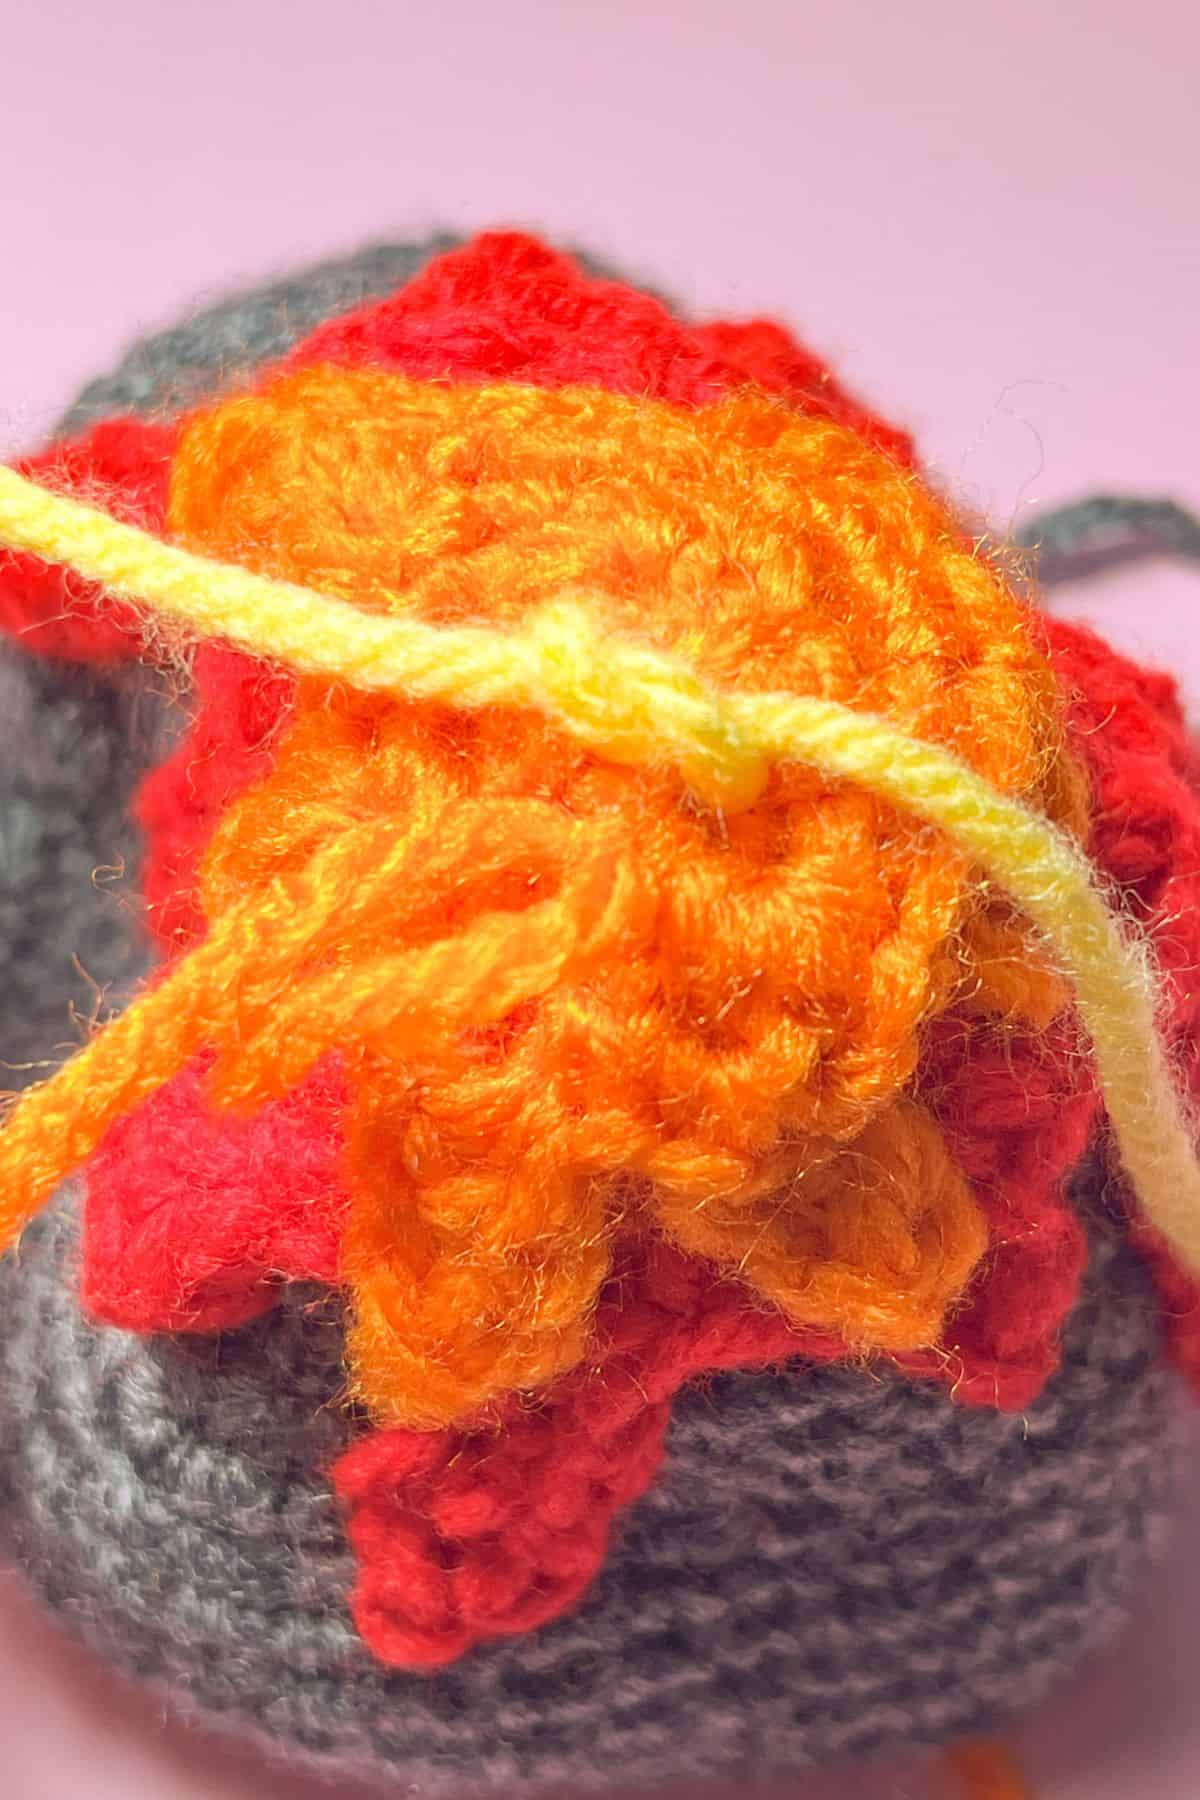
Before attaching the volcano and mountain, cut a few strands of yellow and orange yarn into 3 inch strips. Then thread them through any of the stitches of the volcano top and tie them. Roughly 10-12 pieces should do the trick, then trim the yarn to length desired for the explosive top.
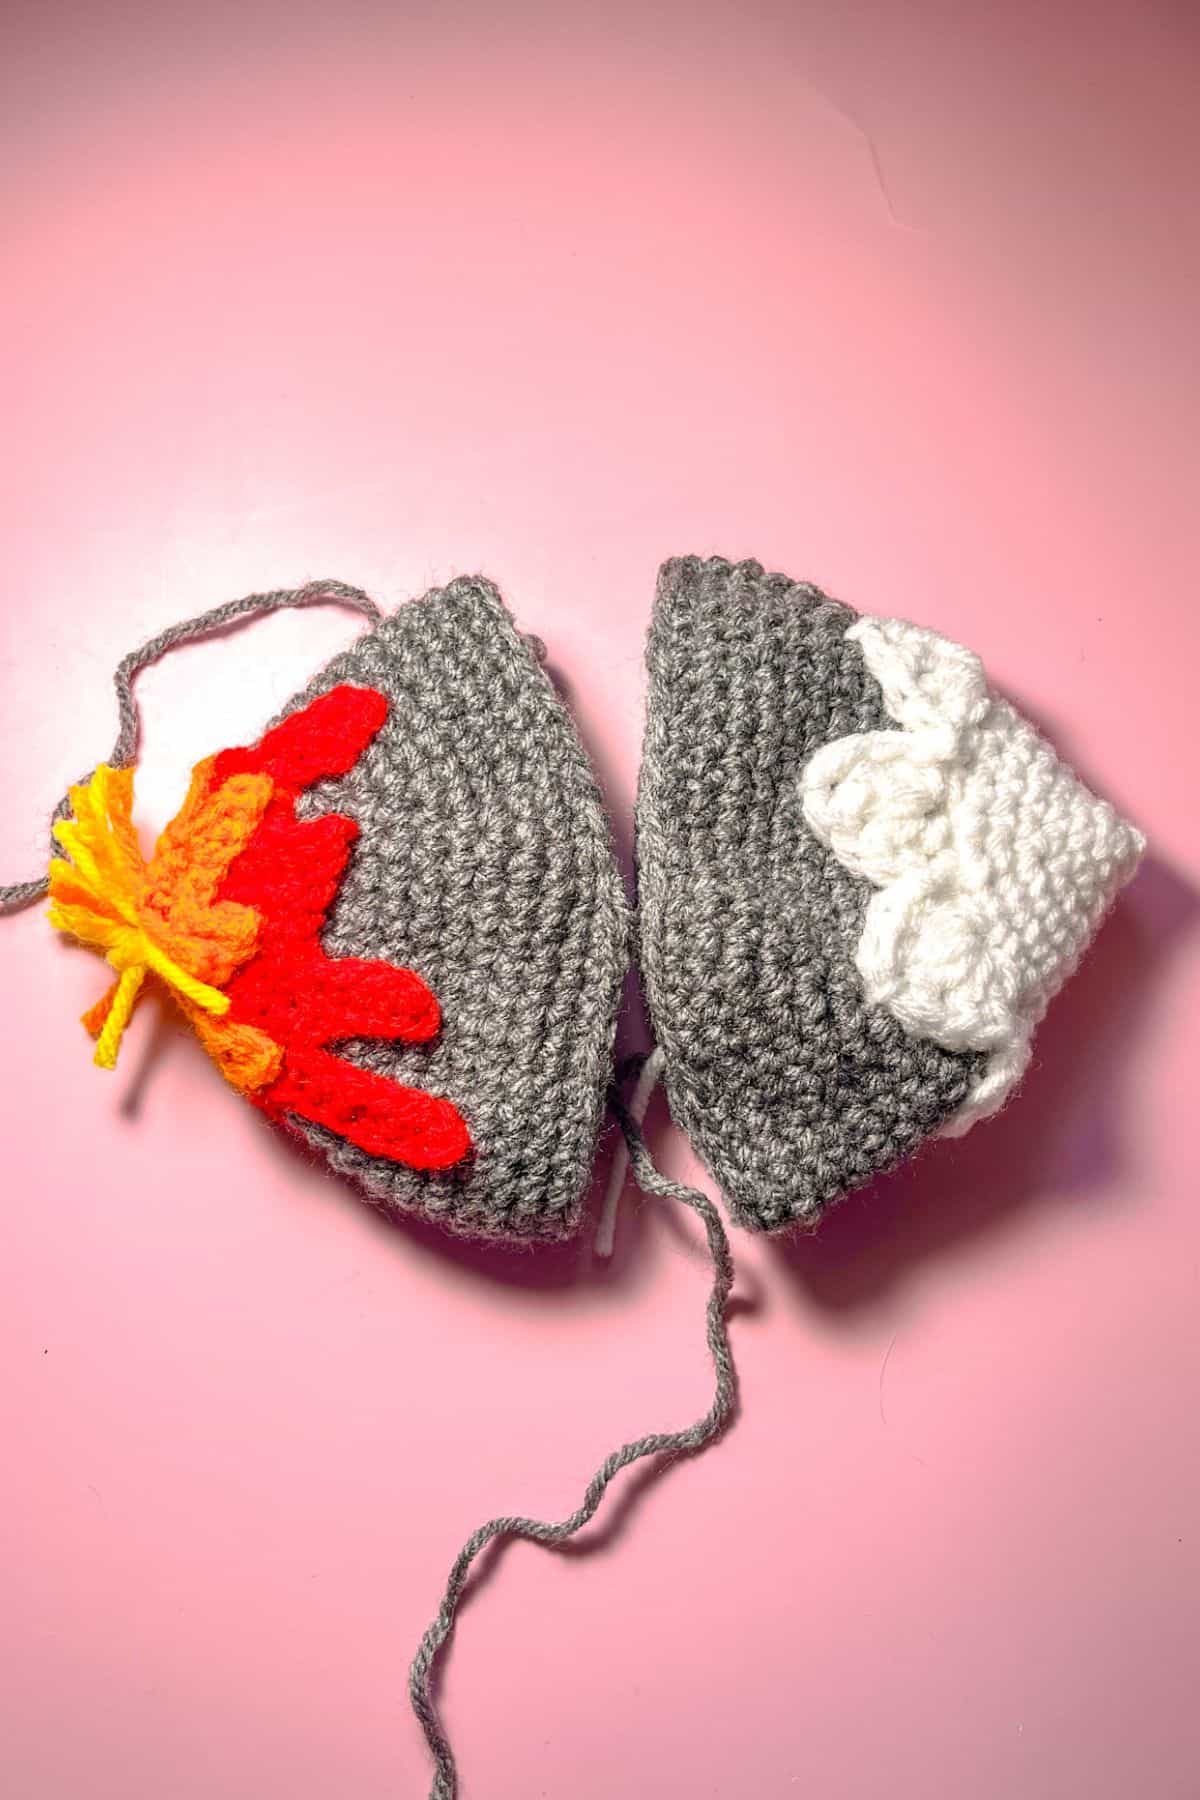
The lava and snow should already be tacked down, but make sure to weave in any loose ends if you haven't already.
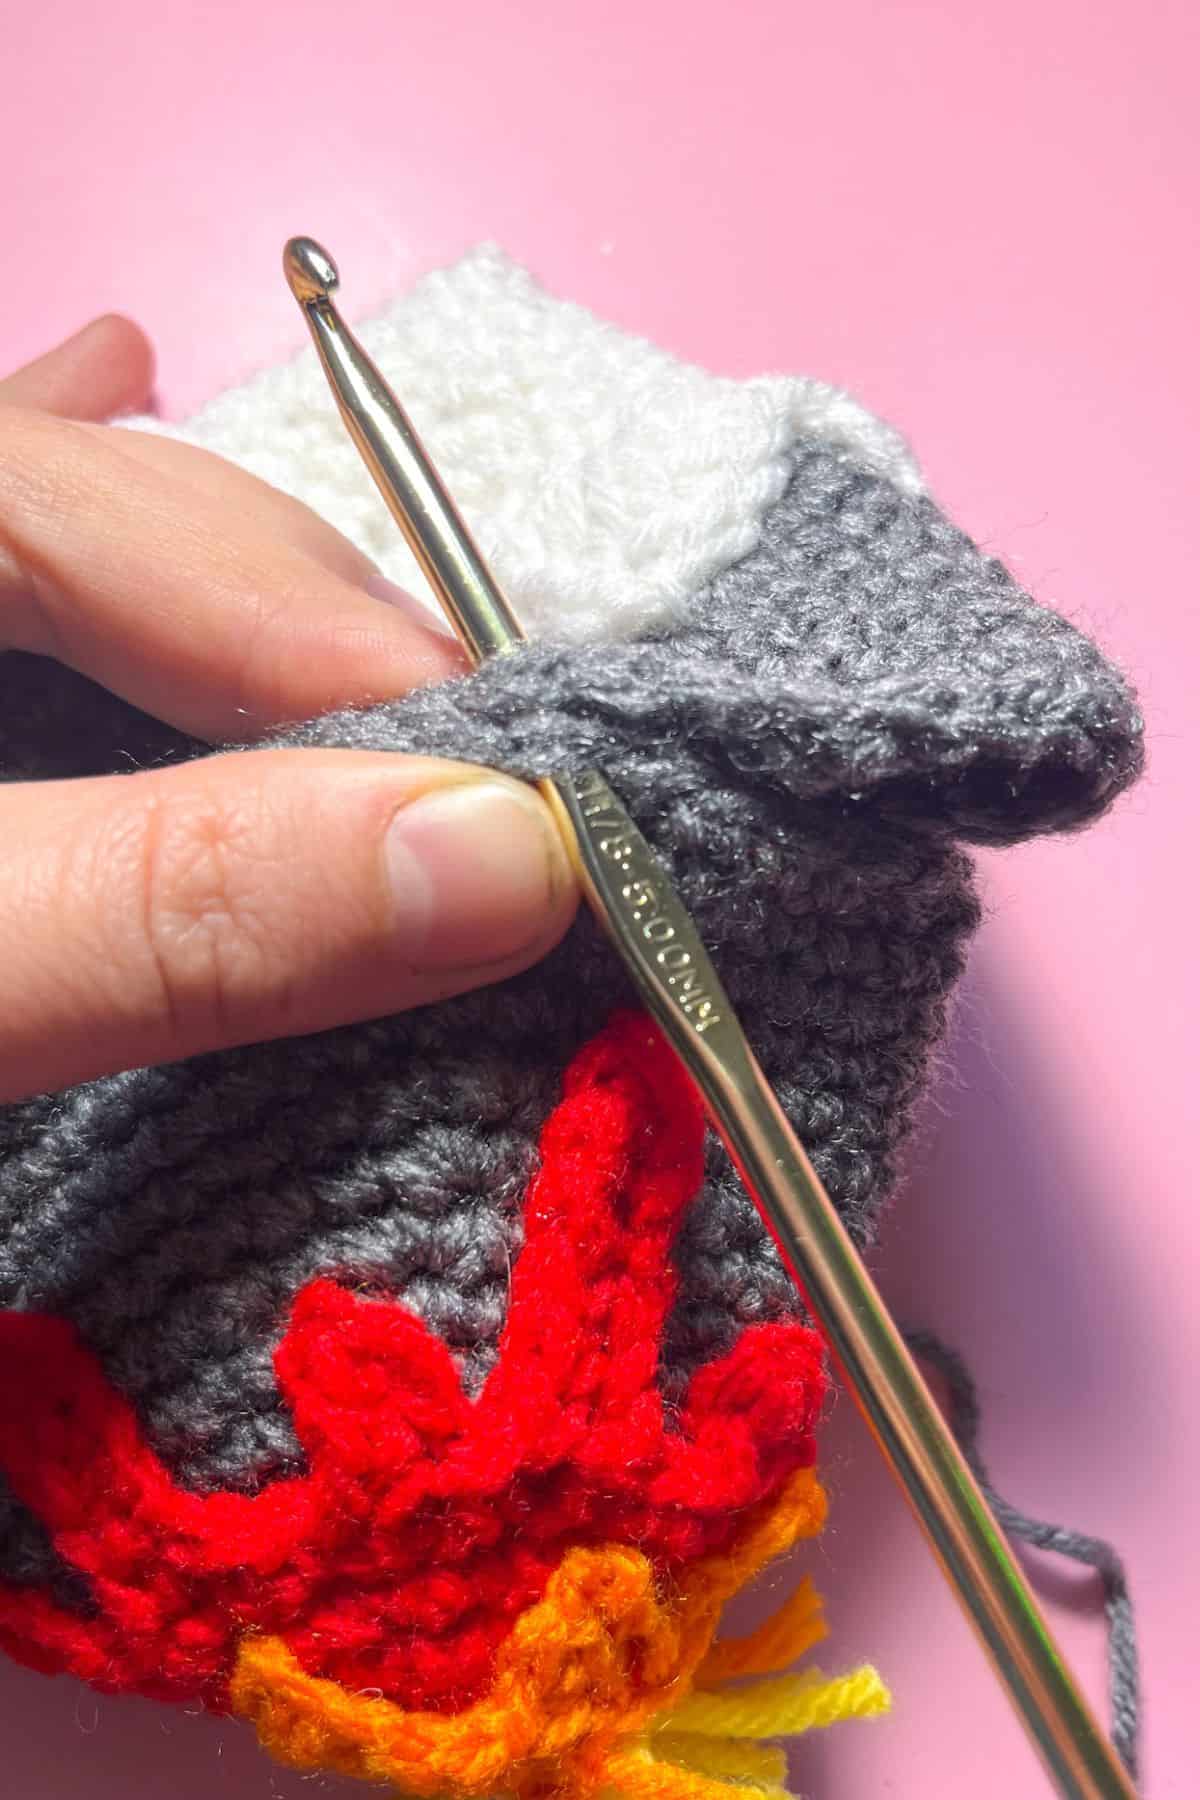
Then sc the bases of the volcano and mountain together with heather gray colored yarn.
MAKE SURE THAT THE MOUNTAIN AND VOLCANO ARE BOTH RIGHT SIDE OUT.
Once attached, weave in any little bits of yarn and test it out by flipping it one way and then the other way.
Now you have a reversible crochet volcano made from my crochet volcano pattern! Perfect for endless amounts of fun for all ages.
If you are wanting to make another educational toy, check out my crochet planet and solar system pattern.
🐌Expert Tips
- Complete Both Sides First: It’s best to finish both sides of the two different halves of the crochet volcano pattern before attaching them. This makes it easier, though it is still doable if you find yourself in that situation.
- Experiment with Colors: Feel free to mix and match colors for the lava and mountain to make your volcano unique!
- Add Embellishments: Consider adding small crochet animals or trees to enhance the play experience.
🧵Pattern FAQs
Yes, it's possible if you either expand the pattern or use double crochet. Be prepared for some adjustments, though.
It would be at least 10 inches. While I don’t typically work with blanket yarn, I know it will be much larger than the original pattern.
Yes! You can use shells on the mountain side in orange and then red for the lava drips.

🧶More Crochet Plushie Patterns


If you tried this Crochet Volcano Pattern (or any other pattern on my website), please let me know how it went in the 📝 comments below. I'd love to hear from you!

Crochet Volcano Pattern
Materials
- 1 skein heather gray yarn from Red Heart
- 1 skein white yarn from Red Heart
- 1 skein red yarn from Red Heart
- 1 skein orange yarn from Red Heart
- 1 skein yellow yarn from Red Heart
- H hook
- Tapestry needle
Abbreviations (US terms)
- mr = Magic ring
- ch = Chain
- sc = Single crochet
- flo = Front loop only
- blo = Back Loop Only
- sl st = Slip Stitch
- dc = Double Crochet
- inc = Increase
- dec = Decrease
- tr = Triple Crochet
Notes
Instructions
Crochet Mountain Pattern Side:
- This crochet mountain pattern is made in rounds.
- Round 1: With white yarn, make a magic ring and sc x3 into the circle. If you cannot make a mr, you can ch x2 and then sc x3 into the second ch from the hook. (3)
- Round 2: Inc, and repeat for the rest of the round (6).
- Round 3: Inc, then sc x1 and repeat for the rest of the round (9).
- Round 4: Inc, then sc x2 and repeat for the rest of the round (12).
- Round 5: Inc, then sc x3 and repeat for the rest of the round (15).
- Round 6: Inc, then sc x4 and repeat for the rest of the round (18).
- Round 7: Inc, then sc x5 and repeat for the rest of the round (21).
- Round 8: Inc, then sc x6 and repeat for the rest of the round (24).
- Round 9: This row is for making the shells at the base of the snowy part of the mountain. In flo, make a shell by yarning over, skipping the next stitch and then inserting the hook into the following stitch and make a dc stitch like normal. Make another dc stitch, then make a tr, ch, tr, 2dc in the same stitch. Skip the next stitch and anchor the shell to the following stitch with a sl st. Repeat making shells like that for the rest of the round. Remember to only do the flo.
- Round 10: Now in the blo, crochet a sc in every back loop (24). Then fasten off the white yarn and change the color to heather gray.
- Round 11: In the newly attached heather gray yarn, inc, then sc x7 and repeat for the rest of the round (27).
- Round 12: Inc, then sc x8 and repeat for the rest of the round (30).
- Round 13: Inc, then sc x9 and repeat for the rest of the round (33).
- Round 14: Inc, then sc x10 and repeat for the rest of the round (36).
- Round 15: Inc, then sc x11 and repeat for the rest of the round (39).
- Round 16: Inc, then sc x12 and repeat for the rest of the round (42).
- Round 17: Inc, then sc x13 and repeat for the rest of the round (45).
- Round 18: Inc, then sc x14 and repeat for the rest of the round (48).
- Round 19: Dec, then sc x4 and repeat for the rest of the round (40). Fasten off the yarn. Sew the mountain edges down with white yarn.
Crochet Volcano Pattern Side:
- This crochet volcano pattern is made in rounds.
- Round 1: With orange yarn, make a magic ring and sc x6 into the circle. If you cannot make a mr, you can ch x2 and then sc x6 into the second ch from the hook. (6)
- Round 2: Inc, and repeat for the rest of the round (12).
- Round 3: In flo for the entire round, *sc x2, then ch x4. In the second ch from hook make a sc, then sc x2 more times. Sc into the next available stitch on the main volcano part, then sc again. Then ch x3 and in the second hook make a sc and then another sc next to it. Reattach with a sc to the next available stitch on the main part of the volcano.* Repeat between * until the end of the round.
- Round 4: In blo, sc into every back loop on the main volcano (12). Fasten off the orange yarn and join the red yarn.
- Round 5: With the newly attached red yarn, inc, then sc x3 and repeat for the rest of the round (15).
- Round 6: Inc, then sc x4 and repeat for the rest of the round (18).
- Round 7: Inc, then sc x5 and repeat for the rest of the round (21).
- Round 8: Just like we did previously, this round we will be making red lava drips.
- In flo for the entire round, *sc then ch x6, skip the first ch and sc x5 down the ch. Then reattach to the main volcano by making sc in the next 2 stitches. Then ch x3. In the second ch make a sc followed by another sc in the next ch. Sc (remember to do this part in flo) in the next 3 stitches on the main volcano. Ch x7, then skip the first ch and sc x6 down the ch. Then reattach to the main volcano by making sc in the next stitch. Ch x5, skip the first ch and sc x4 down the ch. Then reattach to the main volcano by making sc in the next 3 stitches. * Repeat once more what is between the *.
- With the last little bit of the round left: Ch x3, sc x2 in the chains and then secure back to the main part of the volcano.
- Round 9: In blo, make a sc around the entire circle of the volcano (21). Then fasten off the red and join heather gray yarn to where you left off.
- Round 10: In the newly attached heather gray yarn, inc, then sc x6 and repeat for the rest of the round (24).
- Round 11: Inc, then sc x7 and repeat for the rest of the round (27).
- Round 12: Inc, then sc x8 and repeat for the rest of the round (30).
- Round 13: Inc, then sc x9 and repeat for the rest of the round (33).
- Round 14: Inc, then sc x10 and repeat for the rest of the round (36).
- Round 15: Inc, then sc x11 and repeat for the rest of the round (39).
- Round 16: Inc, then sc x12 and repeat for the rest of the round (42).
- Round 17: Inc, then sc x13 and repeat for the rest of the round (45).
- Round 18: Inc, then sc x14 and repeat for the rest of the round (48).
- Round 19: Dec, then sc x4 and repeat for the rest of the round (40). Fasten off the yarn. Sew the lava down using orange and red yarn respectively.
Finishing:
- Before attaching the volcano and mountain, cut a few strands of yellow and orange yarn into 3 inch strips. Then thread them through any of the stitches of the volcano top and tie them. Roughly 10-12 pieces should do the trick, then trim the yarn to length desired for the explosive top.
- The lava and snow should already be tacked down, but make sure to weave in any loose ends if you haven't already. Then sc the bases of the volcano and mountain together with heather colored yarn. MAKE SURE THAT THE MOUNTAIN AND VOLCANO ARE BOTH RIGHT SIDE OUT.
- Once attached, weave in any little bits of yarn and test it out by flipping it one way and then the other way.
- Now you have a reversible crochet volcano! Perfect for endless amounts of fun for all ages.
Leave a Reply