Double Crochet Border for Beginners
The Double Crochet Border for Beginners is the perfect finishing touch for blankets and other flat panel projects. Follow my step-by-step tutorial to learn how to create this easy and elegant crochet border.
Materials
- Scrap yarn or yarn of choice use the same weight yarn as the project you are working on for best results
- Tapestry needle
- 5 mm hook
Abbreviations (US terms)
- Chain - ch
- Double crochet - dc
- Slip stitch - sl st
Notes
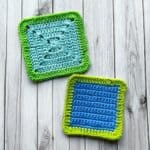
- Yarn Type. This is just a stitch tutorial, so I am using a crochet swatch from a previous project. You can apply this border to any flat project.
- Yarn Weight. Any yarn weight works well for this stitch. Specialty yarns, like fuzzy yarns, can also be used.
- Row Options. I made my double crochet border with only one row, but you can add more rows for a bigger border.
Instructions
- This pattern is made in the round.
- Step 1: If you’re using a different color yarn than the main body, reattach your yarn to the last stitch (or anywhere on the border) of your last row.
- Overall, the placement of the yarn doesn’t matter for this border.
- Step 2: Then ch x3 and then make a dc in the next stitch you attached your yarn to.
- Step 3: Continue making dc stitches into each top of the stitches from the row below.
- Step 4: When you get to the corner make 5 or 6 dc stitches.
- Step 5: When you get to the raw edge of the project, make 1 dc stitch into each row. If your project uses dc stitches for rows, make 2 stitches per dc. If your project is made in the round like a granny square, just make 1 stitch into each stitch top.
- Step 6: When you are done going around the project, make a sl st to the starting chains. Then fasten off the yarn and weave in any ends.
- And now you know how to make a double crochet border! A great foundational crochet border perfect for beginners.
Video
Tried this pattern?Mention @thecaffeinatedsnail or tag #thecaffeinatedsnail!
