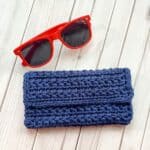
Crochet Glasses Case Pattern
A crochet glasses case pattern was something I didn’t realize I desperately needed—until I kept finding my sunglasses scratched up at the bottom of my bag. Between keys, pens, and who knows what else, my lenses didn’t stand a chance. So I designed this quick and practical crochet sunglasses case to keep my glasses protected and looking good!
Materials
- Any worsted weight cotton yarn 175 yards is plenty
- 4.5 mm hook
- Tapestry needle
Abbreviations (US terms)
- Chains - ch
- Single crochet - sc
- Half double crochet - hdc
Notes
- Skill Level: This pattern is best suited for intermediate crocheters or confident beginners ready to try something new. The crochet star stitch (aka daisy stitch crochet) can be a little tricky at first, but once you get the hang of it, it flows beautifully.
- Stitch Knowledge: The pattern uses the crochet star stitch, which creates a dense, textured fabric. If you’re not familiar with this stitch, I recommend practicing a small swatch first.
- Yarn Choice: I used 100% cotton yarn for its soft texture and durability. Cotton is ideal for a crochet glasses case because it’s less likely to scratch your lenses and it holds its shape well.
- Gauge Is Not Critical: Since this is a small accessory, gauge isn’t super important—but it does affect the final size. If you're using a different weight yarn or hook size, your case may come out slightly larger or smaller. So measure against your pair of glasses just in case, just make sure it's an ODD amount of chains.
Instructions
- Row 1: Ch x33 (or more chains if making a larger project as this is just a stitch swatch, just make sure it's an ODD amount of chains).
- Row 2: Start by inserting your hook into the second chain from the hook. Yarn over and pull up a loop. Then, insert your hook into the next chain, yarn over, and pull through. You should now have three loops on your hook. Repeat this for the next three chains until you have six loops on the hook.
- Once you have six loops on your hook, yarn over and pull through all six loops.
- Then, chain 1 to complete the star and create the "eye" in the center.
- Next, insert your hook into the "eye" you just made, yarn over, and pull through, leaving two loops on your hook.
- Then, insert your hook into the space between the two last "spikes" of the first star, yarn over, and pull through. This will give you three loops on your hook.
- Now, insert your hook into the same chain where you worked the last stitch of the previous star, yarn over, and pull through, so you have four loops on your hook. Insert your hook into the next chain, yarn over, and pull through. Repeat this in the following chain until you have six loops on your hook.
- Yarn over and pull through all six loops on the hook. Chain 1 to close the second star.
- Repeat these steps for the rest of the row.
- When you reach the end, finish by making 1 hdc in the last stitch. Then ch x2 and turn.
- Row 3: Crochet 2 hdc in the "eye" of each star across.
- Finish with 1 hdc in the last stitch. Then ch x3 and turn (27).
- Row 4: Insert your hook into the second chain from the hook, yarn over, and pull through, repeat for the next chain, then continue for the next 3 stitches until you have 6 loops. Then yarn over and pull through all 6 loops, then chain 1 to close the star. This creates the eye of the first star of this row.
- Finish the row of star stitches by using the steps in row 2. Then at the end of the row make a hdc and then ch x2.
- Row 5-13: Repeat Row 3 and 4 until your project is the length you want it.
Finishing the Edges and Assembling the Pouch
- Work a round of single crochet around the entire edge of the rectangle for a clean finish. Along the top and bottom edges, make 1 single crochet (sc) in each stitch. Along the sides (row edges), work 1 to 2 sc per row—adjust this based on your tension.
- If the edge looks wavy, reduce the number of stitches.
- If the edge curls or cups, add more stitches. Place 3 single crochet stitches in each corner to keep the edges neat.
- Fasten off the yarn.
- Lay the rectangle flat with the right side facing up. Fold the rectangle into thirds horizontally so the rows run side to side (not up and down). The wrong side of the crochet panel should now be facing out.
- Sew the sides of the bottom two-thirds together to form the pouch, being careful not to sew the top third flap closed—this will be the opening for your sunglasses.
- Fasten off and weave in any yarn ends. Then, turn the pouch right side out.
- I hope you enjoyed learning the crochet star stitch—or daisy stitch crochet, as it's also called—and feel inspired to use it in more projects! It's such a beautiful, textured stitch that can really elevate even the simplest patterns. Once you’ve mastered it, you’ll find so many ways to use it beyond just the crochet glasses case pattern.
Tried this pattern?Mention @thecaffeinatedsnail or tag #thecaffeinatedsnail!
